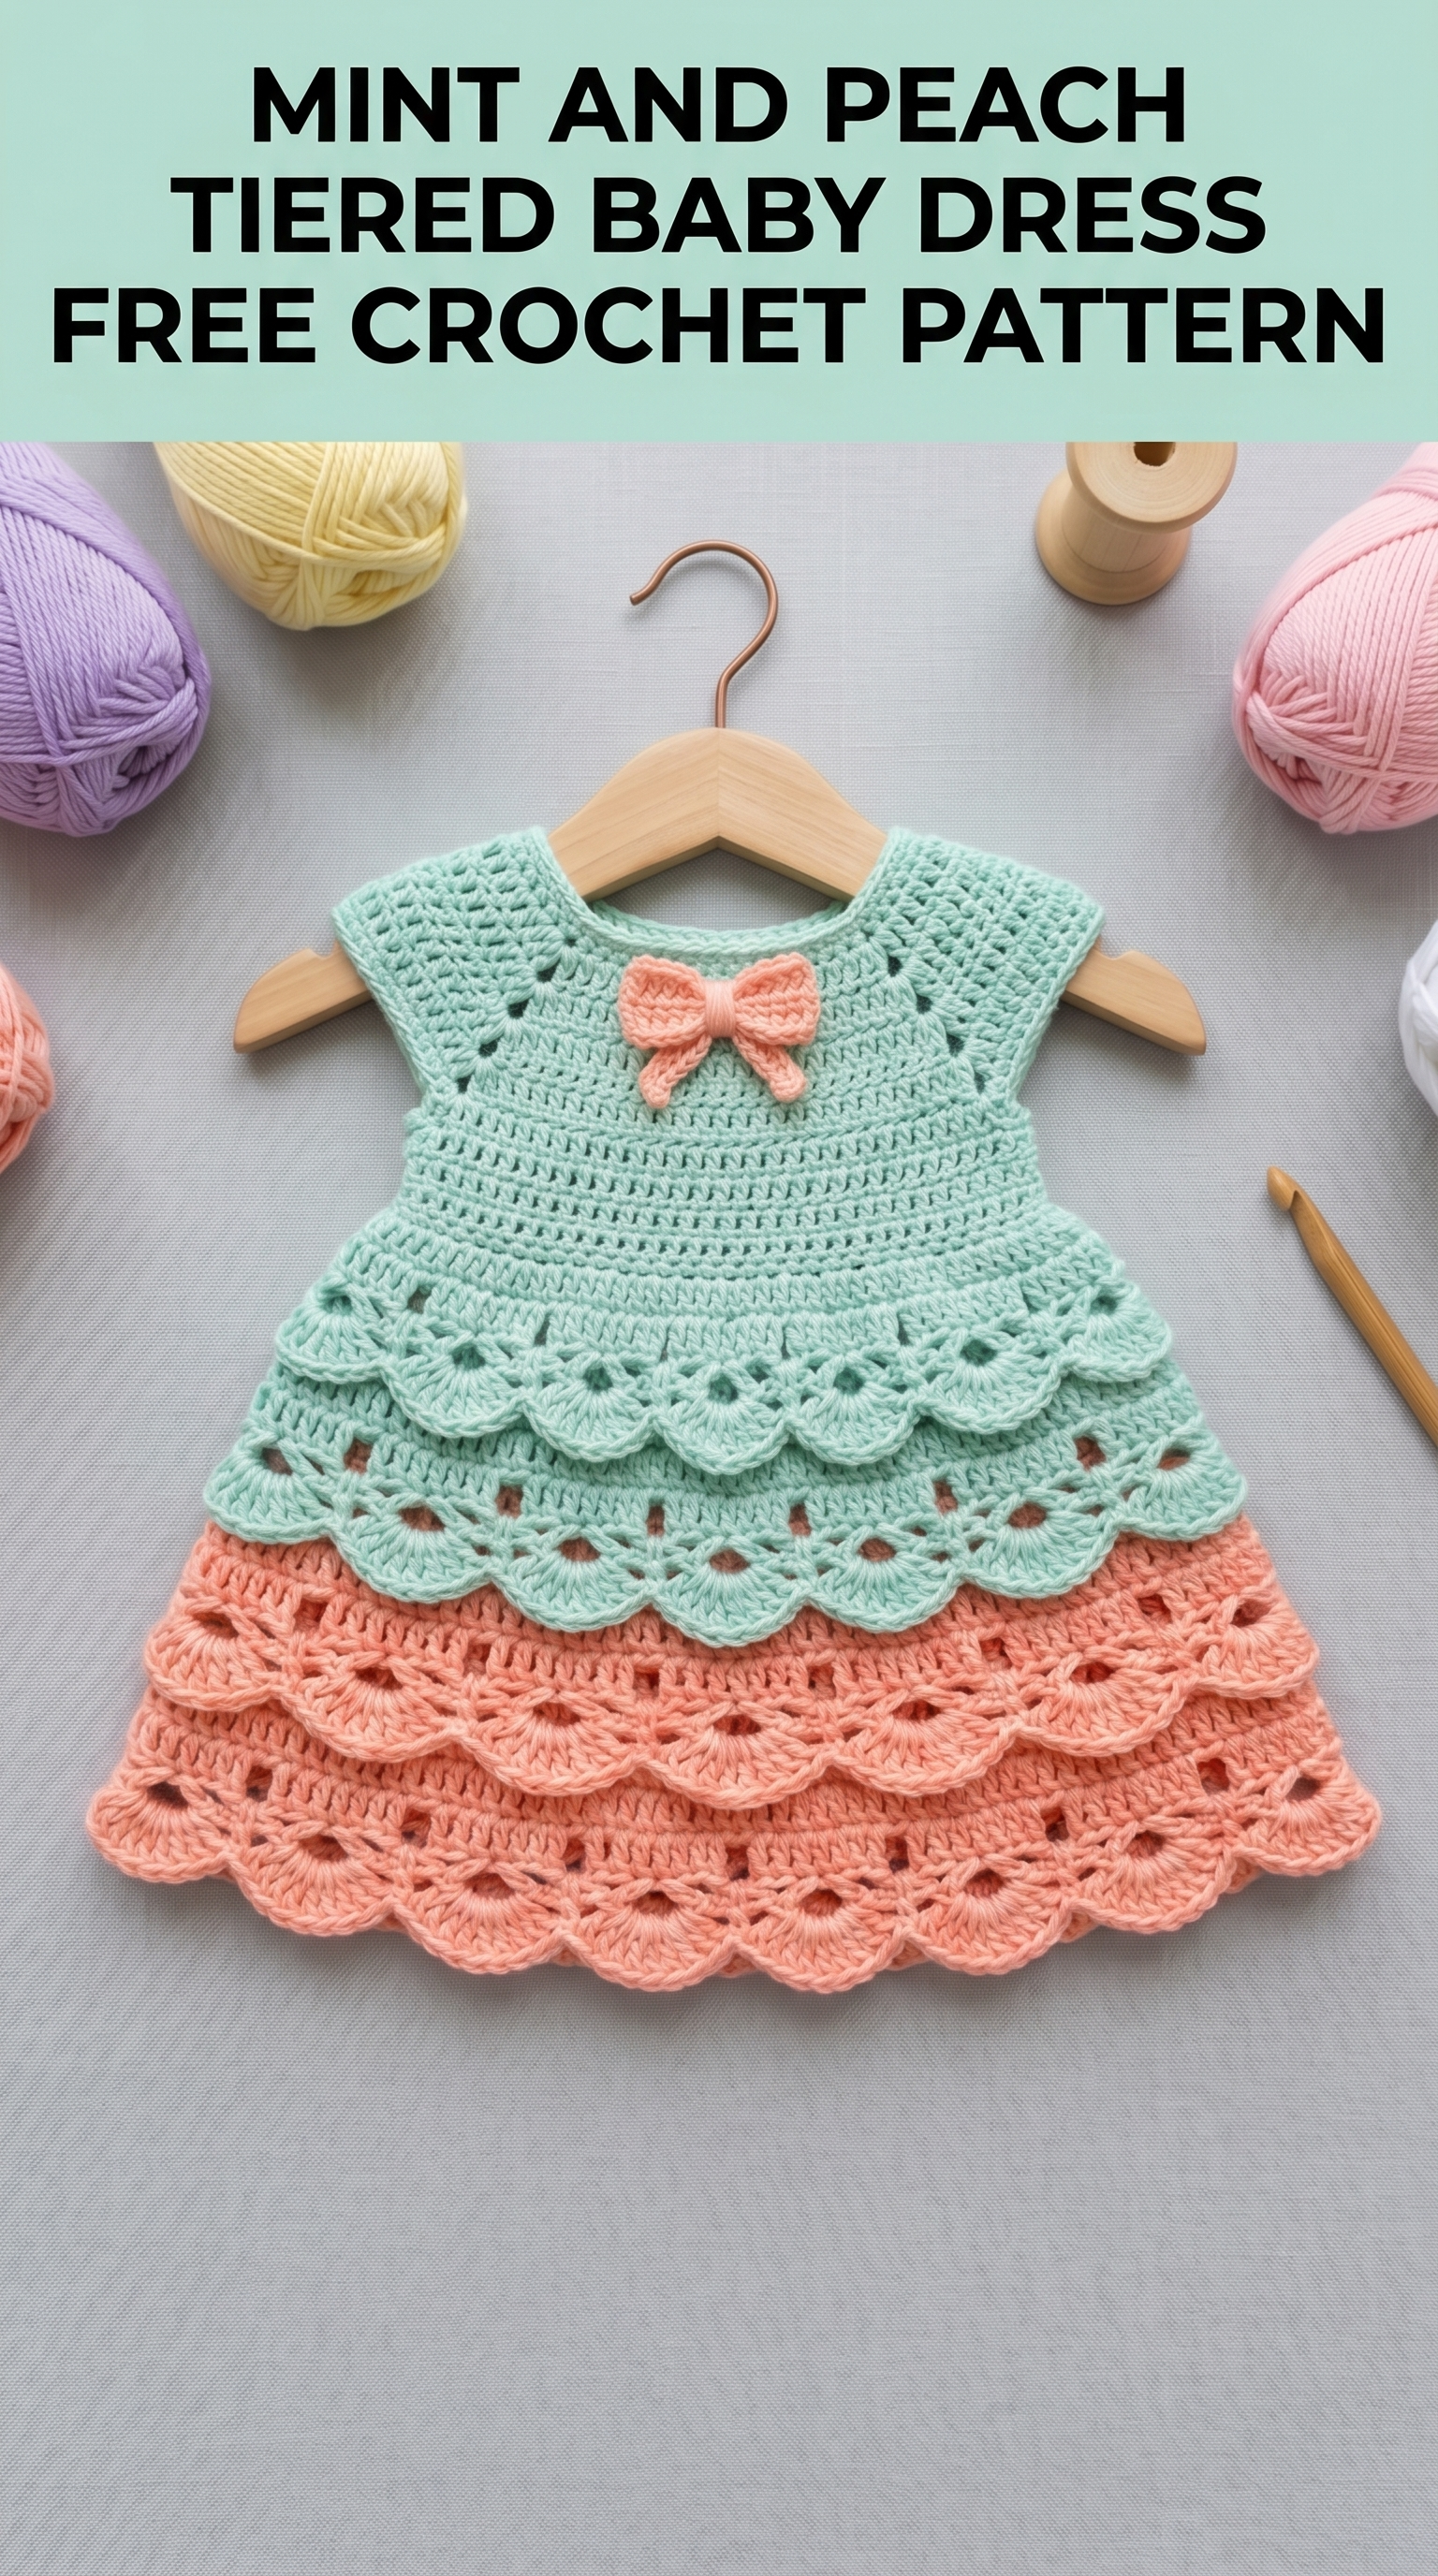
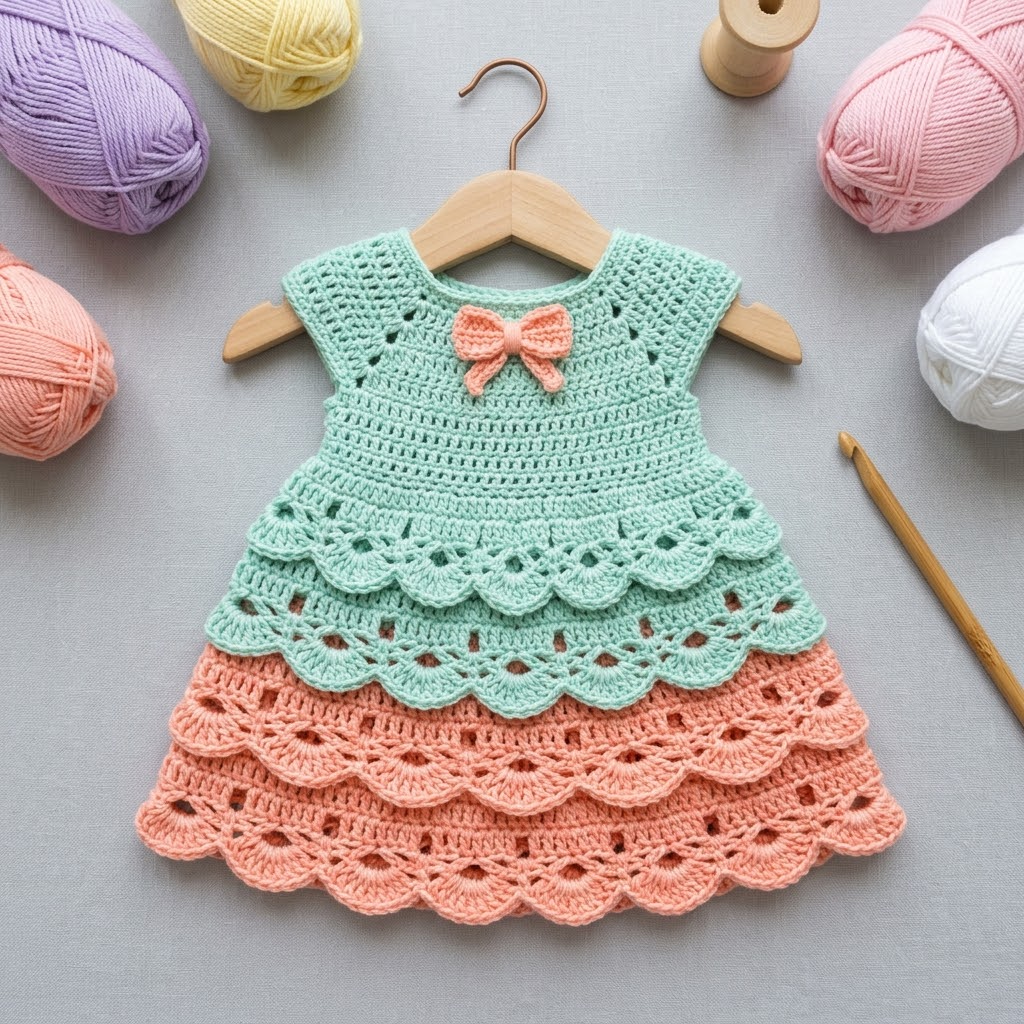
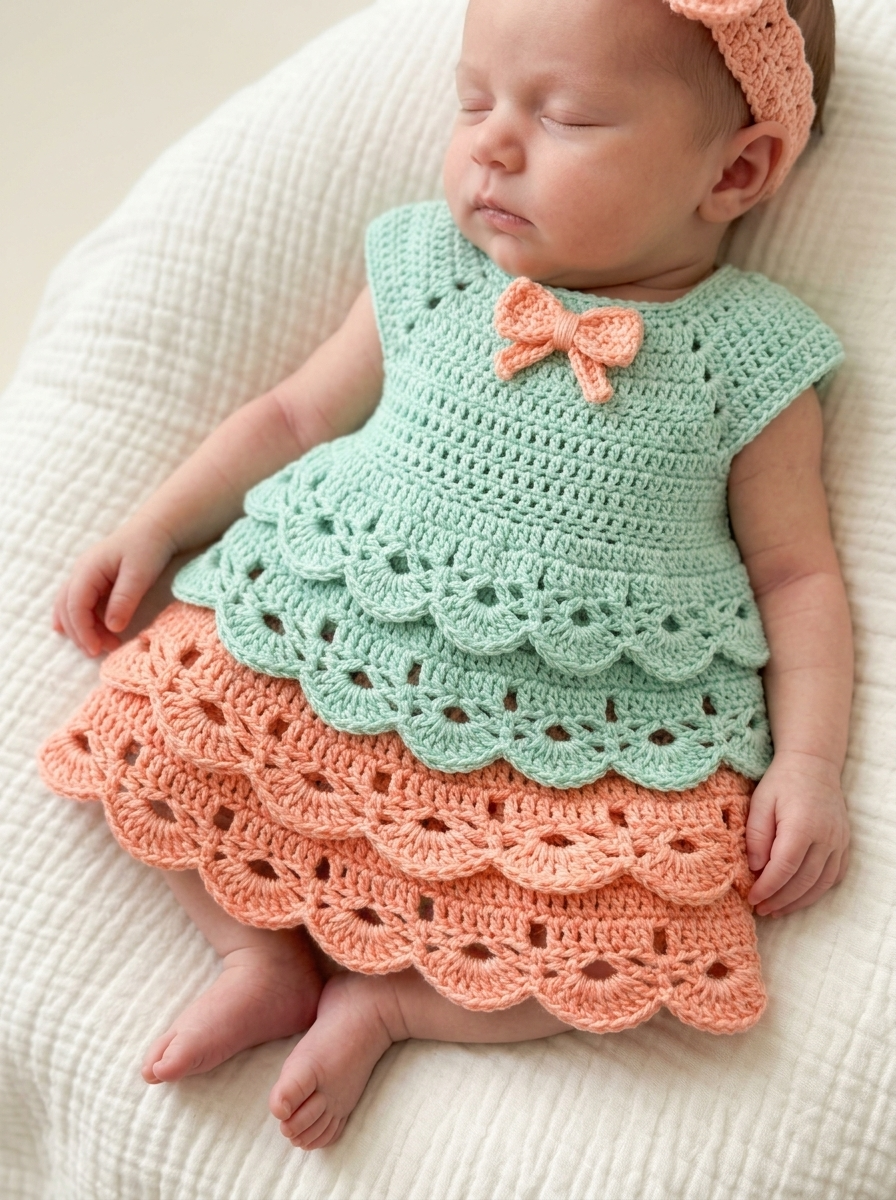
There is something truly magical about crocheting tiny garments. This Mint and Peach Tiered Baby Dress has become one of my absolute favorite projects to make for baby showers and first birthday gifts. The combination of soft mint green and warm peach creates a look that feels both classic and fresh. And those layered scalloped tiers? They are simpler to create than they appear, I promise.
If you have mastered basic stitches and feel comfortable reading a pattern, you can absolutely make this dress. I would call it an intermediate level project, but a confident beginner who takes their time will do beautifully. Let me walk you through everything you need to know to crochet this sweet tiered baby dress from start to finish.
Why This Crochet Pattern Works So Well
What I love about this baby dress crochet pattern is the clever construction. The bodice is worked from the top down in one piece, which means minimal seaming. The tiered skirt attaches seamlessly and creates that gorgeous layered effect without any complicated techniques.
The shell stitch pattern in the skirt tiers gives you maximum visual impact for minimal effort. Each tier builds on the one before, creating depth and movement. When a little one wears this dress, those tiers sway and flutter in the sweetest way.
The small bow detail at the center bodice adds a finishing touch that elevates the whole piece. You can make it in a contrasting color like the peach shown here, or match it to the bodice for a more subtle look.
Materials You Will Need
Before we start crocheting, let me share exactly what you need to gather. Having everything ready makes the process so much smoother.
Yarn:
Hook:
Notions:
Gauge:
Finished Size:
Stitch Abbreviations and Definitions
Let me define every stitch we will use. If you are newer to pattern reading, bookmark this section and refer back as needed.
ch = chain: Yarn over, pull through loop on hook. This creates the foundation for most crochet work.
sl st = slip stitch: Insert hook, yarn over, pull through both the stitch and the loop on hook in one motion. Used for joining and moving across stitches without adding height.
sc = single crochet: Insert hook, yarn over and pull up a loop (2 loops on hook), yarn over and pull through both loops. The shortest basic stitch.
hdc = half double crochet: Yarn over, insert hook, yarn over and pull up a loop (3 loops on hook), yarn over and pull through all 3 loops. Medium height stitch.
dc = double crochet: Yarn over, insert hook, yarn over and pull up a loop (3 loops on hook), yarn over and pull through 2 loops (2 loops remain), yarn over and pull through remaining 2 loops. A taller stitch that creates nice drape.
sk = skip: Pass over the indicated stitch without working into it.
sp = space: The gap or hole created by chains in previous rows.
shell = a group of stitches worked into the same stitch or space. For this pattern, a shell is 5 dc in the same stitch unless otherwise noted.
Understanding the Construction
Before diving into the step by step instructions, let me explain how this baby dress comes together. Understanding the big picture helps everything make sense.
1. Yoke and Bodice: We start at the neckline and work down, increasing at four points to create the shoulder shaping. The bodice continues in rows with armhole openings.
2. Bodice Front and Back: After creating armholes, we work the front and back separately, then join them.
3. Skirt Tier One (Mint): Stitches are picked up around the bodice bottom, and we work the first tier of shells.
4. Skirt Tier Two (Mint): A second layer of shells, slightly larger, creates the tiered effect.
5. Skirt Tier Three (Peach): The final and longest tier completes the skirt.
6. Bow: A small crocheted bow is made separately and attached.
7. Finishing: Edging, button closure, and weaving ends.
Crochet Pattern Instructions
Yoke (Worked in Rounds)
Using mint yarn and 4.0mm hook:
Foundation: Ch 52. Join with sl st to first ch to form a ring, being careful not to twist.
Round 1: Ch 3 (counts as dc here and throughout), dc in each ch around. Join with sl st to top of beginning ch 3. (52 dc)
Round 2: Ch 3, dc in same st, dc in next 5 sts, *2 dc in next st (this is your increase corner), dc in next 11 sts*, repeat from * twice more, 2 dc in next st, dc in next 5 sts. Join. (56 dc)
Round 3: Ch 3, dc in next st, 2 dc in next st, dc in next 5 sts, *2 dc in next st, dc in next 13 sts*, repeat from * twice more, 2 dc in next st, dc in next 6 sts. Join. (60 dc)
Round 4: Ch 3, dc in next 2 sts, 2 dc in next st, dc in next 6 sts, *2 dc in next st, dc in next 15 sts*, repeat from * twice more, 2 dc in next st, dc in next 8 sts. Join. (64 dc)
Round 5: Ch 3, dc in next 3 sts, 2 dc in next st, dc in next 7 sts, *2 dc in next st, dc in next 17 sts*, repeat from * twice more, 2 dc in next st, dc in next 9 sts. Join. (68 dc)
Round 6: Ch 3, dc in next 4 sts, 2 dc in next st, dc in next 8 sts, *2 dc in next st, dc in next 19 sts*, repeat from * twice more, 2 dc in next st, dc in next 10 sts. Join. (72 dc)
Place stitch markers at each of the four increase points. These mark your raglan lines.
Dividing for Armholes
Round 7: Ch 3, dc in next 9 sts (this is the back section), ch 4, sk next 14 sts (first armhole), dc in next 22 sts (front section), ch 4, sk next 14 sts (second armhole), dc in next 12 sts. Join. (44 dc + 8 ch)
Bodice Body
Round 8: Ch 3, dc in each dc and each ch around. Join. (52 dc)
Rounds 9 through 12: Ch 3, dc in each st around. Join. (52 dc)
At the end of Round 12, fasten off but do not cut yarn if continuing in same color.
Skirt Tier One (Mint)
The skirt attaches directly to the bodice bottom.
Round 1: With right side facing, join mint yarn to any st at bodice bottom. Ch 3, dc in same st, sk 1 st, *5 dc in next st (shell made), sk 2 sts*, repeat from * around, adjusting final skip if needed to end evenly. Join to top of ch 3. (approximately 17 shells)
Round 2: Sl st to center dc of first shell, ch 3, 4 dc in same st, *sc in sp between shells, 5 dc in center dc of next shell*, repeat from * around, sc in final sp. Join. (17 shells)
Round 3: Repeat Round 2, working shells in center of previous round shells. (17 shells)
Round 4: Repeat Round 2 once more. Fasten off mint yarn. (17 shells)
Skirt Tier Two (Mint)
This tier begins in the chain spaces of the first tier, creating the layered effect.
Row 1: Turn piece to work into the back of Tier One Round 1. Join mint yarn to any space between shells. Ch 3, 2 dc in same sp, *3 dc in next sp between shells*, repeat around. Join. (approximately 51 dc)
Round 2: Ch 3, dc in same st, sk 2 sts, *5 dc in next st, sk 2 sts*, repeat around. Join. (17 shells)
Rounds 3 through 5: Repeat the shell pattern (sl st to center, ch 3, 4 dc in same st, sc between shells, 5 dc in next center dc). Continue for 3 rounds total. Fasten off. (17 shells)
Skirt Tier Three (Peach)
Switch to peach yarn for the final tier.
Round 1: Working into the back of Tier Two Row 1, join peach yarn. Ch 3, 2 dc in same sp, *3 dc in next sp*, repeat around. Join. (approximately 51 dc)
Rounds 2 through 6: Work shell pattern as established for 5 rounds. The additional rounds create the longest tier. (17 shells)
Final Edging Round: Sl st to center dc of first shell, *ch 3, sl st in center of next shell*, repeat around. This creates a delicate scalloped edge. Fasten off.
Crocheted Bow (Peach)
Bow Center:
Ch 6, sc in 2nd ch from hook, sc in each ch across. (5 sc)
Rows 2 through 4: Ch 1, turn, sc in each st. (5 sc)
Fasten off, leaving a long tail.
Bow Loops:
Ch 25, sl st in first ch to form loop. Ch 25, sl st in same st. Fasten off.
Assembly: Wrap the small rectangle around the center of the bow loops. Use the tail to stitch in place. Attach bow to center front bodice at neckline using tapestry needle and matching yarn.
Neckline Edging
Join mint yarn to back center of neckline.
Round 1: Sc evenly around neckline opening, working approximately 52 sc. Join with sl st.
Round 2: Ch 1, *sc in next 4 sts, sk 1 st*, repeat around for a slightly gathered effect. Join and fasten off.
Armhole Edging
Join mint yarn to underarm.
Round 1: Sc evenly around armhole, approximately 28 sc. Join.
Round 2: Sc in each st around. Join and fasten off.
Repeat for second armhole.
Back Closure (Optional)
If you prefer a button closure rather than pulling the dress over baby’s head, you can add a small opening at the back bodice. Before joining the yoke into a round, work flat for the first 6 rounds, then join. Add a button loop at the top.
Finishing Your Baby Dress
Weave in all ends using your tapestry needle. I like to weave through several stitches, then double back for security. Baby garments get washed frequently, so take extra care here.
Blocking: Wet block your finished dress by soaking in lukewarm water for 15 minutes, then laying flat on a towel. Shape the tiers so they fan out nicely and let dry completely.
Care Instructions: Machine wash gentle cycle in cold water. Lay flat to dry or tumble dry low. Cotton may shrink slightly with heat, so air drying is safest.
Tips for Success
If your bodice is too tight: Go up one hook size for the yoke section only, then return to recommended size for the skirt.
If your tiers do not lay flat: Check your stitch count. Uneven shell placement can cause curling or bunching.
For a longer dress: Add one or two additional rounds to each tier, keeping the shell pattern consistent.
To adjust sizing: Add or subtract from the foundation chain in multiples of 4 to maintain the raglan shaping math.
Make This Baby Dress Your Own
This crochet tutorial gives you a solid foundation, but feel free to make it yours. Try an all white version for a christening gown. Use pastels for spring or jewel tones for fall. Add ribbon woven through the bodice. Create a matching headband with a smaller version of the bow.
The tiered construction works beautifully in variegated yarn too. Just keep in mind that the color pooling may look different across the tiers.
Final Thoughts
Thank you so much for choosing this pattern for your next project. I truly hope you enjoy making this mint and peach tiered baby dress as much as I enjoyed designing it. There is something incredibly satisfying about watching those scalloped tiers take shape, and knowing a little one will wear something made with your own hands.
I would absolutely love to see your finished dress. Tag me on Instagram or share in my Facebook group. Your color combinations always inspire me, and connecting with fellow crocheters makes this craft even more joyful.
Happy crocheting, friend. You have got this.
