Last summer, I found myself standing in a craft market, completely mesmerized by a woman carrying the most gorgeous handmade backpack I had ever seen. I actually stopped her to ask where she got it. When she said she crocheted it herself, I knew I had to figure out how to make my own. Three prototypes and about a dozen yarn shopping trips later, I finally created this terracotta granny square backpack that I genuinely cannot stop showing off to everyone who will look at it.
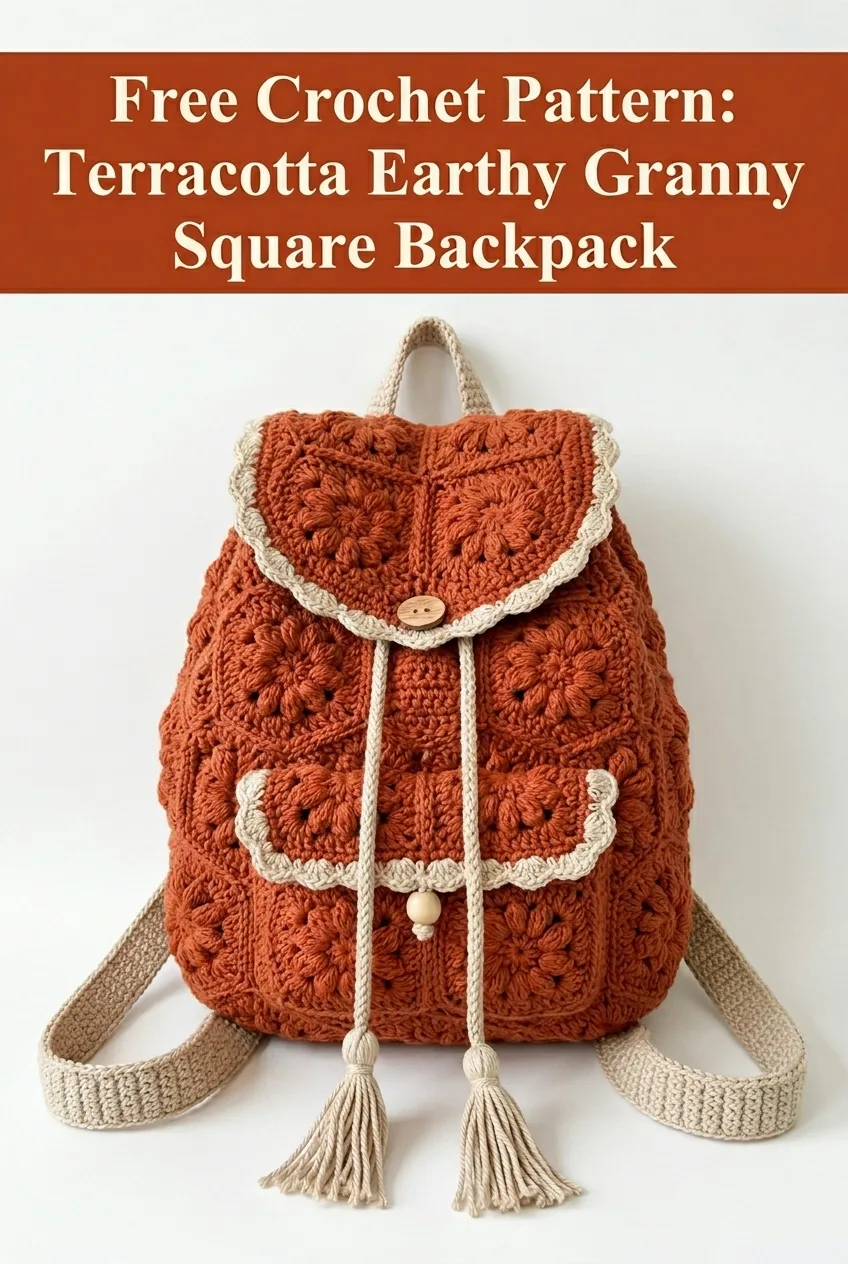
This crochet backpack pattern combines the classic charm of granny square construction with a modern, earthy color palette that works for everyday use. The puff flower motifs create beautiful texture, while the cream trim adds a sweet, vintage-inspired detail that makes the whole bag feel special. Whether you are heading to a farmer’s market, a weekend trip, or just running errands, this backpack is both functional and absolutely stunning.
Why You Will Love This Granny Square Backpack Crochet Pattern
This is not your grandmother’s granny square project. Well, actually, maybe it is, but in the best possible way. The construction method takes those familiar square motifs and transforms them into a fully functional, genuinely useful backpack that holds its shape and carries your essentials with style.
What makes this pattern special:
The finished backpack measures approximately 12 inches tall, 10 inches wide, and 4 inches deep. This size fits a water bottle, wallet, book, snacks, and all the random things you accumulate throughout the day.
Skill Level
I would call this an intermediate level crochet pattern. If you have made granny squares before and feel comfortable joining motifs, you can absolutely handle this project. The puff stitches might be new to some of you, but I promise they are easier than they look. I will walk you through everything step by step.
If you are a confident beginner who wants to level up your skills, this is a great challenge project. Just take your time with the puff flowers and practice a few squares before committing to the whole bag.
Materials Needed
Yarn:
I recommend using a cotton or cotton blend yarn for this project. Cotton holds its shape beautifully and gives the bag structure. A yarn like Lily Sugar’n Cream, Paintbox Cotton DK, or similar would work wonderfully.
Tools:
Notions:
Gauge
One completed puff flower granny square should measure approximately 3.5 inches by 3.5 inches after blocking. Gauge matters here because it affects the final size of your backpack. If your squares are too small, your bag will be tiny. Too large, and it becomes unwieldy.
Make one square first and measure it. Adjust your hook size up if your square is too small, or down if it is too large.
Stitch Abbreviations and Definitions
Let me break down every stitch you will need for this crochet tutorial:
Ch – Chain: Wrap yarn over hook, pull through loop on hook. This creates the foundation for most crochet projects.
Sl st – Slip stitch: Insert hook into stitch, yarn over, pull through both loops on hook at once. Used primarily for joining rounds.
Sc – Single crochet: Insert hook into stitch, yarn over, pull up a loop (2 loops on hook), yarn over, pull through both loops. Creates a short, tight stitch.
Dc – Double crochet: Yarn over, insert hook into stitch, yarn over, pull up a loop (3 loops on hook), yarn over, pull through 2 loops, yarn over, pull through remaining 2 loops. Creates a taller stitch with nice drape.
Puff st – Puff stitch: (Yarn over, insert hook into stitch, yarn over, pull up a loop) 3 to 4 times in the same stitch, yarn over, pull through all loops on hook, ch 1 to secure. This creates a puffy, textured cluster. Think of it like a little cloud of yarn.
Sk – Skip: Miss a stitch and work into the next one.
Sp – Space: The gap between stitches, usually created by chains.
Puff Flower Granny Square Pattern
This is the building block of your entire backpack. You will need approximately 30 squares for the body, flap, pocket, and bottom of the bag.
Using Terracotta yarn:
Round 1 (Center): Make a magic ring. Ch 3 (counts as first dc), work 2 dc into ring, ch 2. *Work 3 dc into ring, ch 2.* Repeat from * two more times. Sl st to top of beginning ch 3 to join. (4 groups of 3 dc, 4 ch-2 corner spaces)
Round 2 (Puff Flowers): Sl st into next dc, sl st into ch-2 corner space. Ch 1, work (sc, ch 2, puff st, ch 2, sc) all into the same corner space. *Ch 1, skip 3 dc, work (sc, ch 2, puff st, ch 2, sc) into next corner space.* Repeat from * around. Sl st to first sc to join. (4 puff flowers)
Round 3 (Building Out): Ch 3 (counts as dc), work 2 dc into first ch-2 space. Work 3 dc into next ch-2 space. *Ch 2 for corner. Work 3 dc into next ch-2 space, 3 dc into following ch-2 space.* Repeat from * around, ending with ch 2. Sl st to top of beginning ch 3. (8 groups of 3 dc total, 4 corner spaces)
Round 4 (Final Round): Ch 3 (counts as dc), dc in each dc across to corner space. *Work (2 dc, ch 2, 2 dc) into corner space. Dc in each dc across to next corner.* Repeat from * around. Sl st to top of beginning ch 3. Fasten off. (14 dc per side, 4 corner spaces)
Weave in your ends and block each square to 3.5 inches. Trust me, blocking makes assembly so much easier.
Backpack Assembly
Now for the fun part. Well, some people find joining squares tedious, but I actually find it relaxing. Put on a podcast and settle in.
Square Layout
Back Panel: 6 squares arranged in 2 columns of 3 squares
Front Panel: 6 squares arranged in 2 columns of 3 squares
Side Panels: 3 squares each, arranged vertically (2 side panels total, 6 squares)
Bottom: 2 squares joined side by side
Flap: 4 squares arranged in 2 columns of 2 squares
Front Pocket: 2 squares joined side by side
Joining Method
Using cream yarn and a flat slip stitch join creates that beautiful contrast detail you see in the finished bag.
Hold two squares with wrong sides together. Working through both layers, insert hook through corner spaces of both squares. Sl st to join. *Insert hook through next stitch on both squares, sl st.* Continue across the edge, matching stitches as you go. This creates a raised seam on the right side that becomes a decorative element.
Join all squares for each panel first, then join panels together to form the bag body.
Constructing the Body
1. Join the back panel squares together
2. Join the front panel squares together
3. Join each side panel
4. Join the bottom panel
5. Connect back panel to bottom panel along one long edge
6. Connect front panel to opposite edge of bottom
7. Connect side panels to complete the box shape
Adding the Flap
Position the joined flap panel at the top back of the bag. Using cream yarn, sc evenly across the top edge of the bag back and top edge of flap to join. Work 3 sc into each corner to help the flap lay flat when closed.
Scalloped Edging
This sweet detail finishes the flap and pocket edges beautifully.
Using cream yarn, join to any corner of the flap.
*Work 5 dc into next stitch, skip 2 stitches, sl st into next stitch.* Repeat around the three open edges of the flap (not the attached edge). Fasten off.
Repeat this edging around the top edge of the front pocket before attaching it to the bag front.
Attaching the Pocket
Position the completed pocket on the front panel, centered and about 1 inch up from the bottom. Using cream yarn and a whip stitch, sew along the bottom and sides, leaving the top open for access.
Drawstring and Closure
Drawstring Cord
Using cream yarn, ch 150 or until cord measures approximately 36 inches. Sl st into second ch from hook and each ch across. Fasten off.
Thread the cord through stitches around the top opening of the bag, about 1 inch down from the top edge. Pull through a wooden bead on each end and secure with a knot. Add tassels below the beads for that extra bohemian touch.
Making Tassels
Wrap cream yarn around a 3-inch piece of cardboard about 30 times. Slide off, tie tightly at one end to create the top. Cut the loops at the opposite end. Wrap yarn around the tassel about half an inch down from the top and secure. Trim ends evenly.
Button Loop and Placement
Using terracotta yarn, ch 12. Sl st to first ch to form a loop. Fasten off, leaving a long tail. Sew this loop to the center underside of the flap.
Sew your wooden button to the front of the bag, centered and positioned so the loop catches it snugly when the flap is closed.
Shoulder Straps
Make 2:
Using cream yarn, ch 8.
Row 1: Sc in second ch from hook and each ch across. Ch 1, turn. (7 sc)
Rows 2 to 100 (or desired length): Sc in each sc across. Ch 1, turn. (7 sc)
Your straps should measure approximately 24 to 28 inches long, depending on how you like your backpack to sit on your body. Try it on as you go and adjust.
Fasten off, leaving a long tail for sewing.
Attaching Straps
Sew the top ends of both straps to the top corners of the back panel, just below where the flap attaches.
Sew the bottom ends of both straps to the bottom corners of the back panel.
For extra security, sew through multiple times and consider adding a small fabric reinforcement on the inside.
Top Handle
Using cream yarn, ch 6.
Row 1: Sc in second ch from hook and each ch across. Ch 1, turn. (5 sc)
Rows 2 to 30: Sc in each sc across. Ch 1, turn. (5 sc)
Fasten off, leaving a long tail. Sew both ends to the top center of the back panel, creating a loop for carrying.
Finishing Touches
Block your completed backpack lightly with steam to even out any wonky stitches. Add a fabric lining if you want extra durability and to prevent smaller items from poking through the openwork.
To add lining, cut fabric pieces to match each panel plus half an inch seam allowance. Sew fabric pieces together to create a bag shape, then hand stitch inside your crocheted backpack along the top edge.
Care Instructions
Hand wash your backpack in cool water with mild detergent. Lay flat to dry, reshaping as needed. Cotton yarn can stretch when wet, so avoid hanging it to dry.
Thank you so much for choosing this terracotta granny square backpack crochet pattern. I genuinely hope you love making it as much as I loved designing it. If you create one, please tag me on Instagram or share in my Facebook group. I absolutely love seeing your finished projects and color combinations.
If this pattern inspired you, save it to your Pinterest boards so you can find it whenever you are ready to start. And please drop a comment below if you make one. I would love to hear how it turned out and see your beautiful work!
