A bucket bag that actually fits your phone, wallet, and keys without turning into a bottomless pit? That’s exactly what this Autumn Harvest Granny Square Bag delivers. The construction uses twelve simple sunburst squares joined into a tube, topped with a gathered cream yoke and finished with a drawstring closure. It works up in about 10 to 14 hours spread across a few evenings, making it a satisfying project for confident beginners ready to try something beyond basic squares.
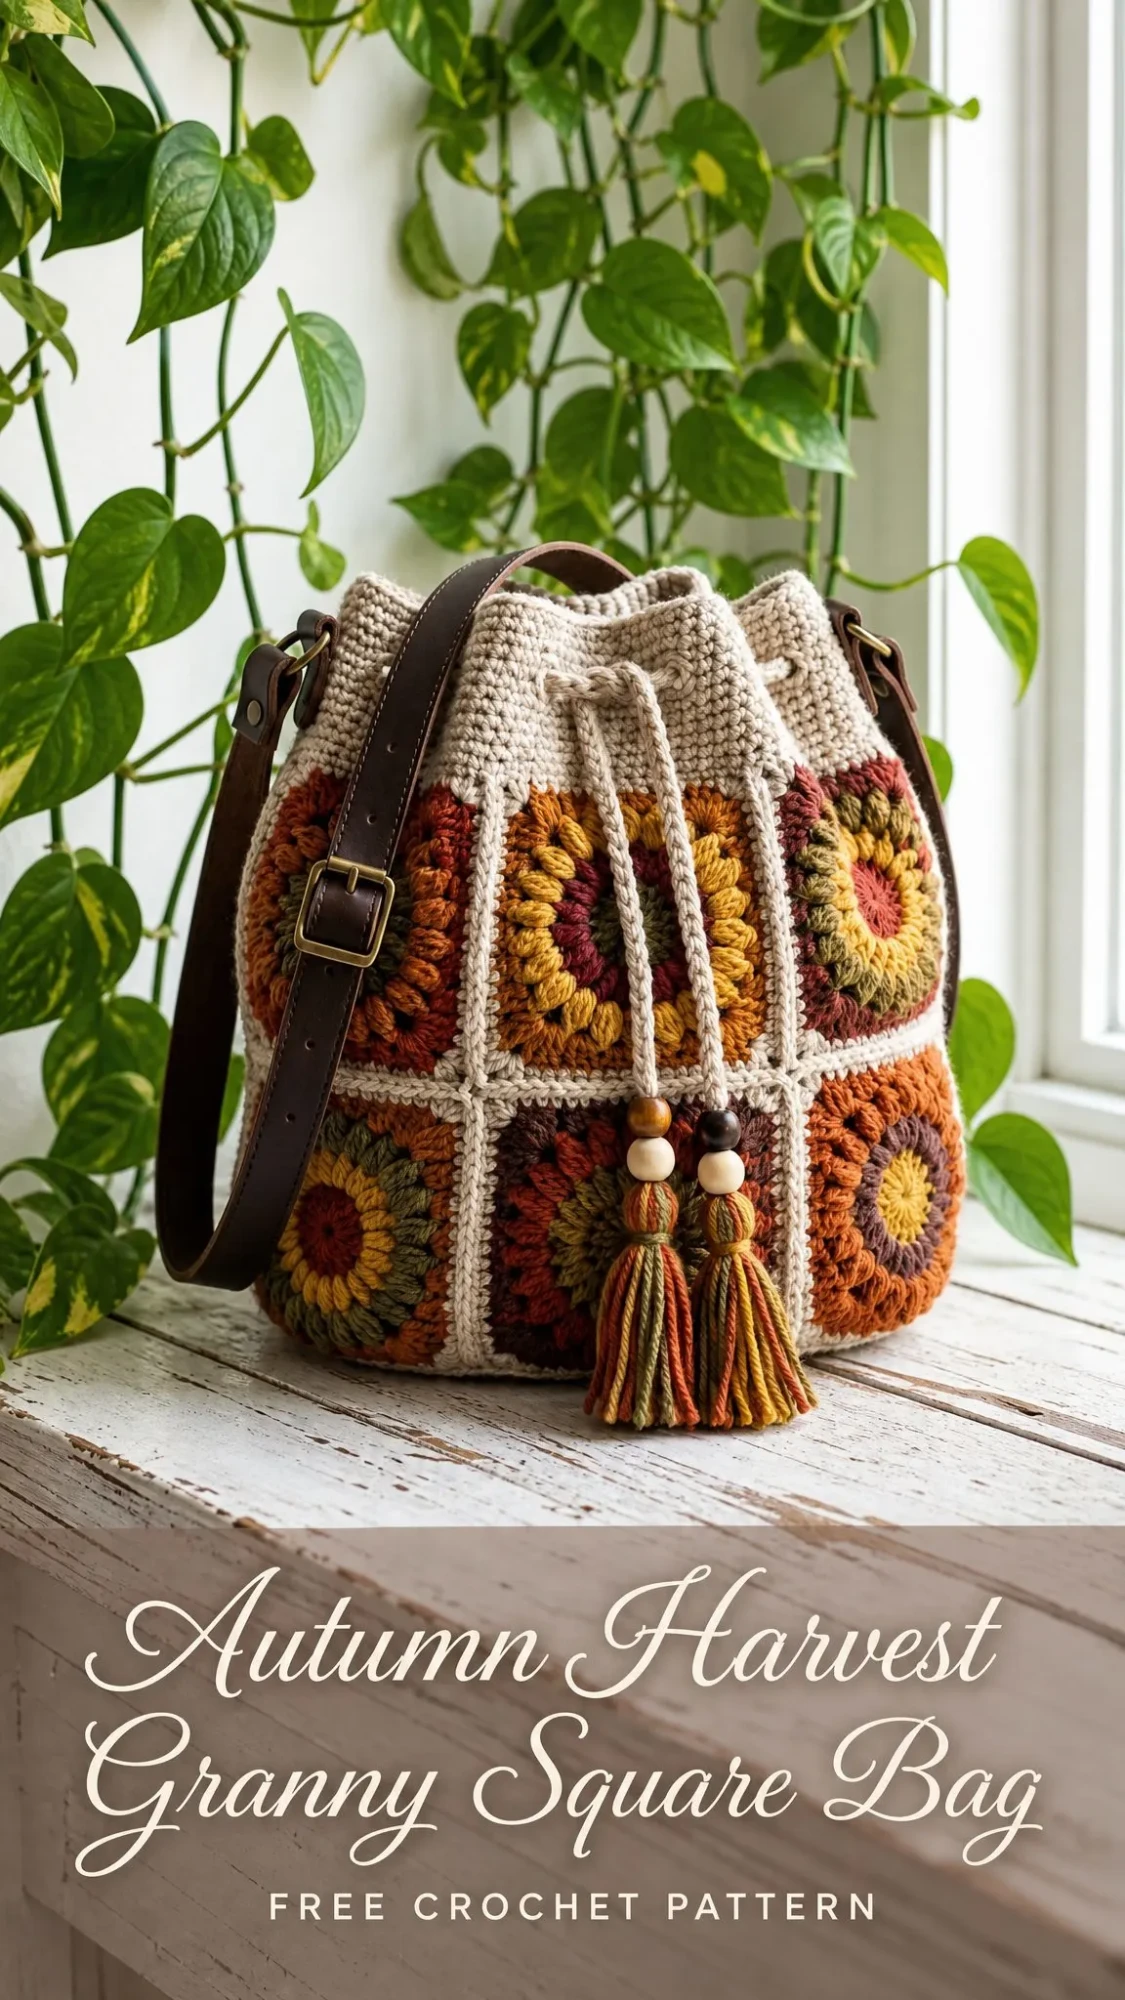
This crossbody bag measures 7 inches in diameter by 9 inches tall, which is the perfect size for everyday essentials without the bulk. The warm harvest palette of rust, pumpkin, mustard, gold, olive, and burgundy makes it ideal for gift giving during the fall season. If you have been looking for a practical project that showcases your colorwork skills while creating something genuinely useful, this one checks all the boxes.
The stitches are straightforward. You will use double crochet (dc) for the squares and base, half double crochet (hdc) for the yoke, and basic joining techniques. If you can work in the round and join granny squares, you have everything you need to make this bag.
Materials You Will Need
Gather these supplies before you start:
Yarn:
Tools:
Optional:
Yarn Suggestions:
Paintbox Yarns Cotton Aran gives crisp stitch definition and has a broad autumn colour range. Lily Sugar’n Cream worsted cotton works well if you want a budget friendly option that holds up to daily use. You can also hold Scheepjes Catona double, or any DK weight yarn held double, to reach aran weight.
Gauge
Getting gauge right matters here because your square size determines the entire bag dimensions.
One finished sunburst square = 3.75 inches (9.5 cm) square, blocked, after Round 4.
In half double crochet (yoke): 13 stitches × 10 rows = 4 inches (10 cm).
Six squares at 3.75 inches gives you a 22.5 inch (57 cm) circumference and a 7 inch (18 cm) base. Make one square first and measure it before committing to all twelve. If your square is larger, drop down a hook size. If it is smaller, go up a hook size.
Abbreviations
Here are all the abbreviations used in this pattern, written in US crochet terms:
UK Crocheters: This pattern uses US stitch names. Swap as follows: US sc = UK dc, US hdc = UK htr, US dc = UK tr. Hook sizes and measurements stay the same.
Special Stitches and Techniques
Magic ring: An adjustable loop used to start each square and the base. Work your first round of stitches into the ring, then pull the tail to close it tight.
2-dc increase: Work 2 double crochet stitches into the same stitch to add one stitch.
Corner: Work (2 dc, ch 2, 2 dc) all into the same stitch. This turns a circle into a square.
Eyelet: Chain 1, skip 1 stitch. The drawstring threads through these spaces later.
Pattern Notes
Before you begin, keep these points in mind:
The Sunburst Square (Make 12)
Each square grows from a magic ring centre outward through three glowing rounds of colour, then a cream border round squares it off. Choose three accent shades per square: A for the centre, B for the ring, and C for the sunburst. Cream is always used for Round 4.
Round 1 (Colour A):
Into a magic ring: ch 3 (counts as dc), 11 dc into ring. Join with sl st to top of beg ch-3. Pull ring closed. (12 dc)
Round 2 (Colour B):
Join B in any st. Ch 3, dc in same st, then 2 dc in each st around. Join to top of ch-3. (24 dc)
Round 3 (Colour C):
Join C in any st. Ch 3, dc in same st, dc in next st; 2 dc in next st, dc in next st; rep from * around. Join. (36 dc)
Round 4 (Cream):
Join Cream in any st. In that st work (ch 3, dc, ch 2, 2 dc) for the first corner; dc in next 8 sts; (2 dc, ch 2, 2 dc) in next st three times; dc in last 8 sts. Join to top of ch-3. (48 dc and 4 corner ch-2 spaces, which is 12 dc per side)
Fasten off and weave in ends.
Important: Block your first square and check that it measures 3.75 inches (9.5 cm) along each side. Adjust your hook size if needed, then make eleven more squares.
Colour Recipe and Layout
There is no wrong way to mix your harvest shades. The goal is to scatter the colours so no two touching squares have the same combination. Cream is always the Round 4 border.
Here is a balanced starting recipe for your twelve squares:
| Quantity | Centre (A) | Ring (B) | Sunburst (C) |
|---|---|---|---|
| 3 | Gold | Rust | Pumpkin |
| 3 | Burgundy | Mustard | Olive |
| 3 | Olive | Pumpkin | Gold |
| 3 | Mustard | Burgundy | Rust |
Feel free to adjust this based on your stash and preferences. The beauty of this project is that every bag turns out unique.
Joining the Squares
Lay out 6 squares in a row for the lower round and 6 for the upper round. Shuffle them until the colours feel balanced and no identical squares touch.
With Cream and a tapestry needle, whip stitch through back loops only, matching stitch to stitch (12 stitches per side).
1. Join each row of 6 into a ring.
2. Stack the two rings and join them one above the other to form a tube that is 6 squares around by 2 squares tall.
If you prefer a flatter seam, you can use a join-as-you-go method with single crochet in Cream instead.
The Round Base (Make 1)
This flat cream circle is worked in double crochet. The final round has 72 stitches, which matches the bottom edge of the square tube (6 squares × 12 stitches) so they seam together cleanly.
Round 1:
Magic ring: ch 3, 11 dc in ring. Join. (12 dc)
Round 2:
Ch 3, dc in same st, 2 dc in each st around. Join. (24 dc)
Round 3:
Ch 3, dc in same st; dc in next st, 2 dc in next st; rep from * around. Join. (36 dc)
Round 4:
Dc in next 2 sts, 2 dc in next st; rep from * around. Join. (48 dc)
Round 5:
Dc in next 3 sts, 2 dc in next st; rep from * around. Join. (60 dc)
Round 6:
Dc in next 4 sts, 2 dc in next st; rep from * around. Join. (72 dc)
Fasten off.
The finished circle should measure about 7 inches (18 cm) across. If yours curls into a cup shape, your tension is too tight. Add an even round of dc to flatten it. If it ruffles, your circle is too loose. Rework it with a smaller hook.
Tip for a Sturdier Bottom: Work the final round in back loops only for extra structure, or cut a circle of plastic canvas to sit inside the base before adding a lining.
The Cream Yoke and Eyelets
With the tube seamed to the base (see Assembly section below), work the soft cream top straight up from the joined squares. You have 72 stitches around the top edge (6 squares × 12 stitches).
Set-up Round:
Join Cream in any top st. Ch 1, hdc evenly around, 72 sts total. Join. (72 hdc)
Rounds 1 through 5:
Ch 1, hdc in each st around. Join. (72 hdc each round)
Eyelet Round:
Ch 1, hdc in next 5 sts, ch 1, sk 1 st; rep from * 12 times total. Join. (60 hdc and 12 ch-1 eyelets)
Round 7:
Ch 1, hdc in each hdc and in each ch-1 sp around. Join. (72 hdc)
Rounds 8 and 9:
Ch 1, hdc in each st around. Join. (72 hdc each round)
Edge Round:
Ch 1, sc in each st around. Join and fasten off. (72 sc)
The yoke does not decrease. The drawstring does all the gathering, pulling the opening in to about 4 inches (10 cm) across.
Drawstring Cord
With Cream, make a firm cord approximately 32 inches (81 cm) long using one of these methods:
Chain Cord Method:
Ch 130, then sl st back along the chain for a rounder cord. Fasten off. (approximately 32 inches / 81 cm)
Alternative:
Work a 4-stitch i-cord to the same length for a chunkier look.
Beginning and ending at centre front, weave the cord in and out through all 12 eyelets so both ends emerge at the front of the bag.
Beads and Tassels
Adding the Beads:
Thread a wooden bead onto each cord end and slide it up close to the yoke.
Making the Tassels (Make 2):
1. Wrap a blend of autumn shades around a 4 inch (10 cm) piece of cardboard about 30 times.
2. Thread a strand under the top of the wrapped yarn and tie it tightly. Slip the bundle off the cardboard.
3. Wrap a strand several times around the bundle approximately 0.75 inches (2 cm) below the top to form the neck. Knot securely and bury the ends inside the tassel.
4. Cut the bottom loops and trim the ends level. The finished tassel should be about 3.5 inches (9 cm) long.
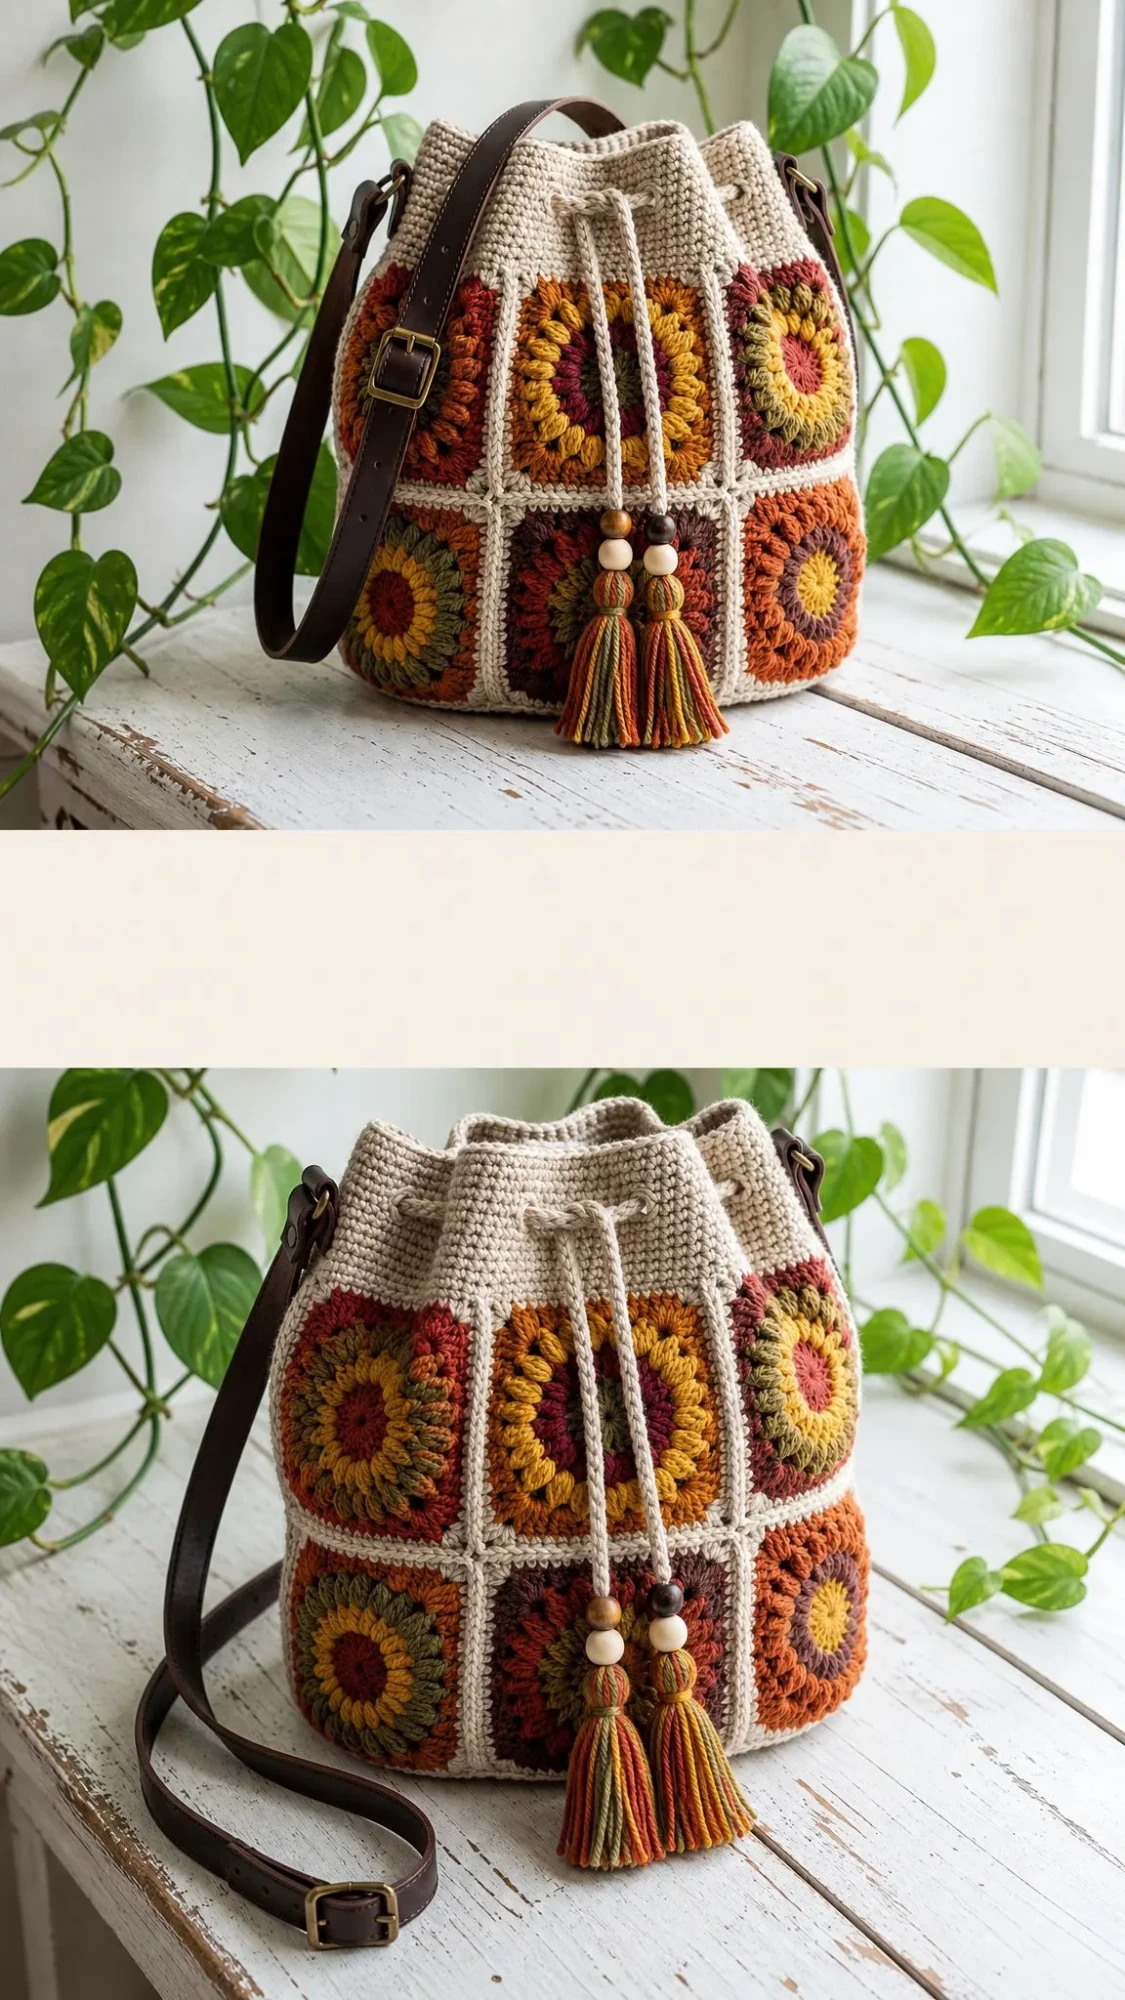
Tie one tassel to each cord end, then add a second bead above each tassel as shown in the photos.
Tip: A dab of fabric glue inside each bead keeps it from sliding once the bag is in daily use.
Assembly and Strap
Order of Assembly:
1. Join the 12 squares into the tube (6 around × 2 tall).
2. With Cream, seam the bottom edge of the tube to the base circle, matching 72 stitches to 72 stitches. Use whip stitch or single crochet all the way around.
3. Work the cream yoke up from the top edge of the tube.
4. Thread the drawstring through the eyelets. Add beads and tassels.
5. Attach the strap and weave in any remaining ends.
Attaching the Strap:
The sample uses a 1 inch (2.5 cm) adjustable leather strap. Attach it at the two side seams, level with the eyelet row.
Method 1, Crocheted Tabs:
With Cream, ch 7. Sc back along the chain to make a small loop. Sew each tab firmly to a side seam. Clip the strap’s swivel hooks to the loops.
Method 2, Direct Sewing:
Stitch the strap ends to the inside of the yoke with strong thread, reinforcing with several passes.
Optional Lining:
Cut cotton fabric to match the base circle plus a tube that reaches the yoke height. Sew it into a pouch and hand stitch it just below the eyelet row. A magnetic snap keeps the bag closed under the drawstring.
Finishing and Care
Finishing Steps:
Care Instructions:
Sizing Adjustments
Want a Bigger Bag?
Use 8 squares around × 2 rows (16 total) and grow the base to 8 rounds with 96 stitches.
Want a Taller Bag?
Add a third row of squares, or work extra hdc rounds in the yoke before the eyelet round.
Want a Mini Pouch?
Use DK weight yarn and a 3.5 mm hook. Keep all stitch counts the same for a smaller version of everything.
Want Less Gathering?
Work an extra eyelet round lower down and lace a second drawstring through it.
Helpful Tips for Success
Blocking Makes a Difference:
Take time to block each square before joining. This evens out your stitches and makes the seaming process much easier. Pin each square to a blocking mat, spritz with water, and let dry completely.
Colour Placement:
Lay out all twelve squares before you start joining. Move them around until no two identical colour combinations touch. This creates visual interest and shows off your colour choices.
Reinforcing the Base:
Cotton yarn stretches over time, especially when the bag carries weight. Adding a piece of plastic canvas inside the base, or working the final round in back loops only, gives extra structure.
Strap Attachment:
Make sure your strap attachment points are secure. The bag will hold everyday items, so reinforce those seams with extra stitching.
I hope you love making this Autumn Harvest Granny Square Bag as much as I enjoyed writing up this pattern. The combination of colourful sunburst squares and that soft cream yoke creates something that looks impressive but stays approachable for confident beginners.
If you found this pattern helpful, I would love it if you saved it to your Pinterest boards so you can find it again later. And if you make this bag, please leave a comment below or tag me on social media. Seeing your colour combinations and finished projects honestly makes my day!
