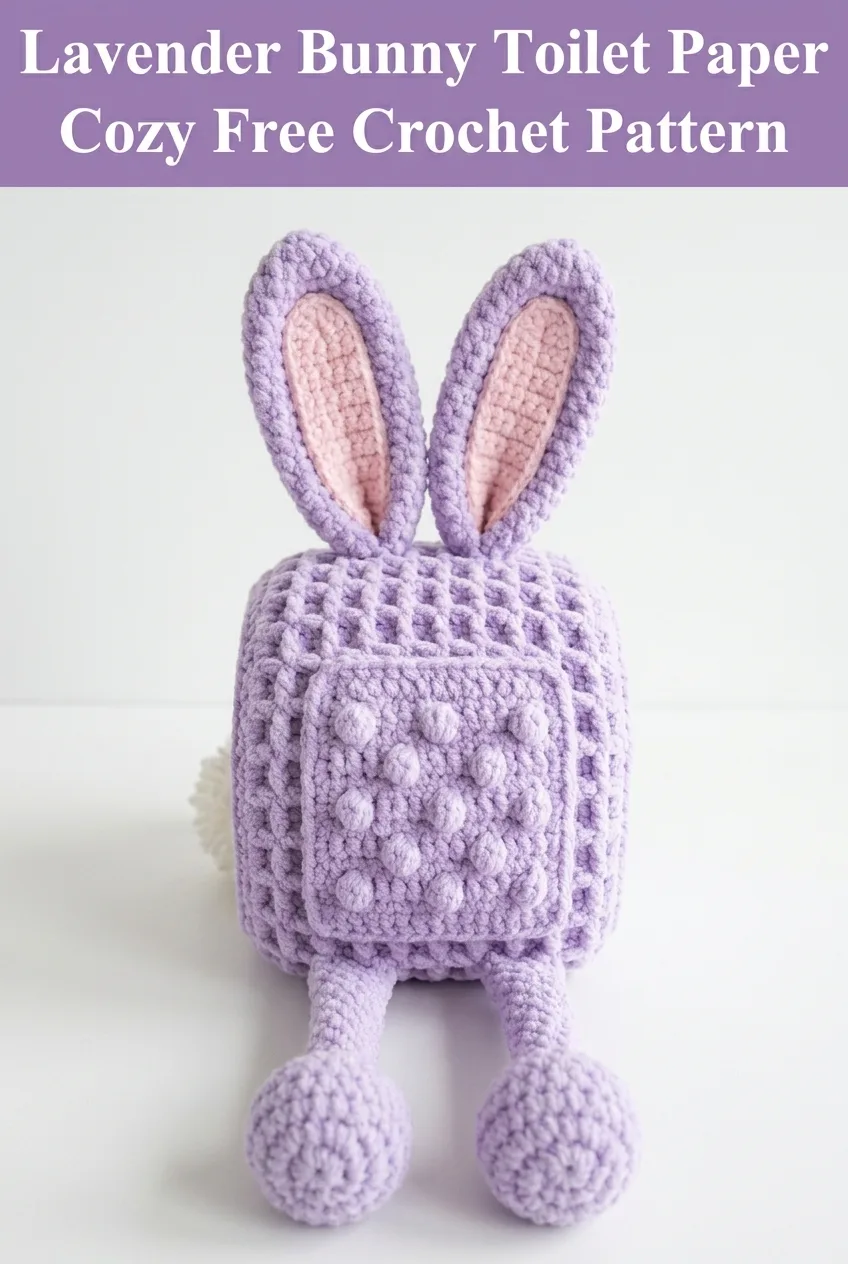
SUPER EASY and absolutely adorable! This lavender bunny toilet paper cozy works up in just a couple of hours and makes the cutest bathroom accessory you never knew you needed. I am SO excited about this one because it combines bobble texture, sweet floppy bunny ears, and those darling dangling legs that hang right off the edge of your counter. Perfect for Easter decor, a nursery bathroom, or gifting to that friend who appreciates whimsical handmade touches. Trust me when I say this project looks way more complicated than it actually is!
Why You Will Love This Crochet Bunny Toilet Paper Cozy Pattern
This crochet pattern transforms an ordinary bathroom essential into something genuinely charming. The chunky yarn makes every stitch quick and satisfying, while the bobble details add just enough texture to keep things interesting without overwhelming you.
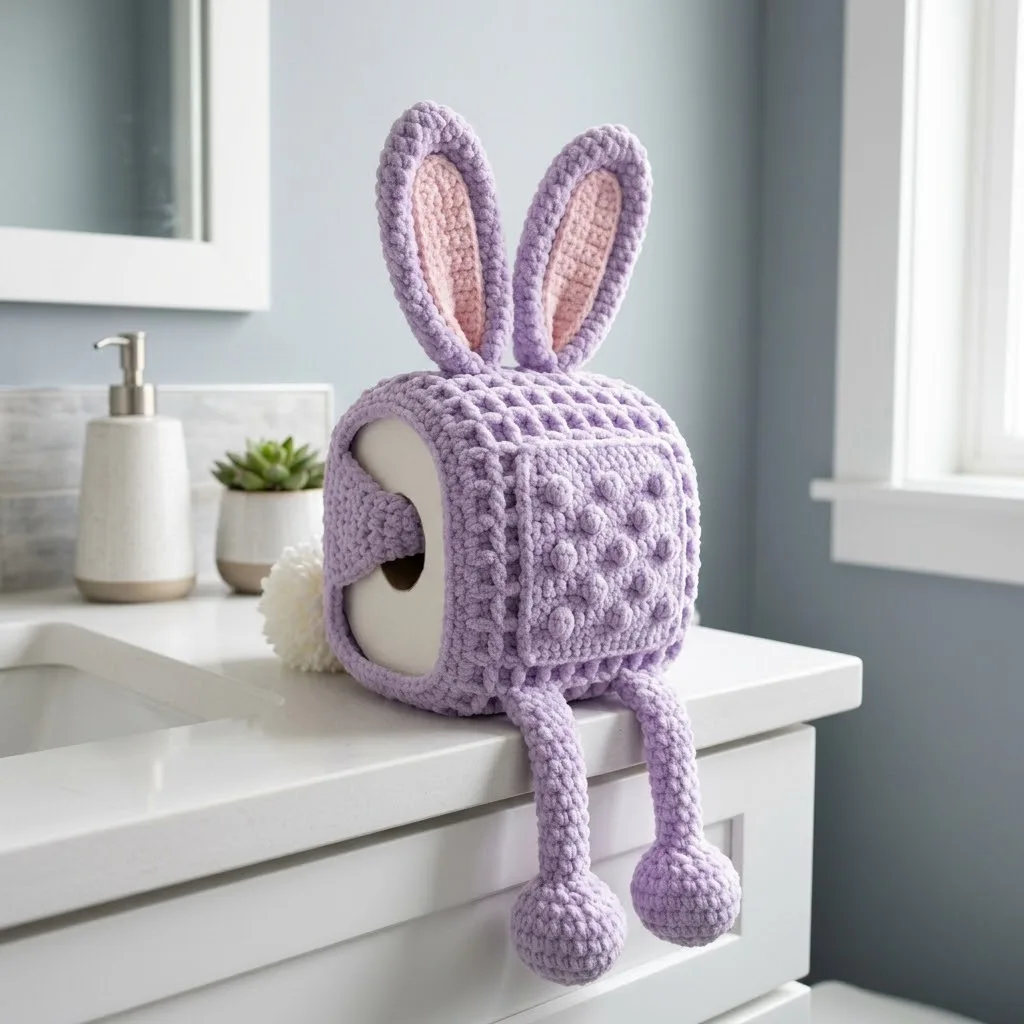
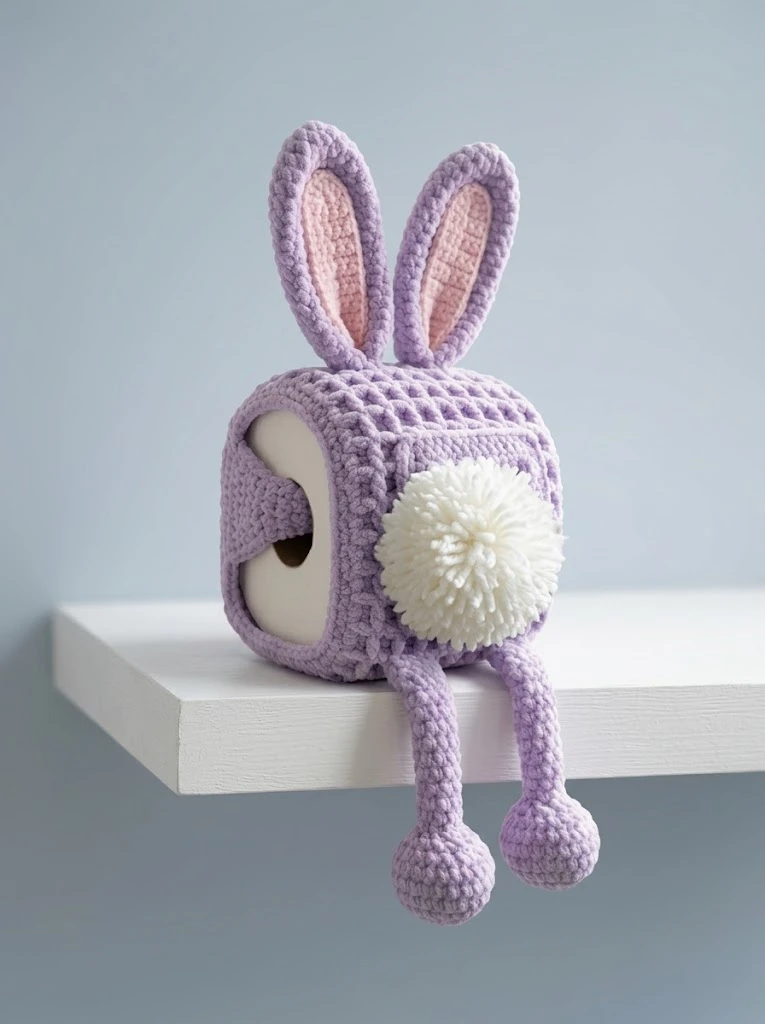
What makes this toilet paper cozy special is the thoughtful construction. The body wraps snugly around a standard roll while leaving an opening on the side for easy access. Those tall bunny ears stand upright on their own thanks to the sturdy yarn choice. And the dangling legs with their little rounded feet? Pure whimsy.
This pattern is beginner friendly with clear step by step instructions. If you can work basic stitches in the round and follow a simple bobble pattern, you can absolutely make this bunny cozy.
Materials Needed for Your Crochet Bunny Toilet Paper Cozy
Gathering your supplies before you start makes everything smoother. Here is what you will need:
Yarn:
Hook:
Notions:
Gauge:
10 single crochet stitches and 10 rows = 4 inches in single crochet with bulky yarn
Finished Size:
Fits a standard toilet paper roll (approximately 4.5 inches tall and 4.5 inches in diameter)
Stitch Abbreviations and Definitions
Before we dive into the crochet tutorial, let me define every stitch you will use:
Ch = Chain. Wrap yarn over hook, pull through loop on hook. This creates the foundation for your work.
Sl st = Slip stitch. Insert hook, yarn over, pull through stitch AND loop on hook in one motion. Used for joining rounds.
Sc = Single crochet. Insert hook into stitch, yarn over, pull up a loop (2 loops on hook), yarn over, pull through both loops. The most basic and sturdy stitch.
Hdc = Half double crochet. Yarn over, insert hook, yarn over, pull up a loop (3 loops on hook), yarn over, pull through all 3 loops at once.
Dc = Double crochet. Yarn over, insert hook, yarn over, pull up a loop, yarn over, pull through 2 loops, yarn over, pull through remaining 2 loops. Taller than single crochet.
Bobble = A textured stitch that pops out from the surface. For this pattern: yarn over, insert hook, yarn over, pull up loop, yarn over, pull through 2 loops. Repeat this 4 more times in the same stitch (6 loops on hook), then yarn over and pull through all 6 loops. Push the bobble to the right side of your work.
Inc = Increase. Work 2 stitches into the same stitch to add width.
Dec = Decrease. Work 2 stitches together as one to reduce width. For single crochet decrease: insert hook in first stitch, pull up loop, insert hook in next stitch, pull up loop (3 loops on hook), yarn over, pull through all 3.
Step by Step Crochet Pattern Instructions
Body of the Toilet Paper Cozy (Make 1)
The body is worked from the top down in joined rounds. This creates the main cylinder that wraps around your toilet paper roll.
With lavender yarn:
Round 1: Make a magic ring. Ch 1, work 6 sc into the ring. Sl st to first sc to join. Pull ring closed. (6 sts)
Round 2: Ch 1, 2 sc in each st around. Sl st to join. (12 sts)
Round 3: Ch 1, *sc in first st, 2 sc in next st* repeat around. Sl st to join. (18 sts)
Round 4: Ch 1, *sc in next 2 sts, 2 sc in next st* repeat around. Sl st to join. (24 sts)
Round 5: Ch 1, *sc in next 3 sts, 2 sc in next st* repeat around. Sl st to join. (30 sts)
Round 6: Ch 1, *sc in next 4 sts, 2 sc in next st* repeat around. Sl st to join. (36 sts)
Round 7: Ch 1, *sc in next 5 sts, 2 sc in next st* repeat around. Sl st to join. (42 sts)
Rounds 8 through 10: Ch 1, sc in each st around. Sl st to join. (42 sts)
Now we begin the bobble texture pattern. The bobbles create that adorable bumpy surface you see in the finished piece.
Round 11: Ch 1, *sc in next 5 sts, bobble in next st* repeat around. Sl st to join. (42 sts, 7 bobbles)
Tip for beginners: When you make a bobble, give it a gentle push from the back to make sure it pops to the outside of your work. This keeps all your texture on the right side.
Round 12: Ch 1, sc in each st around. Sl st to join. (42 sts)
Round 13: Ch 1, sc in next 2 sts, *bobble in next st, sc in next 5 sts* repeat around, ending with sc in last 3 sts. Sl st to join. (42 sts, 7 bobbles offset from Round 11)
Round 14: Ch 1, sc in each st around. Sl st to join. (42 sts)
Rounds 15 through 18: Repeat Rounds 11 through 14.
Round 19: Ch 1, sc in each st around. Sl st to join. (42 sts)
Creating the Opening
Now we work back and forth in rows to create the side opening where the toilet paper pulls out.
Row 20: Ch 1, sc in next 28 sts. Turn, leaving remaining stitches unworked. (28 sts)
Rows 21 through 24: Ch 1, sc in each st across. Turn. (28 sts)
Row 25: Ch 1, sc in each st across. Do not turn. Continue around the opening edge with 4 sc evenly down the side, skip the unworked bottom stitches, work 4 sc evenly up the other side. Sl st to first sc of Row 25 to join. (36 sts around opening edge)
Fasten off and weave in ends.
Outer Ear (Make 2)
With lavender yarn:
Row 1: Ch 8. Sc in 2nd ch from hook and in each ch across. Turn. (7 sts)
Rows 2 through 8: Ch 1, sc in each st across. Turn. (7 sts)
Row 9: Ch 1, sc dec, sc in next 3 sts, sc dec. Turn. (5 sts)
Row 10: Ch 1, sc in each st across. Turn. (5 sts)
Row 11: Ch 1, sc dec, sc in next st, sc dec. Turn. (3 sts)
Row 12: Ch 1, sc dec, sc in last st. Turn. (2 sts)
Row 13: Ch 1, sc dec. (1 st)
Fasten off, leaving a long tail for sewing.
Inner Ear (Make 2)
With pink yarn:
Row 1: Ch 6. Sc in 2nd ch from hook and in each ch across. Turn. (5 sts)
Rows 2 through 6: Ch 1, sc in each st across. Turn. (5 sts)
Row 7: Ch 1, sc dec, sc in next st, sc dec. Turn. (3 sts)
Row 8: Ch 1, sc in each st across. Turn. (3 sts)
Row 9: Ch 1, sc dec, sc in last st. Turn. (2 sts)
Row 10: Ch 1, sc dec. (1 st)
Fasten off, leaving a tail for sewing.
Assembling the Ears
Place one pink inner ear piece centered on one lavender outer ear piece. Using pink yarn and your tapestry needle, whip stitch around the edges of the inner ear to attach it to the outer ear. The pink should sit slightly inside the lavender border, creating that sweet two tone effect.
Repeat for the second ear.
Legs (Make 2)
With lavender yarn:
Round 1: Make a magic ring. Ch 1, work 6 sc into the ring. Sl st to join. (6 sts)
Round 2: Ch 1, 2 sc in each st around. Sl st to join. (12 sts)
Rounds 3 through 5: Ch 1, sc in each st around. Sl st to join. (12 sts)
Stuff the foot lightly with fiberfill.
Round 6: Ch 1, *sc dec* repeat around. Sl st to join. (6 sts)
Now work the leg portion:
Rounds 7 through 18: Ch 1, sc in each st around. Sl st to join. (6 sts)
This creates a long tube for the leg. Fasten off, leaving a long tail for attaching to the body.
Finishing and Assembly
Take your time with assembly. This is where your bunny comes to life!
Attaching the Ears:
Position both ears at the top center of the body, spacing them about 1 inch apart. The ears should stand upright. Using your tapestry needle and lavender yarn, sew the base of each ear securely to the top of the cozy. You may need to stuff the base of each ear lightly to help them stand straight.
Attaching the Legs:
Position the legs at the front bottom edge of the cozy, spacing them so they dangle naturally over the edge of your counter. Sew securely using the long tails you left.
Final Touches:
Weave in all remaining yarn ends. Give your bunny a gentle steam or reshape if needed.
Tips for Success with This Crochet Pattern
Tension matters. Because this cozy needs to hold its shape around the toilet paper roll, keep your stitches firm and consistent. If your work feels too loose, try going down one hook size.
Bobble direction. Always push your bobbles to the right side of your work as you complete them. This ensures they all pop outward for maximum texture.
Ear stability. If your ears flop over, you can insert a small piece of pipe cleaner or craft wire inside before sewing them closed. This helps them stand tall.
Color variations. This pattern works beautifully in any color combination. Consider classic gray with pink inner ears, white with pale blue, or even pastel rainbow stripes on the body.
Why This Makes a Perfect Handmade Gift
This bunny toilet paper cozy is the kind of unexpected handmade gift that people genuinely love receiving. It is practical, adorable, and shows real thought and effort. Consider making several in different colors for a baby shower gift basket, Easter hostess present, or housewarming surprise.
The chunky yarn means each cozy works up quickly, so you can easily make multiples for craft fairs or charity donations. Pair with a package of nice toilet paper for a complete gift that will make anyone smile.
I really hope you enjoy making this lavender bunny toilet paper cozy as much as I enjoyed designing it! If you make one, please save this pattern to your Pinterest boards so you can find it again anytime. And I would absolutely love to see your finished bunnies, so drop a comment below or tag me on social media when yours is complete!
