
Last spring, my daughter came home from a birthday party with one of those cheap plastic charm bracelets. You know the kind. Within a week, the clasp broke and the charms scattered across her bedroom floor. She was heartbroken, and I found myself thinking there had to be a better way.
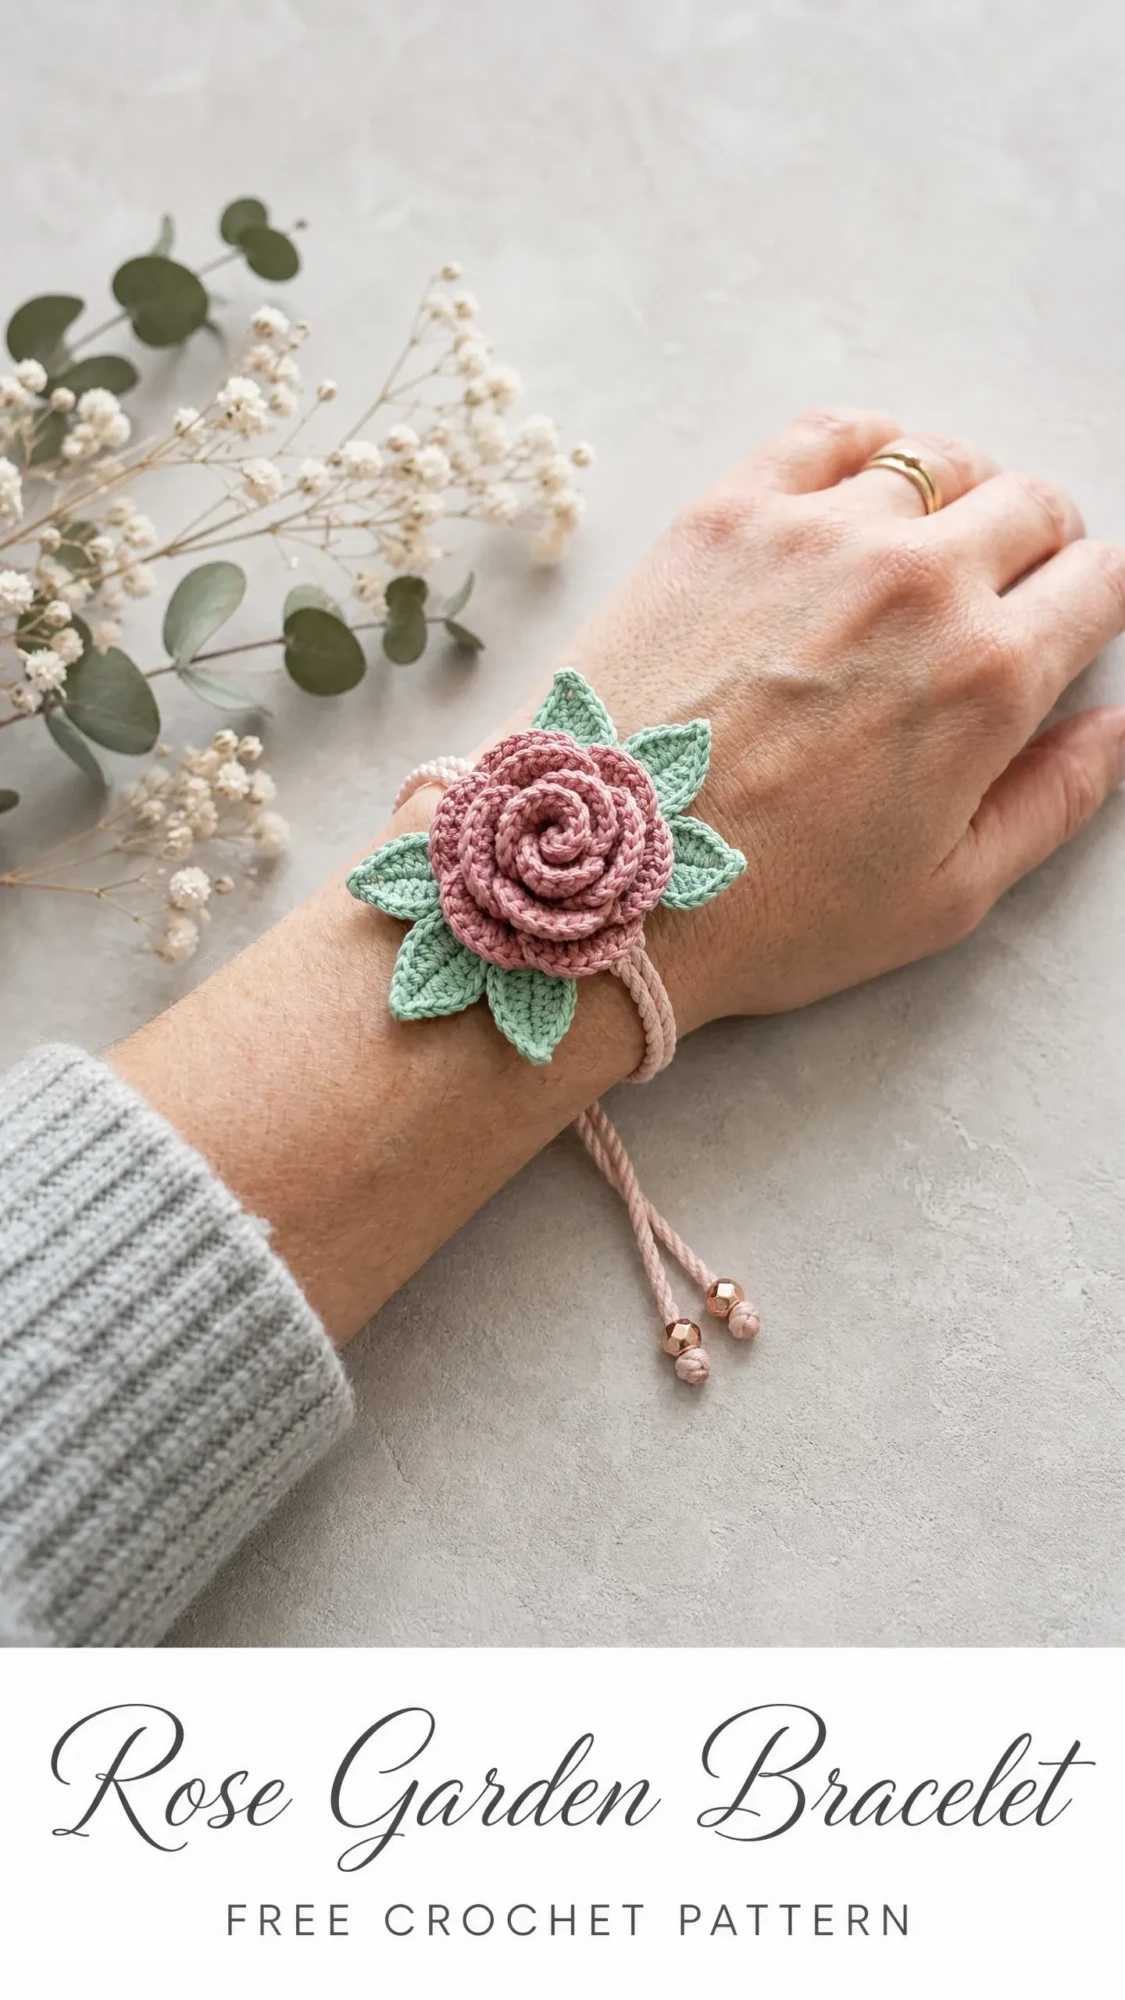
That night, I pulled out my hook and some cotton scraps. I wanted to make her something beautiful. Something that would last. Something she could adjust herself without fighting with a tiny metal clasp. Three hours later, the Rose Garden Bracelet was born.
Now it has become my go-to gift for birthdays, teacher appreciation week, and those moments when someone just needs a little handmade love. The dimensional rose looks so impressive that people assume it took forever. But once you understand how the spiral construction works, you will be making these for everyone you know.
About This Crochet Pattern
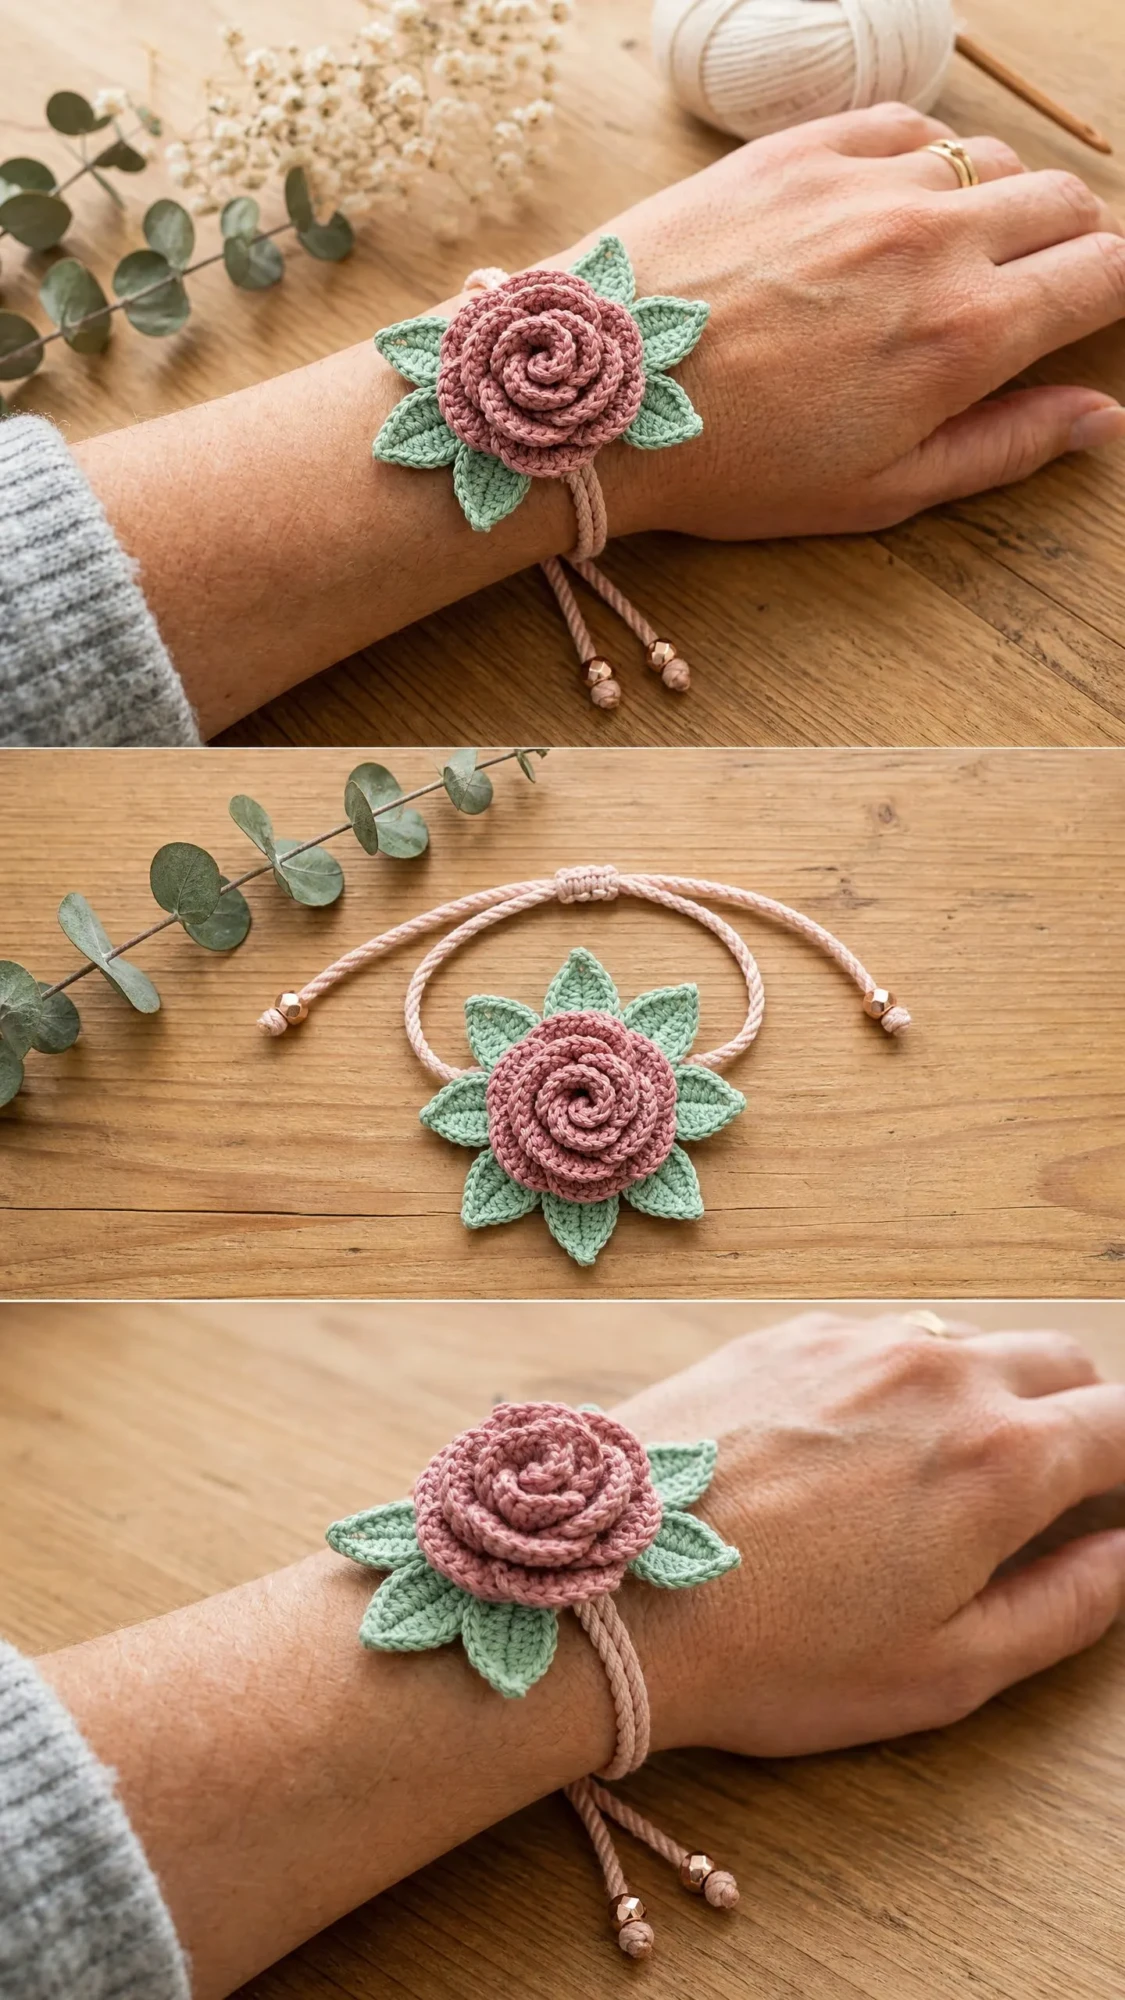
This bracelet features a stunning crocheted rose worked in dusty pink cotton yarn. The flower sits on a sunburst of eight sage green leaves, all threaded onto an adjustable braided cord with rose gold bead accents. The rose is constructed as a flat spiral coil that creates a gorgeous three-dimensional rolled appearance. No complicated shaping required.
Skill Level: Intermediate. You should be comfortable working in the round, joining motifs, and working with small hooks. The leaf shaping involves increases and decreases in sequence. If you have made amigurumi or small motifs before, you will do great here.
Time to Complete: 3 to 5 hours for an experienced crocheter, including all finishing work.
Finished Measurements:
This crochet tutorial walks you through every single step. Even if you have never made jewelry before, you can absolutely do this.
Materials Needed for This Crochet Bracelet Pattern
Yarn:
Recommended Yarn Brands:
1. DMC Natura Just Cotton gives crisp stitch definition that really shows off the spiral rose texture
2. Scheepjes Catona has a wide color palette perfect for matching these dusty tones
3. Paintbox Yarns Cotton DK used with a smaller hook creates a softer, more romantic look
Hook: US B-1 / 2.25 mm crochet hook
Notions:
Why cotton? Cotton holds the rose spiral shape without stretching over time. Avoid acrylic for this project since it tends to relax and lose that beautiful sculptural quality.
Gauge
Working in single crochet (sc) in the round with Yarn A and a US B-1 / 2.25 mm hook:
9 sc x 10 rows = 1 inch (2.5 cm)
Here is a quick checkpoint to make sure you are on track. Your finished rose center circle after Round 3 should measure approximately 0.75 inches (2 cm) in diameter. The finished rose after Round 6 should measure approximately 1.75 inches (4.5 cm) in diameter.
If your rose is too small, go up one hook size. Too large? Go down one hook size. Adjust in 0.25 mm increments until you hit the target.
Abbreviations and Stitch Definitions
Let me walk you through every abbreviation used in this step by step crochet pattern. Even if you have been crocheting for years, it never hurts to review.
Special Stitches Explained
Petal Stitch
This creates the curved petals of the rose. Each petal is made by working stitches that increase in height, then decrease back down. Here is the standard sequence:
1. Work 1 sl st into the next stitch
2. Work 1 sc into the next stitch
3. Work 1 hdc into the next stitch
4. Work 2 dc into the next stitch
5. Work 2 dc into the next stitch
6. Work 1 hdc into the next stitch
7. Work 1 sc into the next stitch
8. Work 1 sl st into the next stitch
One petal uses 8 stitches. The petals curl naturally because you work into front loops only, allowing the strip to spiral beautifully.
Sliding Knot Closure
This is what makes the bracelet adjustable. Here is how to create one:
1. Fold one end of the cord so the tail overlaps the main cord by approximately 2.5 inches (6 cm), forming a loop
2. Wrap the tail end around both strands of cord 4 times, working toward the open end of the loop
3. Thread the tail end through the small remaining loop at the center of the wraps
4. Pull both ends to tighten
The knot should slide smoothly along the main cord. You will make one on each side.
Pattern Instructions
The Rose
The rose is built on a base disc of 6 rounds of single crochet worked in a spiral. Petals are then worked into the front loops of specific rounds to create that gorgeous layered, spiraling appearance. Use Yarn A throughout.
Rose Base Disc
Round 1: Make a MR. Work 6 sc into the ring. Pull ring closed. Do not join, do not turn. Place marker at first stitch and move it up each round. (6 sc)
Round 2: Work 2 sc into each stitch around. (12 sc)
Round 3: (1 sc in next st, inc in next st) 6 times. (18 sc)
Round 4: (1 sc in next 2 sts, inc in next st) 6 times. (24 sc)
Round 5: (1 sc in next 3 sts, inc in next st) 6 times. (30 sc)
Round 6: (1 sc in next 4 sts, inc in next st) 6 times. (36 sc)
After Round 6, join with sl st to first st of round. Fasten off, leaving a long tail for assembly. Your base disc should measure approximately 1.75 inches (4.5 cm) in diameter.
Quick Check: The base disc should lie flat. If it cups, loosen your tension or go up one hook size. If it ruffles, go down one hook size.
Petal Layer 1 (Innermost Petals)
These petals are worked into the front loops of Round 2.
Rejoin Yarn A with a sl st into any front loop of Round 2. These loops will feel slightly buried after the later rounds were worked over them. Insert your hook carefully.
Because Round 2 has only 12 stitches, use this condensed 6-stitch petal:
Condensed Inner Petal: (sl st, sc, 2 hdc, sc, sl st) into 6 consecutive front loops.
Work this sequence twice around all 12 front loops of Round 2. (12 sts used, 2 petals formed)
Join with sl st. Fasten off Yarn A.
Petal Layer 2 (Middle Petals)
These petals are worked into the front loops of Round 4.
Rejoin Yarn A with a sl st into any front loop of Round 4.
Standard Petal Stitch sequence: (sl st, sc, hdc, dc, dc, hdc, sc, sl st) into 8 consecutive front loops.
Repeat 3 times around all 24 front loops of Round 4. (24 sts used, 3 petals formed)
Join with sl st. Fasten off Yarn A.
Petal Layer 3 (Outer Petals)
These petals are worked into the front loops of Round 6.
Rejoin Yarn A with a sl st into any front loop of Round 6.
Extended Petal Stitch sequence: (sl st, sc, hdc, dc, tr, dc, hdc, sc, sl st) into 9 consecutive front loops.
Repeat 4 times around 36 front loops of Round 6. (36 sts used, 4 petals formed)
Join with sl st. Fasten off Yarn A, leaving a tail for weaving.
Weave in all ends except the long assembly tail. Your completed rose should measure approximately 1.75 inches (4.5 cm) in diameter with petals curling upward in concentric spiral layers.
The Leaves
Make 8 leaves individually in Yarn B (sage green).
Individual Leaf Pattern
Foundation: Ch 9. (9 ch)
Row 1 (up side): Starting in the 2nd ch from hook: 1 sc in 2nd ch from hook, 1 sc in next ch, 1 hdc in next ch, 1 dc in next 2 ch, 1 hdc in next ch, 1 sc in next ch. Now work into the final chain at the tip: 3 sc into the last ch. (8 sts up one side plus 3 tip sts = 11 sts so far)
Row 1 continued (down side): Working into the bottom loops of the foundation chain back toward the starting point: 1 sc in next ch, 1 hdc in next ch, 1 dc in next 2 ch, 1 hdc in next ch, 1 sc in next 2 ch. (8 sts down other side)
Join with sl st to the first sc at the base of the leaf.
Leaf Edging Round: Work 1 round of sl sts around the entire outer edge of the leaf. Join with sl st. Fasten off Yarn B, leaving a 6-inch (15 cm) tail for joining.
Each completed leaf should measure approximately 1.25 inches (3 cm) in length and 0.5 inches (1.25 cm) at the widest point.
Blocking tip: Dampen each leaf lightly and pin to shape on a foam mat. The pointed tip and gently oval body will be beautifully defined after blocking. Allow to dry fully before assembly.
Leaf Ring Assembly
Arrange the 8 leaves in a circle with tips pointing outward. The base (tail end) of each leaf should meet at the center. Space them evenly at approximately 45 degrees apart, like points of a compass.
Using the tail ends and a tapestry needle, sew the base of each leaf to the bases of its two neighboring leaves. Take several stitches through adjacent leaf bases and knot securely. The joined leaf ring should be flat with a small open center of approximately 0.5 inches (1.25 cm) diameter.
Weave in all ends except two tails on opposite sides of the ring for attaching to the cord.
Cord Preparation
Cut one length of braided cord measuring 28 inches (71 cm).
Thread 2 rose gold beads onto one end of the cord and slide them down to sit approximately 1 inch (2.5 cm) from that end. Tie an overhand knot directly below the beads to prevent them from sliding further. Repeat on the other end with the remaining 2 beads.
Find the center point of the cord, approximately 14 inches (35.5 cm) from each knotted end, and mark with a clip or stitch marker.
Final Medallion Assembly
Step 1: Thread both ends of the cord through the center opening of the leaf ring from front to back. Position the leaf ring at the center marker, with the WS facing down.
Step 2: Using remaining leaf tails or a length of Yarn B with a tapestry needle, whipstitch the cord to the WS of the leaf ring at the center point. Take stitches around the cord and through several leaf bases.
Step 3: Position the completed rose on top of the leaf ring, RS facing up. Center the rose over the leaf ring so it covers the cord attachment point.
Step 4: Using the long assembly tail from the rose base disc and a tapestry needle, sew the rose to the leaf ring. Take stitches through the outer edge of the rose base disc and through the leaf bases at the center. Work around at least 8 anchor points evenly distributed. Pull each stitch firmly and knot securely.
Step 5 (optional): Apply a small amount of clear-drying jewelry adhesive to the back of the rose where it meets the leaf ring for extra security. Allow to cure fully before wearing.
Creating the Sliding Knot Closure
With both cord ends extending from the back of the medallion, bring them parallel to each other pointing the same direction, overlapping by approximately 4 inches (10 cm).
Right side knot:
1. Fold the right cord end back over both cords, forming a small loop with the tail pointing toward the medallion
2. Wrap the tail around both cords 4 times, moving away from the medallion
3. Thread the tail end through the remaining loop
4. Pull tail and standing cord in opposite directions to tighten
Repeat on the left side.
Trim cord tails to approximately 0.5 inches (1.25 cm) beyond the beads. For synthetic cord, you can carefully melt-seal the ends with a lighter to prevent fraying. For natural cotton cord, apply fabric sealant instead.
To wear: Slide both knots toward the medallion to open the bracelet and place on your wrist, then slide knots away from the medallion to tighten.
Size Customization Tips
For smaller wrists (under 6 inches): Use a shorter starting cord of approximately 24 inches (61 cm) and tie the sliding knots closer to the medallion.
For larger wrists (over 8 inches): Use a longer cord of approximately 32 inches (81 cm).
For a larger medallion: Add Round 7 to the rose base disc: (sc in each of 5 sts, inc in next st) repeat 6 times for 42 sts. Add a corresponding Petal Layer 4 with 6 petals of 7 stitches each. Use 9 or 10 leaves instead of 8.
For a children’s size: Work the rose base disc through Round 4 only (24 sts) and work just 2 petal layers. Use 6 leaves instead of 8.
Care Instructions
Hand wash your bracelet in cool water with a gentle, pH-neutral soap. Do not wring or twist. Gently press excess water out with a clean towel and lay flat to dry. Reshape the rose petals and leaves while damp.
Do not machine wash or tumble dry. Heat and agitation will distort the rose spiral and may shrink the cotton. Remove the bracelet before swimming, bathing, or applying lotions and perfumes.
You Did It!
I hope this Rose Garden Bracelet pattern brings you as much joy as it has brought me. Every time I see my daughter wearing hers, I remember that night I stayed up just a little too late, determined to make something beautiful for her. Worth every stitch.
Thank you so much for choosing this pattern. I truly appreciate you being here and trusting me with your crafting time. If you make this bracelet, I would absolutely love to see it! Tag me on Instagram or share a photo in my Facebook group. Seeing your creations is honestly the best part of my day.
Save this crochet pattern to your Pinterest boards so you can find it whenever inspiration strikes. And please drop a comment below if you make one. I love hearing which color combinations you choose and who you are gifting these to!
You Might Also Like
- Cherry Blossom Butterfly Garden Charm Free Crochet Pattern
- Sage Green Textured Slipper Socks Free Crochet Pattern
- Sage Garden Granny Square Maxi Dress Free Crochet Pattern
- Navy Nautical Crochet Sandals in Coastal Bathroom Free Pattern
