
Looking for a handmade gift that feels special without taking a week to make? This butterfly bracelet is exactly that. It works up in about two to three hours, uses small amounts of thread you might already have in your stash, and creates a delicate accessory that looks far more complicated than it actually is.
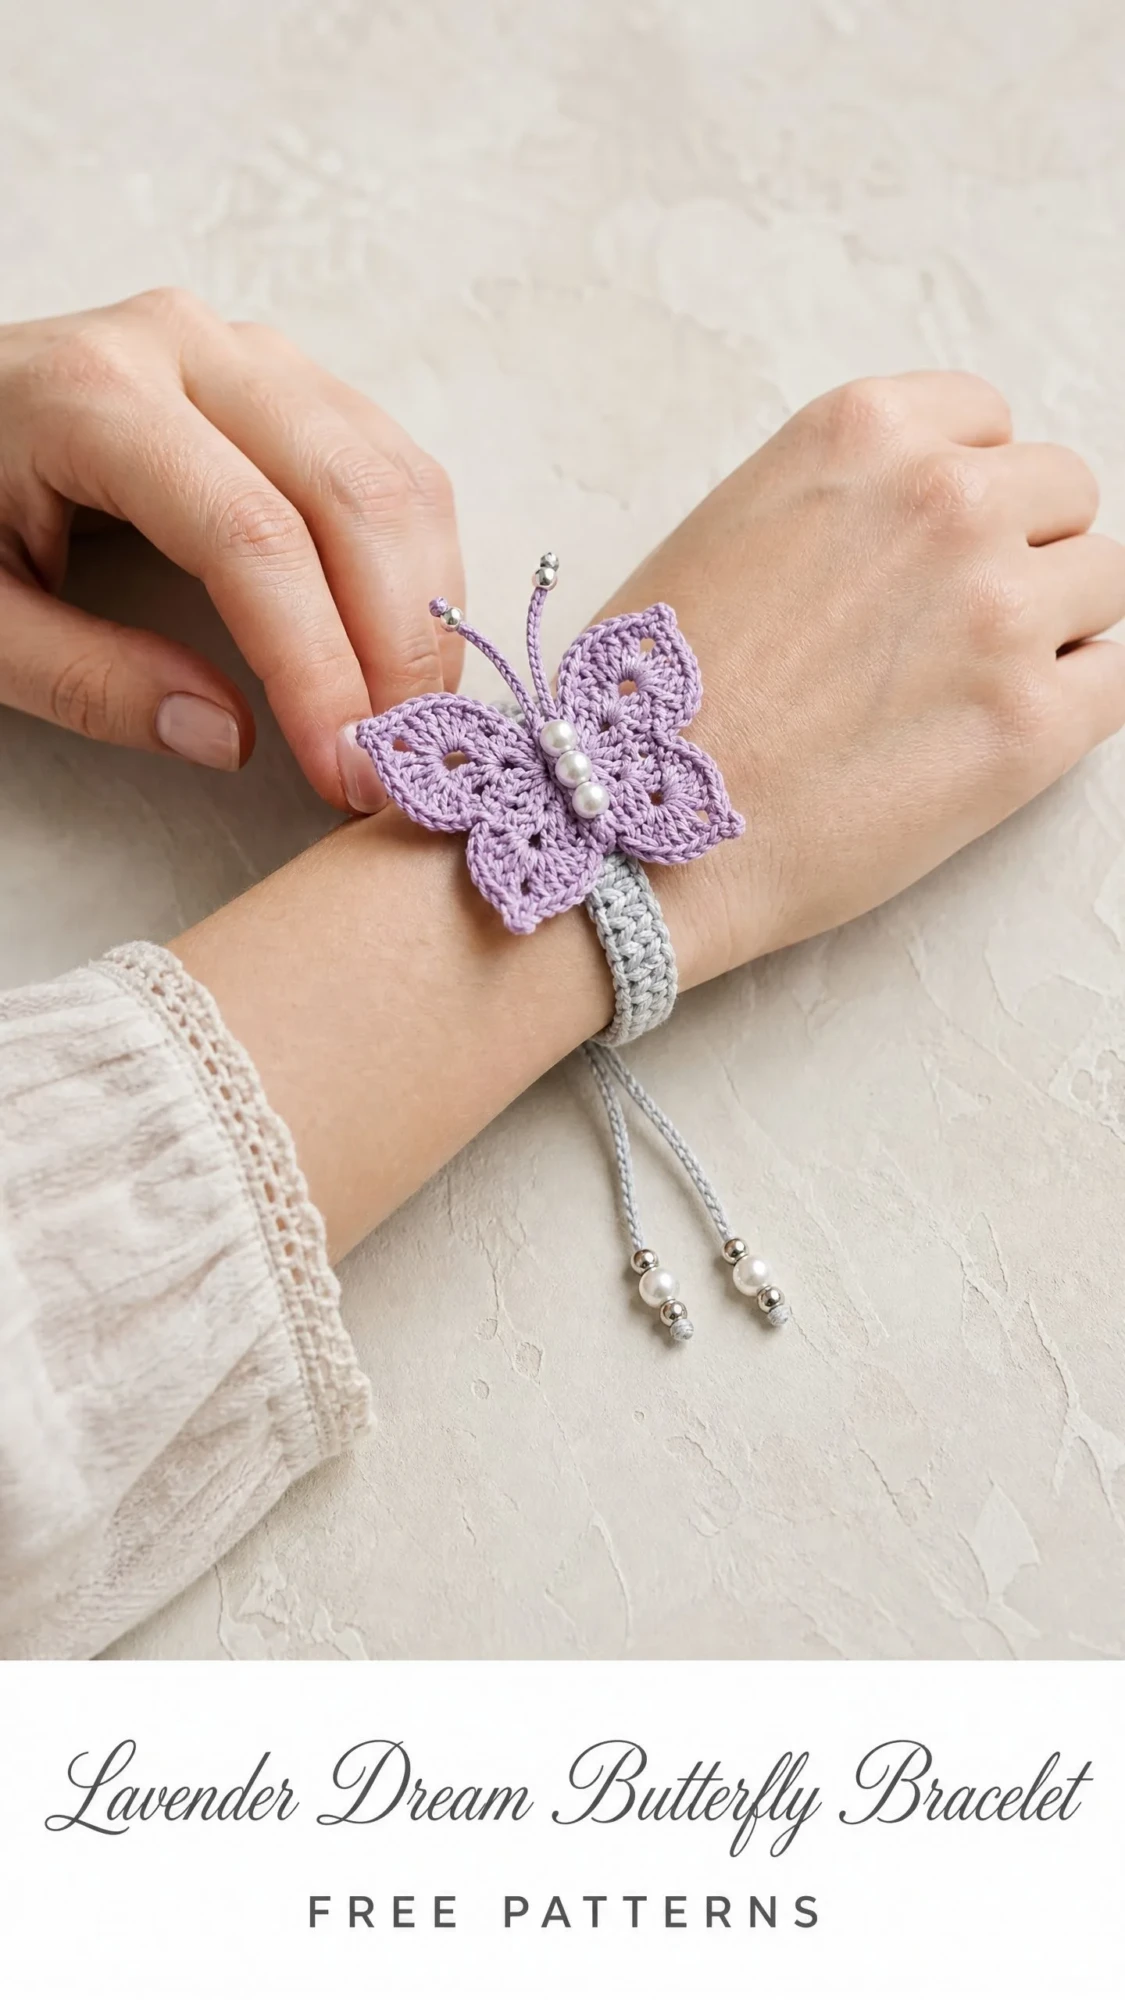
The construction combines a simple slip stitch band with a dimensional butterfly motif. The butterfly features four distinct wing sections worked around foundation chains, finished with pearl bead embellishments and tiny antennae. If you can work basic stitches like single crochet, double crochet, and treble crochet, you can absolutely make this.
Whether you want something pretty for yourself or need a thoughtful gift for a friend who loves feminine accessories, this crochet pattern delivers. The adjustable sliding closure means one size truly fits most wrists, so you do not have to stress about measurements. Let me walk you through every step.
About This Butterfly Bracelet Crochet Pattern
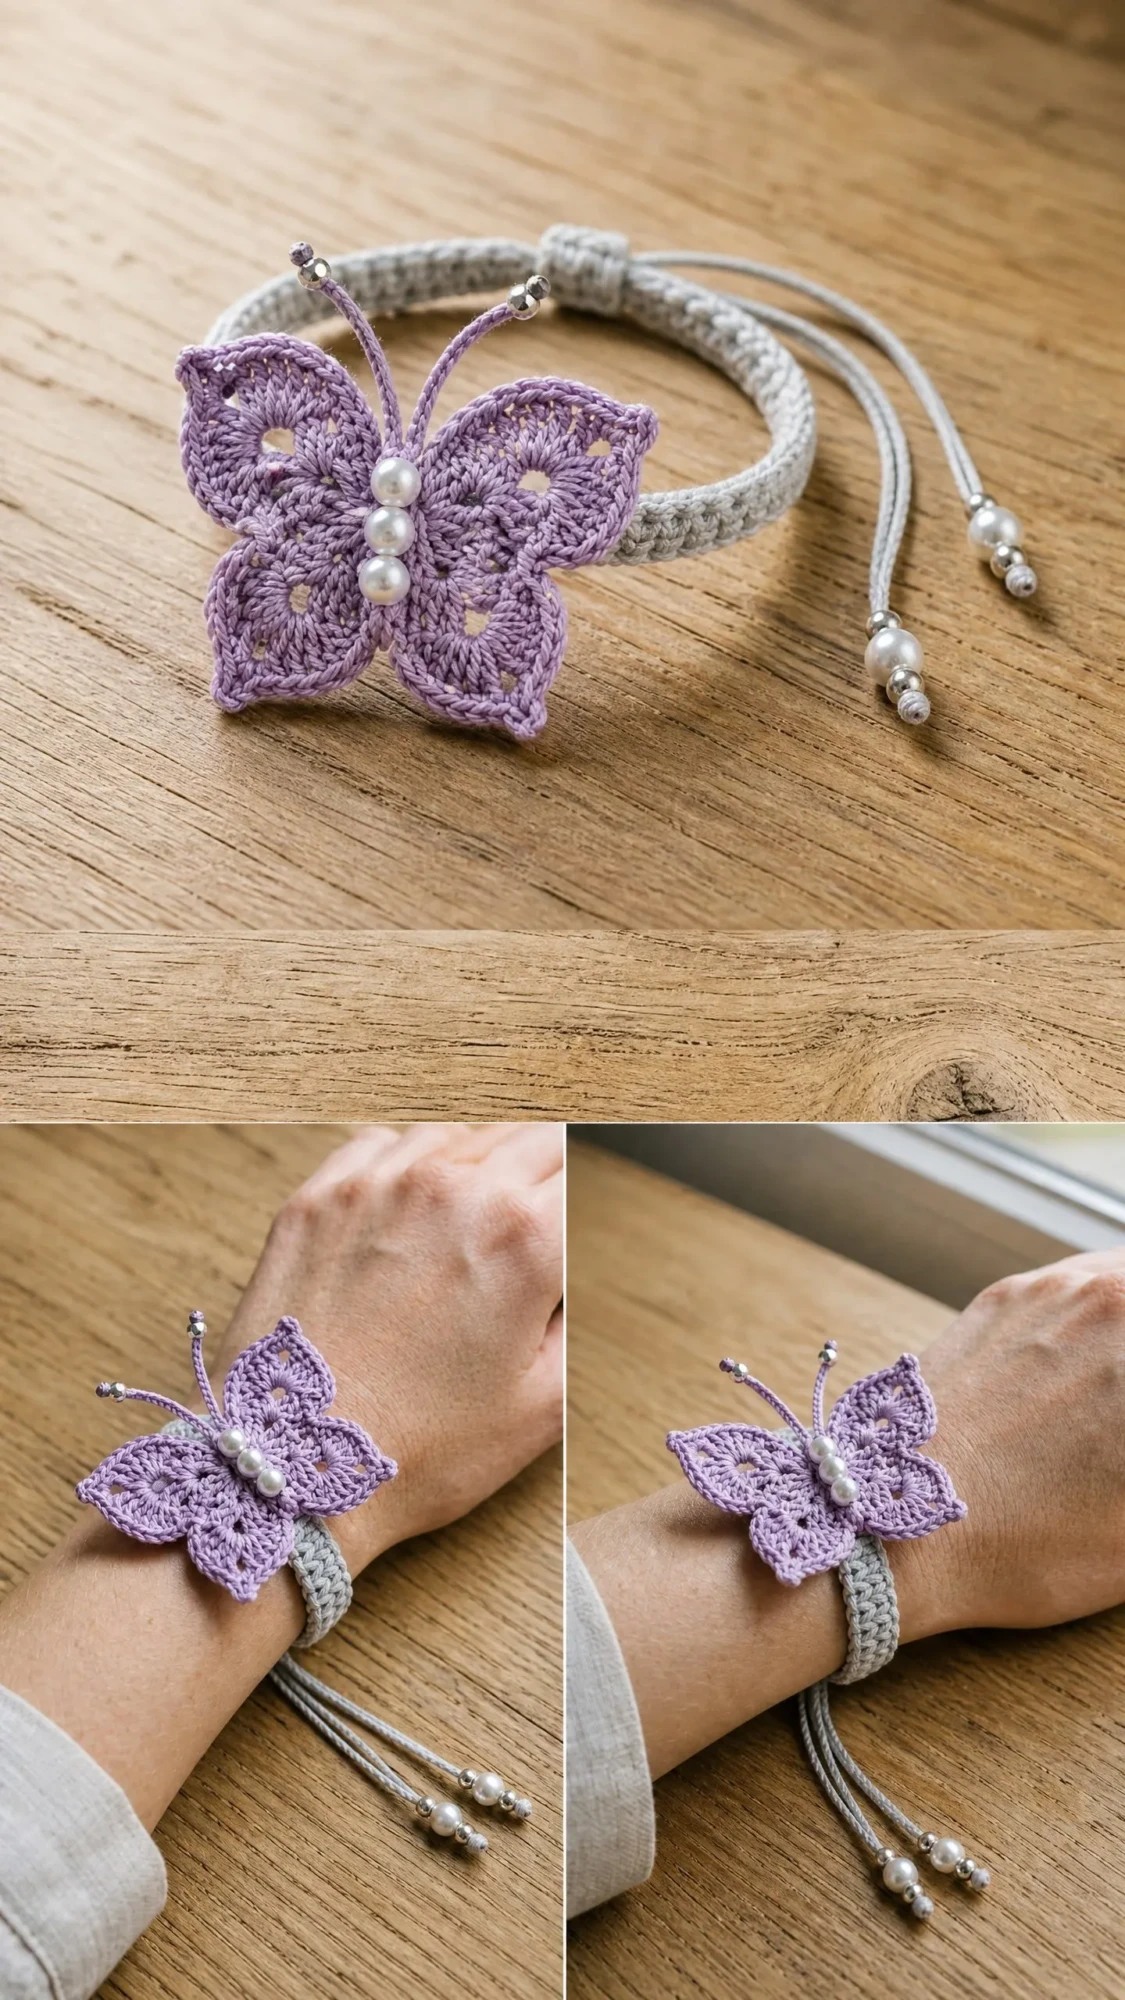
This bracelet combines two separately worked components. First, you create a flat slip stitch cord in light gray that forms the adjustable band. Then you crochet a lavender butterfly motif with lacy wings, a small stuffed body, and beaded antennae. The butterfly gets sewn onto the band, and a clever sliding bead closure finishes everything off.
The finished band measures approximately 7.5 inches long by 0.375 inches wide before adjustment. It fits wrists measuring 5.5 to 7 inches in circumference. The butterfly motif spans approximately 2 inches wide by 1.75 inches tall, including the antennae.
This is an intermediate level project. The band itself is beginner friendly, but the butterfly requires comfort working into specific stitches, creating picots, and assembling multiple pieces. If you have made amigurumi or lace motifs before, you will feel right at home.
Materials You Will Need
Yarn A (for the band):
Light gray, size 10 crochet thread or fingering weight cotton yarn, approximately 15 yards
Yarn B (for the butterfly):
Light purple or lavender, size 10 crochet thread or fingering weight cotton yarn, approximately 20 yards
Hook:
US steel crochet hook size 7 (1.65 mm) for crochet thread, OR US B/1 (2.25 mm) for fingering weight yarn. Use whichever size achieves gauge.
Notions:
Yarn Suggestions
Lizbeth Size 10 Crochet Thread by Handy Hands works beautifully here. Try "Silver Gray" for the band and "Lilac Medium" or "Lavender" for the butterfly. This 100% Egyptian cotton gives clean, firm stitch definition.
DMC Petra Size 5 Crochet Cotton in colors 5415 (gray) and 5554 (lavender) produces a slightly thicker version with excellent stitch visibility. This is a good choice if you are newer to working with fine thread.
Avoid fuzzy or loosely spun fibers. Stitch definition matters for the butterfly wing lace effect.
Gauge
Using size 10 crochet thread and steel hook size 7 (1.65 mm):
16 slip stitches = 1 inch in slip stitch cord pattern worked flat
10 rows = 0.375 inches in height for the band
For the butterfly: 1 complete small wing section (Rounds 1 through 3) = approximately 0.875 inches wide
Gauge matters here. If your band is too loose or too tight, the adjustable closure will not work within the intended range. Swatch before starting.
Abbreviations and Special Stitches
Let me define every stitch you will encounter in this crochet tutorial.
ch = chain: yarn over, pull through loop on hook
sl st = slip stitch: insert hook, yarn over, pull through stitch and loop on hook in one motion
sc = single crochet: insert hook, yarn over, pull up loop, yarn over, pull through both loops
hdc = half double crochet: yarn over, insert hook, pull up loop, yarn over, pull through all 3 loops
dc = double crochet: yarn over, insert hook, pull up loop, yarn over, pull through 2 loops, yarn over, pull through remaining 2 loops
tr = treble crochet: yarn over twice, insert hook, pull up loop, (yarn over, pull through 2 loops) three times
sk = skip
st/sts = stitch/stitches
ch-sp = chain space
MR = magic ring (also called magic circle or adjustable ring)
pm = place marker
RS/WS = right side/wrong side
Special Stitches Explained
Picot: Chain 3, slip stitch into the first chain made. This creates a small decorative loop. It does not add to your working stitch count.
3-dc cluster (3-dc cl): Work three incomplete double crochets into the same stitch or space (yarn over, insert hook, pull up loop, yarn over, pull through 2 loops). Then yarn over and pull through all 4 loops on hook. Counts as 1 stitch.
Slip stitch cord: All rows are slip stitches through both loops. Turn after each row without making a turning chain. This creates a dense, rounded cord texture.
Antenna loop: Chain 8, slip stitch into the 8th chain from hook to form a small loop. Thread a bead onto the loop before closing if desired.
Step by Step Instructions
Part 1: The Band
The band is worked flat in a slip stitch cord pattern. This creates that dense, rounded look you see in the photos.
Foundation:
Using Yarn A (gray), ch 7.
Row 1 (RS): Sl st into the 2nd ch from hook and into each ch across. Turn. (6 sl sts)
Row 2: Sl st into each sl st across. Turn. (6 sl sts)
Repeat Row 2 until band measures 7.5 inches from foundation chain. This takes approximately 120 rows at gauge.
Final row: Sl st across. Do not fasten off yet.
Checkpoint: Your band should measure approximately 7.5 inches long and 0.375 inches wide. It should feel dense and cord-like, lying flat without curling.
Optional Edging:
With RS facing, join Yarn A at one short end. Work 1 row of sc evenly along each long edge and 3 sc in each corner. Sl st to join. Fasten off.
Fasten off Yarn A. Weave in all ends. Set band aside.
Part 2: The Butterfly Upper Wings
The upper wings are worked around a foundation chain, creating two mirrored wing shapes.
Using Yarn B (lavender), ch 10. Do not join.
Round 1:
Side A (Right Upper Wing):
Sc in 2nd ch from hook. (1 sc)
Sc in next ch. (2 sc)
Hdc in next ch. (3 sts)
Dc in next ch. (4 sts)
Tr in next ch. (5 sts)
Tr in next ch. (6 sts)
Dc in next ch. (7 sts)
Hdc in next ch. (8 sts)
Sc in next ch. (9 sts)
Work 5 sc into the last ch to pivot around the tip. (14 sts total on this side, including pivot)
Side B (Left Upper Wing):
Working back along the opposite side of the foundation chain:
Sc into the next available ch. (1 st)
Hdc in next ch. (2 sts)
Dc in next ch. (3 sts)
Tr in next ch. (4 sts)
Tr in next ch. (5 sts)
Dc in next ch. (6 sts)
Hdc in next ch. (7 sts)
Sc in next ch. (8 sts)
Sc in the last ch. (9 sts)
Sl st to the first sc of Side A to close. (Total stitches around upper wing unit: 23 sts plus pivot)
Do not fasten off.
Round 2 (Wing shaping and lace detail):
Sl st into first st. Ch 1.
Right upper wing:
Sc in same st. Sc in next st. Ch 2, sk 1 st, sc in next st. Ch 2, sk 1 st, sc in next st. Sc in next 2 sts. Work (sc, ch 3, sc) into the center pivot st. Sc in next 2 sts.
Left upper wing (mirror):
Sc in next 2 sts. Ch 2, sk 1 st, sc in next st. Ch 2, sk 1 st, sc in next st. Sc in next 2 sts. Sc in last 2 sts.
Sl st to first sc to close.
Round 3 (Picot edging):
Sl st into first sc. Work sc into each sc and (sc, hdc, sc) into each ch-2 sp around. Work (sc, picot, sc) into the ch-3 tip sp. Continue in pattern around the left wing in mirror. Sl st to close.
Fasten off, leaving a 6-inch tail for sewing. Set aside.
Part 3: The Butterfly Lower Wings
The lower wings are slightly smaller and more rounded.
Using Yarn B, ch 8. Do not join.
Round 1:
Side A (Right Lower Wing):
Sc in 2nd ch from hook. (1 sc)
Hdc in next ch. (2 sts)
Dc in next ch. (3 sts)
Tr in next ch. (4 sts)
Dc in next ch. (5 sts)
Hdc in next ch. (6 sts)
Work 5 sc into the last ch to pivot. (11 sts total including pivot)
Side B (Left Lower Wing):
Hdc into next ch on underside. (1 st)
Dc in next ch. (2 sts)
Tr in next ch. (3 sts)
Dc in next ch. (4 sts)
Hdc in next ch. (5 sts)
Sc in last ch. (6 sts)
Sl st to first sc of Side A to close. (Total sts around lower wing unit: 17 sts plus pivot)
Round 2 (Wing shaping):
Sl st into first st. Ch 1.
Right lower wing:
Sc in same st. Sc in next st. Ch 2, sk 1 st, sc in next st. Sc in next 2 sts. Work (sc, ch 3, sc) into center pivot st.
Left lower wing (mirror):
Sc in next 2 sts. Ch 2, sk 1 st, sc in next st. Sc in next 2 sts.
Sl st to close.
Round 3 (Picot edging):
Sc into each sc and (sc, hdc, sc) into each ch-2 sp. Work (sc, picot, sc) into ch-3 tip sp. Continue in mirror around left wing. Sl st to close.
Fasten off, leaving a 6-inch tail for sewing.
Part 4: The Butterfly Body
Using Yarn B, make a MR (magic ring).
Round 1: Ch 1, work 6 sc into the MR. Pull ring tight. Do not join. Work in a continuous spiral. Pm in last st. (6 sc)
Round 2: Work 2 sc in each st around. (12 sc)
Round 3: Work (sc in next st, 2 sc in next st) around. (18 sc)
Round 4: Work (sc in next 2 sts, 2 sc in next st) around. (24 sc)
Round 5: Sc in each st around. (24 sc)
Round 6: Work (sc in next 2 sts, sc2tog) around. (18 sc)
Round 7: Work (sc in next st, sc2tog) around. (12 sc)
Lightly stuff the body with scrap yarn, or leave flat for a flatter butterfly.
Round 8: Work (sc2tog) around. (6 sc)
Sl st to next st, fasten off leaving a long tail. Pull tail through remaining 6 sts, draw tight, and secure. The body is a small oval approximately 0.75 inches long.
Part 5: The Antennae
Cut two lengths of Yarn B, each measuring 4 inches.
For each antenna:
Fold one length in half. Pull the fold through the top center of the butterfly body using your hook to create a lark’s head knot attachment.
Chain 8 along one tail by making slip stitch chains with your hook. At the tip, thread a small seed bead onto both tail ends, tie a tight overhand knot behind the bead, and trim excess.
Repeat for the second antenna, positioning it approximately 0.25 inches from the first and angling outward.
Part 6: Assembly of Butterfly
Step 1: Lay the upper wing unit flat with RS facing up.
Step 2: Lay the lower wing unit on top, RS facing up, aligning the center spines. The lower wings should overlap the bottom third of the upper wings.
Step 3: Place the body oval centered over where both wing units overlap.
Step 4: Using a tapestry needle and the body tail, sew the body securely to both wing layers at the center, stitching through all layers several times.
Step 5: Using sewing thread and a beading needle, sew 3 pearl beads vertically down the center of the body. Top bead sits just below the antennae base, middle bead at the widest point, lower bead near the base.
Step 6: If antennae were not attached earlier, attach them now at the top center, tucking the knot beneath the body oval.
Part 7: Attaching Butterfly to Band
Position the completed butterfly onto the center front of the band, approximately 3.75 inches from each end. The butterfly sits on the RS of the band.
Using Yarn B and a tapestry needle, sew the bottom edge of the lower wing unit to the band with small overcast stitches. Sew through the top layer of the band only. Sew the body base down as well for extra security.
The butterfly should lie flat and centered. If the wings pucker, loosen your stitches slightly.
Fasten off and weave in all ends.
Part 8: Adjustable Sliding Closure
You will need two 6-inch lengths of gray crochet thread and 4 small silver metal beads.
Step 1: Thread one cord through the left short end of the band, centering it so 3 inches extend from each side.
Step 2: Thread one cord through the right short end the same way.
Step 3: Take both ends from the LEFT cord and cross them to the RIGHT side. Thread both ends through one silver bead from left to right, tie a tight overhand knot behind the bead, and trim to 0.25 inches. Thread a second silver bead over the knotted end to cap it.
Step 4: Take both ends from the RIGHT cord and cross them to the LEFT side. Repeat Step 3 in mirror.
Step 5: The two cords now cross between the two sets of beads. Pulling the bead caps away from each other tightens the bracelet. Pushing them toward each other loosens it. Test before trimming excess cord.
Step 6: Trim all cord ends to approximately 0.125 inches beyond their final knots. Apply a drop of clear fabric glue to each knot to prevent unraveling. Allow to dry completely.
Size Customization Tips
For larger wrists: Add rows to the band, working up to 10 inches total. The adjustable closure adds 1 to 1.5 inches of additional range, so a 10-inch band fits wrists up to 8.5 inches.
For children: Work the band to 6 inches. This fits wrists measuring approximately 4.5 to 6 inches.
For a chunkier version: Use size 3 crochet thread with a steel hook size 2 (2.2 mm). The butterfly will measure approximately 2.5 inches wide. Increase pearl bead size to 6 mm.
Finishing and Blocking
Wet blocking is recommended for the butterfly only. Spray lightly with water, pin each wing to a blocking board, and allow to dry completely before removing pins. This step is critical for the wings to lie flat and symmetrically.
The band does not require blocking but may be lightly steamed with an iron held 0.5 inch above the surface to even out the texture.
Do not block the adjustable closure or beaded sections.
Weave in all ends by running the tail forward and backward at least twice through dense stitches. Trim close.
Care Instructions
Hand wash only in cool water with mild soap. Do not wring. Lay flat to dry. Do not machine wash or tumble dry. Store flat or coiled loosely. Avoid prolonged direct sunlight, which may fade the lavender thread over time. If the butterfly loses its shape after washing, re-block by pinning and air drying.
You Did It!
Thank you so much for choosing this butterfly bracelet crochet pattern. I hope the step by step instructions made the process smooth, even if this was your first time working with crochet thread or creating jewelry. If you made this, I would genuinely love to see your finished piece. Tag me on Instagram or share in my Facebook group. Seeing your creations is honestly the best part of sharing patterns.
If you loved this project, go ahead and save it to your Pinterest boards so you can find it again later. And please drop a comment below if you make one. I read every single comment and your feedback helps me create better patterns for you.
You Might Also Like
- Mint Green Spring Highland Cow Amigurumi Free Crochet Pattern
- Mint Green Bohemian Ruffle Dress Free Crochet Pattern
- Cream Lace Flutter Sleeve Baby Dress Free Crochet Pattern
- Cream Lace Bridal Barrel Bag Free Crochet Pattern
