
If you have ever wanted a statement piece that keeps you looking effortlessly put together while feeling like you are wearing a cloud, this dress delivers. The classic granny square construction uses double crochet clusters and chain spaces, making it perfect for confident intermediate crocheters ready to tackle a garment project. It works up beautifully as a special occasion dress, a summer wedding guest outfit, or even a unique handmade gift for someone who appreciates wearable art.
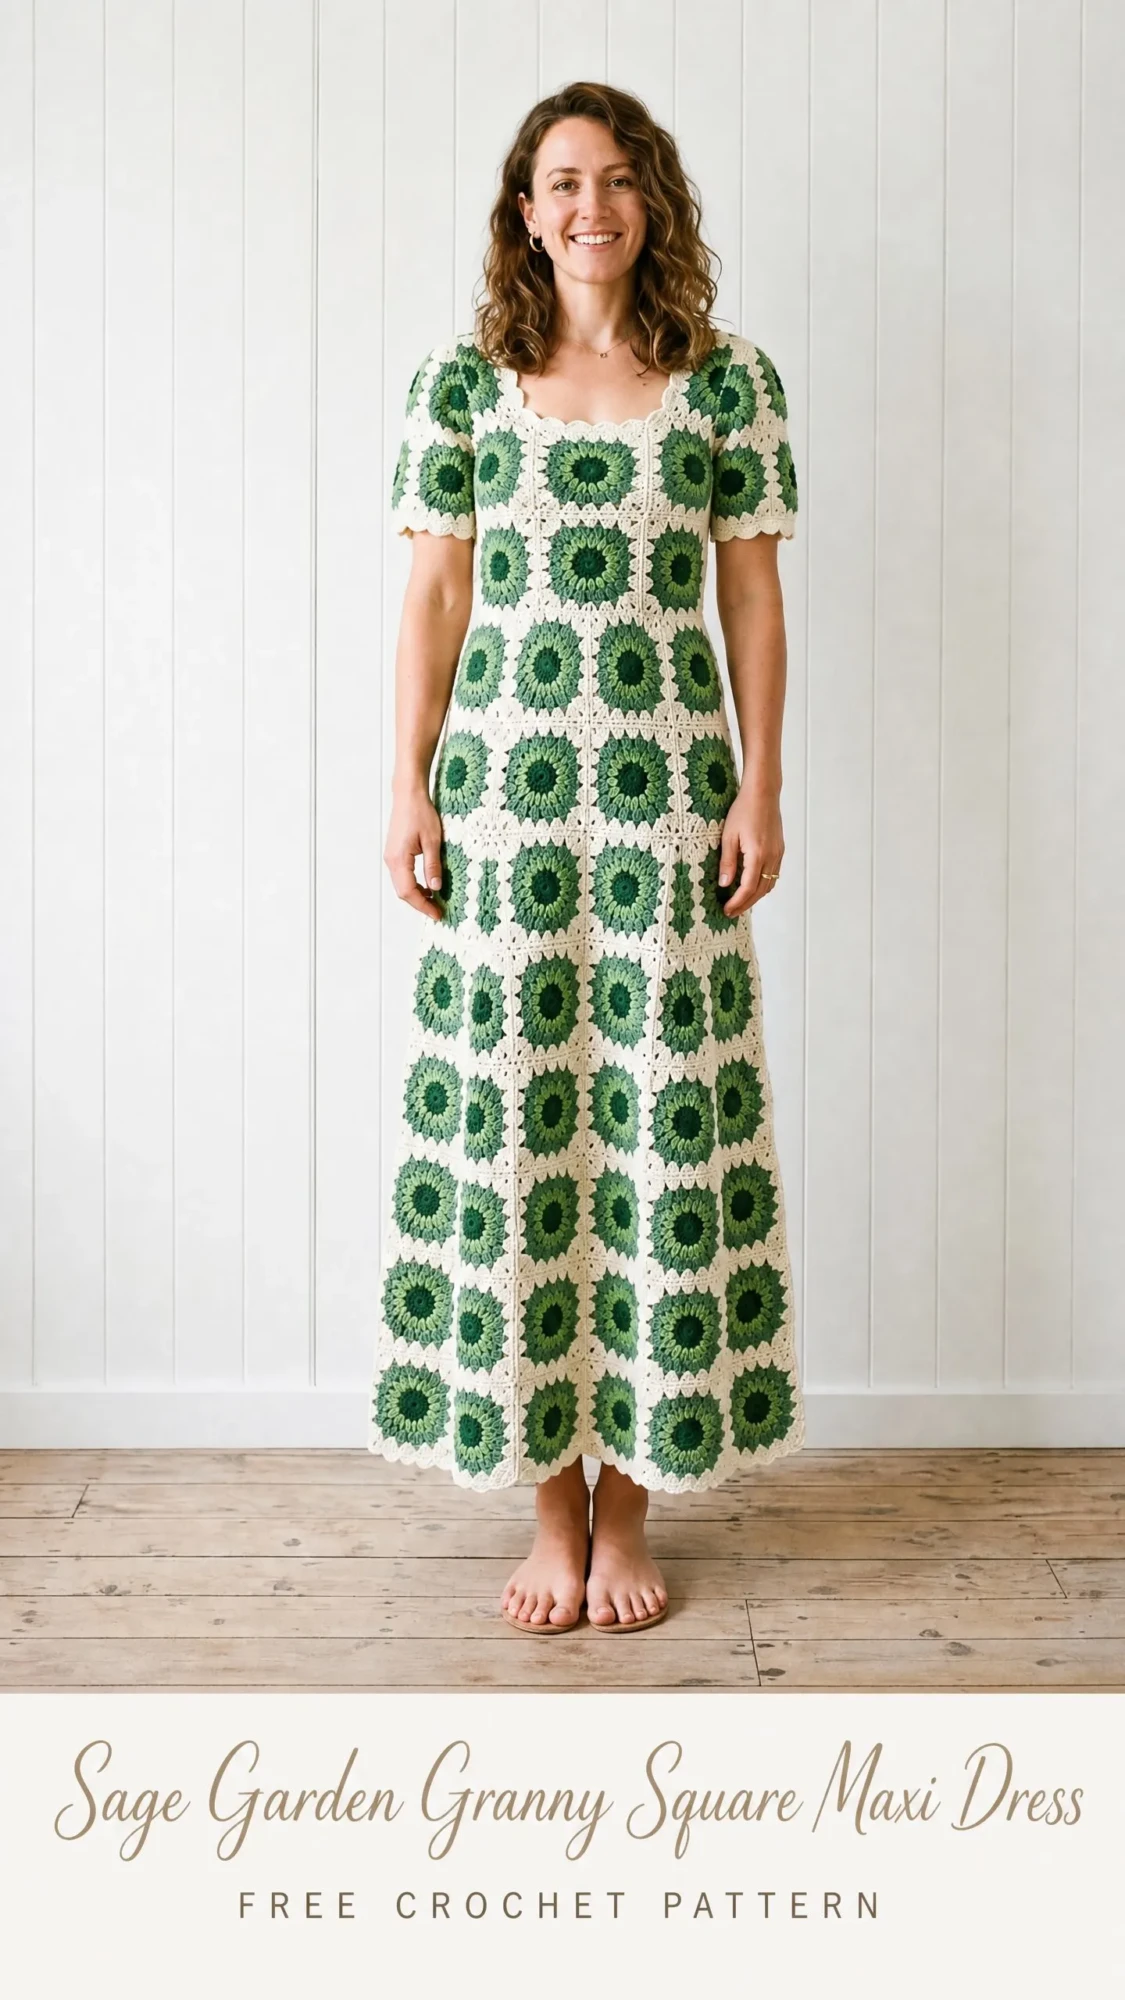
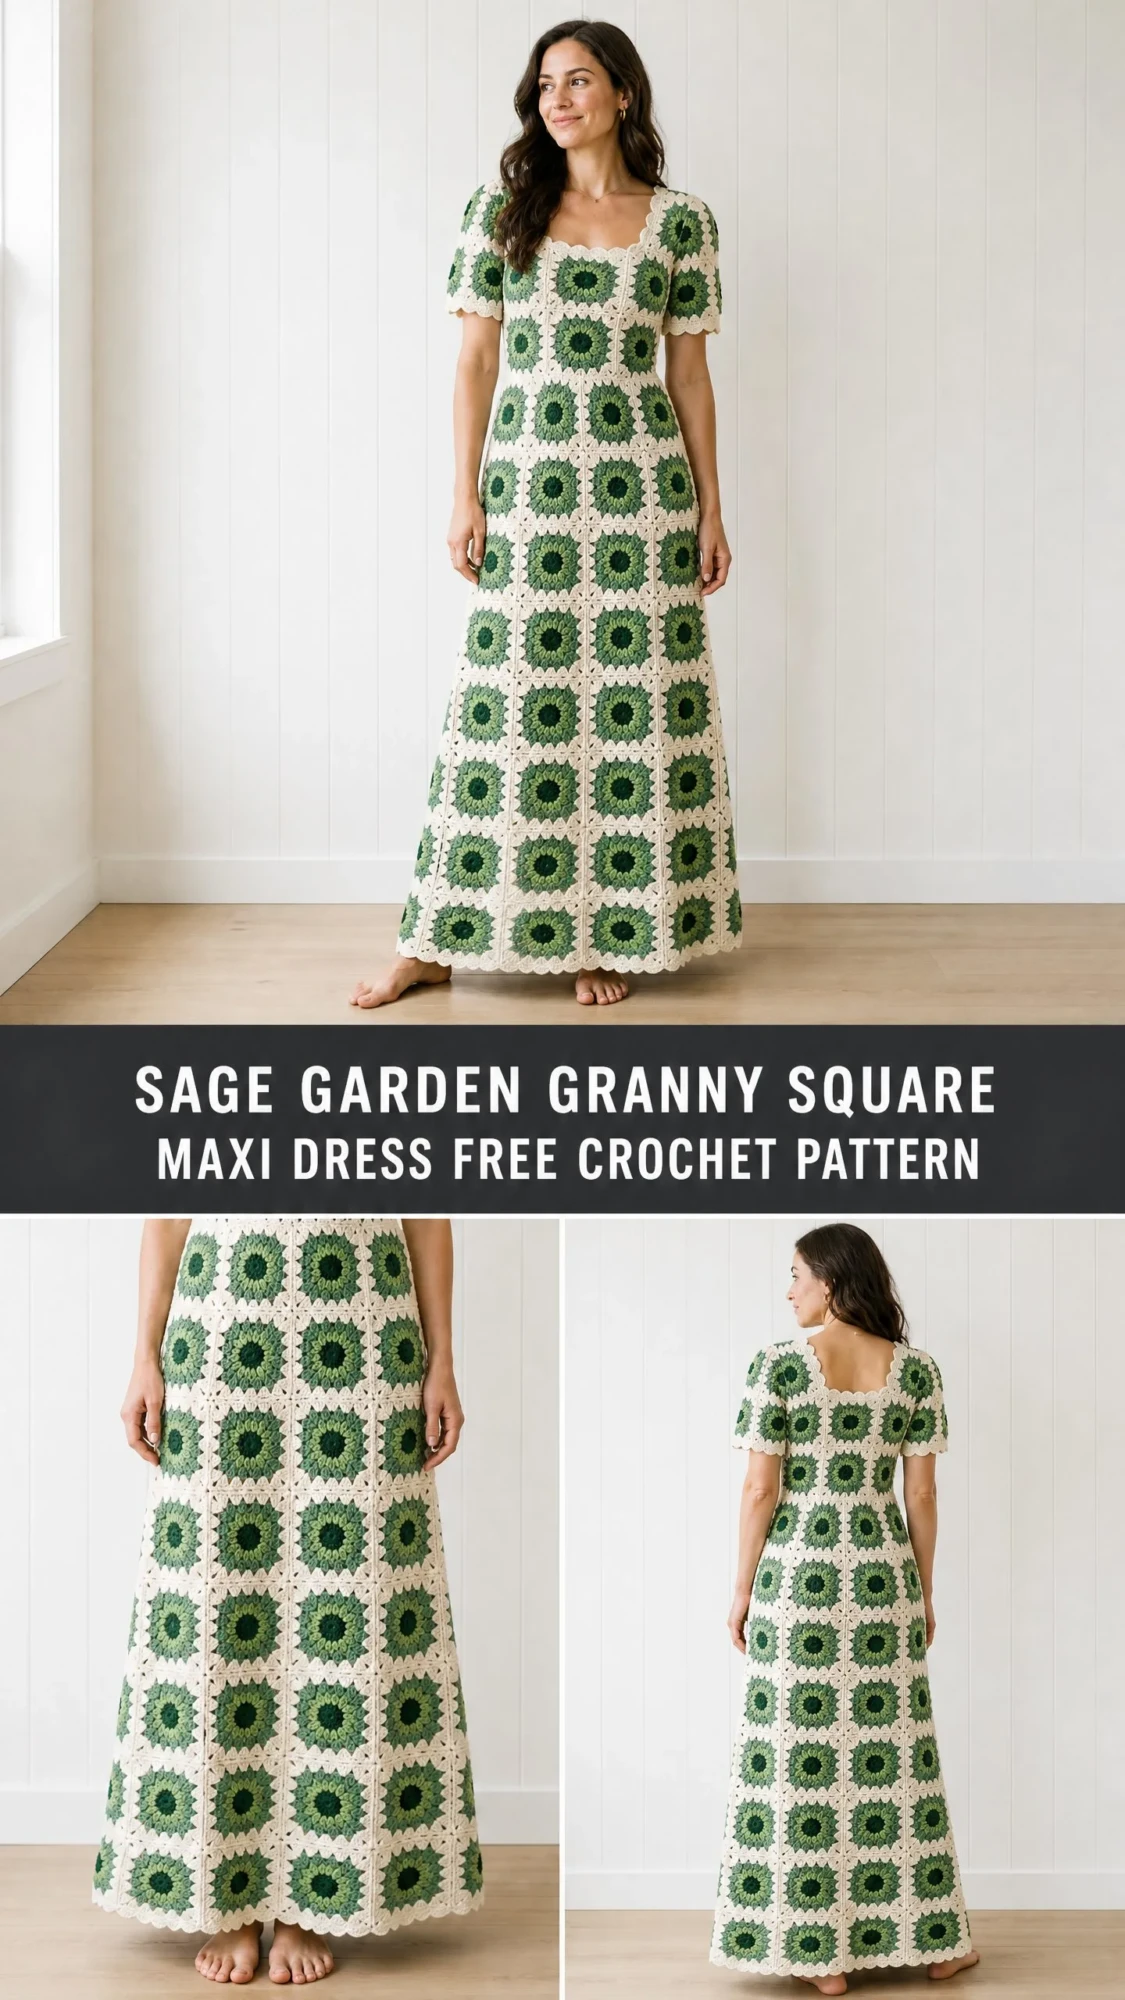
This stunning maxi dress features a fitted bodice, an A-line skirt that flows gracefully, and short puffed sleeves made from a single row of squares. The construction is surprisingly straightforward once you understand the join-as-you-go technique. You will work individual granny squares, join them into flat panels, then seam those panels together to create the finished garment.
The time investment is significant, around 60 to 80 hours for a size Medium, but the result is a one-of-a-kind piece you will treasure for years. Let me walk you through everything you need to know to create this beautiful dress from start to finish.
Why This Granny Square Dress Pattern Works
The genius of this design lies in its simplicity. Each square follows the same basic granny square formula you may already know, just worked in a specific four-color sequence that creates that gorgeous gradient effect. Dark green at the center, medium green in the middle round, light green for the outer petals, and off-white for the border that ties everything together.
No complicated shaping within the squares themselves. All the silhouette magic happens through strategic square placement. The bodice uses fewer squares across than the skirt, creating that fitted-to-flowing transition at the waist naturally.
Materials You Will Need
Yarn Requirements (DK Weight)
You will need four colors of DK weight yarn, also called light worsted or CYCA 3 weight.
Total yarn needed: approximately 2000 (2250, 2500, 2750) yards across all four colors.
Suggested Yarns
Paintbox Yarns Simply DK works wonderfully for this project. It has excellent stitch definition and is machine washable. Lion Brand Comfy Cotton Blend DK is another great option if you want a slightly draping quality for summer wear. For cooler weather versions, Cascade Yarns 220 Superwash DK blocks beautifully and gives those squares a polished, professional look.
Hook and Notions
Finished Sizes
This pattern includes four sizes. Choose your size based on your actual bust measurement minus 2 inches, as the crochet structure is designed with slight positive ease.
| Size | Bust | Waist | Hip | Length |
|---|---|---|---|---|
| S | 34 in / 86 cm | 28 in / 71 cm | 40 in / 102 cm | 52 in / 132 cm |
| M | 38 in / 97 cm | 32 in / 81 cm | 44 in / 112 cm | 53 in / 135 cm |
| L | 42 in / 107 cm | 36 in / 91 cm | 48 in / 122 cm | 54 in / 137 cm |
| XL | 46 in / 117 cm | 40 in / 102 cm | 52 in / 132 cm | 55 in / 140 cm |
Sleeve length is 4 inches for all sizes.
Gauge
One blocked granny square should measure 3.5 inches (9 cm) square.
In the body of the square: 4 double crochet cluster groups and 4 spaces equals 3.5 inches.
Gauge is critical here. Even a quarter inch difference per square will cause significant cumulative error across a panel of 10 or 12 squares. Please work, wet-block, and measure at least three squares before beginning the full project. Adjust your hook size up or down as needed.
Abbreviations and Definitions
Let me walk you through each abbreviation you will encounter. If you are newer to reading crochet patterns, bookmark this section.
Special Stitches Explained
Granny Cluster (dc-cluster)
This is simply 3 double crochet stitches worked into the same stitch or space. This group of 3 dc counts as one cluster unit throughout the pattern. You will work lots of these.
Corner Shell
Work (3 dc, ch 2, 3 dc) into the same corner chain-2 space. This creates the characteristic granny square corner that gives squares their shape.
Scallop Edging
This decorative edge finishes the neckline, sleeve hems, and skirt hem.
1. Join yarn with a slip stitch
2. Chain 1, single crochet in same stitch
3. Skip 2 stitches or spaces
4. Work 5 double crochet into the next stitch or space
5. Skip 2 stitches or spaces
6. Single crochet into the next stitch or space
7. Repeat steps 3 through 6 to end
8. Slip stitch to first single crochet to close if working in the round
The scallop requires a stitch count divisible by 6 at each edging location. You may need to add or omit single crochet stitches when picking up along panel edges.
Join As You Go Technique
This is the method that eliminates most seaming. When attaching a new square to an existing square along one side, work the new square through Round 4 but do not fasten off.
When you reach the side that will be joined, replace each chain-2 corner or chain-1 side space with a slip stitch join into the corresponding space on the adjacent finished square.
At corners: Instead of chain 2, work chain 1, slip stitch into corner chain-2 space of adjacent square, chain 1.
Along sides: Instead of chain 1 between clusters, work a slip stitch into the corresponding chain-1 space of the adjacent square.
This creates an invisible flat join with no seaming required for square-to-square attachment within a panel.
How Many Squares Do You Need?
Here is your total square count by size:
I recommend making all your squares first, blocking them, and then joining. Some crocheters prefer to join as they go from the start. Either approach works.
Granny Square Instructions
Each square is worked in the round without turning. Join each round with a slip stitch to the top of the first stitch of that round.
With Color A, make a magic ring or chain 4 and slip stitch to form a ring.
Round 1 (Color A):
Chain 3 (counts as first dc here and throughout), work 2 dc into ring, chain 2, (3 dc into ring, chain 2) 3 times, slip stitch to top of beginning chain-3 to join. Fasten off Color A.
You now have 4 clusters and 4 chain-2 corner spaces.
Round 2 (Color B):
Join Color B with slip stitch to any chain-2 corner space.
Chain 3, work 2 dc into same space, chain 2, 3 dc into same space (first corner made), chain 1, (3 dc into next chain-2 space, chain 2, 3 dc into same space, chain 1) 3 times, slip stitch to top of beginning chain-3. Fasten off Color B.
You now have 8 clusters total, 4 chain-2 corner spaces, and 4 chain-1 side spaces.
Round 3 (Color C):
Join Color C with slip stitch to any chain-2 corner space.
Chain 3, 2 dc into same space, chain 2, 3 dc into same space (corner), chain 1, 3 dc into chain-1 side space, chain 1, (3 dc into next chain-2 corner space, chain 2, 3 dc into same space, chain 1, 3 dc into chain-1 side space, chain 1) 3 times, slip stitch to top of beginning chain-3. Fasten off Color C.
You now have 12 clusters, 4 chain-2 corner spaces, and 8 chain-1 side spaces.
Round 4 (Color D, border and joining round):
Join Color D with slip stitch to any chain-2 corner space.
Chain 3, 2 dc into same space, chain 2, 3 dc into same space (corner), (chain 1, 3 dc into next chain-1 space) twice, chain 1, (3 dc into next chain-2 corner space, chain 2, 3 dc into same space, (chain 1, 3 dc into next chain-1 space) twice, chain 1) 3 times, slip stitch to top of beginning chain-3.
For standalone squares, fasten off Color D. For JAYG squares, do not fasten off and proceed with the joining method described above.
Final square has 16 clusters, 4 chain-2 corner spaces, and 12 chain-1 side spaces. Each side has 3 cluster groups between corners.
Panel Construction
Here are the grid dimensions for each panel, listed as width by height in number of squares:
FRONT BODICE PANEL
BACK BODICE PANEL
FRONT SKIRT PANEL
BACK SKIRT PANEL
Same dimensions as front skirt panel for each size.
SLEEVE PANELS (make 2)
Assembling Your Dress
Step 1: Work all squares to completion, blocking each one flat to exactly 3.5 x 3.5 inches before joining.
Step 2: Use JAYG to join all squares within each panel. Work row by row from bottom to top.
Step 3: Place front bodice and back bodice panels with right sides together. Use Color D and a slip stitch seam to join the shoulder edges. The shoulder seam on each side spans 2 squares for all sizes.
Step 4: With right sides together, slip stitch seam the bodice side edges. The bodice side seam spans 3 squares in height.
Step 5: With right sides together, slip stitch seam the top edge of the front skirt panel to the bottom edge of the front bodice panel. Repeat for back panels.
Step 6: With right sides together, slip stitch seam the skirt side edges from waist to hem.
Step 7: Identify your armhole openings, which span 2 (2, 3, 3) squares across depending on size.
Step 8: Work each sleeve panel into a tube by seaming the two short ends together with right sides facing. Turn right side out.
Step 9: With right sides facing, pin the sleeve tube to the armhole opening so the seam aligns with the underarm. Slip stitch seam the sleeve into the armhole.
Adding the Edging
All edging is worked with Color D using the scallop edging technique.
Neckline: Join Color D at one back neckline corner. Work single crochet evenly around the full neckline edge, approximately 3 sc per square side edge and 1 sc per corner join. Make sure your total is divisible by 6. Then work the scallop edging around the full neckline.
Sleeve Hems: Join Color D at the sleeve seam. Work single crochet evenly around the lower edge, then work scallop edging.
Skirt Hem: Join Color D at one side seam. Work single crochet evenly around the full hem, then work scallop edging.
Finishing Touches
Blocking the Finished Dress: Wet block the entire garment by soaking for 20 minutes, pressing out water gently, and laying flat on blocking mats pinned to finished dimensions. Allow to dry completely.
Adding the Lining: Cut lining fabric into two pieces using the dress front and back as a pattern, adding half-inch seam allowance. Sew side and shoulder seams. Hem the bottom 1 inch shorter than the dress. Hem neckline and armhole edges with a narrow rolled hem. Insert the lining with wrong sides together and hand stitch at neckline, armholes, and center back opening.
Center Back Closure: Sew one or two small snaps or hooks-and-eyes to the center back opening at the neckline.
Size Customization Tips
Want to adjust the pattern? Here are some easy modifications:
Care Instructions
Hand wash in cool water with gentle detergent if using wool. Machine wash on gentle in a mesh bag if using acrylic or cotton-blend yarn. Always lay flat to dry. Never tumble dry, wring, or hang, as hanging will stretch the garment over time. Steam blocking periodically will refresh those squares and keep your dress looking beautiful.
I hope this granny square maxi dress brings you as much joy to make as it will to wear. The construction is methodical and meditative, perfect for evenings spent with good music or a favorite podcast. If you have any questions as you work through the pattern, drop them in the comments below.
If you make this dress, I would absolutely love to see it. Tag me on Instagram or share your finished photos on Facebook. Seeing your creations truly makes my day, and your color choices always inspire me.
Save this pattern to your Pinterest boards so you can find it whenever you are ready to start. And please leave a comment below if you give it a try. I cannot wait to hear how yours turns out.
You Might Also Like
- Buttercream Yellow Dragon Amigurumi Plush Free Crochet Pattern
- Sunset Ombre Daisy Granny Square Blanket Free Crochet Pattern
- Peach Blossom Fairy Crochet Dress Free Crochet Pattern
- Midnight Black Crescent Bag with Silver Hardware Free Crochet Pattern
