
You know that gorgeous gradient yarn you’ve been hoarding? The one that’s too special for just any project? This is the pattern that finally deserves it.
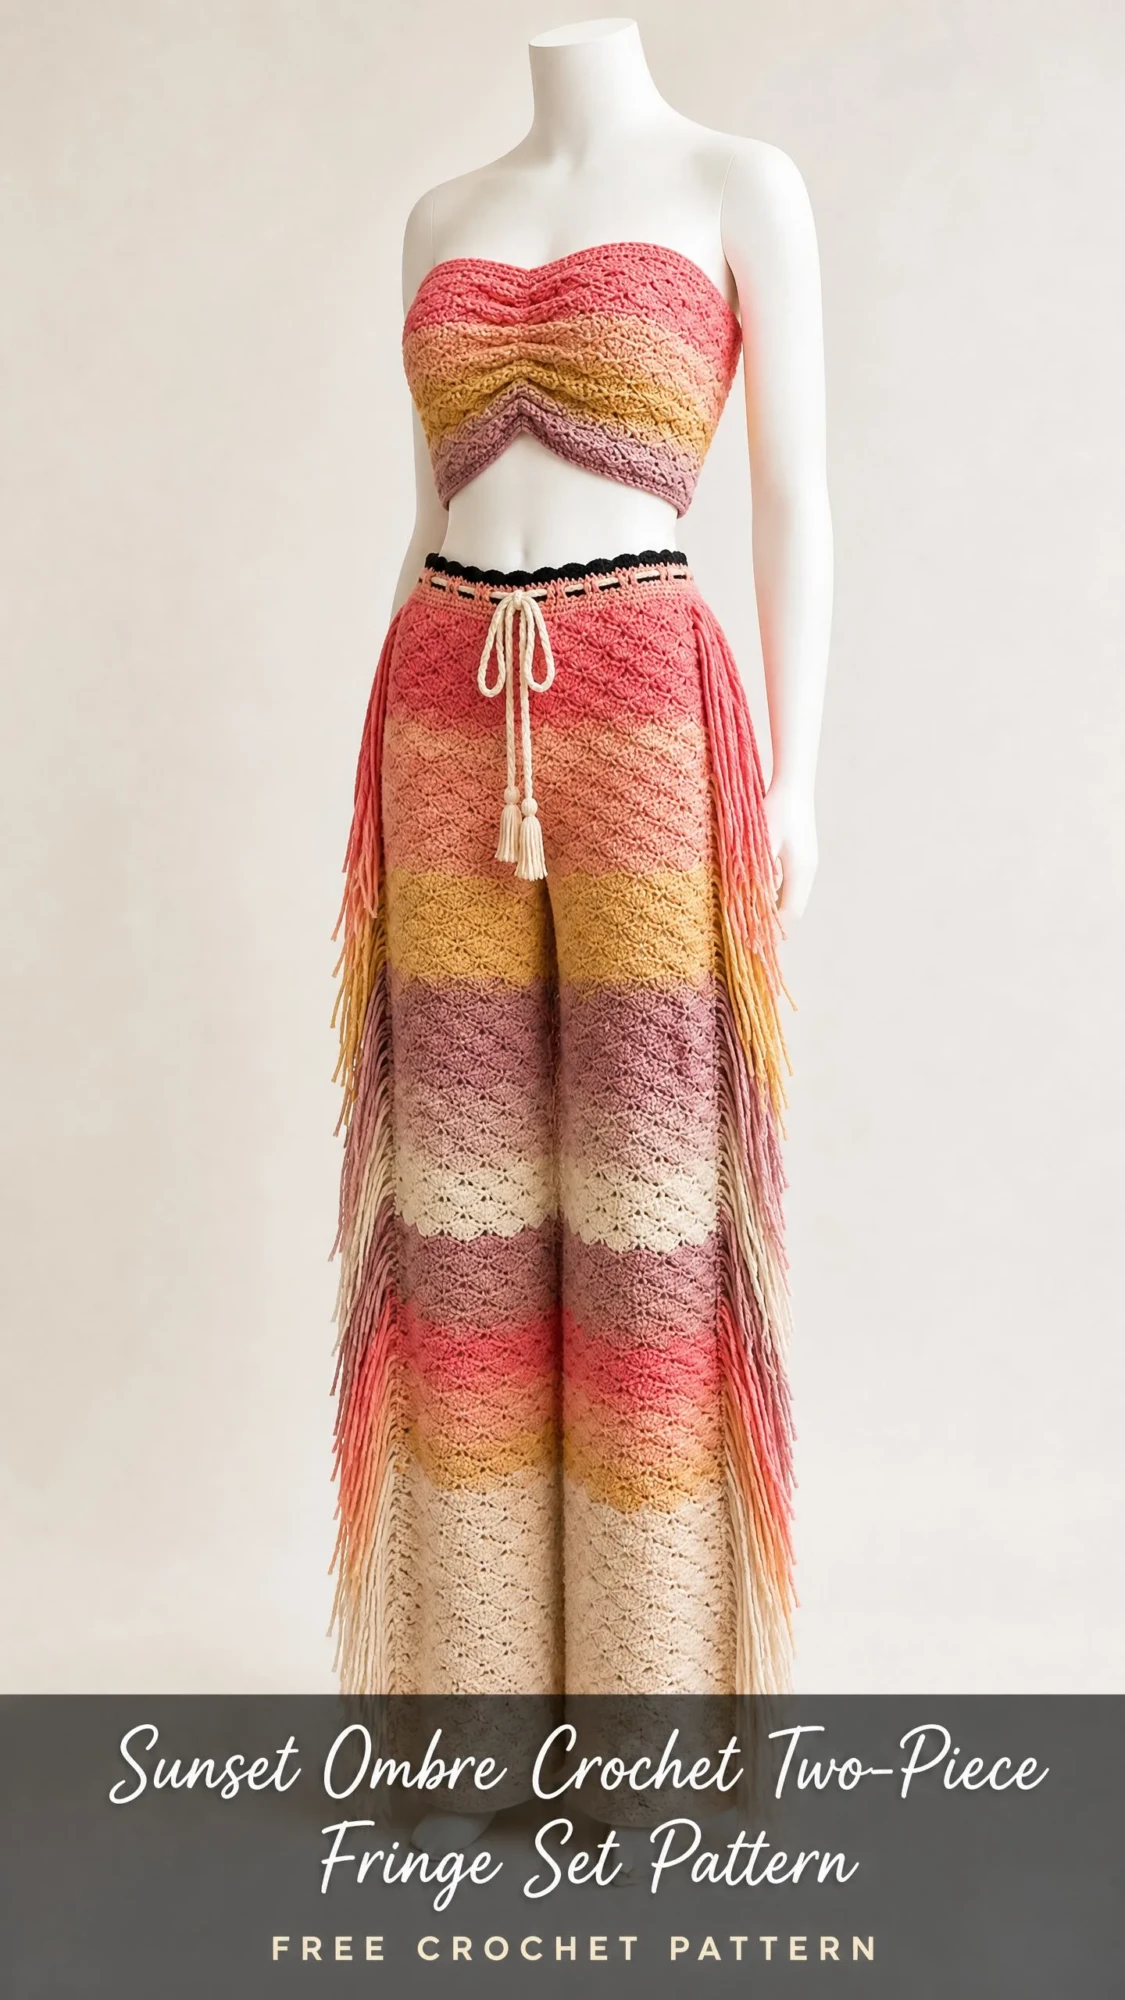
This bohemian two-piece set combines a strapless bandeau top with dramatic wide-leg fringe pants. Both pieces feature a shell stitch lace pattern that lets those sunset colors really sing. The construction is genuinely interesting. You’ll work sweetheart shaping on the bandeau, build pants in the round from waistband to crotch, then split into separate leg tubes. And that cascading fringe along the sides? It matches each color stripe perfectly.
I’ll be honest with you. This is an intermediate to advanced project that takes 50 to 70 hours to complete. The fringe attachment alone runs 8 to 12 hours. But if you’ve worked lace before and you’re ready for a statement piece, this festival-worthy set is absolutely worth the commitment.
About This Crochet Pattern
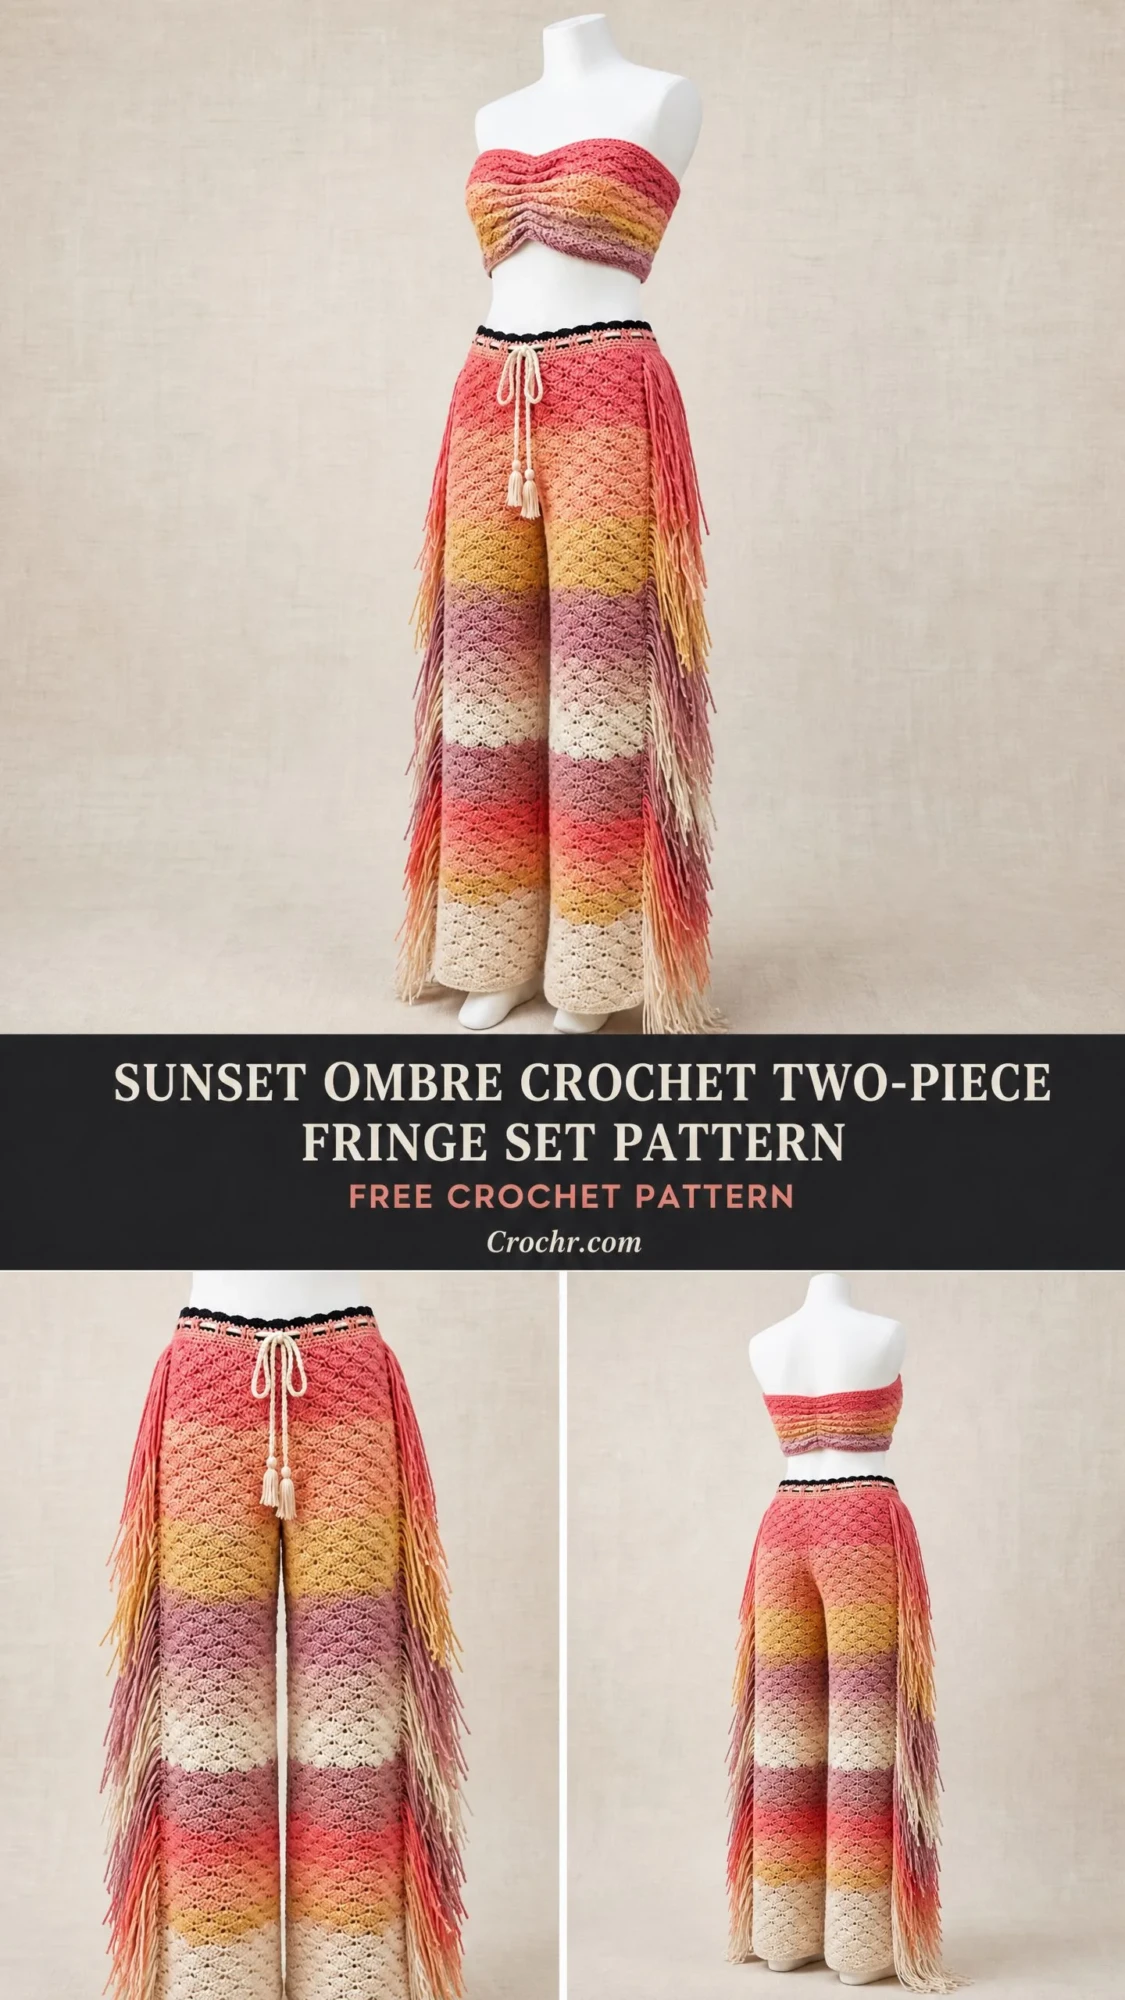
This sunset ombre crochet two-piece fringe set captures that dreamy 1970s bohemian aesthetic that never goes out of style. The gradient flows from hot coral at the top through peach, golden yellow, dusty rose, soft mauve, blush pink, and finally cream at the hem. Both pieces mirror this color sequence for visual unity.
The bandeau features a ruched center-front gathering that creates a flattering sweetheart neckline. The pants sit at the natural waist with a black scallop trim and a twisted cream drawstring with tassel ends. Long fringe cascades down the outer side seams of each leg and down the center back.
Finished Measurements (Size Medium):
Bandeau Top:
Pants:
Materials You’ll Need
Yarn (DK Weight, approximately 1,850 yards / 1,692 m total):
Hooks:
Notions:
Recommended Yarn Options
Paintbox Yarns Simply DK works beautifully here. This 100% acrylic DK weight yarn offers excellent stitch definition and a wide color range to achieve the exact gradient. Each ball is 137 yards / 125 m at 100 g. It’s machine-washable and very affordable.
Lion Brand Comfy Cotton Blend is another excellent choice. This 52% cotton / 48% modal blend gives a soft, drapey hand perfect for warm-weather festival wear. Each ball is 230 yards / 210 m at 100 g. The slight stretch aids in fit.
Scheepjes Catona (mercerized cotton) creates a subtle sheen that enhances the gradient colors. This fine sport weight can be doubled or held at gauge. Each ball is 62 yards / 50 m at 25 g, so plan on multiple balls per color.
Important: Use any smooth DK weight yarn with good stitch definition. Avoid textured, fuzzy, or variegated skeins. The solid color gradient effect depends on clear color bands.
Gauge
With G-6 / 4.0 mm hook and DK weight yarn in Shell Stitch Pattern:
Gauge Swatch Instructions: Chain 43. Work in Shell Stitch Pattern for 20 rows. Block lightly. Measure the center 3 shell repeats across and the center 10 rows vertically. Adjust hook size as needed. Gauge is critical for achieving the stated dimensions, particularly the waist and hip fit of the pants.
Abbreviations and Definitions
Special Stitches
Shell Stitch
A shell is 5 double crochets worked into the same stitch or space. It creates a fan shape. Here’s how to work one:
1. Identify the center stitch or chain space for shell placement
2. Yarn over, insert hook, pull up a loop, yarn over, pull through 2 loops (first dc made)
3. Work 4 more dc into that same stitch or space (5 dc total)
That group of 5 dc is one shell.
V-Stitch (V-st)
Work 1 dc, ch 1, 1 dc all into the same stitch or space. This creates a small V shape and serves as the anchor between shells in the lace fabric.
Shell Stitch Pattern (Flat, Even Rows)
Foundation: Chain a multiple of 6 plus 2.
Row 1 (WS): Sc in 2nd ch from hook, sk 2 ch, work shell in next ch, sk 2 ch, sc in next ch; rep from beginning across, ending sc in last ch. Turn.
Row 2 (RS): Ch 3 (counts as dc), 2 dc in first sc (half-shell at edge), sk shell, sc in center dc of shell, sk shell, shell in next sc; rep across, end 3 dc in last sc. Turn.
Row 3: Ch 1, sc in first dc, shell in next sc, sc in center dc of shell; rep across, end sc in top of t-ch. Turn.
Repeat Rows 2 and 3 for pattern.
Scallop Trim
Work with F-5 / 3.75 mm hook in Color H (Black):
1. Join yarn, ch 1
2. Sl st in first st
3. Ch 3, 4 dc in same st
4. Sl st in next st
5. Repeat steps 3 and 4 across
Twisted Drawstring
Cut 12 strands of Color G, each 80 inches / 203 cm long. Hold all 12 strands together. Fold in half so you have a loop at one end and 24 loose ends at the other.
Anchor the loop end to a fixed point (doorknob works great). Twist the strands clockwise until they are tightly wound and begin to kink when tension is released slightly.
Fold the twisted length in half, holding the two ends together. Allow the cord to twist back on itself naturally. Tie an overhand knot at each end to secure. Trim ends evenly to about 3 inches / 7.5 cm to form tassels. The finished drawstring should be approximately 32 inches / 81 cm long including tassels.
Fringe
Cut 2 strands of the specified color, each 18 inches / 45.5 cm long. Hold both strands together, fold in half. Insert hook through designated stitch or row-end loop from front to back. Pull the folded loop through to the front. Draw both loose ends through the folded loop and pull firmly to knot. Trim all fringe to 8.5 inches / 21.5 cm from the knot after attaching.
Color Sequence
Follow this sequence for both pieces, changing color every 4 rows/rounds:
Always join the new color in the last yarn-over of the last stitch of the previous color. Cut and join cleanly rather than carrying unused colors.
Part One: Bandeau Top
Section 1A: Bandeau Foundation and Body
The bandeau is worked flat, beginning at the lower edge and worked upward.
Chain 134 stitches using Color A.
Row 1 (WS): Sc in 2nd ch from hook, sk 2 ch, shell in next ch, sk 2 ch, sc in next ch, (sk 2 ch, shell in next ch, sk 2 ch, sc in next ch) across. Turn. (22 shells, 23 sc = 133 sts)
Stitch Count Check: Foundation ch 134. First sc uses ch 2 (1 sc in 2nd ch, skip 1), then each shell unit uses 6 ch. After the first sc, you have 132 ch remaining, which is 22 sets of 6 = 22 shells. So 23 sc plus 22 shells of 5 dc each = 23 + 110 = 133 stitches total.
Row 2 (RS): Ch 3 (counts as first dc here and throughout), 2 dc in first sc (half-shell at right edge), sc in center (3rd) dc of first shell, (shell in next sc, sc in center dc of next shell) across, end with 3 dc in last sc. Turn. (21 full shells, 22 sc, 2 half-shells of 3 dc each = 133 sts)
Row 3: Ch 1, sc in first dc, (shell in next sc, sc in center dc of next shell) across, end sc in top of t-ch. Turn. (22 shells, 23 sc = 133 sts)
Rows 4 through 6: Continue in established shell pattern, repeating Rows 2 and 3 alternately. At end of Row 4, join Color B. Continue color sequence, changing color every 4 rows.
Continue through Row 18 in established shell stitch pattern and color sequence, ending after completing a Row 3 equivalent. (133 sts each row throughout)
Checkpoint: After Row 18, your bandeau body should measure approximately 28 inches / 71 cm wide (laid flat) and 6.75 inches / 17 cm tall. The color band should be Color E (soft mauve).
Section 1B: Sweetheart Shaping
The sweetheart top edge is created by working the left and right cups separately. The center falls between shell 11 and shell 12.
Left Cup Shaping (Rows 19 onward, worked on first 67 sts)
Row 19 (RS): Work in established shell pattern across first 67 sts (11 shells, 12 sc). Do not work remaining sts. Turn. (67 sts)
Row 20: Work shell pattern across. Turn. (67 sts)
Row 21 (decrease row): Ch 1, sc in first dc, (shell in next sc, sc in center dc of shell) 9 times, shell in next sc, sc2tog over (center dc of last shell, top of t-ch or last sc). Turn. (66 sts)
Row 22: Work established pattern across. Turn. (66 sts)
Row 23 (decrease row): Ch 1, sc in first dc, work pattern across to last 2 sts, sc2tog. Turn. (65 sts)
Row 24: Work established pattern across. Turn. (65 sts)
Row 25: Sl st across first 6 sts (removes one shell at outer edge for shoulder sweep), sl st in 7th st, ch 1, sc in same st, work pattern to last 2 sts, sc2tog. Turn. (58 sts)
Fasten off. Work 1 row of sc evenly across the top edge of left cup. Fasten off.
Right Cup Shaping
Skip the center sc of Row 18, rejoin working yarn at the next stitch to the right of center with RS facing.
Row 19 (RS): Ch 3, 2 dc in first sc (half-shell), work established shell pattern across remaining right half. Turn. (67 sts)
Row 20: Work pattern. Turn. (67 sts)
Row 21: Ch 1, sc2tog over (first sc and next st), work pattern across. Turn. (66 sts)
Row 22: Work pattern. Turn. (66 sts)
Row 23: Ch 1, sc2tog, work pattern across. Turn. (65 sts)
Row 24: Work pattern. Turn. (65 sts)
Row 25: Ch 1, sc2tog at inner edge, work pattern to last 7 sts, sl st across last 6 sts. Fasten off. (58 sts worked before sl sts)
Work 1 row sc across top edge of right cup. Fasten off.
Section 1C: Bandeau Finishing
Seam: Fold bandeau so RS faces in. Align back edges. Using yarn needle and Color A, whipstitch back seam from lower edge to top edge. Turn RS out.
Ruching: Thread a 24 inch / 61 cm length of Color A onto yarn needle. Working along the center-front vertical column of ch-1 spaces, weave the yarn in and out through approximately 8 to 10 spaces, then pull gently to gather approximately 0.5 inch / 1.3 cm at center. Secure yarn ends invisibly to WS.
Lower Edge Trim: Join Color H with F-5 hook at back seam, work Scallop Trim around entire lower circumference. Fasten off. Weave in ends.
Upper Edge Trim: With Color A and G-6 hook, work 1 rnd of sc evenly around entire upper edge. Join with sl st. Fasten off.
Part Two: Fringe Pants
Section 2A: Waistband
Using Color H and F-5 hook, chain 16.
Row 1: Sc in 2nd ch from hook, sc in each ch across. Turn. (15 sc)
Row 2: Ch 1, working in back loops only (BLO), sc in each st across. Turn. (15 sc)
Repeat Row 2 until waistband measures 28 inches / 71 cm. Fasten off, leaving a 12 inch / 30.5 cm tail for seaming.
Fold waistband, RS together, and seam the two short ends together. Turn RS out.
Eyelet Row: Join Color G on RS of waistband at center-front position with G-6 hook. Work 1 rnd sc around top edge, placing ch-2 buttonhole spaces at 1 inch / 2.5 cm and 1.5 inches / 3.8 cm from center front on each side (2 eyelets total). Join, fasten off.
Thread twisted drawstring through eyelets so both tassel ends emerge at center front.
Section 2B: Pants Body (Waist to Crotch)
Join Color A with G-6 hook to inner lower edge of waistband at the back-left position.
Foundation Rnd: Working into the lower edge of the waistband, work 144 sc evenly spaced around. Join with sl st to first sc. Do not turn. (144 sc)
Rnd 1: Ch 3 (counts as dc), 2 dc in same st, sk 2, sc in next st, (sk 2, shell in next st, sk 2, sc in next st) across, ending with 2 dc in same st as beginning ch-3. Join with sl st to top of ch-3. (24 shells = 144 sts)
Rnd 2: Ch 1, (sc in center dc of shell, sk 2 dc, shell in sc, sk 2 dc) around, ending sc in center dc of last shell. Join with sl st to first sc. (24 shells, 24 sc = 144 sts)
Rnd 3: Ch 3, 2 dc in same sc, (sc in center dc of shell, shell in sc) around, ending 2 dc in starting sc position. Join with sl st to top of ch-3. (144 sts)
Continue Rnds 2 and 3 alternately, changing colors per color sequence, until pants body measures 10 inches / 25.5 cm from top of waistband (approximately 26 rounds).
Checkpoint: You should be in Color C (golden yellow).
Section 2C: Hip Shaping
Increase Round A (after Rnd 26): Work established pattern, inserting 4 shell increases evenly spaced. Work 6 shells in pattern, then (shell, ch 1, shell) in the next sc position. Continue 5 shells, (shell, ch 1, shell) in next sc. Repeat this placement 2 more times evenly. (156 sts = 26 shells)
Increase Round B (4 rounds later): Same method, adding 4 more shells. (168 sts = 28 shells)
Continue even in pattern without further increases until pants body measures 14 inches / 35.5 cm from waistband. (168 sts each round)
Checkpoint: Body circumference should be 35 inches / 89 cm. You should be in Color D (dusty rose).
Section 2D: Crotch Shaping and Leg Separation
Mark the current round at back center and front center positions.
Leg Separation Round: Work across front half (84 sts), ch 12 (crotch bridge), skip back half, work across back half, ch 12. Join with sl st. (192 sts total)
Section 2E: Right Leg
Join Color D to the right leg opening (84 sts from body half plus 12 crotch chain sts = 96 sts).
Foundation Rnd: Sc 96 evenly around leg opening, join. (96 sc = 16 shells)
Work in Shell Stitch Pattern in the Round for 36 rounds, changing colors per color sequence, until leg measures 20 inches / 51 cm. (96 sts every round)
Continue in Color G for final 6 rounds if not already reached, ending with a sc round for hem.
Hem: With F-5 hook and Color H, work 1 round of Scallop Trim around hem edge. Fasten off.
Section 2F: Left Leg
Rejoin Color D to the left leg opening (84 sts plus 12 crotch ch sts = 96 sts).
Work exactly as Right Leg through all rounds and hem trim. (96 sts every round, 36 rounds, then hem trim)
Section 2G: Crotch Seam Finishing
Thread yarn needle with matching color. Close any gaps at the inner leg join point by working a few overcast stitches from WS.
Section 2H: Fringe Attachment
Placement:
Fringe Color: Match each fringe unit to the stripe color at the row where it’s attached.
Attachment: Using the Fringe technique, attach 1 fringe unit in every other row-end stitch along designated columns.
Fringe Counts:
After all fringe is attached, lay pants flat and trim all fringe to 8.5 inches / 21.5 cm from the knot.
Size Customization Tips
Bandeau:
The foundation chain is a multiple of 6 plus 2. For XS/S, reduce to 110 ch (18 shells). For L/XL, increase to 158 ch (26 shells). Each 6-stitch shell equals approximately 1.25 inches / 3.2 cm of width.
Pants:
Finishing and Blocking
Weave in all yarn tails, running each in two directions through WS sts.
Wet Blocking: Soak both pieces in cool water with wool wash for 20 minutes. Gently squeeze out excess water (do not wring). Roll in a clean towel.
Lay pieces flat on a blocking mat. Pin bandeau to correct dimensions. Pin pants leg hems flat. Do not pin or stretch the fringe.
Allow to dry completely (12 to 24 hours).
Light steaming with a garment steamer held 1 inch / 2.5 cm from surface will set the gradient and add drape. Do not iron directly.
Care Instructions
You Did It!
Thank you so much for choosing this sunset ombre crochet two-piece fringe set pattern for your next project. I know this is a significant time investment, but the finished result is truly a showstopper. That gradient cascade of colors combined with the flowing fringe creates movement and drama that photographs beautifully and feels incredible to wear.
I would absolutely love to see your finished set! Tag me on Instagram or share in my Facebook group. Seeing your color combinations and styling choices genuinely makes my day.
If this pattern is calling to you, go ahead and save it to your Pinterest boards so you can find it when you’re ready to start. And please drop a comment below if you make this set. I’d love to hear which colors you chose and how the construction process went for you. Happy crocheting!
You Might Also Like
- Forest Green Elegant Peplum Crochet Top Free Pattern
- Succulent Garden Crochet Bowl Free Crochet Pattern
- Charcoal Gray Button Cuff Slipper Boots Free Crochet Pattern
- Ocean Blues Granny Square Bag Free Crochet Pattern
