
I don’t know about you, but I’ve been dreaming of a statement piece that captures every warm sunset I’ve ever watched. You know the ones. That slow fade from terracotta through salmon into buttery cream at the horizon.
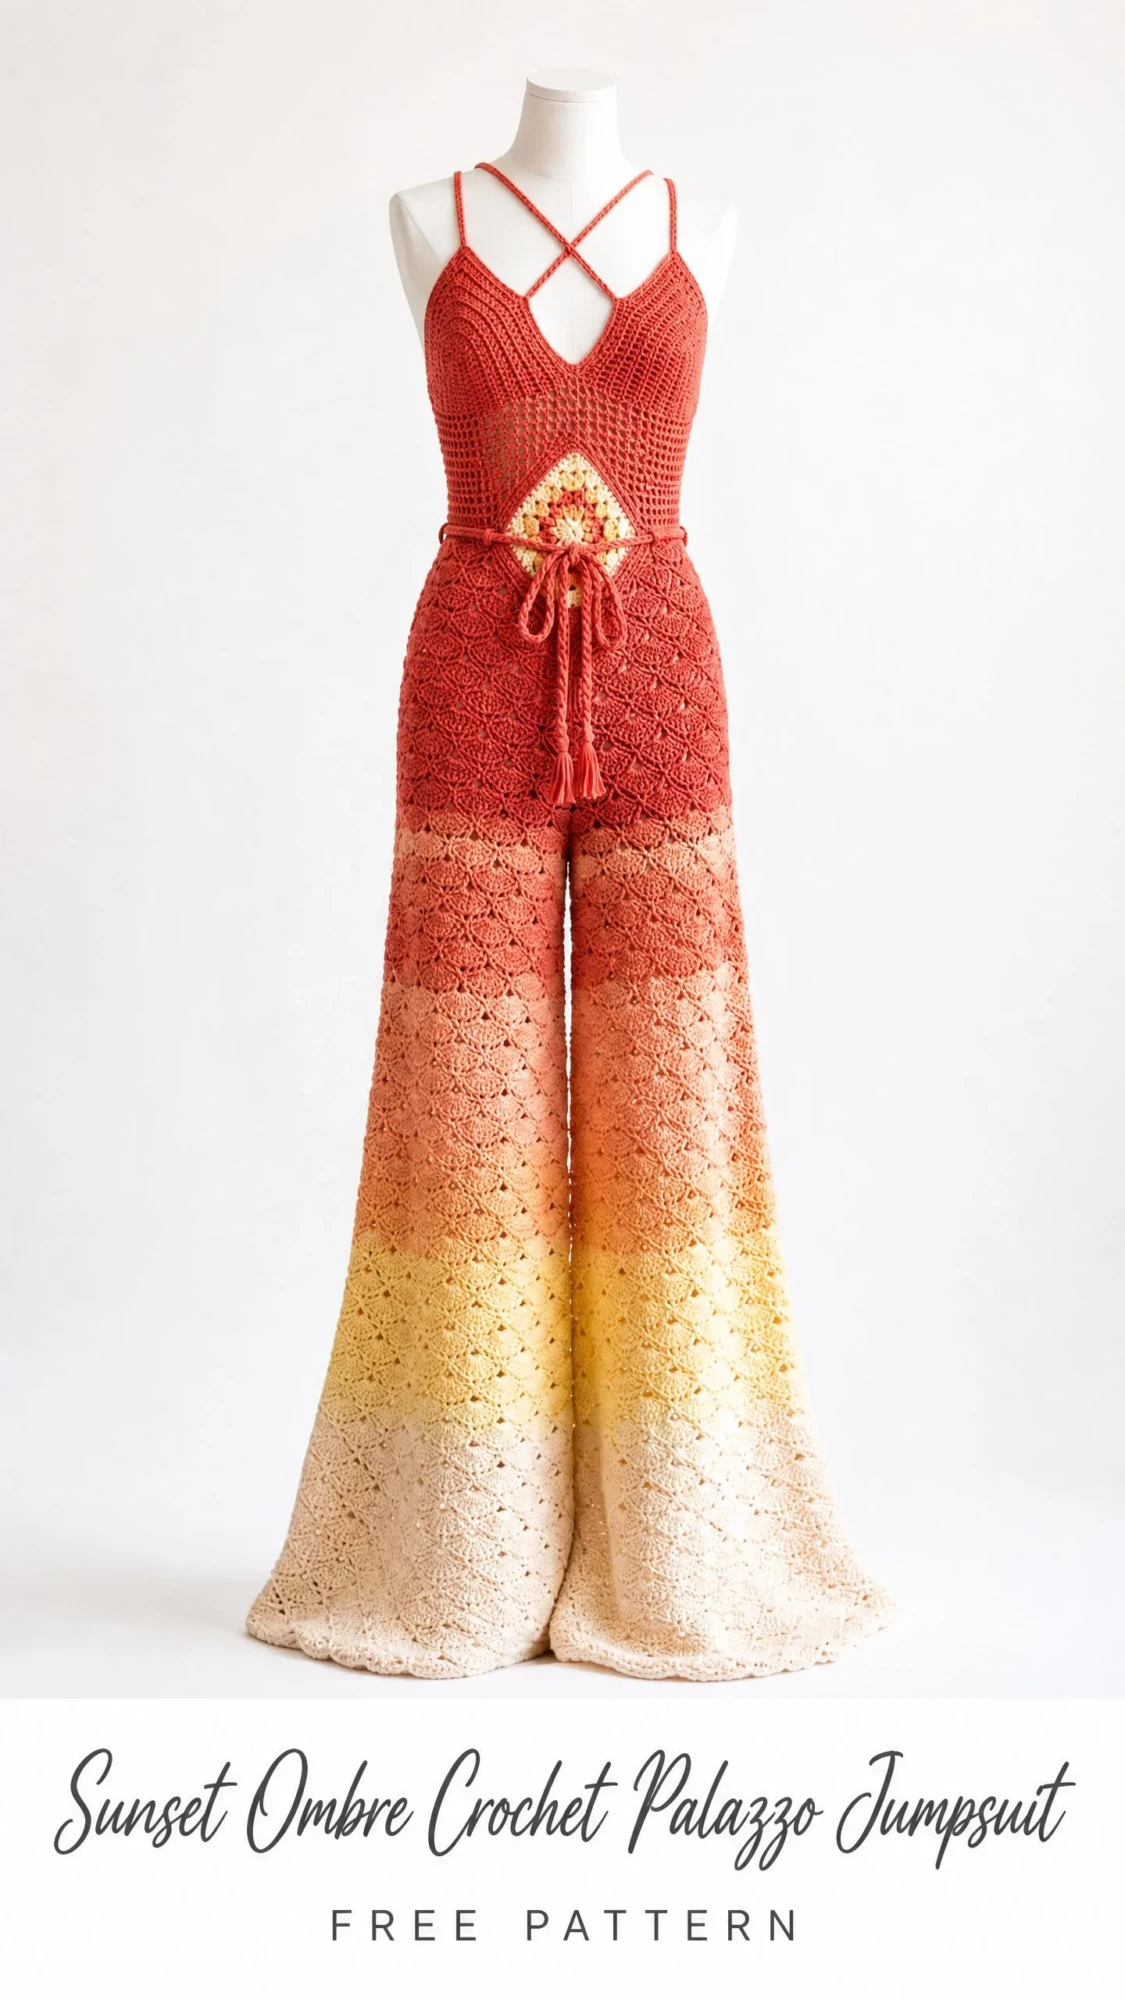
This jumpsuit is exactly that feeling turned into wearable art. The fitted bodice hugs you in all the right places while those dramatic wide legs flutter and flow with every step. It’s bohemian, it’s bold, and it’s absolutely the kind of project that makes you proud to say "I made this."
Fair warning though. This isn’t a weekend project. We’re talking 60 to 80 hours of dedicated crochet time. But if you’ve been itching to level up your skills and create something truly show-stopping, grab your hook and let’s dive in together.
Why This Crochet Jumpsuit Pattern Is Worth the Commitment
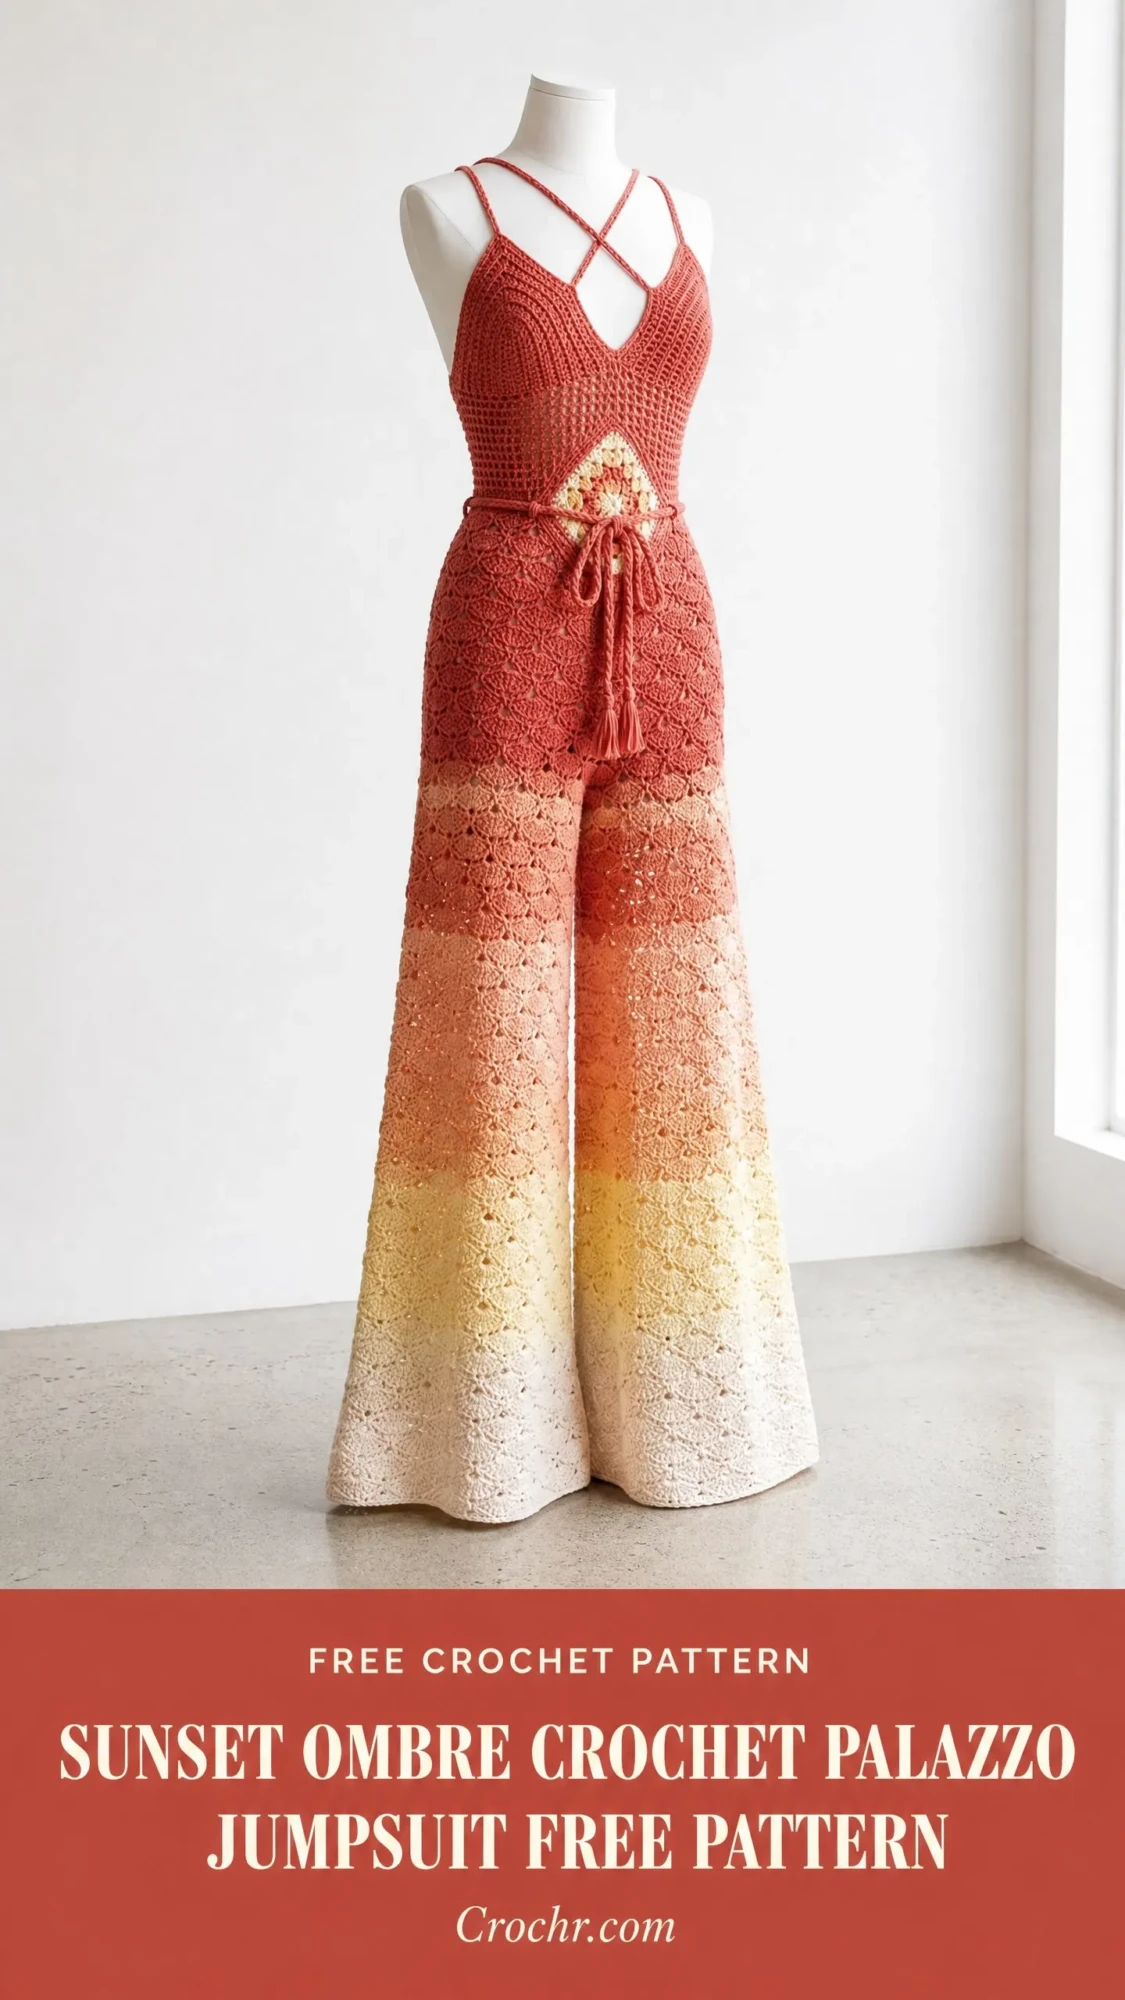
This palazzo jumpsuit combines several techniques that will expand your crochet skills in the best way. You’ll work a structured bodice with waist and bust shaping, flowy shell stitch pants with gradual decreases, a classic granny square accent, and those gorgeous crossback straps that add such a romantic touch.
The ombre effect moving from deep terracotta at the hip down to cream at the hem creates stunning visual interest. And because the color changes happen every eight rounds, you get that beautiful gradient without any complicated colorwork.
The finished piece features a half double crochet (hdc) bodice for structure and an open shell stitch for the legs that creates incredible drape and movement. Two different hooks, two different textures, one cohesive garment.
Skill Level
Advanced Intermediate
You should be comfortable with working flat and in the round, seaming multiple pieces together, reading color change sequences, maintaining stitch counts through increases and decreases, constructing a granny square motif, and shaping a fitted bodice with a V-neck.
If you’ve made garments before and feel confident with basic construction, you’ve got this.
Finished Measurements (Size Small)
Materials Needed
Yarn (DK Weight, Light, CYCA 3)
Total yardage: approximately 2100 yards / 1920 m
Recommended Yarn Options
Lion Brand Comfy Cotton Blend works beautifully here. It’s 52% cotton and 48% modal with excellent stitch definition and gorgeous drape for those palazzo legs.
Paintbox Yarns Simply DK is another solid choice. It’s 100% acrylic, machine washable, and comes in a broad palette perfect for matching the ombre sequence.
WeCrochet Dishie gives the bodice excellent body and crisp stitch definition while staying breathable.
When substituting, look for any DK weight yarn with at least 50% natural or modal fiber for best drape in the legs. Avoid very elastic yarns like high nylon or wool blends since they may pull the shell stitch closed and reduce the flare.
Tools
Gauge (Very Important!)
Bodice gauge (G-6 hook, half double crochet worked flat):
18 hdc x 12 rows = 4 inches / 10 cm square, blocked
Leg gauge (H-8 hook, shell stitch worked flat):
One 5-dc shell repeat (6 sts) = approximately 1.25 inches / 3.2 cm wide
8 rows of shell stitch = approximately 4 inches / 10 cm tall, blocked
Please swatch both sections before beginning. Your gauge determines whether this fits properly, and trust me, you don’t want to discover sizing issues 40 hours in.
Abbreviations Used
Special Stitches Explained
Shell Stitch
Work 5 double crochet (dc) into the same stitch or chain space. This creates a fan-shaped cluster that forms the primary texture of the palazzo legs.
Foundation row: ch 1, sc in first st, (sk 2 sts, shell in next st, sk 2 sts, sc in next st) rep across, ending with sc in last st.
Subsequent rows: ch 3, turn, 2 dc in first sc (half shell at edge), (sc in center dc of next shell, shell in next sc) rep across, ending with 3 dc in last sc (half shell at edge).
When counting stitches, count each full shell as 6 stitches (the 5 dc plus the sc that precedes or follows it), and half shells at edges as 3 stitches each.
Hdc2tog (Half Double Crochet Decrease)
Yarn over, insert hook in next stitch, pull up loop (3 loops on hook), yarn over, insert hook in following stitch, pull up loop (5 loops on hook), yarn over and draw through all 5 loops. One stitch decreased.
Granny Square
Round 1: With Color D, make a magic ring. Ch 3 (counts as dc), 2 dc in ring, ch 2, (3 dc in ring, ch 2) 3 times, sl st to top of beginning ch-3 to join. (4 clusters of 3 dc, 4 ch-2 corner spaces)
Round 2: Sl st to ch-2 sp, ch 3, 2 dc in same sp, ch 1, (3 dc, ch 2, 3 dc) in next ch-2 sp, ch 1, rep around, 3 dc in first sp, ch 2, sl st to join. Fasten off D. Join Color E.
Round 3: Sl st to ch-2 corner sp, ch 3, 2 dc in same sp, ch 1, 3 dc in ch-1 sp, ch 1, (3 dc, ch 2, 3 dc) in corner ch-2 sp, ch 1, 3 dc in ch-1 sp, ch 1, rep around, sl st to join, fasten off. (12 clusters of 3 dc total, 4 ch-2 corner spaces)
Finished square measures approximately 3.5 inches / 9 cm.
Tassel
Cut 20 strands of Color A each 10 inches / 25 cm long. Fold bundle in half. Use a separate 8 inch / 20 cm strand to tie tightly around the folded end, leaving a long tail for attaching. Trim ends to approximately 4 inches / 10 cm below the tie knot.
Pattern Notes Before You Begin
1. The jumpsuit is assembled from five pieces: Bodice Front, Bodice Back, Right Palazzo Leg, Left Palazzo Leg, and Granny Square Waist Accent.
2. For ombre color changes, begin the new color on the last yarn over of the final stitch of a round in the old color, then continue in the new color. Colors change every 8 rounds.
3. The bodice uses the smaller G-6 hook throughout. The palazzo legs use the larger H-8 hook for drape.
4. Turning chains: for hdc rows, ch 2 at the start of each row. The ch-2 does NOT count as a stitch. Always work the first hdc into the first stitch at the base of the ch-2.
5. All stitch counts refer to working stitches only and do not include turning chains.
6. The pants legs are worked flat and seamed along both side edges before the crotch join.
Section 1: Bodice Front
Using Color A and G-6 hook, ch 79.
Foundation Row (WS): Hdc in 3rd ch from hook and in each ch across. Turn. (77 hdc)
This foundation row establishes the lower edge of the bodice at waist level. You’ll work upward toward the bust.
Waist Shaping (Rows 1-4)
Row 1: Ch 2, turn, hdc2tog, hdc to last 2 sts, hdc2tog. Turn. (75 hdc)
Row 2: Ch 2, turn, hdc2tog, hdc to last 2 sts, hdc2tog. Turn. (73 hdc)
Row 3: Ch 2, turn, hdc2tog, hdc to last 2 sts, hdc2tog. Turn. (71 hdc)
Row 4: Ch 2, turn, hdc2tog, hdc to last 2 sts, hdc2tog. Turn. (69 hdc)
Rows 5-6: Ch 2, turn, hdc in each st across. (69 hdc)
Bust Shaping (Rows 7-10)
Row 7: Ch 2, turn, 2 hdc in first st, hdc to last st, 2 hdc in last st. (71 hdc)
Row 8: Ch 2, turn, 2 hdc in first st, hdc to last st, 2 hdc in last st. (73 hdc)
Row 9: Ch 2, turn, 2 hdc in first st, hdc to last st, 2 hdc in last st. (75 hdc)
Row 10: Ch 2, turn, 2 hdc in first st, hdc to last st, 2 hdc in last st. (77 hdc)
Rows 11-14: Ch 2, turn, hdc in each st across. (77 hdc)
Checkpoint: After Row 14, the bodice front should measure approximately 5.5 inches / 14 cm tall from the foundation row.
Divide for V-Neck
Row 15 (RS): Ch 2, turn, hdc across first 38 sts. Turn, leaving remaining 39 sts unworked for right shoulder. (38 hdc, left side)
Left Bodice Front Panel
Row 16: Ch 2, turn, hdc2tog (at neck edge), hdc to end. (37 hdc)
Row 17: Ch 2, turn, hdc to last 2 sts, hdc2tog (at neck edge). (36 hdc)
Row 18: Ch 2, turn, hdc2tog, hdc to end. (35 hdc)
Row 19: Ch 2, turn, hdc in each st across. (35 hdc)
Row 20: Ch 2, turn, hdc2tog, hdc to end. (34 hdc)
Row 21: Ch 2, turn, hdc in each st across. (34 hdc)
Row 22: Ch 2, turn, hdc2tog, hdc to end. (33 hdc)
Rows 23-26: Ch 2, turn, hdc in each st across. (33 hdc)
Left Shoulder Strap
Row 27: Ch 2, turn, hdc across 6 sts only. (6 hdc) Leave remaining sts unworked.
Rows 28-42: Ch 2, turn, hdc in each of 6 sts. Repeat for 15 rows total. (6 hdc per row)
Fasten off, leaving a 12 inch / 30 cm tail for seaming.
Right Bodice Front Panel
Rejoin Color A to the remaining 39 sts at Row 15 (begin at center front, working outward toward right shoulder).
Row 15 Right (RS): Ch 2, hdc2tog (at neck edge, center front side), hdc to end. (38 hdc)
Row 16: Ch 2, turn, hdc to last 2 sts, hdc2tog. (37 hdc)
Row 17: Ch 2, turn, hdc2tog, hdc to end. (36 hdc)
Row 18: Ch 2, turn, hdc to last 2 sts, hdc2tog. (35 hdc)
Row 19: Ch 2, turn, hdc in each st across. (35 hdc)
Row 20: Ch 2, turn, hdc to last 2 sts, hdc2tog. (34 hdc)
Row 21: Ch 2, turn, hdc in each st across. (34 hdc)
Row 22: Ch 2, turn, hdc to last 2 sts, hdc2tog. (33 hdc)
Rows 23-26: Ch 2, turn, hdc in each st across. (33 hdc)
Right Shoulder Strap
Row 27: Ch 2, turn, skip to last 6 sts of the row. Work hdc in each of last 6 sts. (6 hdc)
Rows 28-42: Ch 2, turn, hdc in each of 6 sts. (6 hdc per row)
Fasten off, leaving 12 inch / 30 cm tail.
Section 2: Bodice Back
Using Color A and G-6 hook, ch 79.
Foundation Row (WS): Hdc in 3rd ch from hook and in each ch across. (77 hdc)
Waist Shaping (Rows 1-4)
Row 1: Ch 2, turn, hdc2tog, hdc to last 2 sts, hdc2tog. (75 hdc)
Row 2: Ch 2, turn, hdc2tog, hdc to last 2 sts, hdc2tog. (73 hdc)
Row 3: Ch 2, turn, hdc2tog, hdc to last 2 sts, hdc2tog. (71 hdc)
Row 4: Ch 2, turn, hdc2tog, hdc to last 2 sts, hdc2tog. (69 hdc)
Rows 5-6: Ch 2, turn, hdc in each st across. (69 hdc)
Bust Shaping (Rows 7-10)
Row 7: Ch 2, turn, 2 hdc in first st, hdc to last st, 2 hdc in last st. (71 hdc)
Row 8: Ch 2, turn, 2 hdc in first st, hdc to last st, 2 hdc in last st. (73 hdc)
Row 9: Ch 2, turn, 2 hdc in first st, hdc to last st, 2 hdc in last st. (75 hdc)
Row 10: Ch 2, turn, 2 hdc in first st, hdc to last st, 2 hdc in last st. (77 hdc)
Rows 11-14: Ch 2, turn, hdc in each st across. (77 hdc)
Back Neck Divide
Row 15: Ch 2, turn, hdc across 33 sts. Turn. Leave remaining 44 sts unworked. (33 hdc, left back)
Left Back Panel
Rows 16-26: Ch 2, turn, hdc in each st across. (33 hdc)
Row 27 (Strap): Ch 2, turn, hdc across last 6 sts. (6 hdc)
Rows 28-42: Ch 2, turn, hdc in each of 6 sts. (6 hdc)
Fasten off with 12 inch / 30 cm tail.
Right Back Panel
Rejoin Color A at the remaining 44 sts of Row 15. Skip the center 11 sts for the back neck opening (mark these with a stitch marker), then work across the final 33 sts.
Row 15 Right: Ch 2, hdc in each of 33 sts. (33 hdc)
Rows 16-26: Ch 2, turn, hdc in each st across. (33 hdc)
Row 27 (Strap): Ch 2, turn, hdc across first 6 sts. (6 hdc)
Rows 28-42: Ch 2, turn, hdc in each of 6 sts. (6 hdc)
Fasten off with 12 inch / 30 cm tail.
Important: The center 11 sts left unworked at Row 15 form the upper back opening. Seam the left front strap to the right back panel strap, and the right front strap to the left back panel strap, crossing them to form the X crossback detail.
Section 3: Palazzo Pants Legs (Make 2)
Each leg is worked flat from the hem upward, then the two legs are seamed and joined at the crotch.
Color Sequence for Each Leg
Using Color E and H-8 hook, ch 265.
Foundation Row (WS): Sc in 2nd ch from hook, (sk 2 ch, shell in next ch, sk 2 ch, sc in next ch) rep across, ending sc in last ch. Turn. (44 shells, 45 sc = 264 working sts in pattern)
Row 1 (RS): Ch 3, turn. 2 dc in first sc (half shell), (sc in center dc of shell, shell in sc) rep across, ending 3 dc in last sc. Turn. (264 sts)
Row 2 (WS): Ch 1, turn. Sc in first dc, (shell in sc, sc in center dc of shell) rep across, sc in top of turning ch. Turn. (264 sts)
Repeat Rows 1 and 2 for shell pattern throughout.
Leg Shaping
The leg tapers from 44 shells at the hem to 30 shells at the hip over 44 rows. Decrease rows occur at Rows 3, 6, 9, 12, 15, 18, 21, 24, 27, 30, 33, 36, 39, and 42.
Decrease Method: On RS rows, ch 3, turn, work to within the last full shell, skip that shell and its adjacent sc, 3 dc in final sc. Each decrease row removes 1 shell from each edge (6 sts total).
Stitch counts after decrease rows:
Rows 43-44: Work even in shell pattern. (180 sts, 30 shells)
Fasten off, leaving a 24 inch / 61 cm tail for seaming.
Checkpoint: Each finished leg piece should measure approximately 44 inches / 112 cm wide at the foundation row, tapering to approximately 22.5 inches / 57 cm wide at Row 44. Length from hem to top edge should measure approximately 22 inches / 56 cm.
Section 4: Joining Legs and Hip Yoke
Seaming Each Leg
Fold each leg piece in half lengthwise with right sides together, aligning the two short side edges. Seam along the full 44-row side edge using mattress stitch. This creates a tube for each leg. Turn right side out.
Joining at Crotch
Hold both tubes with the seams aligned at the inner leg. Using Color A and G-6 hook, slip stitch 20 sts of the back edge of the Right Leg to the back edge of the Left Leg, working from the top edges downward. Repeat at the front edge.
Hip Yoke Transition Round
With Color A and G-6 hook, work 1 sc round around the top of the joined pants piece, decreasing evenly to achieve 126 stitches. Place 18 sc2tog evenly spaced around (approximately every 13 sts) while working the transition round. (126 sc)
Hip Yoke (Worked in the Round)
Join with sl st to form a ring. Ch 2 (does not count as st).
Round 1: Hdc in each st around. (126 hdc)
Round 2: Hdc in each st around. (126 hdc)
Round 3: (Hdc2tog, hdc in next 12 sts) rep 9 times. (117 hdc)
Round 4: Hdc in each st around. (117 hdc)
Round 5: (Hdc2tog, hdc in next 11 sts) rep 9 times. (108 hdc)
Round 6: Hdc in each st around. (108 hdc)
Round 7: (Hdc2tog, hdc in next 10 sts) rep 9 times. (99 hdc)
Round 8: Hdc in each st around. (99 hdc)
Round 9: (Hdc2tog, hdc in next 9 sts) rep 9 times. (90 hdc)
Rounds 10-12: Hdc in each st around. (90 hdc)
Do not fasten off.
Section 5: Attaching Bodice to Pants
Hold the bodice and hip yoke with wrong sides together. Align the center front and center back. The lower edge of the bodice (154 hdc total) attaches to the 90 hdc hip yoke top.
To reconcile the stitch count difference, work a joining round: insert hook through 1 st of the bodice lower edge and 1 st of the hip yoke simultaneously, then sc them together. Work approximately 2 bodice sts per 1 hip yoke st, working 2 bodice sts together then 1 hip yoke st alternately across.
The waist join will gather the bodice slightly for a fitted silhouette.
Section 6: Granny Square Waist Accent
Work the Granny Square as described in the Special Stitches section using Colors D and E. Sew the finished 3.5 inch / 9 cm square to the center front of the waist join, positioning it over the seam between bodice and hip yoke.
Section 7: Belt
Cut 18 strands of Color A, each 90 inches / 229 cm long. Divide into 3 groups of 6 strands. Braid the 3 groups together for approximately 50 inches / 127 cm, leaving 4 inches / 10 cm of unbraided strand at each end. Tie off each end with a knot.
Make 2 tassels and attach one to each end of the braided belt, threading the long tail of the tassel tie knot over the end knot of the braid and securing with several overhand knots.
Thread the belt through the top edge of the hip yoke at Round 1, passing behind the granny square, and tie in a bow at the center front.
Section 8: Crossback Straps
Using Color A and G-6 hook, make a foundation chain approximately 24 inches / 61 cm long (approximately 110 ch).
Row 1: Sc in 2nd ch from hook, sc in each ch across. Fasten off. (109 sc)
Thread each strap from the front shoulder position, cross it at the back, and attach to the opposite back shoulder position using the tapestry needle and long tails. Straps should lie flat and cross in the center of the back below the neckline.
Optional: Fold the strip in half lengthwise and slip stitch the long edges together for a double-layer strap with more body.
Finishing and Blocking Your Crochet Jumpsuit
Weave in all ends securely, especially at color change points in the palazzo legs.
Wet blocking: Submerge the entire assembled jumpsuit in cool water. Gently press out excess water (do not wring). Lay flat on blocking mats. Use rustproof pins to pin the palazzo legs to the stated dimensions, spreading the shell stitch fans open to their full width. Pin the bodice to measured dimensions. Allow to dry completely (12 to 24 hours).
Wet blocking is especially important for opening the shell stitch repeat and setting the ombre gradient beautifully.
Steam blocking (for acrylic yarns): Use a steam iron held 1 inch / 2.5 cm above the surface. Never press directly onto acrylic with a hot iron.
After blocking, attach the granny square, belt, and straps if not already done.
Care Instructions
Hand wash in cool water with a gentle detergent. Lay flat to dry. Store folded rather than hanging to prevent stretching. The cotton or cotton-blend yarns recommended will soften beautifully with each wash while maintaining the garment’s shape.
Size Customization Tips
This pattern is written for Size Small. For Medium, add 4 stitches to the foundation chains of the bodice and increase leg foundation chains by 12 stitches. For Large, add 8 stitches to bodice foundations and 24 stitches to leg foundations. Adjust decrease spacing proportionally.
You Did It!
This sunset ombre palazzo jumpsuit is truly a labor of love, and every single hour you invest shows in that stunning finished piece. The way those colors flow from deep terracotta down to cream, the dramatic flutter of those wide legs, the sweet detail of that granny square accent at the waist. It all comes together into something absolutely magazine-worthy.
Thank you so much for choosing this crochet pattern for your next big project. I genuinely can’t wait to see your finished jumpsuit! Tag me on Instagram or share in our Facebook group so I can celebrate with you.
If you loved making this palazzo jumpsuit, save this pattern to your Pinterest boards so you can find it again later or share it with your crochet-loving friends. And please drop a comment below when you finish yours. I’d love to hear which colorway you chose and how your ombre turned out!
You Might Also Like
- Dusty Rose Romantic Lace Maxi Skirt Free Crochet Pattern
- Sunny Lemon Couple Amigurumi Free Crochet Pattern
- Dusty Rose Bobble Purse Free Crochet Pattern
- Emerald Green Holiday Baby Romper Free Crochet Pattern
