
I have been dreaming about designing a statement loungewear piece for months. Something cozy but bold. Something that looks impressive but still feels like pajamas. When I started sketching these cow print joggers, I wanted them to work for multiple sizes, use a relaxed silhouette that actually flatters, and feature colorwork that any intermediate crocheter could tackle with confidence.
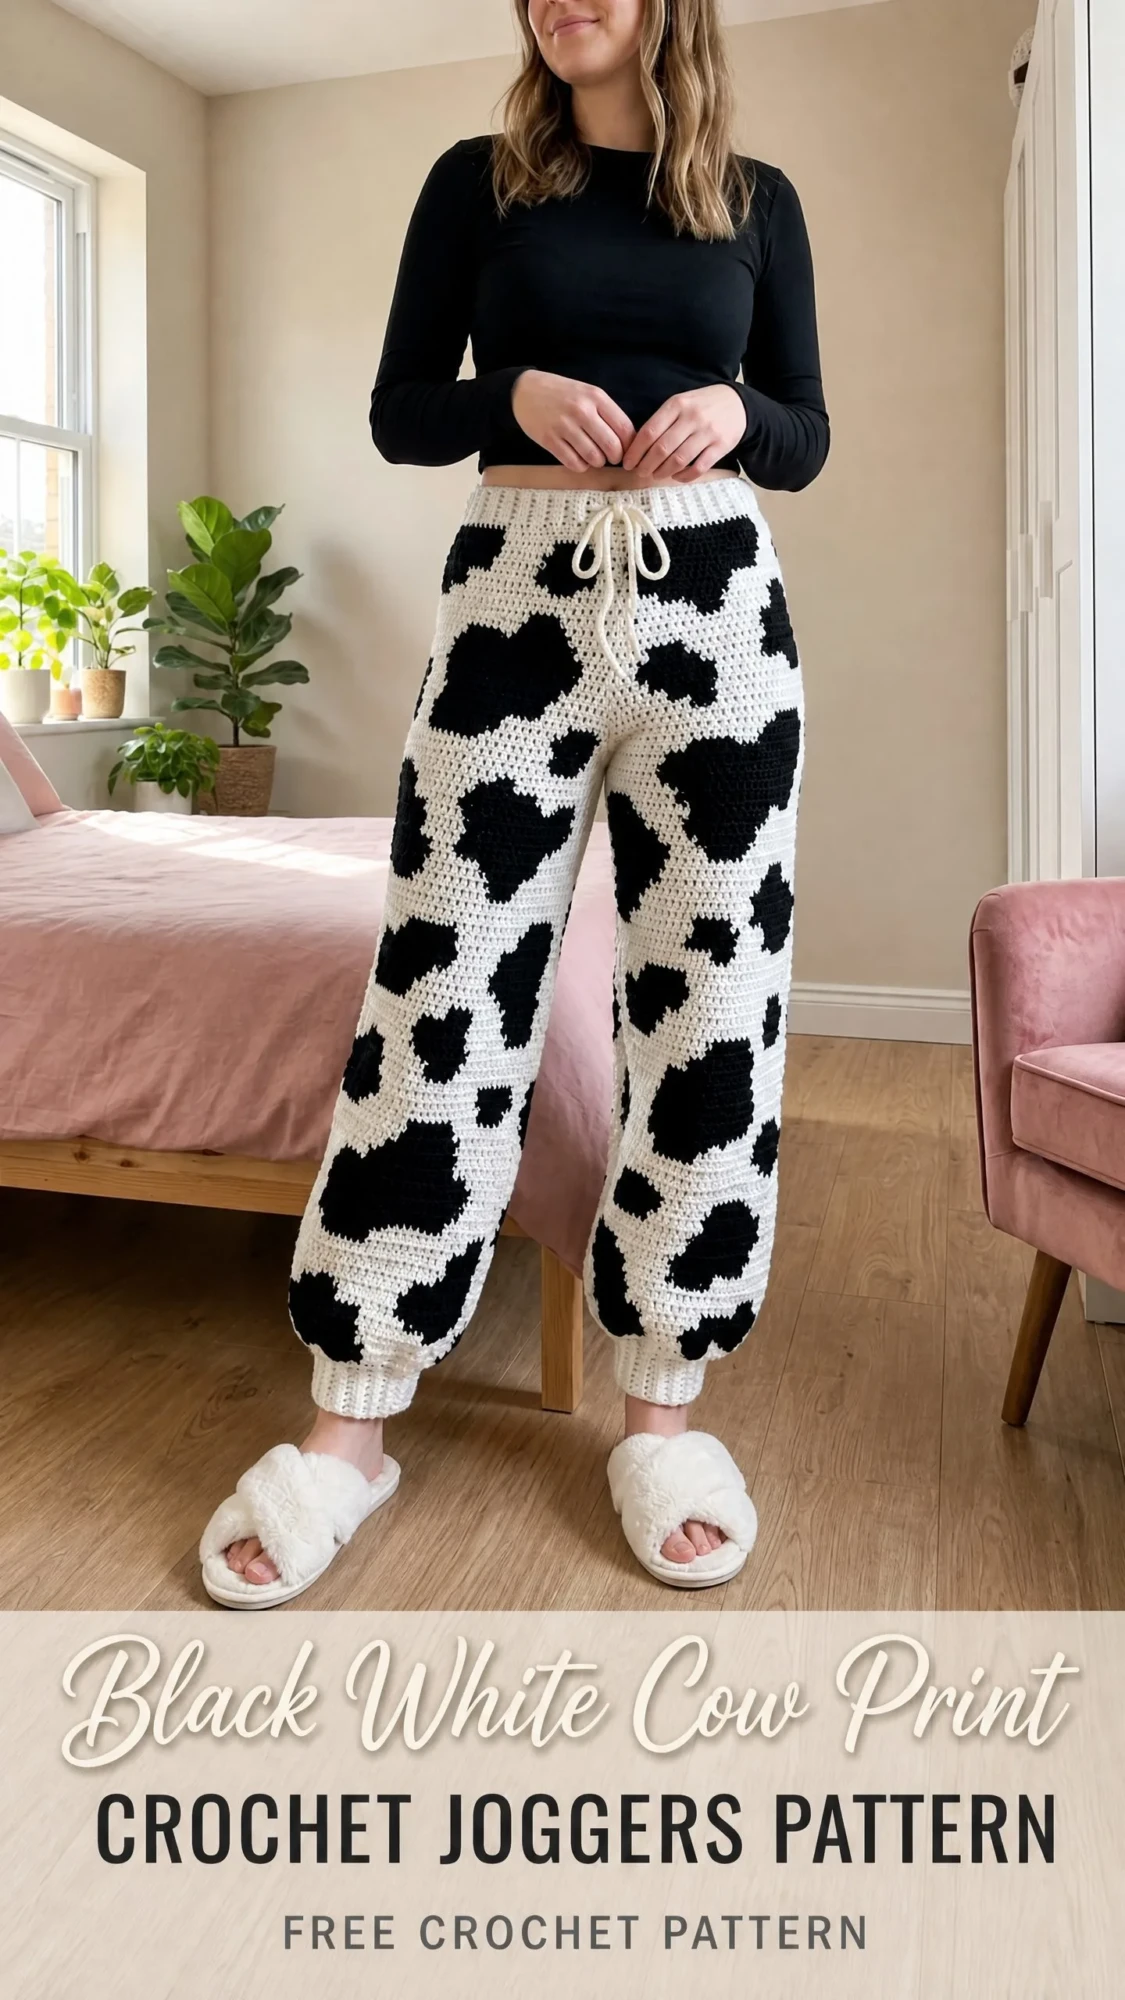
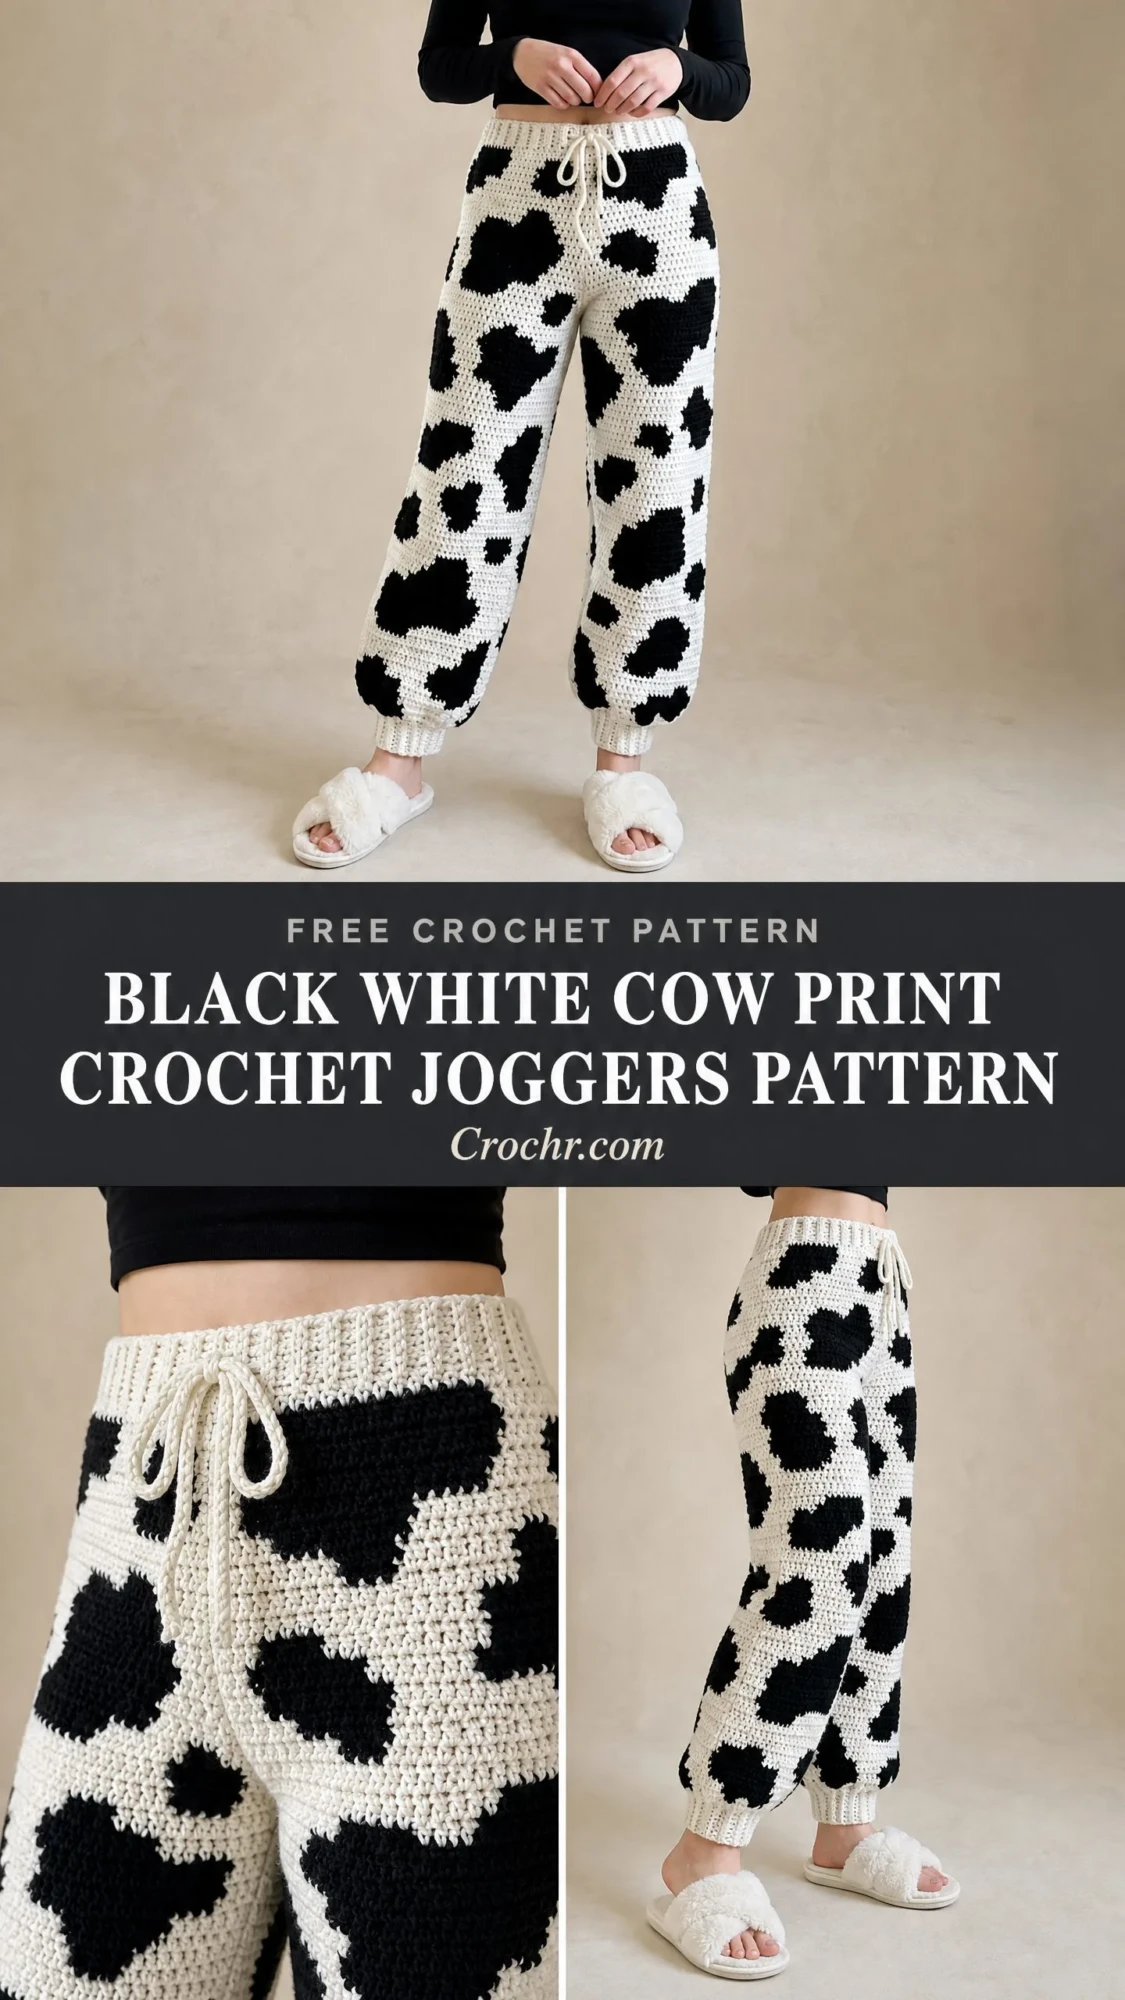
The result? I am SO pleased with how these turned out. The black and white spots pop beautifully against the cream background. The ribbed waistband and ankle cuffs give that authentic jogger look. And the drawstring closure means you get a customizable fit every single time.
If you have been wanting to try tapestry crochet but felt intimidated, these joggers are the perfect project to build your skills. The organic cow print pattern is forgiving by nature. Spots do not need to be perfect. They are supposed to look a little irregular. Let me walk you through everything you need to make your own pair.
Why You Will Love This Crochet Joggers Pattern
These are not your grandmother’s crochet pants. The wide leg silhouette with gathered ankle cuffs creates a trendy jogger shape that works for lounging at home or running quick errands. The tapestry crochet technique (where you carry both yarn colors across every row) creates a dense, opaque fabric with no see-through issues.
The cow print design looks complex but breaks down into simple shapes. You are just working single crochet (sc) stitches while switching between two colors. Each spot is an irregular blob that shifts slightly from row to row. This organic approach means small mistakes blend right in.
The construction is clever too. You make two flat leg panels, seam them into tubes, then join them at the crotch. The separate ribbed waistband adds structure and that classic jogger aesthetic. This method gives you full control over fit at every stage.
Skill Level
This crochet tutorial is rated intermediate to advanced. You should be comfortable with:
If you have never tried tapestry crochet before, I recommend practicing on a small swatch first. The motion of encasing the carried yarn becomes second nature after a few rows.
Time Estimate
Plan for approximately 25 to 40 hours of work depending on your speed and experience with colorwork. The tapestry sections move slower than plain single crochet because you are managing two strands. This is a wonderful project for cozy evenings over several weeks.
Finished Measurements
This pattern is written for Size Medium with customization tips included at the end.
Materials Needed
Yarn
You will need worsted weight yarn in two colors:
Recommended Yarn Options
Lion Brand Vanna’s Choice works beautifully for this project. It has excellent stitch definition and is machine washable. You will need approximately 9 skeins of Color A and 4 skeins of Color B.
Caron Simply Soft is another great choice if you want extra drape and softness. This yarn makes the joggers feel luxuriously cozy. You will need approximately 5 skeins of Color A and 2 skeins of Color B.
Avoid fuzzy or textured yarns as they will obscure your colorwork pattern. Look for smooth fibers with good stitch definition.
Hook
US Size J-10 / 6.0 mm crochet hook
Notions
Gauge
Getting gauge right is critical for a wearable garment. Please do not skip this step.
Tapestry single crochet gauge (governing gauge): 15 sc x 18 rows = 4 in / 10 cm
To check your gauge: Chain 24 stitches and work 22 rows in tapestry single crochet while carrying both colors. Block your swatch. Measure the center 15 stitches and center 18 rows. If your swatch is too big, try a smaller hook. If it is too small, go up a hook size.
Abbreviations and Stitch Definitions
Here are all the terms you will encounter in this step by step crochet pattern:
Special Techniques
Tapestry Single Crochet
This technique lets you work in one color while hiding the other color inside your stitches. Here is how it works:
1. Hold the non-working color yarn against the top of the row below
2. Insert your hook into the next stitch as normal
3. Lay the carried yarn over the top of the hook alongside the working yarn
4. Yarn over with the working color ONLY and pull through the stitch (two loops on hook)
5. Yarn over with the working color ONLY and pull through both loops
The carried yarn is now trapped inside the completed stitch. It stays hidden and creates a dense fabric.
Color Changes
When you need to switch colors:
1. Work to the last stitch before the color change
2. Insert hook, yarn over with current color, pull up a loop (two loops on hook)
3. Drop the current color to the back
4. Pick up the new color
5. Yarn over with the NEW color and pull through both loops
The old color becomes the carried color from this point forward.
Ribbing Stitch (BLO sc)
Working single crochet in the back loop only creates stretchy ribbed fabric perfect for waistbands and cuffs. Simply insert your hook under only the back loop of each stitch instead of both loops.
Cow Print Spot Placement Guide
The beauty of cow print is its irregularity. Here is a placement guide for one leg panel. Feel free to adjust spot positions to make each leg unique.
Spot 1: Begin at Row 6. Work CB in stitches 8 through 16 for Rows 6 and 7. On Row 8, work CB in stitches 7 through 15.
Spot 2: Begin at Row 6. Work CB in stitches 30 through 38 for Rows 6 through 8. On Row 9, work CB in stitches 31 through 37.
Spot 3: Begin at Row 14. Work CB in stitches 4 through 9 for Rows 14 through 16. On Row 17, work CB in stitches 5 through 10. On Row 18, work CB in stitches 5 through 9.
Spot 4: Begin at Row 14. Work CB in stitches 22 through 32 for Rows 14 through 17. On Row 18, work CB in stitches 23 through 31. On Row 19, work CB in stitches 24 through 30.
Spot 5: Begin at Row 22. Work CB in stitches 12 through 20 for Rows 22 through 25. On Row 26, work CB in stitches 13 through 19.
Spot 6: Begin at Row 22. Work CB in stitches 34 through 42 for Rows 22 through 24. On Row 25, work CB in stitches 35 through 41.
Continue adding spots following this organic approach throughout the leg panels. Spots range from 3 to 12 stitches wide and 2 to 8 rows tall.
Step by Step Instructions
Section 1: Leg Panel (Make 2)
Each leg panel is worked flat from the ankle upward, gradually widening toward the hip.
Foundation: Using CA and J-10 hook, chain 48.
Row 1 (RS): Sc in 2nd ch from hook and in each ch across. Turn. (47 sc)
Rows 2 through 5: Ch 1, sc in each st across. Turn. (47 sc each row)
Begin carrying CB from Row 6 forward, following the Cow Print Spot Guide.
Rows 6 through 10: Ch 1, work tapestry sc across following spot guide. Turn. (47 sc each row)
Row 11: Ch 1, inc in first st, tapestry sc across to last st, inc in last st. Turn. (49 sc)
Rows 12 through 20: Ch 1, tapestry sc across. Turn. (49 sc each row)
Row 21: Ch 1, inc in first st, tapestry sc across to last st, inc in last st. Turn. (51 sc)
Rows 22 through 30: Ch 1, tapestry sc across. Turn. (51 sc each row)
Row 31: Ch 1, inc in first st, tapestry sc across to last st, inc in last st. Turn. (53 sc)
Rows 32 through 40: Ch 1, tapestry sc across. Turn. (53 sc each row)
Row 41: Ch 1, inc in first st, tapestry sc across to last st, inc in last st. Turn. (55 sc)
Rows 42 through 50: Ch 1, tapestry sc across. Turn. (55 sc each row)
Row 51: Ch 1, inc in first st, tapestry sc across to last st, inc in last st. Turn. (57 sc)
Rows 52 through 55: Ch 1, tapestry sc across. Turn. (57 sc each row)
CHECKPOINT: Your panel should measure approximately 12 in / 30.5 cm tall and 12.5 in / 32 cm wide.
Row 56: Ch 1, inc in first st, tapestry sc across to last st, inc in last st. Turn. (59 sc)
Rows 57 through 62: Ch 1, tapestry sc across. Turn. (59 sc each row)
Row 63: Ch 1, inc in first st, tapestry sc across to last st, inc in last st. Turn. (61 sc)
Rows 64 through 70: Ch 1, tapestry sc across. Turn. (61 sc each row)
Row 71: Ch 1, inc in first st, tapestry sc across to last st, inc in last st. Turn. (63 sc)
Rows 72 through 80: Ch 1, tapestry sc across. Turn. (63 sc each row)
Row 81: Ch 1, inc in first st, tapestry sc across to last st, inc in last st. Turn. (65 sc)
Rows 82 through 90: Ch 1, tapestry sc across. Turn. (65 sc each row)
Row 91: Ch 1, inc in first st, tapestry sc across to last st, inc in last st. Turn. (67 sc)
Rows 92 through 110: Ch 1, tapestry sc across. Turn. (67 sc each row)
Do not fasten off. Continue to crotch shaping.
Section 2: Crotch Shaping
Row 111: Ch 1, tapestry sc across all 67 sts. At end of row, chain 5 additional chains. Turn.
Row 112: Sc in 2nd ch from hook and in each of the next 3 ch (4 new sts added), tapestry sc across remaining 67 sts. Turn. (71 sc)
Row 113: Ch 1, tapestry sc across all 71 sts. At end of row, chain 4 additional chains. Turn.
Row 114: Sc in 2nd ch from hook and in each of next 2 ch (3 new sts added), tapestry sc across remaining 71 sts. Turn. (74 sc)
Row 115: Ch 1, tapestry sc across all 74 sts. At end of row, chain 3 additional chains. Turn.
Row 116: Sc in 2nd ch from hook and in each of next 1 ch (2 new sts added), tapestry sc across remaining 74 sts. Turn. (76 sc)
Rows 117 through 120: Ch 1, tapestry sc across. Turn. (76 sc each row)
Fasten off, leaving a 24 in / 61 cm tail for seaming. Make a second leg panel, mirroring spot placement.
Section 3: Seaming the Legs
Fold each leg panel in half lengthwise with RS facing out. Using CA and a tapestry needle, whipstitch or mattress stitch along the outseam (straight edge) from ankle to waist. Then seam the inseam from ankle to where the crotch extension begins. You now have two fabric tubes.
Section 4: Joining the Crotch
Turn one leg tube right side out. Leave the second leg wrong side out. Insert the right-side-out leg inside the wrong-side-out leg so RS surfaces face each other. Align the inseam seams at the center bottom of the crotch. Whipstitch the crotch seam from front waist edge to back waist edge. Pull both legs right-side-out.
Section 5: Waistband
Using CA only and J-10 hook, chain 14.
Waistband Row 1: Sc in 2nd ch from hook and in each ch across. Turn. (13 sc)
Waistband Row 2: Ch 1, sc in BLO of each st across. Turn. (13 sc)
Repeat Waistband Row 2 until the strip measures 40 in / 102 cm long. Join the short ends with a slip stitch seam to form a ring. Create two small drawstring eyelets at center front using whipstitches to reinforce gaps between stitches. Attach the waistband to the pants waist opening, aligning the waistband seam at center back.
Section 6: Ankle Cuffs
Join CA at the ankle outseam. Working across the bottom edge of the ankle opening, evenly sc 63 sts across the full circumference. Turn.
Cuff Rows 1 through 12: Ch 1, sc in BLO of each st across. Turn. (63 sc each row)
Fasten off leaving a long tail. Seam the cuff ends together. Repeat for the second ankle.
Section 7: Drawstring
Cut 60 in / 152 cm of cream cotton cord. Thread through the waistband channel using a tapestry needle or safety pin. Both ends should exit from the front center eyelets. Knot each end.
Finishing Your Cow Print Crochet Joggers
Weave in all ends securely, running each tail through at least 4 direction changes. Check and reinforce any gaps at the crotch or ankle seams.
Blocking: Wet block your finished joggers for best results. Soak in cool water for 20 minutes, gently squeeze out excess water, roll in a towel, then lay flat to dry. Shape to finished measurements and pin the cuffs and waistband. Allow 24 to 48 hours to dry completely.
Size Customization Tips
Smaller waist: Reduce the foundation chain to 42 stitches and adjust increases proportionally.
Larger waist: Increase the foundation chain to 54 stitches.
Shorter length: Remove rows from the lower leg section (Rows 6 through 55).
Longer length: Add rows to the lower leg section.
Care Instructions
Machine wash cold on a gentle cycle inside a mesh laundry bag. Reshape and lay flat to dry. Do not tumble dry as heat may distort the colorwork.
I hope you love making these cozy cow print joggers as much as I loved designing them. They make an incredible statement piece for your loungewear collection and a wonderful conversation starter. The tapestry technique gets easier with every row, I promise.
If you make these joggers, I would absolutely love to see them. Save this pattern to your Pinterest boards so you can find it when you are ready to start, and please leave a comment below to share your finished project or ask any questions. Happy crocheting!
You Might Also Like
- Charcoal Gray Modern Crochet Lace Boots Free Pattern
- Coral Hibiscus Tropical Backpack Free Pattern
- Sunset Ombre Granny Square Bag Free Crochet Pattern
- Mint Green Spring Highland Cow Amigurumi Free Crochet Pattern
