
This structured tote bag is built from classic granny squares joined into a grid pattern. Each square takes about five rounds to complete. The finished bag features a boxy silhouette with leather handles and brass hardware.
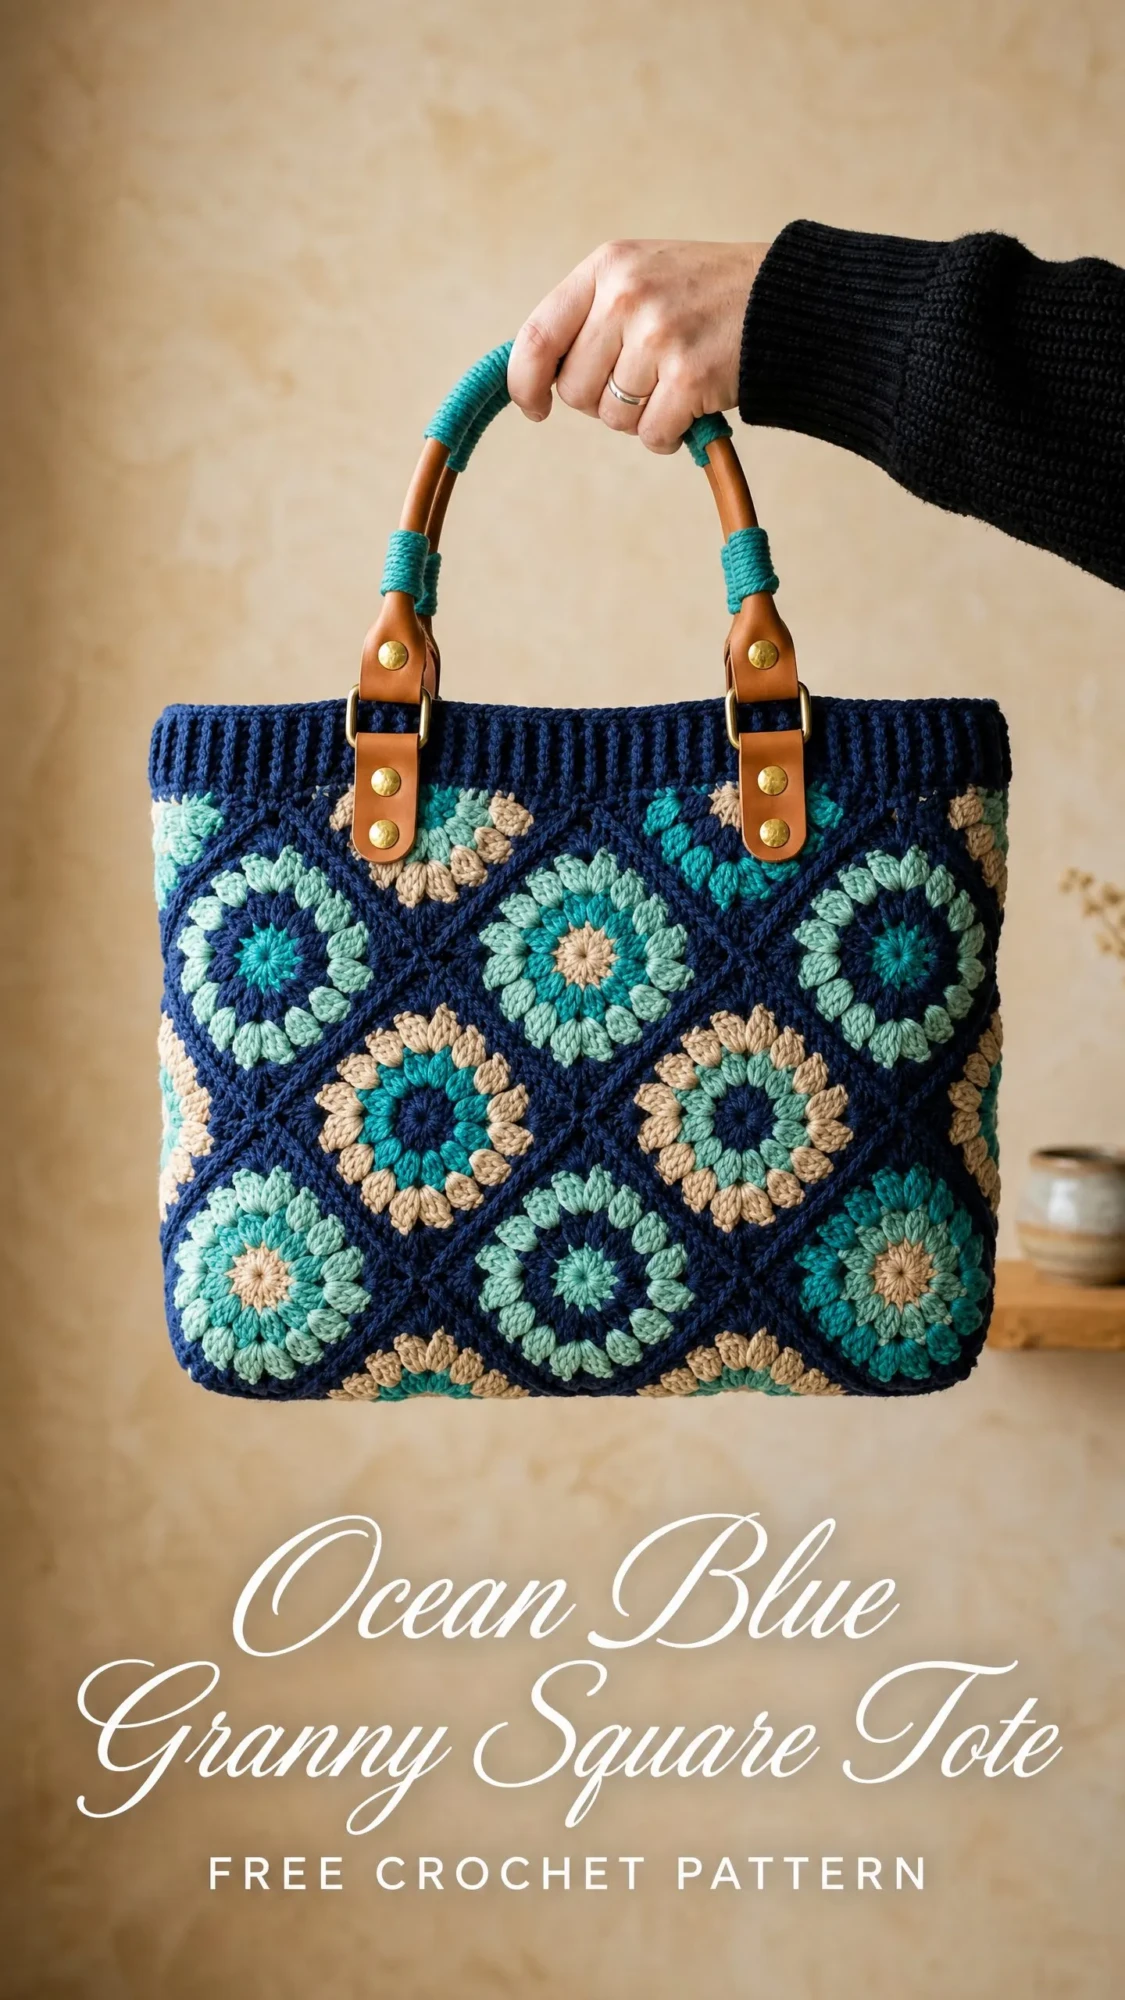
You will work in the round, change colors cleanly, and attach hardware to finish. The construction is straightforward once you understand the join-as-you-go technique. If you can make a basic granny square, you can absolutely make this bag.
The colorwork uses four yarn colors in a rotating arrangement that creates visual rhythm across the bag face. Navy borders every square, giving you that striking diagonal diamond effect you see in the photos.
Why This Granny Square Tote Works So Well
I love how this bag brings together vintage technique and modern style. The granny square is probably the most recognizable crochet motif out there, and when you set them in a grid with contrasting navy borders, something special happens. The circular motifs inside each square create an almost optical illusion of diamonds.
The structure comes from using cotton yarn and boxing the corners at the bottom. No fancy interfacing required. The leather handles with brass rivets give it a polished, professional finish that looks like something you would find in a boutique.
This is an intermediate level project. You should be comfortable working in the round and changing colors without leaving gaps. The join-as-you-go method might be new to you, but I will walk you through it step by step.
Materials You Will Need
Yarn (Worsted Weight, Category 4):
Total approximate yardage: 860 yards (787 m)
I recommend 100% cotton or a cotton blend for structure and durability. Some excellent options include Lion Brand 24/7 Cotton, Paintbox Yarns Simply DK held double, or WeCrochet Dishie. Avoid acrylic for this project as it will not hold the bag’s shape as well.
Hook: US size H/8 (5.0 mm)
Notions:
Finished Measurements
Each finished and joined square measures 3.25 inches by 3.25 inches (8.25 cm by 8.25 cm) after blocking.
Gauge
One completed granny square through Round 5 measures 3.25 inches by 3.25 inches (8.25 cm by 8.25 cm), blocked.
In standard double crochet (dc): 14 dc and 8 rows equals 4 inches (10 cm) with US size H/8 (5.0 mm) hook and worsted weight cotton.
Gauge is critical for this project. If your square measures smaller than 3.25 inches, go up a hook size. If it measures larger, go down a hook size. The bag dimensions depend directly on each individual square.
Abbreviations
Special Stitches
Granny Cluster (3-dc cluster):
Yarn over, insert hook into indicated chain space, yarn over and pull up a loop, yarn over and draw through 2 loops on hook. You now have 2 loops remaining. Yarn over, insert hook into the same chain space, yarn over and pull up a loop, yarn over and draw through 2 loops on hook. You now have 3 loops remaining. Yarn over, insert hook into the same chain space, yarn over and pull up a loop, yarn over and draw through 2 loops on hook. You now have 4 loops remaining. Yarn over and draw through all 4 loops on hook. One granny cluster complete.
Join-as-you-go Side Join:
When the pattern instructs to join to an adjacent completed square, replace the ch 2 at a corner or the ch 1 between clusters with a sl st join worked into the corresponding ch-sp of the neighboring square. Work ch 1, sl st into the corresponding ch-sp of the adjacent square, ch 1 at corners. This creates a flat seam visible on the wrong side and a clean line on the right side.
Ribbing Row (worked flat):
Ch 1, sc in BLO of each st across, turn. This creates the stretchy ribbing band along the top of the bag.
Understanding the Colorway System
This bag uses two colorway arrangements distributed across 30 total squares in a checkerboard pattern.
Colorway 1 (make 15 squares):
Colorway 2 (make 15 squares):
Color A, the navy, is always the final border round of every square. This creates the dominant navy grid visible in the finished bag.
Granny Square Instructions
Each square is worked in continuous rounds with a standing stitch or chain 3 start at each new color round. Join each round with a slip stitch to the top of the starting ch-3 unless otherwise noted. All rounds are worked on the right side.
Round 1 (with first color of chosen colorway):
Make a magic ring, or ch 4 and join with sl st to form a ring.
Ch 3 (counts as first dc here and throughout), work 2 dc into ring, ch 2. Work 3 dc into ring, ch 2 3 times. Join with sl st to top of beginning ch-3. Fasten off.
(4 clusters of 3 dc, 4 ch-2 corner spaces) (12 dc, 4 ch-2 sps)
Round 2 (with second color of chosen colorway):
Join yarn with sl st into any ch-2 corner sp.
Ch 3, work 2 dc into same sp, ch 2, work 3 dc into same sp. This creates the first corner.
Ch 1.
Work 3 dc, ch 2, 3 dc into next ch-2 corner sp, ch 1.
Rep from to 2 more times.
Join with sl st to top of beginning ch-3. Fasten off.
(8 clusters of 3 dc, 4 ch-2 corner sps, 4 ch-1 sps) (24 dc, 4 ch-2 sps, 4 ch-1 sps)
Round 3 (with third color of chosen colorway):
Join yarn with sl st into any ch-2 corner sp.
Ch 3, work 2 dc into same sp, ch 2, work 3 dc into same sp.
Ch 1, work 3 dc into next ch-1 sp, ch 1.
Work 3 dc, ch 2, 3 dc into next ch-2 corner sp, ch 1, work 3 dc into next ch-1 sp, ch 1.
Rep from to 2 more times.
Join with sl st to top of beginning ch-3. Fasten off.
(12 clusters of 3 dc, 4 ch-2 corner sps, 8 ch-1 sps) (36 dc, 4 ch-2 sps, 8 ch-1 sps)
Round 4 (with fourth color of chosen colorway):
Join yarn with sl st into any ch-2 corner sp.
Ch 3, work 2 dc into same sp, ch 2, work 3 dc into same sp.
Ch 1, work 3 dc into next ch-1 sp twice, ch 1.
Work 3 dc, ch 2, 3 dc into next ch-2 corner sp, ch 1, work 3 dc into next ch-1 sp twice, ch 1.
Rep from to 2 more times.
Join with sl st to top of beginning ch-3. Fasten off.
(16 clusters of 3 dc, 4 ch-2 corner sps, 12 ch-1 sps) (48 dc, 4 ch-2 sps, 12 ch-1 sps)
Round 5 (Color A, navy, joining round):
This round adds one more cluster per side, completing the square border. If working a standalone square, work as written. If joining to an adjacent square, use the join-as-you-go method at each shared edge.
Join Color A with sl st into any ch-2 corner sp.
Ch 3, work 2 dc into same sp, ch 2, work 3 dc into same sp.
Ch 1, work 3 dc into next ch-1 sp 3 times, ch 1.
Work 3 dc, ch 2, 3 dc into next ch-2 corner sp, ch 1, work 3 dc into next ch-1 sp 3 times, ch 1.
Rep from to 2 more times.
Join with sl st to top of beginning ch-3. Fasten off.
(20 clusters of 3 dc, 4 ch-2 corner sps, 16 ch-1 sps) (60 dc, 4 ch-2 sps, 16 ch-1 sps)
Finished square measures 3.25 inches by 3.25 inches (8.25 cm by 8.25 cm) after a light blocking.
Joining the Squares into Panels
You will need 30 squares total:
Arrange squares in a checkerboard pattern for each panel:
Front and Back Panels (each 4 squares wide, 3 squares tall):
Left and Right Gusset Panels (each 1 square wide, 3 squares tall):
Join squares using the join-as-you-go method on Round 5, or sew together with Color A using a whip stitch through both loops on the wrong side if all squares were completed before joining.
To join using whip stitch: hold two squares with wrong sides together. Thread yarn needle with Color A. Working through the outermost loops of corresponding stitches on both squares, whip stitch across the shared edge.
Checkpoint: The front panel should measure 13 inches wide by 9.75 inches tall (33 cm by 24.75 cm). The gusset panel should measure 3.25 inches wide by 9.75 inches tall (8.25 cm by 24.75 cm).
Assembling the Bag Body
Step 1: Join front panel to left gusset panel along their shared vertical edge, working from top to bottom with Color A and whip stitch or sl st seam on the wrong side.
Step 2: Join the right gusset panel to the right edge of the front panel in the same manner.
Step 3: Join the back panel to the free edge of the left gusset and the free edge of the right gusset.
You now have a tube open at the top and bottom.
Step 4: Seam the bottom edge. With wrong sides facing out, whip stitch or sl st the bottom edge of the front panel to the bottom edge of the back panel.
Step 5: Create box corners. Push each bottom corner of the bag flat so the side seam aligns with the bottom seam, creating a triangular flap at each corner. The triangle should measure approximately 2 inches (5 cm) from tip to fold line. Stitch across the base of each triangle with Color A and a yarn needle to secure. Fold the triangle flat against the bottom of the bag and tack in place.
Turn the bag right side out.
Ribbing Band
The ribbing band is worked as a flat strip and seamed into a tube. The top opening circumference is approximately 36 inches (91.5 cm).
With Color A and US size H/8 (5.0 mm) hook, chain 13.
Row 1: Sc in second ch from hook and in each ch across. Turn. (12 sc)
Row 2: Ch 1, sc in BLO of each sc across. Turn. (12 sc)
Repeat Row 2 until the strip measures 36 inches (91.5 cm) long, approximately 100 rows.
Fold into a ring and sl st the short ends together to form a tube.
Pin the ribbing band to the top edge of the bag body, matching seams at corners. Whip stitch the bottom edge of the ribbing to the top edge of the bag body. Fold the ribbing band down over the outside of the bag approximately 1.5 inches (4 cm) to create a reinforced attachment zone.
Handle Attachment
Position leather strap hardware sets 3.5 inches (9 cm) from the center of the front panel, measuring outward in each direction. The two straps should be 7 inches apart, center to center. Repeat on the back panel.
Push rivet posts through the crochet fabric and leather tabs together, passing through both the ribbing band and the outer layer of the bag body. Set rivet caps on the interior side and press or hammer to secure.
Wrap the junction where handle meets strap tab with teal macrame cord, winding tightly for approximately 1.5 inches (4 cm). Secure cord ends by threading them under the wrapped section.
Finishing and Care
Weave in all remaining ends securely. Cotton yarn does not grip as firmly as wool, so weave in at least 1 inch (2.5 cm) in each direction.
Wet block the assembled bag by filling it with plastic bags or towels to hold its shape. Allow to dry completely, which takes 24 to 48 hours for cotton.
For the optional bag base insert, cut plastic canvas or stiff cardboard to 13.5 by 3.5 inches (34.25 by 9 cm).
Machine wash on a gentle cycle in cold water using a mesh laundry bag. Lay flat to dry. Do not put in the dryer. If leather handles get wet, allow them to air dry and condition afterward.
Time Estimate
Plan for 12 to 18 hours total: approximately 3 to 4 hours for motif construction, 2 hours for joining, 2 hours for the ribbing band, 1 hour for assembly and seaming, and 2 to 3 hours for hardware attachment and finishing. This is a perfect project to work on over a few weekends.

You Did It!
Thank you so much for making this granny square tote with me. I hope you love the finished bag as much as I do. There is something deeply satisfying about turning simple squares into a structured, functional piece you will actually use every day.
If you make this tote, I would absolutely love to see it! Tag me on Instagram or share a photo in my Facebook group. Seeing your finished projects is honestly the best part of sharing patterns.
Save this pattern to your Pinterest boards so you can find it whenever you are ready to start. And if you have any questions along the way, drop a comment below. I am always happy to help!
You Might Also Like
- Navy Blue Open Weave Crochet Shrug Free Pattern
- Black White Cow Print Crochet Joggers Pattern
- Sparkle Galaxy Snake Amigurumi Free Crochet Pattern
- Ocean Blue Seashell Motif Tote Free Crochet Pattern
