
I’ve been looking for the perfect bucket bag pattern for ages. Something feminine but practical, structured but soft, with that handmade charm that makes people stop and ask where you got it. This dusty rose romantic bucket bag is exactly what I wanted, and I’m thrilled to share it with you today.
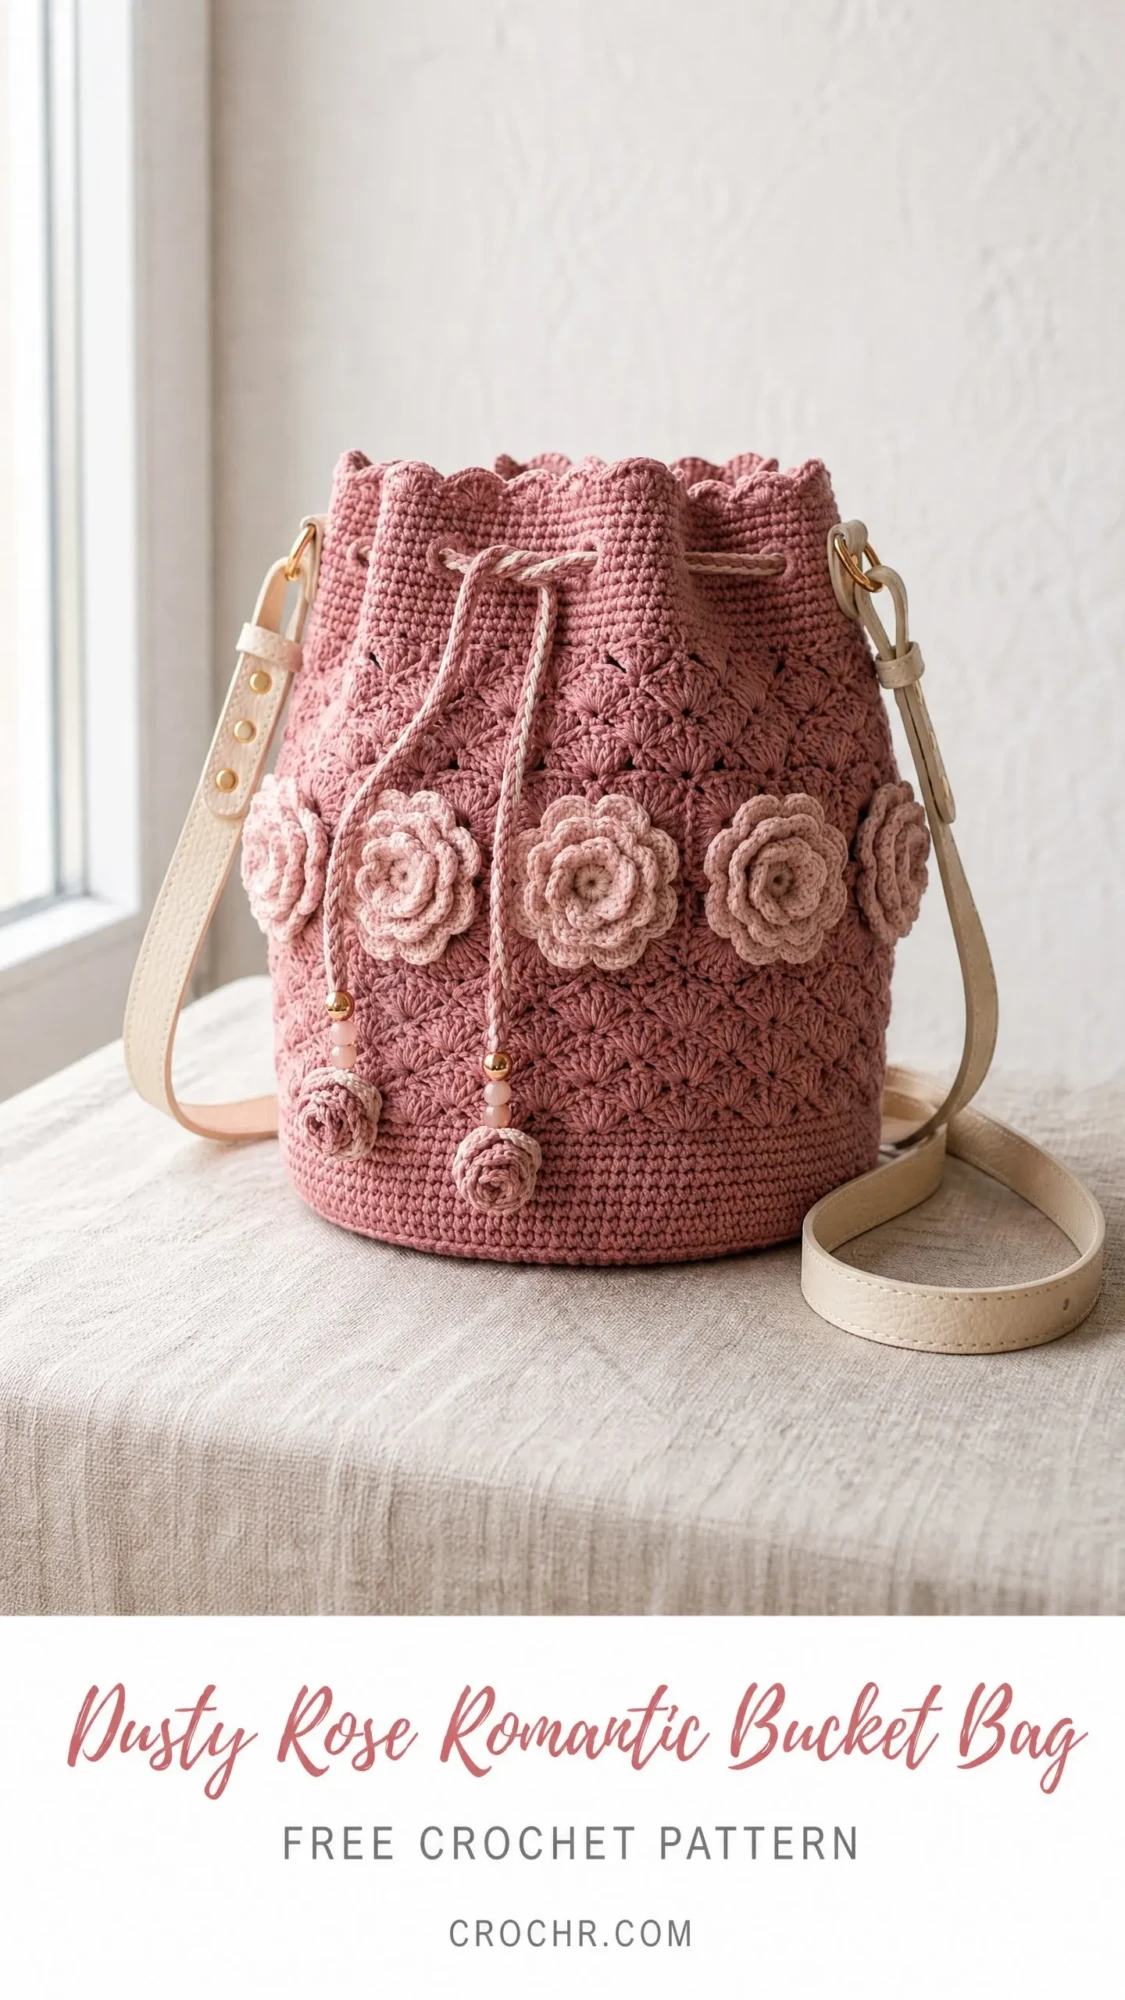
The combination of textured shell stitches, delicate three-dimensional roses, and that gorgeous blush pink colorway creates a bag that looks far more complicated than it actually is. Yes, there are multiple techniques involved. But if you’ve crocheted in the round before and you’re ready for a satisfying challenge, you can absolutely make this.
Let me walk you through everything you need to know to create this stunning accessory from start to finish.
What Makes This Bucket Bag Special
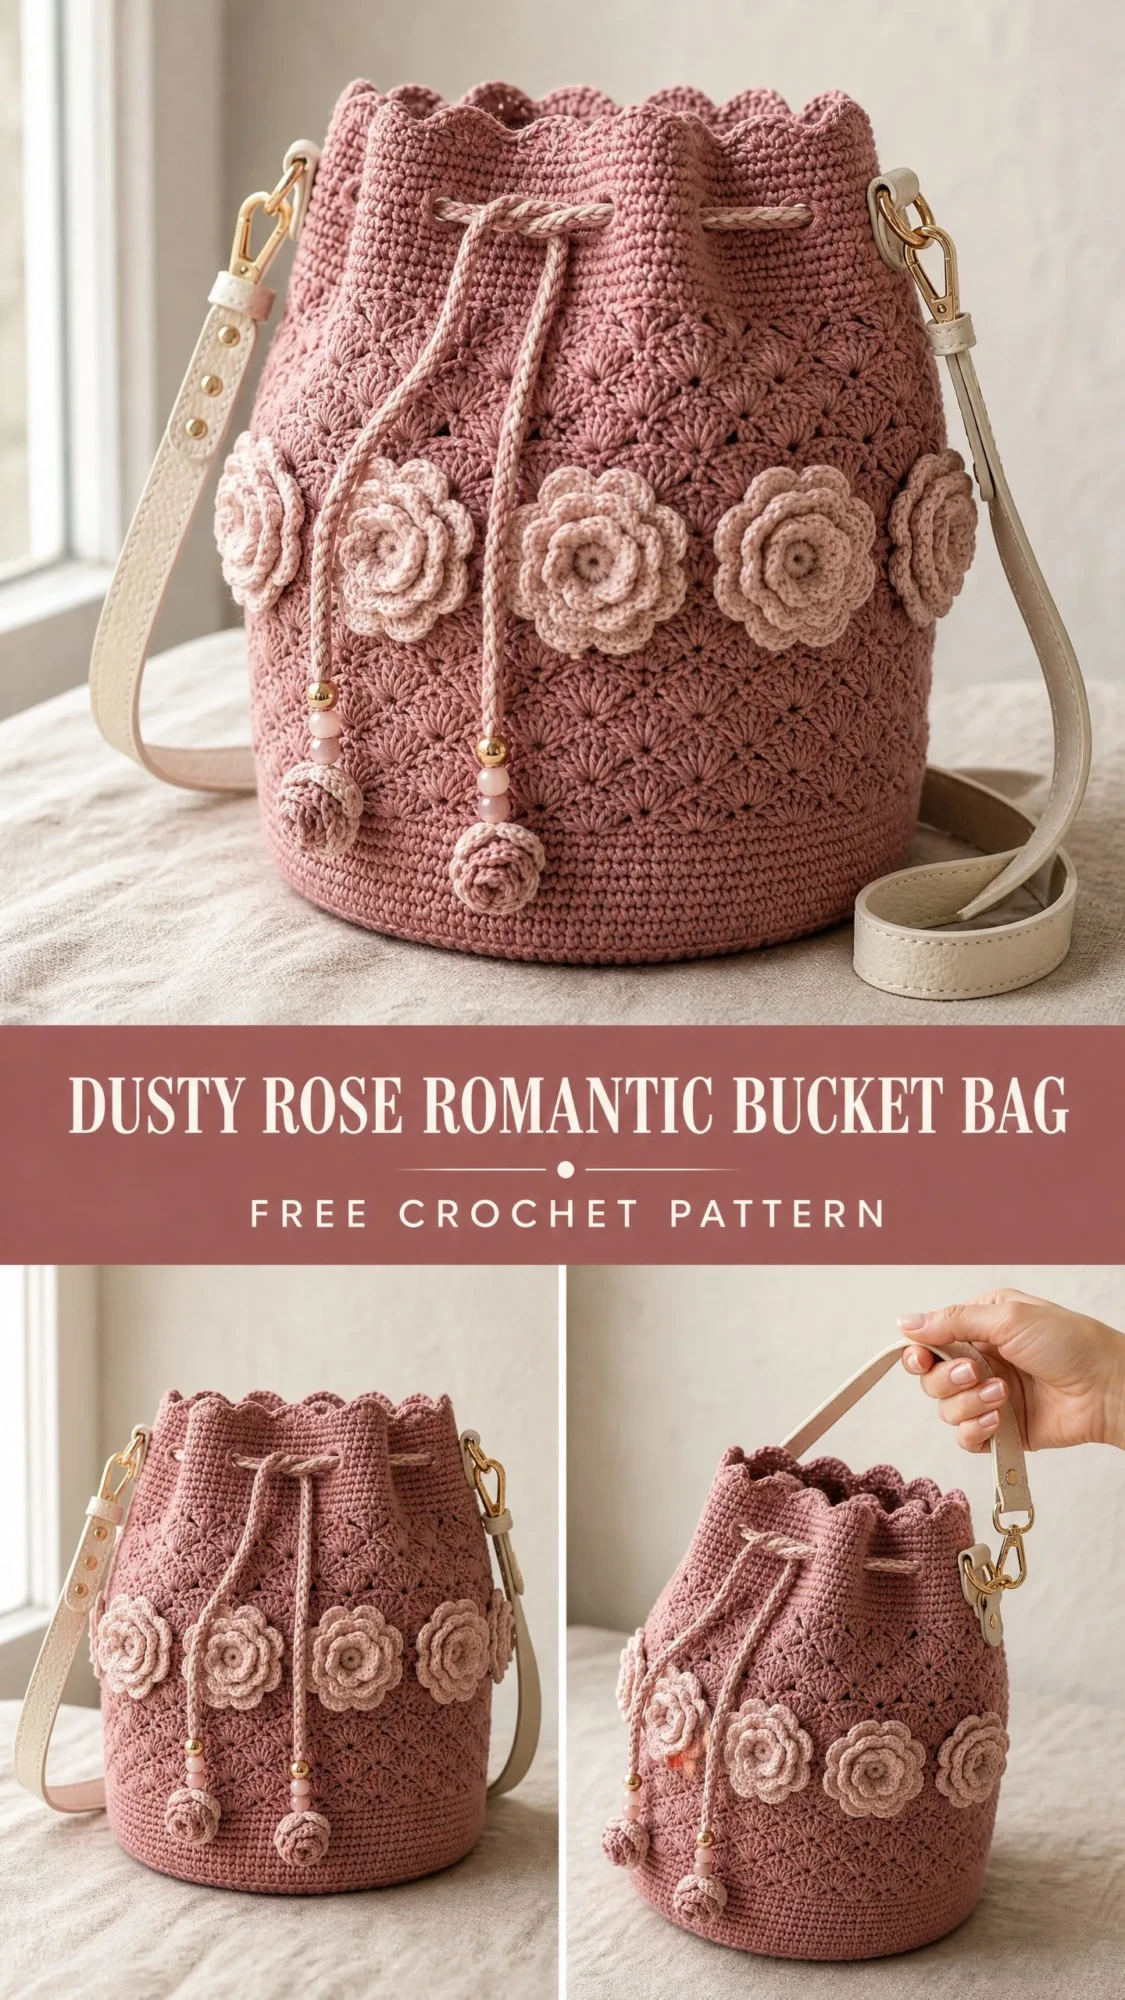
This isn’t your average crocheted tote. The cylindrical body features a beautiful shell-fan stitch pattern that creates an almost lace-like texture across the entire surface. Seven handmade crochet roses adorn the exterior, arranged in a romantic band around the middle. A scalloped picot edge finishes the top opening with delicate detail.
The practical elements are just as thoughtful. A twisted drawstring closure with beaded ends keeps your belongings secure. A cream vegan leather adjustable strap with gold hardware gives the bag a polished, boutique-quality look. And a fabric lining inside provides structure and prevents stretching over time.
Finished dimensions come out to 8.5 inches tall, 22 inches around, and 7 inches across the base. That’s the perfect size for daily essentials without being bulky.
Skill Level and Time Commitment
I’ll be honest with you. This pattern falls into the intermediate to advanced category. You’ll need experience working in the round, comfort with stitch counts that need to divide evenly, and patience for working three-dimensional embellishments.
If you’ve never crocheted a bag before, this might not be your first project. But if you’ve made amigurumi, worked textured stitches, or constructed anything with shaping, you have the skills to tackle this.
Plan for 20 to 30 hours of crochet time for the bag body, roses, and edging. Add another 2 to 4 hours if you’re hand-sewing your own lining. This is a project to work on over several evenings or a cozy weekend retreat.
Materials You’ll Need
Yarn
Main Color (MC): Dusty rose or antique pink, approximately 400 yards of worsted weight (Category 4) cotton or cotton-blend yarn
Contrast Color (CC): Light blush pink, approximately 80 yards of the same weight for the roses and drawstring cord
My yarn recommendations:
Stick with smooth, tightly-spun cotton. Avoid fuzzy yarns like mohair blends because they’ll obscure that gorgeous shell texture.
Hooks
Notions
Gauge
Getting gauge right matters tremendously for bag construction. Your gauge determines whether the base lies flat and whether the body circumference matches the finished size.
18 single crochet stitches x 20 rows = 4 inches, worked in the round in single crochet with your G/6 hook, after blocking.
Shell-fan stitch gauge: 1 complete repeat (6 stitches wide) = approximately 1.33 inches; 3 rows = approximately 1 inch.
If you’re off by even one stitch per 4 inches, your finished circumference will differ by more than an inch. Take time to swatch.
Abbreviations
Let me define every abbreviation you’ll encounter:
Special Stitches Explained
Shell-Fan Stitch
This creates the beautiful textured diamond pattern on the body. It works over a multiple of 6 stitches.
Shell-Fan Round A: Skip 2 stitches, work 5 double crochet all into the next stitch (this is one shell), skip 2 stitches, single crochet in the next stitch. Repeat around. Each repeat uses 6 stitches.
Shell-Fan Round B (offset round): Chain 3 (counts as first dc), work 2 dc in the same stitch (half-shell), then single crochet in the center (3rd) dc of the next shell below, work 5 dc in the next sc anchor. Continue around, ending with 2 dc in the same stitch as the beginning chain to complete the split shell. Join with slip stitch to the top of the beginning chain 3.
These two rounds alternate to create the staggered fan texture you see in the finished bag.
3D Crochet Rose
Each rose is worked flat as a strip of increasing petals, then rolled and stitched into a dimensional bloom.
Foundation: Using CC, chain 26.
Row 1: Starting in the 2nd chain from hook, work (sc, hdc) in first chain, (hdc, dc, hdc) in next chain, then (hdc, dc, dc, hdc) in each of the next 5 chains, (hdc, dc, hdc) in next chain, (hdc, sc) in next chain. Continue with larger petals: (dc, tr, tr, dc) in each of the next 4 chains, (dc, tr, dc) in next chain, sc in the last chain. Fasten off, leaving a 12-inch tail.
Assembly: Starting at the small-petal end, roll the strip tightly to form the center. Continue rolling more loosely as the petals get larger. Use the tail to stitch through the base several times to secure the spiral. Your finished rose should measure about 1.75 to 2 inches in diameter.
Small Rosebud (for drawstring ends)
Using CC, chain 14. Work Row 1 as: (sc, hdc, dc) in first chain, (dc, hdc, sc) in next chain, (hdc, dc, dc, hdc) in each of the next 3 chains, (dc, hdc) in next chain, sc in last chain. Roll tightly and stitch to secure. Each rosebud measures about 0.75 inch.
Scallop Picot Edging
Slip stitch in the next 2 stitches, chain 3, slip stitch back into the first chain of that chain 3 (picot made), slip stitch in the same stitch as the last slip stitch before the picot. Repeat around.
Pattern Instructions
The Base
Work in continuous rounds with MC. Place a stitch marker at the beginning of each round and move it up as you work. Do not join unless instructed.
Rnd 1: MR, work 6 sc into ring, pull ring closed. (6 sc)
Rnd 2: 2 sc in each st around. (12 sc)
Rnd 3: 2 sc in next st, sc in next st; rep from around. (18 sc)
Rnd 4: 2 sc in next st, sc in next 2 sts; rep from around. (24 sc)
Rnd 5: 2 sc in next st, sc in next 3 sts; rep from around. (30 sc)
Rnd 6: 2 sc in next st, sc in next 4 sts; rep from around. (36 sc)
Rnd 7: 2 sc in next st, sc in next 5 sts; rep from around. (42 sc)
Rnd 8: 2 sc in next st, sc in next 6 sts; rep from around. (48 sc)
Rnd 9: 2 sc in next st, sc in next 7 sts; rep from around. (54 sc)
Rnd 10: 2 sc in next st, sc in next 8 sts; rep from around. (60 sc)
Rnd 11: 2 sc in next st, sc in next 9 sts; rep from around. (66 sc)
Rnd 12: 2 sc in next st, sc in next 10 sts; rep from around. (72 sc)
Checkpoint: Your base should measure approximately 5 inches in diameter and lie perfectly flat. If it cups upward, your tension is too tight. If it ruffles, your tension is too loose.
Rnd 13: 2 sc in next st, sc in next 11 sts; rep from around. (78 sc)
Rnd 14: 2 sc in next st, sc in next 12 sts; rep from around. (84 sc)
Important: 84 is divisible by 6, which is essential for the shell-fan stitch. Count carefully before continuing. Your base should now measure approximately 6.75 to 7 inches in diameter.
Body: Lower Single Crochet Section
Rnd 15: Working in BLO only, sc in each st around. (84 sc)
This creates a visible fold line where the base meets the sides.
Rnds 16-18: Working in both loops, sc in each st around. (84 sc each round)
Checkpoint: The straight body should measure approximately 0.75 inch above the base fold line.
Body: Shell-Fan Stitch Section
Rnd 19 (Setup): Sc in each st around. (84 sc)
Rnd 20 (Shell-Fan A): Sk 2 sts, 5 dc in next st, sk 2 sts, sc in next st; rep from 13 more times. Join with sl st to first sc. (14 shells, 14 sc anchors)
Rnd 21 (Shell-Fan B): Ch 3, 2 dc in same st as join, sc in 3rd dc of next shell, 5 dc in next sc anchor; rep from 12 more times, sc in 3rd dc of last shell, 2 dc in same st as beg ch-3. Join with sl st to top of beg ch-3.
Rnds 22-29: Continue alternating Shell-Fan A and B rounds as established.
Checkpoint: After Round 29, the shell-fan section should measure approximately 4 inches tall.
Body: Upper Single Crochet Section
Rnd 30: Working into the shell structure, sc in sc anchor, sc in first dc of shell, sc in center (3rd) dc of shell, sc in 5th dc of shell; rep from 13 more times. (56 sc)
This round decreases your stitch count, creating a gentle taper.
Rnd 31: Sc in next 6 sts, 2 sc in next st; rep from 7 more times. (64 sc)
Rnds 32-33: Sc in each st around. (64 sc each round)
Drawstring Eyelet Round
Rnd 34 (Eyelet Rnd): Sc in next 2 sts, ch 2, sk 2 sts; rep from 15 more times. Join with sl st to first sc. (16 sc, 16 ch-2 spaces)
Rnd 35 (Restore count): Sc in next 2 sts, 2 sc in ch-2 sp; rep from 15 more times. (64 sc)
Rnds 36-38: Sc in each st around. (64 sc each round)
Checkpoint: Total height from base fold line should measure 7.5 to 8 inches.
Scallop Picot Edging
Rnd 39: Sl st in next 2 sts, ch 3, sl st back into the first ch of the ch-3 just made (picot complete), sl st in the same st as last sl st before picot; rep from around. Join with sl st. Fasten off and weave in ends.
You’ll have 32 picot points around the opening.
D-Ring Attachment Tabs (make 2)
Using MC, chain 10.
Row 1: Sc in 2nd ch from hook, sc in each ch across. Turn. (9 sc)
Rows 2-4: Ch 1, sc in each st across. Turn. (9 sc)
Fasten off, leaving a 10-inch tail.
Fold the tab in half through the D-ring. Sew the tab securely to the inside top edge of the bag at each side.
Making and Attaching the Roses
Crochet 7 full roses and 2 small rosebuds as described in the special stitches section.
Front panel placement: Arrange 3 roses in a horizontal line, centered on the front. Space them approximately 2.5 inches apart, with the bottom of each rose sitting about 2 inches above the base fold line.
Back panel: Mirror the front arrangement with 3 roses.
Side panel: Place 1 rose centered on the right side at the same height.
Sew each rose through its rolled base using the CC tail, making several secure anchor stitches.
Drawstring Cord
Using 2 strands of CC held together, chain 120. Slip stitch in the 2nd chain from hook and in each chain back to form a twisted cord.
Thread through the eyelet row, with both ends emerging at the front center.
Add 3 to 4 beads to each end. Tie an overhand knot below the beads. Attach one small rosebud to each cord end and secure with a small drop of fabric glue.
Lining and Finishing
Cut a fabric circle 7.5 inches in diameter and a rectangle 23 inches by 9.5 inches.
Sew the rectangle into a tube, attach the circle base, and fold the top edge down 0.5 inch. Insert the lining into the bag and slip stitch to the inside along the top edge.
Insert a cardboard or plastic canvas circle into the bottom for structure.
Attach your adjustable strap by clipping the swivel clasps onto the D-rings.
Blocking Tips
Wet blocking gives the best results. Soak the bag body (before lining and hardware) in cool water for 10 to 15 minutes. Shape to measurements and let dry completely over 24 to 48 hours.
Care Instructions
Hand wash in cool water with gentle soap. Reshape and air dry. Spot clean the leather strap with a damp cloth. Store stuffed with tissue to maintain the cylindrical shape.
Thank you so much for choosing this pattern for your next project. I really hope you love making this bucket bag as much as I loved designing it. If you finish one, I would absolutely love to see your work. Tag me on Instagram or share a photo in our Facebook group.
Don’t forget to save this crochet pattern to your Pinterest boards so you can find it easily when you’re ready to start. And if you make this bag, please drop a comment below. I’d love to hear which colors you chose and how it turned out!
You Might Also Like
- Sunset Glow Granny Square Tote Free Crochet Pattern
- Autumn Maple Leaf Crochet Bracelet Free Pattern
- Yellow Heart Granny Square Baby Blanket Free Crochet Pattern
- Mint Green Dragon Amigurumi Plush Free Crochet Pattern
