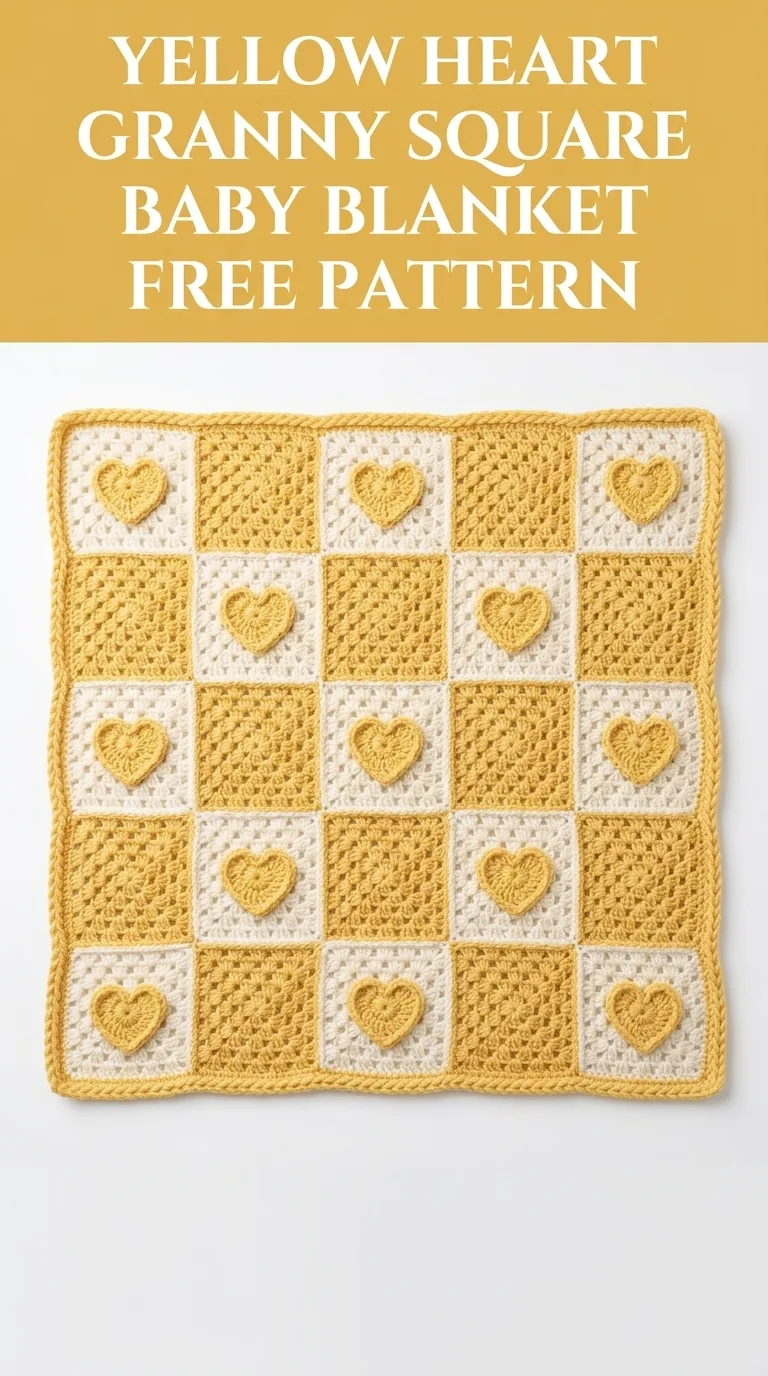
This is a classic granny square baby blanket with sweet appliqué hearts. It uses basic stitches. The construction is simple. You will make individual squares, join them in a checkerboard layout, then add a border. Perfect for confident beginners ready to try their first blanket project.
Why You Will Love This Yellow Heart Baby Blanket Pattern
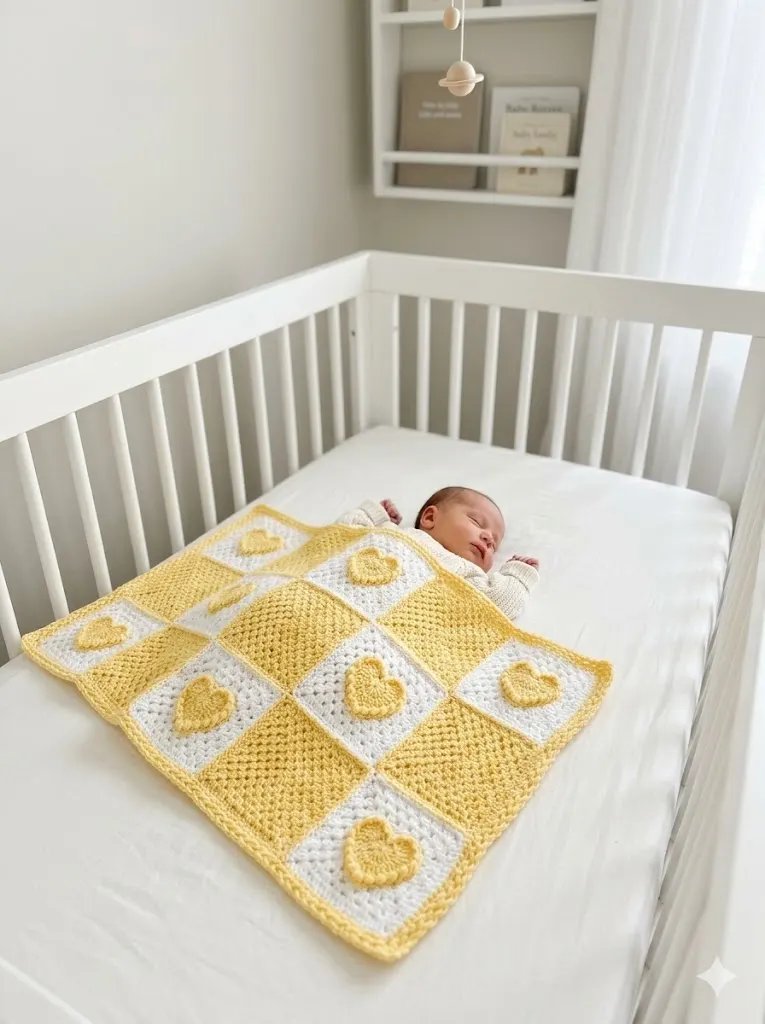
I made this blanket as a cheerful baby shower gift. The yellow and white color combination feels fresh and modern. It works beautifully for any nursery style. The raised heart appliqués add texture and visual interest without complicated colorwork.
The checkerboard arrangement gives you flexibility too. You can easily adjust the size by adding or removing rows of squares. Need a smaller lovey? Use fewer squares. Want a larger throw? Just keep going.
This crochet tutorial walks you through every step. You will learn how to make solid granny squares, create simple heart appliqués, join squares neatly, and finish with a polished border.
Skill Level
Confident Beginner to Intermediate
You should be comfortable with basic crochet stitches and working in the round. If you have made a granny square before, you can absolutely make this blanket. If granny squares are new to you, I recommend practicing one or two squares first before committing to the full project.
Finished Dimensions
Approximately 36 inches by 36 inches (91 cm by 91 cm)
This creates a generous baby blanket size. It will work as a tummy time mat, stroller blanket, or crib throw.
Materials Needed
Yarn:
I recommend a soft acrylic or acrylic blend for baby items. It washes well and holds up to frequent use. Cotton blends work too but may be heavier.
Hook:
Adjust your hook size if needed to match gauge.
Notions:
Gauge
Each finished solid granny square should measure approximately 6 inches by 6 inches (15 cm by 15 cm) after blocking.
Gauge matters for this project. If your squares are too small, your blanket will be smaller than expected. If they are too large, you will run out of yarn.
Abbreviations and Stitch Definitions
Let me walk you through every stitch you will use. Even if you know these, a quick review never hurts.
Ch = Chain. Wrap yarn over hook, pull through loop on hook. This creates the foundation for most crochet work.
Sl st = Slip stitch. Insert hook, yarn over, pull through both the stitch and the loop on your hook in one motion. Used for joining rounds.
Sc = Single crochet. Insert hook into stitch, yarn over and pull up a loop (2 loops on hook), yarn over and pull through both loops. A short, tight stitch.
Dc = Double crochet. Yarn over, insert hook into stitch, yarn over and pull up a loop (3 loops on hook), yarn over and pull through 2 loops (2 loops remain), yarn over and pull through remaining 2 loops. A taller stitch that creates the classic granny square look.
Hdc = Half double crochet. Yarn over, insert hook into stitch, yarn over and pull up a loop (3 loops on hook), yarn over and pull through all 3 loops at once. Height falls between single and double crochet.
3-dc cluster = Three double crochet stitches worked into the same stitch or space. This creates the signature granny square grouping.
Sp = Space. The gap between stitch clusters.
Pattern Notes Before You Begin
Read through the entire pattern first. I know it is tempting to jump in, but understanding the construction will help everything go smoothly.
This blanket uses 25 solid granny squares total. You will make 13 squares in Color A (yellow) and 12 squares in Color B (white). They are arranged in a 5 by 5 checkerboard grid.
The heart appliqués are made separately and sewn onto the white squares only. This keeps the construction simple. No colorwork, no carrying yarn, no complicated techniques.
All rounds are worked on the right side. You will join at the end of each round rather than working in a spiral.
How to Crochet the Solid Granny Square
Make 13 squares in Color A (yellow) and 12 squares in Color B (white).
Round 1: With your chosen color, ch 4. Sl st to first ch to form a ring.
Ch 3 (this counts as your first dc throughout the pattern). Work 2 dc into the ring. Ch 2. *Work 3 dc into ring, ch 2.* Repeat from * two more times. Sl st to top of beginning ch-3 to join. (12 dc total, 4 ch-2 corner spaces)
Round 2: Sl st across the tops of the next 2 dc to reach the corner space. Ch 3, 2 dc into same corner space, ch 1. *In next corner space work (3 dc, ch 2, 3 dc), ch 1.* Repeat from * two more times. Work 3 dc into first corner space, ch 2. Sl st to top of beginning ch-3 to join. (24 dc total, 4 corner spaces, 4 side spaces)
Round 3: Sl st across the tops of the next 2 dc to reach the corner space. Ch 3, 2 dc into same corner space, ch 1. Work 3 dc in next ch-1 space, ch 1. *In next corner space work (3 dc, ch 2, 3 dc), ch 1. Work 3 dc in next ch-1 space, ch 1.* Repeat from * two more times. Work 3 dc into first corner space, ch 2. Sl st to top of beginning ch-3 to join. (36 dc total)
Round 4: Sl st across the tops of the next 2 dc to reach the corner space. Ch 3, 2 dc into same corner space, ch 1. *Work 3 dc in next ch-1 space, ch 1.* Repeat across side to corner. *In next corner space work (3 dc, ch 2, 3 dc), ch 1.* Continue around, working 3-dc clusters in each side space and corner increases at each corner. Sl st to top of beginning ch-3 to join. (48 dc total)
Round 5: Repeat Round 4, adding one more 3-dc cluster per side. (60 dc total)
Fasten off. Weave in ends.
Your finished square should measure approximately 6 inches. If it is significantly smaller, try a larger hook. If it is much larger, try a smaller hook.
How to Crochet the Heart Appliqué
Make 12 hearts in Color A (yellow). These will be sewn onto the white squares.
The heart is worked in rows with some shaping. It is easier than it looks. Trust the process.
Starting at the bottom point:
Ch 2.
Row 1: Work 1 sc in second ch from hook. Ch 1, turn. (1 sc)
Row 2: Work 2 sc in the single stitch. Ch 1, turn. (2 sc)
Row 3: Work 2 sc in first st, 2 sc in second st. Ch 1, turn. (4 sc)
Row 4: Work 2 sc in first st, sc in next 2 sts, 2 sc in last st. Ch 1, turn. (6 sc)
Row 5: Work 2 sc in first st, sc in next 4 sts, 2 sc in last st. Ch 1, turn. (8 sc)
Row 6: Work 2 sc in first st, sc in next 6 sts, 2 sc in last st. Ch 1, turn. (10 sc)
Row 7: Sc in each st across. Ch 1, turn. (10 sc)
Creating the heart lobes:
Row 8 (First Lobe): Sc in first 5 sts. Ch 1, turn. Leave remaining stitches unworked. (5 sc)
Row 9: Sc2tog (single crochet two together by inserting hook in first st, pull up loop, insert hook in second st, pull up loop, yarn over and pull through all 3 loops), sc in next st, sc2tog. Ch 1, turn. (3 sc)
Row 10: Sc3tog (work similar decrease over 3 stitches). Fasten off. (1 sc)
Row 8 (Second Lobe): Skip the center of the heart. Join yarn in the 6th stitch of Row 7. Sc in remaining 5 sts. Ch 1, turn. (5 sc)
Rows 9-10: Repeat as for first lobe.
Fasten off. Weave in all ends.
Your heart should measure approximately 2.5 to 3 inches tall. The shape will become more defined once sewn onto the square.
Assembling the Baby Blanket
Now comes the satisfying part. Seeing all those squares come together is so rewarding.
Step 1: Arrange Your Squares
Lay out all 25 squares in a 5 by 5 grid. Alternate colors in a checkerboard pattern. Start with a yellow square in the top left corner.
Your layout should look like this:
Take a photo of your layout before joining. This prevents any mix-ups.
Step 2: Attach Heart Appliqués
Before joining the squares, sew one heart onto the center of each white square. You will have 12 hearts and 12 white squares.
Thread your yarn needle with a length of yellow yarn. Position the heart in the center of the square with the point facing down. Use a whip stitch around the edges of the heart, catching just the outer loops to keep it secure but flat.
Take your time here. Neat appliqué work makes a big difference in the finished look.
Step 3: Join the Squares
I recommend the flat slip stitch join for this blanket. It creates a neat, slightly raised seam that looks intentional with the granny square style.
Hold two squares with right sides facing. Working through both layers, insert hook through the corner ch-2 spaces. Join yellow yarn with a sl st. Ch 1. *Sl st through corresponding stitches on both squares.* Continue across the edge to the next corner.
Join squares in horizontal strips first. You will have 5 strips of 5 squares each. Then join the strips together vertically.
Alternatively, you can use a whip stitch or mattress stitch if you prefer an invisible seam.
Adding the Border
The border frames everything beautifully and hides any slight unevenness at the joins.
Round 1: Join Color A (yellow) in any corner space. Ch 3, 2 dc in same corner, ch 2, 3 dc in same corner. *Work 3 dc in each space along the side. At each corner work (3 dc, ch 2, 3 dc).* Continue around entire blanket. Sl st to top of beginning ch-3 to join.
Round 2: Sl st to corner space. Ch 3, 2 dc in corner, ch 2, 3 dc in same corner. Continue as established, adding one more 3-dc cluster per side. Sl st to join.
Round 3: Repeat Round 2.
Fasten off. Weave in all remaining ends.
Finishing Your Yellow Heart Baby Blanket
Blocking (Optional but Recommended):
Blocking helps even out your stitches and gives the blanket a polished look. Wet block by soaking the blanket in cool water for 15 minutes. Gently squeeze out excess water without wringing. Lay flat on blocking mats, pin corners square, and let dry completely.
Weaving Ends:
Go back and check every color change and join point. Secure ends should be woven through at least 2 inches of stitches in multiple directions.
Care Instructions:
For gift giving, include a care tag. Machine wash cold on gentle cycle. Tumble dry low or lay flat to dry. Acrylic yarn softens with washing.
Tips for Success with This Crochet Pattern
Consistent tension matters. Try to keep your tension even throughout all 25 squares. If some squares are noticeably different sizes, they will be harder to join neatly.
Count your stitches. At the end of each round, count your dc clusters and corner spaces. Catching a mistake early saves frustration later.
Block before joining. If your squares are slightly different sizes, blocking them before joining can help even things out.
Use stitch markers. Mark your corners as you work the border. It makes it easier to keep track of where you are.
Take breaks. A blanket is a big project. Work on a few squares at a time. Enjoy the process rather than racing to finish.
Customization Ideas
Change the size: For a smaller lovey, make a 3 by 3 grid (9 squares). For a larger throw, make a 7 by 7 grid (49 squares).
Try different colors: Pastel pink and white would be lovely. Navy and cream creates a nautical feel. Use variegated yarn for the hearts for extra interest.
Switch the appliqué: Instead of hearts, try stars, flowers, or simple circles. The technique stays the same.
Add more texture: Work a round of single crochet before the border for extra definition.
I really hope you enjoy making this yellow heart granny square baby blanket. It is such a satisfying project to work on, and the finished result always gets compliments. If you make one, I would absolutely love to see it. Tag me on Instagram or share in my Facebook group. Seeing your creations truly makes my day.
If this pattern is going on your to-make list, save it to your Pinterest boards so you can find it easily when you are ready to start. And please drop a comment below if you have any questions or just want to share your color choices. I read every single one.
