
This is ONE OF THOSE PROJECTS that looks like it belongs in a high-end boutique, and honestly? You’re going to be SO proud when you finish it. The raised mandala center, the delicate filet lace panels, those gorgeous bamboo ring handles. It all comes together into something truly stunning.
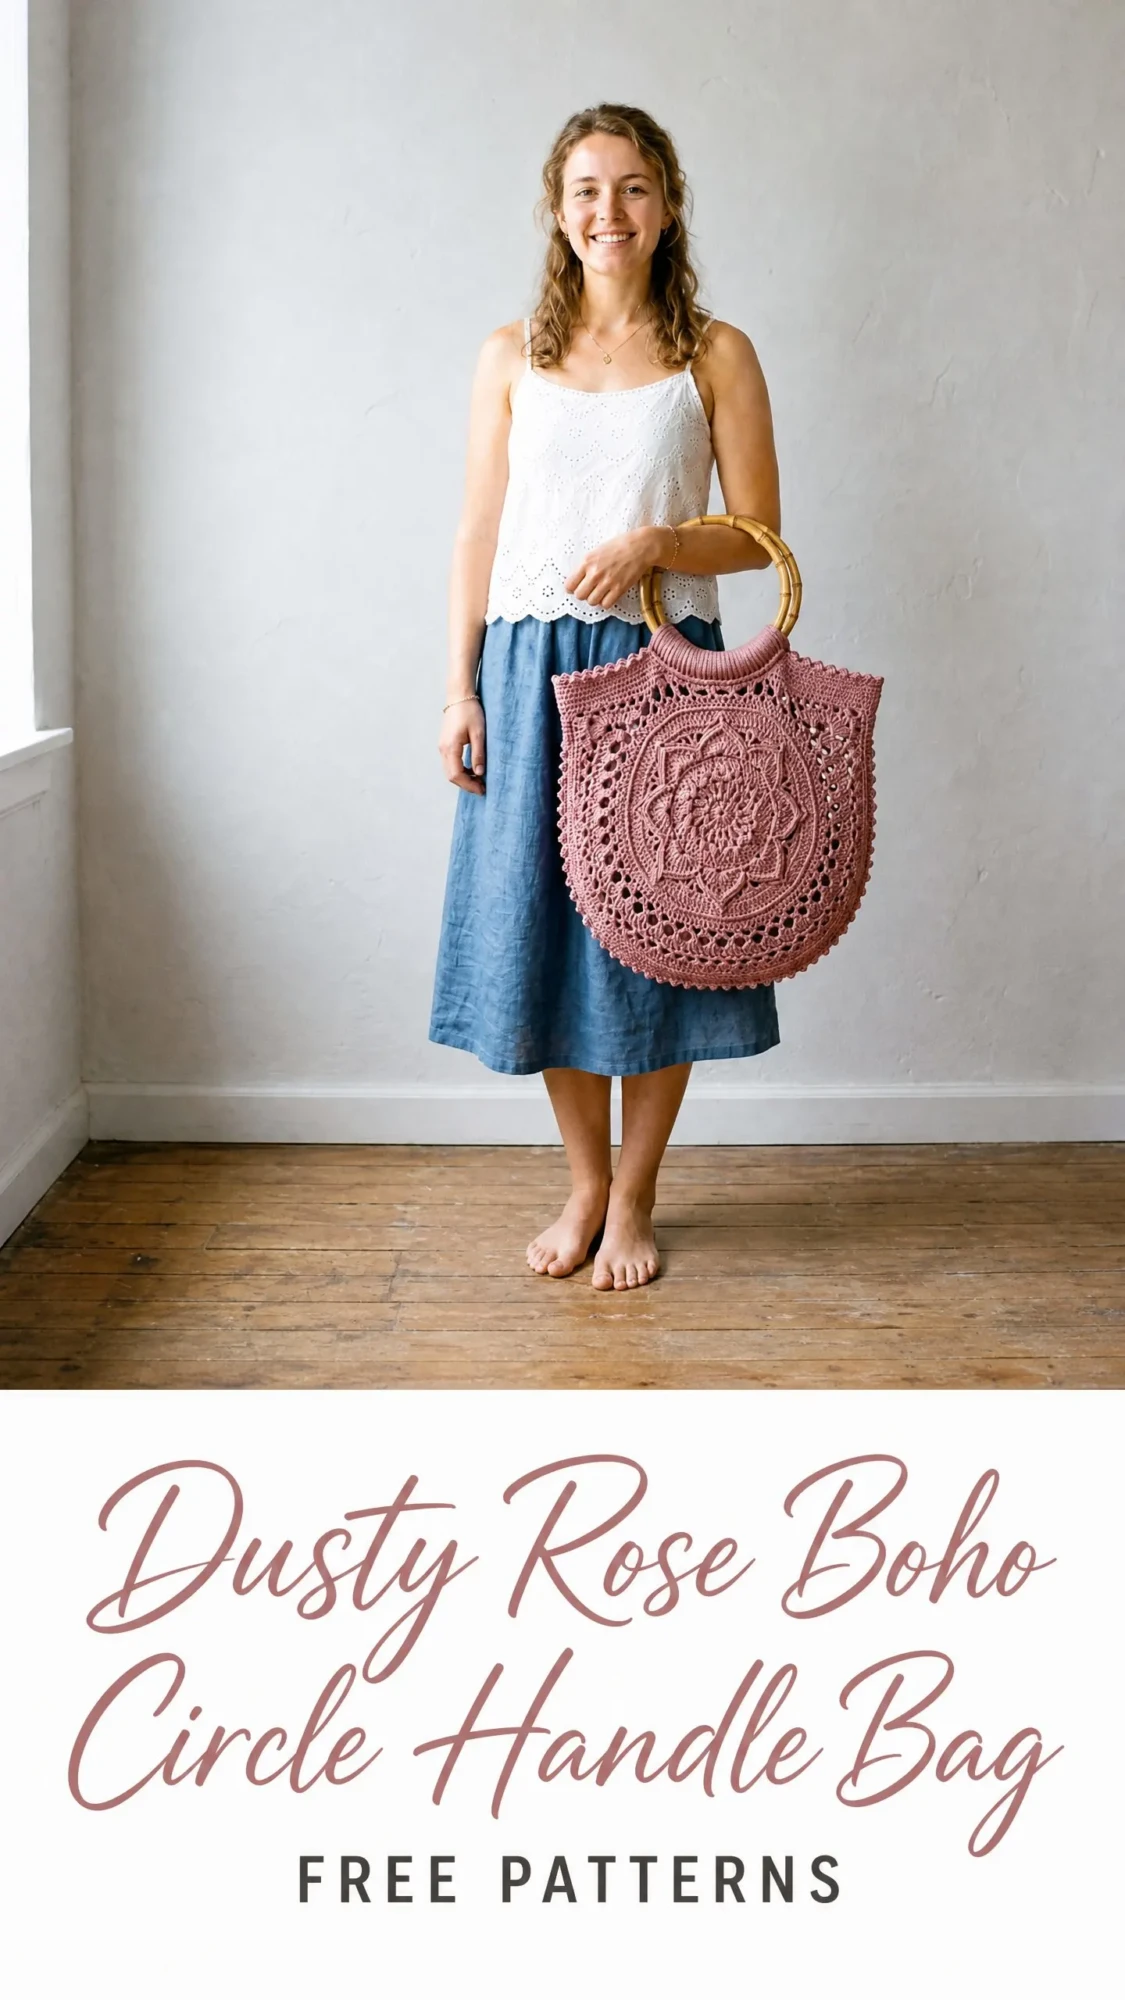
I won’t sugarcoat it. This bag takes time. We’re talking 25 to 35 hours of focused crochet work. But here’s the thing. Every single round builds on the last, and before you know it, you’re watching this incredible floral design emerge from your hook. The compliments you’ll get carrying this around? Absolutely worth every stitch.
If you’ve been wanting to level up your crochet skills and create something genuinely impressive, this dusty rose boho bag is calling your name. Let’s break it down step by step so you can make this beautiful piece with confidence.
About This Boho Circle Handle Bag Crochet Pattern
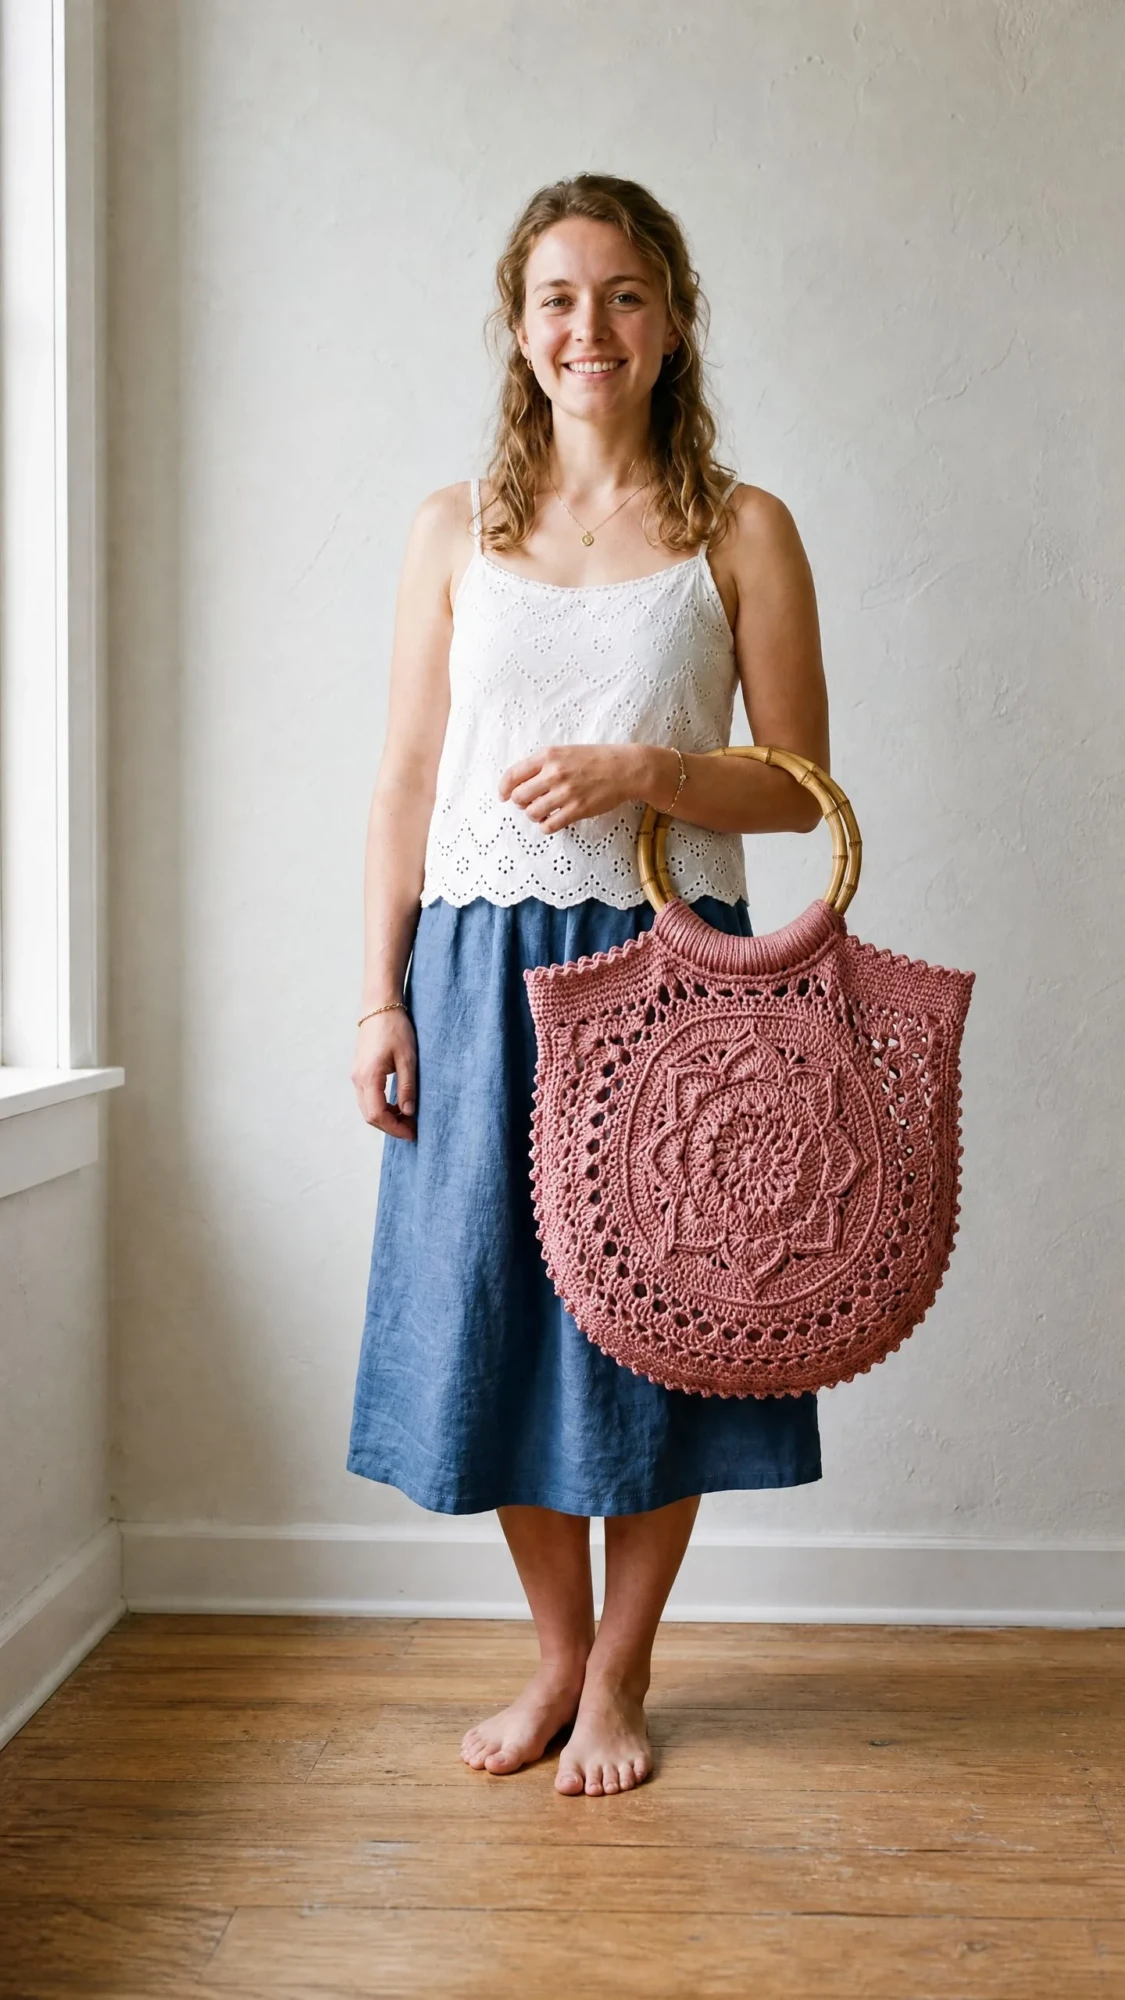
This structured tote features two identical panels built around a large raised floral mandala motif. The mandala sits within concentric rounds of filet-style lace, creating that gorgeous layered texture you can see in the finished bag. A gusset strip joins the panels along the sides and bottom, giving the bag real depth and dimension.
The overall shape is a modified square with gently rounded lower corners and a straight top edge. Think of it like a shield or escutcheon outline. The upper opening wraps around a pair of circular bamboo ring handles, which get attached by crocheting directly around them. Very clever construction.
Finished Dimensions: Approximately 14 inches wide by 13 inches tall (excluding handles) by 1.5 inches deep. In metric, that’s 35.5 cm wide by 33 cm tall by 4 cm deep. The handle rings add about 5 inches to the total height when held upright.
Skill Level
Let me be honest with you. This is an advanced pattern. You’ll need comfort with working in continuous and joined rounds, raised front and back post stitches, filet mesh construction, precise stitch counts through complex motif rounds, assembling multi-piece bags, and attaching hardware by crocheting directly around a rigid ring.
If you’re a beginner or intermediate crocheter, I’d recommend getting comfortable with all basic stitches and increases before attempting this project. That said, if you’ve tackled doilies or mandalas before, you’ve got a head start on the skills you’ll need.
Materials You’ll Need
Yarn: Approximately 700 yards (640 meters) of DK weight (light worsted) 100 percent cotton yarn in dusty rose or antique mauve. Cotton gives the raised post stitches crisp definition and provides the structural firmness the bag requires.
Hook: US size E-4 (3.5 mm) for panels and gusset. Using a smaller hook than typical for DK weight produces the dense, structured fabric necessary for a bag that holds its shape.
Notions:
Yarn Suggestions
Option 1: Lion Brand 24/7 Cotton in Dusty Pink (DK weight, 186 yards per 3.5 oz skein). Widely available, consistent twist, excellent stitch definition. You will need approximately 4 skeins.
Option 2: Paintbox Yarns Simply DK Cotton in Blush Pink (DK weight, 137 yards per 1.75 oz skein). Smooth, tightly plied, holds shape well. You will need approximately 6 skeins.
Option 3: Drops Safran in Old Rose (DK weight, 175 yards per 1.75 oz skein). A sport-weight cotton that works at DK gauge with this hook. Excellent sheen and drape while retaining structure. You will need approximately 4 skeins.
Substitution Note: Any smooth 100 percent cotton or cotton-blend DK weight yarn will work. Avoid wool, acrylic, or fuzzy fibers for this project. Raised post stitches require a smooth, firm twist to read clearly. Check your gauge carefully with any substitute.
Gauge
After blocking:
Motif gauge check: Rounds 1 through 6 of the mandala panel (through the first filet round) should measure approximately 4.5 inches (11.5 cm) in diameter.
Gauge is critical for this project. The bamboo rings are a fixed size. If your panel grows too large, the handle attachment will be loose. If it is too small, the bag will feel stiff and cramped. Adjust hook size as needed to match gauge before beginning the full panels.
Abbreviations and Stitch Definitions
Let me walk you through every abbreviation you’ll encounter in this crochet tutorial. I’ll give you the full name, the abbreviation, and a plain-English explanation of what to do.
ch = chain. Wrap yarn over hook and pull through the loop on your hook.
sl st = slip stitch. Insert hook, yarn over, pull through both the stitch and the loop on hook in one motion.
sc = single crochet. Insert hook, yarn over, pull up a loop (2 loops on hook), yarn over, pull through both loops.
hdc = half double crochet. Yarn over, insert hook, pull up a loop (3 loops on hook), yarn over, pull through all 3 loops.
dc = double crochet. Yarn over, insert hook, pull up a loop (3 loops on hook), yarn over, pull through 2 loops (2 loops remain), yarn over, pull through last 2 loops.
tr = treble crochet. Yarn over twice, insert hook, pull up a loop (4 loops on hook), yarn over and pull through 2 loops three times.
sp = space
ch-sp = chain space
st/sts = stitch/stitches
beg = beginning
rep = repeat
rem = remaining
rnd = round
RS = right side
WS = wrong side
sk = skip
pm = place marker
sm = slip marker
tog = together
Special Stitches Explained
FPdc (Front Post Double Crochet): This creates the raised texture that makes the mandala pop. Yarn over, insert hook from front to back to front around the post (the vertical bar) of the indicated stitch in the round below. Not through the top loops. Yarn over and pull up a loop, yarn over and draw through 2 loops, yarn over and draw through remaining 2 loops. This stitch sits on the front face of the fabric.
BPdc (Back Post Double Crochet): The opposite of FPdc. Yarn over, insert hook from back to front to back around the post of the indicated stitch in the round below, then complete as a regular dc. This stitch recedes into the back face of the fabric.
FPtr (Front Post Treble Crochet): A taller version of FPdc. Yarn over twice, insert hook from front to back to front around the post of the indicated stitch below, yarn over and pull up a loop, then yarn over and draw through 2 loops three times.
BPtr (Back Post Treble Crochet): Same as FPtr but worked from back to front to back.
V-stitch (V-st): Work (dc, ch 2, dc) all in the same stitch or space. Used in the filet lace sections to create that open, airy look.
Shell: Work 5 dc all in the same stitch or space. Used in the outer decorative border.
Picot: Ch 3, sl st in the first ch made. Creates a small decorative loop at the edge of the border.
dc2tog (Double Crochet Two Together): A decrease. Yarn over, insert hook in first stitch, yarn over and pull up a loop, yarn over and draw through 2 loops (2 loops on hook). Yarn over, insert hook in second stitch, yarn over and pull up a loop, yarn over and draw through 2 loops (3 loops on hook). Yarn over and draw through all 3 loops.
Pattern Notes Before You Begin
Read these through before you start. They’ll save you confusion later.
1. Make two identical panels (front and back). The mandala motif is identical on both panels. The raised post stitches that form the floral design will naturally appear on the RS of each panel.
2. The bag is constructed in this order: mandala panel center (Rounds 1-8), inner lace band (Rounds 9-12), outer lace band with squaring (Rounds 13-18), border and edging (Round 19), then the panel is repeated for the second side. The gusset is worked separately and seamed. The top opening is finished and the handles are attached last.
3. The mandala is worked in joined rounds throughout. After Round 18 the panel transitions to straight rows along the top edge to form the flat upper opening.
4. When working post stitches, always skip the stitch behind the post stitch at the base of the current round. The post stitch replaces it.
5. The panels will be slightly cup-shaped before blocking. Wet block firmly to a flat surface before seaming.
6. All rounds are worked with RS facing unless noted.
7. The ch-3 at the beginning of any dc round counts as 1 dc throughout.
Step by Step Crochet Pattern Instructions
Panel (Make 2)
The mandala center is built outward from a magic ring. If you prefer not to use a magic ring, chain 4 and join with sl st to form a ring.
Round 1 (Inner Flower Center):
Make a magic ring. Ch 3 (counts as dc). Work 11 dc into the ring. Pull ring closed. Sl st to top of ch-3 to join.
(12 dc)
Round 2 (Petal Base Layer):
Ch 3 (counts as dc). FPdc around same stitch as ch-3. Work (dc, FPdc) in each remaining stitch around. Sl st to top of ch-3 to join.
(12 dc, 12 FPdc = 24 sts)
Round 3 (Raised Inner Petals):
Ch 1 (does not count as st). Sc in first dc. Ch 3. Sk the FPdc. (Sc in next dc, ch 3, sk FPdc) 11 times. Sl st to first sc to join.
(12 sc, 12 ch-3 sps)
Round 4 (Petal Fill):
Sl st into first ch-3 sp. Ch 3 (counts as dc). Work 4 dc in same ch-3 sp (first shell made). Sc in next sc. (Shell of 5 dc in next ch-3 sp, sc in next sc) 11 times. Sl st to top of ch-3 to join.
(12 shells of 5 dc, 12 sc = 72 sts)
Round 5 (Post Stitch Petal Outline):
Ch 3 (counts as dc). BPdc around each dc of first shell (work 1 BPdc around each of the 5 dc), then sc in the sc between shells. (Work 1 BPdc around each of the 5 dc of next shell, sc in next sc) 11 times. Sl st to top of ch-3 to join.
(60 BPdc, 12 sc = 72 sts)
Round 6 (Second Flower Layer, Increase Round):
Ch 3 (counts as dc). Work 2 dc in next BPdc. Dc in next BPdc. 2 dc in next BPdc. Dc in next BPdc. Sc in sc. (Dc in first BPdc of next group, 2 dc in next BPdc, dc in next, 2 dc in next, dc in next, sc in sc) 11 times. Sl st to top of ch-3 to join.
(12 groups of 7 sts, 12 sc = 96 sts)
Round 7 (Extended Petal Round):
Ch 1. Sc in first st. Ch 5. Sk 3 sts. (Sc in next st, ch 5, sk 3 sts) rep around, ending with last sc before the sc between petal groups. When you reach an sc between groups from Round 6, work sc in that sc, ch 3, sk 1, then continue. Continue working (sc, ch-5, sk 3) through petal tops and (sc, ch-3, sk 1) at each sc connector. You will complete 12 large ch-5 loops and 12 small ch-3 bridges. Sl st to first sc to join.
(24 sc, 12 ch-5 sps, 12 ch-3 sps)
Round 8 (Petal Fill, Second Layer):
Sl st into first ch-5 sp. Ch 3. Work 6 dc in same ch-5 sp. Sc in ch-3 sp. (7 dc in next ch-5 sp, sc in next ch-3 sp) 11 times. Sl st to top of ch-3 to join.
(12 groups of 7 dc, 12 sc = 96 sts)
CHECKPOINT 1: After Round 8 the mandala center should measure approximately 4.75 inches (12 cm) in diameter. The raised petal texture should be visible on the RS.
Round 9 (Inner Filet Mesh Setup):
Ch 5 (counts as dc, ch 2). Sk 2 sts. (Dc in next st, ch 2, sk 2 sts) around, ending with sl st to 3rd ch of beg ch-5 to join. You will place a dc approximately every 3 stitches. Work 32 dc total evenly spaced around, adjusting sk counts at each sc connector to keep the round flat.
(32 dc, 32 ch-2 sps)
Round 10 (Filet Mesh):
Sl st into first ch-2 sp. Ch 5 (counts as dc, ch 2). (Dc in next dc, ch 2) 31 times. Sl st to 3rd ch of beg ch-5 to join.
(32 dc, 32 ch-2 sps)
Round 11 (Raised Starburst Outline):
Ch 3 (counts as dc). FPdc around first dc of Round 10. Ch 2. (FPdc around next dc, ch 2) 31 times. Sl st to top of ch-3 to join.
(1 dc, 31 FPdc, 32 ch-2 sps = 64 stitch positions)
Round 12 (Filet Expansion, Increase Round):
Sl st into first ch-2 sp. Ch 5 (counts as dc, ch 2). Dc in next post stitch. Ch 2. Work (dc, ch 2, dc) in the 9th, 17th, 25th, and 33rd ch-2 sp of this round (4 corner V-sts added to begin the squaring process). In all other ch-2 sps work (dc, ch 2). Continue around, placing the 4 corner increases evenly at positions marking the four sides of the eventual square panel.
(36 dc, 36 ch-2 sps)
CHECKPOINT 2: After Round 12 the piece should begin to show the faint squaring that will become the panel shape. Diameter approximately 7 inches (18 cm).
Round 13 (Outer Filet, Begin Squaring):
Sl st into ch-2 sp. Ch 5 (counts as dc, ch 2). Work around in filet mesh, placing V-st (dc, ch 2, dc) in each of the 4 corner ch-2 sps from Round 12, and (dc, ch 2) in every other sp.
(40 dc, 40 ch-2 sps)
Round 14 (Outer Filet, Continue Squaring):
Work as Round 13, placing V-st in each of the 4 corner sps (the center sp of each corner V-st from Round 13).
(44 dc, 44 ch-2 sps)
Round 15 (Decorative Cluster Round):
Ch 3 (counts as dc). Work around in the following pattern: in each regular ch-2 sp work (dc, ch 1, dc). In each corner ch-2 sp work (dc, ch 2, dc, ch 2, dc). Continue around.
(88 dc, 36 ch-1 sps, 8 ch-2 sps at corners)
Round 16 (Raised Post Outline, Panel Frame):
Ch 3 (counts as dc). FPdc around each dc from Round 15. Work (dc, ch 2, dc) at each corner ch-2 sp. In ch-1 sps work ch 1 passing through.
(96 dc total, 32 ch-1 sps, 8 ch-2 sps at corners)
Round 17 (Shell Border, Lower Portion):
For the three sides of the panel (both side edges and the bottom edge), work as follows: sl st to first ch-1 sp of lower 3 sides. (Shell of 5 dc in ch-1 sp, sc in next dc, sc in next ch-1 sp, sc in next dc) across lower 3 sides. At each lower corner sp work (shell, ch 2, shell). At the top edge (which will become the handle attachment zone) work sc across all sts and sps without shells, keeping the top edge straight and firm.
After this round the panel should measure approximately 13.5 inches (34 cm) at its widest and 12.5 inches (32 cm) tall.
Round 18 (Picot Edge, Lower Three Sides Only):
Working only along the bottom and two side edges (not the top opening), join yarn at corner of top opening edge. Sc in each st across to first shell. (3 sc across shell, picot in center dc of shell, 3 sc continue) across each shell. Sc in each sc between shells. At lower corners work (sc, picot, sc) in corner ch-2 sp. End at opposite corner of top opening. Fasten off.
CHECKPOINT 3: Both panels, before seaming, should each measure approximately 14 inches wide by 13 inches tall (35.5 x 33 cm) when blocked flat. Stack them together to confirm they match.
Top Edge Finishing Rows (Both Panels, Worked Flat)
With RS facing, join yarn at right edge of top opening of one panel.
Row 1 (WS): Ch 1. Turn. Sc across all sts of top opening edge. Count the sts across the top. You should have approximately 52 sts. If your count differs slightly, increase or decrease evenly to reach 52 sc by the end of this row.
(52 sc)
Row 2 (RS): Ch 1. Turn. Sc in each sc across.
(52 sc)
Row 3 (WS): Ch 3 (counts as dc). Turn. Dc in each sc across.
(52 dc)
Row 4 (RS): Ch 1. Turn. Sc in each dc across.
(52 sc)
Row 5 (Handle Attachment Ridge, WS): Ch 1. Turn. Working in back loops only, sl st in each sc across. Do not fasten off.
Fold Row 5 ridge over the bamboo ring. With the hook still attached, work slip stitches through both layers (the sl-st ridge and the corresponding sts of Row 4 behind it) to enclose the ring securely. The bamboo ring is now attached. Fasten off and weave in end.
Repeat Rows 1 through 5 and handle attachment on the second panel.
Gusset
The gusset is a narrow strip that runs along the bottom and both side edges of the bag, creating the 1.5-inch depth. The gusset does not run across the top opening.
Foundation chain: Ch 7.
Row 1: Sc in 2nd ch from hook and in each ch across. Turn.
(6 sc)
Row 2 onward: Ch 1. Turn. Sc in each sc across.
(6 sc)
Repeat Row 2 until the gusset strip measures approximately 38 inches (96.5 cm), which is the combined length of the bottom plus both side edges of one panel. Fasten off.
Assembly Instructions
Block both panels and the gusset firmly before assembly. Pin the panels flat on a blocking board to the finished dimensions and mist with water or steam. Allow to dry completely.
To seam: Hold one panel and the gusset together with RS facing outward (WS together). Using yarn and a yarn needle, whipstitch or single crochet the gusset to the side and bottom edges of the first panel, easing around the lower corners. Repeat to attach the second panel to the other long edge of the gusset. The top edges of the gusset ends should meet the lower corners of the handle attachment rows.
When joining with a crochet seam: With RS of both pieces facing outward, insert hook through both edge stitches, draw up a loop, ch 1, and sc through both layers along the entire edge. This creates a visible seam ridge on the outside. If you prefer an invisible seam, use the whipstitch method instead.
Finishing Your Boho Bag
Weave in all ends on the WS, running each tail in two directions for security.
If adding an optional fabric lining: Cut lining fabric to match the finished panel dimensions plus 0.5-inch seam allowance on all sides. Fold seam allowance under, press, and hand-stitch the lining inside the bag along all four edges. A lining adds polish and prevents small items from poking through the lace openings.
Blocking and Care
Wet blocking is strongly recommended before assembly and again after finishing. Submerge the completed bag in cool water, gently squeeze (do not wring), roll in a towel to remove excess water, then pin to dimensions on a flat surface and allow to dry fully.
For ongoing care: Hand wash in cool water with mild soap. Lay flat to dry. Do not machine wash or tumble dry, as the cotton will shrink and the bamboo rings may crack if exposed to high heat. Do not dry clean.
Size Customization Tips
For a smaller bag (approximately 11 x 10 inches): Work only through Round 14 for the panels instead of Round 18, and reduce the top edge rows to 3 rows. Choose 5-inch bamboo rings instead of 6-inch rings.
For a larger bag (approximately 17 x 16 inches): Add two additional filet rounds (Rounds 15a and 15b) each with 4 corner increases before beginning the shell border. Use 7-inch bamboo rings. Adjust gusset length to approximately 46 inches.
For a deeper gusset: Increase the foundation chain from ch 7 to ch 11 (working 10 sc across) for a 2.25-inch depth.
You’ve Got This
I know this crochet pattern looks intimidating at first glance. But take it one round at a time, use your stitch markers generously, and trust the process. The mandala builds beautifully, and those checkpoint measurements are there to keep you on track.
This dusty rose boho circle handle bag is the kind of project that becomes a treasured piece in your handmade collection. It’s the bag people stop you to ask about. The one that makes you feel like a crochet artist, not just a crafter.
Thank you so much for choosing this pattern. I genuinely hope you love making it as much as I loved designing it. If you finish your bag, I would absolutely love to see it. Tag me on Instagram or share a photo in my Facebook group. Seeing your finished projects is honestly the best part of sharing patterns.
If this boho bag is calling to you but you’re not quite ready to start today, go ahead and save this pattern to your Pinterest boards so you can find it easily when the time is right. And if you do make it, please drop a comment below. I’d love to hear how it turned out for you!
You Might Also Like
- Ivory White Bridal Tote with Pearl Embellished Tassels Pattern
- Ocean Blue Tropical Crochet Dress Free Pattern
- Emerald Green Bobble Stitch Clutch Free Crochet Pattern
- Coral Sunset Baby Dress Free Crochet Pattern
