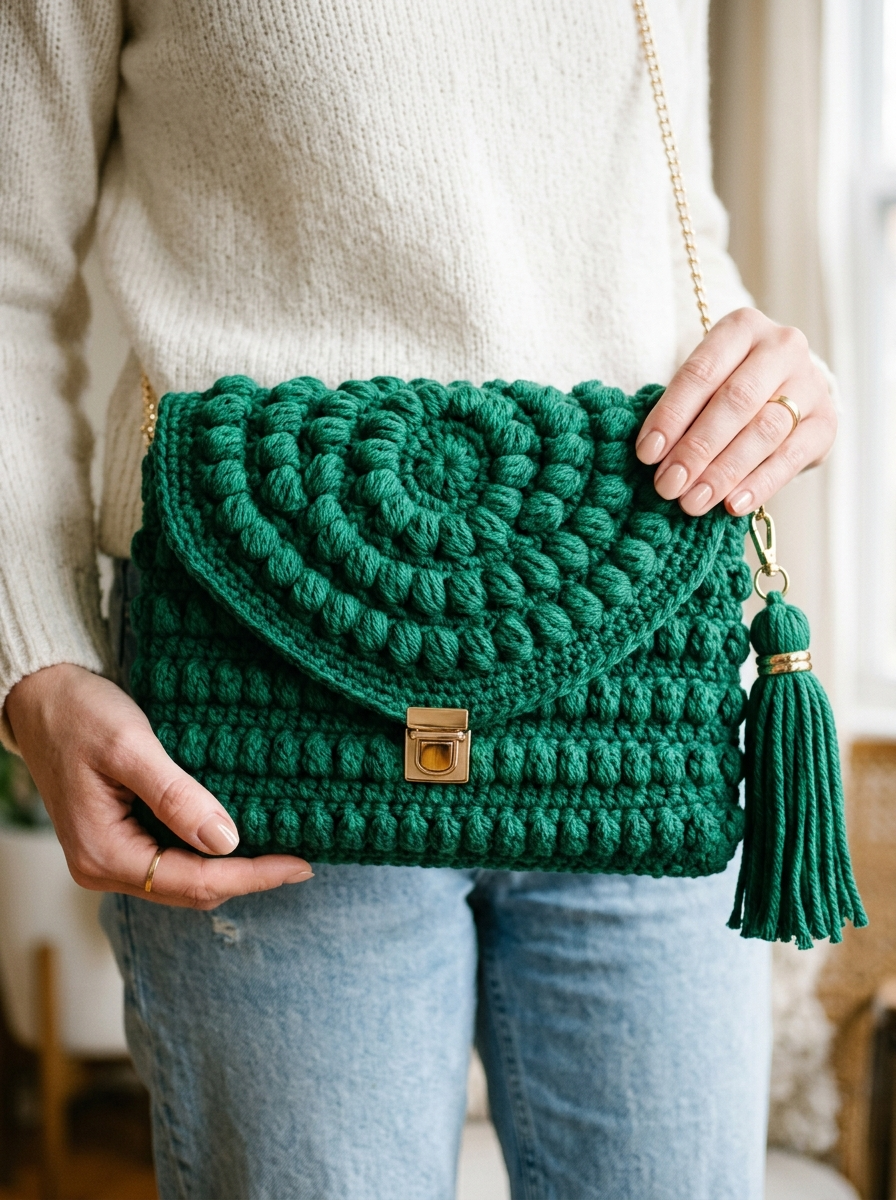
This gorgeous textured clutch bag is about to become your new favorite accessory project. I designed this emerald green bobble stitch clutch to look like something you would find in a high end boutique, but you can make it yourself with basic crochet skills and a few evenings of relaxing stitching.
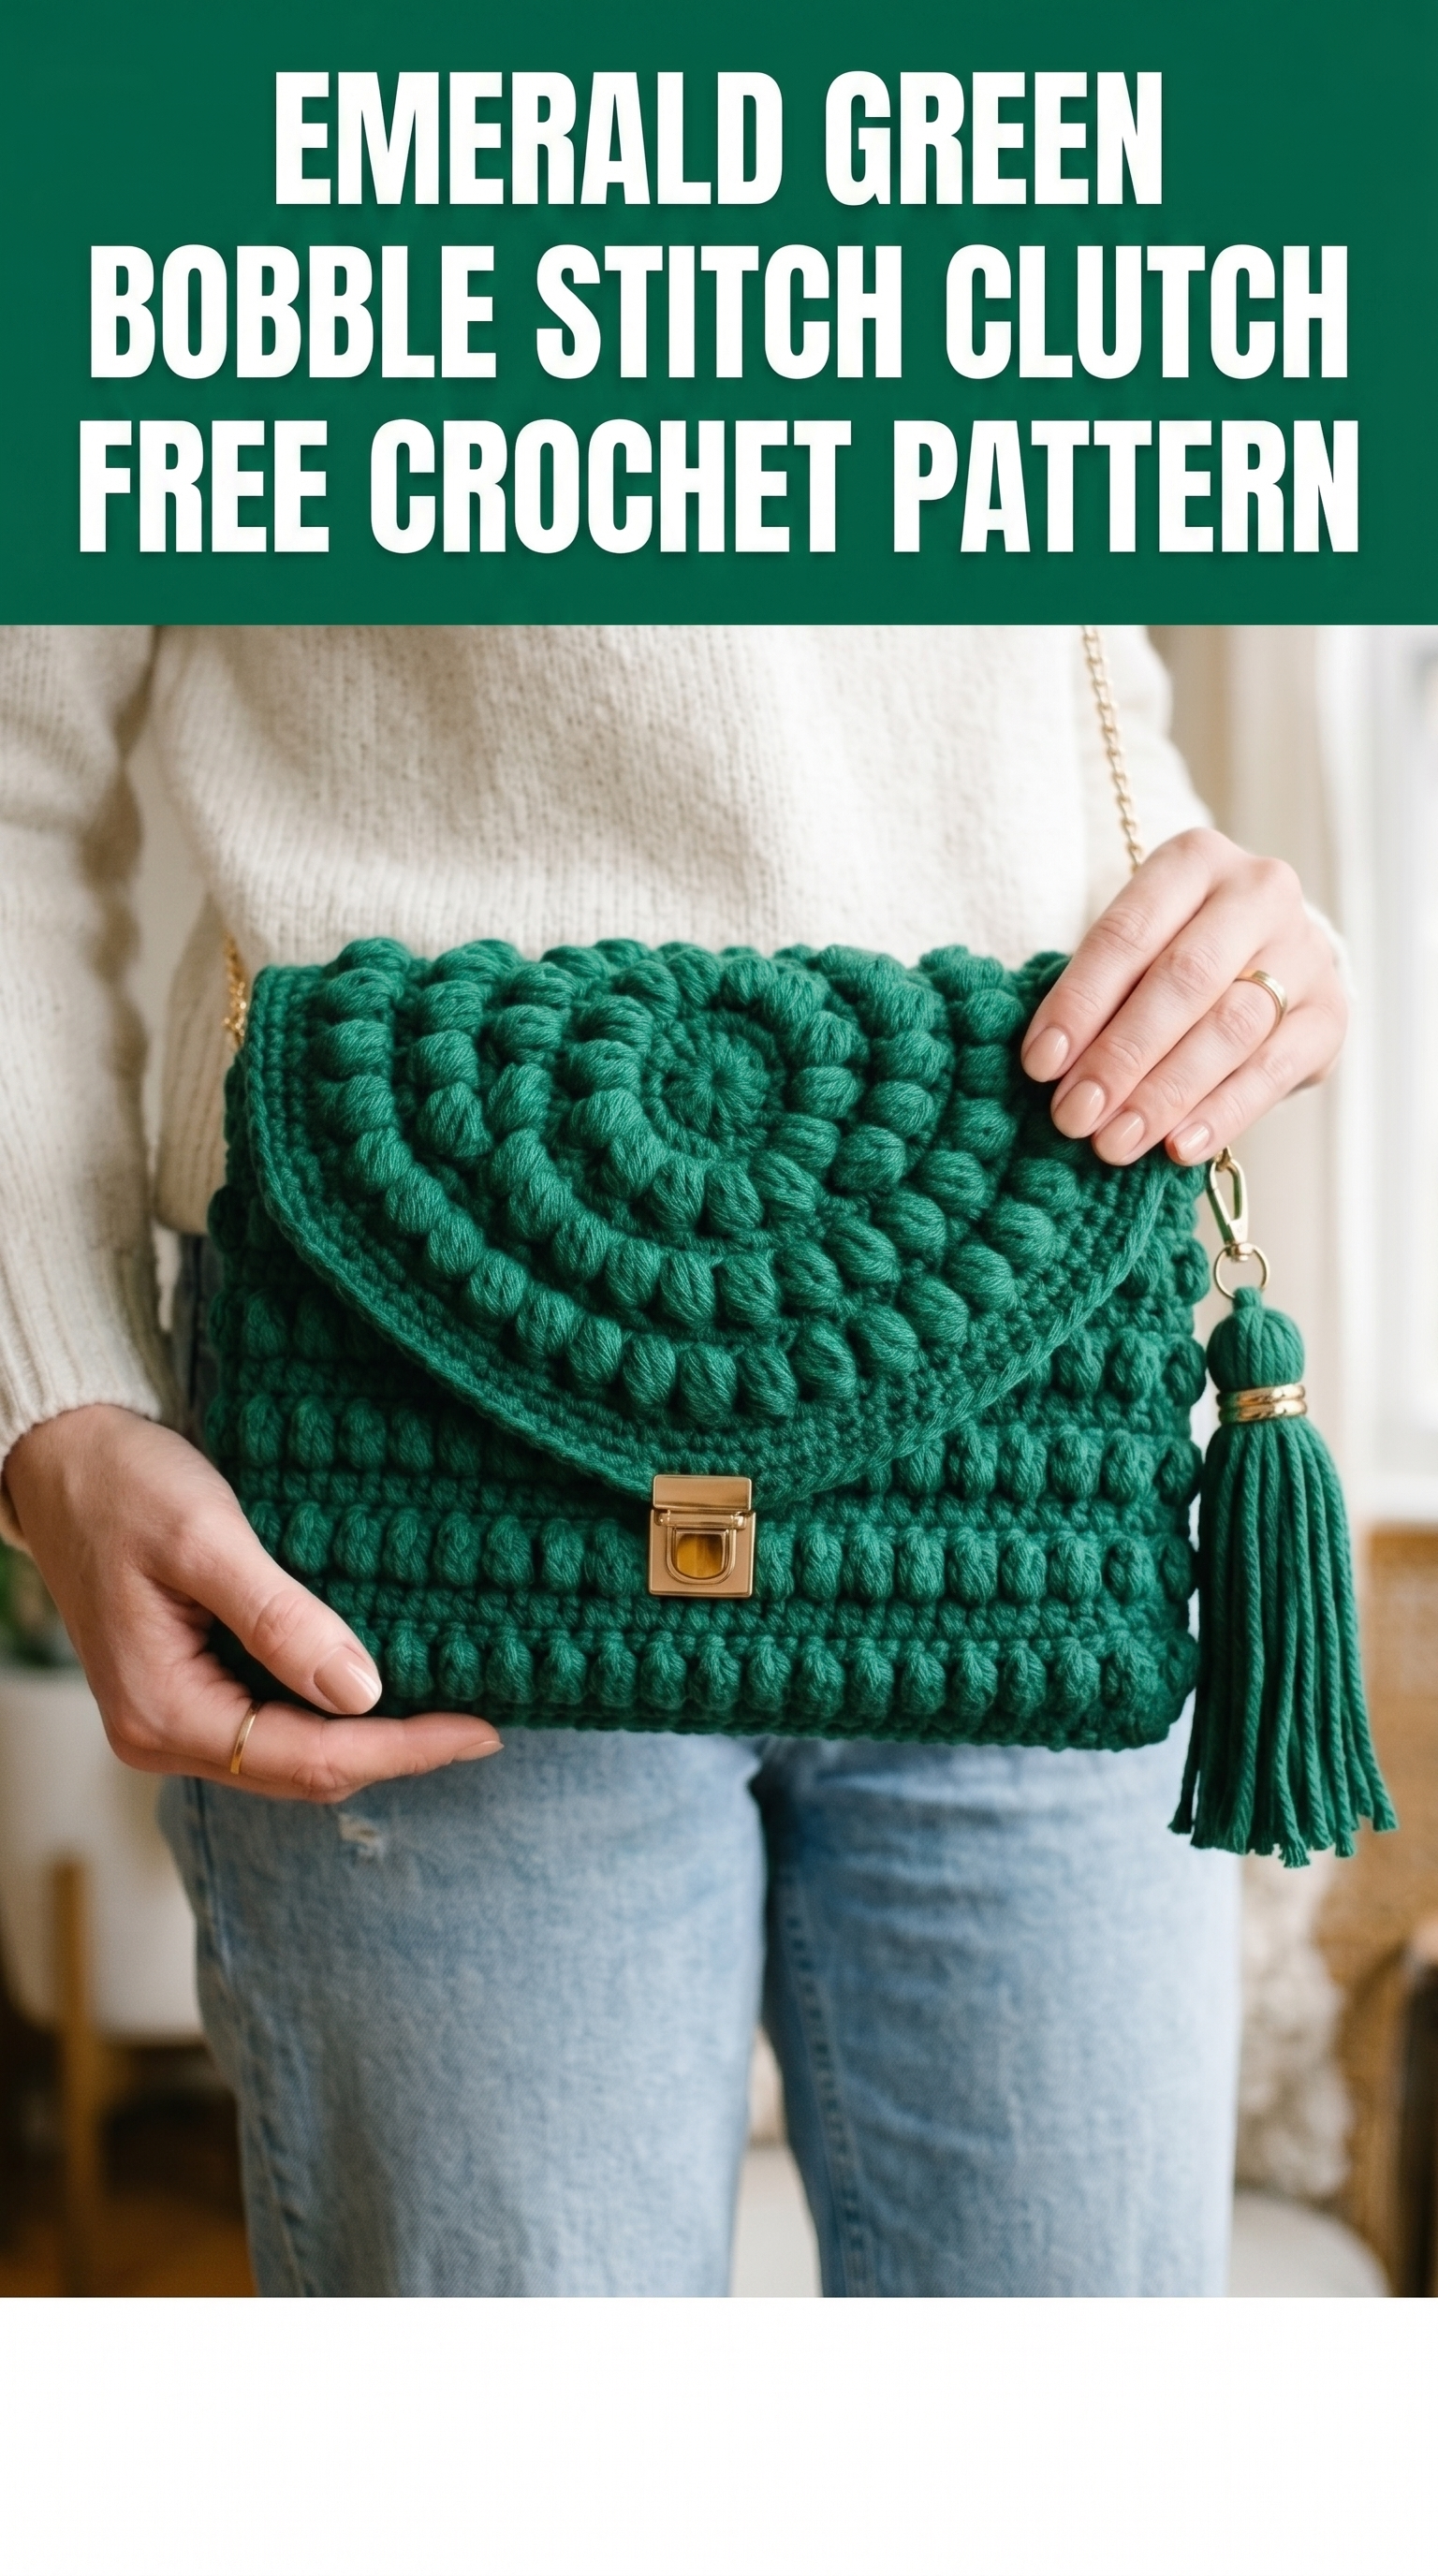
The combination of bobble stitches on the flap and body creates that stunning dimensional texture that catches the light beautifully. Do not let the fancy look intimidate you. If you can single crochet and double crochet, you can absolutely make this bag. I will walk you through every single step.
Why This Crochet Clutch Pattern Works So Well
What makes this crochet pattern special is the strategic placement of the bobble stitches. The flap features a circular medallion worked in a spiral, while the body uses horizontal rows of bobbles separated by simple stitches. This contrast keeps the design interesting without being overwhelming.
The finished clutch measures approximately 10 inches wide by 7 inches tall when closed. It is the perfect size for your phone, wallet, keys, and a few essentials for a night out or casual day.
I chose a rich emerald green yarn for this project because it photographs beautifully and works for every season. But you can use any color that speaks to you. Navy, burgundy, mustard, and cream all look stunning with this stitch pattern.
Materials Needed for Your Bobble Stitch Clutch
Yarn:
Hook:
Notions:
For the Tassel:
Gauge and Sizing Information
Gauge: 14 stitches and 16 rows equals 4 inches in single crochet with 5.0mm hook
Take time to check your gauge before starting. Your clutch needs to be sturdy enough to hold its contents without stretching out of shape. If your gauge is too loose, your bag will be floppy. Go down a hook size if needed.
Finished Measurements:
Abbreviations and Stitch Definitions
Let me explain every stitch and abbreviation before we start. Refer back to this section anytime you need a refresher.
Ch means chain. Wrap yarn over hook and pull through the loop on your hook. This creates one chain stitch.
Sl st means slip stitch. Insert hook, yarn over, pull through both the stitch and the loop on your hook in one motion. This creates a nearly invisible join.
Sc means single crochet. Insert hook into stitch, yarn over and pull up a loop (two loops on hook), yarn over and pull through both loops.
Hdc means half double crochet. Yarn over, insert hook into stitch, yarn over and pull up a loop (three loops on hook), yarn over and pull through all three loops.
Dc means double crochet. Yarn over, insert hook into stitch, yarn over and pull up a loop (three loops on hook), yarn over and pull through two loops (two loops remain), yarn over and pull through remaining two loops.
Bobble means bobble stitch. This creates that beautiful puffy texture. Here is how to make one: yarn over, insert hook, yarn over and pull up a loop, yarn over and pull through two loops. You now have two loops on your hook. Repeat this sequence four more times in the same stitch. You will have six loops on your hook. Yarn over and pull through all six loops. One bobble complete. Push the bobble to the front of your work so it pops outward.
Inc means increase. Work two stitches into the same stitch.
FLO means front loop only. Work into just the front loop of the stitch instead of both loops.
BLO means back loop only. Work into just the back loop of the stitch.
Step by Step Crochet Tutorial for the Clutch Body
The body is worked flat in rows, then folded and seamed to create the bag shape.
Foundation and Base Rows
Row 1: Ch 36. Sc in second ch from hook and in each ch across. (35 sts)
Row 2: Ch 1, turn. Sc in each st across. (35 sts)
Row 3: Ch 1, turn. Sc in each st across. (35 sts)
Row 4: Ch 1, turn. Working in BLO only, sc in each st across. (35 sts)
This back loop row creates a nice fold line at the bottom of your bag.
Rows 5 to 8: Ch 1, turn. Sc in each st across. (35 sts)
Bobble Section of the Body
Now we add the beautiful texture. Take a deep breath. This is easier than it looks.
Row 9: Ch 1, turn. Sc in first st, *bobble in next st, sc in next st* repeat from * across. (35 sts, 17 bobbles)
Row 10: Ch 1, turn. Sc in each st across. (35 sts)
Row 11: Ch 1, turn. Sc in first 2 sts, *bobble in next st, sc in next st* repeat from * to last st, sc in last st. (35 sts, 16 bobbles)
Row 12: Ch 1, turn. Sc in each st across. (35 sts)
Notice how we offset the bobbles. Row 9 starts with a bobble in the second stitch. Row 11 starts with a bobble in the third stitch. This creates that brick pattern look.
Repeat Rows 9 through 12 four more times for a total of five bobble pattern repeats. You should have 28 rows completed.
Upper Body Section
Rows 29 to 32: Ch 1, turn. Sc in each st across. (35 sts)
Row 33: Ch 1, turn. Working in BLO only, sc in each st across. (35 sts)
This creates the fold line where the flap will attach.
Rows 34 to 37: Ch 1, turn. Sc in each st across. (35 sts)
Fasten off and weave in the end. Set the body aside.
How to Crochet the Flap with Spiral Bobble Medallion
The flap is the showstopper of this design. We work a circular medallion first, then add a border and extend it into a semicircle shape.
Center Medallion
Work in continuous rounds. Use a stitch marker to track the beginning of each round.
Round 1: Make a magic ring. Ch 1, work 6 sc into the ring. Do not join. Place marker in first st. (6 sts)
Round 2: 2 sc in each st around. (12 sts)
Round 3: *Sc in first st, 2 sc in next st* repeat around. (18 sts)
Round 4: *Bobble in first st, sc in next st, 2 sc in next st* repeat around. (24 sts, 6 bobbles)
Round 5: *Sc in next 2 sts, 2 sc in next st, sc in next st* repeat around. (30 sts)
Round 6: *Sc in first st, bobble in next st, sc in next 2 sts, 2 sc in next st* repeat around. (36 sts, 6 bobbles)
Round 7: *Sc in next 4 sts, 2 sc in next st, sc in next st* repeat around. (42 sts)
Round 8: *Sc in next 2 sts, bobble in next st, sc in next 3 sts, 2 sc in next st* repeat around. (48 sts, 6 bobbles)
Round 9: *Sc in next 6 sts, 2 sc in next st, sc in next st* repeat around. (54 sts)
Round 10: *Sc in next 3 sts, bobble in next st, sc in next 4 sts, 2 sc in next st* repeat around. (60 sts, 6 bobbles)
Round 11: Sc in each st around. (60 sts)
Sl st to first st to join. Do not fasten off.
Extending the Flap
Now we work back and forth in rows to create the rectangular extension that attaches to the bag body.
Row 1: Ch 1, turn. Sc in next 35 sts. Leave remaining sts unworked. (35 sts)
Row 2: Ch 1, turn. Sc in each st across. (35 sts)
Row 3: Ch 1, turn. *Sc in first st, bobble in next st* repeat across to last st, sc in last st. (35 sts)
Rows 4 to 7: Ch 1, turn. Sc in each st across. (35 sts)
Fasten off, leaving a long tail for sewing.
Assembly Instructions
Folding and Seaming the Body
Fold the body piece with wrong sides together at the BLO row (Row 4). The bobble side should face outward.
Using your tapestry needle and matching yarn, whip stitch the side seams closed. Work from bottom to top on both sides, stopping at Row 33.
Turn the bag right side out. The bobbles should pop nicely on the outside.
Attaching the Flap
Position the flap extension piece along the back edge of the bag, aligning with the BLO row at Row 33. The circular medallion should drape over the front.
Whip stitch the flap securely to the back of the bag. I recommend going over this seam twice for durability.
Installing the Hardware
Turn Lock Clasp:
Mark the center of the bag front, approximately 1 inch below the top edge. Using sharp scissors, carefully cut a small slit just wide enough for the clasp prongs. Insert the back plate from inside the bag and fold the prongs flat.
Position the front piece of the clasp on the flap to align with the back. Mark and cut the slot. Attach securely.
D Rings:
Crochet two small tabs for the D rings. Ch 8, sl st to first ch to form a loop. Sc 12 sts around the loop. Fasten off. Thread through D ring and sew to the inside side seams at the top corners.
Attach your chain strap to the D rings.
Creating the Tassel
Cut 40 strands of yarn, each 12 inches long. Fold in half. Use a separate piece of yarn to tie tightly around the fold, leaving long tails to attach to the bag.
Wrap another piece of yarn around the tassel about 1 inch below the top to create the head. Wrap tightly 8 to 10 times and secure.
Trim the bottom ends evenly. Add decorative gold rings if desired.
Attach the tassel to one D ring with the chain strap.
Optional Lining
For a more polished interior, cut your lining fabric to 9 by 13 inches. Fold in half with right sides together and sew the side seams with 0.5 inch seam allowance. Fold the top edge under 0.5 inch and press.
Insert the lining into the bag with wrong sides together. Hand stitch the lining to the inside of the bag along the top edge, just below where the flap attaches.
Beginner Friendly Tips for Success
Bobble troubles? The most common issue is loose bobbles that do not pop. Make sure you pull your yarn tight after completing each bobble. Push each bobble firmly to the right side before working the next stitch.
Counting stitches? After each bobble row, count your stitches carefully. A bobble counts as one stitch, not five. You should always have 35 stitches.
Spiral confusion? Working in continuous rounds can feel disorienting at first. Trust your stitch marker. Move it up to the first stitch of each new round.
Clasp installation scary? Practice on a scrap piece of crocheted fabric first. Once you understand how the prongs work, the real installation goes smoothly.
Caring for Your Finished Clutch
Hand wash in cool water with mild soap. Reshape while damp and lay flat to dry. Store stuffed with tissue paper to maintain shape.
Avoid hanging by the chain strap for extended periods, as this can stretch the attachment points over time.
I hope you love making this emerald green bobble stitch clutch as much as I loved designing it. There is something so satisfying about creating a beautiful accessory with your own hands.
If you make this clutch, I would absolutely love to see it. Tag me on Instagram or share in our Facebook group. Seeing your creations in different colors and yarn choices always makes my day.
Happy crocheting, friend. You have got this.
