
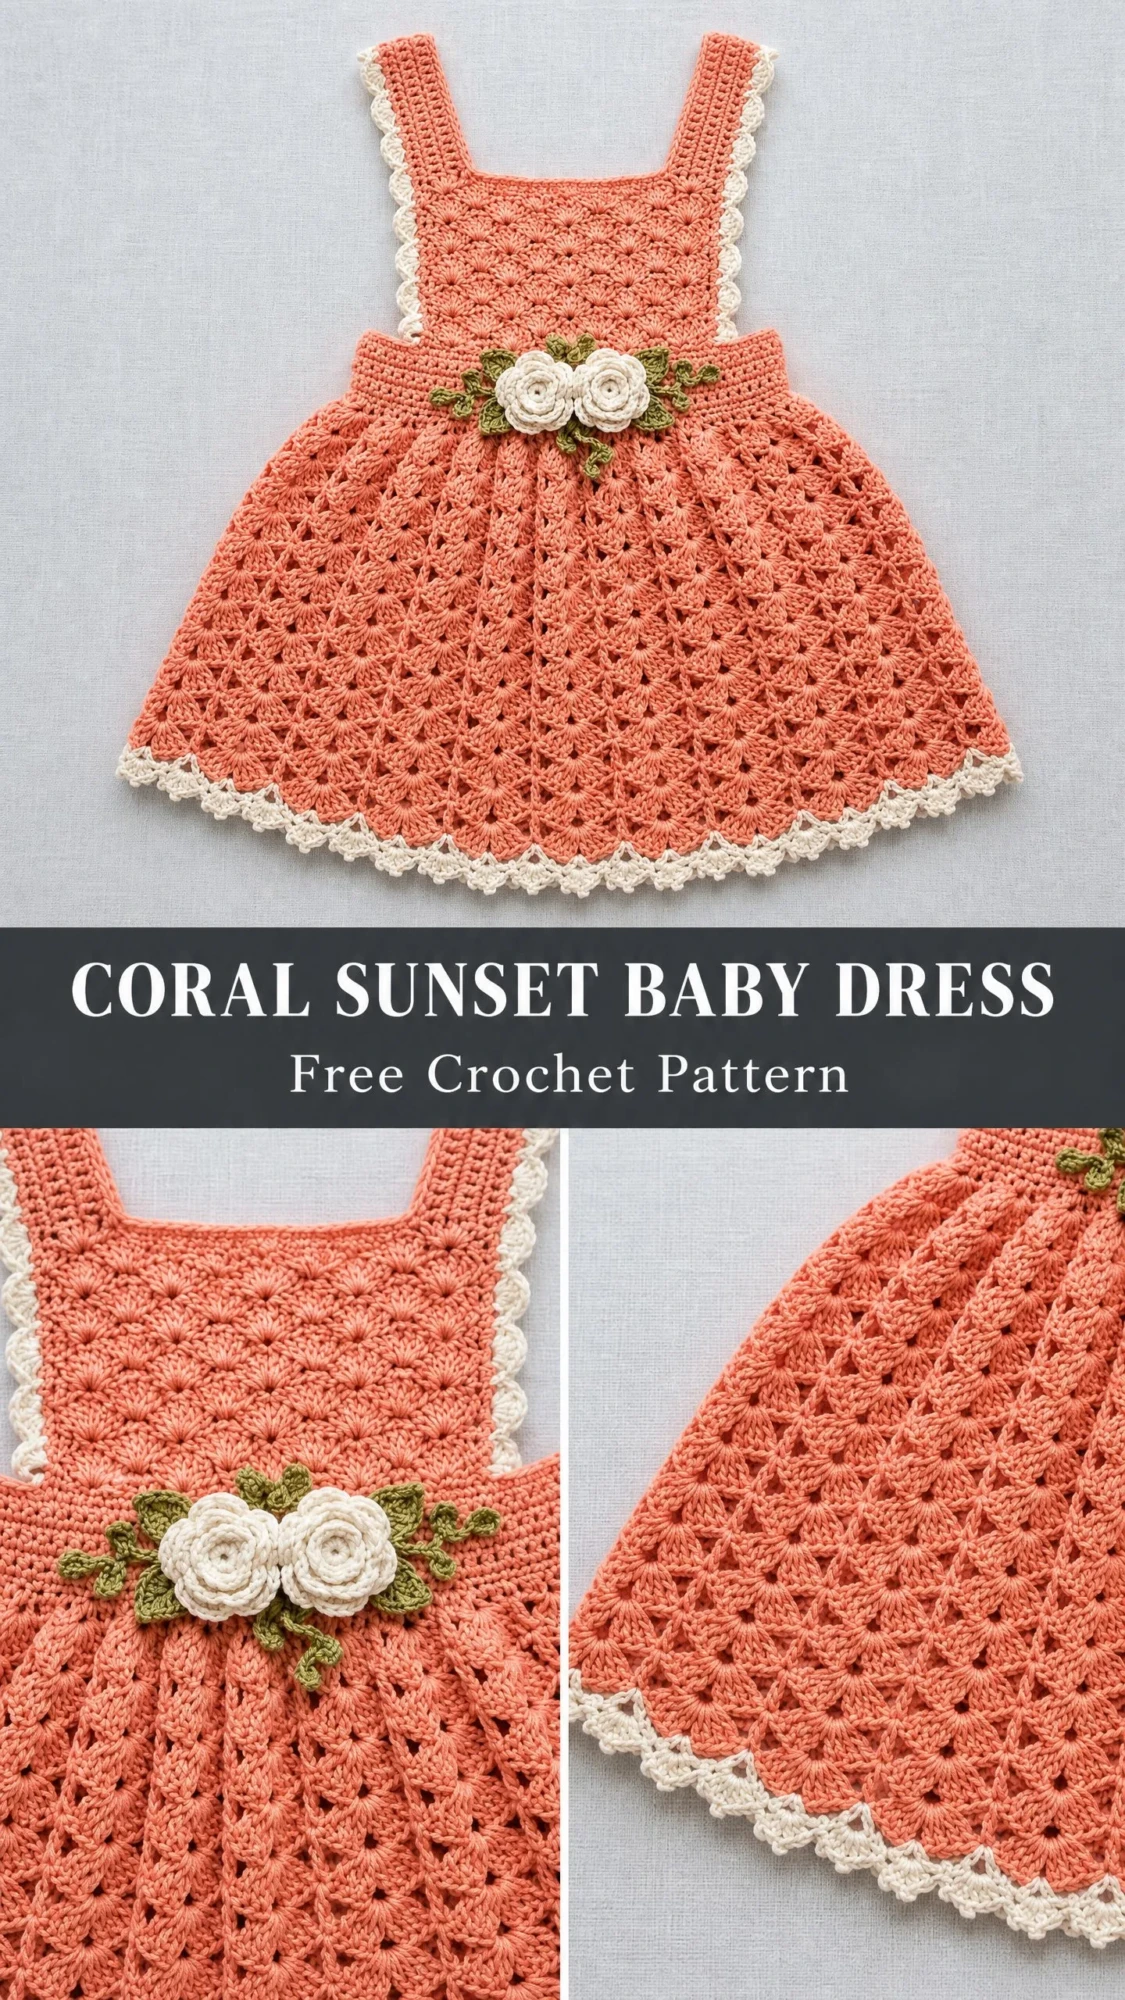
This is a crocheted baby dress worked in coral cotton yarn with cream trim. It features a fitted square-neck bodice, wide straps, and a flared lace skirt. The pattern uses shell stitches, single crochet, and a fan lace repeat. Sized for 6 to 12 months.
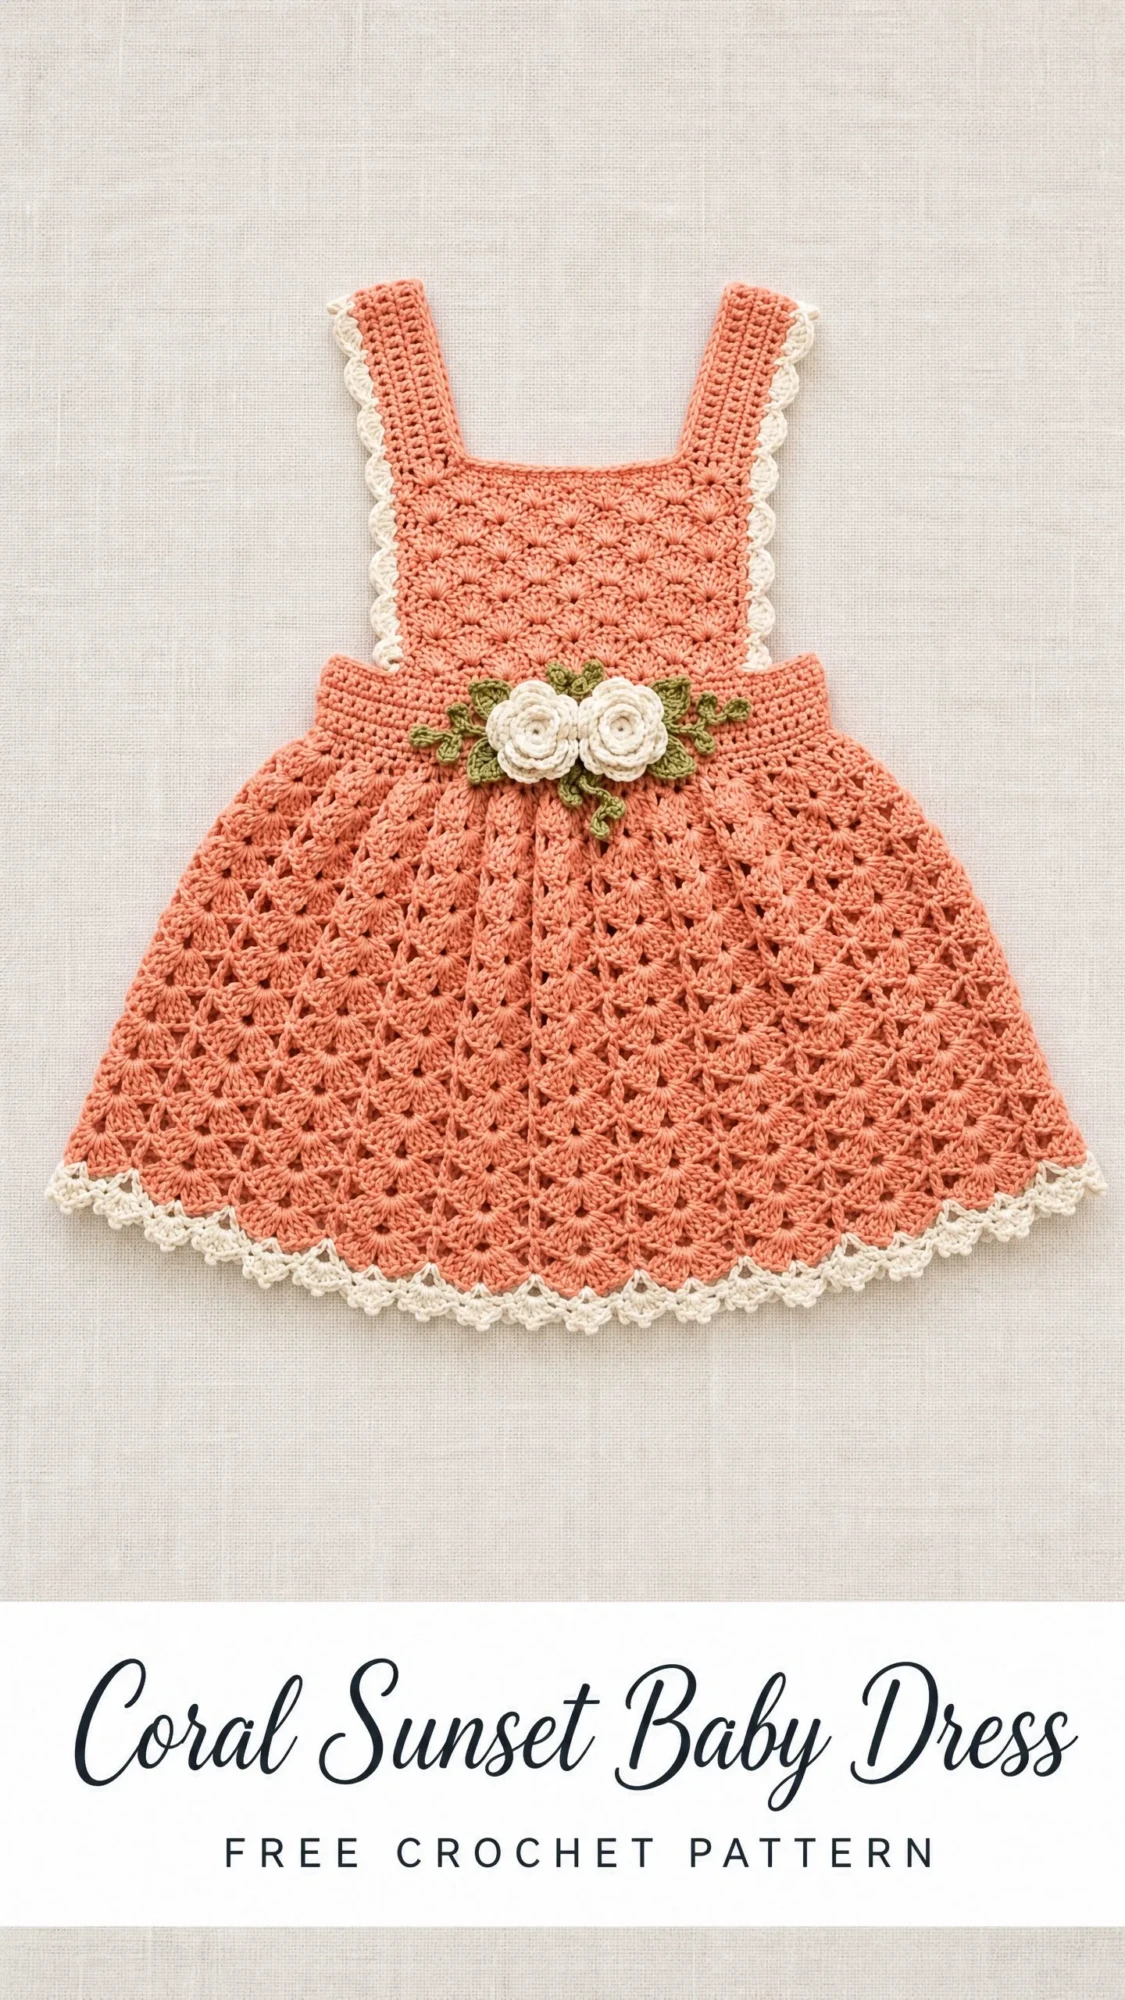
If you have been searching for a special handmade baby gift, this dress delivers. The construction is straightforward once you understand the two main sections. You work the bodice flat, seam the sides, then pick up stitches at the waist and crochet the skirt in rounds.
The coral and cream color combination feels both classic and fresh. Those little crocheted roses at the waist add a sweet finishing touch without overwhelming the design. Let me walk you through everything you need to know.
Why This Crochet Baby Dress Pattern Works
The Coral Sunset Baby Dress breaks down into manageable pieces. You are not tackling the whole thing at once. First you make two flat bodice panels using mostly single crochet. Then you seam them together at the sides. Next you add the straps. Finally you work the skirt downward in joined rounds using a pretty fan lace stitch.
This approach means you can set the project down between sections without losing your place. It also makes the construction easier to visualize as you go.
The shell stitch creates that lovely scalloped texture you see in the bodice yoke. A shell stitch is simply 5 double crochet stitches all worked into the same stitch or space. When grouped together, shells create a fan-shaped cluster that adds visual interest without complicated techniques.
The skirt uses a fan lace pattern that naturally flares as you work downward. The openwork design is breathable for baby and stunning to look at. After blocking, the lace really opens up and shows off its beauty.
Skill Level and Time Investment
I would call this an intermediate pattern. You should feel comfortable working flat and in the round, reading stitch counts, and executing shell stitches before starting.
If you have completed two or three crochet projects and understand basic increases, you can absolutely handle this dress. Take your time with the lace section and count your stitches carefully.
Expect to spend approximately 10 to 16 hours on this project depending on your speed and familiarity with the yarn. The bodice works up quickly. The skirt takes longer because of the lace pattern, but the rhythm becomes second nature after a few rounds.
Finished Measurements
This pattern fits size 6 to 12 months.
Materials Needed
Yarn
Recommended Yarn Options
Lion Brand 24/7 Cotton in Terracotta (MC) and Ecru (CC) offers excellent stitch definition and washes beautifully. Paintbox Yarns Simply DK held double works well too, giving a lighter hand with lovely sheen. Drops Paris in Coral and Off White provides sturdy construction with a matte finish.
Any smooth, tightly spun cotton or cotton-blend will work. Avoid fuzzy fibers like mohair or angora because they will obscure the lace pattern in the skirt.
Hook
US size G-6 / 4.0 mm crochet hook (or size needed to meet gauge)
Notions
Gauge
With MC and US G-6 / 4.0 mm hook:
Gauge matters here. A too-loose gauge creates a dress that is too large and floppy. A too-tight gauge makes the fabric stiff and the dress too small. Please swatch and block before beginning.
Abbreviations
Special Stitches
Shell Stitch (Shell): Work 5 double crochet stitches all into the same stitch or space. This creates a fan-shaped cluster.
Picot: Chain 3, slip stitch into the first chain made (the chain closest to the hook). This forms a small decorative loop.
Picot-Scallop Border: (Sl st into next st, ch 3, sl st into same st, sk 1 st) across or around. This creates the scalloped edge visible on straps and hem.
Crochet Rose: Make a slip knot. Chain 36. Row 1: dc into 4th ch from hook, (ch 1, skip 1 ch, 2 dc into next ch) across. Fasten off, leaving a 12-inch tail. Roll the strip loosely from one end, stitching the base together with the yarn tail as you roll to form a rose shape. Secure and weave end.
Small Leaf: Chain 8. Sl st into 2nd ch from hook, sc into next ch, hdc into next ch, dc into next 2 ch, hdc into next ch, sc into next ch, sl st into last ch. Work 3 sl sts down the side of the leaf base. Fasten off. Make 4 to 6 leaves per dress.
Pattern Notes
The dress is constructed in this order: front bodice panel worked flat, back bodice panel worked flat, side seams joined, straps worked flat and attached, strap and neckline trim added, skirt worked in joined rounds from the waist down, hem border worked, roses and leaves made and sewn on.
All turning chains count as noted in each section. Stitch counts given at the end of each row or round in parentheses reflect the total working stitches unless otherwise specified.
The right side is the public-facing side. The first row after the foundation chain is the wrong side.
When joining rounds, always join to the first stitch of the round (not the turning chain) with a slip stitch unless otherwise noted.
The dress has no button or zipper closure. It slips over the head, and the open-back construction provides ease for dressing.
Step by Step Crochet Instructions
Front Bodice Panel
With MC, make a foundation chain.
Row 1 (WS): Chain 38. Sc into 2nd ch from hook and into each ch across. Turn. (37 sc)
Row 2 (RS): Ch 1, sc into each st across. Turn. (37 sc)
Rows 3 through 6: Rep Row 2 four more times. (37 sc each row)
Checkpoint: After Row 6, your front panel should measure approximately 1.25 inches / 3 cm tall from the foundation edge.
Now work the shell yoke accent rows.
Row 7 (RS): Ch 1, sc into first 3 sts, (skip 2 sts, 5 dc into next st, skip 2 sts, sc into next 3 sts) 4 times, sc into last 2 sts. Turn. (37 sts)
Row 8 (WS): Ch 1, sc into each st across (working 1 sc into each of the 5 dc of each shell, flattening the texture). Turn. (37 sc)
Rows 9 through 14: Ch 1, sc into each st across. Turn. (37 sc each row)
Checkpoint: After Row 14, the front bodice panel measures approximately 4 inches / 10 cm tall.
Waist Gather Row (Row 15, RS): Ch 1, (sc2tog, sc into next 3 sts) 7 times, sc2tog. Turn. (29 sc)
Row 16 (WS): Ch 1, sc into each st across. Turn. (29 sc)
Row 17 (RS): Ch 1, sc into each st across. Turn. (29 sc)
Fasten off. This completes the front bodice panel. Set aside.
Back Bodice Panel
Work exactly as the front bodice panel through Row 14. (37 sc)
Row 15 Waist Gather (RS): Ch 1, (sc2tog, sc into next 3 sts) 7 times, sc2tog. Turn. (29 sc)
Row 16: Ch 1, sc into each st across. Turn. (29 sc)
Row 17: Ch 1, sc into each st across. Turn. (29 sc)
Fasten off. Set aside.
Joining Side Seams
With wrong sides facing together (right sides facing out), align front and back bodice panels. Using MC and a yarn needle, mattress stitch the two side seams together, joining the side edges from the waist gather row (Row 15) up through Row 5 on each side.
Leave the top 4 rows (Rows 1 through 4, counting from the neckline) open on each side to form the armhole openings. Leave the bottom open for skirt attachment.
Checkpoint: After seaming, the joined bodice should measure approximately 5.5 inches / 14 cm in total height and approximately 9 inches / 23 cm in circumference at the widest point.
Straps
The dress has two wide straps connecting the front neckline to the back neckline over the shoulders.
Strap 1 (Right Strap, Front to Back):
With MC and RS facing, join yarn at the right-hand corner of the front neckline (Row 1 edge).
Row 1: Ch 1, sc into next 6 sts along neckline edge. Turn. (6 sc)
Rows 2 through 14: Ch 1, sc into each st across. Turn. (6 sc each row)
After Row 14, the strap should be approximately 3.5 inches / 9 cm long. Do not fasten off. Pin strap to the corresponding right corner of the back neckline. Sl st strap end to back panel using the live stitches. Fasten off.
Strap 2 (Left Strap, Front to Back):
Rejoin MC at the left-hand corner of the front neckline with RS facing.
Work as Strap 1, Rows 1 through 14. (6 sc each row)
Attach to the left corner of the back neckline with sl sts. Fasten off.
Checkpoint: Both straps are attached. The neckline opening between the straps measures approximately 6 inches / 15 cm wide across the front.
Strap and Neckline Trim
With CC (cream), join with sl st at the right shoulder seam (top of right strap, back edge).
Work Picot-Scallop Border around each outer strap edge and across the full neckline edge: (Sl st into next st along edge, ch 3, sl st into base of ch-3 just made to form picot, skip 1 st) across entire strap edge, across front neckline, down second strap edge. Work 3 sl sts around corners for coverage.
Along the back neckline, work (sl st into next st, ch 3, sl st into base) across.
Join with sl st to starting point. Fasten off. Weave ends.
Work the same Picot-Scallop Border along the inner armhole openings: join CC at the top of the side seam, work along the open armhole edge, end at the bodice top. Fasten off.
Skirt
The skirt is worked in joined rounds, beginning at the waist opening of the assembled bodice.
With RS facing, join MC at one side seam at the waist with a sl st.
Setup Round: Ch 1, sc evenly around the entire waist opening, placing 1 sc into each available stitch and approximately 1 sc per row along the row-end edges of the bodice panels. The goal is 66 sc total around the waist. Adjust by working sc2tog or skipping 1 stitch if needed to arrive at exactly 66. Join with sl st to first sc. (66 sc)
Note: 66 is divisible by 11, which is the fan lace repeat width. This gives you 6 fans per round.
Round 1: Ch 3 (counts as first dc), dc into same st, ch 1, skip 1 st, (2 dc into next st, ch 1, skip 1 st) around. Join with sl st to top of beg ch-3. (66 dc total)
Round 2: Ch 1, sc into first ch-1 sp, (sc into each dc and each ch-1 sp around). Join with sl st to first sc. (66 sc)
Skirt Round 1 (Fan Round): Ch 1. (Sk 1 st, Shell into next st, sk 2 sts, sc into next st, sk 2 sts, sc into next st, sk 3 sts) 6 times. Join with sl st to first sc. (30 dc in shells, 12 sc)
Skirt Round 2: Ch 1. Sc into same st. (Ch 3, sc into 3rd dc of shell, ch 3, sc into next sc between shells) around, ending last rep with ch 3, join with sl st to first sc. (24 sc, 24 ch-3 sps)
Continue in the established fan lace pattern, working Round 1 and Round 2 alternately for a total of 14 to 16 rounds, or until skirt measures approximately 7 inches from waist.
Hem Border
With CC, join at any point along the hem edge.
Work the Picot-Scallop Border around the entire hem: (Sl st into next st, ch 3, sl st into base of ch-3, sk 1 st) around. Join with sl st. Fasten off. Weave ends.
Roses and Leaves
Make 2 crocheted roses in CC following the special stitch instructions above.
Make 4 to 6 small leaves in green yarn (or CC if preferred) following the special stitch instructions.
Using MC or CC and a yarn needle, sew the roses to the center front waistline. Arrange the leaves on either side of the roses and stitch in place. Weave all ends securely.
Finishing and Blocking
Block the finished dress by wet-blocking: soak in cool water for 10 minutes, press out water gently, pin to measurements on a foam mat, and allow to dry flat.
Blocking opens the lace pattern dramatically and evens the fabric. Do not skip this step. The skirt will look so much better after blocking.
Weave in any remaining ends. Trim excess yarn.
Tips for Success
Count your stitches at the end of every row, especially in the bodice. Losing or gaining stitches early throws off your entire project.
Place stitch markers at the beginning of each round in the skirt section. This helps you keep track of where your rounds start and end.
If the lace section feels confusing at first, work a small practice swatch before starting the actual skirt. The rhythm clicks after a few repeats.
Use a smooth, light-colored cotton yarn for your first attempt. This makes it easier to see your stitches and catch mistakes early.
Thank you so much for choosing this pattern for your next crochet project. I hope you love making this sweet little dress as much as I loved designing it. If you finish one, I would absolutely love to see it. Tag me on Instagram or share a photo in my Facebook group.
If this pattern is calling your name, go ahead and pin it to your Pinterest boards so you can find it when you are ready to start. And please drop a comment below if you make one. Hearing from you always makes my day.
You Might Also Like
- Sunny Lemon Couple Amigurumi Free Crochet Pattern
- Burnt Orange Autumn Granny Cardigan Free Crochet Pattern
- Navy Blue Elegant Crochet Lace Dress Free Pattern
- Mint Green Daisy Baby Dress Free Crochet Pattern
