
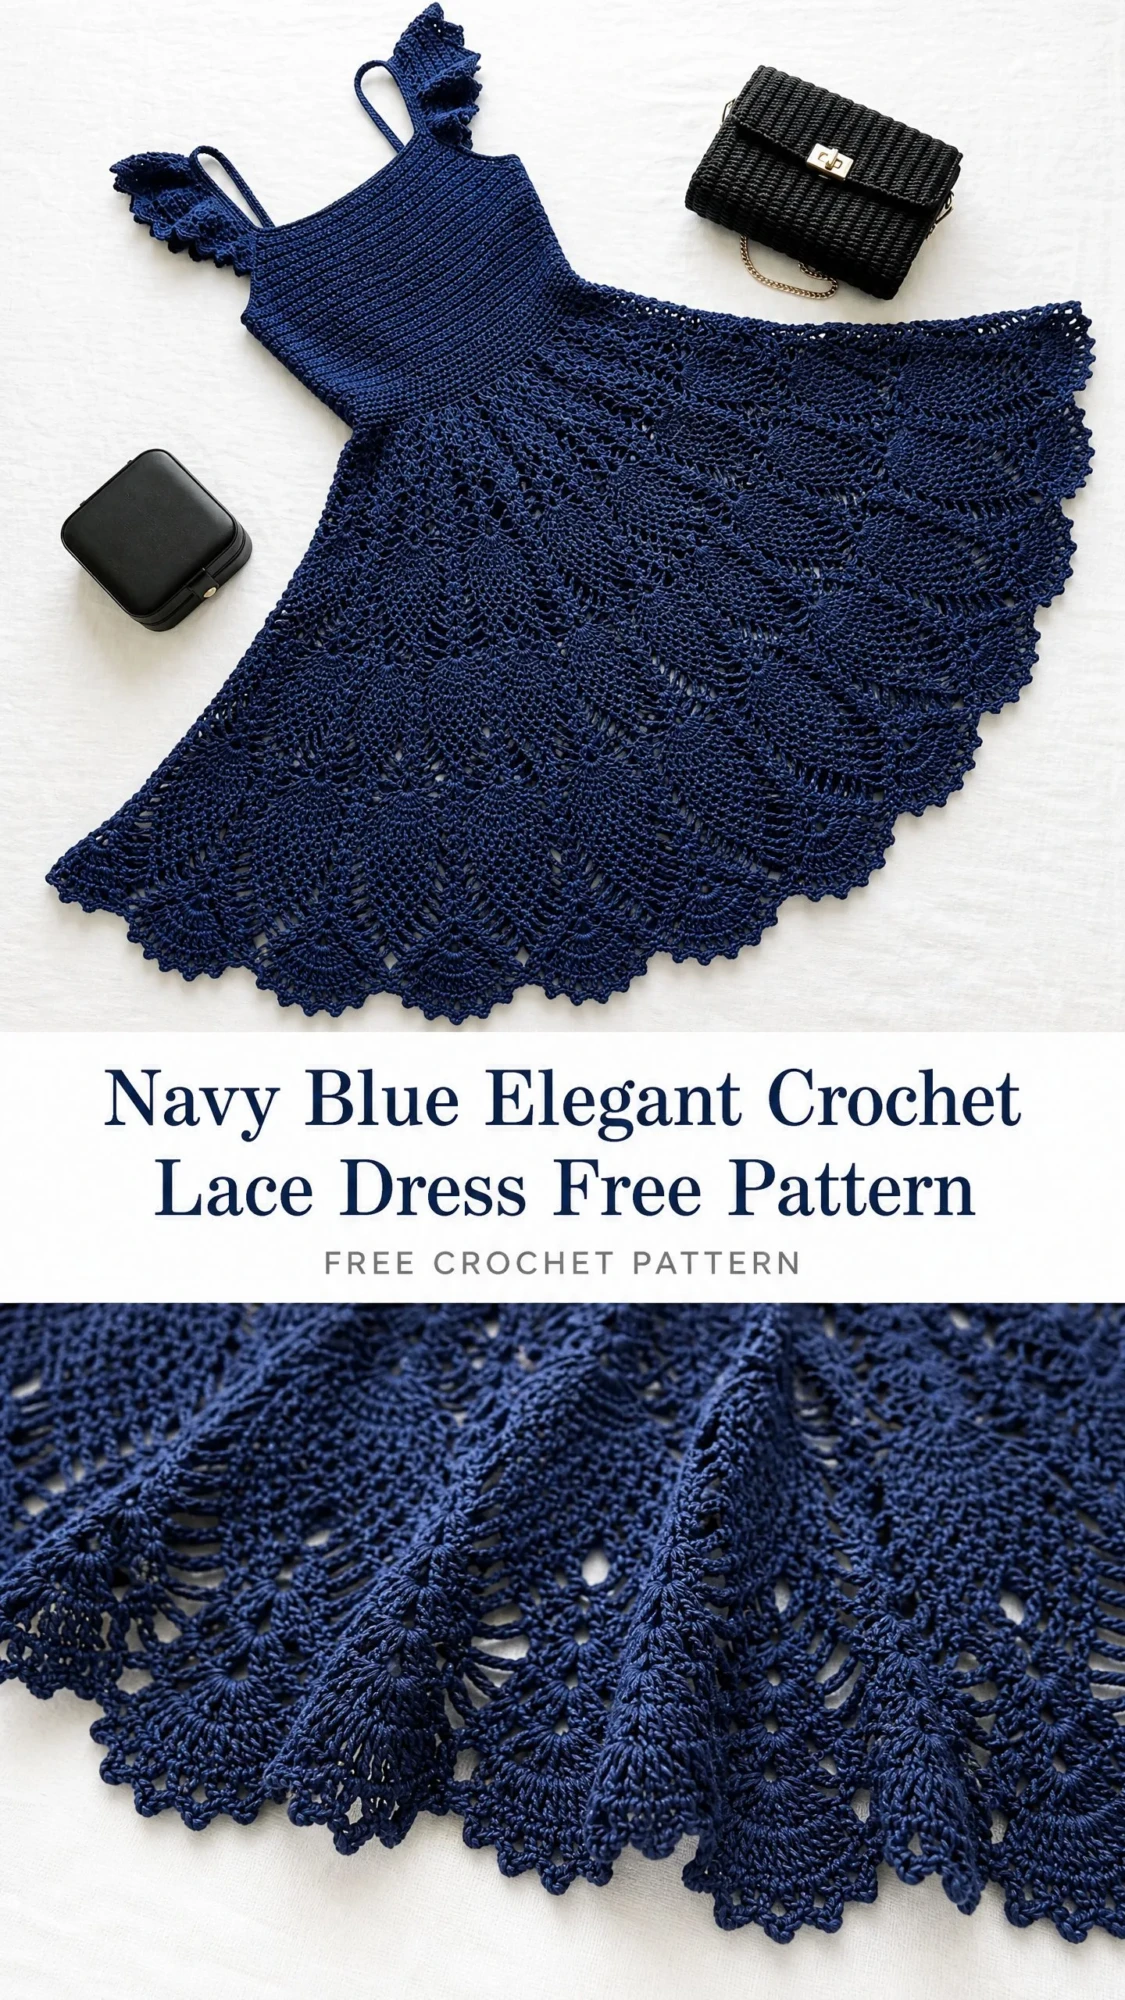
This is a navy blue crochet dress with a fitted ribbed bodice, flutter sleeve trim, thin straps, and a sweeping pineapple lace skirt. The bodice uses front post and back post double crochet for the ribbing. The skirt features classic pineapple motifs worked in the round. This is an advanced pattern that takes approximately 40 to 60 hours to complete.
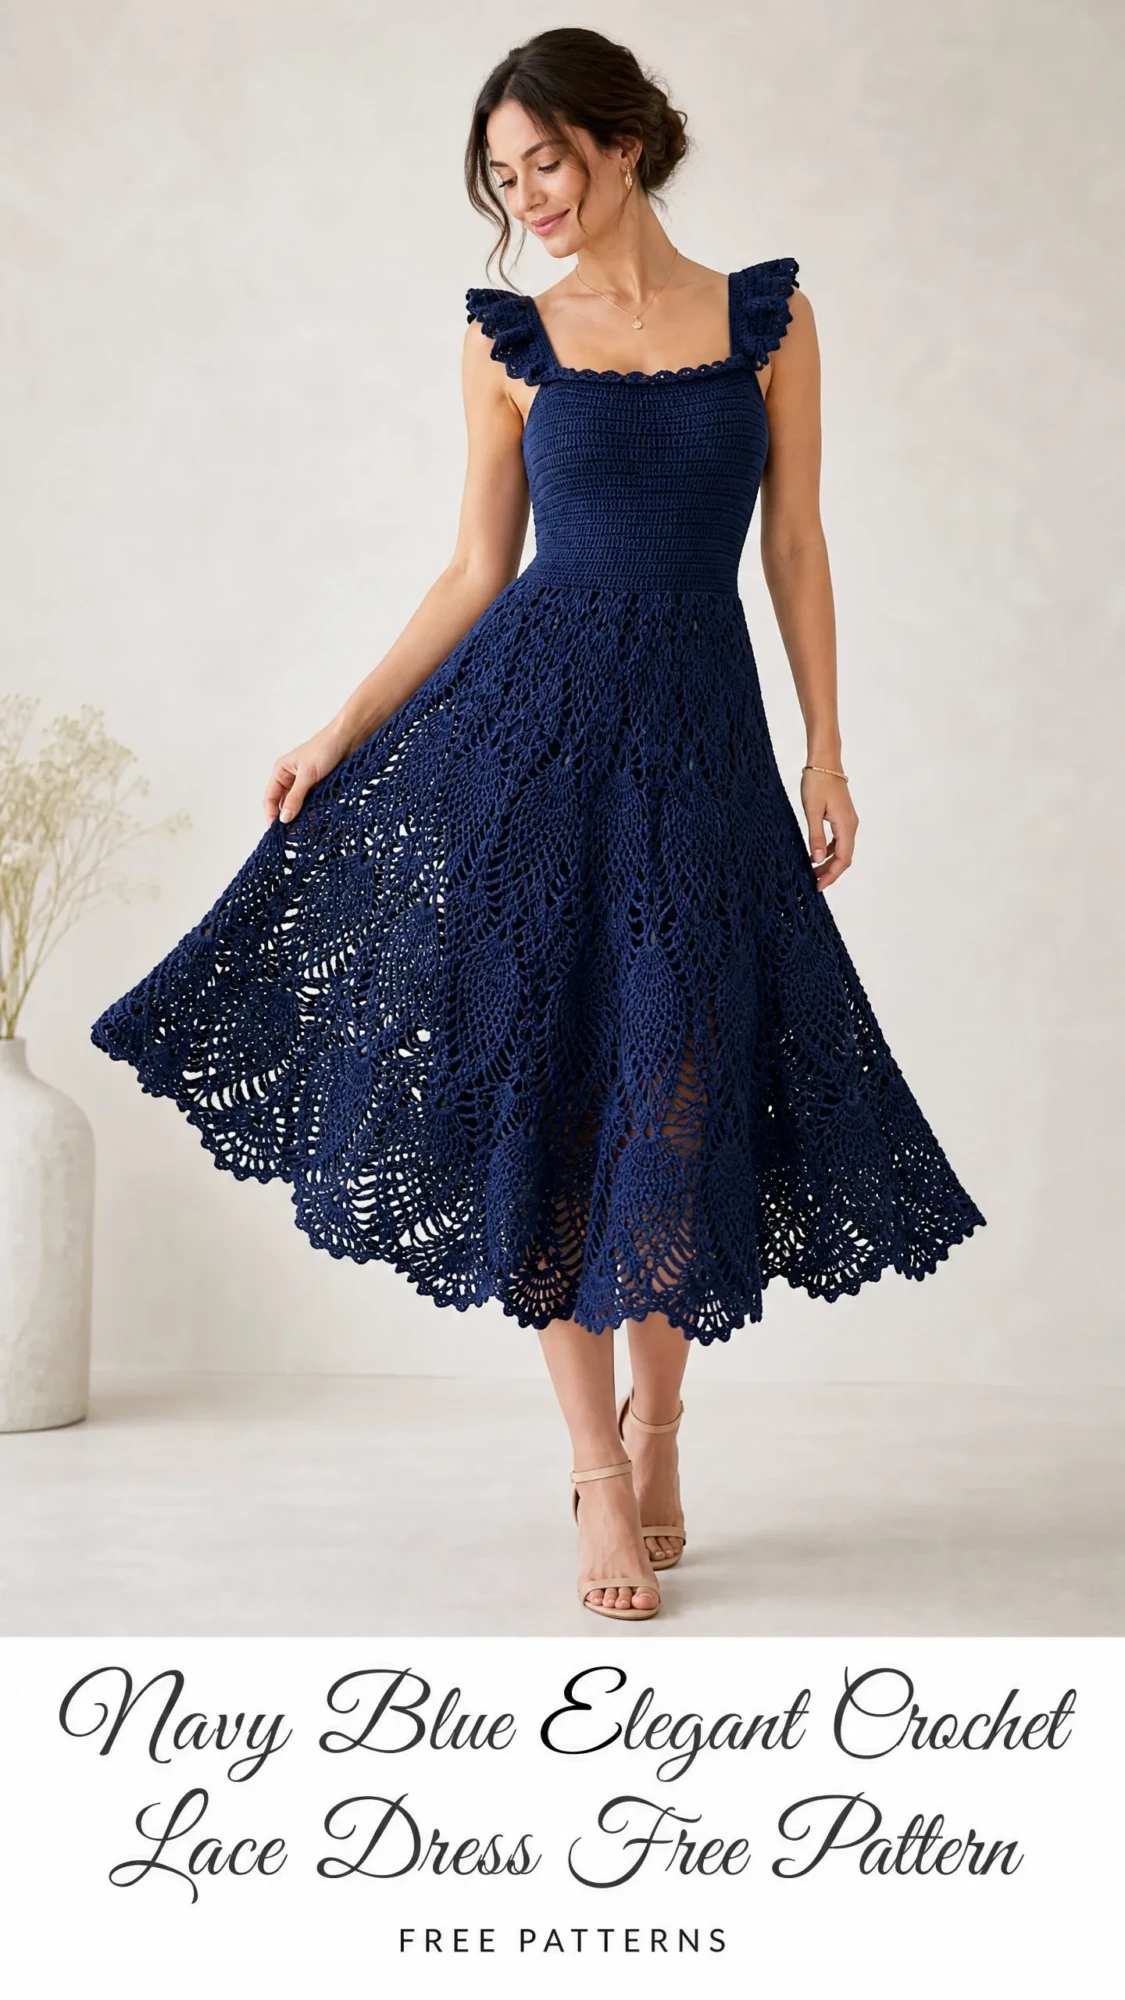
If you have been searching for a showstopper garment project, this is it. The construction combines flat work for the bodice with circular lace construction for the skirt. Every section builds on skills you may already have, just brought together in a new way.
The finished dress fits a women’s size Small to Medium with a 32 to 34 inch bust and 26 to 28 inch waist. The skirt falls about 18 inches from waist to hem with gorgeous scalloped edging all around.
Why This Crochet Dress Pattern Works So Well
The magic of this design comes from the contrast between the structured bodice and the flowing lace skirt. The vertical ribbing on the bodice creates a flattering, slightly stretchy fit that hugs the body without being restrictive. Meanwhile, the pineapple lace skirt has that classic romantic drape that moves beautifully when you walk.
I love how the flutter sleeve ruffle adds a feminine touch without overwhelming the design. These small ruffles are worked directly into the armhole edges after the bodice is assembled. They frame the shoulders without adding bulk or requiring complicated sleeve shaping.
The thin double straps on each shoulder give you options. You can wear them parallel for a classic look or cross them in back for something a bit more unexpected. The pattern includes instructions for adding adjustable sliders if you want customizable length.
Materials You Will Need
Yarn: DK weight cotton or cotton blend yarn in navy blue. You will need approximately 1,400 to 1,600 yards total.
Here are three yarn suggestions that work beautifully for this project:
Paintbox Yarns Simply DK in Sailor Blue works wonderfully. This 100% cotton yarn has excellent stitch definition for lace work. You will need about 11 to 12 skeins.
Lion Brand 24/7 Cotton DK in Navy is widely available and affordable. It has great drape and durability. Plan for 8 to 9 skeins.
Drops Safran in Navy Blue contains 70% cotton and 30% viscose. The viscose adds a subtle sheen that looks elegant in the finished dress. You will need 9 to 10 skeins.
Hook: US size E-4 (3.5 mm) crochet hook, or the size needed to obtain gauge.
Notions:
Gauge Information
Getting gauge right is critical for fit on a garment like this. Please do not skip the swatch.
For the bodice (single crochet):
18 sc = 4 inches (10 cm)
22 rows of sc = 4 inches (10 cm)
For the lace skirt section:
One full pineapple repeat (14 stitches wide at base) = approximately 3 inches (7.5 cm)
One vertical pineapple motif (full height from base to tip) = approximately 4.5 inches (11.5 cm)
Work a 6 inch square swatch in single crochet, wash it, block it flat, and measure before you begin. If your gauge is off, adjust your hook size. Too many stitches per inch means you need a larger hook. Too few means you need a smaller hook.
Abbreviations and Stitch Definitions
Let me walk you through every stitch used in this pattern. I am defining them in plain English so you know exactly what each one means.
ch = chain. Wrap yarn over hook and pull through the loop on your hook.
sl st = slip stitch. Insert hook, yarn over, pull through both the stitch and the loop on your hook in one motion.
sc = single crochet. Insert hook, yarn over, pull up a loop (2 loops on hook), yarn over, pull through both loops.
dc = double crochet. Yarn over, insert hook, yarn over, pull up a loop (3 loops on hook), yarn over, pull through 2 loops, yarn over, pull through remaining 2 loops.
tr = treble crochet. Yarn over twice, insert hook, yarn over, pull up a loop (4 loops on hook), then yarn over and pull through 2 loops three times until 1 loop remains.
FPdc = front post double crochet. Yarn over, insert hook from front to back to front around the post of the stitch below, then complete the double crochet as normal. This creates raised texture on the front of your work.
BPdc = back post double crochet. Yarn over, insert hook from back to front to back around the post of the stitch below, then complete the double crochet as normal. This creates raised texture on the back of your work.
sk = skip. Pass over the indicated number of stitches without working into them.
ch-sp = chain space. The open space created by chains in the previous row or round.
RS = right side. The side that faces outward when worn.
WS = wrong side. The side that faces inward when worn.
Special Stitches Explained
Rib Stitch (for the bodice)
The ribbed bodice uses alternating front post and back post double crochet stitches. This creates vertical columns that stretch horizontally, giving the bodice a fitted feel.
Row pattern: Chain 1, turn. Work FPdc in next stitch, BPdc in next stitch. Repeat this alternation to the end of the row.
The key is consistency. If you worked FPdc around a stitch in the previous row, you will work BPdc around that same stitch position in the current row, and vice versa. This keeps your rib columns aligned.
Shell Stitch (for the ruffle)
Work 5 double crochet stitches all into the same stitch or space. This creates a fan shape that gives the flutter sleeves their pretty ruffled appearance.
Scallop Edging (for the hem)
Step 1: Slip stitch into the first stitch.
Step 2: Chain 3, then work 4 more dc into the same stitch (5 dc shell total).
Step 3: Skip 2 stitches, slip stitch into the next stitch.
Step 4: Skip 2 stitches, work 5 dc into the next stitch.
Repeat steps 3 and 4 across the entire edge.
Pineapple Cluster
This is the signature stitch that creates the layered fan shape within each pineapple motif. It involves working multiple incomplete treble crochet stitches into the same space, then joining them all at the top.
Yarn over twice, insert hook into the designated space, pull up a loop. Yarn over, pull through 2 loops. Yarn over, pull through 2 loops. You now have 2 loops remaining on your hook. Without completing the stitch, repeat this process (yarn over twice, insert into same space, and work down to 2 loops remaining) until you have the required number of incomplete trebles. Then yarn over and pull through all remaining loops at once.
The number of trebles per cluster decreases as you work up the pineapple, which creates the tapered shape.
Step by Step Pattern Instructions
Section 1: Bodice Ribbing Panel
The bodice is worked flat as a ribbed rectangle, then seamed into a tube at the back.
Foundation chain: Chain 29.
Row 1 (RS): Double crochet in the 4th chain from hook and in each chain across. Turn. (27 dc)
Row 2: Chain 3 (counts as first dc throughout). Work FPdc around next stitch, BPdc around next stitch. Repeat this alternation to the last stitch, dc in top of turning chain. Turn. (27 sts)
Row 3: Chain 3. Work BPdc around the next FPdc from the previous row, FPdc around the next BPdc. Repeat this alternation to the last stitch, dc in top of turning chain. Turn. (27 sts)
Rows 4 through 115: Repeat Rows 2 and 3 alternately until you have 115 rows total. Your ribbed panel should measure approximately 25.5 inches (65 cm) wide and 6 inches (15 cm) tall.
Fasten off, leaving a long tail for seaming.
Seaming the bodice: Fold the panel so Row 1 meets Row 115 at center back. Using your tapestry needle and the yarn tail, whipstitch or mattress stitch the short ends together, matching the rib columns carefully. You now have a tube.
Section 2: Bodice Top Edging
With the right side facing and the bodice tube positioned with ribbing running vertically, find the top edge.
Round 1: Join yarn at center back seam. Chain 1, work single crochet evenly around the top edge, placing 1 sc per row end. Work exactly 116 sc around. Join with slip stitch to first sc. (116 sc)
Round 2: Chain 1, sc in each sc around. Join. (116 sc)
Mark these positions with stitch markers:
Section 3: Flutter Sleeve Ruffle
Work this ruffle into each armhole opening. The armhole edge has approximately 12 to 14 row ends available.
Round 1 (Ruffle Foundation): Join yarn at the bottom of the armhole (underarm point). Chain 1, work 2 sc in each row end around the armhole curve. You should have approximately 28 sc. Join with slip stitch to first sc. (28 sc)
Round 2: Chain 3 (counts as dc), 2 dc in same stitch. Skip 1 stitch, slip stitch in next stitch, skip 1 stitch, 5 dc in next stitch. Repeat from around, ending with skip 1, slip stitch, skip 1, 2 dc in first stitch to complete the last shell. Join with slip stitch to top of chain 3. (7 shells)
Round 3: Slip stitch to center dc of first shell, chain 1, sc in same stitch. Chain 3, sc in center dc of next shell. Repeat around. Chain 3, join with slip stitch to first sc. (7 sc + 7 ch-3 spaces)
Round 4: Slip stitch into chain 3 space, chain 3, 4 dc in same space (5 dc shell). Slip stitch into next sc, 5 dc in next chain 3 space. Repeat around. Slip stitch in next sc. Join. (7 shells)
Round 5: Repeat Round 3. (7 sc + 7 ch-3 spaces)
Round 6: Slip stitch into chain 3 space, chain 3, 6 dc in same space. Slip stitch into next sc, 7 dc in next chain 3 space. Repeat around. Slip stitch in next sc. Join. (7 shells of 7 dc)
Fasten off and weave in ends. Repeat for the second armhole.
Section 4: Straps
Each strap is a simple double-thick cord.
Foundation: Chain 100 (approximately 18 inches).
Row 1: Single crochet in 2nd chain from hook and in each chain across. (99 sc)
Row 2: Chain 1, turn. Single crochet in each sc across. (99 sc)
Fasten off, leaving a 12 inch tail for attaching.
Make 4 straps total (2 for each shoulder).
Pin the straps to the front and back of the bodice top edge, spaced approximately 2.5 inches apart at each shoulder. Try on the dress or use a dress form to determine the correct length before final attachment. Sew each strap securely through 4 to 6 stitches.
Section 5: Waistband Transition
With right side facing, locate the bottom long edge of the bodice tube.
Round 1: Join yarn at center back seam. Chain 1, sc evenly around, placing 1 sc per row end. Work exactly 168 sc around. Join with slip stitch. (168 sc)
Round 2: Chain 1, sc in each sc around. Join. (168 sc)
Round 3: Chain 1. Single crochet in next 12 stitches, 2 sc in next stitch. Repeat this pattern 12 times around. Join. (180 sc)
Round 4: Chain 1, sc in each sc around. Join. (180 sc)
Your bottom edge now has exactly 180 stitches, which provides the foundation for 12 pineapple motifs.
Section 6: Pineapple Lace Skirt
The skirt is worked in rounds from waist to hem. The 12 pineapple motifs grow wider as you work down, creating the A-line silhouette. Each pineapple repeat uses 15 stitches across the foundation.
Skirt Setup Round: Chain 5 (counts as dc + chain 2). Skip 2 stitches. Work 7 dc in next stitch (this is your pineapple base fan). Chain 2, skip 2 stitches, dc in next stitch (anchor). Chain 2, skip 2 stitches. Repeat the sequence from around 11 more times. Join with slip stitch to 3rd chain of beginning chain 5.
Continue working the pineapple motifs according to traditional pineapple lace construction, with chain mesh backgrounds between each motif. The pineapples taper from their 7 dc base to a single stitch at the tip over approximately 14 rounds of decreasing clusters.
After completing the pineapple tiers, work the scallop edging around the entire hem for a beautiful finished edge.
Finishing Your Dress
Block all pieces before final assembly. Wet blocking works best for cotton yarn. Soak the dress in lukewarm water, gently squeeze out excess moisture without wringing, and pin it to blocking mats. Shape the skirt into a full circle and pin out the scalloped hem so each scallop point is visible.
Let dry completely before unpinning. This may take 24 to 48 hours depending on humidity.
If desired, add a lining to the lace skirt for modesty. A simple A-line slip in a matching navy or neutral color works perfectly.
Tips for Success
Take your time with the pineapple lace section. Each round builds on the one before it, and mistakes are easier to fix if caught early.
Count your stitches at the end of every round during the skirt construction. The math must stay correct for the pineapples to align properly.
Use stitch markers generously. Mark the beginning of each round and the center of each pineapple motif if it helps you track your position.
This dress makes a stunning special occasion piece. Pair it with the black accessories shown for a sophisticated look, or dress it down with sandals for summer events.
I hope you enjoy making this beautiful crochet lace dress as much as I enjoyed designing it. If you make one, I would absolutely love to see it. Tag me on Instagram or share in my Facebook group. Your creations always inspire me and other makers in our community.
If this pattern caught your eye, go ahead and pin it to your Pinterest boards so you can find it when you are ready to start. And please drop a comment below if you have questions or want to share your finished dress. I read every single one and love hearing from you.
You Might Also Like
- Mint Green Summer Baby Romper Free Crochet Pattern
- Autumn Harvest Sunflower Granny Tote Free Crochet Pattern
- Charcoal Gray Modern Crochet Lace Boots Free Pattern
- Mint and Peach Tiered Baby Dress Free Crochet Pattern
