
I don’t know about you, but I have a complicated relationship with summer layering. You want something light and breezy that actually looks intentional, not like you grabbed the first thing off the chair. You want coverage without feeling like you’re wrapped in a blanket at the beach.
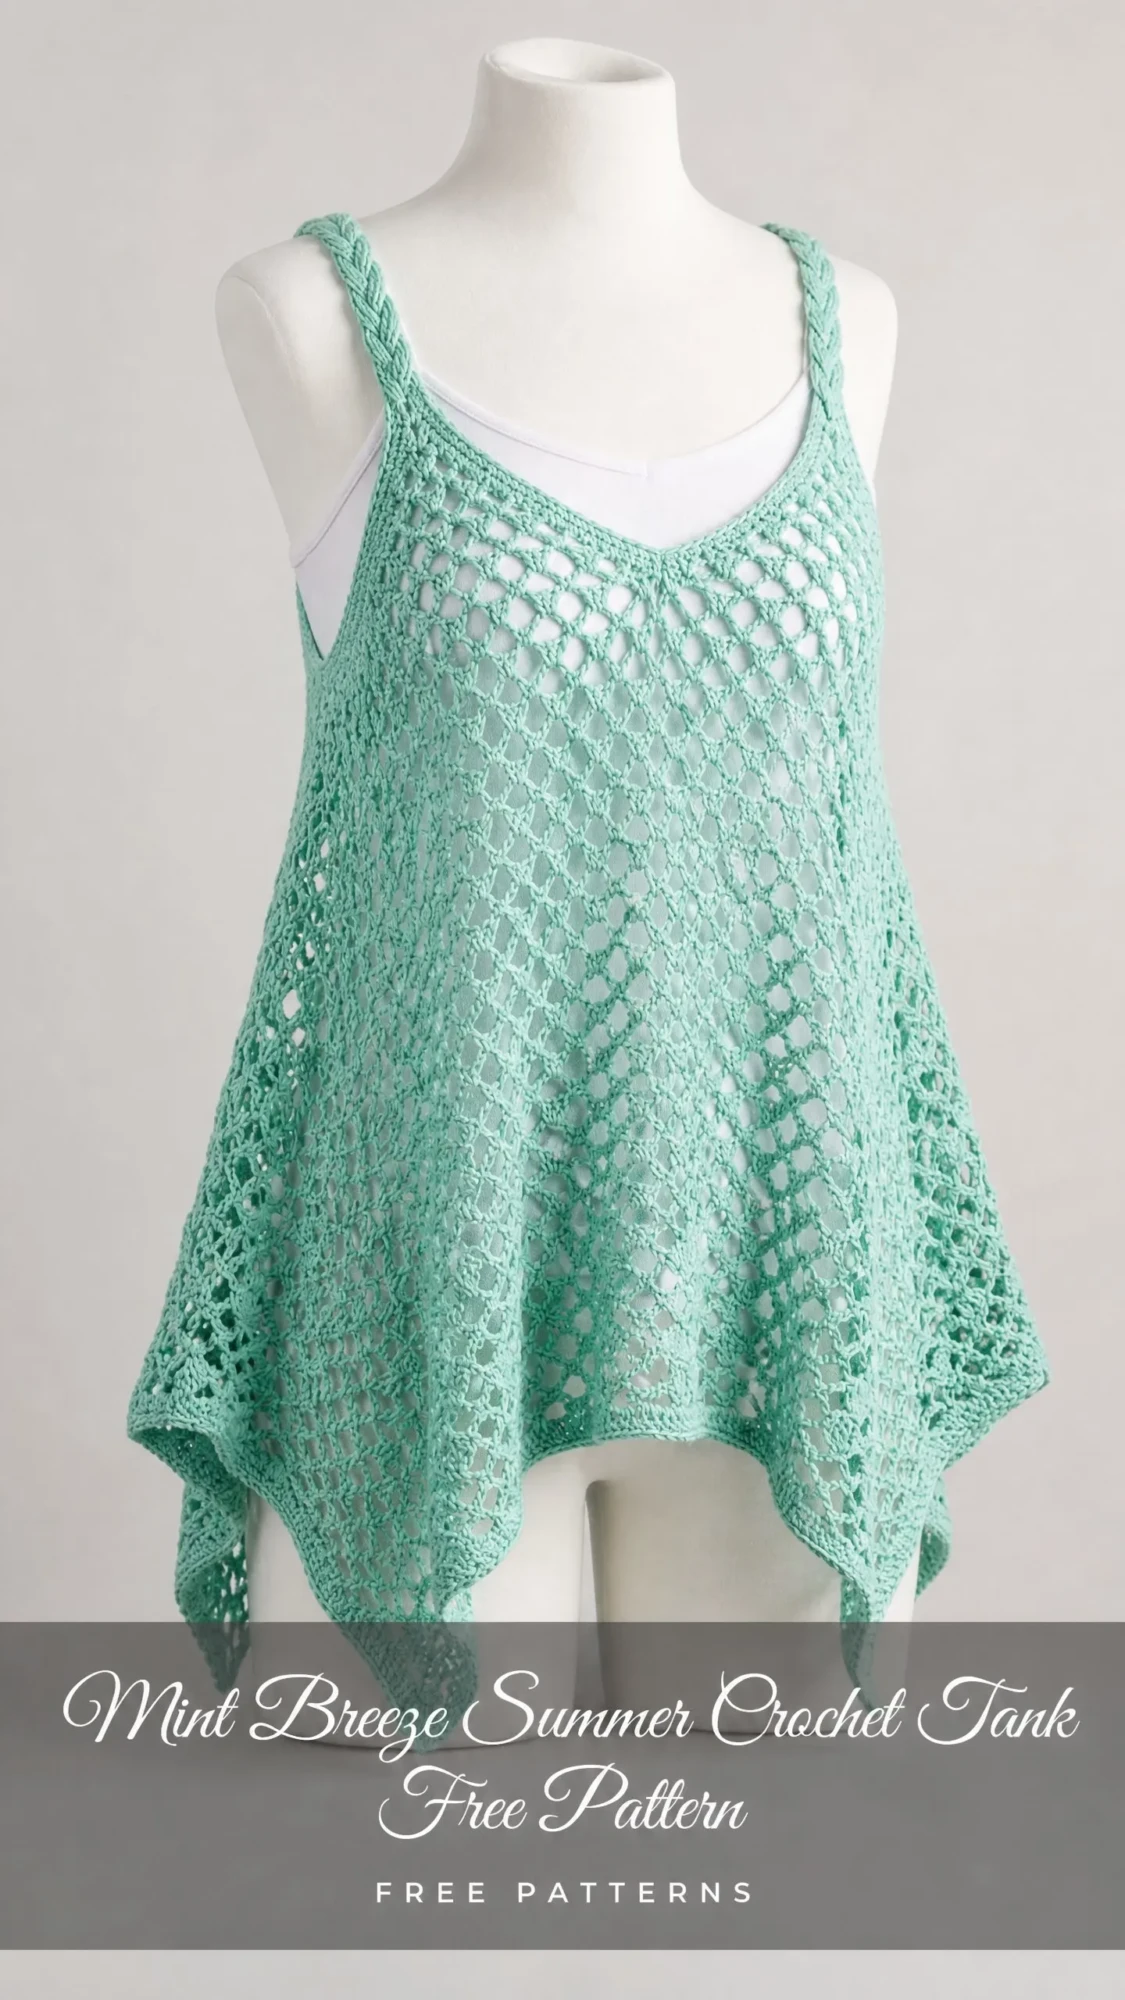
This crochet tank solves all of that. The open mesh keeps you cool. The dramatic handkerchief hem adds movement and visual interest. And that mint color? It practically screams "I have my life together" even when you absolutely do not.
The construction is clever but not fussy. You work two flat panels from the top down, shape the necklines differently for front and back, then join everything with a pretty shell border at the hem. The braided straps add a finished, polished look without complicated techniques. If you have made a couple of projects and feel comfortable with chain spaces and basic shaping, you can absolutely make this.
Why This Summer Tank Pattern Works So Well
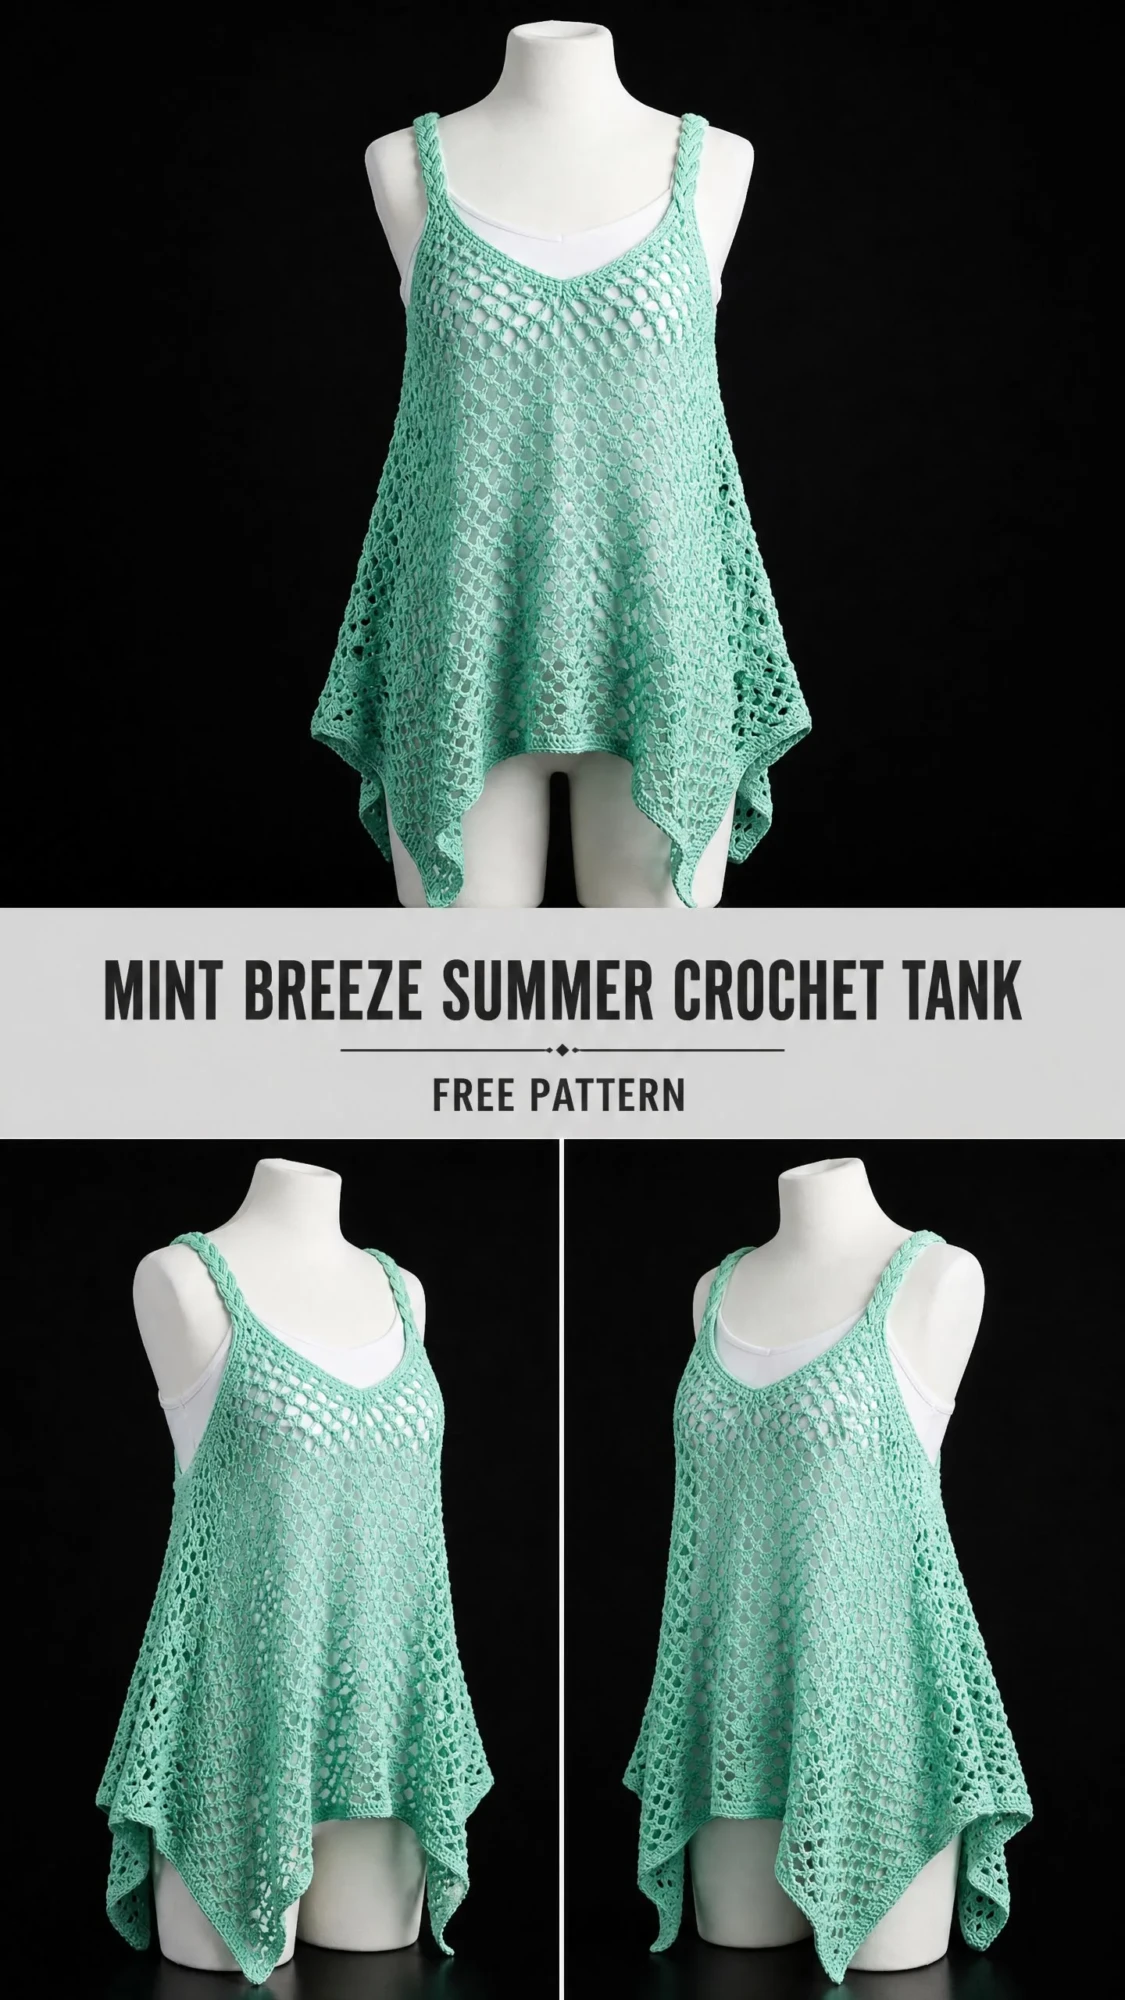
The genius of this design is in the details. The front features a flattering V-neckline while the back has a relaxed scoop neck. Both are worked separately, which means the shaping is straightforward and you can try on each piece as you go.
The body uses a diamond mesh stitch that creates an open lattice effect. Picture little diamond shapes made of chain arches, row after row. It looks intricate but it is really just a repeating pattern once you get the rhythm. The mesh is what gives this top its beach cover-up vibe while still being substantial enough to wear over a camisole or bralette.
Those handkerchief points at the hem? They happen naturally because of how the panels are shaped. You increase at the sides as you work down, creating a trapezoid shape. When you join the front and back at the side seams but leave the bottom edges free, the corners drape down into those elegant points. No complicated shaping required.
Materials You Will Need
Gather these supplies before you start:
Yarn: Approximately 550 (650, 750, 850) yards of DK weight, 100% cotton yarn in your chosen color. The sample uses a mint or seafoam green shade. You will need 3 (4, 4, 5) skeins if using Lion Brand 24/7 Cotton or a similar DK cotton.
Hook: US size G-6 / 4.0 mm crochet hook, or the size needed to achieve gauge.
Notions:
Yarn alternatives: Paintbox Yarns Cotton DK works beautifully and is budget friendly. Cascade Yarns Pima Tencel DK adds a subtle sheen if you want something slightly dressier. Avoid fuzzy fibers like mohair or alpaca blends because they will hide the pretty open mesh pattern.
Finished Measurements
This pattern is written for size Small with changes for Medium, Large, and Extra-Large in parentheses: S (M, L, XL).
Bust circumference: 34 (38, 42, 46) inches / 86.5 (96.5, 106.5, 117) cm
Body length from shoulder to longest hem point: 26 (27, 28, 29) inches / 66 (68.5, 71, 73.5) cm
Strap length: Approximately 10 to 12 inches / 25.5 to 30.5 cm (adjustable)
Hem width at widest point: 40 (44, 48, 52) inches / 101.5 (112, 122, 132) cm
The top is designed with 4 inches of positive ease. Choose your size based on your actual bust measurement.
Gauge
Getting gauge right matters here because you want the top to fit and drape properly.
In Diamond Mesh Stitch pattern after blocking:
How to check: Make a foundation of 32 chains. Work the Diamond Mesh Stitch for 12 rows. Block the swatch. It should measure 6 inches wide by 6 inches tall. If your swatch is too wide, go down one hook size. If it is too narrow, go up one hook size.
I know swatching feels tedious when you are excited to start, but please do not skip this step. The mesh opens up significantly during blocking, and your finished measurements depend on hitting this gauge.
Abbreviations and Stitch Definitions
Here are all the terms you will encounter:
Special Stitches
Diamond Mesh Stitch
This creates the open lattice fabric for the entire body. You are making chain-3 arches that connect with single crochets, forming a diagonal diamond grid.
Row 1 (RS): Ch 4 (counts as first dc plus ch 1). Skip first 3 sts. Dc in next st. (Ch 1, skip 1 st, dc in next st) across to end of row. Turn.
Row 2 (WS): Ch 4 (counts as first dc plus ch 1). Dc in first ch-1 sp. (Ch 1, dc in next ch-1 sp) across. Ch 1, dc in 3rd ch of t-ch. Turn.
Repeat Row 2 for the pattern. In the actual garment, the mesh uses ch-3 arches rather than ch-1 spaces. The row-by-row instructions below specify this in detail.
Shell Lace Border
Used at the hem edge: (Sc, ch 2, 2 dc, ch 2, sc) all in the same stitch or space. This creates a small pointed shell.
Braided Strap
Made from 3 foundation chains of equal length, joined at the top, braided together firmly, then fastened at the bottom end.
Pattern Instructions
Front Panel
The front begins at the top edge and is worked in two sections (right shoulder and left shoulder) that are then joined at the V-neck center.
Foundation for Front Right Shoulder
Ch 22 (24, 26, 28).
Row 1 (RS): Sc in 2nd ch from hook. (Ch 3, skip 2 ch, sc in next ch) across. Turn.
Arch count: 7 (8, 8, 9) arches.
Row 2 (WS): Ch 5 (counts as dc plus ch 2). Sc in first ch-3 sp. (Ch 3, sc in next ch-3 sp) across to last arch. Ch 2, dc in last sc. Turn.
Arch count: 7 (8, 8, 9) arches.
Row 3 (RS): Ch 1. Sc in first dc. (Ch 3, sc in next ch-3 sp) across. End with ch 3, sc in 3rd ch of t-ch. Turn.
Arch count: 7 (8, 8, 9) arches.
Rows 4 through 6: Rep Rows 2 and 3, then Row 2.
Arch count: 7 (8, 8, 9) arches throughout.
This completes the right shoulder section. It should measure approximately 3 (3.5, 3.5, 4) inches wide and 3 inches tall. Do not fasten off.
V-Neck Decrease Shaping (Right Side)
Row 7 (RS Decrease Row): Ch 1. Sc in first dc or first ch-3 sp. (Ch 3, sc in next ch-3 sp) 4 (5, 5, 6) times. Leave remaining arches un-worked. Turn.
Arch count at working edge: 4 (5, 5, 6) arches.
Row 8 (WS): Ch 5. Sc in first ch-3 sp. (Ch 3, sc in next ch-3 sp) across. Ch 2, dc in last sc. Turn.
Arch count: 4 (5, 5, 6) arches.
Row 9 (RS Decrease Row): Ch 1. Sc in first dc. (Ch 3, sc in next ch-3 sp) 3 (4, 4, 5) times. Leave remaining arches un-worked. Turn.
Arch count: 3 (4, 4, 5) arches.
Row 10 (WS): Ch 5. Sc in first ch-3 sp. (Ch 3, sc in next ch-3 sp) across. Ch 2, dc in last sc. Turn.
Arch count: 3 (4, 4, 5) arches.
Row 11 (RS Decrease Row): Ch 1. Sc in first dc. (Ch 3, sc in next ch-3 sp) 2 (3, 3, 4) times. Leave remaining arches un-worked. Turn.
Arch count: 2 (3, 3, 4) arches.
Row 12 (WS): Ch 5. Sc in first ch-3 sp. (Ch 3, sc in next ch-3 sp) across. Ch 2, dc in last sc. Turn.
Arch count: 2 (3, 3, 4) arches.
Rows 13 through 16: Rep Rows 11 and 12 twice.
Arch count: 2 (3, 3, 4) arches.
The right shoulder panel should now measure approximately 3 (3.5, 3.5, 4) inches wide and 8 inches tall at the outer edge. Fasten off and set aside.
Front Left Shoulder
Attach yarn to the opposite end of the foundation chain at the same top edge. Work Rows 1 through 6 as for the right shoulder, mirroring the direction.
For the V-Neck Decrease Rows, decrease at the outer edge of each RS row instead of the inner edge:
Row 7 (RS Decrease): Ch 1. Skip first arch. Sc in next ch-3 sp. (Ch 3, sc in next ch-3 sp) across. Turn.
Arch count: 4 (5, 5, 6) arches.
Row 8 (WS): Ch 5. Sc in first ch-3 sp. (Ch 3, sc in next ch-3 sp) across. Ch 2, dc in last sc. Turn.
Arch count: 4 (5, 5, 6) arches.
Continue mirroring the right shoulder decrease rows for Rows 9 through 16.
Arch count at end: 2 (3, 3, 4) arches.
Fasten off left shoulder.
Join Front Shoulders
With RS facing, re-attach yarn to the inner neckline edge of the right shoulder at the last row worked. Ch 3. Join with sc into the inner neckline edge of the left shoulder at its last row worked. Ch 3. Work across the left shoulder panel to its outer edge.
Both shoulders are now connected with a V at the center front. Place a marker at the center join sc. This completes Row 17 of the front.
Total arch count across the full front: 2 (3, 3, 4) right arches + 1 center joining arch + 2 (3, 3, 4) left arches = 5 (7, 7, 9) arches.
Body Increases (Front Panel)
Row 18 (WS): Ch 5. Sc in first ch-3 sp. (Ch 3, sc in next ch-3 sp) across. Ch 2, dc in last sc. Turn.
Arch count: 5 (7, 7, 9) arches.
Row 19 (RS Increase Row): Ch 1. Sc in first dc. Ch 3. Sc in same first dc (this adds one arch at the right edge). (Ch 3, sc in next ch-3 sp) across to last sc. Ch 3. Sc in last sc. Ch 3. Sc in last sc again (this adds one arch at the left edge). Turn.
Arch count: 7 (9, 9, 11) arches.
Row 20 (WS): Ch 5. Sc in first ch-3 sp. (Ch 3, sc in next ch-3 sp) across. Ch 2, dc in last sc. Turn.
Arch count: 7 (9, 9, 11) arches.
Continue increasing 1 arch at each edge on every RS row through Row 37:
After Row 38, switch to increasing every other RS row (every 4 rows total):
Rows 39-40: Work even, no increase. 25 (27, 27, 29) arches.
Row 41 (RS Increase): 27 (29, 29, 31) arches.
Rows 42-44: Work even.
Row 45 (RS Increase): 29 (31, 31, 33) arches.
Rows 46-48: Work even.
Row 49 (RS Increase): 31 (33, 33, 35) arches.
Rows 50-52: Work even.
Row 53 (RS Increase): 33 (35, 35, 37) arches.
Row 54 (WS): Work even. 33 (35, 35, 37) arches.
For sizes M, L, XL only: Work additional rows as specified in the pattern text to reach final arch counts:
Fasten off after completing the last row. Set aside.
Back Panel
The back is wider at the neckline (scoop neck instead of V-neck) and worked as one piece.
Foundation for Back Neckline: Ch 34 (38, 42, 46).
Row 1 (RS): Sc in 2nd ch from hook. (Ch 3, skip 2 ch, sc in next ch) across. Turn.
Arch count: 11 (12, 13, 14) arches.
Rows 2 through 16: Work even in mesh pattern as established.
Arch count: 11 (12, 13, 14) arches throughout.
Starting at Row 17, work side increases to match the front panel, following the same increase schedule. Because the back starts wider, it will reach the target hem arch count in fewer rows.
Work to match the same final arch count as the front panel:
Add even rows as needed until the back panel height matches the front panel height. Fasten off.
Hem Border
Side Seam Join: Lay front and back panels with wrong sides together, side edges aligned. Whipstitch the side seams together from the bottom of the neckline section down to the hem edge on each side. Leave the hem edges open so the front and back hang separately, creating the handkerchief points.
Border Row 1: With RS facing, attach yarn to the lower right corner of the front panel. Ch 1. Work 1 sc into each ch-3 sp across the entire lower hem edge. Turn.
Front hem sc count: 33 (37, 39, 43) sc.
Border Row 2: Ch 1. Sc in first sc. Work Shell Lace Border stitch (sc, ch 2, 2 dc, ch 2, sc) in next sc. (Sc in next sc. Shell in next sc) across, ending sc in last sc. Fasten off.
Shell count: 16 (18, 19, 21) shells.
Repeat Border Rows 1 and 2 along the lower hem edge of the back panel.
Neckline Finishing
Front V-Neck Edge: With RS facing, attach yarn at right shoulder top edge. Work 1 row of sc evenly along the entire front neckline edge. Fasten off.
Back Scoop Neck Edge: With RS facing, attach yarn at right back shoulder. Work 1 row of sc evenly along the back neckline foundation chain edge. Fasten off.
Shoulder Straps
For each strap, make 3 chains:
Ch 65 (70, 75, 80). Fasten off, leaving a 6 inch tail at each end.
Braid the 3 chains together loosely. Secure both ends by knotting or stitching the tails together.
Strap length after braiding: approximately 11 (12, 12.5, 13) inches.
Stitch one end of each strap to the front shoulder edge, approximately 1 inch in from each outer shoulder corner. Stitch the other end to the corresponding back shoulder edge. Try on the garment to check placement before permanently securing.
Blocking and Finishing
Weave in all ends using a tapestry needle, working horizontally through the backs of stitches for at least 1 inch.
Wet Blocking: Fill a basin with cool water. Submerge the garment and press gently to saturate. Do not wring or twist. Press between two clean towels to remove excess water. Lay flat on a blocking mat. Pin the hem points out to their full extension. Pin the neckline edges to finished measurements. Allow to dry completely (12 to 24 hours).
The mesh will open up significantly during blocking. This is expected and gives the top its beautiful drape.
Care Instructions
Machine wash cold on gentle cycle in a mesh laundry bag. Lay flat to dry. Do not tumble dry. If smoothing is needed, steam lightly with the iron held above the fabric surface. Do not dry clean.
Time Estimate
Plan for 12 to 18 hours of crochet time for size Medium. Blocking adds 1 to 2 hours of drying time. This is a perfect project to spread over a week or two, working a panel at a time.
I really hope you love making this summer tank as much as I enjoyed designing it. The finished piece is so flattering and versatile, perfect for throwing over a swimsuit or pairing with shorts for a casual lunch. If you make one, I would absolutely love to see it. Tag me on Instagram or share your photo on Facebook so I can cheer you on!
If this pattern is calling your name, go ahead and pin it to your summer crochet board so you can find it when you are ready to start. And if you do make this breezy tank, please drop a comment below. I love hearing which colors you choose and seeing how your projects turn out!
You Might Also Like
- Ocean Breeze Coastal Square Poncho Free Crochet Pattern
- Cream and Peach Ombre Baby Dress Free Crochet Pattern
- Butter Yellow Lace Mini Dress Free Crochet Pattern
- Blush Pink Bow Front Crochet Cardigan Free Pattern
