
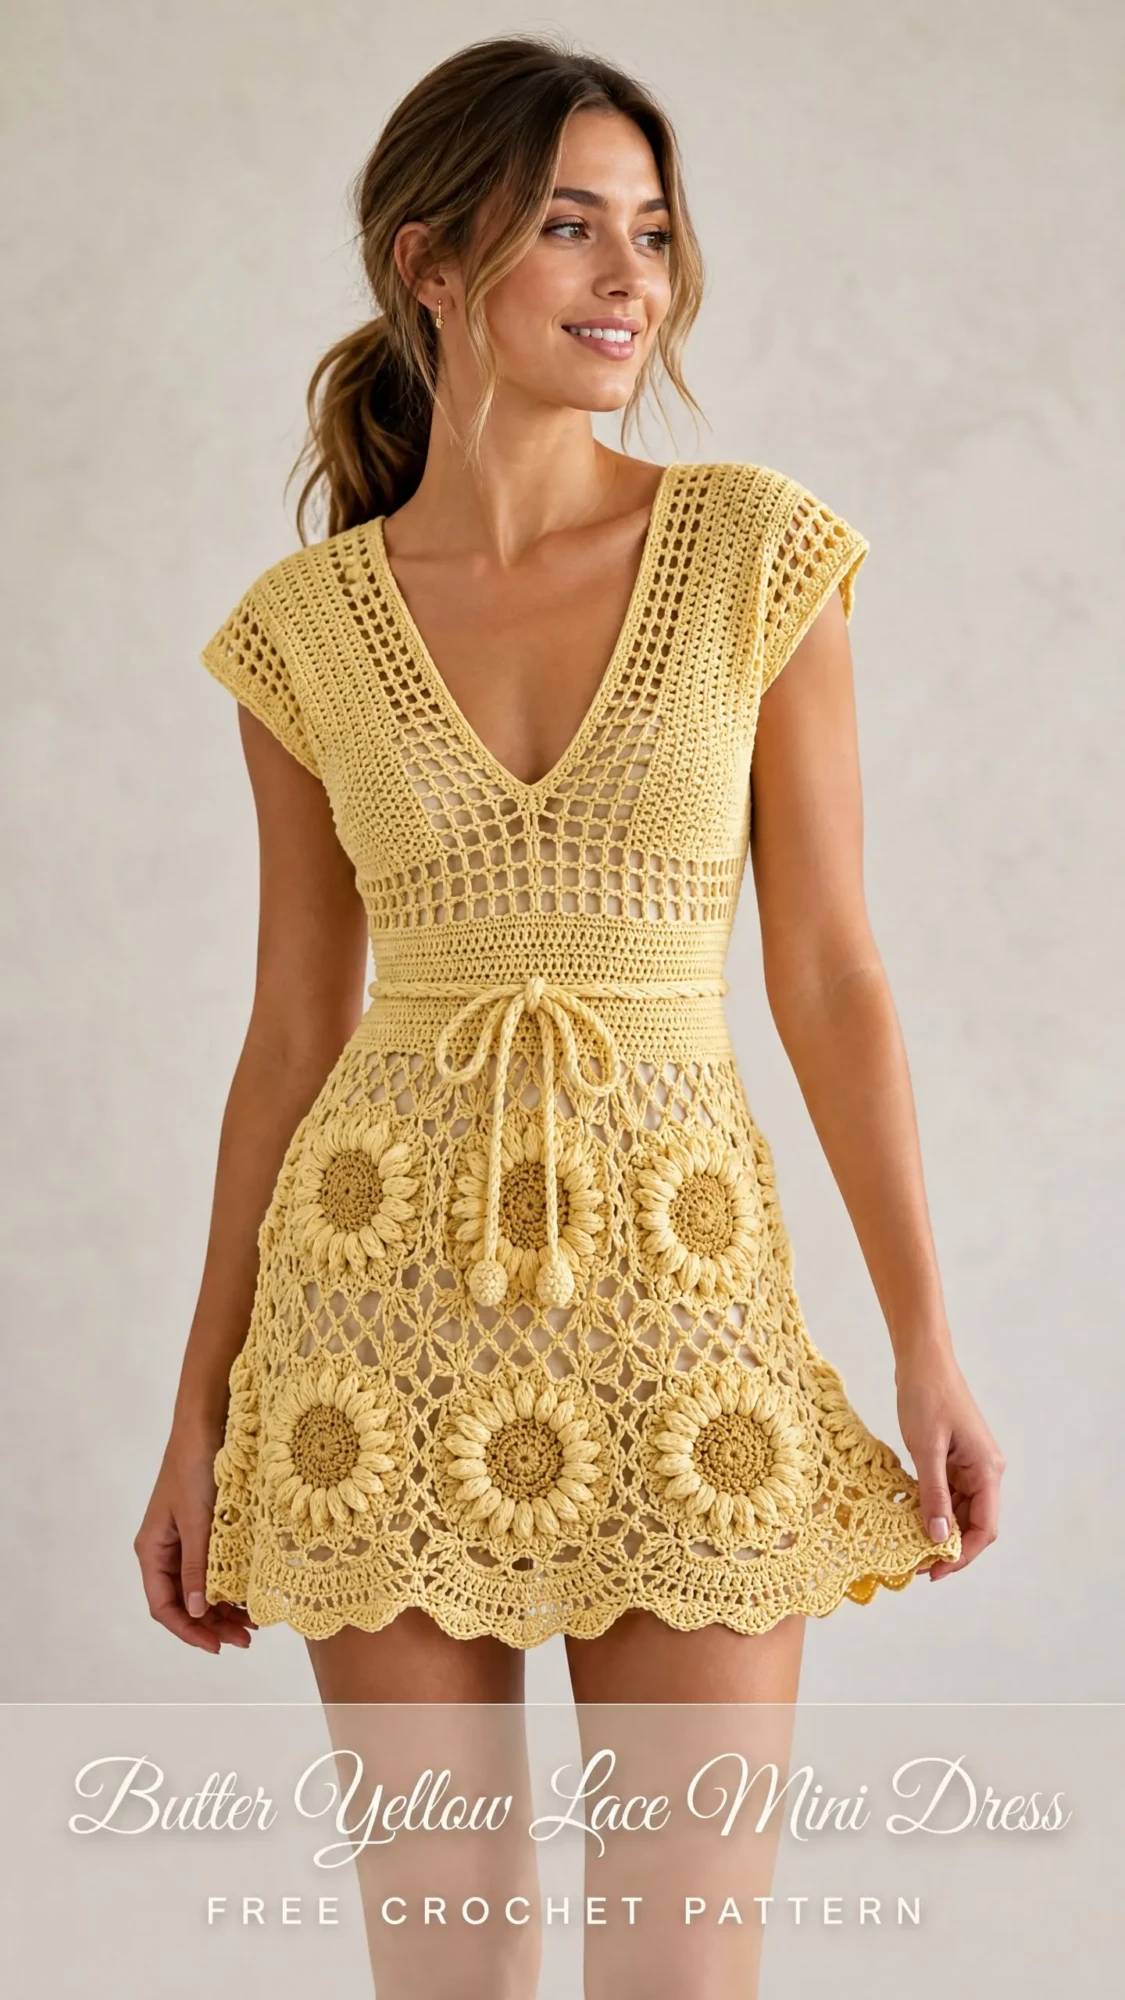
I call this one the Sunshine Dress, and it has quite the history in my pattern notebooks. Back in 2019, I sketched the original concept for my cousin’s summer birthday party. She wanted something that felt like a warm afternoon in a wildflower field. I drew sunflowers scattered across an airy skirt, a fitted lace bodice, and a drawstring waist that would flutter in the breeze.
The notebook sat on my shelf for years. Life got busy, yarn got shuffled around, and that sketch waited patiently. Last spring, I finally pulled it out, dusted off the idea, and spent three months turning those pencil lines into the dress you see here.
Now the Sunshine Dress is ready for your hook. Every puff stitch sunflower center, every open mesh square, every scalloped shell along the hem, it all comes together into something I am genuinely proud to share with you.
Why This Butter Yellow Lace Mini Dress Stands Out
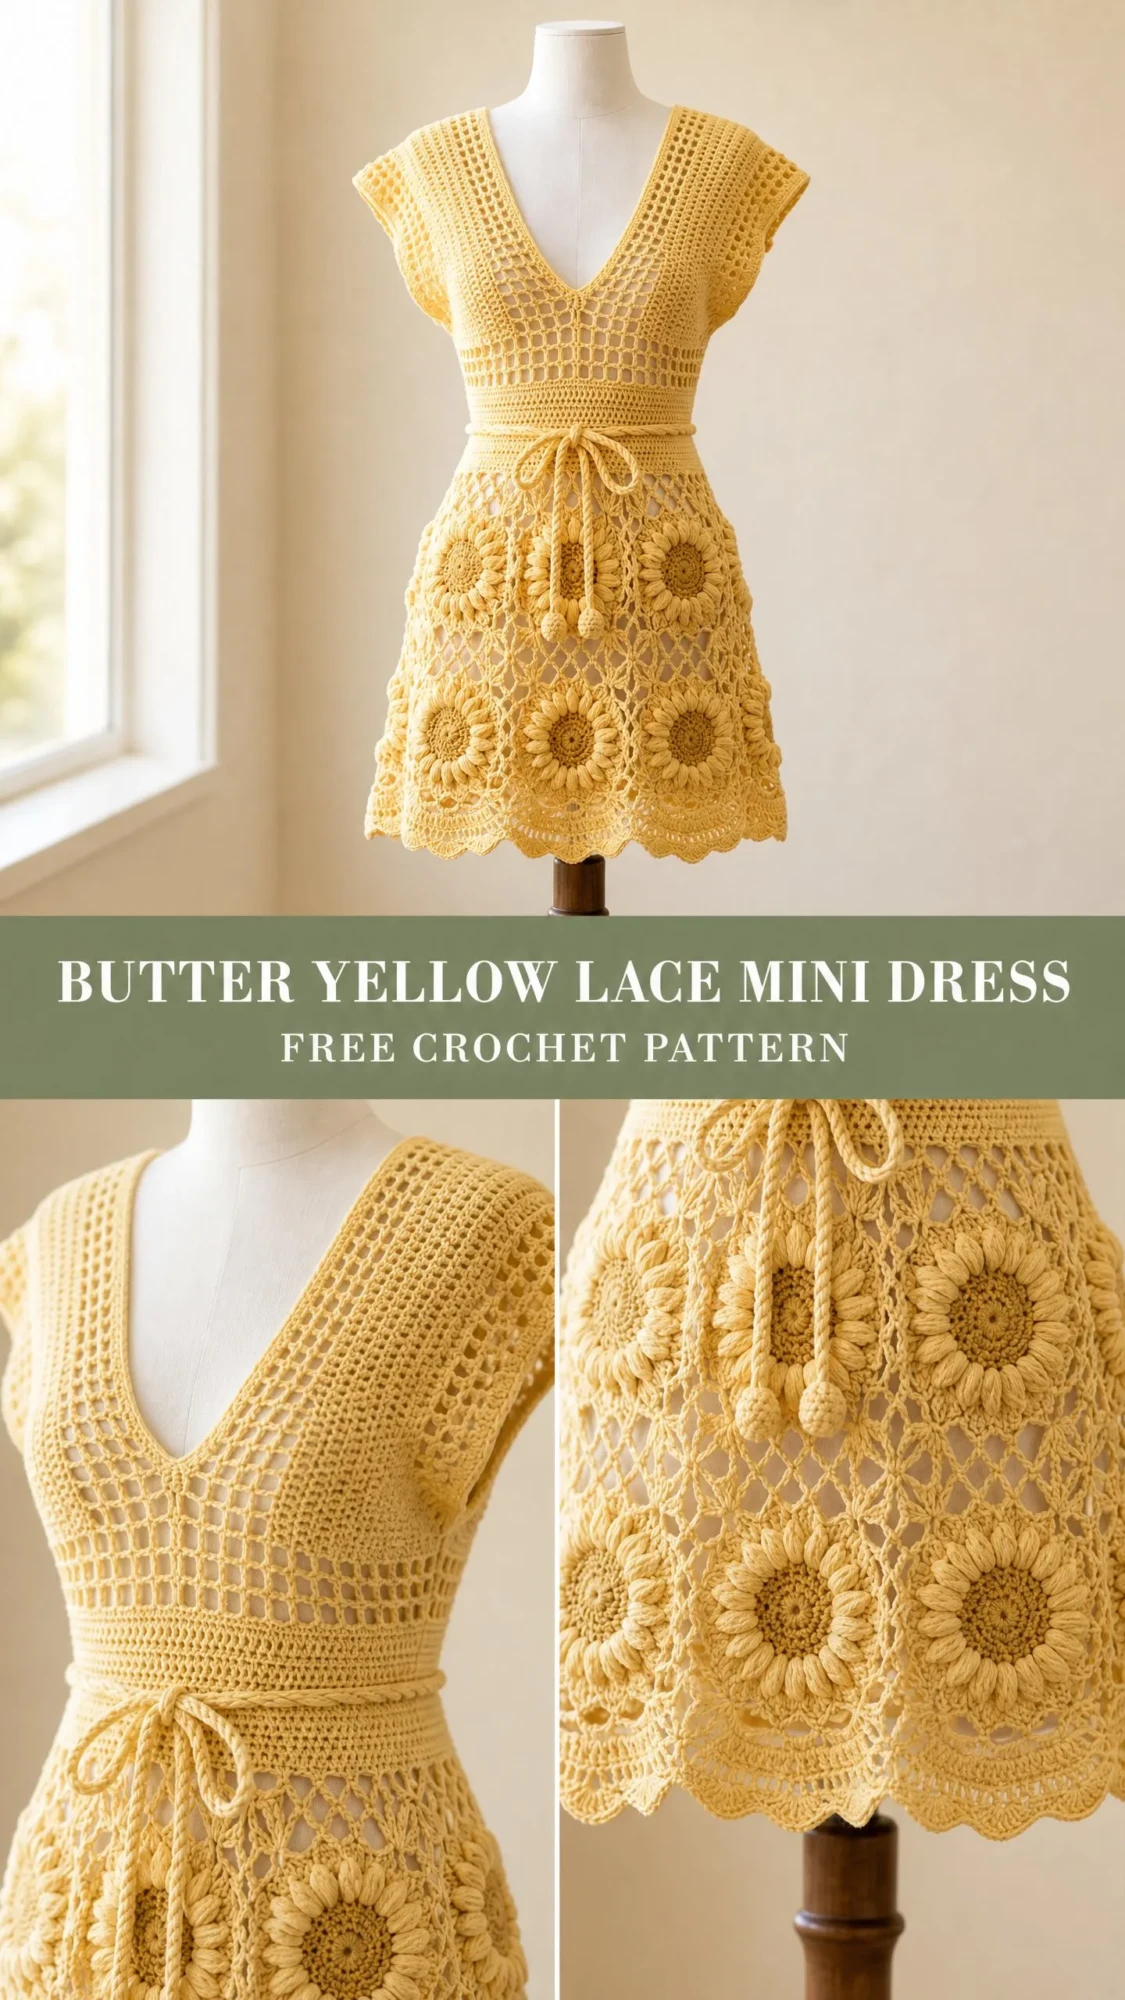
This is not your typical crochet dress pattern. The construction combines three distinct techniques that keep your hands and brain engaged throughout the project. You will work a structured filet mesh bodice, dimensional sunflower motifs with textured puff stitch centers, and an open diamond lattice that connects everything into a flowing A-line skirt.
The butter yellow color creates a cohesive monochromatic look. Without color changes to track, you can focus entirely on the stitches themselves. The finished dress works beautifully as a beach coverup, a summer party outfit, or a layering piece over a simple slip dress.
Skill level: Advanced. You should feel comfortable with fitted garments, motif construction, and joining techniques before starting this project.
Time investment: Plan for 60 to 90 hours of work. The sunflower motifs alone take roughly 25 to 35 minutes each, and you will make 12 of them.
Finished Measurements
The written instructions produce a size Small/Medium.
Size customization notes appear later in this pattern.
Materials You Will Need
Yarn: Approximately 1,400 to 1,600 yards (1,280 to 1,460 m) of DK weight (light 3) 100% mercerized cotton in butter yellow. Mercerized cotton gives you crisp stitch definition in the lace sections and a subtle sheen that photographs beautifully.
Recommended yarns:
Hooks:
Have both hooks ready before you begin.
Notions:
Gauge (Please Check This)
With E-4 (3.5 mm) hook and bodice filet mesh pattern: 20 stitches x 22 rows = 4 inches (10 cm) square after light blocking.
With F-5 (3.75 mm) hook and sunflower motif: 1 completed sunflower motif = 4.5 inches (11.5 cm) in diameter after blocking.
Cotton has minimal stretch, so accurate gauge is critical for fit. A difference of even one stitch per inch will change your finished bust measurement by 1.5 to 2 inches across the full circumference. Please swatch first.
Abbreviations and Stitch Definitions
Let me walk you through every abbreviation you will encounter. I am defining them all here so you never have to wonder what a term means.
Special Stitches for This Crochet Pattern
Puff Stitch (puff-st)
This creates the raised, seeded texture in the sunflower centers. Here is how to work it:
1. Yarn over, insert hook into the indicated stitch or space.
2. Yarn over and pull up a loop to the height of a double crochet. You now have 3 loops on hook.
3. Yarn over, insert hook into the same stitch, yarn over and pull up a loop. You now have 5 loops on hook.
4. Yarn over, insert hook into the same stitch, yarn over and pull up a loop. You now have 7 loops on hook.
5. Yarn over and draw through all 7 loops on hook.
6. Chain 1 to close and secure the puff stitch.
Shell Stitch (shell)
Work 5 dc into the same stitch or space.
Picot
Chain 3, slip stitch into the first chain made. This creates a small decorative bump.
V-Stitch (V-st)
Work (dc, ch 2, dc) into the same stitch or space.
Mesh Stitch (for bodice)
Row/Rnd 1: (Dc, ch 2, sk 2 sts, dc) repeated across. Each repeat uses 4 stitches and produces one mesh square.
Step by Step Butter Yellow Lace Mini Dress Instructions
Bodice Front Panel
The bodice front is worked flat from the top (neckline edge) downward to the waistline. The V-neck begins immediately on Row 1.
Using E-4 (3.5 mm) hook, chain 43.
Row 1 (RS): Dc in 4th ch from hook, (ch 2, sk 2 ch, dc in next ch) across. You will have 14 mesh squares across. Turn. (15 dc, 14 ch-2 sps)
Row 2 (WS): Ch 5 (counts as dc + ch 2), sk first ch-2 sp, dc in next dc, (ch 2, sk ch-2 sp, dc in next dc) across, ending with dc in top of t-ch. Turn. (15 dc, 14 ch-2 sps)
Rows 3 through 12: Rep Row 2. After Row 12, the front panel measures approximately 4.5 inches (11.5 cm) from foundation. Do not fasten off.
V-Neck Division (Front)
At the end of Row 12, you have 15 dc and 14 ch-2 sps. The center of the V falls between the 7th and 8th mesh squares.
Right Shoulder Section (Front):
Row 13 (RS): Ch 5, (dc in next dc, ch 2) 6 times, dc in next dc. Leave rem sts unworked. Turn. (7 dc, 6 ch-2 sps)
Row 14 (WS): Ch 5, (dc in next dc, ch 2) 5 times, dc in top of t-ch. Turn. (7 dc, 6 ch-2 sps)
Rows 15 through 24: Rep Row 14. Fasten off after Row 24.
Left Shoulder Section (Front):
With RS facing, rejoin yarn at the 9th dc from right edge.
Row 13 (RS): Ch 5, (dc in next dc, ch 2) 6 times, dc in last dc or t-ch. Turn. (7 dc, 6 ch-2 sps)
Rows 14 through 24: Rep same as Right Shoulder rows 14 to 24. Fasten off.
Bodice Back Panel
Work identically to the front panel, including the V-neck shaping at back. Yes, the back also has a V-neck. It is a lovely design detail.
Using E-4 (3.5 mm) hook, chain 43.
Work Rows 1 through 12 exactly as front panel. (15 dc, 14 ch-2 sps after each row)
Work Right and Left Shoulder sections exactly as front panel Rows 13 through 24. Fasten off.
Checkpoint: Each bodice half should measure approximately 12 inches (30.5 cm) wide at the foundation edge and 10 inches (25.5 cm) tall at the shoulder.
Shoulder and Side Seams
Shoulder seams: Hold front panel and back panel with WS facing together. Using tapestry needle and yarn, whipstitch the right front shoulder to the right back shoulder through the outermost column of stitches. Repeat for left shoulder. Each shoulder seam spans 6 mesh squares (approximately 3 inches / 7.5 cm wide).
Side seams: Beginning 1.5 inches (4 cm) below the shoulder join, whipstitch side seams down to the lower edge of the bodice. Rep for both sides. The cap sleeve opening is the unsewn gap at each upper side.
Cap Sleeve Edging
With RS facing and E-4 (3.5 mm) hook, join yarn at the underarm seam of the right armhole.
Rnd 1: Sc evenly around the armhole opening, working 2 sc per dc row end, 1 sc per ch-2 sp, and 1 sc per dc. Approximate total: 28 sc. Join with sl st to first sc. (28 sc)
Rnd 2: Ch 1, sc in each sc around. Join with sl st to first sc. Fasten off. (28 sc)
Rep for left armhole.
Neckline Edging
With RS facing and E-4 (3.5 mm) hook, join yarn at right shoulder seam on front neck edge.
Rnd 1: Sc evenly down the right front V, 2 sc at the center V point, sc evenly up the left front V, across the back neck right side, 2 sc at back V center, across the back neck left side. Total approximate sc count: 96. Join with sl st to first sc. (96 sc)
Rnd 2: Ch 1, sc in each sc to 1 st before the front V-point center, 3 sc into the center V-point st, sc in each sc to 1 st before back V-point center, 3 sc into the back V-point st, sc to end. Join with sl st to first sc. (100 sc)
Rnd 3: Rep Rnd 2. Fasten off. (104 sc)
Waistband
Change to E-4 (3.5 mm) hook if not already in use.
Pickup round: With RS facing, join yarn at the right side seam at the bodice lower edge. Sc evenly around the entire lower edge of the bodice, working 1 sc per dc and 2 sc per ch-2 sp space. Target total: 140 sc. Place marker at beginning of round. Join with sl st to first sc. (140 sc)
Rnd 1: Ch 1, sc in each sc around. Join with sl st to first sc. (140 sc)
Rnds 2 through 8: Rep Rnd 1. (140 sc each rnd)
Eyelet Round (Rnd 9): Ch 3 (counts as dc), sk 1 sc, (dc in next sc, ch 1, sk 1 sc) around, ending dc in last sc before marker. Join with sl st to top of beg ch-3. (70 dc, 70 ch-1 sps)
Rnd 10: Ch 1, sc in each dc and each ch-1 sp around. Join with sl st to first sc. (140 sc)
Rnd 11: Ch 1, sc in each sc around. Join with sl st to first sc. Fasten off. (140 sc)
Drawstring Tie: Using E-4 (3.5 mm) hook, chain 180. Sl st in 2nd ch from hook and in each ch across. Fasten off. Weave the cord through the eyelet round, entering and exiting at the center front.
Sunflower Motifs (Make 12)
Change to F-5 (3.75 mm) hook for all motif work. Each completed motif measures 4.5 inches (11.5 cm) in diameter.
Set up: MR (or chain 4 and join with sl st to form a ring).
Rnd 1: Ch 1, 12 sc into the ring. Join with sl st to first sc. (12 sc)
Rnd 2 (Puff Center): Ch 2 (does not count as st), (puff-st into same st as join, ch 1, puff-st into next sc, ch 1) around, for 12 puff stitches total with ch 1 between each. Join with sl st to top of first puff-st. (12 puff-sts, 12 ch-1 sps)
Rnd 3: Ch 1, sc into the top of each puff-st and 1 sc into each ch-1 sp around. Join with sl st to first sc. (24 sc)
Rnd 4 (Petal Foundation): Ch 1, hdc in same st, ch 2, sk 1 sc, (hdc in next sc, ch 2, sk 1 sc) around. Join with sl st to first hdc. (12 hdc, 12 ch-2 sps)
Rnd 5 (Petals): Working in back loops only of the Rnd 3 sc sts, insert hook behind the Rnd 4 stitches. Sl st to reposition behind the first Rnd 4 hdc. Ch 1, dtr into the back loop of the corresponding Rnd 3 sc, (ch 1, dtr) 2 more times into the same back loop, ch 1, sl st into the back loop of the next Rnd 3 sc. Rep from around for 12 petals total. (12 petals)
Rnd 6 (Outer Ring and Joining Round): With RS facing, join yarn with sl st into any ch-2 sp of Rnd 4. Ch 4 (counts as tr), 2 tr into same ch-2 sp, ch 3, (3 tr into next ch-2 sp, ch 3) around. Join with sl st to top of beg ch-4. (36 tr, 12 ch-3 sps)
Skirt Assembly
The skirt has two horizontal rows of motifs. Top row: 5 motifs joined in a ring to the waistband lower edge. Bottom row: 7 motifs joined to each other and to the spaces between top row motifs.
Top Row (5 motifs): Work each motif through Rnd 5. On Rnd 6, join 4 of the 12 ch-3 sps to the waistband using join-as-you-go technique, replacing ch 3 with ch 1, sl st into the waistband, ch 1. Join adjacent motifs at 1 ch-3 sp each.
Bottom Row (7 motifs): Stagger these between and below the top row motifs. Each bottom row motif joins at 2 ch-3 sps to the top row and at 1 ch-3 sp to adjacent bottom row motifs.
Diamond Lattice Infill
With F-5 (3.75 mm) hook, join yarn with sl st into any free ch-3 sp between two adjacent motifs.
Row 1: Ch 6, sl st into the opposing ch-3 sp of the adjacent motif across the gap.
Row 2: Ch 6, sl st back into the first ch-3 sp.
Continue building chain bridges in a diagonal grid, anchoring each chain to a motif ch-3 sp or to the midpoint of an existing chain. Work infill into all gaps between motifs.
Skirt Hem Border
With F-5 (3.75 mm) hook and RS facing, join yarn into the first free ch-3 sp along the lower edge of any bottom row motif.
Rnd 1: Ch 1, sc into ch-3 sp, ch 3, sc into next ch-3 sp, ch 3; rep from around all free lower edge ch-3 sps. Join with sl st to first sc. (Approximately 56 ch-3 sps)
Rnd 2: Sl st into first ch-3 sp, ch 3 (counts as dc), 4 dc into same ch-3 sp (shell made), ch 1, (5 dc shell into next ch-3 sp, ch 1) around. Join with sl st to top of beg ch-3. (28 shells, 28 ch-1 sps)
Rnd 3: Sl st into 2nd dc of first shell, ch 1, sc in same dc, (picot, sc in next dc of shell, picot, sc in next dc of shell, ch 3, sc in 2nd dc of next shell) around, ending ch 3. Join with sl st to first sc. Fasten off.
Size Customization Tips
To size up (Medium/Large, bust 38 to 40 inches): Chain 47 instead of 43 for each bodice panel. Increase waistband pickup to 156 sc. Use 6 top row motifs and 8 bottom row motifs.
To size down (XS, bust 30 to 32 inches): Chain 39 instead of 43 for each bodice panel. Decrease waistband pickup to 124 sc. Use 4 top row motifs and 6 bottom row motifs.
To lengthen the skirt: Add a third row of 7 to 9 motifs below the second row.
To shorten the skirt: Use only 1 row of 5 to 6 motifs attached directly to the waistband.
Finishing and Blocking Your Dress
Weave in all yarn ends thoroughly, burying each tail at least 1 inch through the back of the work in two directions.
Wet blocking is required. Submerge the entire dress in cool water. Gently squeeze to saturate all fibers. Roll in a clean dry towel and press firmly to remove excess water.
Lay flat on blocking mats. Stretch the bodice mesh squares into even alignment. Open the diamond lattice sections fully. Coax each sunflower petal outward to lie flat. Pin the hem border scallops so each shell fans open symmetrically. Allow to dry completely before unpinning, at least 24 hours.
Thread the drawstring cord through the waistband eyelet round after blocking.
Care Instructions
Machine wash on gentle cycle in cool water (below 86 degrees F). Use a mesh laundry bag. Lay flat to dry. Do not tumble dry. Do not hang to dry when wet. If pressing is needed, use a cool iron with a pressing cloth.
You Made It!
Thank you so much for choosing this butter yellow lace mini dress crochet pattern. I poured years of dreaming and months of testing into these instructions, and I am thrilled you are bringing it to life with your own hands. If you make this dress, I would absolutely love to see it. Tag me on Instagram or share a photo in our Facebook group. Your versions always inspire me.
This is definitely a pattern worth saving for later, so go ahead and pin it to your crochet boards on Pinterest. And if you have any questions or just want to share your progress, drop a comment below. I read every single one and I am always cheering you on.
You Might Also Like
- Spring Garden Hexagon Blanket Free Crochet Pattern
- Mustard Sunflower Bow Bucket Bag Free Crochet Pattern
- Black Fishnet Crochet Bell Sleeve Shrug Free Pattern
- Golden Honey Highland Cow Amigurumi Free Crochet Pattern
