I’ve been looking for a statement bag pattern that actually delivers on the wow factor, and this one immediately caught my eye. The combination of that gorgeous herringbone texture, the sculpted bow, and the cheerful sunflower applique creates something truly special.
Get the Ad-Free PDF Pattern
You can find the free pattern below, or you can purchase the ad-free printable PDF from my shop.
Get the Printable PDF →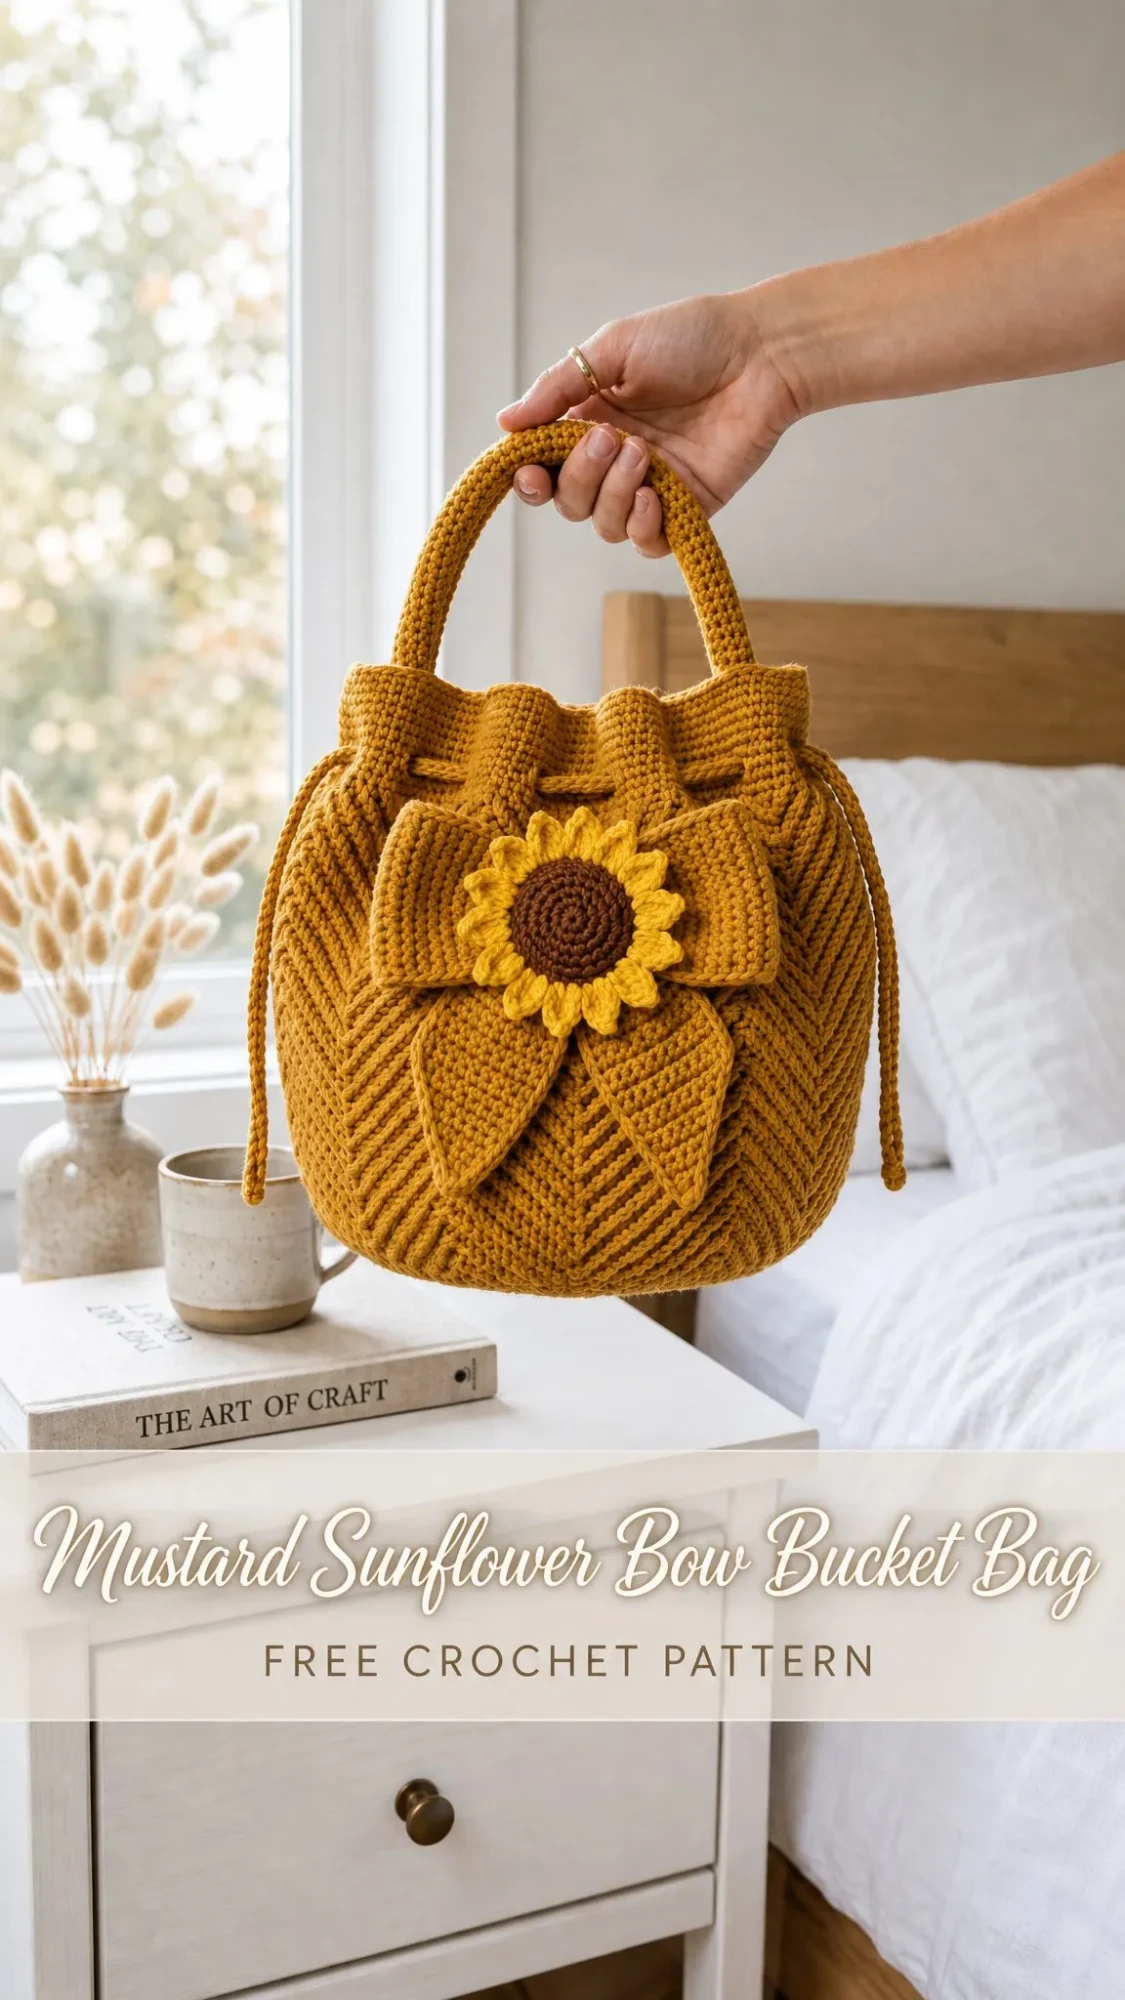
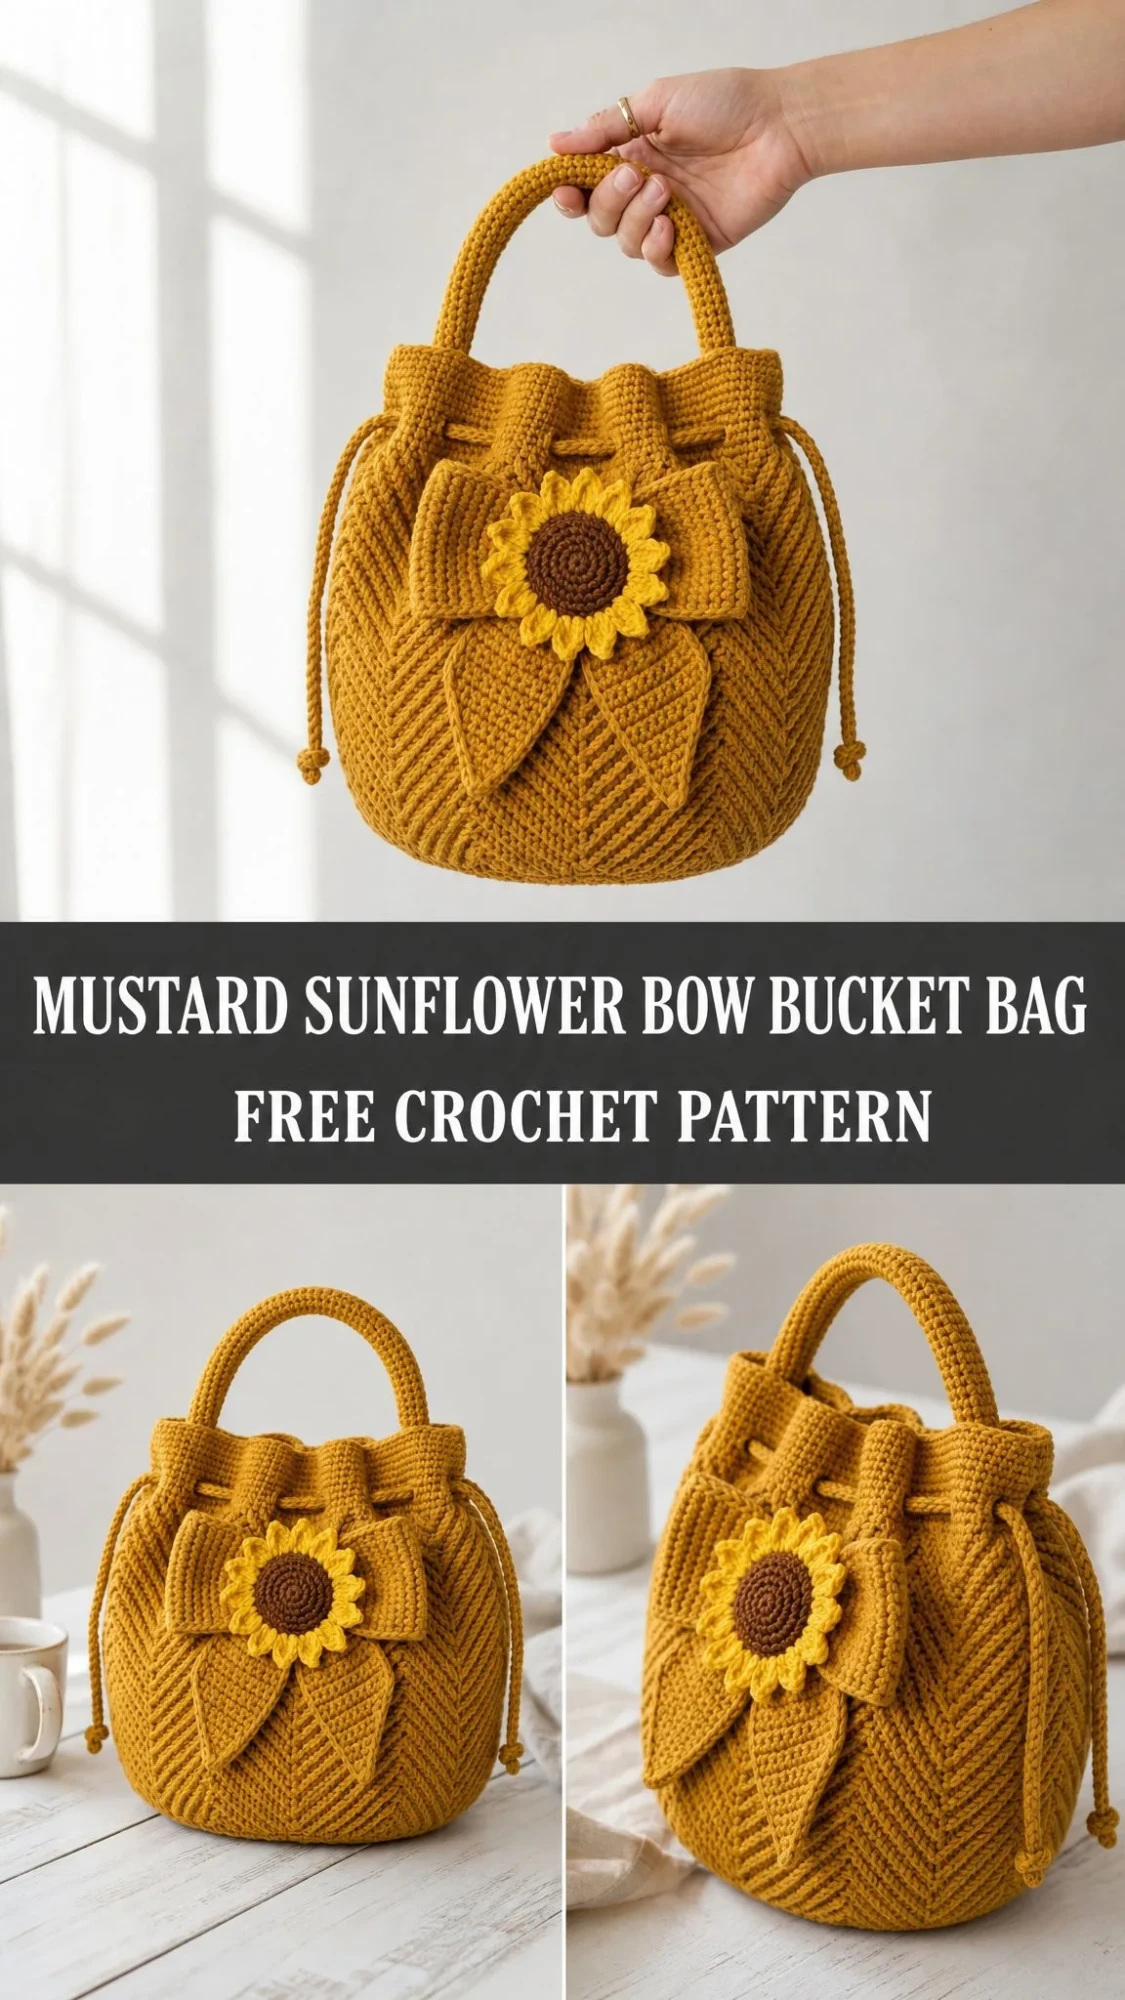
This Mustard Sunflower Bow Bucket Bag has quickly become my favourite recommendation for anyone wanting to level up their crochet accessories. It’s the kind of project that looks incredibly impressive but breaks down into manageable pieces once you understand the construction.
If you’ve been searching for a bag pattern that showcases your skills and turns heads at the farmers market, this is the one I’d point you toward every single time.
About This Crochet Bucket Bag Pattern
This structured crochet bucket bag features an oval base, gathered eyelet top, short carry handle, side drawstrings, raised herringbone surface texture, and a beautiful bow with sunflower applique. The finished bag measures approximately 8.5 inches wide at the widest point, 8 inches tall to the top edge (not including the handle), and 4.5 inches deep. The handle drop is about 5.5 inches, making it perfect for carrying by hand.
The skill level is intermediate. You’ll work in joined rounds, build an oval base, maintain an 8-panel repeat, add surface crochet texture, and assemble layered applique pieces. Don’t let that list intimidate you though. Each technique builds on basic crochet skills, and I’ll walk you through every step.
Expect to spend about 10 to 14 hours on this project, plus blocking and drying time. It’s not a quick weekend make, but the result is absolutely worth the investment.
Materials You’ll Need
Yarn Requirements:
Suggested Yarns: Lion Brand 24/7 Cotton, Paintbox Cotton Aran, or Lily Sugar n Cream work beautifully. Choose a smooth, firm yarn that shows texture clearly. If you prefer a softer yarn, consider adding a lining or going down a hook size to maintain structure.
Hooks:
Tools and Extras:
Optional additions: 7.5 x 4 inch (19 x 10 cm) plastic canvas or bag base insert, fabric lining, magnetic snap
Gauge
16 single crochet (sc) stitches by 18 rounds equals 4 inches (10 cm) in firm single crochet after blocking. Surface crochet may pull in slightly, so keep it relaxed. Taking time to check your gauge will ensure your finished bag matches the intended dimensions.
Stitch Abbreviations and Definitions
This pattern uses US crochet terminology throughout. If you’re a UK maker, remember that US sc equals UK dc, US hdc equals UK htr, and US dc equals UK tr.
Special Stitches Explained
Surface Slip Stitch: Hold yarn behind the fabric. Insert your hook from front to back and back to front around the chosen stitch or between rounds, yarn over on the back, pull the loop to the front and through the loop on your hook. Keep loops loose so the bag does not pucker. This creates those beautiful raised diagonal lines.
sc2tog (Single Crochet Two Together): Insert hook in next stitch, yarn over and pull up a loop, insert hook in next stitch, yarn over and pull up a loop, yarn over and pull through all 3 loops on your hook.
Crab Stitch Option: Work single crochet from left to right for a corded edge. If you prefer a simpler finish, you can replace this with one round of regular single crochet.
Note for left-handed crocheters: Work the same written instructions. Your surface crochet diagonals will lean the opposite direction. Mirror the diagonal placement so each panel still forms a V shape.
Bag Base Instructions
Work the base in joined rounds. The chain 1 at the start of a round does not count as a stitch. Join each round with a slip stitch to the first single crochet unless instructed otherwise.
Round 1: Chain 25. Work 2 sc in the 2nd chain from hook, sc in the next 22 chains, 4 sc in the last chain. Rotate to work along the opposite side of the chain, sc in the next 22 chains, 2 sc in the same chain as the first stitches. Join. (52 sc)
Round 2: Ch 1. Inc in the next 2 stitches, sc 22, inc in the next 4 stitches, sc 22, inc in the last 2 stitches. Join. (60 sc)
Round 3: Ch 1. (Sc 1, inc) twice, sc 22, (sc 1, inc) 4 times, sc 22, (sc 1, inc) twice. Join. (68 sc)
Round 4: Ch 1. (Sc 2, inc) twice, sc 22, (sc 2, inc) 4 times, sc 22, (sc 2, inc) twice. Join. (76 sc)
Round 5: Ch 1. Sc in each stitch around. Join. (76 sc)
Round 6: Ch 1. Sc 18, inc, sc 19, inc, sc 18, inc, sc 18, inc, sc 3. Join. (80 sc)
Checkpoint: Your base should measure approximately 7.5 inches (19 cm) long and 4 inches (10 cm) deep after Round 6. If it’s significantly different, check your gauge and adjust your hook size if needed.
Bag Body Instructions
Rounds 1-2: Ch 1. Working in back loop only (BLO) to create a turning ridge, sc in each stitch around. Join. (80 sc)
Rounds 3-22: Ch 1. Sc in each stitch around. Join. Place markers every 10 stitches to divide into eight texture panels. (80 sc each round)
Round 23 (Eyelet Round): Ch 1. Sc 3, ch 2, skip 2, sc 5; repeat from 8 times. Join. (64 sc + 8 ch-2 spaces)
Round 24: Ch 1. Sc 3, 2 sc in ch-2 space, sc 5; repeat from 8 times. Join. (80 sc)
Rounds 25-27: Ch 1. Sc in each stitch around. Join. (80 sc each round)
Round 28: Finish the edge with crab stitch around, or regular single crochet if you prefer. Join and fasten off. (80 sts)
Raised Herringbone Texture
This is where the magic happens! With the bag held upright, each 10-stitch panel receives two relaxed surface slip stitch diagonal ridges. Use the panel markers you placed as guides.
Left ridge: Begin near Round 3 at stitch 1 of the panel, travel diagonally to the center between stitches 5-6 by Round 21.
Right ridge: Begin near Round 3 at stitch 10 of the panel, travel diagonally to the center between stitches 5-6 by Round 21.
Repeat for all 8 panels. If you want a deeper, more pronounced texture, add a second parallel ridge beside each line.
Texture checkpoint: Your ridges should form eight tall V shapes around the bag. Keep your surface stitches loose enough that the bag wall remains rounded instead of cinched or puckered.
Handle Instructions
Chain 62.
Row 1: Sc in the 2nd chain from hook and each chain across. (61 sc)
Rows 2-5: Ch 1, turn, sc in each stitch across. (61 sc)
Fold lengthwise with wrong sides together and whipstitch the long edges for a padded handle. Sew the ends securely to the inside top edge, centered over the side panels.
Handle checkpoint: The handle strip measures approximately 15 inches (38 cm) before sewing and gives about 5.5 inches (14 cm) of drop.
Drawstrings Instructions (Make 2)
Make a 24-inch (61 cm) crocheted cord: Chain 94, slip stitch in the 2nd chain from hook and each chain across. Alternatively, you can work a two-strand twisted cord of the same length.
Thread one cord from the left side to the front and back to the left side. Thread the second cord from the right side to the front and back to the right side. Tie small knots at the ends to prevent fraying and add a decorative touch.
Bow Loops (Make 2)
Chain 16.
Row 1: Sc in the 2nd chain from hook and each chain across. (15 sc)
Rows 2-10: Ch 1, turn, sc across. (15 sc)
Fasten off, leaving a long tail for assembly.
Bow Tails (Make 2)
Chain 14.
Row 1: Sc in the 2nd chain from hook and each chain across. (13 sc)
Rows 2-8: Ch 1, turn, sc across. (13 sc)
Row 9: Ch 1, turn, sc2tog, sc 9, sc2tog. (11 sc)
Row 10: Sc2tog, sc 7, sc2tog. (9 sc)
Row 11: Sc2tog, sc 5, sc2tog. (7 sc)
Row 12: Sc2tog, sc 3, sc2tog. (5 sc)
Row 13: Sc2tog, sc 1, sc2tog. (3 sc)
Fasten off.
Bow Center Wrap
Chain 9.
Row 1: Sc in the 2nd chain from hook and each chain across. (8 sc)
Rows 2-6: Ch 1, turn, sc across. (8 sc)
Fasten off with a long tail for wrapping and securing.
Sunflower Center and Petals
Center Round 1: With brown yarn, make a magic ring, ch 1, work 6 sc in the ring. Join. (6 sc)
Round 2: Ch 1, inc in each stitch around. Join. (12 sc)
Round 3: Ch 1, (sc 1, inc) 6 times. Join. Change to yellow yarn. (18 sc)
Petals: Ch 5, sc in the 2nd chain, hdc in the next chain, dc in the next chain, hdc in the next chain, sl st in the next center stitch; repeat from around. Fasten off. (18 petals)
Applique checkpoint: Your finished bow should be approximately 5 inches (12.5 cm) wide. The sunflower should be approximately 2.5 inches (6.5 cm) across and will sit centered over the bow wrap.
Assembly and Finishing
Step 1: Weave in all body ends except those needed for sewing. Steam lightly or wet block the bag over a towel-stuffed form so the base stays oval and the walls dry upright.
Step 2: Sew the handle ends inside the top edge. Place each end over the side panels so the handle rises from side to side, not front to back. Stitch through several rows for strength.
Step 3: Lace the drawstrings through the Round 23 eyelets. Cinch gently to create the soft gathered bucket shape, then knot the cord ends.
Step 4: Shape the bow by overlapping the two loop rectangles at the center, pinching them together. Add the two tapered tails beneath and wrap with the center strip. Sew the wrap securely through all bow layers.
Step 5: Sew the bow to the front center with the wrap aligned between two front V panels. Sew the sunflower over the wrap using small stitches around the brown center and a few hidden stitches behind the petals.
Step 6 (Optional): For a lining, trace the base, add seam allowance, and sew a simple drawstring bucket lining. Tack the lining just below the eyelet round so it does not show.
Final Measurements
Tips and Troubleshooting
Bag cups too soon: Your base rounds may be tight or the Round 6 increases may be missing. Count 80 stitches before starting the body.
Top edge flares: Keep Rounds 25-28 firm and use the drawstrings to gather the eyelet round.
Surface ridges pucker: Switch to the smaller hook only if your loops are loose. Otherwise, use the main hook and pull up taller loops.
Bow droops: Block the bow pieces flat and sew through the center wrap, loops, and tails in one anchored stack.
Need a larger bag: Add 10 stitches to the final base circumference for each added texture panel, then work the body rounds to the same height or add rounds as desired.
Care Instructions
Spot clean when possible. For washable cotton yarn, hand wash in cool water, press in a towel, reshape over a towel form, and dry flat. Do not hang while wet because the handle may stretch.
Customization Ideas
For a longer handle: Add 4 chains for each extra inch (2.5 cm) you want.
For a wider bag: Add or subtract panels in 10-stitch multiples and adjust base increases to finish with the new multiple of 10.
You can also experiment with different color combinations. A cream bag with a pink flower would be lovely for spring, or try a deep burgundy with golden accents for fall.
Thank you so much for choosing this pattern! I really hope you enjoy creating your Mustard Sunflower Bow Bucket Bag. It’s such a satisfying project to see come together, and the finished piece makes an incredible gift or statement accessory.
If you’re planning to make this later, go ahead and save this pattern to your Pinterest boards so you can find it easily when you’re ready to start. And please, I’d absolutely love to see your finished bags! Drop a comment below or tag me on social media when you complete yours. Happy crocheting!
Want a Quick & Easy Printable Version?
Get a clean, beautifully formatted PDF of this pattern — easy to follow step by step, ready to print or save on any device. No scrolling, no distractions, just the pattern.
Get the Printable PDF →