
The Lavender Garden Baby Dress has lived in my pattern notebook for nearly three years now. I originally designed it for my niece’s first birthday, sketching out those little daisies on a napkin during a family dinner while everyone else was talking about the weather. She wore it exactly once before she outgrew it, but I photographed every angle because I knew this one was special.
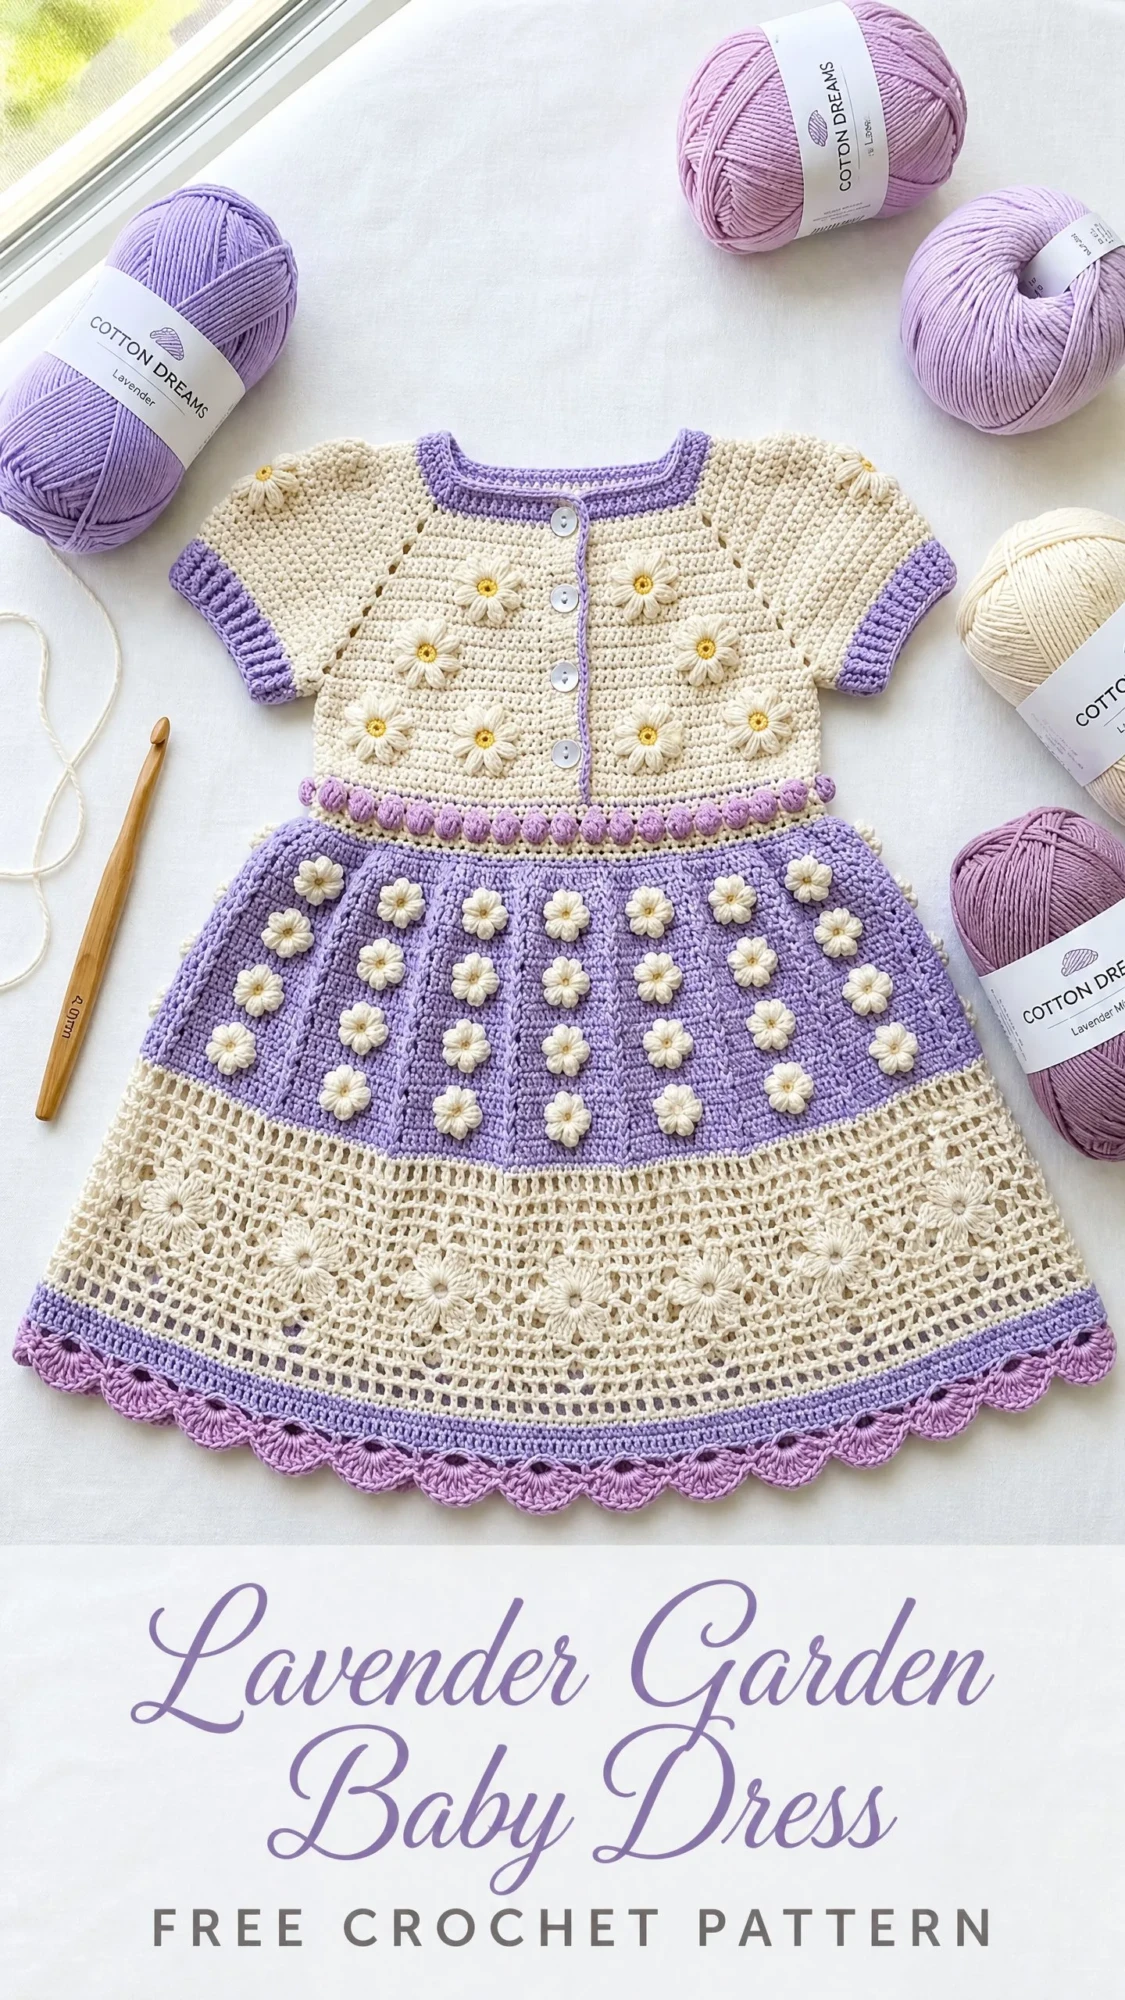
I named it Lavender Garden because of those soft purple tones mixed with cream, like an English cottage garden in early summer. The three-dimensional daisy appliques scattered across the bodice and skirt give it that whimsical, heirloom quality that makes strangers stop you on the street to ask where you bought it.
This is not a quick weekend project, I will be honest with you. But if you have been looking for a dress pattern that will genuinely impress, one that looks like it came from a high-end baby boutique, this is the one. Every single stitch is worth it when you see those little daisies bloom across that lavender skirt.
About This Crochet Pattern
This baby dress pattern creates a structured top-down garment with raglan shaping, a gathered skirt worked in the round, and a front button closure. The finished dress fits babies approximately 6 to 12 months old, with a chest circumference of about 18 inches and a total length from shoulder to hem of approximately 17 inches.
The bodice is worked flat from the neckline down, which means you will turn your work at the end of each row. Once you reach the underarms, the sleeves go on hold and the body continues. Then the skirt joins in the round and works downward through three distinct sections: a lavender panel with applique daisies, a cream openwork lace panel, and a pink shell-stitch border at the hem.
Skill level sits at intermediate to advanced. You should feel comfortable with top-down raglan construction, working lace repeats in the round, joining flat pieces to work circularly, and creating three-dimensional flower appliques. If you have made a few garments before and feel confident reading stitch counts, you are ready for this one.
Time estimate runs approximately 20 to 30 hours for an experienced crocheter. The daisy appliques add another 4 to 6 hours depending on your pace. I suggest spreading this project over a few weeks rather than rushing through it.
Materials You Will Need
Gathering your supplies before you start prevents frustrating stops mid-project. Here is everything this crochet tutorial requires:
Yarn:
Hooks:
Notions:
Yarn Suggestions
Paintbox Yarns Cotton DK works beautifully here with its crisp stitch definition. Lion Brand 24/7 Cotton gives the skirt excellent drape without stretching. Scheepjes Catona produces gorgeously defined lace stitches if you prefer a finer mercerized cotton.
Whichever you choose, avoid fuzzy or textured fibers. They will obscure those pretty daisies and muddy up the lace pattern. Smooth cotton shows off every stitch.
Gauge Information
With your US Size E-4 (3.5 mm) hook and Yarn A, work a single crochet (sc) swatch:
For the lace pattern section, one 6-stitch lace repeat should measure approximately 1.2 inches / 3 cm wide.
Please, please make a gauge swatch. Cotton has almost no stretch, so even one stitch difference per 4 inches will throw off the chest measurement significantly. Swatch, wash, and block before you begin. Your future self will thank you.
Abbreviations and Stitch Definitions
Let me walk you through every abbreviation used in this step by step pattern. I have included plain-English explanations so nothing catches you off guard.
Special Stitches
These techniques appear throughout the pattern. Practice them before starting if they are new to you.
Bobble Stitch (for waist picot border)
This creates a raised rounded bump on the right side.
1. YO, insert hook into stitch, YO, pull up a loop, YO, pull through 2 loops (2 loops remain)
2. YO, insert hook into same stitch, YO, pull up a loop, YO, pull through 2 loops (3 loops remain)
3. YO, insert hook into same stitch, YO, pull up a loop, YO, pull through 2 loops (4 loops remain)
4. YO, pull through all 4 loops on hook
Shell Stitch (for hem border)
Work 5 dc in the same stitch or space. This creates a fan shape that adds beautiful scalloped texture.
V-Stitch (for lace panel)
Work (dc, ch 2, dc) all in the same stitch or space. The "V" shape opens up the fabric for an airy look.
Raglan Increase Shell
Work (sc, ch 1, sc) all in the same raglan marker stitch. This adds 2 stitches plus a ch-1 space at each raglan point per row.
Daisy Applique
These sweet little flowers are worked separately, then sewn on at the end.
1. With Yarn D, make a magic ring (or ch 4 and join with sl st)
2. Ch 1. Work 6 sc into the ring. Join with sl st to first sc. (6 sc)
3. Working into each sc around: Ch 5, sl st back into base of same sc (forming a petal loop). Repeat for each sc. (6 petals)
4. Cut Yarn D. Attach Yarn E to center ring from the front using a yarn needle. Work 3 to 4 small straight stitches in a cluster at the center. Fasten off. Weave ends. Block lightly.
Pattern Instructions
Part One: Bodice
Section 1A: Neckline Foundation and Raglan Setup
With Yarn B (Lavender) and smaller hook (D-3 / 3.25 mm), ch 58.
Foundation Row (WS): Sc in 2nd ch from hook and in each ch across. Turn. (57 sc)
Switch to Yarn A (Cream) and larger hook (E-4 / 3.5 mm).
Row 1 (RS, Raglan Setup Row): Ch 1. Work as follows, placing stitch markers at the 4 raglan dividing points:
Sc in first 8 sts (Right Front). Pm in next st. Work Raglan Increase Shell in marked st (sc, ch 1, sc). Pm in center ch-1 sp. Sc in next 6 sts (Right Sleeve). Pm in next st. Work Raglan Increase Shell. Pm. Sc in next 23 sts (Back). Pm in next st. Work Raglan Increase Shell. Pm. Sc in next 6 sts (Left Sleeve). Pm in next st. Work Raglan Increase Shell. Pm. Sc in last 8 sts (Left Front). Turn.
Stitch count after Row 1: Right Front: 9 sc. Right Sleeve: 8 sc. Back: 25 sc. Left Sleeve: 8 sc. Left Front: 9 sc. Plus 4 raglan ch-1 spaces. Total: 59 sc plus 4 ch-1 spaces.
Row 2 (WS): Ch 1. Sc across all stitches, working sc into each ch-1 space at raglan points (do NOT increase on WS rows). Turn. (63 sc)
Row 3 (RS, Increase Row): Ch 1. Sc to 1 st before raglan marker, work Raglan Increase Shell in next st, move marker to new ch-1 sp. Rep from at each of the 4 raglan points. Sc to end. Turn. (71 sc)
Each RS increase row adds 8 stitches total (2 at each of 4 raglan points).
Row 4 (WS): Ch 1. Sc across, working 1 sc into each ch-1 raglan space. Turn. (75 sc)
Row 5 (RS, Increase Row): Repeat Row 3 pattern. Turn. (83 sc)
Row 6 (WS): Sc across. Turn. (87 sc)
Row 7 (RS, Increase Row): Repeat Row 3 pattern. Turn. (95 sc)
Row 8 (WS): Sc across. Turn. (99 sc)
Row 9 (RS, Increase Row): Repeat Row 3 pattern. Turn. (107 sc)
Row 10 (WS): Sc across. Turn. (111 sc)
Row 11 (RS, Increase Row): Repeat Row 3 pattern. Turn. (119 sc)
Row 12 (WS): Sc across. Turn. (123 sc)
Row 13 (RS, Increase Row): Repeat Row 3 pattern. Turn. (131 sc)
Row 14 (WS): Sc across. Turn. (135 sc)
Row 15 (RS, Increase Row): Repeat Row 3 pattern. Turn. (143 sc)
Row 16 (WS): Sc across. Turn. (147 sc)
Stitch distribution after Row 16: Right Front: 17 sc. Right Sleeve: 22 sc. Back: 39 sc. Left Sleeve: 22 sc. Left Front: 17 sc.
Checkpoint: After Row 16, the bodice should measure approximately 3 inches from the neckline foundation row.
Section 1B: Underarm Join and Body Setup
Row 17 (RS): Ch 1. Sc across 17 Right Front sts. Skip 22 Right Sleeve sts (place on holder). Ch 4 (underarm bridge). Sc across 39 Back sts. Skip 22 Left Sleeve sts (place on holder). Ch 4. Sc across 17 Left Front sts. Turn. (77 sc plus 8 ch)
Row 18 (WS): Ch 1. Sc across all sts and ch sts. Turn. (85 sc)
Rows 19 through 22: Ch 1. Sc across all 85 sts. Turn. (85 sc each row)
Checkpoint: After Row 22, your bodice should measure approximately 5.5 to 6 inches from the neckline edge.
Section 1C: Front Button Band
With Yarn A and smaller hook, attach yarn at the top-right neck corner (RS facing). Work 1 sc in each row end down the right front edge. At the bottom-right corner, work 3 sc. Continue along the foundation chain of the neckline. At the top-left corner, work 3 sc. Work 1 sc in each row end up the left front edge. Fasten off.
Button Loop Row (Right Front): With Yarn A and smaller hook, RS facing, attach yarn at top right corner. Ch 1. Sc in first st. Sc in next 3 sts, ch 3 (button loop), sk 1 st. Rep from 4 more times. Sc to end. Fasten off.
This creates 5 button loops. Sew 5 buttons onto the left front edge, aligned with the loops.
Section 1D: Sleeve Finishing
Transfer the held Right Sleeve stitches (22 sc) to your hook.
With Yarn A and larger hook, attach yarn at underarm bridge center.
Round 1: Ch 1. Sc in each of the 22 held sleeve sts. Sc in each of the 4 underarm bridge ch sts. Join with sl st. (26 sc)
Rounds 2 and 3: Ch 1. Sc in each st around. Join with sl st. (26 sc)
Switch to Yarn B (Lavender) and smaller hook.
Rounds 4 and 5 (Cuff): Ch 1. Working in BLO, sc in each st around. Join with sl st. (26 sc)
Fasten off. Repeat for Left Sleeve.
Part Two: Neckline Band
The neckline foundation in Yarn B forms the neck accent. For additional definition, work 1 round of sc along the neck edge in Yarn B, then 1 round of sl st. Fasten off.
Part Three: Waist Picot Border
This creates the pink bobble trim between bodice and skirt.
Attach Yarn C (Soft Pink) to the bottom-right corner of the bodice.
Row 1: Ch 1. Work 1 sc in each of the 85 bodice bottom sts. Join ends with sl st. Fasten off. (85 sc)
Row 2 (Bobble Row): Attach Yarn C. Ch 1. Sc in 1 st, work Bobble Stitch in next st. Rep from across. Fasten off. (approximately 42 bobbles alternating with 43 sc)
Part Four: Skirt
Section 4A: Joining in the Round
With Yarn A and larger hook, RS facing, attach yarn at bottom center-back of the bodice.
Setup Round: Ch 1. Work 85 sc evenly around the bottom of the bodice. Join with sl st. (85 sc)
Increase Round 1: Ch 1. Sc in next 4 sts, inc in next st. Rep from 17 times. Join with sl st. (102 sc)
Increase Round 2: Ch 1. Sc in next 5 sts, inc in next st. Rep from 17 times. Join with sl st. (119 sc)
Section 4B: Upper Skirt (Lavender Daisy Panel)
Switch to Yarn B (Lavender).
Rounds 1 through 14: Ch 1. Sc in each st around. Join with sl st. (119 sc each round)
Fasten off Yarn B.
Checkpoint: The lavender panel measures approximately 2.5 inches tall.
Section 4C: Skirt Increase Transition
Switch to Yarn A (Cream).
Increase Round (Transition): Ch 1. Sc in next 6 sts, inc in next st. Rep from 17 times. Join with sl st. (136 sc)
Plain Round: Ch 1. Sc in each st around. Join with sl st. (136 sc)
Final Increase Round: Ch 1. Sc in next 8 sts, inc in next st. Rep from 14 times. Sc in remaining 10 sts. Join with sl st. (150 sc)
Note: 150 divides evenly by 6 for the lace repeat.
Section 4D: Cream Lace Panel
Lace Round 1: Ch 4 (counts as dc plus ch 1). Sk 2 sts, dc in next st, ch 1, sk 2 sts, dc in next st, ch 1. Rep from 24 more times. Join with sl st to 3rd ch of beginning ch-4. (50 dc, 50 ch-1 spaces)
Lace Round 2: Sl st into first ch-1 sp. Ch 5 (counts as dc plus ch 2). Dc in next ch-1 sp, ch 2. Rep from around. Join with sl st to 3rd ch of beginning ch-5. (50 dc, 50 ch-2 spaces)
Lace Round 3: Sl st into first ch-2 sp. Ch 3 (counts as dc). Work 2 more dc in same sp. Ch 2, 3 dc in next ch-2 sp. Rep from around. Ch 2. Join with sl st. (150 dc, 50 ch-2 spaces)
Lace Round 4: Ch 1. Sc in ch-2 sp, ch 3, sc in same sp. Rep from around. Join with sl st. (100 sc, 50 ch-3 loops)
Lace Round 5: Sl st into first ch-3 loop. Ch 3 (counts as dc). Work 4 more dc in same loop. Ch 1, 5 dc in next ch-3 loop. Rep from around. Ch 1. Join with sl st. (250 dc, 50 ch-1 spaces)
Lace Round 6: Ch 1. Sc in first dc of shell, sc in next 4 dc of shell, sc in ch-1 sp. Rep from around. Join with sl st. (300 sc)
Lace Round 7: Ch 1. Sc2tog, sc in next 2 sts, sc2tog. Rep from 50 times. Join with sl st. (200 sc)
Lace Round 8: Ch 1. Sc in next 3 sts, inc in next st. Rep from 50 times. Join with sl st. (250 sc)
Checkpoint: The skirt should measure approximately 10 to 11 inches from waist join. Hem circumference is approximately 50 inches.
Section 4E: Hem Shell Border
Switch to Yarn C (Soft Pink) and larger hook.
Round 1: Ch 1. Sc in each st around. Join with sl st. (250 sc)
Round 2 (Shell Border): Ch 3 (counts as dc). Work 4 more dc in first st. Sk 4 sts, sl st in next st, sk 4 sts, 5 dc in next st. Rep from around. End with sk 4 sts, sl st in next st, sk 4 sts. Join with sl st. (25 shell repeats)
Round 3: Ch 1. Sl st in same st. Working into next shell: (sl st, ch 3, sl st) in each of 5 dc to create picot points. Sl st in sl st between shells. Rep from around. Join with sl st. Fasten off.
Round 4 (Optional lavender accent): Attach Yarn B. Ch 1. Sc in sl st between shells, ch 3, sc in same sl st. Rep from 25 times. Join with sl st. Fasten off.
Part Five: Daisy Applique Placement
Make 30 daisies total following the special stitch instructions. Block all daisies before sewing.
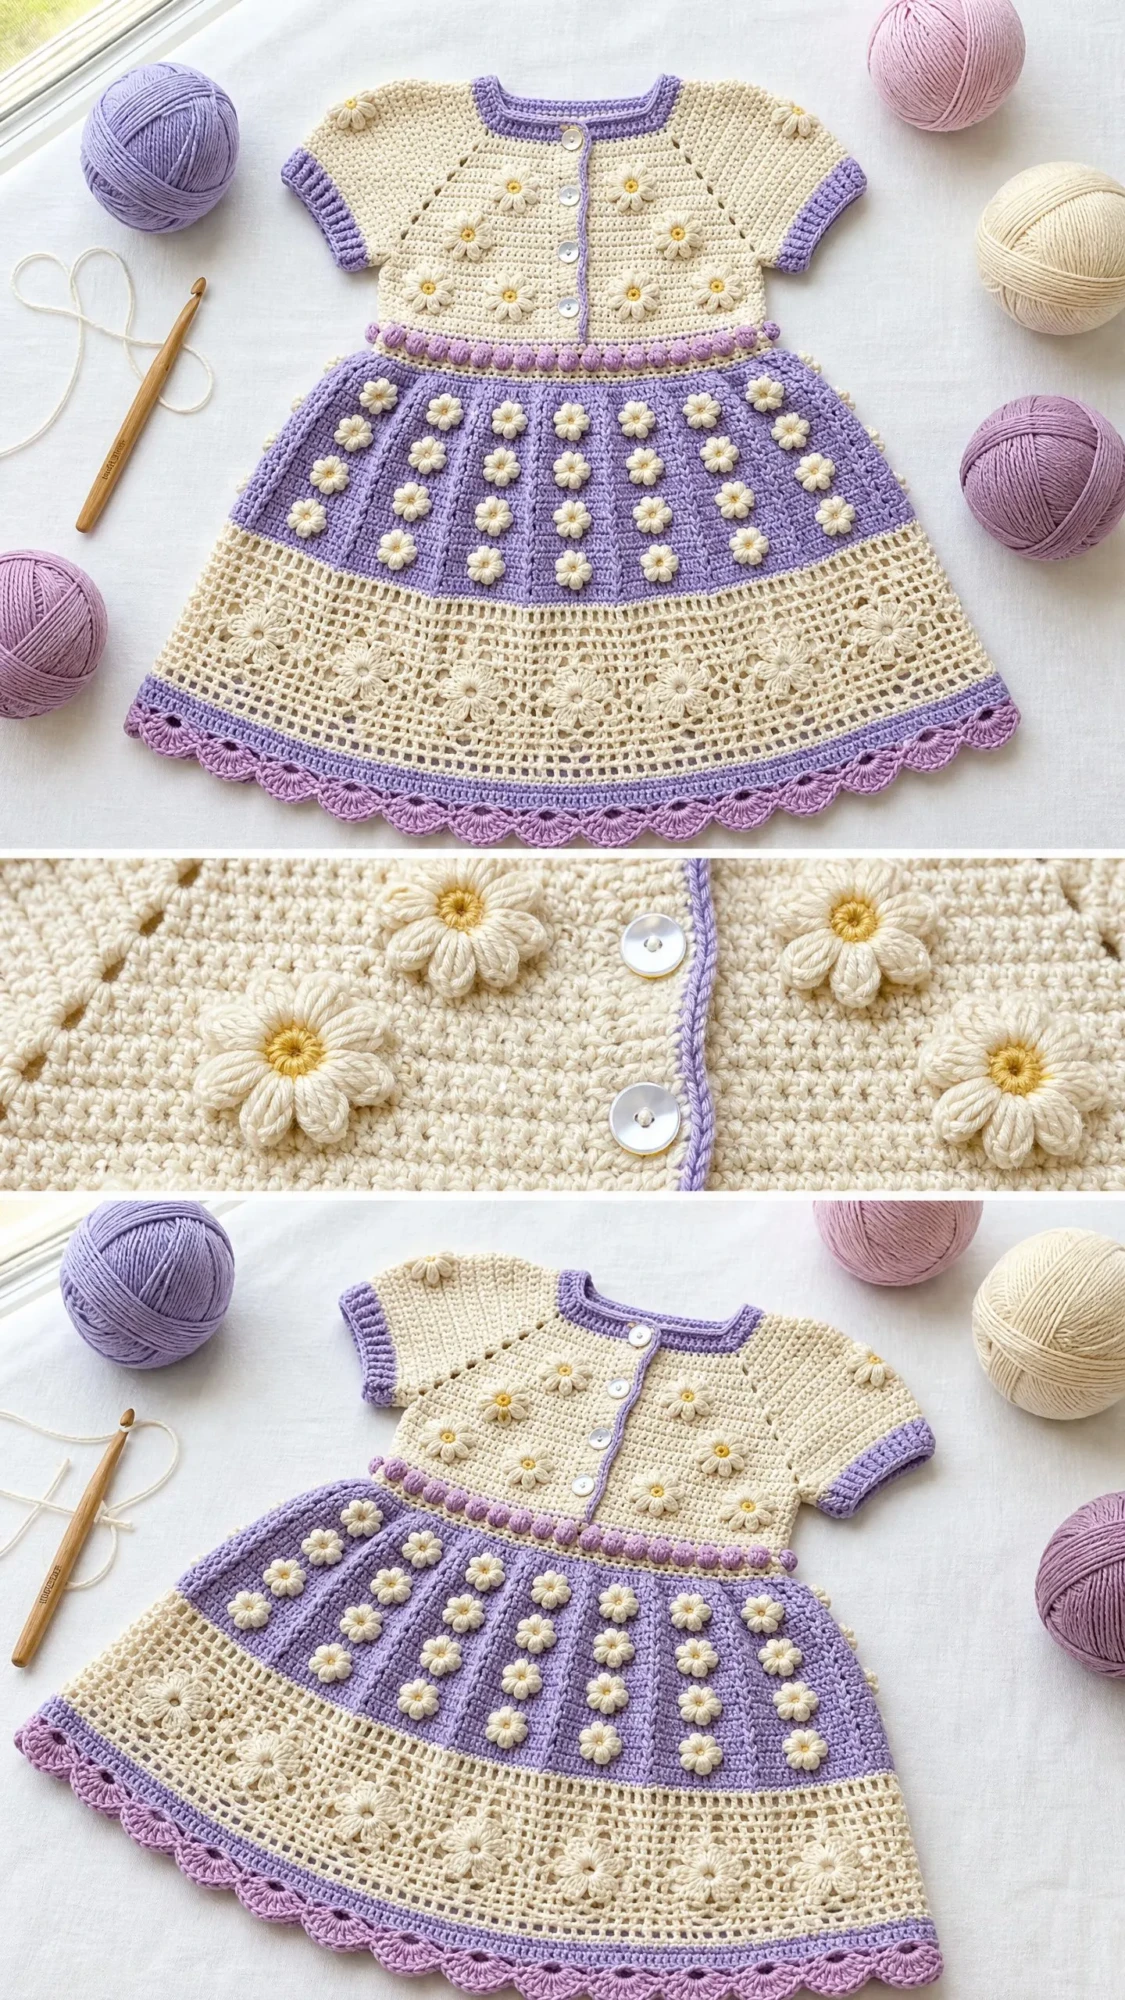
Bodice Daisies (6 total): Arrange in two columns of 3 daisies each, one column per side of the button band. Place the top daisy approximately 1 inch below the neckline, spacing each subsequent daisy 1 inch below.
Upper Skirt Daisies (24 total): Arrange in 3 horizontal rows within the lavender panel.
Sew each daisy with matching yarn, catching the center and outer petals. Allow petals to stand slightly raised.
Size Customization Tips
For 12 to 18 months: Add 2 additional raglan increase rows before separating for sleeves. Add 4 rounds to the lavender panel and 2 rounds to the lace panel.
For 18 to 24 months: Add 4 additional raglan increase rows. Add 6 rounds to the lavender panel and 4 to the lace panel. Make 6 additional daisies.
For 3 to 6 months: Remove 2 raglan increase rows. Reduce the lavender panel by 4 rounds and the lace panel by 2 rounds.
Finishing Your Dress
Weave in all yarn ends securely on the wrong side, working ends at least 1 inch in two directions. Sew buttons aligned with the button loops.
Blocking makes a tremendous difference with this dress. Soak in cool water, press gently in a towel (do not wring), and lay flat to dry. Pin the skirt panels open to full width so the lace pattern sets beautifully. Allow to dry completely before moving.
Trim any remaining threads, and your Lavender Garden Baby Dress is complete.
Final Thoughts
Thank you so much for choosing this pattern. I know it takes time and attention, but the result is truly something special. There is nothing quite like seeing a little one in a handmade dress covered in daisies you stitched yourself.
If you make this dress, I would absolutely love to see it. Tag me on Instagram or share a photo on Facebook. Seeing your finished projects genuinely makes my day.
Go ahead and save this crochet pattern to your Pinterest boards so you can find it whenever you are ready to start. And if you do make it, please drop a comment below. I love hearing which colors you chose and how your daisies turned out.
You Might Also Like
- Mint Green Lacy Baby Dress Free Crochet Pattern
- Autumn Harvest Granny Square Bag Free Crochet Pattern
- Sunset Orange Chameleon Amigurumi Free Crochet Pattern
- Mustard Yellow Backpack Free Crochet Pattern
