
I don’t know about you, but I absolutely melt over tiny baby clothes with vintage charm. There’s just something about a little one in a hand-crocheted romper that makes my heart skip a beat.
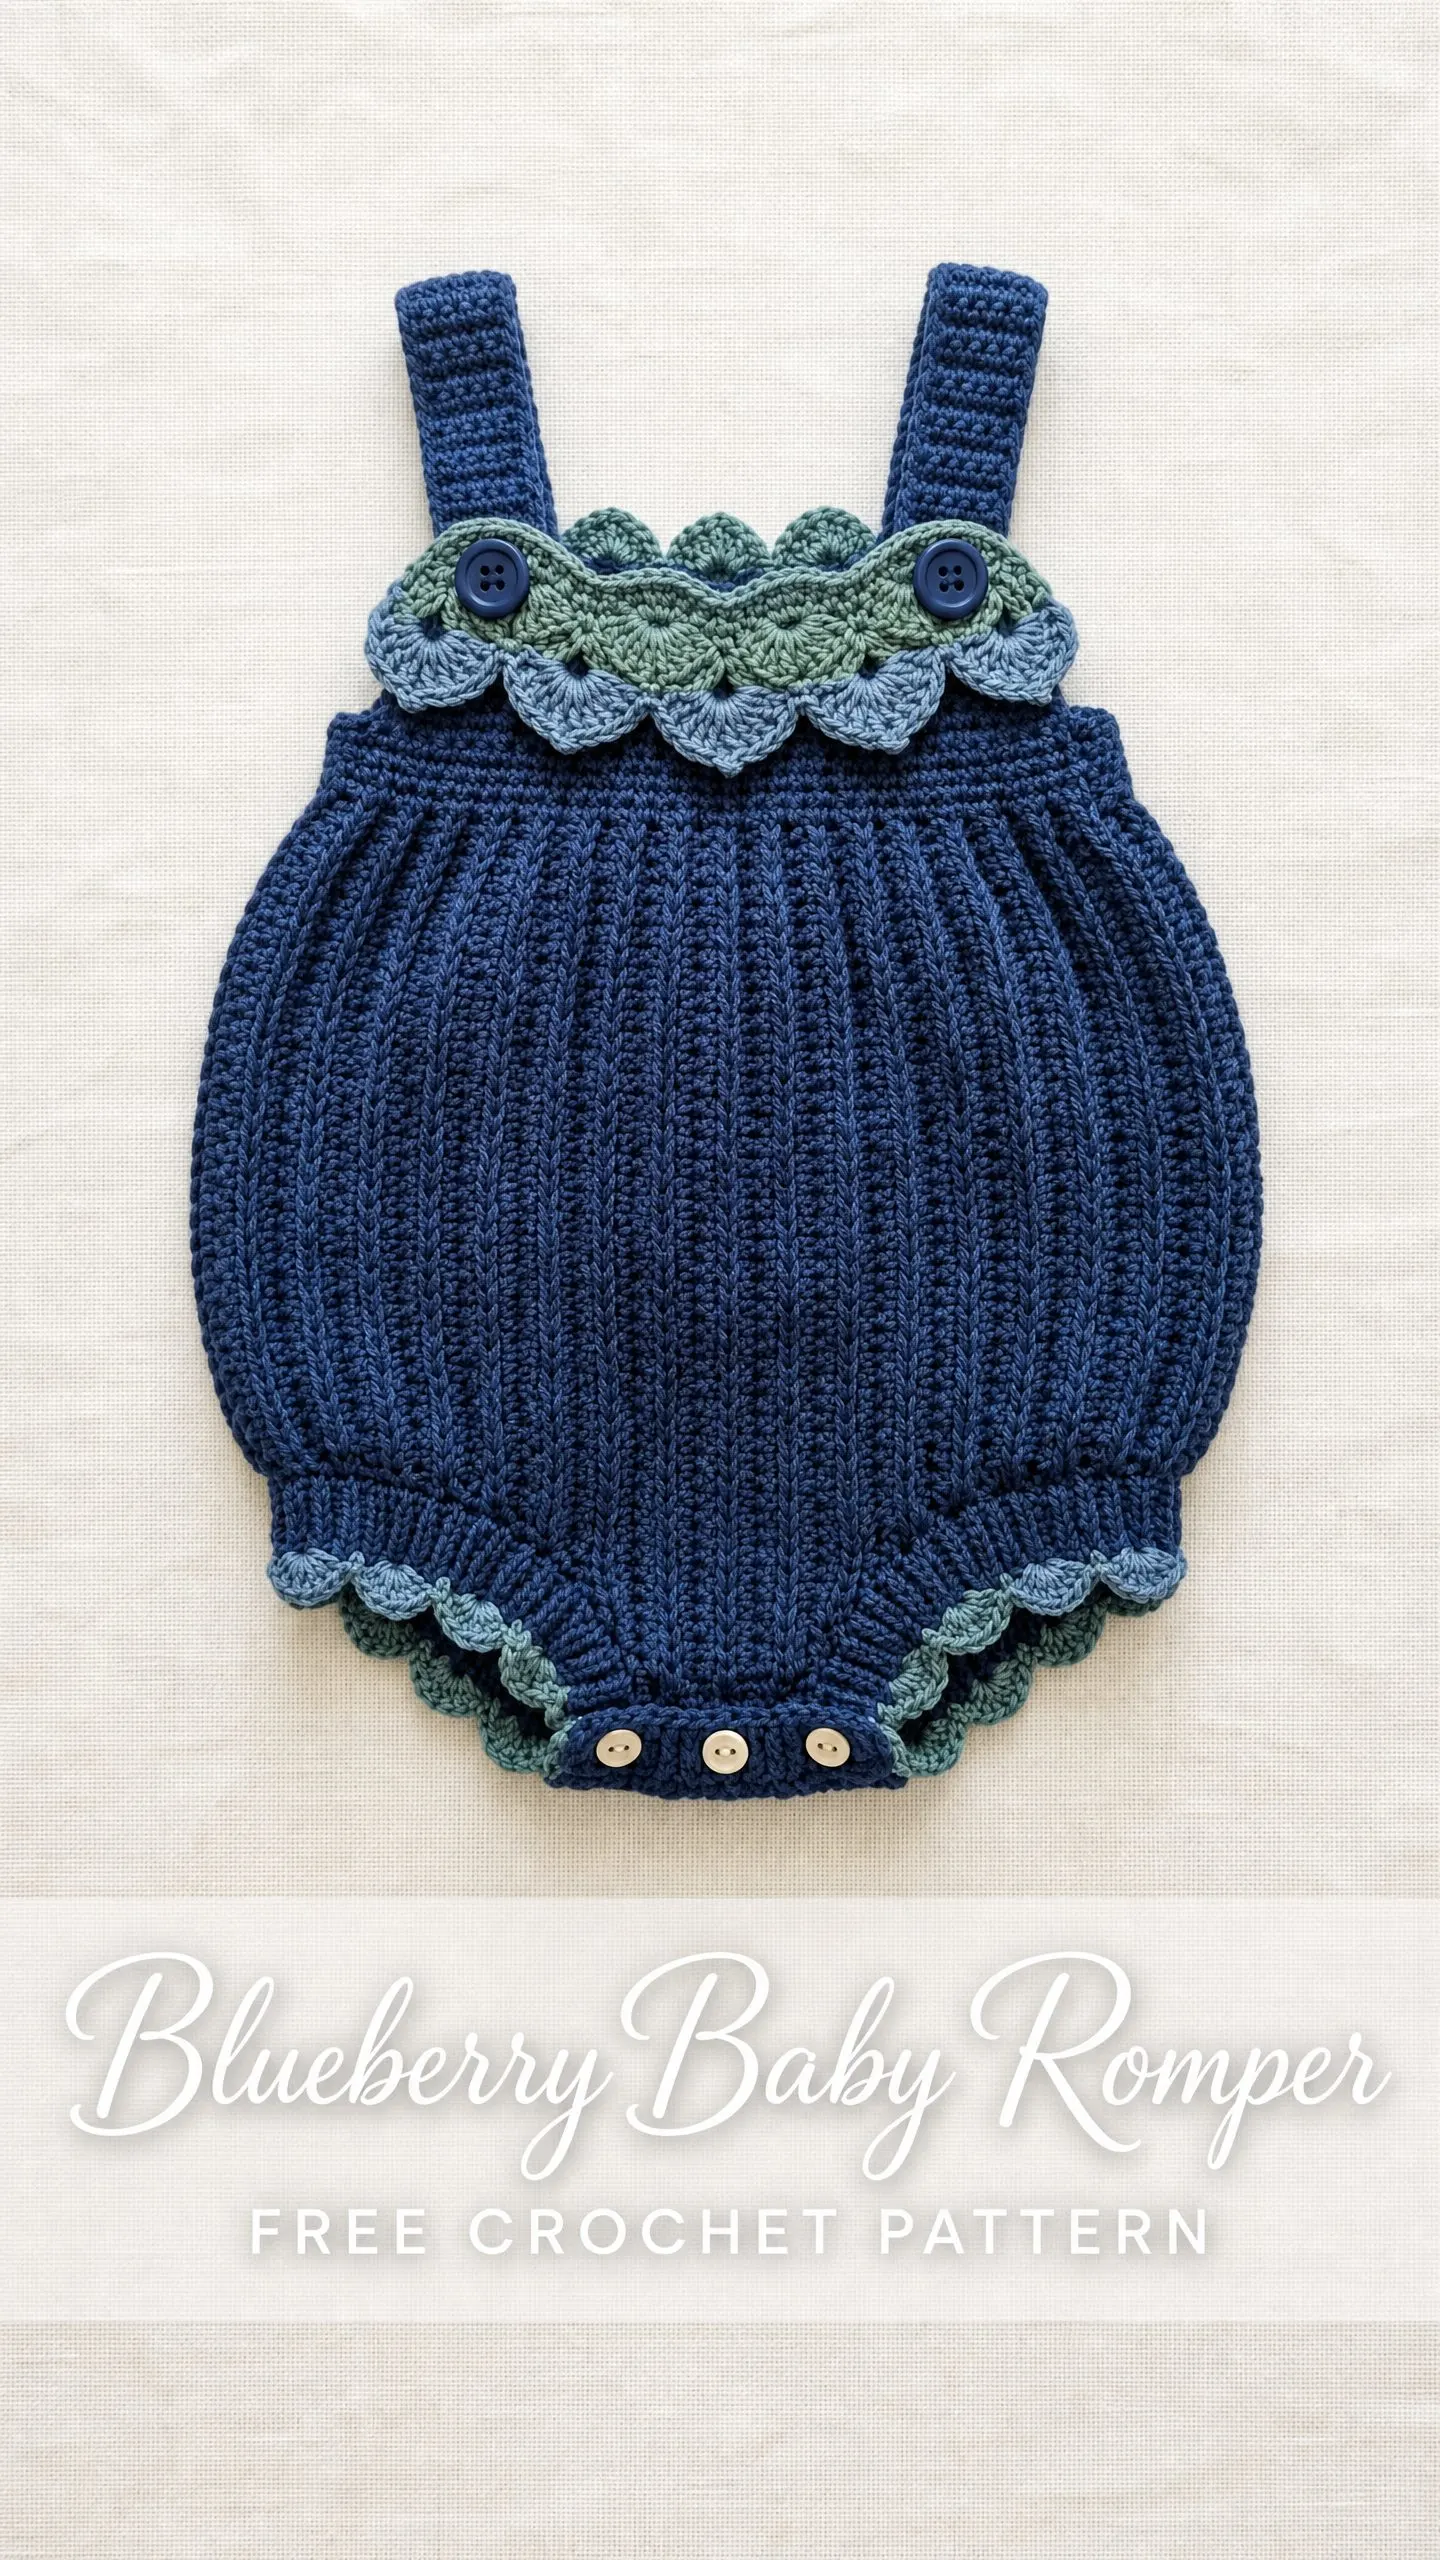
This Blueberry Baby Romper delivers all the sweetness without the overwhelming construction headaches. The ribbed texture looks incredibly sophisticated, the scalloped trim adds a dreamy vintage touch, and the whole thing comes together in a way that’s totally manageable for an intermediate crocheter.
If you’ve been searching for a baby shower gift that will genuinely wow, or you just want to make something beautiful for a little person in your life, this is the pattern you’ve been waiting for.
About This Baby Romper Crochet Pattern
This romper is a one-piece baby garment featuring a gorgeous vertical ribbed texture that mimics knitted ribbing. The body has that adorable rounded bloomer shape that looks precious on babies, while wide shoulder straps keep everything in place comfortably.
The real showstopper here is the two-layer scalloped trim at both the chest yoke and leg openings. Working in two contrasting accent colors creates a dimensional, ruffled effect that photographs beautifully and looks far more complex than it actually is.
Practical details matter for baby items, and this pattern doesn’t skimp. Snap or button closures at the crotch make diaper changes easy, and two decorative buttons accent the front yoke for extra charm.
The construction begins with the back body panel worked flat in rows, then joins to the front body panel. The piece is finished in the round at the bottom with decorative edging, and straps are worked separately before being attached.
Skill Level
This pattern is rated intermediate. You’ll need comfort working both in the round and flat, reading stitch counts carefully across multiple sections, changing colors cleanly, working post stitches for the ribbed texture, and executing a multi-step decorative edging.
If you’re a beginner who feels comfortable with basic stitches but hasn’t tackled garment shaping yet, I’d recommend completing a few simpler flat projects first. That said, if you take it row by row and trust the stitch counts, you’ve absolutely got this.
Time Estimate
Plan for approximately 10 to 16 hours of working time if you’re an experienced intermediate crocheter. Your actual time will depend on your working speed and how familiar you are with post stitches.
Finished Measurements
This pattern is written for size 3 to 6 months.
Size customization tips are included at the end of the pattern if you need to adjust for a smaller or larger baby.
Materials Needed for This Crochet Baby Romper
Yarn:
Yarn Suggestions:
Lion Brand Pound of Love (worsted weight, 100% acrylic, 1020 yards per 16 oz skein) is soft, washable, and widely available. One skein provides more than enough yardage for all three colors if purchased separately in coordinating shades.
Paintbox Yarns Simply DK (used at a slightly tighter gauge with a G hook for a firmer fabric) is 100% acrylic, machine washable, and available in a wide range of colors including navy, slate, and sage tones.
Cascade 220 Superwash (worsted weight, 100% superwash wool, 220 yards per 100g skein) gives superior stitch definition for the ribbed texture and scallop trim. It blocks beautifully but requires two skeins in MC and one skein each in AC1 and AC2.
Substitution note: Any smooth worsted weight yarn that meets gauge will work. Avoid fuzzy or textured yarns as they will obscure the ribbed stitch pattern. Always prioritize machine washability for baby garments.
Tools:
Gauge
18 stitches and 14 rows = 4 inches / 10 cm in ribbed half double crochet (hdc) pattern (front post and back post hdc alternating), after blocking.
To make a gauge swatch: Chain (ch) 22. Row 1: Hdc in 3rd chain from hook and in each chain across. Turn. (20 hdc) Row 2: Ch 2, front post half double crochet (fphdc) around first stitch (st), back post half double crochet (bphdc) around next st, alternate fphdc and bphdc across, hdc in top of turning chain. Turn. (20 sts) Repeat Row 2 for 14 rows total. Fasten off. Block swatch and measure center 4 inches.
Gauge is critical for a fitted garment. Adjust hook size as needed. Going up a hook size loosens fabric; going down tightens it.
Abbreviations
Special Stitches Explained
Let me break down the special techniques you’ll use in this crochet tutorial.
Front Post Half Double Crochet (fphdc):
Yarn over (yo), insert hook from front to back to front around the post (that’s the vertical bar) of the indicated stitch in the row below, yo and pull up a loop, yo and pull through all 3 loops on hook. This creates a raised ridge on the front of the fabric.
Back Post Half Double Crochet (bphdc):
Yo, insert hook from back to front to back around the post of the indicated stitch in the row below, yo and pull up a loop, yo and pull through all 3 loops on hook. This pushes the stitch to the back, creating a recessed channel on the front of the fabric.
Ribbed HDC Pattern:
The combination of alternating fphdc and bphdc produces a vertical ribbed effect that resembles knitted ribbing. This is what gives the body its characteristic texture.
Shell Stitch:
Work 5 double crochet (dc) all into the same stitch or chain space. This creates a fan shape.
Two-Layer Scallop Edging:
Layer 1 in AC1:
Round 1 in AC1: Join AC1, sc evenly around opening, join with sl st.
Round 2 in AC1: Ch 1, (sc in next st, sk 1 st, 5 dc shell in next st, sk 1 st) repeat around, join with sl st.
Layer 2 in AC2:
With RS facing, join AC2 in the base round of AC1 stitches (the sc round), working into the skipped stitches from the base sc round.
Round in AC2: Ch 3, (3 dc in skipped st from base round, ch 1) repeat around, join with sl st.
The two layers overlap and nest together to create that beautiful ruffled, dimensional look.
Pattern Notes Before You Begin
1. The romper body is worked in two flat panels (front and back) that are joined at the sides, then the leg openings and yoke are finished with decorative edging worked in rounds.
2. The turning ch 2 at the start of each ribbed row counts as a stitch in this pattern. Always work an hdc (not a post stitch) into the top of the previous row’s turning chain at the end of each row.
3. Stitch markers are helpful to mark the beginning of rounds and to mark armhole positions on the yoke.
4. The crotch button band is worked flat separately and sewn to the bottom edge of the front panel.
5. The decorative scallop trim at the yoke is worked after the body is assembled. The trim at the leg openings is worked last.
6. Read all instructions for a section before beginning that section.
7. When changing colors for the edging, fasten off each color cleanly and weave ends before adding the next layer.
8. The back panel is worked slightly wider at the base to create the bloomer fullness, then the shaping tapers toward the yoke.
Step by Step Pattern Instructions
Back Panel
Foundation: Using MC, ch 41.
Row 1 (RS): Hdc in 3rd ch from hook and in each ch across. Turn. (39 hdc)
Row 2: Ch 2, fphdc around first st, (bphdc around next st, fphdc around next st) across to last st, hdc in top of turning ch. Turn. (39 sts)
Row 3: Ch 2, bphdc around first st, (fphdc around next st, bphdc around next st) across to last st, hdc in top of turning ch. Turn. (39 sts)
Rows 4 through 10: Repeat Rows 2 and 3 alternately, ending on a Row 3 repeat. (39 sts each row)
After Row 10, the back base section measures approximately 3 inches / 7.5 cm tall.
Shaping Row 11 (decrease row): Ch 2, hdc2tog over first 2 sts, work in established rib pattern across to last 3 sts, hdc2tog, hdc in top of turning ch. Turn. (37 sts)
Row 12: Work even in rib pattern. Turn. (37 sts)
Shaping Row 13: Ch 2, hdc2tog over first 2 sts, work in established rib pattern across to last 3 sts, hdc2tog, hdc in top of turning ch. Turn. (35 sts)
Row 14: Work even in rib pattern. Turn. (35 sts)
Shaping Row 15: Ch 2, hdc2tog over first 2 sts, work in established rib pattern across to last 3 sts, hdc2tog, hdc in top of turning ch. Turn. (33 sts)
Rows 16 through 22: Work even in rib pattern. Turn. (33 sts each row)
After Row 22, the back panel measures approximately 6.5 inches / 16.5 cm tall from foundation chain.
Armhole shaping Row 23: Sl st across first 4 sts, ch 2, work in rib pattern across to last 4 sts, leave remaining 4 sts unworked. Turn. (25 sts)
Row 24: Work even in rib pattern. Turn. (25 sts)
Rows 25 through 28: Work even in rib pattern. Turn. (25 sts each row)
After Row 28, the back yoke section is complete. Fasten off MC. Leave a long tail for seaming.
Checkpoint: After completing the back panel, the piece should measure approximately 8 inches / 20 cm from the foundation chain to the top of the yoke, and approximately 8.5 inches / 21.5 cm wide at the base narrowing to approximately 5.5 inches / 14 cm at the yoke.
Front Panel
Foundation: Using MC, ch 41.
Row 1 (RS): Hdc in 3rd ch from hook and in each ch across. Turn. (39 hdc)
Row 2: Ch 2, fphdc around first st, (bphdc around next st, fphdc around next st) across to last st, hdc in top of turning ch. Turn. (39 sts)
Row 3: Ch 2, bphdc around first st, (fphdc around next st, bphdc around next st) across to last st, hdc in top of turning ch. Turn. (39 sts)
Rows 4 through 10: Repeat Rows 2 and 3 alternately, ending on a Row 3 repeat. (39 sts each row)
Shaping Row 11: Ch 2, hdc2tog over first 2 sts, work in established rib pattern across to last 3 sts, hdc2tog, hdc in top of turning ch. Turn. (37 sts)
Row 12: Work even in rib pattern. Turn. (37 sts)
Shaping Row 13: Ch 2, hdc2tog over first 2 sts, work in established rib pattern across to last 3 sts, hdc2tog, hdc in top of turning ch. Turn. (35 sts)
Row 14: Work even in rib pattern. Turn. (35 sts)
Shaping Row 15: Ch 2, hdc2tog over first 2 sts, work in established rib pattern across to last 3 sts, hdc2tog, hdc in top of turning ch. Turn. (33 sts)
Rows 16 through 22: Work even in rib pattern. Turn. (33 sts each row)
Armhole shaping Row 23: Sl st across first 4 sts, ch 2, work in rib pattern across to last 4 sts, leave remaining 4 sts unworked. Turn. (25 sts)
Row 24: Work even in rib pattern. Turn. (25 sts)
Rows 25 through 28: Work even in rib pattern. Turn. (25 sts each row)
After Row 28, the front yoke section is complete. Fasten off MC. Leave a long tail for seaming.
Checkpoint: The front panel should match the back panel in dimensions exactly, approximately 8 inches / 20 cm tall from foundation to yoke top.
Joining Panels and Side Seams
Lay front panel and back panel with right sides facing each other, aligning side edges. Using MC and a tapestry needle, mattress stitch or whip stitch the side seams together from the base of the armhole shaping down to the bottom edge of the crotch, leaving the bottom edge open for leg openings and crotch access, and leaving armhole and yoke top open.
Turn right side out.
Crotch Button Band
The crotch of the romper is left open at the bottom edge between the two panels for diaper access. A button band closes this opening.
Using MC, join yarn at bottom right corner of front panel’s lower edge.
Row 1: Ch 1, sc evenly along the entire bottom edge of the front panel, working approximately 1 sc per stitch across. Turn. (20 sc)
Row 2: Ch 1, sc in each sc across. Turn. (20 sc)
Row 3 (buttonhole row): Ch 1, sc in first 2 sts, (ch 1, sk 1 st, sc in next 3 sts) 3 times, ch 1, sk 1 st, sc in last 2 sts. Turn. (16 sc and 4 ch-1 spaces)
Row 4: Ch 1, sc in each st and ch-1 sp across. Turn. (20 sc)
Fasten off. Weave ends.
Work a matching 4-row band on the back panel bottom edge, omitting buttonholes (plain sc only, 4 rows of 20 sc). Sew corresponding buttons to the back button band aligned with the front buttonholes.
Shoulder Straps (make 2)
Using MC, ch 9.
Row 1: Hdc in 3rd ch from hook and in each ch across. Turn. (7 hdc)
Row 2: Ch 2, (fphdc, bphdc) 3 times, hdc in top of turning ch. Turn. (7 sts)
Repeat Row 2 until strap measures 6 inches / 15 cm from beginning, or desired length.
Fasten off, leaving a long tail for sewing.
Make a second strap identical to the first.
Attaching Straps
Position one strap at the back of the yoke, approximately 2.5 inches / 6.5 cm in from each side edge of the back yoke. With WS of strap against RS of back yoke, whip stitch securely across the strap base. Repeat for both straps.
Bring straps over shoulders to the front. Position straps on the front yoke approximately 2.5 inches / 6.5 cm in from each side edge. Mark strap placement with a stitch marker.
Yoke Edging and Trim
The yoke trim is worked along the top edge of the front panel (the top of Rows 25 to 28), incorporating the strap attachment points.
Step 1: Base Round in AC1
Join AC1 at top right corner of front yoke (RS facing).
Round 1: Ch 1, work 25 sc evenly across the top edge of the front yoke (1 sc per stitch across the 25 working sts), then work 7 sc down the right armhole edge, 7 sc across back yoke top, 7 sc up the left armhole edge. Join with sl st to first sc. (46 sc)
Round 2 (Scallop Layer 1 in AC1): Ch 1, (sc in next st, sk 1 st, 5 dc in next st, sk 1 st) repeat around to last 2 sts, sc in next st, sk last st. Join with sl st to first sc. (11 scallops)
Note: 44 of the 46 sts are consumed in the scallop repeat of 4 sts each, yielding 11 complete scallops. Work the remaining 2 sts as sc at join.
Fasten off AC1.
Step 2: Scallop Layer 2 in AC2
Join AC2 in the first sc of Round 1 (the base sc round).
Working into the skipped stitches of Round 1: Ch 3 (counts as dc), 2 dc in same st, (ch 1, 3 dc in next skipped st) repeat around the opening. Join with sl st to top of ch 3. Fasten off AC2.
The AC2 layer sits behind the AC1 scallop layer and creates the second ruffle visible in the finished garment.
Sew decorative navy buttons to the front yoke, one on each side, positioned approximately 1.5 inches / 4 cm from center front. Sew strap ends to front yoke behind buttons, or create a single buttonhole at the top of each strap (ch 2, sk 2 sts at strap end) and button through yoke buttons.
Leg Opening Trim
Each leg opening is trimmed with the same two-layer scallop as the yoke.
Step 1: Join AC1 at side seam of one leg opening. Work sc evenly around the leg opening, placing approximately 1 sc per row end along side edges and 1 sc per stitch along bottom edges. Aim for a multiple of 4 sts.
Target: 40 sc around each leg opening. Join with sl st to first sc. (40 sc)
Step 2: Scallop Layer 1 in AC1
Ch 1, (sc in next st, sk 1 st, 5 dc in next st, sk 1 st) 10 times around. Join with sl st to first sc. (10 scallops, 40 sts used)
Fasten off AC1.
Step 3: Scallop Layer 2 in AC2
Join AC2 in first sc of the base sc round. Ch 3, 2 dc in same st, (ch 1, 3 dc in next skipped st) 9 times, ch 1. Join with sl st to top of ch 3. Fasten off AC2.
Repeat Steps 1 through 3 for the second leg opening.
Final Checkpoint: At this point, the romper body, straps, button band, and all trim should be complete. The piece should measure approximately 14 inches / 35.5 cm from top of strap to bottom of crotch band, and approximately 16 inches / 40.5 cm in chest circumference laid flat and doubled.
Finishing and Blocking Your Baby Romper
Weave in all ends securely using a tapestry needle, running each tail in at least 2 directions to prevent unraveling.
To block: Soak the finished romper in cool water with a small amount of wool wash or gentle detergent for 15 to 20 minutes. Gently squeeze out water without wringing. Roll in a clean towel to remove excess moisture. Lay flat on blocking mat. Pin to finished measurements, shaping the scallop trim open so the layers fan apart attractively. Allow to dry completely before removing pins.
Blocking significantly improves the appearance of the ribbed texture and opens the scallop layers beautifully. Trust me on this one.
Attach crotch buttons to back button band, aligned with front buttonholes.
Care Instructions
Hand wash in cool water or machine wash on a gentle cycle in a mesh laundry bag. Use mild detergent. Do not wring. Lay flat to dry. Do not tumble dry. If using a superwash wool yarn, cool machine wash is acceptable per the yarn manufacturer’s label. Check and retighten any buttons before each use.
Size Customization Tips
To make the romper larger (6 to 12 months): Add 6 chains to the foundation chain (ch 47 instead of ch 41, giving 45 working sts instead of 39). Increase strap length to 7 inches / 18 cm. Add 2 additional even rows to the body section before armhole shaping. The chest circumference will increase to approximately 18 to 19 inches / 46 to 48 cm.
To make the romper smaller (0 to 3 months): Reduce the foundation chain by 6 (ch 35, giving 33 working sts). Reduce strap length to 5 inches / 12.5 cm. Work one fewer even row in the body section before shaping. The chest circumference will decrease to approximately 14 inches / 35.5 cm.
For length adjustments: Add or remove even rows in the section between shaping completion (Row 15) and armhole shaping (Row 23). Each 2 rows adds approximately 0.6 inches / 1.5 cm of body length.
For width adjustments at any size: The scallop trim requires a stitch count divisible by 4. Always adjust your leg opening and yoke sc rounds to the nearest multiple of 4 when customizing.
Always recheck your gauge if substituting yarn or changing hook size, and recalculate stitch counts accordingly.
Final Thoughts on This Crochet Baby Romper Pattern
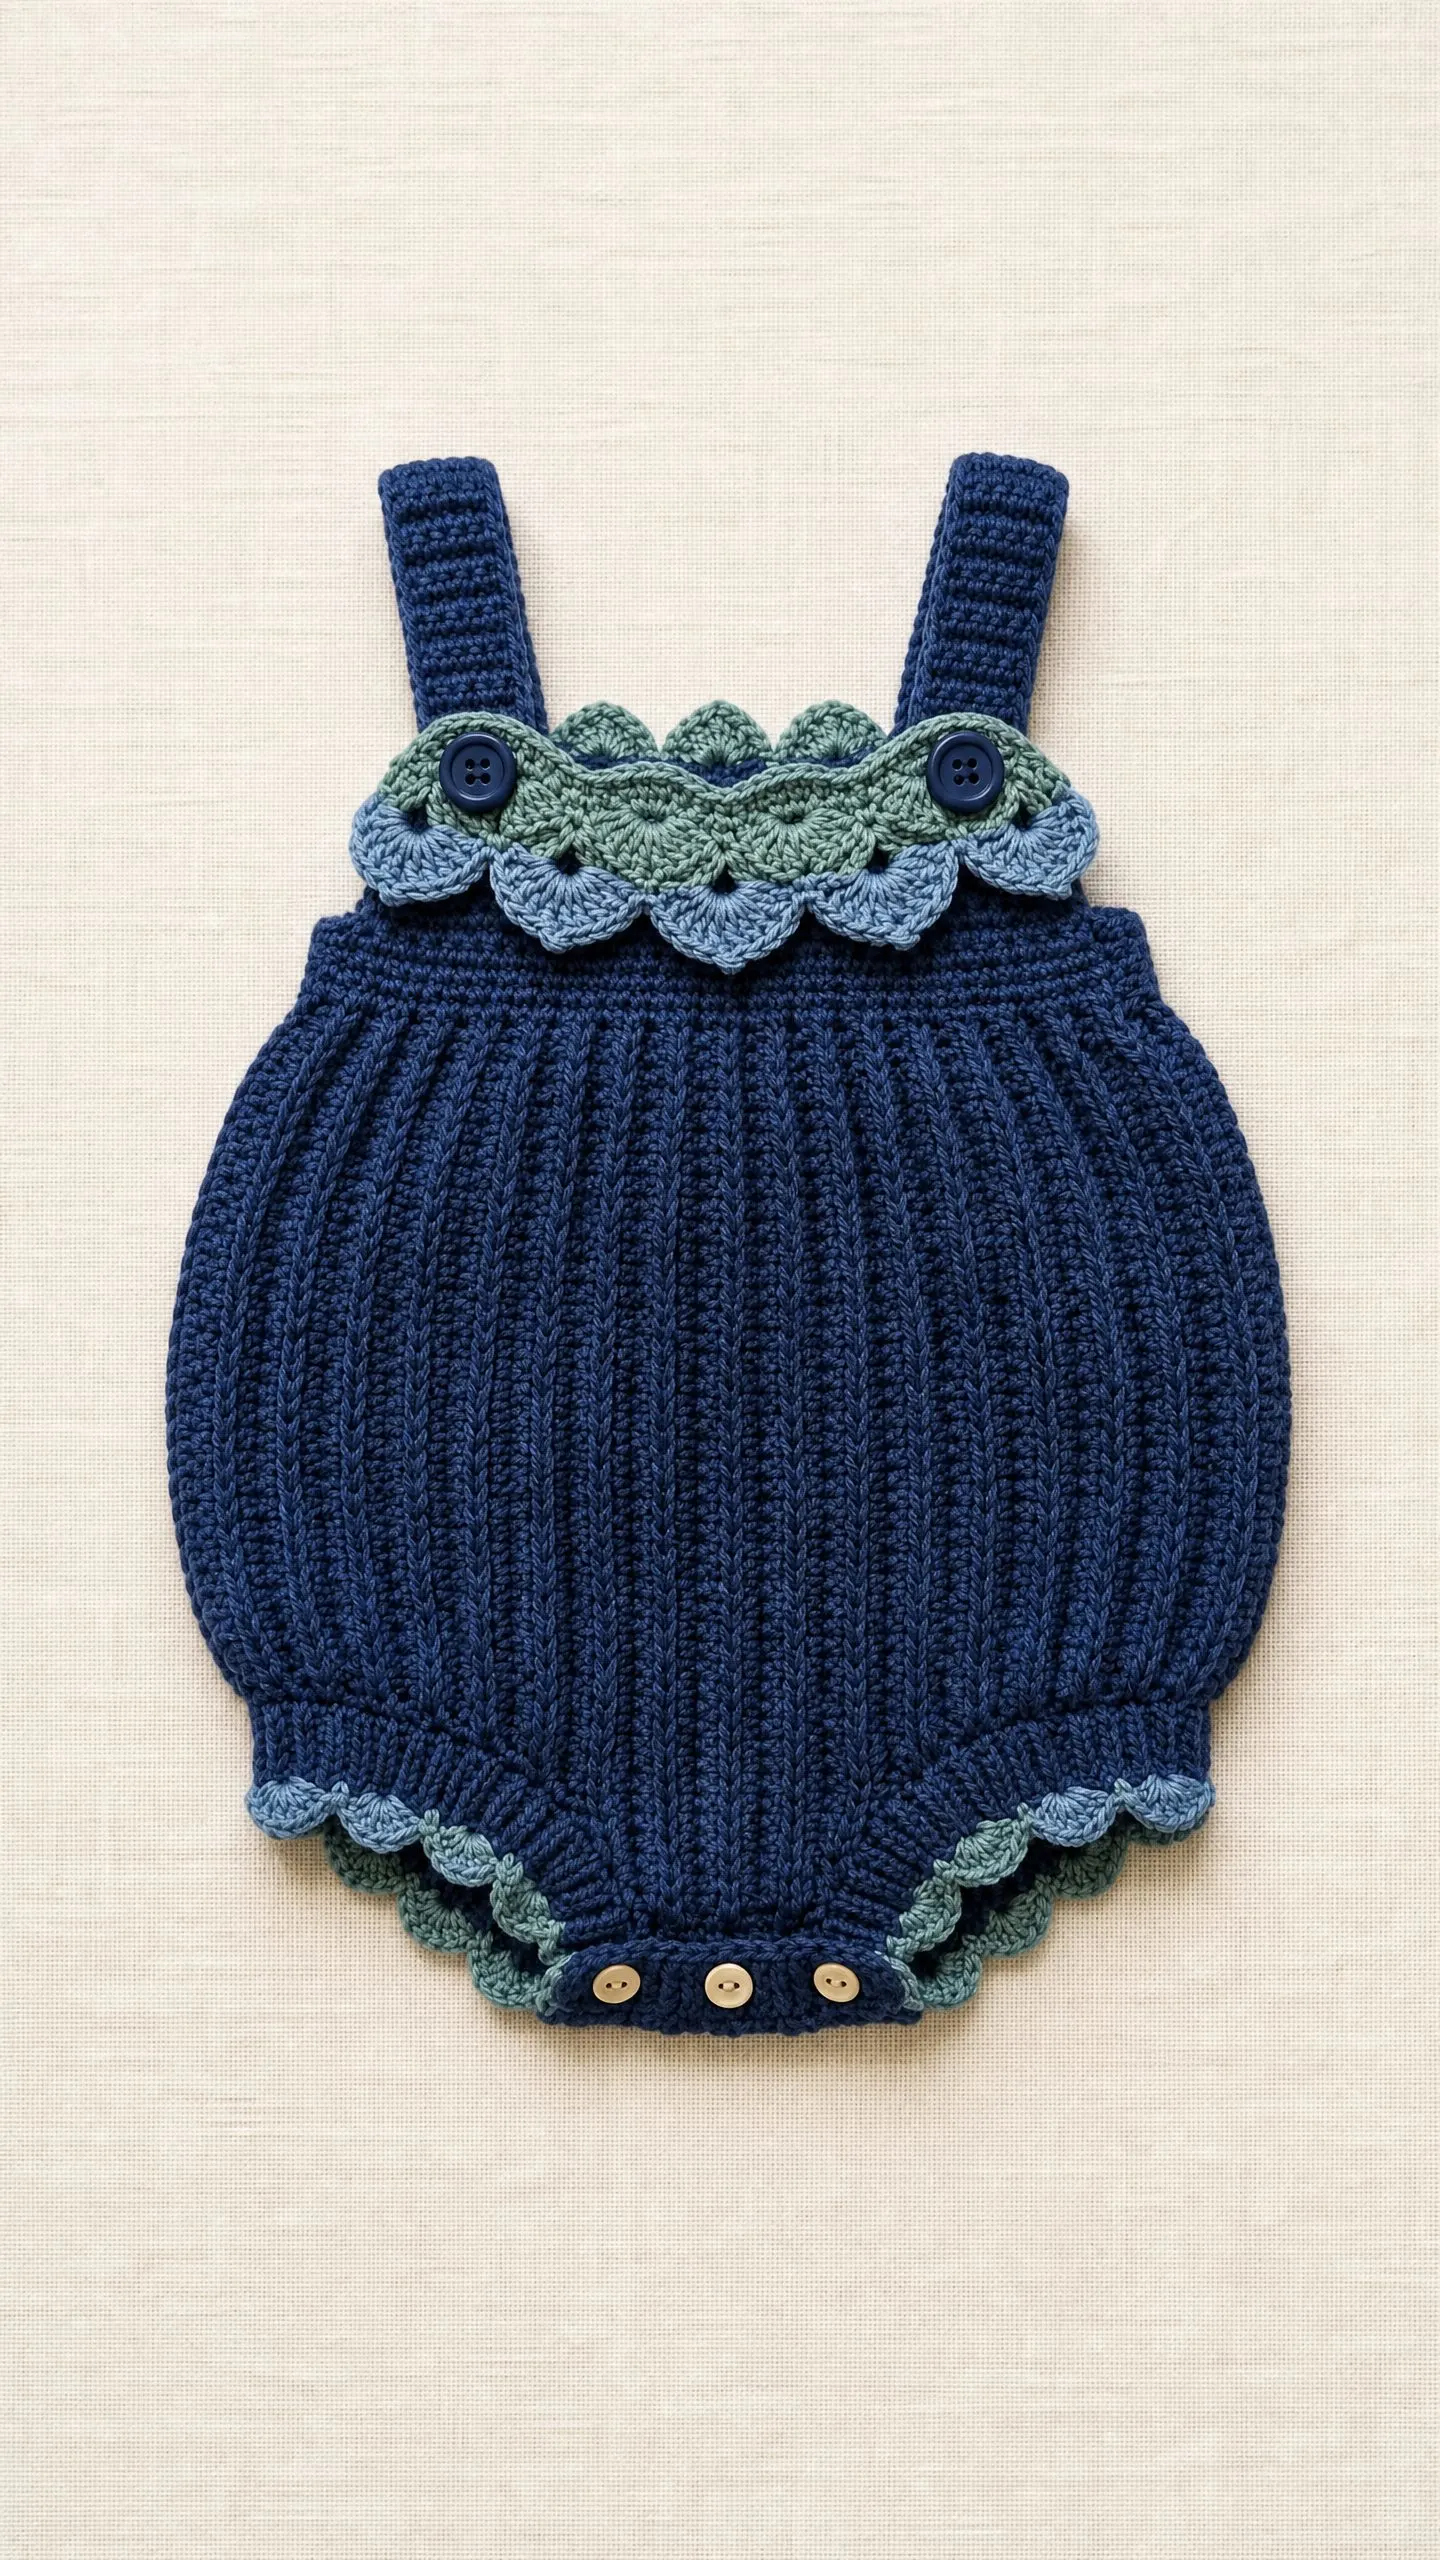
This Blueberry Baby Romper is one of those projects that looks incredibly impressive when finished but is absolutely achievable if you take it step by step. The ribbed texture gives it that high-end, boutique-quality appearance, and those layered scallops at the yoke and leg openings add just the right amount of vintage sweetness.
I hope you enjoy making this as much as I enjoyed designing it. Thank you so much for choosing this pattern for your next project. It truly means the world to me.
If you make this romper, I would absolutely love to see it! Tag me on Instagram or share a photo on Facebook. Seeing your finished projects is genuinely one of the best parts of sharing patterns.
Go ahead and save this pattern to your Pinterest boards so you can find it easily when you’re ready to start. And if you do make this little romper, please drop a comment below. I’d love to hear how it turns out for you!
You Might Also Like
- Ocean Blue Floral Crochet Bracelet Free Crochet Pattern
- Autumn Harvest Granny Square Bag Free Crochet Pattern
- Blush Pink Lacy Baby Dress Free Crochet Pattern
- Pastel Pink Daisy Tote Bag Free Crochet Pattern
