
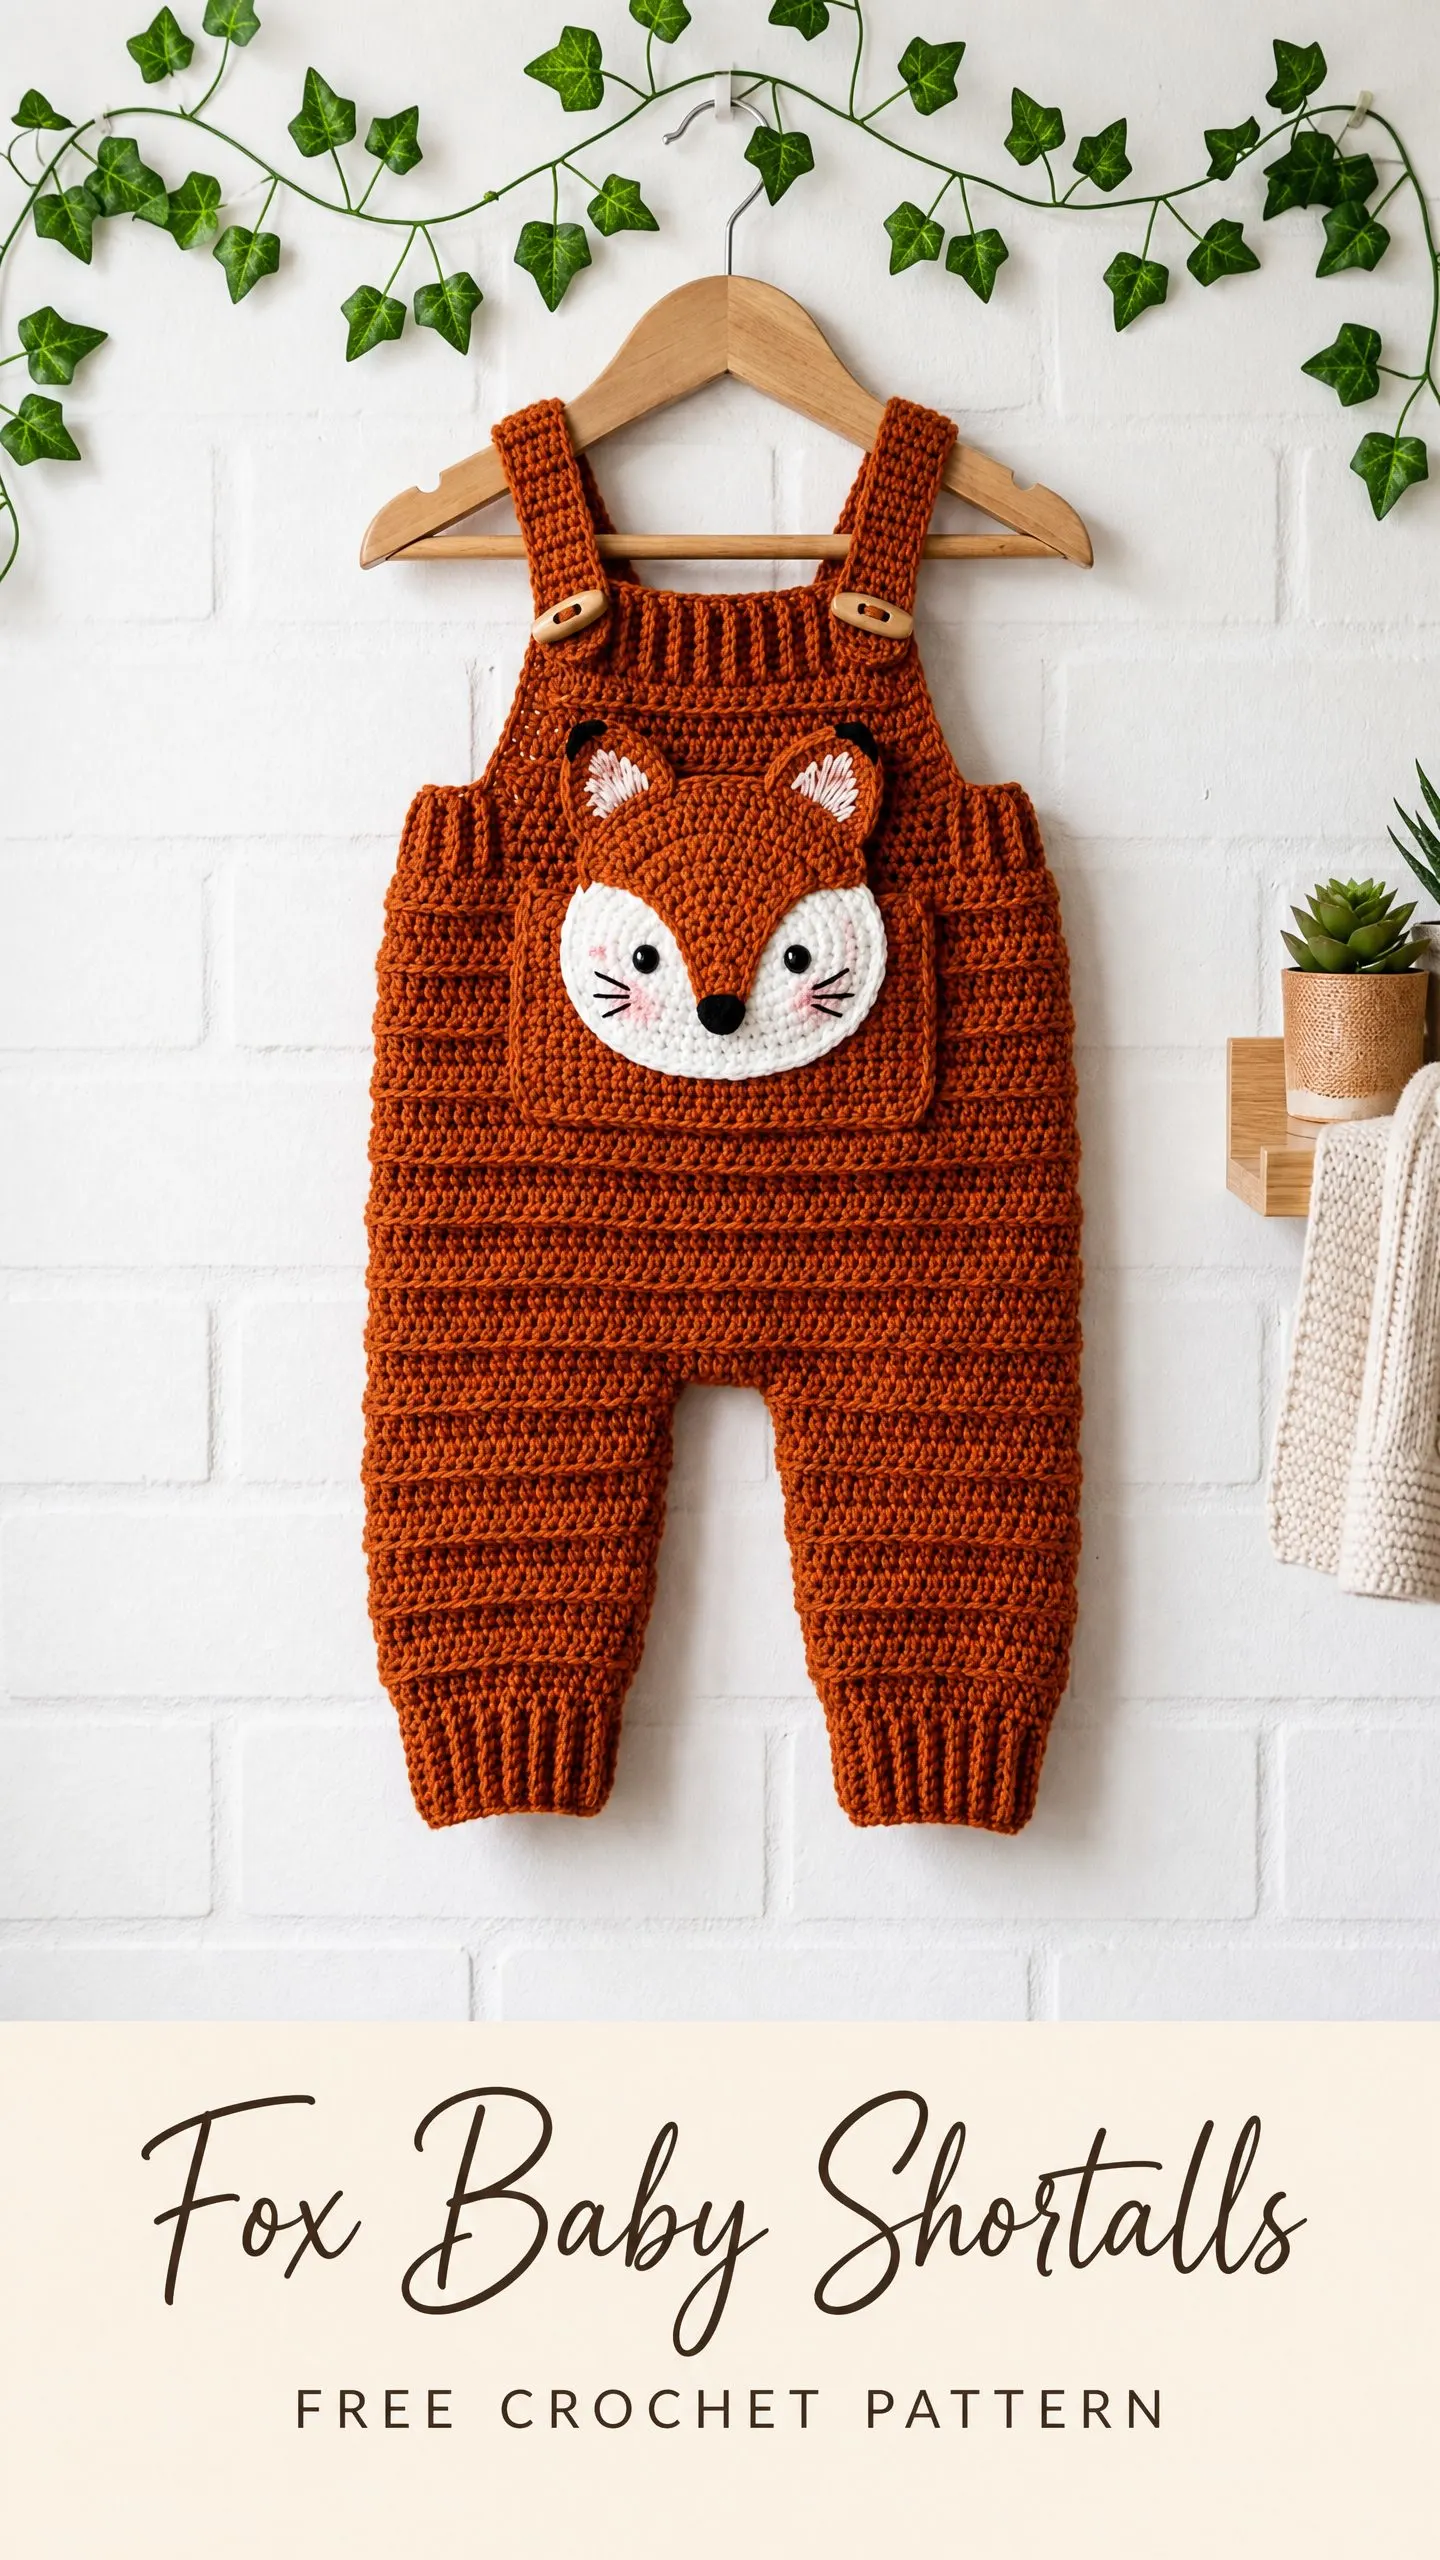
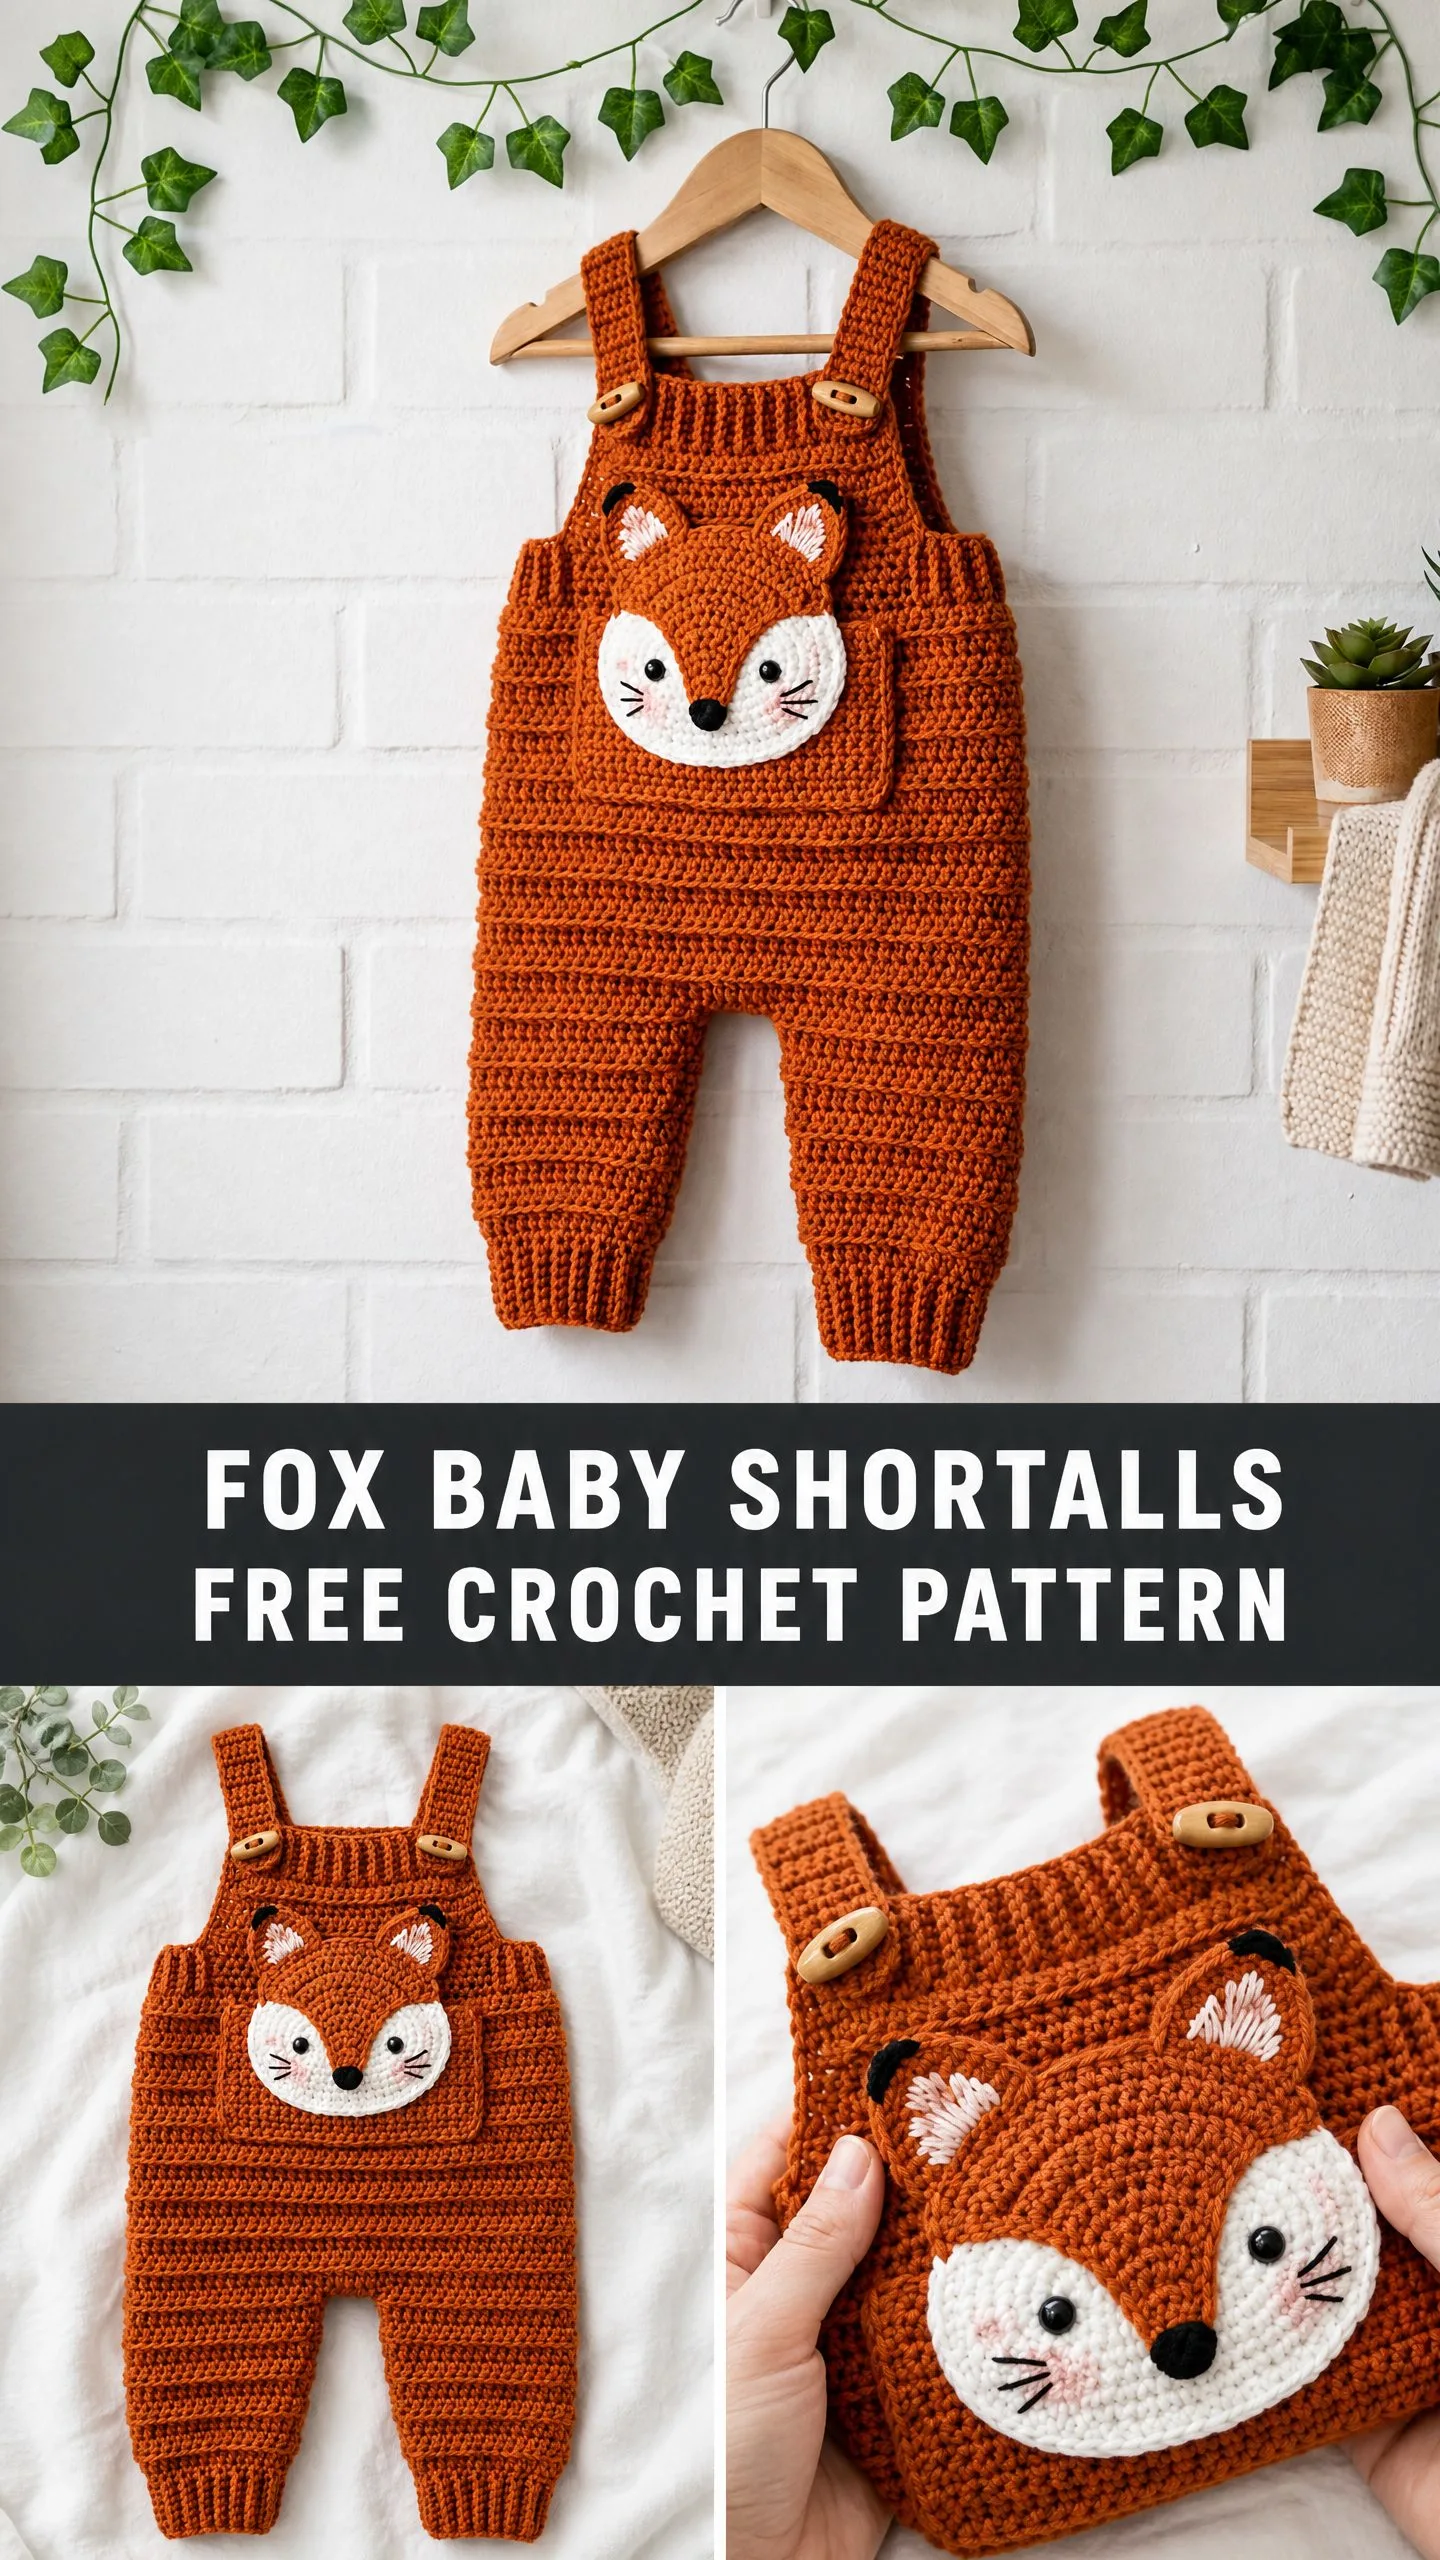
Okay, yarn lovers. This is your sign to dig into that stash and pull out that gorgeous rust or burnt orange skein you’ve been saving for something special. These fox baby shortalls are that something special. The construction is genuinely interesting because you work each leg tube separately, join them at the crotch, then continue upward to build the body and bib. The fox face applique becomes an actual functional pocket, which is both adorable and practical.
I’ll be honest with you about the difficulty level. This is an intermediate project. You need to be comfortable working in the round, joining two separate tubes, working flat rows for the bib section, and sewing on appliques neatly. None of it is scary hard, but it does require attention to your stitch counts and careful assembly.
If you’ve made amigurumi before, you already have most of the skills you need. If you’ve only done blankets and scarves, this might stretch you a bit, and that’s a good thing. Let’s walk through everything step by step.
Why This Fox Baby Shortalls Crochet Pattern Works So Well
The design uses a back loop only half double crochet stitch throughout most of the body. This creates horizontal ridges that look like ribbing, give the fabric stretch, and drape beautifully on a wiggly baby. The leg cuffs and bib top use slip stitch ribbing for a tighter, more structured edge.
The shortalls cover five sizes from newborn through 24 months. Size C, which fits 6 to 12 months, is written as the main size. Other sizes appear in parentheses in the order A, B, C, D, E. Where you see only one number, it applies to all sizes.
The fox face isn’t just decorative. It’s sewn on three sides to create a pocket opening at the top. Babies won’t use it for storage, obviously, but it adds dimension and makes the design feel complete.
Materials You’ll Need
Yarn:
Hooks:
Notions:
Yarn Suggestions:
Lion Brand Pound of Love works beautifully. It’s 100% acrylic, machine washable, and the golden caramel shade matches the rust color perfectly. Paintbox Yarns Simply DK held double also works well. The Burnt Orange colorway is spot on. For a softer option, try Cascade 220 Superwash in Rust or Ginger.
Choose any worsted weight yarn (category 4) that achieves gauge. Machine washability matters for baby garments. Avoid novelty or highly textured yarns that would hide the back loop stitch texture.
Gauge
With MC and the J-10 / 6.0 mm hook, working in back loop only half double crochet in the round:
Gauge swatch instructions: Chain 22. Row 1: Hdc in 3rd chain from hook and in each chain across. (20 hdc) Rows 2 onward: Chain 2, turn, hdc in BLO of each stitch across. (20 hdc) Work 14 rows total. Do not count the turning chain as a stitch. Block your swatch before measuring. Adjust hook size as needed. Gauge is critical for fit.
Finished Sizes
Size A (0 to 3 months): Chest 14 in, total length 13 in, leg length 4 in, inseam 1.5 in
Size B (3 to 6 months): Chest 16 in, total length 14.5 in, leg length 4.5 in, inseam 2 in
Size C (6 to 12 months): Chest 18 in, total length 16 in, leg length 5 in, inseam 2.5 in
Size D (12 to 18 months): Chest 20 in, total length 17.5 in, leg length 5.5 in, inseam 3 in
Size E (18 to 24 months): Chest 22 in, total length 19 in, leg length 6 in, inseam 3.5 in
Abbreviations
Special Stitches Explained
BLO hdc (back loop only half double crochet): Insert your hook under only the back loop of the stitch. That’s the loop farthest from you when the right side faces you. Yarn over, pull up a loop so you have 3 loops on your hook. Yarn over again, pull through all 3 loops. This creates the horizontal ribbed texture you see throughout the shortalls.
hdc2tog (half double crochet 2 together): This is your decrease stitch. Yarn over, insert hook into next stitch, yarn over, pull up a loop. You have 3 loops. Yarn over, insert hook into the following stitch, yarn over, pull up a loop. Now you have 5 loops. Yarn over, pull through all 5 loops at once. You’ve turned 2 stitches into 1.
BLO sl st rib: Worked on a foundation chain for the cuffs and bib top. Row 1: Slip stitch in back loop only of 2nd chain from hook and each chain across. Chain 1, turn. Row 2: Slip stitch in back loop only of each stitch across. Chain 1, turn. Repeat Row 2 for tight, dense ribbing. Always use the H-8 / 5.0 mm hook for ribbing sections.
Magic ring: Form a loop with your yarn, crossing the tail over the working yarn. Insert hook through the center, draw up a loop, chain 1. Work your first round of stitches into the center of that ring, then pull the tail to close it tight. This eliminates any hole at the center of circular pieces.
Step by Step Crochet Pattern Instructions
Section 1: Leg Cuff Ribbing (Make 2)
Switch to H-8 / 5.0 mm hook and MC.
Chain 7 (7, 9, 9, 11).
Row 1: Sl st in BLO of 2nd ch from hook and each ch across. Ch 1, turn. (6, 6, 8, 8, 10 sl sts)
Row 2: Sl st in BLO of each st across. Ch 1, turn. (6, 6, 8, 8, 10 sl sts)
Repeat Row 2 until ribbing strip measures:
After the final row, do not fasten off. Fold the strip so short ends meet with right sides together. Slip stitch the two short ends together through both loops to form a ring. Fasten off. Weave in the end. Set aside.
You now have a small ribbed ring. Make a second one.
Section 2: Leg Tubes (Make 2)
Switch to J-10 / 6.0 mm hook and MC.
Join MC with sl st to any stitch along one edge of the cuff ring.
Setup round: Ch 2 (does not count as stitch now or ever). Work 1 hdc into same stitch as join, then 1 hdc into each remaining stitch around the top edge of the cuff ring, sl st to first hdc to join round. Pm in first stitch.
All leg rounds from this point are worked in BLO hdc.
Round 1: Ch 2, BLO hdc in same st as join and in each st around. Sl st to first hdc to join. Move marker. (28 hdc for Size C)
Continue working even rounds with no shaping until leg tube measures:
For Size C this is approximately 12 to 13 rounds of BLO hdc.
After the final round of Leg 1, do not fasten off. Do not slip stitch to join. Leave a long tail and set aside with a stitch marker in the last stitch worked. This is your active leg.
Work Leg 2 the same way through all leg rounds. After the final round of Leg 2, do not fasten off. Do not join.
Section 3: Joining the Legs and Working the Body
You will join both legs in the same round to form one continuous body tube.
Place Leg 2 on your work surface with the live working yarn ready. Place Leg 1 beside it with its stitch marker.
Determine the inseam position. On each leg, count to find the halfway point of the round. Place markers at the halfway points on both legs.
Joining Round:
With the working yarn from Leg 2, ch 3 for Size C. (Crotch chain counts: A and B: ch 2; C: ch 3; D: ch 4; E: ch 5)
Working into Leg 1, work BLO hdc across all stitches of Leg 1 all the way around (28 sts for Size C). Then work BLO hdc into each chain of the crotch bridge chain (3 sts for Size C). Then continue working BLO hdc across all stitches of Leg 2 all the way around (28 sts). Then work BLO hdc into the remaining side of the crotch bridge (3 sts on the back side of the chain). Sl st to first hdc of round to join. Pm in first stitch.
Place markers at the front center stitch and the back center stitch for reference throughout body construction.
Section 4: Body Rounds
Continue working in the round in BLO hdc with MC. Do not increase or decrease. Work even rounds until the body measured from the crotch joining round reaches:
Maintain stitch count throughout:
After the final body round, do not join. Leave live stitches and move to bib construction.
Section 5: Front Bib Panel
The bib covers the front half of the body. You will now work flat in rows on the front stitches only.
Identify the front center stitch and count out the front half of stitches.
With RS facing, join MC with sl st to the first stitch of the front section. Ch 2, turn.
Bib Row 1 (WS): BLO hdc in each st across front section only. Ch 2, turn. (31 hdc for Size C)
Bib Row 2 (RS): BLO hdc in each st across. Ch 2, turn. (31 hdc)
Continue working even rows in BLO hdc until the bib measured from the top body edge reaches:
After the final bib row, do not fasten off.
Bib Top Ribbing:
Switch to H-8 / 5.0 mm hook. Work 1 row of BLO sl st across the top of the bib.
Sl st row: Sl st in BLO of each st across. Ch 1, turn. (31 sts for Size C)
Work 3 more rows of BLO sl st ribbing for a total of 4 rows.
Fasten off and weave in end.
Section 6: Back Panel Edging
The back of the shortalls is open and finished with simple single crochet edging.
With RS facing, join MC at the top left corner of the back opening. Using J-10 / 6.0 mm hook, work 1 sc into each stitch along the top edge of the back. Do not turn. Fasten off.
Section 7: Straps (Make 2)
Straps are worked as long flat ribbed strips using H-8 / 5.0 mm hook and MC.
Chain 5.
Row 1: Sl st in BLO of 2nd ch from hook and each ch across. Ch 1, turn. (4 sl sts)
Row 2: Sl st in BLO of each st across. Ch 1, turn. (4 sl sts)
Repeat Row 2 until strap measures:
Fasten off, leaving a 12 in tail for sewing.
Make a second strap the same way.
Each strap attaches at the front bib top corners (sewn securely), crosses over the shoulder, and buttons onto the back panel top corners. Sew two buttons on the back, approximately 1 in from each top corner. Create a buttonhole loop at the end of each strap: ch 4, sl st to base of chain, fasten off.
For decorative wooden buttons on the front bib top as shown, sew two additional buttons at the top front bib corners where straps attach.
Section 8: Fox Face Applique
Ears (Make 2):
With MC and J-10 hook, make a magic ring.
Round 1: Ch 1, work 6 sc into ring. Pull ring closed. Do not join, work in continuous spiral. (6 sc)
Round 2: Work 2 sc in each sc around. (12 sc)
Round 3: (Sc in next sc, 2 sc in next sc) 6 times. (18 sc)
Round 4: Sc in each sc around. (18 sc)
Sl st to next stitch to close. Fasten off, leaving long tail for assembly.
Using CA, embroider or surface work a V-shape on each ear covering the inner 2/3 to create inner ear coloring.
Fox Face Circle:
With MC and J-10 hook, make a magic ring.
Round 1: Ch 2, work 10 hdc into ring. Sl st to first hdc to join. (10 hdc)
Round 2: Ch 2, work 2 hdc in each hdc around. Sl st to first hdc. (20 hdc)
Round 3: Ch 2, (2 hdc in next st, hdc in next st) 10 times. Sl st to first hdc. (30 hdc)
Round 4: Ch 2, (2 hdc in next st, hdc in each of next 2 sts) 10 times. Sl st to first hdc. (40 hdc)
Round 5: Ch 2, (2 hdc in next st, hdc in each of next 3 sts) 10 times. Sl st to first hdc. (50 hdc)
For Sizes D and E only, work one additional round:
Round 6: Ch 2, (2 hdc in next st, hdc in each of next 4 sts) 10 times. Sl st to first hdc. (60 hdc)
Fasten off MC, leaving a long tail for sewing.
Muzzle Section:
With CA and H-8 / 5.0 mm hook, make a magic ring.
Round 1: Ch 1, work 6 sc into ring. Pull closed. Do not join. (6 sc)
Round 2: 2 sc in each sc around. (12 sc)
Round 3: (Sc in next sc, 2 sc in next sc) 6 times. (18 sc)
Round 4: (Sc in each of next 2 sc, 2 sc in next sc) 6 times. (24 sc)
Sl st to next st to close. Fasten off, leaving long tail.
Sew the muzzle to the lower center of the fox face circle, covering approximately the lower third, with the flat edge at top.
Facial Features:
Using black yarn and a yarn needle:
Using dusty pink yarn:
Ear Assembly:
Position the two ear pieces at the top of the fox face circle, one on each side. The bottom edge of each ear should overlap the top edge of the face circle by 4 to 5 stitches. Sew securely.
Section 9: Attaching the Fox Face as a Bib Pocket
Position the completed fox face on the front bib panel with the top of the ears just below or at the ribbing edge. Center it horizontally. The bottom of the face should sit approximately 1 in above the body join line.
Using MC and a yarn needle, whip stitch or mattress stitch around three sides: left side, bottom, and right side. Leave the top edge open behind the ears to form a pocket opening.
Weave in all ends securely on the wrong side.
Finishing Your Fox Baby Shortalls
Weave in all remaining yarn ends on the wrong side, working in multiple directions to secure them.
Attach all four wooden buttons. Two go on the back panel top edge for the strap closures. Two decorative buttons go at the front bib top corners where the straps attach.
Check all seams: crotch join, leg cuff join, strap attachment, and pocket attachment. Reinforce with extra stitching if any area feels loose.
Blocking:
Wet blocking is recommended. Soak finished shortalls in cool water for 15 minutes. Press out water without wringing. Pin flat to a foam blocking mat matching the finished size measurements. Allow to air dry completely, approximately 24 hours.
Let the ribbing sections relax naturally during blocking. Don’t stretch them.
Care Instructions
Machine wash cold on a gentle cycle if you used acrylic or superwash wool. Lay flat to dry. Do not tumble dry, iron, or dry clean. If you used non-superwash wool, hand wash in cool water with wool wash and lay flat to dry.
Always check buttons before each use to ensure they’re firmly attached. Baby safety comes first.
Size Customization Tips
To make the shortalls larger or smaller than listed sizes, maintain gauge and add or subtract 2 stitches per leg at the leg tube foundation. Each 2-stitch addition to each leg adds approximately 0.5 in to body circumference.
To lengthen the leg, add rounds to the leg tube section in increments of 2 to 3 rounds per 0.75 in of additional length.
To lengthen the body torso, add rounds in the body section in increments of 2 rounds per 0.75 in.
The bib height should stay around 4.5 in for good proportions regardless of size. Adjust fox face scale by working one additional or one fewer increase round on the face circle.
I really hope you love making these fox baby shortalls as much as I loved designing them. The combination of practical construction and that irresistible fox face makes this one of my favorite baby garment patterns. Save this crochet pattern to your Pinterest boards so you can find it when you’re ready to start, and please leave a comment below if you make a pair. I’d absolutely love to see your finished shortalls and hear which colorway you chose.
You Might Also Like
- Bear Ears Hooded Baby Poncho Free Crochet Pattern
- Sage Green Chunky Turtleneck Free Crochet Pattern
- Pink Rose Granny Square Table Runner Free Crochet Pattern
- Sunflower Ear Climber Free Crochet Pattern
