
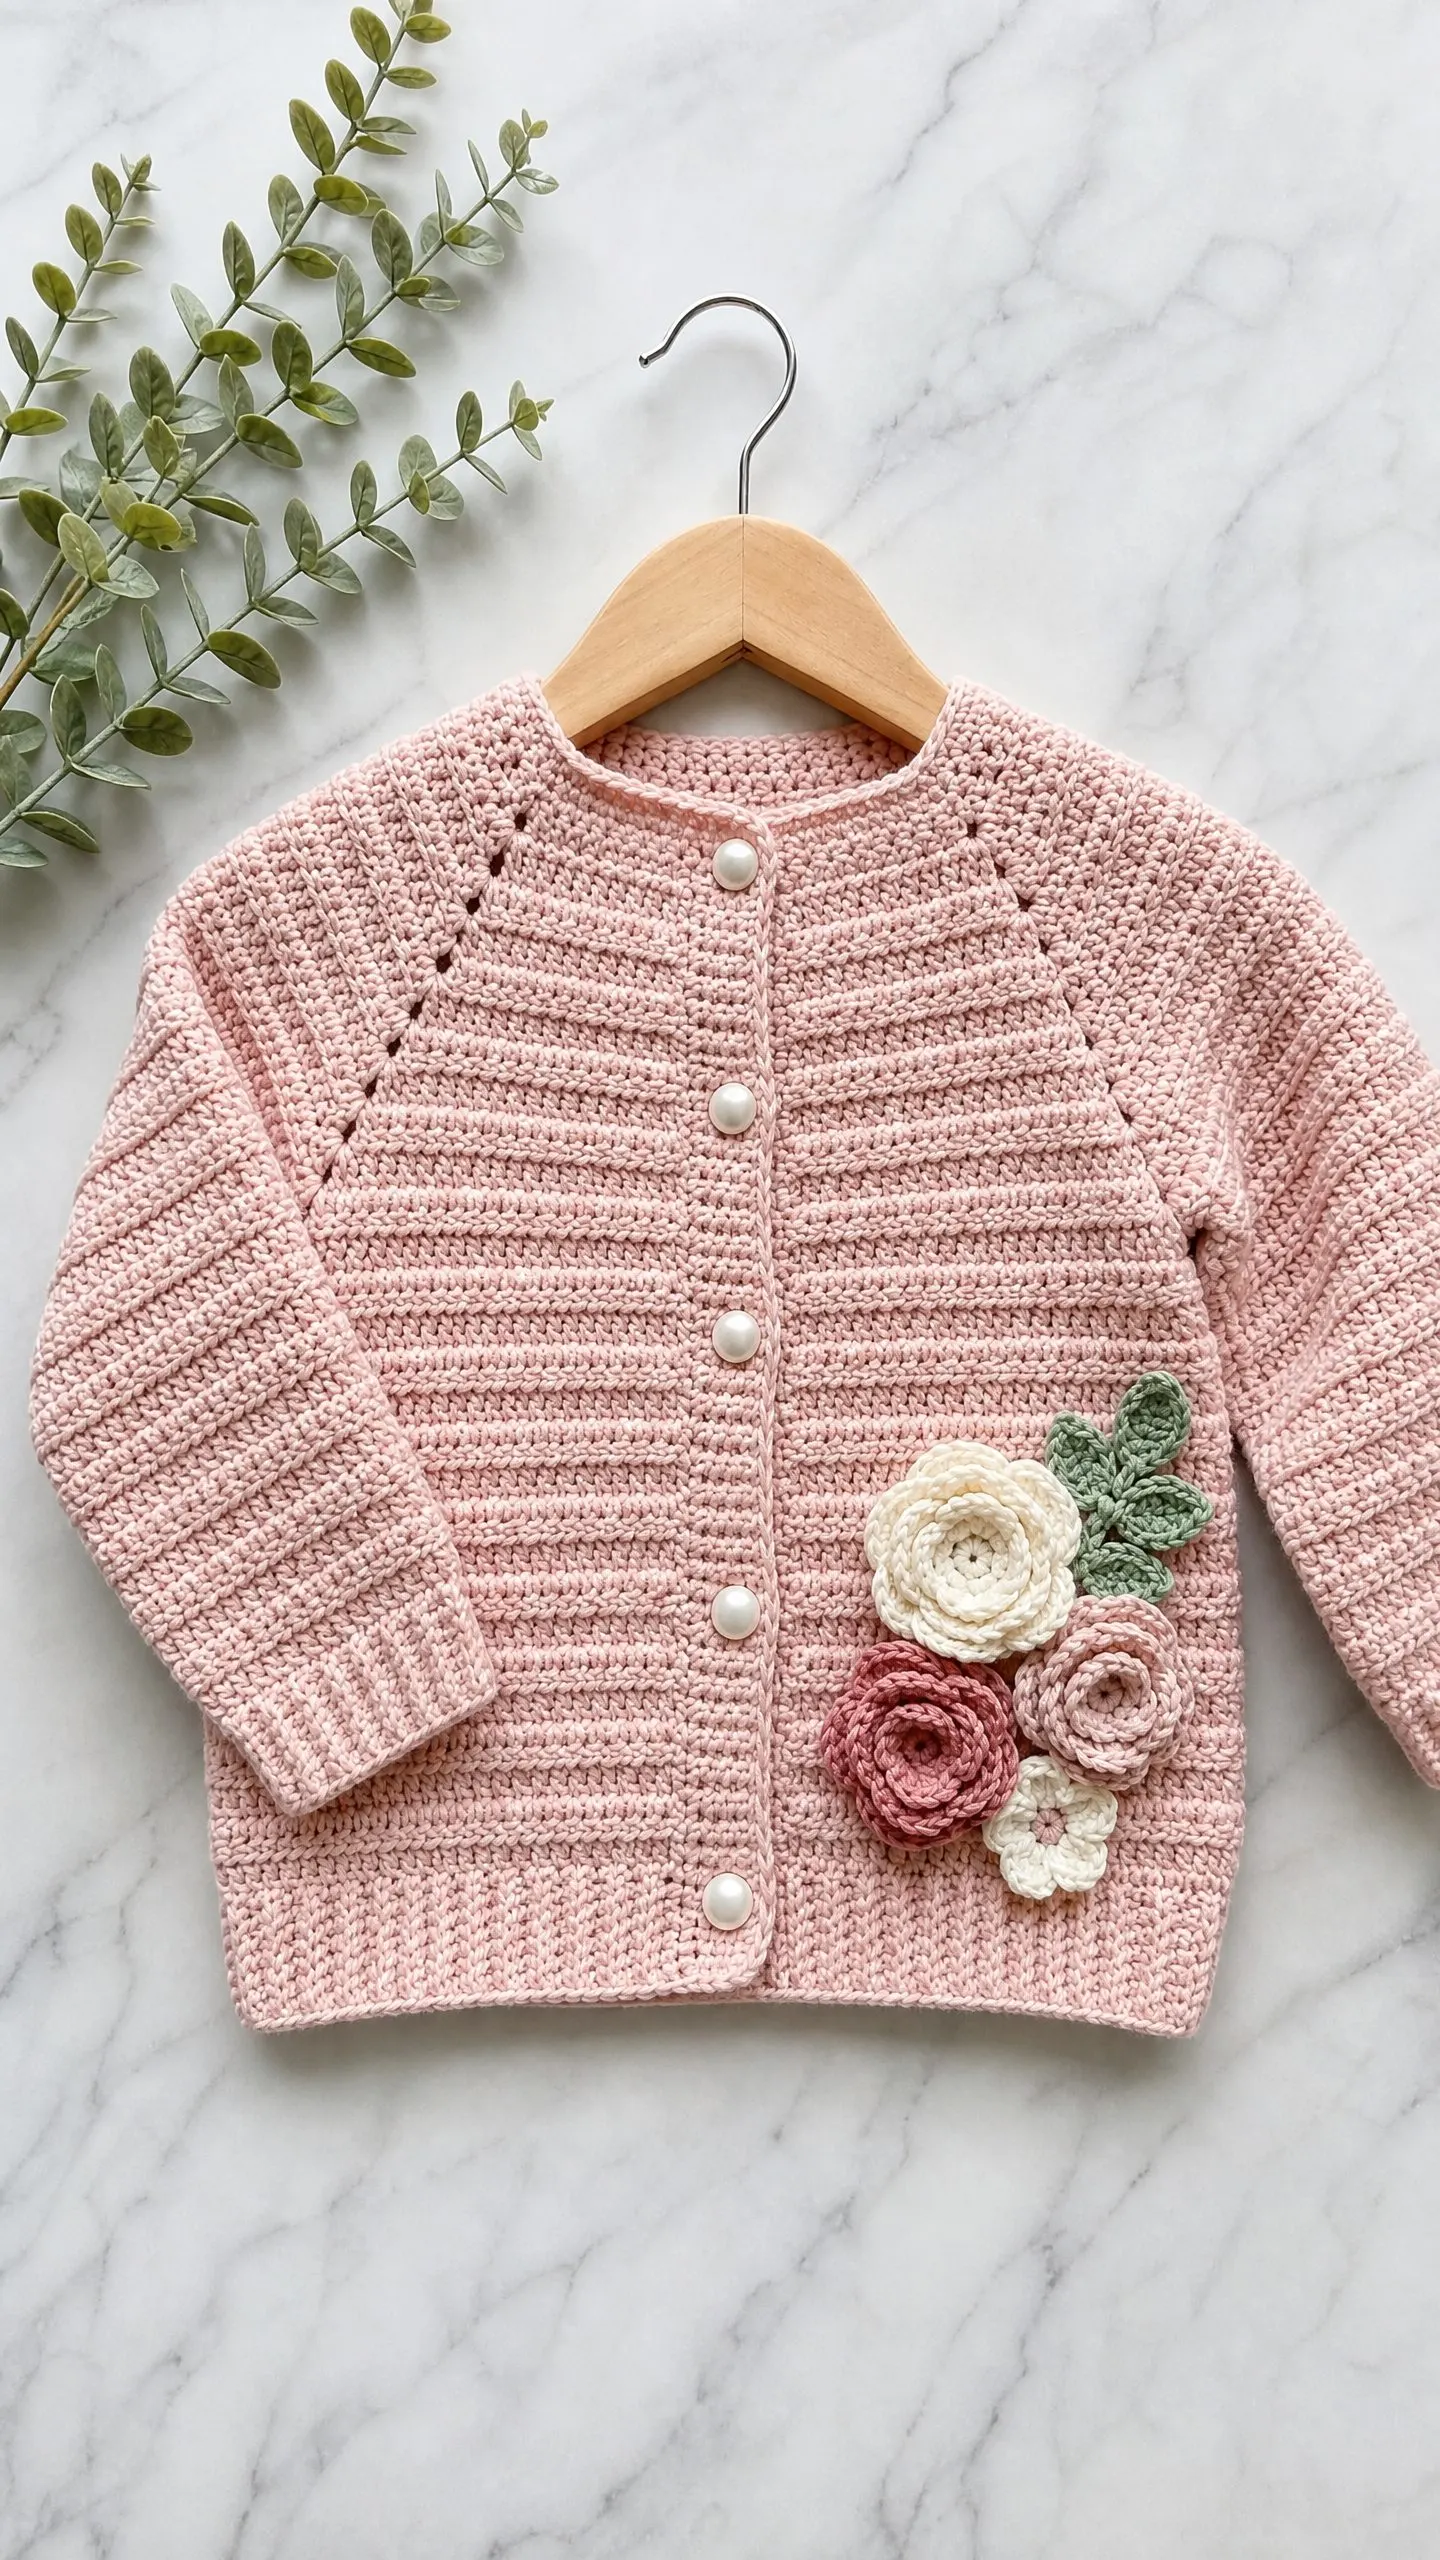
A handmade baby cardigan makes one of the most cherished gifts you can give a new parent. This sweet blush pink sweater keeps little ones cozy while looking absolutely adorable, and the dimensional floral embellishment turns it into a true heirloom piece.
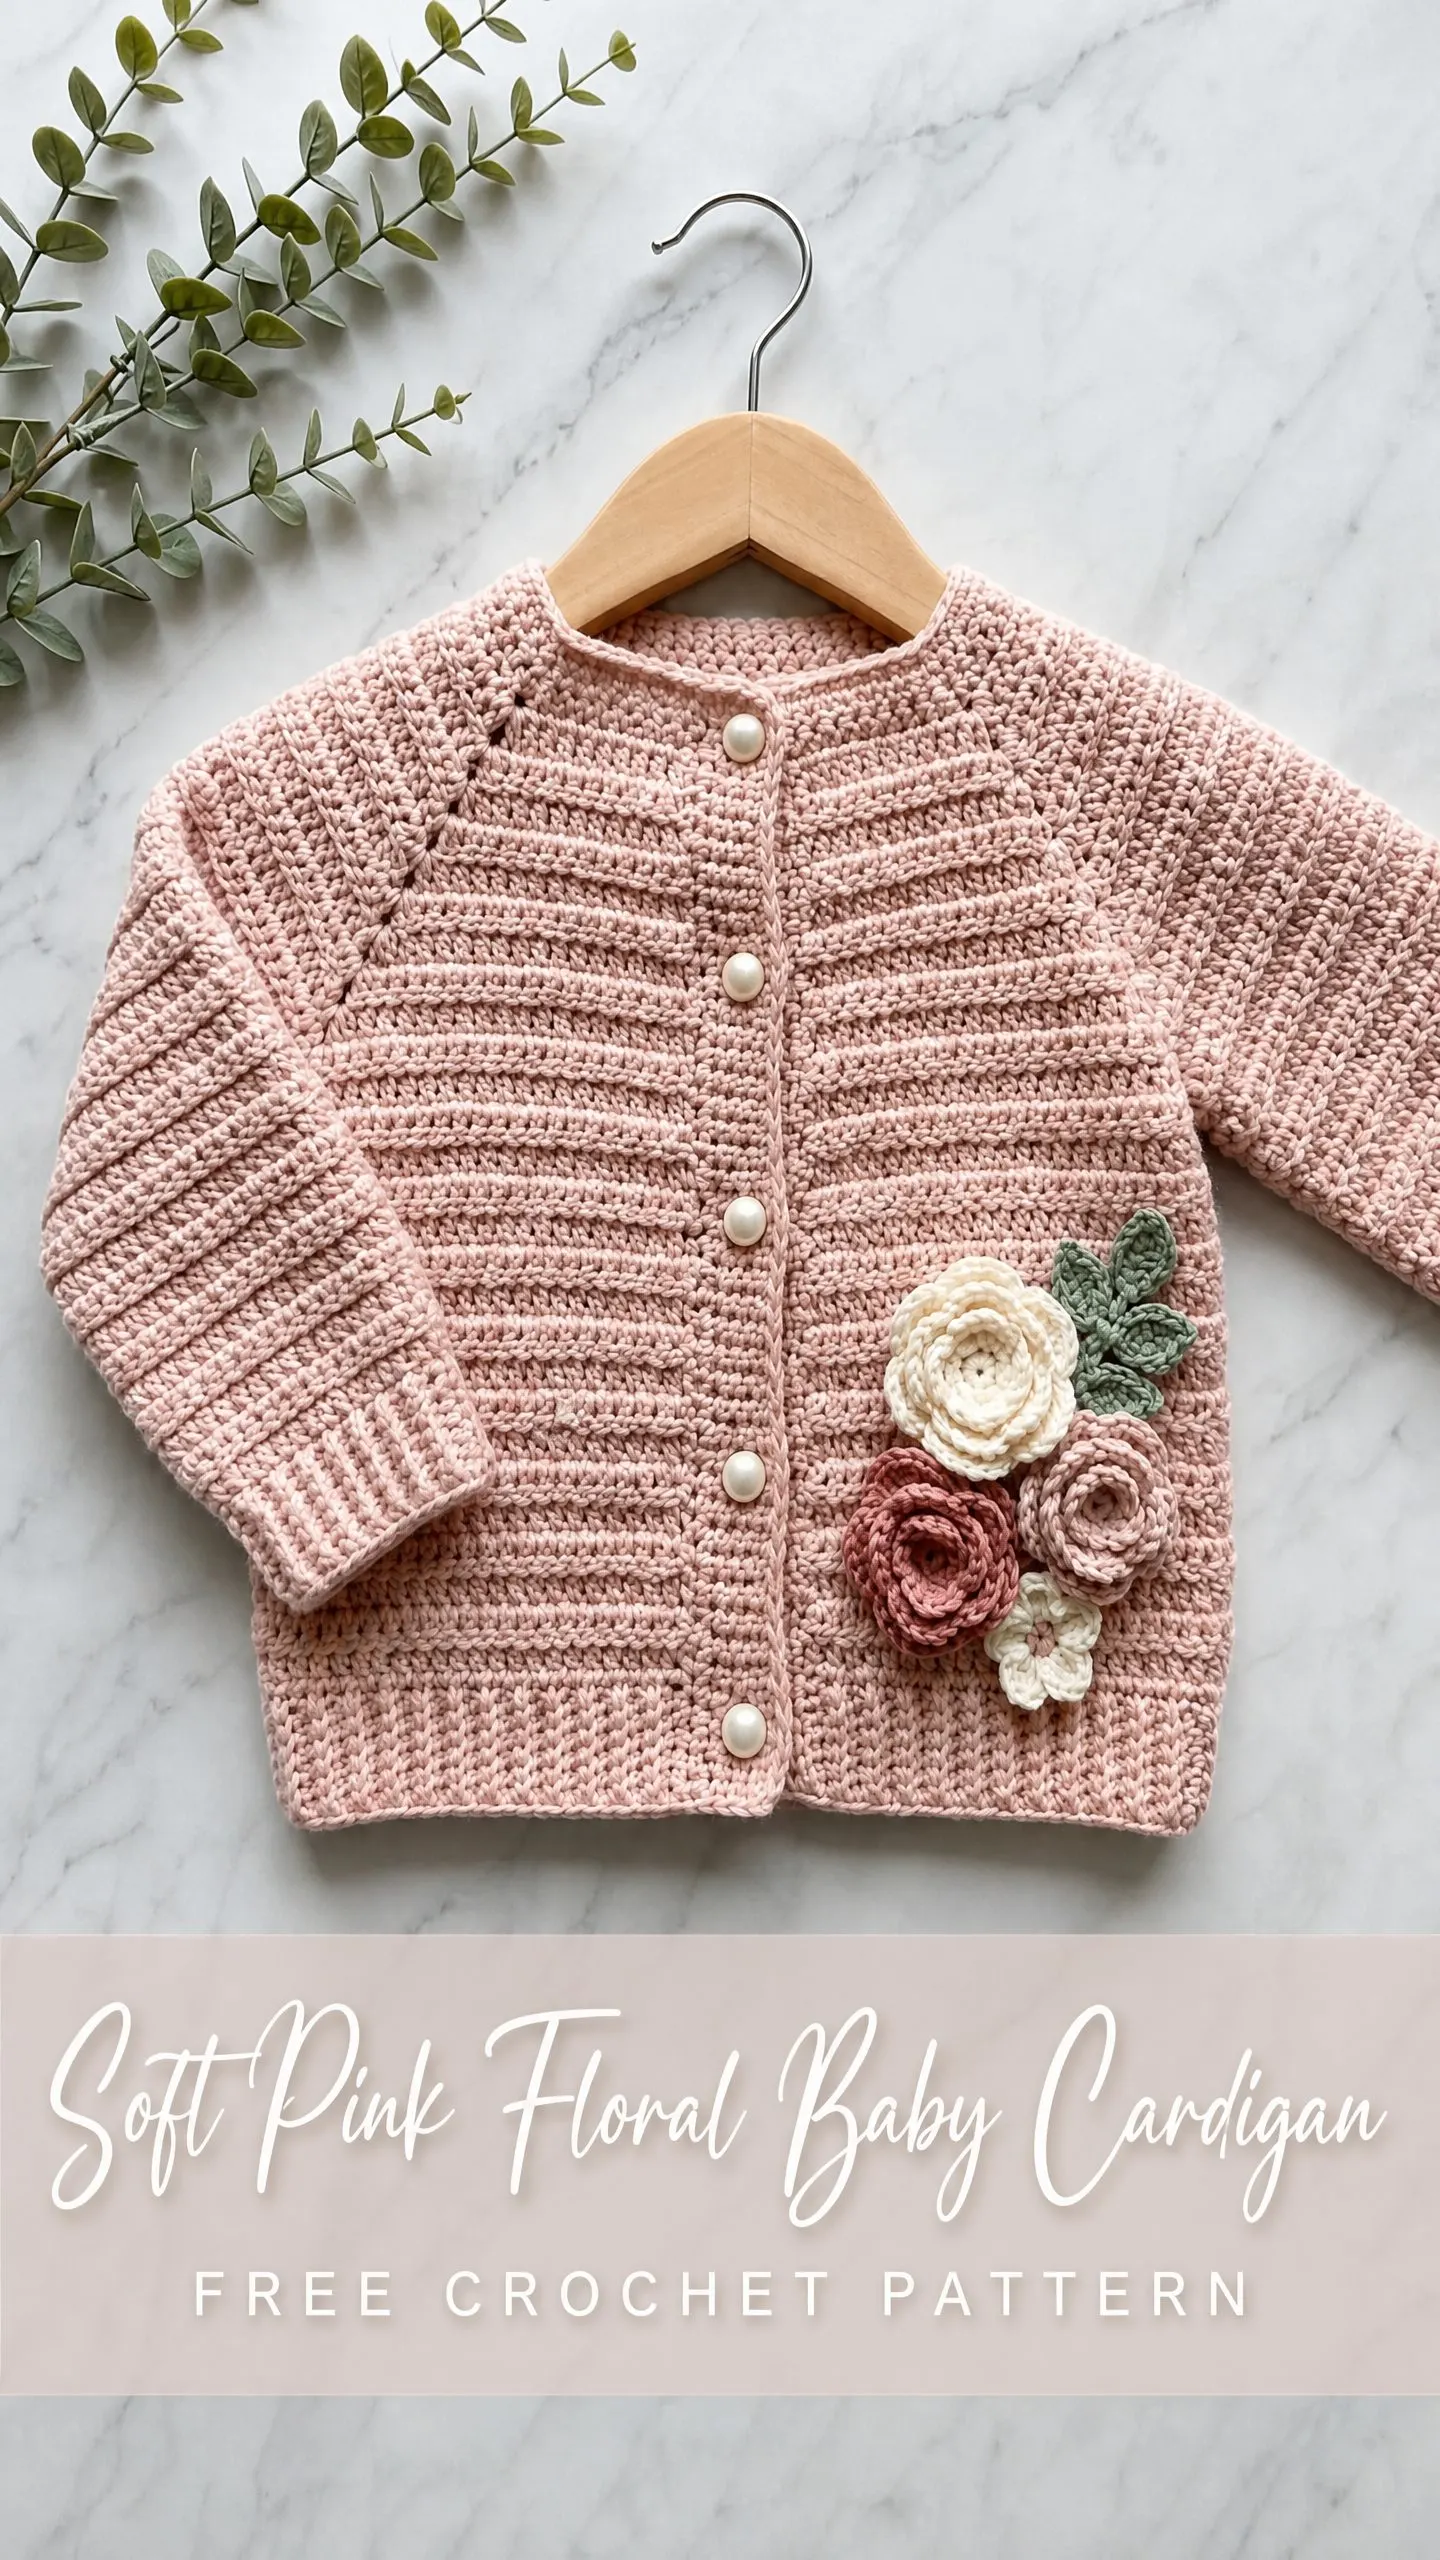
The construction uses a top-down raglan method, which means minimal seaming and a satisfying build as you watch the cardigan take shape from the neckline down. The main texture comes from a simple ridge stitch that creates those lovely horizontal lines you see running across the body and sleeves. If you can work a single crochet through the back loop, you can absolutely make this.
Whether you are preparing for a baby shower, welcoming a new grandchild, or adding to your own little one’s wardrobe, this pattern delivers a polished result that looks far more complicated than it actually is. It works up in worsted weight yarn, fits babies 6 to 12 months, and the total project time runs about 9 to 14 hours. Let me walk you through everything you need to know.
Why This Baby Cardigan Pattern Works So Well
The genius of this design lies in the raglan construction. Instead of crocheting separate pieces and sewing them together, you start at the neckline and work your way down in one continuous piece. The sleeves branch off naturally, and by the time you reach the hem, most of your work is already done.
That ridge texture you see in the photos? It comes from working single crochet through the back loop only (sc blo) on every row. This technique creates raised horizontal ridges that give the fabric a knitted appearance. The effect is subtle but beautiful, adding visual interest without any complicated stitch patterns.
The three-dimensional roses and leaves are made separately and sewn on at the end. They look intricate, but they are actually just chains with multiple double crochets worked into each stitch, then rolled into spirals. Once you make one, you will want to put them on everything.
Skill Level and Time Commitment
I would call this an intermediate pattern. The stitches themselves are beginner-friendly, but you will need to track four raglan increase points across every other row during the yoke section. If you have made a basic garment before and feel comfortable with increases, you will do great here.
Time estimate: Plan for about 8 to 12 hours for the cardigan body and sleeves, plus another 1 to 2 hours for the roses, leaves, button bands, and finishing. You could realistically complete this over a weekend of dedicated crocheting or spread it across a week or two of evening sessions.
Finished Measurements
This pattern is written for size 6 to 12 months. Here are the key measurements:
I have included size customization tips at the end if you need to adjust for a smaller newborn or a bigger toddler.
Materials You Will Need
Yarn:
Hooks:
Notions:
Yarn Suggestions
Option 1: Lion Brand Pound of Love (100% acrylic, worsted weight, 1020 yards per 16 oz skein). Soft, machine washable, widely available, and comes in a suitable blush or pink colorway. One skein is sufficient.
Option 2: Paintbox Yarns Simply DK used held double (100% acrylic). Holding two strands together brings this DK yarn to a worsted gauge. Available in Ballet Pink and similar shades. Very affordable.
Option 3: Cascade 220 Superwash (100% superwash merino wool, 220 yards per 100g skein). Luxuriously soft against baby skin, machine washable, and gives excellent stitch definition. You will need 2 skeins. Choose Misty Rose or Blush colorway.
Substitution note: Any smooth worsted weight yarn that achieves the stated gauge is suitable. Avoid highly textured or boucle yarns, as the ridge stitch detail will be lost. For a baby garment, prioritize softness and machine washability.
Gauge
18 sc x 20 rows = 4 inches / 10 cm in single crochet through back loop only (ridge stitch), using US G-6 / 4.00 mm hook, after blocking.
Gauge matters for this project. A difference of even one stitch per 4 inches will significantly affect the finished chest circumference. If your swatch is too large (fewer stitches per inch), go down one hook size. If your swatch is too small (more stitches per inch), go up one hook size.
To make a gauge swatch: Chain 24, sc in second chain from hook and in each chain across. (23 sc) Turn. Work sc blo across each row for 22 rows total. Block the swatch, let it dry fully, then measure only the center area, avoiding the edges.
Abbreviations
Special Stitches Explained
Ridge Stitch
This is the main body stitch, and it is beautifully simple. You work single crochet through the back loop only on every row. Working consistently in blo creates a horizontal ridge on the right side of the fabric, mimicking the look of knit stockinette ridges.
How to work it:
Row 1 (RS): Ch 1, sc blo in each st across. Turn.
Repeat Row 1 for pattern.
Important note: The ch 1 at the start of each row does NOT count as a stitch in this pattern. Always insert your hook into the very first stitch of the row.
Raglan Increase Row
On increase rows, you will place a marker at each of four raglan points. The increases happen on either side of each marker. You work 2 sc in the stitch immediately before the marker and 2 sc in the stitch immediately after the marker. This adds 8 stitches total per increase row (2 increases at each of 4 raglan points).
Three-Dimensional Spiral Rose
With CC1 or CC2 and F-5 hook, loosely chain 36.
Row 1: Work 3 dc in the 4th chain from hook, then work 3 dc in each remaining chain across. (99 dc plus a 3-ch base, approximate)
Cut yarn leaving a long tail. Roll the strip into a spiral, coiling it from one end to the other. Use the yarn tail threaded on a needle to tack the base of the coil together as you roll, stitching through all layers at the bottom of the flower to secure. The petals will naturally fan outward as the strip curls. Fasten off securely.
Small Rose Variation
With CC1 or CC2 and F-5 hook, loosely chain 20.
Row 1: Work 3 dc in the 4th chain from hook, then 3 dc in each remaining chain across. (51 dc approximate)
Finish as for the large rose above.
Leaf
With CC3 and F-5 hook, chain 9.
Round 1: Sl st in 2nd chain from hook, sc in next chain, hdc in next 2 chains, dc in next 2 chains, hdc in next chain, then work 5 sts in last chain (sc, hdc, dc, hdc, sc) to curve around the tip. Working back along the opposite side of the foundation chain: hdc in next ch, dc in next 2 chs, hdc in next 2 chs, sc in next ch, sl st in last ch. Fasten off, leaving a sewing tail. Make 2 leaves.
Pattern Notes Before You Begin
Step-by-Step Instructions
Yoke Foundation
The yoke begins at the neckline and is worked flat. The starting chain creates the full neckline width, which is then divided into back, two fronts, and two sleeves at the raglan points.
With MC and G-6 hook, chain 47.
Row 1 (RS): Sc in 2nd ch from hook and in each ch across. Turn. (46 sc)
This row is the neckline. Now place markers to establish raglan sections as follows:
Section breakdown after Row 1: Right front 6, right sleeve 4, back 26, left sleeve 4, left front 6. Total: 46 sts.
Row 2 (WS): Ch 1, turn. Sc blo in each st across all sections, working 2 sc in the stitch immediately before each marker and 2 sc in the stitch immediately after each marker (move markers to sit between the two increase stitches at each raglan point). (54 sc)
Section breakdown after Row 2: Right front 7, right sleeve 6, back 28, left sleeve 6, left front 7. Total: 54 sts.
Row 3 (RS): Ch 1, turn. Sc blo in each st across, no increases. (54 sc)
Row 4 (WS): Ch 1, turn. Work raglan increase row as established, increasing 2 sts at each of 4 raglan points. (62 sc)
Section breakdown after Row 4: Right front 8, right sleeve 8, back 30, left sleeve 8, left front 8. Total: 62 sts.
Row 5 (RS): Ch 1, turn. Sc blo in each st across, no increases. (62 sc)
Row 6 (WS): Ch 1, turn. Work raglan increase row. (70 sc)
Section breakdown after Row 6: Right front 9, right sleeve 10, back 32, left sleeve 10, left front 9. Total: 70 sts.
Row 7 (RS): Ch 1, turn. Sc blo in each st across, no increases. (70 sc)
Row 8 (WS): Ch 1, turn. Work raglan increase row. (78 sc)
Section breakdown after Row 8: Right front 10, right sleeve 12, back 34, left sleeve 12, left front 10. Total: 78 sts.
Row 9 (RS): Ch 1, turn. Sc blo in each st across, no increases. (78 sc)
Row 10 (WS): Ch 1, turn. Work raglan increase row. (86 sc)
Section breakdown after Row 10: Right front 11, right sleeve 14, back 36, left sleeve 14, left front 11. Total: 86 sts.
Row 11 (RS): Ch 1, turn. Sc blo in each st across, no increases. (86 sc)
Row 12 (WS): Ch 1, turn. Work raglan increase row. (94 sc)
Section breakdown after Row 12: Right front 12, right sleeve 16, back 38, left sleeve 16, left front 12. Total: 94 sts.
Row 13 (RS): Ch 1, turn. Sc blo in each st across, no increases. (94 sc)
Row 14 (WS): Ch 1, turn. Work raglan increase row. (102 sc)
Section breakdown after Row 14: Right front 13, right sleeve 18, back 40, left sleeve 18, left front 13. Total: 102 sts.
Row 15 (RS): Ch 1, turn. Sc blo in each st across, no increases. (102 sc)
Row 16 (WS): Ch 1, turn. Work raglan increase row. (110 sc)
Section breakdown after Row 16: Right front 14, right sleeve 20, back 42, left sleeve 20, left front 14. Total: 110 sts.
Row 17 (RS): Ch 1, turn. Sc blo in each st across, no increases. (110 sc)
Row 18 (WS): Ch 1, turn. Work raglan increase row. (118 sc)
Section breakdown after Row 18: Right front 15, right sleeve 22, back 44, left sleeve 22, left front 15. Total: 118 sts.
Row 19 (RS): Ch 1, turn. Sc blo in each st across, no increases. (118 sc)
Row 20 (WS): Ch 1, turn. Work raglan increase row. (126 sc)
Section breakdown after Row 20: Right front 16, right sleeve 24, back 46, left sleeve 24, left front 16. Total: 126 sts.
CHECKPOINT: Your yoke should measure approximately 4 inches / 10 cm from the neckline chain to the needle, measured at center back. You should have 126 stitches total across all sections.
Divide Sleeves from Body
Row 21 (RS): Ch 1, turn.
Work across right front: sc blo in 16 sts. (16 sts worked)
Skip the 24 right sleeve sts, placing them on a scrap yarn holder.
Chain 4, then continue across back: sc blo in 46 back sts. (46 sts worked)
Skip the 24 left sleeve sts, placing them on a scrap yarn holder.
Chain 4, then continue across left front: sc blo in 16 sts. (16 sts worked)
At the end of Row 21, you have the body joined with underarm chains inserted. Total body stitches: 16 (right front) plus 4 (right underarm ch) plus 46 (back) plus 4 (left underarm ch) plus 16 (left front) equals 86 sts.
Row 22 (WS): Ch 1, turn. Sc blo in each st across, working sc blo into each chain of the underarm chains as regular stitches. (86 sc)
CHECKPOINT: Count 86 sts. The cardigan body should now measure approximately 4.5 inches / 11.5 cm from neckline to current row.
Body
Work even in ridge stitch (sc blo every row) for 34 more rows.
Rows 23 through 56: Ch 1, turn. Sc blo in each st across. (86 sc each row)
CHECKPOINT: Your body (from neckline to current row) should measure approximately 9.5 inches / 24 cm. The body alone from the underarm division should measure approximately 5 inches / 12.5 cm.
Hem Ribbing
Row 57 (RS): Ch 1, turn. Sc in each st across (working through BOTH loops to create a transition ridge). (86 sc)
Rows 58 through 62: Ch 1, turn. Sc blo in each st across. (86 sc each row)
After Row 62, fasten off MC. Weave in end.
CHECKPOINT: Total back length from neckline to hem edge should be approximately 10.5 inches / 26.5 cm.
Sleeves (Make 2)
Return the held 24 sleeve stitches to your G-6 hook.
Note: Sleeves are worked flat and seamed at the underarm. With RS facing, join MC to the first held sleeve stitch.
Row 1 (RS): Ch 1. Sc blo across the 24 held sleeve sts. At the end, pick up and sc in each of the 4 underarm chain sts. Turn. (28 sc)
Row 2 (WS): Ch 1, turn. Sc blo in each st across. (28 sc)
Rows 3 through 6: Ch 1, turn. Sc blo in each st across. (28 sc each row)
Row 7 (decrease row, RS): Ch 1, turn. Sc blo in first st. Sc2tog blo over next 2 sts. Sc blo in each st to last 3 sts. Sc2tog blo over next 2 sts. Sc blo in last st. Turn. (26 sc)
Rows 8 through 12: Ch 1, turn. Sc blo in each st across. (26 sc each row)
Row 13 (decrease row): Ch 1, turn. Sc blo in first st. Sc2tog blo. Sc blo to last 3 sts. Sc2tog blo. Sc blo in last st. Turn. (24 sc)
Rows 14 through 18: Ch 1, turn. Sc blo in each st across. (24 sc each row)
Row 19 (decrease row): Ch 1, turn. Sc blo in first st. Sc2tog blo. Sc blo to last 3 sts. Sc2tog blo. Sc blo in last st. Turn. (22 sc)
Rows 20 through 24: Ch 1, turn. Sc blo in each st across. (22 sc each row)
CHECKPOINT: Sleeve length from underarm to current row should measure approximately 5.5 inches / 14 cm.
Sleeve Cuff Ribbing
Row 25 (RS): Ch 1, turn. Sc in each st across (both loops). (22 sc)
Rows 26 through 30: Ch 1, turn. Sc blo in each st across. (22 sc each row)
After Row 30, fasten off MC.
CHECKPOINT: Total sleeve length including cuff should be approximately 6.5 inches / 16.5 cm.
Seam the sleeve underarm edges together using a yarn needle and a length of MC. Use a whip stitch or mattress stitch on the inside. Weave in all ends.
Repeat for second sleeve.
Button Bands
The left front band receives buttons (as worn). The right front band receives buttonholes.
Left Front Button Band (no buttonholes):
With RS facing and MC, join yarn with sl st at the lower left front corner.
Row 1: Ch 1. Work sc evenly up the left front edge, placing approximately 1 sc for every row end along the edge. You should have approximately 62 sc up this edge. Turn.
Row 2: Ch 1, turn. Sc in each st across. Turn. (62 sc)
Row 3: Ch 1, turn. Sl st in each st across. Fasten off. (62 sl sts)
Mark button placement on this band: Place the first button marker 0.5 inch / 1.3 cm from the top edge (neckline). Place the last button marker 0.5 inch / 1.3 cm from the bottom edge (hem). Space 4 remaining markers evenly between these two points for a total of 6 button markers.
Right Front Buttonhole Band:
With RS facing and MC, join yarn with sl st at the upper right front corner (neckline edge).
Row 1: Ch 1. Work sc evenly down the right front edge, approximately 62 sc total. Turn. (62 sc)
Row 2 (buttonhole row): Ch 1, turn. Work sc in each st, and at each position corresponding to the 6 button markers on the left band, work as follows: sc in st before buttonhole position, ch 2, skip 2 sts, then continue in sc. This creates 6 buttonholes of 2 chains each. (62 sts when counting chain sts as sts)
Row 3: Ch 1, turn. Sc in each st and work 2 sc in each ch-2 sp. Sl st in each st across. Fasten off.
Neckline Finishing
With RS facing and G-6 hook, join MC at top corner of right front band.
Row 1: Ch 1. Work sc evenly around the entire neckline edge, picking up approximately 1 sc per row end along the front bands and 1 sc per stitch across the back neckline chain. Approximate total: 54 sc. Turn.
Row 2: Ch 1, turn. Sl st in each st across. Fasten off.
Weave in all ends.
Embellishment: Floral Cluster
Make 1 large spiral rose using CC1 (cream), following the Three-Dimensional Spiral Rose instructions.
Make 1 medium spiral rose using CC2 (dusty mauve), following the Small Rose Variation instructions.
Make 1 small spiral rose using CC2 (dusty mauve), using a starting chain of 16 instead of 20, and following the same technique.
Make 2 leaves using CC3 (sage green), following the Leaf instructions.
Assembly: Arrange the roses and leaves on the lower left front panel of the cardigan, approximately 2 inches / 5 cm from the left side edge and 2 inches / 5 cm up from the hem edge. Place the large cream rose in the upper center of the cluster, the medium mauve rose below and slightly to the right, and the small mauve rose at the lower left. Tuck the two leaves behind the roses so the leaf tips peek out between them at the upper right of the cluster.
Pin all pieces in place before sewing. Using a yarn needle and matching yarn tails, stitch each piece securely to the cardigan surface through all layers.
Sew on Buttons
Align the left front band over the right front band. Mark button positions through the buttonholes onto the left band. Sew each pearl shank button to the left band at the marked positions using a doubled length of matching thread or a fine strand of MC yarn. Knot securely on the inside of the band.
Size Customization Tips
To increase to 12 to 18 months: Add 2 more raglan increase rows (Rows 21 and 22, shifting the divide row to Row 23). This adds 16 sts to the yoke and increases the body width from 86 sts to approximately 102 sts. Work the body even rows for 38 rows instead of 34, and work sleeves for 3 additional plain rows before beginning cuff ribbing.
To decrease to newborn to 3 months: Remove 2 raglan increase rows from the yoke (stop after Row 16). Place sleeve sts on holders at Row 17. Adjust body even rows to 28 and sleeve plain rows to 20 before cuff.
To lengthen or shorten the body: Each 2 rows in ridge stitch adds or removes approximately 0.4 inch / 1 cm of body length.
To lengthen or shorten the sleeve: Each 2 rows adds or removes approximately 0.4 inch / 1 cm of sleeve length.
Blocking Instructions
Wet blocking is recommended, especially if using wool or a wool blend yarn.
1. Fill a basin with cool or lukewarm water and a small amount of gentle wool wash. Submerge the finished cardigan and gently press to saturate. Do not wring or twist.
2. Lift the cardigan from the water supporting its full weight. Lay it flat on a clean towel and roll the towel to press out excess water.
3. Lay the cardigan flat on a blocking mat or clean dry surface. Use rust-proof pins to shape the garment to the finished measurements. Pin out the button bands flat and smooth the yoke into a neat shape.
4. Allow to dry completely before unpinning. This may take 12 to 24 hours depending on humidity.
5. Do not block the crocheted rose embellishments while attached to the garment, as the three-dimensional structure will be flattened.
Care Instructions
If using acrylic yarn: Machine wash cold on gentle cycle. Lay flat to dry. Do not tumble dry, iron, or dry clean.
If using superwash merino wool: Hand wash in cool water with a gentle wool wash. Lay flat to dry away from direct heat and sunlight.
Do not hang the cardigan to dry, as the weight of wet yarn will distort the shoulders and sleeves. Store folded rather than on a hanger to preserve the shoulder shape over time.
You Did It!
Thank you so much for choosing this pattern for your next baby project. I hope the step-by-step instructions made the raglan construction feel approachable, and that those little spiral roses brought you as much joy to make as they do to look at. This cardigan is the kind of piece that gets passed down and treasured.
If you love this baby cardigan crochet pattern, please save it to your Pinterest boards so you can find it again later. And I would absolutely love to see your finished sweaters! Drop a comment below or tag me on Instagram or Facebook with your photos. Seeing your creations truly makes my day.
You Might Also Like
- Lavender Lace Summer Two-Piece Free Crochet Pattern
- Charcoal Gray Everyday Socks Free Crochet Pattern
- Dusty Rose Knitted Baby Snowsuit Set Free Crochet Pattern
- Dusty Rose Gradient Crochet Mini Dress Free Pattern
