
When I sat down to design this cardigan, I had a very specific vision in mind. I wanted something that looked impressive and heirloom-worthy but used a seamless construction method that would actually be enjoyable to make. No seaming tiny baby sleeves at midnight, thank you very much.
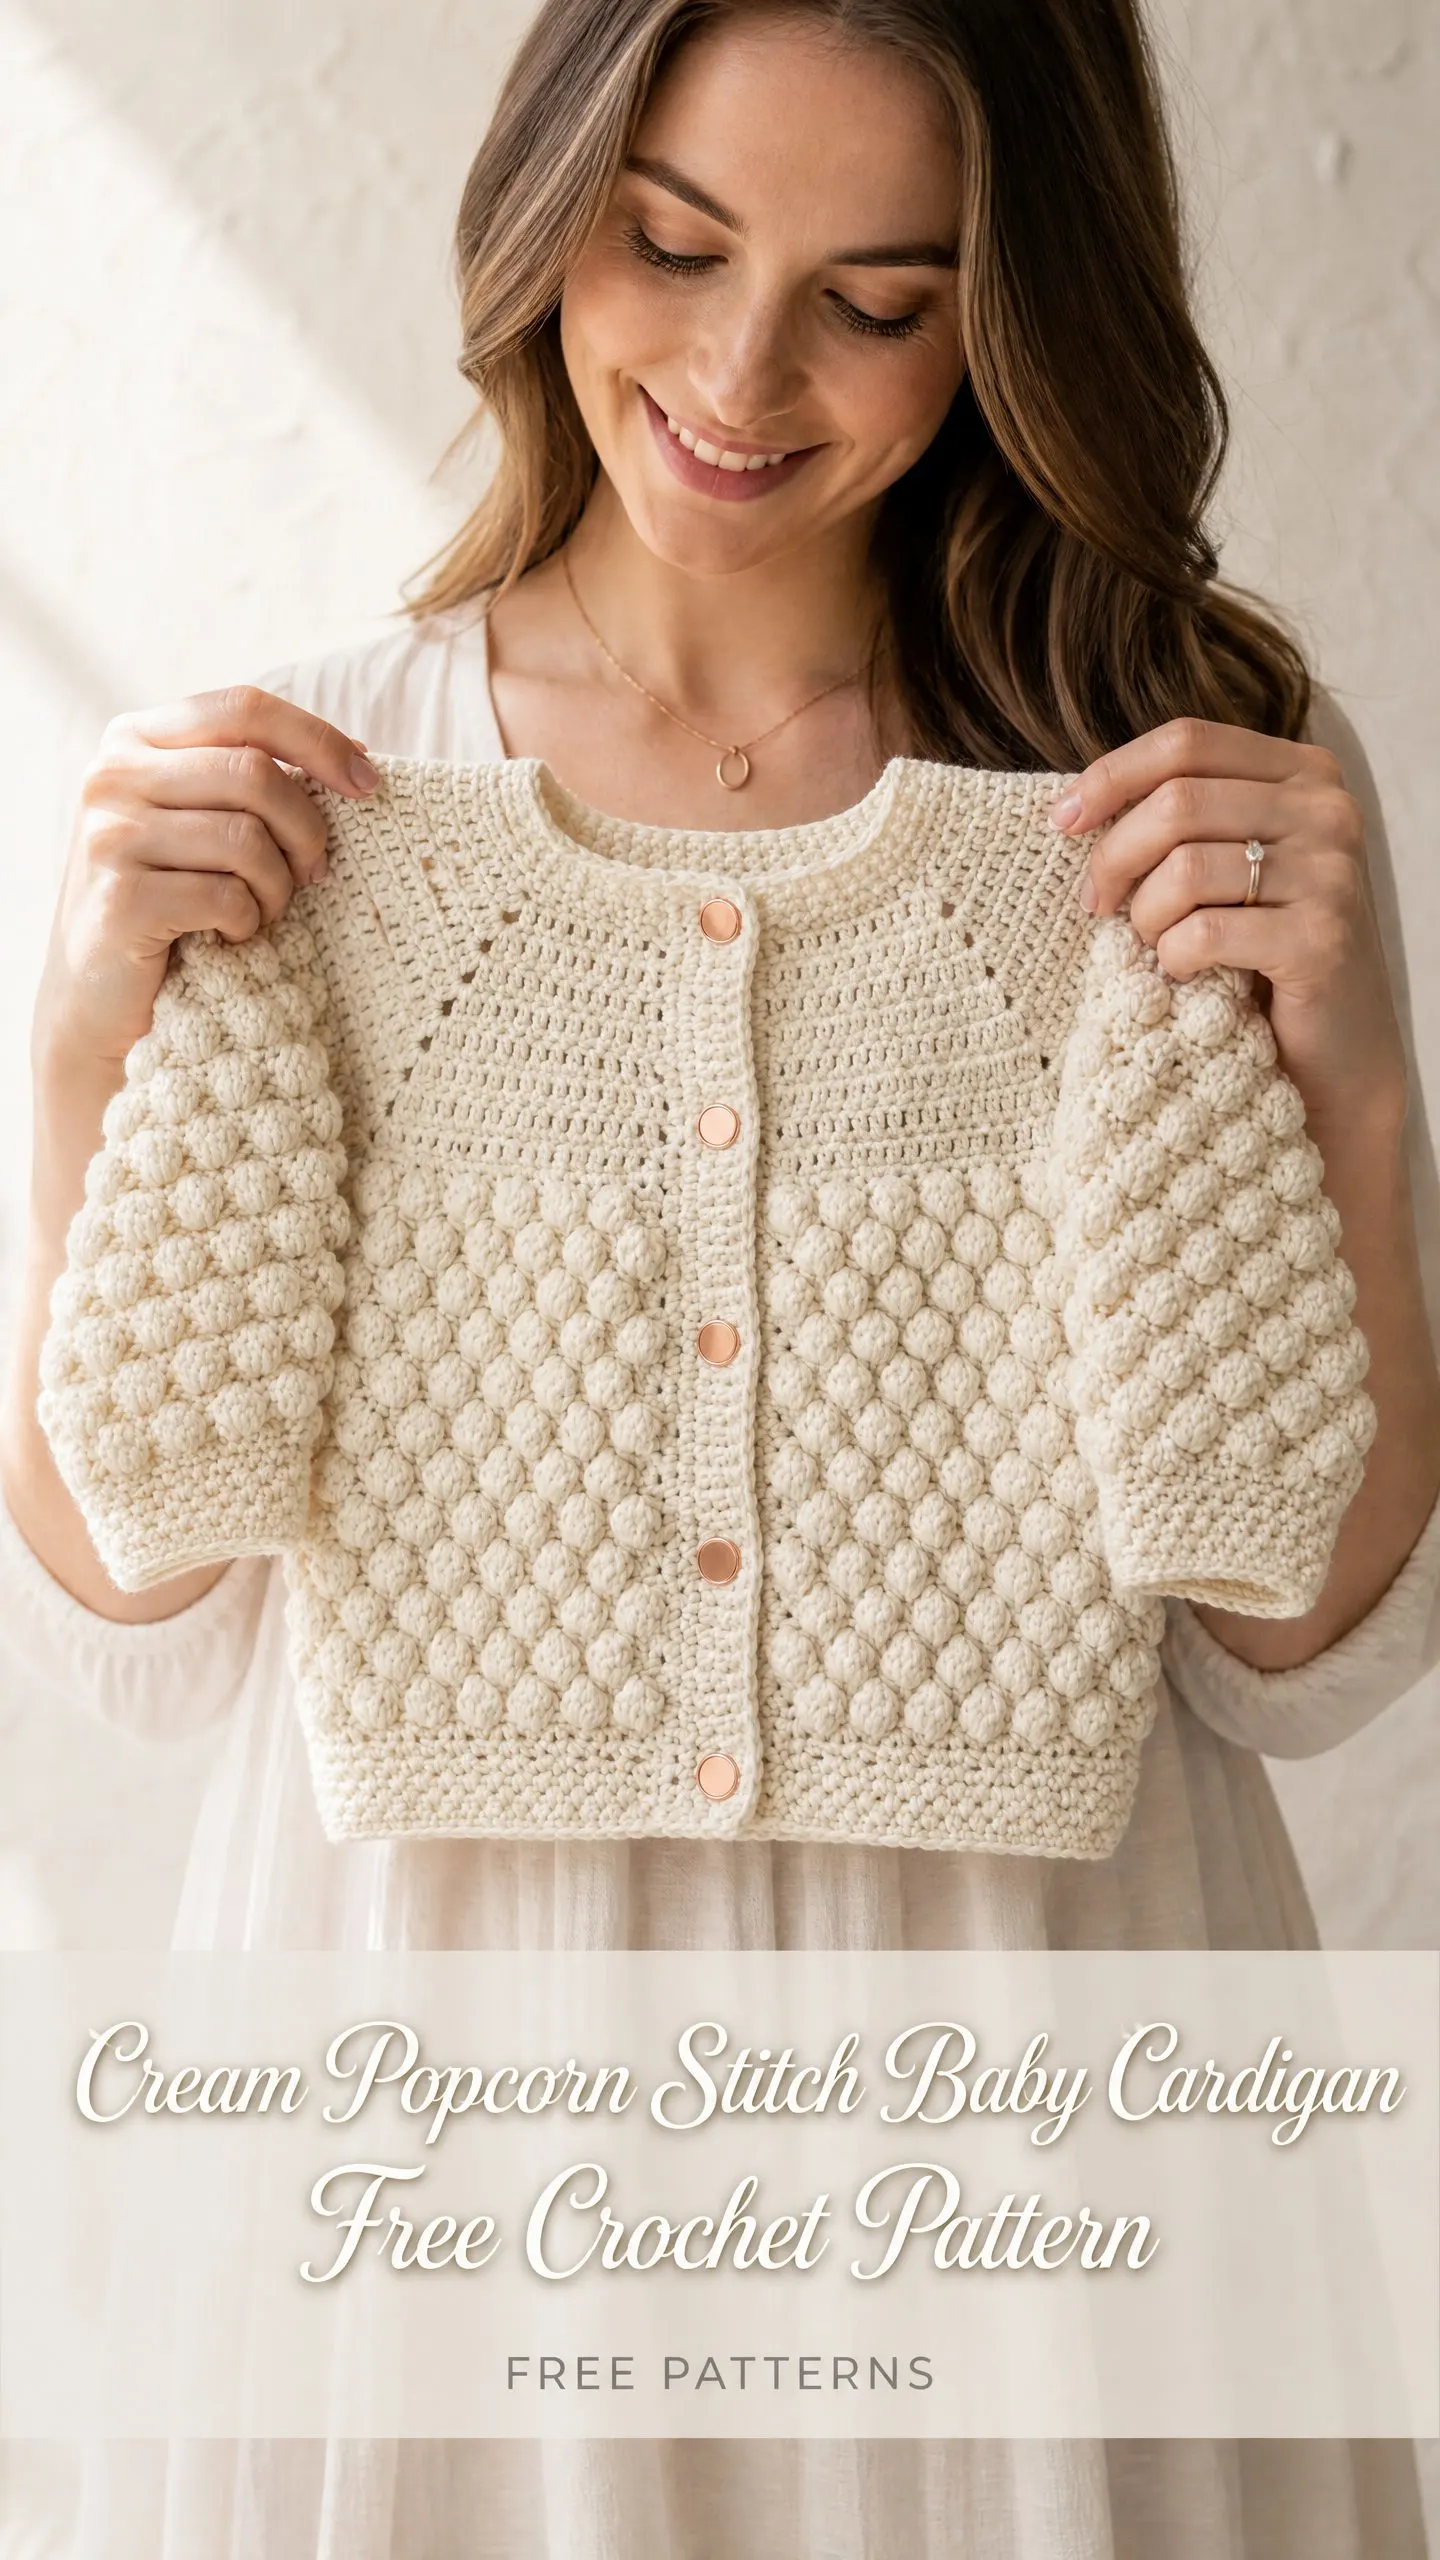
The popcorn stitch was my answer. It creates that gorgeous bubbly texture that makes people gasp when they see it, but it works up in a straightforward rhythm once you get going. I also wanted a top-down raglan construction so you could try it on as you go and adjust the length if needed.
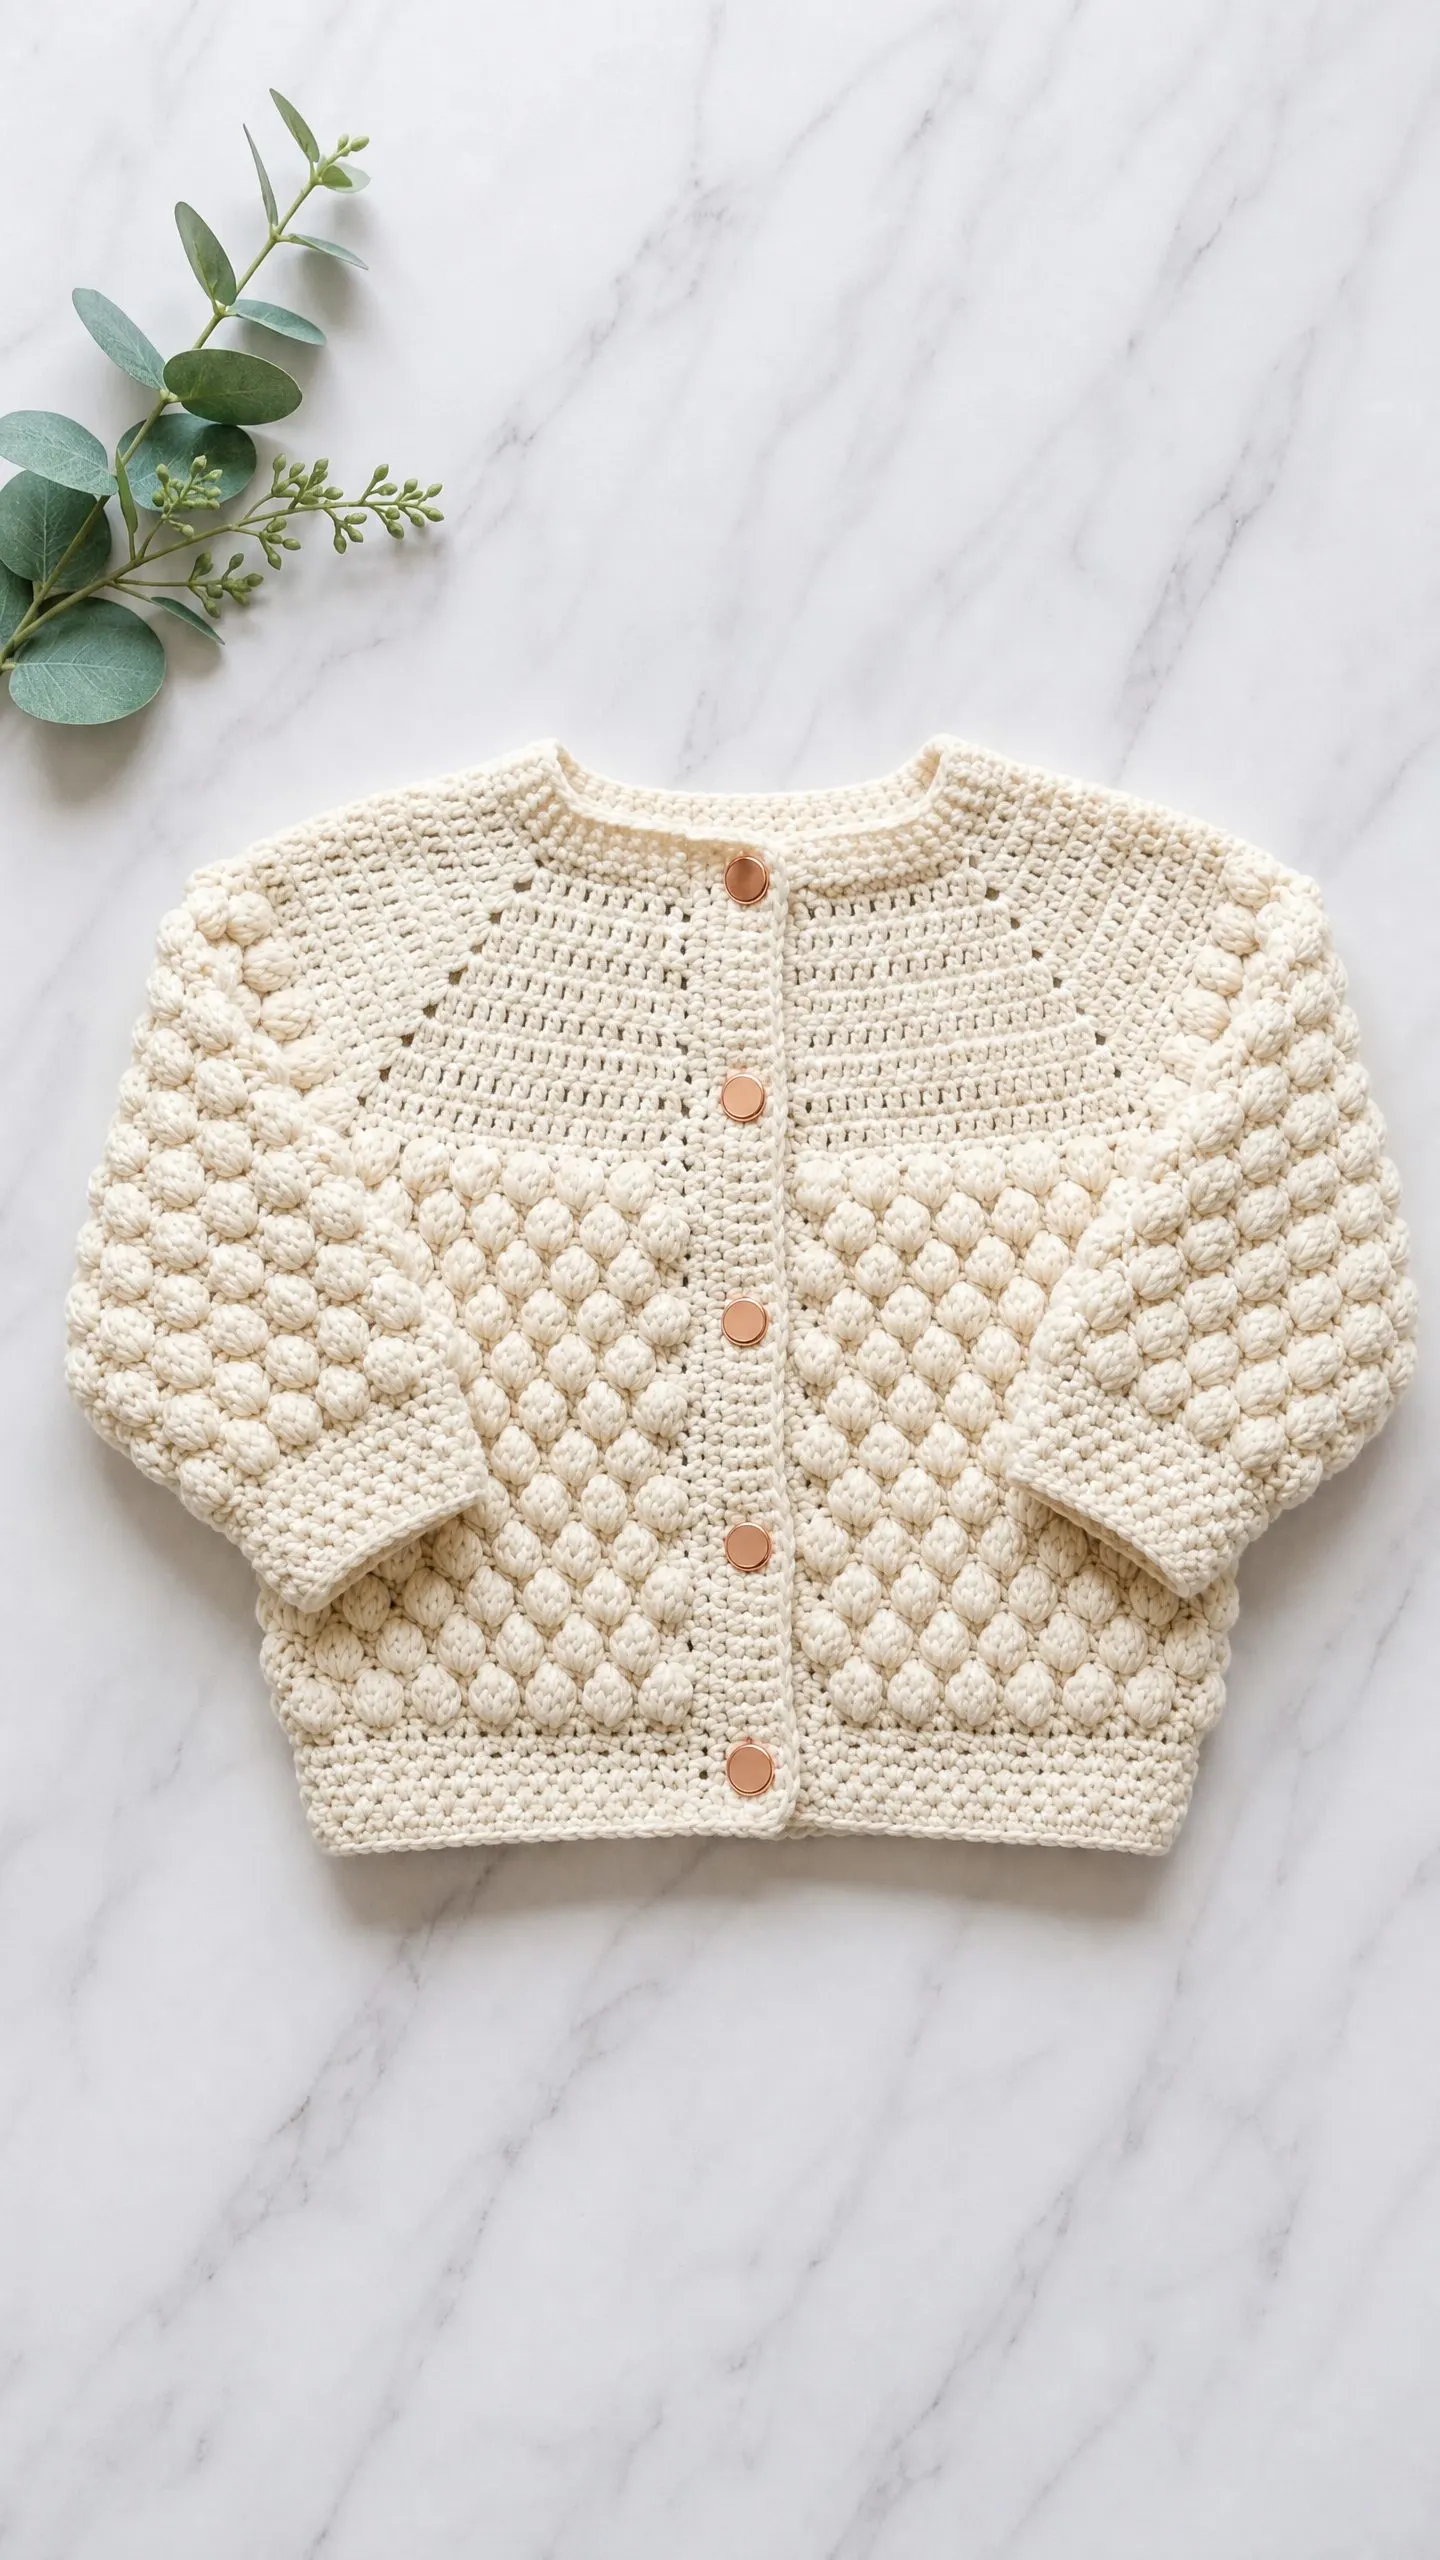
I am SO pleased with how this turned out. The cream yarn shows off every single popcorn beautifully, and those copper buttons add just the right amount of warmth. This is the kind of baby cardigan that becomes a keepsake.
About This Crochet Pattern
This baby cardigan features an all-over popcorn stitch pattern that creates a stunning sculptural surface across the body and sleeves. The construction method is seamless and top-down, meaning you start at the neckline and work your way to the hem without ever picking up a seaming needle.
The yoke uses smooth double crochet (dc) stitches with raglan-style increases, then transitions into the textured popcorn pattern once you reach the body. The result is a boxy, relaxed silhouette with three-quarter-length sleeves that looks far more complicated than it actually is.
This pattern is written for size 12 to 18 months, with customization tips included if you need to size up or down.
Skill Level
I would call this an intermediate pattern. You should be comfortable working in joined rounds, placing increases on a yoke, and maintaining consistent stitch counts across multiple rows.
The popcorn stitch itself is not difficult once you understand the mechanics. If you have never worked one before, I recommend practicing on a small swatch first. Once you get the rhythm of "five double crochets, drop the loop, insert hook through the first stitch, pull through, chain one to lock," it becomes almost meditative.
The trickiest part is keeping track of the offset pattern, where the popcorns shift position every other row to create that staggered diagonal grid. Stitch markers are your best friend here.
How Long Does This Take?
Expect to spend approximately 12 to 18 hours on this project, depending on your experience level and how quickly you work the popcorn stitches. The yoke works up fast since it is just double crochet, but the body and sleeves take more time because of the texture.
Finished Measurements
Materials Needed
Yarn: Worsted weight, Category 4. You will need approximately 350 to 400 yards / 320 to 365 meters in cream or natural ecru.
Hook: US size H-8 / 5.0 mm. Adjust to meet gauge if necessary.
Notions:
Yarn Suggestions
Choosing the right yarn matters a lot for this pattern. The popcorn stitches need a smooth, plied yarn to really pop and show their definition. Here are my top picks:
Lion Brand Pound of Love in Antique White. This is 100% premium acrylic, machine washable, and soft against baby skin. The stitch definition is excellent for textured patterns.
Paintbox Yarns Simply DK used doubled in Champagne White. Doubling a DK weight creates a soft worsted equivalent with beautiful drape and excellent durability.
Cascade 220 Superwash in Winter White. This 100% superwash wool has a slight halo that softens the texture beautifully and blocks to a refined finish.
Avoid yarns with heavy twist or excessive fuzz, as both will obscure the popcorn definition. For a baby garment, machine washability is essential.
Gauge
16 stitches and 10 rows = 4 inches / 10 cm in double crochet, worked in rows, blocked.
One popcorn stitch repeat (a 2-stitch wide, 2-row tall unit) measures approximately 0.5 inch / 1.3 cm wide and 0.75 inch / 1.9 cm tall.
Gauge is mandatory for this garment. Please swatch before beginning. A single hook size difference in either direction will significantly alter the fit.
Abbreviations (US Terms)
Before we begin, here are all the abbreviations you will encounter:
Special Stitches
Popcorn Stitch (PC)
This is the star of the show. Here is how to work it:
Work 5 dc into the same stitch. Without removing the hook, drop the loop from the hook. Insert the hook from front to back through the top of the first dc of the 5-dc group. Pick up the dropped loop and pull it through the top of that first dc. Pull snug to close the popcorn. Chain 1 to lock the popcorn in place (this ch-1 does not count as a stitch).
The popcorn will pop toward the right side. When working in rows, turn your work so popcorns always face the RS. When working sleeves in rounds with the RS always facing, work all popcorns as described.
Join Round (for seamless top-down construction)
At the end of each yoke round, slip stitch into the top of the first dc to join. Chain 2 at the beginning of each dc round. The ch-2 counts as the first dc throughout the yoke. Do not count the joining slip stitch as a stitch.
Front Placket Modification
Because this is a cardigan with a front opening, yoke rounds are not fully closed circles. At the end of each round, you will slip stitch to join and then immediately chain 2 and turn. This creates the vertical front opening while maintaining the circular yoke shaping.
Pattern Notes
1. The cardigan is constructed top-down in one piece through the yoke, then body and sleeves are separated and worked independently to the hem.
2. The yoke is worked in double crochet with increases to create the rounded yoke shape.
3. After yoke completion, stitches for each sleeve are placed on holders and underarm chains are added.
4. The body is worked back and forth in flat rows using the popcorn stitch pattern.
5. Sleeves are worked in closed rounds using the popcorn stitch pattern.
6. The front button band is picked up after the body is complete.
7. Ch 2 at the beginning of every dc row or round counts as 1 dc.
8. Ch 1 at the beginning of every sc row counts as 1 sc only at the neckline edging. In all other sections, ch 1 does not count as a stitch.
9. Stitch counts at the end of each row or round are given in parentheses.
10. Popcorns are only worked on RS rows. WS rows are worked in dc across.
11. Sleeve rounds are worked with RS always facing (no turning), so popcorns are worked on every other round as designated.
Crochet Pattern Instructions
Neckline and Yoke
Foundation: Ch 68.
Row 1 (RS): Dc in 3rd ch from hook (counts as 2 dc), dc in each ch across. Turn. (67 dc)
This foundation row becomes the neckline. The 67 stitches are distributed as follows: 9 sts right front, 10 sts right sleeve, 27 sts back, 10 sts left sleeve, 9 sts left front. Place markers at positions after st 9, after st 19, after st 46, and after st 56 (counting from the first dc, not the t-ch).
Yoke Increase Rows
Each RS row increases 8 stitches total: work 2 dc in the stitch immediately before each marker AND 2 dc in the stitch immediately after each marker. WS rows are dc across with no increases.
Row 2 (WS): Ch 2, turn. Dc in each st across. (67 dc)
Row 3 (RS): Ch 2, turn. Dc across, working inc before and after each marker (2 dc in the st before marker, sm, 2 dc in the st after marker). (75 dc)
Row 4 (WS): Ch 2, turn. Dc in each st across. (75 dc)
Row 5 (RS): Ch 2, turn. Dc across with increases before and after each marker. (83 dc)
Row 6 (WS): Ch 2, turn. Dc in each st across. (83 dc)
Row 7 (RS): Ch 2, turn. Dc across with increases before and after each marker. (91 dc)
Row 8 (WS): Ch 2, turn. Dc in each st across. (91 dc)
Row 9 (RS): Ch 2, turn. Dc across with increases before and after each marker. (99 dc)
Row 10 (WS): Ch 2, turn. Dc in each st across. (99 dc)
Row 11 (RS): Ch 2, turn. Dc across with increases before and after each marker. (107 dc)
Row 12 (WS): Ch 2, turn. Dc in each st across. (107 dc)
Row 13 (RS): Ch 2, turn. Dc across with increases before and after each marker. (115 dc)
Row 14 (WS): Ch 2, turn. Dc in each st across. (115 dc)
CHECKPOINT: After Row 14, the yoke measures approximately 4 inches / 10 cm from the foundation chain edge. Lay flat to verify.
Dividing Body and Sleeves
Row 15 (RS, Divide Row): Ch 2, turn. Dc across 15 sts of right front. Ch 4 (underarm bridge chain). Skip 22 sleeve sts (place these on a holder using scrap yarn). Dc across 39 back sts. Ch 4 (underarm bridge chain). Skip 22 sleeve sts (place on holder). Dc across 15 sts of left front.
Row 16 (WS): Ch 2, turn. Dc in each st and each ch across. (77 dc)
Body Popcorn Section
The body stitch count of 77 needs to become 76 for a clean popcorn repeat. This is accomplished with one decrease at the start of Row 17.
Row 17 (RS, first popcorn row): Ch 2, turn. Dc2tog over first 2 sts (decrease). (PC in next st, dc in next st) repeat across to last 2 sts, dc in last 2 sts. (76 sts)
Row 18 (WS): Ch 2, turn. Dc in each st across, working 1 dc into the top of each PC and 1 dc into each dc. (76 dc)
Row 19 (RS, offset popcorn row): Ch 2, turn. Dc in first st. (DC in next st, PC in next st) repeat across to last st, dc in last st. (76 sts)
The offset on Row 19 places the PC over the dc of Row 17 and the dc over the PC of Row 17, creating the staggered bubble grid.
Row 20 (WS): Ch 2, turn. Dc in each st across. (76 dc)
Row 21 (RS): Repeat Row 17 pattern. (76 sts)
Row 22 (WS): Ch 2, turn. Dc in each st across. (76 dc)
Row 23 (RS): Repeat Row 19 pattern. (76 sts)
Row 24 (WS): Ch 2, turn. Dc in each st across. (76 dc)
Row 25 (RS): Repeat Row 17 pattern. (76 sts)
Row 26 (WS): Ch 2, turn. Dc in each st across. (76 dc)
Row 27 (RS): Repeat Row 19 pattern. (76 sts)
Row 28 (WS): Ch 2, turn. Dc in each st across. (76 dc)
Row 29 (RS): Repeat Row 17 pattern. (76 sts)
Row 30 (WS): Ch 2, turn. Dc in each st across. (76 dc)
Body Hem
Row 31 (RS): Ch 1 (does not count as st), turn. Sc in each st across. (76 sc)
Row 32 (WS): Ch 1, turn. Sc in each st across. (76 sc)
Row 33 (RS): Ch 1, turn. Sc in each st across. (76 sc)
Fasten off. Weave in end.
CHECKPOINT: The cardigan body from the underarm to the bottom edge should measure approximately 7 inches / 18 cm.
Sleeves (Make 2)
Return to the 22 held sleeve stitches. With RS facing, join yarn to the center of the underarm chain (between the 2nd and 3rd chain of the 4-ch bridge).
Setup Round: Ch 2. Dc across 22 held sleeve sts. Pick up 4 dc evenly across the underarm chain bridge (1 dc in each of the 4 ch). Sl st to top of t-ch to join. (26 dc)
The sleeve is now worked in closed rounds with RS always facing.
Round 1 (RS, popcorn): Ch 2, (PC in next st, dc in next st) 12 times across. Sl st to top of t-ch to join. (26 sts)
Round 2 (dc round): Ch 2, dc in each st around. Sl st to join. (26 dc)
Round 3 (offset popcorn): Ch 2, dc in first st, (dc in next st, PC in next st) 11 times, dc in next st, dc in next st. Sl st to join. (26 sts)
Round 4 (dc round): Ch 2, dc in each st around. Sl st to join. (26 dc)
Round 5: Repeat Round 1. (26 sts)
Round 6: Ch 2, dc in each st around. Sl st to join. (26 dc)
Round 7: Repeat Round 3. (26 sts)
Round 8: Ch 2, dc in each st around. Sl st to join. (26 dc)
Round 9: Repeat Round 1. (26 sts)
Round 10: Ch 2, dc in each st around. Sl st to join. (26 dc)
Sleeve Hem
Round 11: Ch 1, sc in each st around. Sl st to join. (26 sc)
Round 12: Ch 1, sc in each st around. Sl st to join. (26 sc)
Round 13: Ch 1, sc in each st around. Sl st to join. (26 sc)
Fasten off. Weave in end.
Repeat for second sleeve.
CHECKPOINT: Each sleeve from underarm to cuff should measure approximately 5.5 inches / 14 cm.
Neckline Edging
With RS facing, join yarn at top right corner of the right front neckline.
Row 1: Ch 1. Sc evenly along the right front neckline edge (approx 14 sc up the right front neckline). Sc across the foundation chain neckline picking up each original chain stitch (67 sc across back neckline). Sc down the left front neckline edge (14 sc). (95 sc total)
Adjust sc count at the corners as needed to keep the edge flat. Do not join; work as a flat strip.
Row 2: Ch 1, turn. Sc in each st across. (95 sc)
Fasten off. Weave in end.
Front Button Band
Right Front Band:
With RS facing, join yarn at the bottom right hem corner.
Row 1: Ch 1. Sc evenly up the right front edge, placing approximately 1 sc per dc row end and 1 sc per sc row end. (35 sc)
Row 2: Ch 1, turn. Sc across. At even intervals, work 5 button loops as follows: (sc to position, ch 2, sk 1 sc) 5 times evenly spaced, sc to end. Space the first loop approximately 0.5 inch from the neckline and the last loop approximately 0.5 inch from the hem. (35 sts)
Row 3: Ch 1, turn. Sc in each sc and 2 sc into each ch-2 loop. (35 sc)
Fasten off.
Left Front Band:
With RS facing, join yarn at the top left front edge (at neckline).
Row 1: Ch 1. Sc evenly down the left front edge. (35 sc)
Row 2: Ch 1, turn. Sc in each st. (35 sc)
Row 3: Ch 1, turn. Sc in each st. (35 sc)
Fasten off.
Finishing and Blocking
Weave in all remaining ends securely on the WS.
Wet blocking method: Submerge the finished cardigan in cool water. Gently press out excess water (do not wring). Lay flat on a blocking mat and pin to the finished measurements stated above. Allow to dry fully before removing pins, at least 24 hours. Blocking opens up the popcorn texture and evens stitch definition dramatically.
Attach buttons to the left front band, aligning each button with one button loop on the right front band. Sew buttons firmly using matching thread and a sewing needle. Knot securely on the WS.
Care Instructions
Hand wash in cool water with a gentle wool-safe or baby-safe detergent. Press out water gently; do not wring or twist. Lay flat to dry. Do not tumble dry, iron, or dry clean unless your specific yarn label permits. If using a superwash wool or acrylic yarn as specified above, follow that yarn label for machine washing guidance.
Size Customization Tips
To size up to 2T to 3T: Add 2 more RS increase rows to the yoke before the divide row, adding 16 more sts to the yoke. Adjust the body to 93 sts and the sleeves to 30 sts. Add 2 more popcorn rows to the body and 2 more rounds to the sleeves.
To size down to 6 to 9 months: Remove 2 yoke increase rows (stop after Row 10). Adjust body to 61 sts and sleeves to 20 sts. Reduce body popcorn rows by 2 and sleeve rounds by 2.
The popcorn repeat is a 2-stitch unit. Always ensure your total body stitch count after the divide is an even number before beginning the popcorn section.
Final Thoughts on This Baby Cardigan Crochet Pattern
This cream popcorn stitch baby cardigan is truly one of my favorite designs. The combination of seamless construction and that gorgeous bubbly texture creates something that feels special to make and even more special to give. Every time I see a finished version, I smile at those little popcorn clusters catching the light.
Thank you so much for choosing this pattern. I hope you enjoy every stitch of it. If you make one, I would absolutely love to see it! Tag me on Instagram or share a photo in my Facebook group. There is nothing better than seeing your beautiful finished projects.
If you loved this pattern, go ahead and save it to your Pinterest boards so you can find it again later. And please drop a comment below if you make this little cardigan. I read every single one, and hearing from you truly makes my day!
You Might Also Like
- Mint Green Spring Baby Dress Free Crochet Pattern
- Sunset Garden Floral Crochet Blouse Free Pattern
- Ocean Blue Tropical Crochet Dress Free Pattern
- Lavender Garden Granny Square Purse Free Crochet Pattern
