
I don’t know about you, but I absolutely melt when I see a tiny handmade dress on a baby. There’s just something about those little scalloped hems and delicate stitches that store-bought clothes can never replicate.
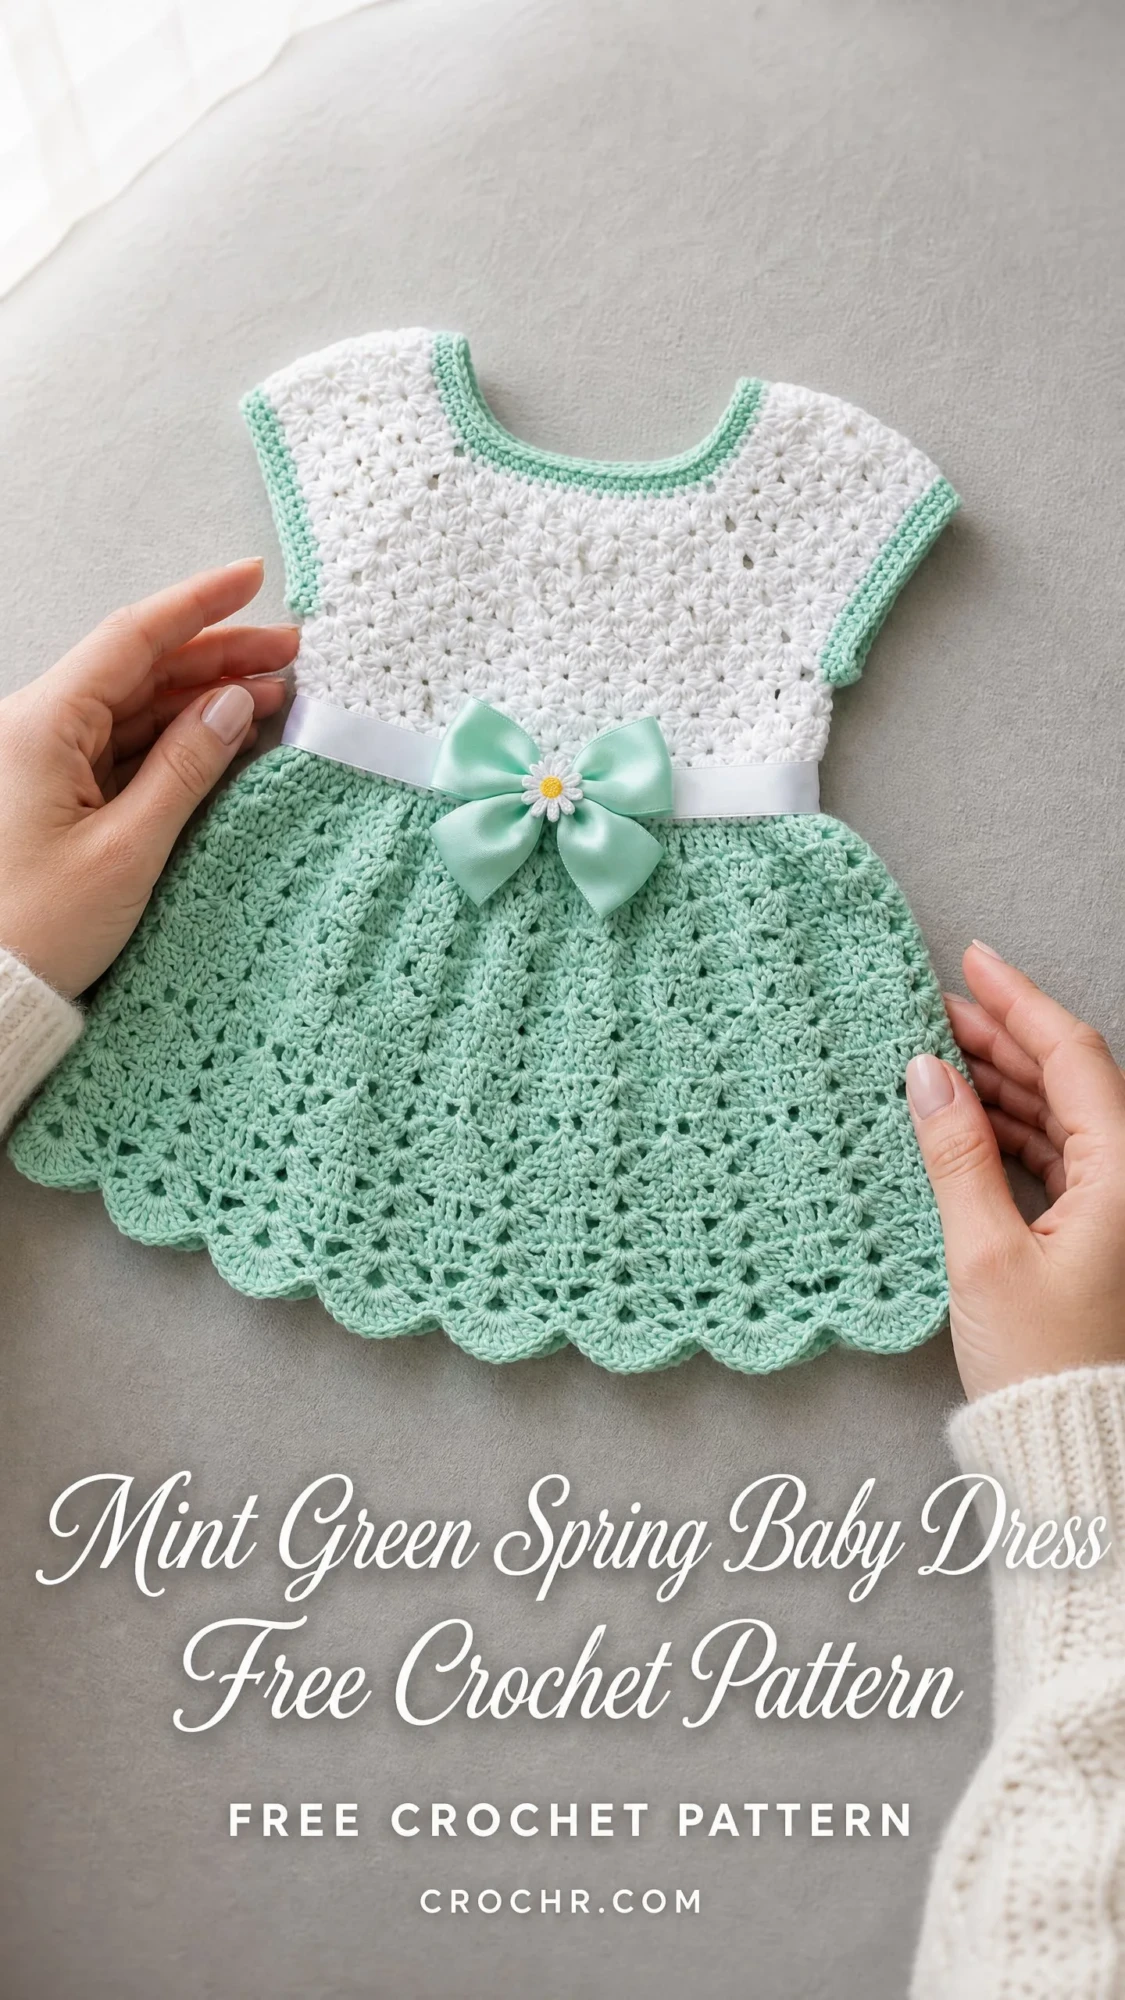
This mint green baby dress has been living rent-free in my head ever since I first sketched it out. The combination of that textured white bodice with the airy mint skirt? Pure sweetness without being over the top.
If you’ve been waiting for the perfect project to make for a baby shower, a spring photo session, or just because you want to create something beautiful, this is it. The dress looks intricate, but I promise the construction is more straightforward than it appears.
About This Crochet Baby Dress Pattern
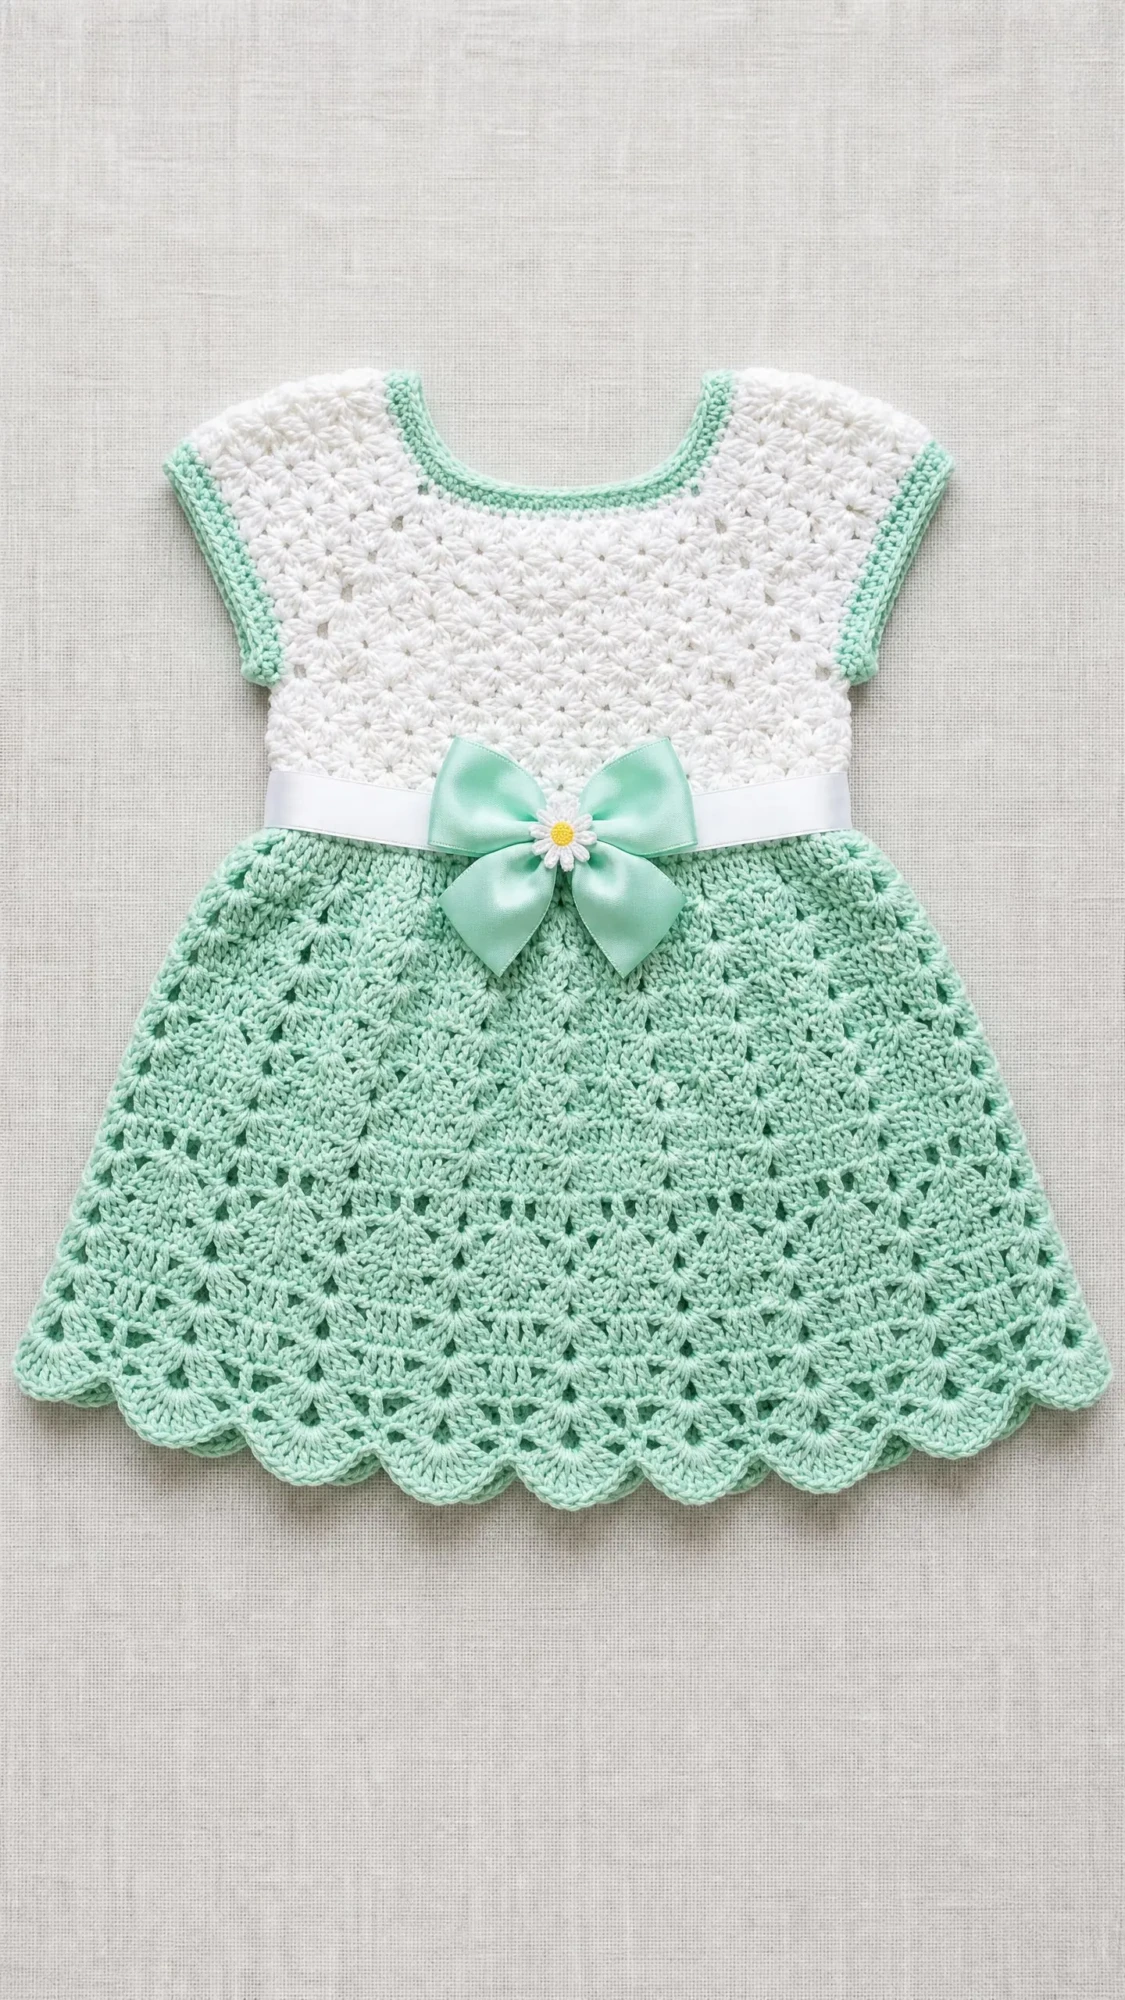
This adorable baby dress features a white crocheted bodice worked in a dense star stitch texture paired with a mint green shell stitch skirt that flares out in a classic A-line silhouette. The whole piece comes together with sweet details: cap sleeves trimmed in mint, a scalloped hem border, a white satin ribbon waistband, and a mint green satin bow with a tiny daisy embellishment at the center front.
The dress is sized to fit a 3 to 6 month old baby, though I’ve included size customization tips at the end if you need to go smaller or larger. When finished, the chest circumference measures approximately 16 inches (40.5 cm) and the total length from shoulder to hem is about 13 inches (33 cm).
This is what I’d call an intermediate level pattern. You should be comfortable working the star stitch (which involves drawing through multiple loops), reading a shell stitch pattern in the round, working increases within a pattern repeat, seaming, and finishing garment edges neatly. If you’ve completed a basic hat or dishcloth, you can absolutely build the skills needed with a practice swatch or two before diving in.
Expect to spend around 12 to 18 hours on this project, including blocking and assembly. It’s not a quick weekend make, but every minute is worth it when you see the finished dress.
Materials You’ll Need
Having everything ready before you start makes the whole process smoother. Here’s what you’ll need to gather:
Yarn:
Hook:
Notions:
Yarn Suggestions:
1. Paintbox Yarns Simply DK (100% acrylic, 276 yd / 253 m per 100 g skein): Excellent stitch definition, machine washable, widely available. Use Paper White for Color A and Pistachio Green for Color B.
2. Lion Brand Yarn Pound of Love (100% premium acrylic, 1020 yd / 932 m per 454 g skein): Very soft against baby skin, machine washable, economical. Use White for Color A.
3. Drops Baby Merino (100% superwash merino wool, 191 yd / 175 m per 50 g skein): The softest option with beautiful drape. Requires gentle hand washing. Use Off White for Color A and a light mint shade for Color B.
Choose any DK weight yarn with good stitch definition and a smooth ply. Avoid overly fuzzy or bouclé yarns as they will obscure the star stitch and shell stitch textures.
Gauge
Getting gauge right is essential for a properly fitting garment, especially for babies!
With Color A in Star Stitch pattern:
16 stitches and 10 rows = 4 in / 10 cm (measured over a blocked swatch)
With Color B in Shell Stitch pattern:
One full shell repeat (6 stitches) = approximately 1.25 in / 3.2 cm wide
4 rounds of shell stitch = approximately 1.5 in / 3.8 cm tall
If your swatch is too big, try going down a hook size. Too small? Go up a hook size. A difference of even half a stitch per inch across a garment this size will shift the chest measurement by a full inch, which is significant for an infant fit.
Abbreviations and Stitch Definitions
Let me walk you through all the terms you’ll see in this pattern:
Special Stitches
This pattern uses two special stitch patterns that create those beautiful textures you see in the finished dress. Don’t let them intimidate you! I’ll break them down step by step.
Star Stitch (worked flat, over an even number of stitches)
The star stitch creates that gorgeous textured bodice. It’s worked in two steps: the "eye" setup and the completing half-hitch. Every star stitch occupies two stitches of the foundation row below it.
Eye Setup (beginning of right-side rows):
1. Chain 3, then insert hook into the 2nd chain from hook, yarn over and pull up a loop (2 loops on hook).
2. Insert hook into the 3rd chain from hook (the base of the ch-3), yarn over and pull up a loop (3 loops on hook).
3. Insert hook into the first stitch of the previous row, yarn over and pull up a loop (4 loops on hook).
4. Insert hook into the next stitch, yarn over and pull up a loop (5 loops on hook).
5. Yarn over and draw through all 5 loops on hook. Chain 1 to close the star eye. This forms the first (half) star at the selvedge.
Full Star (worked across the row after the beginning eye):
1. Insert hook into the eye (the closing chain-1 space) of the star just made, yarn over and pull up a loop (2 loops on hook).
2. Insert hook into the back leg of the last loop drawn through (the "ear" of the star), yarn over and pull up a loop (3 loops on hook).
3. Insert hook into the same stitch used for the final pull-up of the previous star, yarn over and pull up a loop (4 loops on hook).
4. Insert hook into the next stitch of the previous row, yarn over and pull up a loop (5 loops on hook).
5. Yarn over and draw through all 5 loops on hook. Chain 1 to close.
6. Repeat steps 1 through 5 across until 2 stitches remain.
End Half-Star (last 2 stitches):
1. Insert hook into the eye of the last full star made, yarn over and pull up a loop (2 loops on hook).
2. Insert hook into the back leg of the last loop drawn through, yarn over and pull up a loop (3 loops on hook).
3. Insert hook into the next stitch, yarn over and pull up a loop (4 loops on hook).
4. Insert hook into the last stitch of the row, yarn over and pull up a loop (5 loops on hook).
5. Yarn over and draw through all 5 loops. Chain 1 to close.
Wrong-Side Row of Star Stitch:
Wrong-side rows are worked in single crochet into every stitch (including every chain-1 eye) across. These rows form the background fabric between the star ridges and maintain the stitch count.
Shell Stitch (worked in the round)
A shell is made by working 5 double crochet stitches all into the same stitch or space. Simple as that!
Shell Stitch Pattern in the Round (multiple of 6 stitches plus 2):
Eyelet Round (for ribbon)
(Ch 2, skip 1 stitch, sc into next stitch) around. This creates a series of chain-2 spaces through which the ribbon is threaded.
Scallop Border
Worked in Color B as the final edging:
1. Sl st into first stitch, ch 3 (counts as dc).
2. Work 4 dc into the same stitch (5 dc total, first half of shell).
3. Skip 2 stitches, sc into next stitch.
4. Skip 2 stitches, work 5 dc into next stitch.
5. Repeat steps 3 and 4 around. Join with sl st to the top of the beginning ch-3. Fasten off.
Pattern Notes Before You Begin
A few important things to keep in mind as you work:
1. The bodice is worked flat (back and forth) from the top down, in one piece. Armholes are created by chaining across gaps in the yoke shaping.
2. The skirt is worked in joined rounds from the waist down, beginning from the bottom edge of the bodice.
3. Color A (white) is used for the entire bodice. Color B (mint green) is used for the entire skirt, edgings, and border.
4. Mint green trim is added to the neckline, armholes, and sleeve cap edges after the bodice is complete.
5. The white satin ribbon is threaded through the eyelet round at the waist, and the mint green bow is hand-sewn over the ribbon knot at the center front.
6. All slip stitch joins at the end of rounds are made to the top of the first stitch of that round.
7. This dress does not have a back opening. The neck circumference is generous enough to slip over a baby’s head comfortably.
Pattern Instructions
Section 1: Bodice Yoke (Color A, worked flat, top down)
The yoke begins at the neckline and expands at four raglan increase points. Four stitch markers track the raglan lines throughout.
Foundation Chain:
Using Color A and size E-4 hook, chain 46. (This is a working chain of 44 stitches plus 2 turning chain.)
Row 1 (RS, setup row): Sc into the 2nd chain from hook, sc into each chain across. (44 sc)
Place stitch markers as follows for raglan shaping:
The yoke distribution:
Row 2 (WS): Chain 1, turn. Sc in each stitch across. (44 sc)
Important note about raglan increases: Because star stitch increases cannot be easily placed mid-row without disrupting the pattern, all raglan increases are made on the wrong-side (single crochet) rows only. On right-side rows, simply work the star stitch over whatever count is present. On wrong-side rows, work 2 sc into each of the 4 raglan marker stitches. Move markers up to the center stitch of each new 2-sc pair after each increase row.
Row 3 (RS): Ch 3, work star stitch row across all 44 stitches.
Row 4 (WS): Ch 1, turn. Sc across, working 2 sc into each of the 4 marked raglan stitches. (48 sc)
Row 5 (RS): Ch 3, work star stitch row across all 48 stitches.
Row 6 (WS): Ch 1, turn. Sc across, working 2 sc into each of the 4 marked raglan stitches. (52 sc)
Row 7 (RS): Ch 3, work star stitch row across all 52 stitches.
Row 8 (WS): Ch 1, turn. Sc across, working 2 sc into each of the 4 marked raglan stitches. (56 sc)
Row 9 (RS): Ch 3, work star stitch row across all 56 stitches.
Row 10 (WS): Ch 1, turn. Sc across, working 2 sc into each of the 4 marked raglan stitches. (60 sc)
Row 11 (RS): Ch 3, work star stitch row across all 60 stitches.
Row 12 (WS): Ch 1, turn. Sc across, working 2 sc into each of the 4 marked raglan stitches. (64 sc)
After Row 12, verify your markers are positioned correctly before proceeding to the armhole division.
Section 2: Armhole Division (Color A)
On the next wrong-side row, you will separate the sleeve stitches from the body stitches and join the back panels.
Row 13 (WS, armhole separation row): Ch 1, turn.
(43 sc worked into body stitches, plus 2 groups of 4 chains = working total of 51 sts on the next row)
Row 14 (RS): Ch 3, turn. Work star stitch row across all 51 stitches. (51 sts)
Row 15 (WS): Ch 1, turn. Sc across all 51 stitches. (51 sc)
Row 16 (RS): Ch 3, turn. Work star stitch row. (51 sts)
Row 17 (WS): Ch 1, turn. Sc across. (51 sc)
Row 18 (RS): Ch 3, turn. Work star stitch row. (51 sts)
Row 19 (WS): Ch 1, turn. Sc across. (51 sc)
Row 20 (RS): Ch 3, turn. Work star stitch row. (51 sts)
Row 21 (WS): Ch 1, turn. Sc across. (51 sc)
Checkpoint: After Row 21, the bodice from shoulder to waist should measure approximately 6 in / 15 cm. The piece should be approximately 8 in / 20.5 cm wide. If you are short, add one more RS/WS pair of rows before proceeding.
Do not fasten off. Proceed to the eyelet/waistband row.
Section 3: Waist Eyelet Row (Color A, transitional row)
This row creates the channel through which the ribbon waistband is threaded.
Row 22 (eyelet row, RS): Ch 1, turn. Sc into first stitch. (Ch 2, skip 1 stitch, sc into next stitch) across to end. End with sc in last stitch if needed to maintain even edging.
You should have approximately 17 ch-2 eyelet spaces across the bodice.
Row 23 (WS): Ch 1, turn. Sc into first stitch. (2 sc into the ch-2 space, sc into the sc) across to end. (51 sc)
Fasten off Color A. Join Color B at the right edge of the waistline, ready to begin the skirt.
Section 4: Sleeve Caps and Edgings (Color B)
Before beginning the skirt, complete the mint green edgings on the neckline, armholes, and sleeve caps.
Neckline Edging (Color B):
Join Color B to the right back corner of the foundation chain (neckline edge), RS facing.
Round 1: Ch 1. Work sc evenly around the entire neckline edge, working approximately 1 sc per chain stitch along the straight neck and 1 sc per row end along any curved neckline edge, placing a sl st join into the first sc to close. (44 sc)
Fasten off Color B. Weave in ends.
Armhole Edging (Color B, worked on each armhole separately):
Place the held sleeve stitches back on the hook (11 sts).
Join Color B to the underarm chain, RS facing.
Round 1: Ch 1. Work 4 sc across the underarm chain, then sc across the 11 held sleeve stitches, then 4 sc across the other side of the underarm chain. Join with sl st. (19 sc)
Round 2: Ch 1. Sc in each stitch around. Join with sl st. (19 sc)
Fasten off Color B. Repeat for the other armhole.
The two rounds of sc in mint green create a small mint-trimmed sleeve cap that finishes the edge neatly.
Section 5: Skirt (Color B, worked in joined rounds, top down)
The skirt is worked in rounds beginning from the waist. You will increase on the first round to achieve the A-line flare, then work shell stitch rounds to the hem.
Join Round (setup, increase round):
With RS of bodice facing, join Color B to the first stitch of Row 23 at the right back edge.
Round 1: Ch 1. (Sc into next stitch, 2 sc into the following stitch) 23 times. Sc into each of the remaining 5 stitches. Join with sl st to the first sc of the round. (74 sc)
Round 2 (shell setup): Ch 1. Sc into first stitch. (Skip 2 stitches, shell into next stitch, skip 2 stitches, sc into next stitch) 12 times, adjusting the last repeat to join cleanly. Sl st to first sc. (12 shells, 12 sc)
Round 3 (shell continuation): Sl st across the 2 dc of the shell to reach the center dc of that shell. Ch 1. Sc into the center dc of the first shell. (Shell into the sc from the previous round, sc into the center dc of the next shell) 11 times. Shell into the last sc. Join with sl st to first sc. (12 shells, 12 sc)
Rounds 4 through 9: Repeat Round 3. (12 shells, 12 sc per round)
Round 10: Repeat Round 3. (12 shells, 12 sc)
Round 11: Repeat Round 3. (12 shells, 12 sc)
Round 12: Repeat Round 3. (12 shells, 12 sc)
Checkpoint: After Round 12, the skirt should measure approximately 7 in / 18 cm from the waist.
Section 6: Scallop Border (Color B)
The scallop border replaces the final shell round with a decorative finished edge.
Round 13 (scallop border):
Ch 3 (counts as first dc), work 4 more dc into the same sc stitch (first shell of border = 5 dc total).
(Sc into the center dc of the next shell from Round 12, skip 2 dc of that shell on each side, shell of 5 dc into the next sc) 11 times.
Sc into the center dc of the last shell.
Join with sl st to the top of the beginning ch-3.
Fasten off Color B.
The scallop border produces 12 scallop shells with sc stitches between them, giving the finished scalloped hemline.
Section 7: Finishing
Seam:
With RS together, using Color A and a yarn needle, whipstitch or mattress stitch the left and right back selvedge edges together from the waist up to within 1.5 in / 4 cm of the neckline. The remaining 1.5 in / 4 cm at the top is left open as the back neck opening.
Optional Button Closure (back neck):
Work a row of sc along each back opening edge. On one edge, add a chain-2 button loop at the top corner. Sew a small button to the opposite edge.
Ribbon Waistband:
Thread the 18-inch / 46 cm length of white satin ribbon through the eyelet spaces of Rows 22 and 23, beginning and ending at the center front. Tie into a bow or knot. Trim ribbon ends at an angle or seal with a lighter flame to prevent fraying.
Bow Embellishment:
Hand-sew or pin the mint green satin bow over the ribbon at the center front waist. Secure the daisy button or embellishment to the center knot of the bow using sewing needle and matching thread. Knot securely on the WS.
Weave in all ends on the WS of the work.
Blocking Your Finished Dress
Wet blocking is recommended, particularly if you have used a natural fiber yarn. Soak the completed dress in cool water for 15 to 20 minutes, gently press out excess water in a clean towel (do not wring), and lay flat to dry on a blocking mat. Pin the scalloped hem edge to shape each scallop evenly. Allow to dry completely before removing pins.
If using an acrylic yarn, steam blocking with a steam iron held 1 to 2 inches above the surface (never touching the iron directly to acrylic) will relax the stitches and even out the texture.
Care Instructions
Machine washable acrylic yarns: Machine wash on gentle cycle in cold water. Lay flat to dry.
Wool or wool-blend yarns: Hand wash in cool water with gentle wool wash. Do not wring. Lay flat to dry.
Remove the satin ribbon and bow before washing to prevent color bleed. Reattach after the dress is fully dry.
Size Customization Tips
To size up to 6 to 12 months:
To size down to 0 to 3 months:
You Did It!
Thank you so much for choosing this pattern for your next baby project. I truly hope you enjoy making this sweet little dress as much as I enjoyed designing it. There’s nothing quite like seeing a handmade garment on a little one, and I know whoever receives this will treasure it.
If you make this dress, I would absolutely love to see it! Tag me on Instagram or share a photo in my Facebook group. Seeing your finished projects is honestly the best part of my day.
Go ahead and save this pattern to your Pinterest boards so you can find it easily when you’re ready to start. And if you have any questions or just want to share how yours turned out, drop a comment below. I read every single one and love hearing from you!
You Might Also Like
- Ocean Blues Granny Square Bag Free Crochet Pattern
- Dusty Rose Boho Romper Free Crochet Pattern
- Buttercream Yellow Dragon Amigurumi Plush Free Crochet Pattern
- Ocean Wave Butterfly Crochet Dress Free Pattern
