
When I started designing this anklet, I had one clear vision in my head. I wanted to create something whimsical that would make people smile, something that combined my love of tiny amigurumi with wearable accessories. The challenge was keeping everything miniature enough to be delicate but sturdy enough to actually wear.
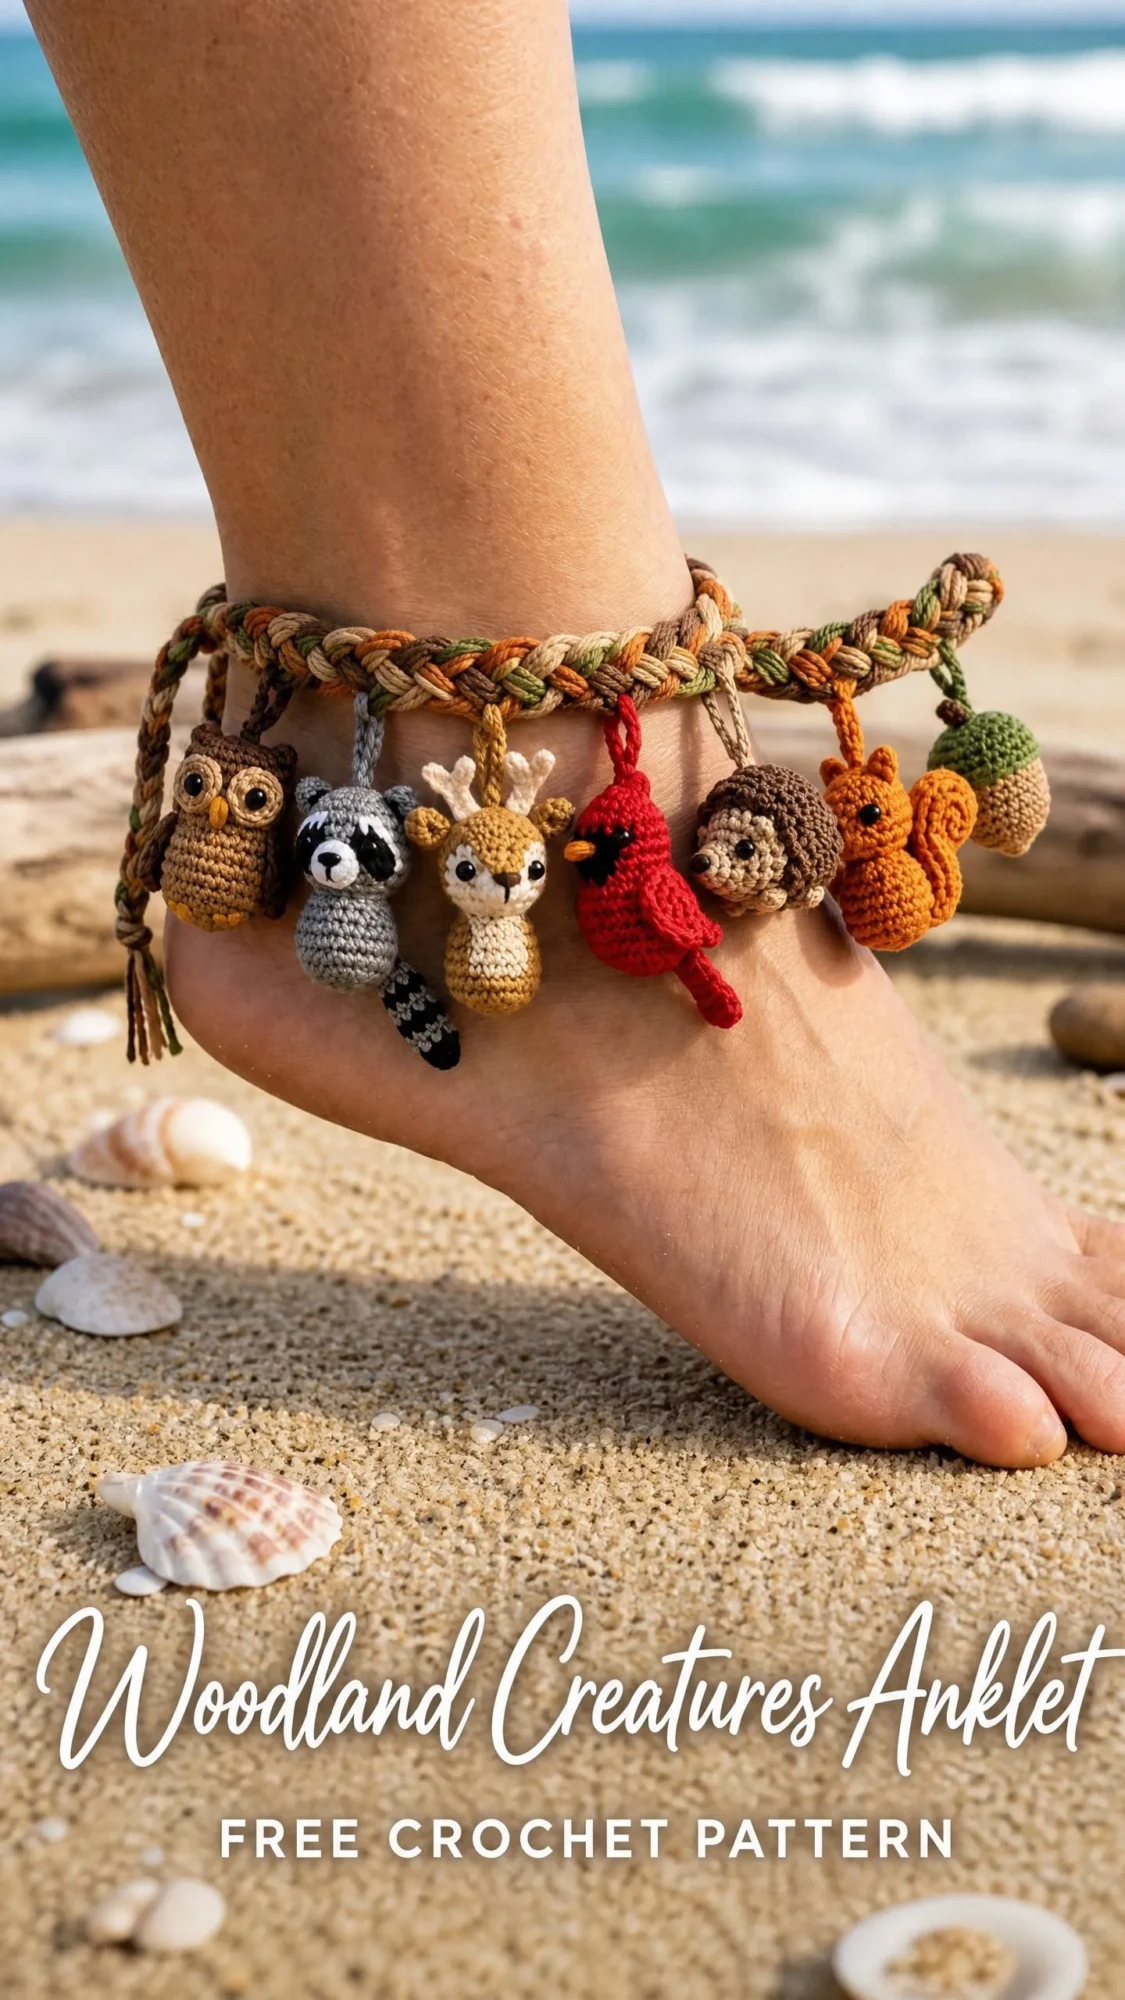
I spent weeks perfecting each little woodland friend. The owl needed the right face proportions. The cardinal had to pop with that bright red against the earthy band. And that little acorn? It took three tries to get the cap sitting just right on the body.
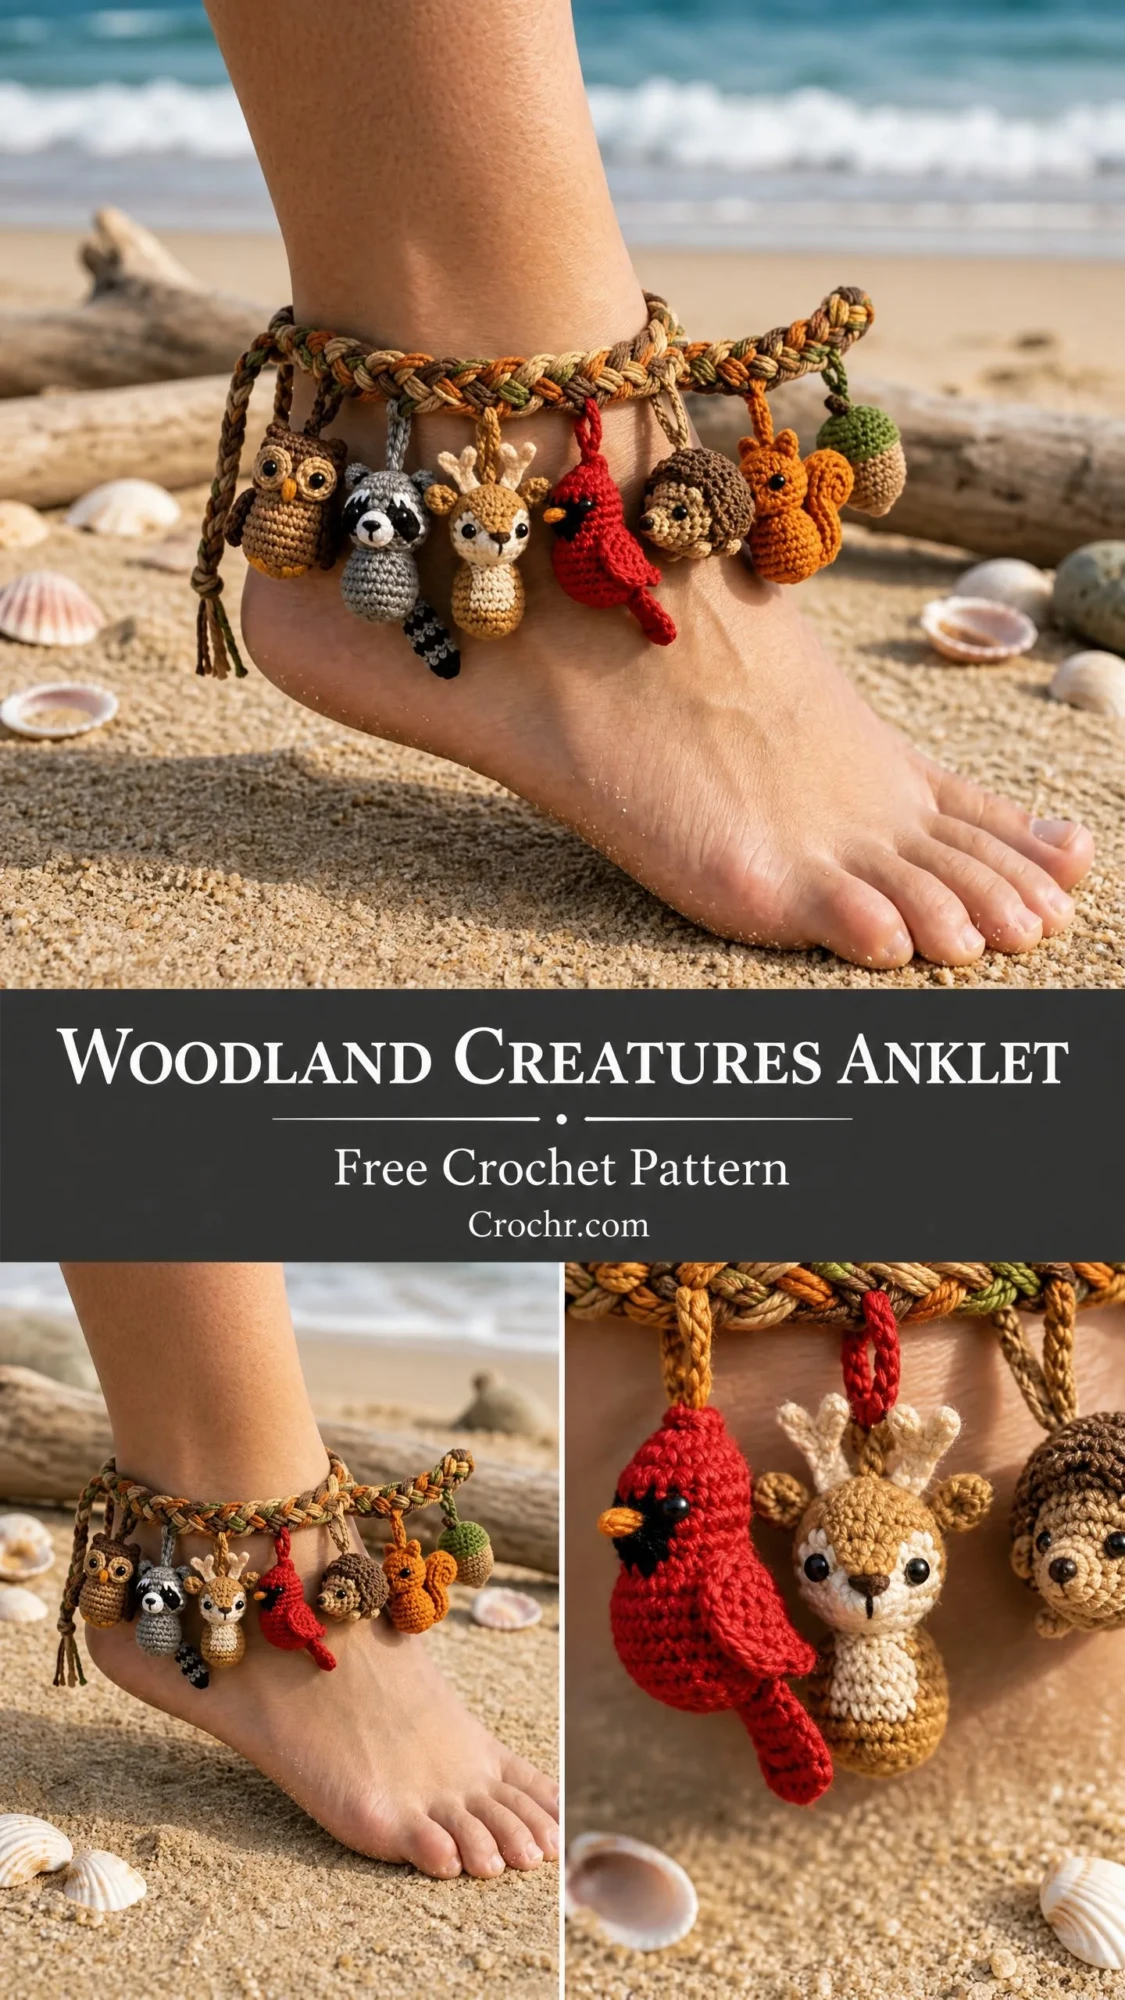
I am SO pleased with how this turned out! Seven tiny creatures dangling from a braided cord, each one crocheted in the round with perfect little details. This is the kind of project that makes you feel like a crochet wizard when you finish it.
About This Woodland Creatures Anklet Pattern
This anklet features a braided multi-strand cord band worked in earthy tones with seven miniature amigurumi charms hanging from it. Amigurumi is the Japanese art of crocheting small stuffed creatures, and these might be the tiniest ones you will ever make.
The charm lineup includes an owl, a raccoon, a deer, a cardinal bird, a hedgehog, a squirrel, and an acorn. Each one is crocheted in continuous rounds, lightly stuffed, and attached to the band with a short loop. The palette runs through warm browns, tawny golds, mossy greens, cool greys, and a gorgeous pop of cardinal red.
The band itself is constructed by braiding multiple strands of thread-weight yarn together. The ends are finished with tassel ties for an adjustable fit. You can wrap this around your ankle and tie it to your exact size.
Skill Level and Time Commitment
I will be honest with you. This is an advanced pattern. You need to be comfortable with working in the round at a tiny scale, color changes within rounds, surface embroidery for facial details, and constructing a braided cord.
Each charm involves shaping, color work, and assembly of small separate pieces like ears, antlers, and tails. If you are newer to amigurumi, I recommend making a few larger stuffed animals first before attempting these mini versions.
Time estimate: Approximately 12 to 18 hours total. The braided band takes about 30 to 45 minutes. Each charm takes between 1 and 2.5 hours depending on complexity. The deer and raccoon are the most time-consuming due to their multi-piece construction.
Finished Measurements
Band: approximately 9 inches (23 cm) total length with tie ends, fitting an ankle circumference of 7 to 9 inches (18 to 23 cm). The tie ends allow for adjustability.
Each charm: approximately 0.75 to 1 inch (2 to 2.5 cm) tall when assembled. These are genuinely tiny, which is part of their charm.
Materials Needed
Yarn: Size 10 crochet thread or fingering weight yarn, approximately 400 yards (366 m) total across all colors.
Colors needed:
Hooks:
Other materials:
Yarn Suggestions
Aunt Lydia’s Classic Crochet Thread Size 10 is widely available with a firm twist. It holds tiny stitch definition well and is excellent for amigurumi at this scale.
DMC Natura Just Cotton in fingering weight is soft with good stitch clarity. The slight sheen enhances the cardinal red especially.
Scheepjes Catona in fingering or thread weight has an extensive color range. You can match all the woodland palette colors from a single brand.
Substitution note: Any thread or yarn that achieves the gauge below will work. Avoid stretchy yarns such as acrylic at this weight as they blur stitch definition in miniature work. Cotton and cotton-blend threads perform best for maintaining the firm, round shape needed in amigurumi at this small scale.
Gauge
Using size 7 steel hook (1.65 mm) and size 10 crochet thread:
6 single crochet (sc) stitches = 0.5 inch (1.27 cm)
6 rows = 0.5 inch (1.27 cm)
Exact gauge is not critical for the band, but each charm should measure approximately 0.75 to 1 inch (2 to 2.5 cm) in diameter after stuffing. Adjust hook size smaller if charms are too loose and stuffing shows through.
Abbreviations (US Terms)
Let me walk you through every abbreviation before we start. This way you will not get confused mid-charm.
Special Stitches Explained
Magic Ring (MR)
This is how you start almost every charm. Make a loop with yarn, crossing the tail end behind the working yarn. Insert hook through the center of the loop, yarn over with working yarn and pull up a loop. Chain 1 to secure. This chain does not count as a stitch.
Work the required number of stitches into the center of the ring. Pull tail end firmly to close the ring before continuing. The beauty of the magic ring is that it closes completely with no hole in the center.
Invisible Decrease (dec)
This creates a much cleaner decrease than the standard sc2tog. Insert hook under the front loop only of the next stitch, then insert hook under the front loop only of the following stitch. You now have 3 loops on hook.
Yarn over and pull through the first 2 loops. Yarn over and pull through the remaining 2 loops. This produces a tighter, less visible decrease that keeps your amigurumi looking smooth.
Braided Cord
Cut strands of thread to the required length. Group strands into three equal bundles. Hold all three bundles at one end and secure temporarily.
Cross the right bundle over the center bundle, so right becomes center. Cross the left bundle over the new center bundle, so left becomes center. Repeat, alternating right over center and left over center, maintaining even tension throughout. Secure the end when the braid reaches the desired length.
Important Pattern Notes
All charms are worked in continuous rounds unless otherwise stated. Do not join at the end of each round unless instructed. Use a stitch marker to track the beginning of each round. This is essential for keeping count.
Stuff each charm firmly but not so tightly that stitches distort. Add stuffing gradually as you work the final rounds so the closing is easier.
Leave a long tail when fastening off each piece. Use this tail to sew pieces together and to attach charms to the band.
Facial details like eyes, nose, and mouth are added after the charm is assembled and stuffed, using embroidery or small safety eyes.
Make the braided band first so you can test the finished length against your ankle before making all seven charms.
The six front-facing charms from left to right when worn are: owl, raccoon, deer, cardinal, hedgehog, squirrel. The acorn hangs slightly to the right of the squirrel.
All color changes are worked by completing the last yarn over of the old color with the new color.
Braided Band Instructions
Cut the following strands of Color I thread, each measuring 36 inches (91.5 cm) long. You need 12 strands total, which will be divided into 4 strands per bundle for a full braid.
Bundle A: 4 strands
Bundle B: 4 strands
Bundle C: 4 strands
Align all strands and tie a simple overhand knot at one end, leaving a 3 inch (7.5 cm) tail beyond the knot. This becomes one tie end.
Braid the three bundles together following the Braided Cord instructions above. Continue braiding for approximately 9 inches (23 cm) total, or to your desired ankle circumference plus 2 inches (5 cm) extra for ease and charm attachment room.
Tie an overhand knot at the other end, again leaving a 3 inch (7.5 cm) tail.
Unravel the tails beyond each knot into individual strands and trim to even lengths to create the fringe and tassel ties.
Checkpoint: The finished braided band before charm attachment should measure 9 inches (23 cm) knot to knot with tassels extending 3 inches (7.5 cm) beyond each knot.
Attachment Loops for Charms
Cut 7 pieces of Color A or matching thread, each 4 inches (10 cm) long.
Fold each piece in half to form a loop. Use a yarn needle to thread the loop through the braid at the desired attachment point, then pass the cut ends through the loop and pull snug. This is called a lark’s head knot. Leave the two tail ends hanging, approximately 1.5 inches (3.8 cm) each. These tails will later be threaded through the top of each finished charm to secure it.
Placement from left to right across the front of the band:
Owl Charm
Body
Using Color A:
Rnd 1: MR, 6 sc into ring. (6 sc)
Rnd 2: inc in each st around. (12 sc)
Rnd 3: (sc in next st, inc in next st) 6 times. (18 sc)
Rnd 4: (sc in next 2 sts, inc in next st) 6 times. (24 sc)
Rnd 5: sc in each st around. (24 sc)
Rnd 6: sc in each st around. (24 sc)
Change to Color C for center face panel on next round, working a color block across 8 stitches as follows:
Rnd 7: sc in next 8 sts in Color A, sc in next 8 sts in Color C, sc in next 8 sts in Color A. (24 sc)
Rnd 8: sc in next 8 sts in Color A, sc in next 8 sts in Color C, sc in next 8 sts in Color A. (24 sc)
Rnd 9: (sc in next 2 sts, dec) 6 times. (18 sc)
Begin stuffing now.
Rnd 10: (sc in next st, dec) 6 times. (12 sc)
Rnd 11: dec 6 times. (6 sc)
Finish stuffing. Close. FO, leave long tail.
Ears (make 2)
Using Color A:
MR, 4 sc into ring. (4 sc)
Sl st to first sc. FO, leave tail. These are small tufted ear shapes.
Eyes (make 2)
Using Color F (tawny gold) for the eye disc:
MR, 6 sc into ring. (6 sc)
Sl st, FO. Embroider a black pupil in center or use 3mm safety eye.
Wing Accents
Using Color E, embroider 2 to 3 straight stitches on each side of the body to suggest feather texture.
Assembly
Sew ears to top of head, spaced 4 stitches apart. Attach eye discs centered on the Color C face panel, spacing them 3 stitches apart. Embroider a small V-shape beak below eyes in Color F. Attach completed owl to Loop 1 on band by threading the loop tails through the top of the owl body and knotting securely on the inside.
Raccoon Charm
Body
Using Color B (medium grey):
Rnd 1: MR, 6 sc into ring. (6 sc)
Rnd 2: inc in each st around. (12 sc)
Rnd 3: (sc in next st, inc in next st) 6 times. (18 sc)
Rnd 4: (sc in next 2 sts, inc in next st) 6 times. (24 sc)
Rnd 5: sc in each st around. (24 sc)
Rnd 6: sc in each st around. (24 sc)
Rnd 7: sc in each st around. (24 sc)
Rnd 8: (sc in next 2 sts, dec) 6 times. (18 sc)
Begin stuffing.
Rnd 9: (sc in next st, dec) 6 times. (12 sc)
Rnd 10: dec 6 times. (6 sc)
Finish stuffing. Close. FO, leave long tail.
Tail
Using Color B:
Rnd 1: MR, 6 sc into ring. (6 sc)
Rnd 2: inc in each st around. (12 sc)
Rnd 3: sc in each st around. (12 sc)
Rnd 4: sc in each st around. (12 sc)
Change to Color H (black):
Rnd 5: sc in each st around. (12 sc)
Change to Color B:
Rnd 6: sc in each st around. (12 sc)
Change to Color H:
Rnd 7: sc in each st around. (12 sc)
Rnd 8: (dec) 6 times. (6 sc)
Lightly stuff tail. Close. FO, leave tail.
Face
Using Color C, embroider or sew a small oval muzzle shape on lower center of face. Using Color H, embroider mask stripes across eyes: two diagonal lines from inner eye outward to each side, then fill in above each eye with a few satin stitches. Embroider small black oval nose. Add 3mm safety eyes or embroider eyes between mask stripes.
Ears (make 2)
Using Color B:
MR, 5 sc into ring. (5 sc)
Sl st. FO. Sew to top of head, spaced 4 stitches apart.
Assembly
Attach tail to lower back of body. Attach raccoon to Loop 2 on band.
Deer Charm
Body
Using Color A:
Rnd 1: MR, 6 sc into ring. (6 sc)
Rnd 2: inc in each st around. (12 sc)
Rnd 3: (sc in next st, inc in next st) 6 times. (18 sc)
Rnd 4: (sc in next 2 sts, inc in next st) 6 times. (24 sc)
Rnd 5: sc in each st around. (24 sc)
Rnd 6: sc in each st around. (24 sc)
Rnd 7: sc in each st around. (24 sc)
Rnd 8: (sc in next 2 sts, dec) 6 times. (18 sc)
Begin stuffing.
Rnd 9: (sc in next st, dec) 6 times. (12 sc)
Rnd 10: dec 6 times. (6 sc)
Finish stuffing. Close. FO.
Ears (make 2)
Using Color A:
Ch 4.
Row 1: sc in 2nd ch from hook, sc in next ch, 3 sc in last ch (this forms the tip). Working back along the other side of the foundation chain: sc in next 2 chs. (7 sc total)
Ch 1, turn.
Row 2: sl st in each st across. FO. Leave tail.
The ear should be a small oval or leaf shape approximately 0.5 inch (1.3 cm) tall.
Antlers (make 2)
Using Color E (dark brown):
Ch 6.
Sl st in 2nd ch from hook, sl st in next ch, ch 3, sl st in 2nd ch from hook, sl st in next ch (this creates the branch fork). Continue sl st in remaining 3 chs of original chain. FO, leave tail.
Each antler should resemble a small Y-shape, approximately 0.5 inch (1.3 cm) tall.
Face
Using Color C, embroider a small muzzle on lower face. Embroider or attach 3mm safety eyes. Add a small black nose.
Assembly
Sew antlers to top of head, spacing them 2 stitches apart in the center. Sew ears to sides of head just below antlers. Attach deer to Loop 3 on band.
Cardinal Charm
Body
Using Color D (cardinal red):
Rnd 1: MR, 6 sc into ring. (6 sc)
Rnd 2: inc in each st around. (12 sc)
Rnd 3: (sc in next st, inc in next st) 6 times. (18 sc)
Rnd 4: (sc in next 2 sts, inc in next st) 6 times. (24 sc)
Rnd 5: sc in each st around. (24 sc)
Rnd 6: sc in each st around. (24 sc)
Rnd 7: (sc in next 2 sts, dec) 6 times. (18 sc)
Begin stuffing.
Rnd 8: (sc in next st, dec) 6 times. (12 sc)
Rnd 9: dec 6 times. (6 sc)
Finish stuffing. Close. FO.
Crest
Using Color D:
Ch 5.
Sl st in 2nd ch from hook, sl st in next 3 chs. FO, leave tail.
This creates a small pointed crest or tuft approximately 0.4 inch (1 cm) long.
Wing Detail
Using a slightly darker red thread or Color E, embroider 3 straight stitches on each side of body to suggest wing feathers.
Face
Using Color H, embroider a small black mask around the eyes. Embroider or attach 3mm safety eyes. Using a small amount of yellow or cream thread, embroider a short triangular beak in the center of the face.
Assembly
Sew crest to top of head. Add facial details. Attach cardinal to Loop 4 (center) on band.
Hedgehog Charm
The hedgehog body is worked with a textured stitch for the spine area.
Body
Using Color E (dark brown) for spine back:
Rnd 1: MR, 6 sc into ring. (6 sc)
Rnd 2: inc in each st around. (12 sc)
Rnd 3: (sc in next st, inc in next st) 6 times. (18 sc)
Rnd 4: (sc in next 2 sts, inc in next st) 6 times. (24 sc)
Rnd 5 (texture round): (sc in BLO of next st, ch 2, sl st in 2nd ch from hook, sc in BLO of next st) 12 times. This creates small spike texture around the upper body. (24 sc base stitches worked, 12 spikes added)
Rnd 6: sc in each BLO of sts from previous round. (24 sc)
Change to Color C (cream) for face and belly section: change color over next 8 stitches only.
Rnd 7: sc in next 8 sts in Color E, sc in next 8 sts in Color C, sc in next 8 sts in Color E. (24 sc)
Rnd 8: (sc in next 2 sts, dec) 6 times. (18 sc)
Begin stuffing.
Rnd 9: (sc in next st, dec) 6 times. (12 sc)
Rnd 10: dec 6 times. (6 sc)
Finish stuffing. Close. FO.
Face
Embroider a small black oval nose. Embroider or attach 3mm safety eyes on the Color C face section. Add a small curved smile in black thread if desired.
Assembly
Attach hedgehog to Loop 5 on band.
Squirrel Charm
Body
Using Color F (burnt orange or tawny gold):
Rnd 1: MR, 6 sc into ring. (6 sc)
Rnd 2: inc in each st around. (12 sc)
Rnd 3: (sc in next st, inc in next st) 6 times. (18 sc)
Rnd 4: (sc in next 2 sts, inc in next st) 6 times. (24 sc)
Rnd 5: sc in each st around. (24 sc)
Rnd 6: sc in each st around. (24 sc)
Rnd 7: sc in each st around. (24 sc)
Rnd 8: (sc in next 2 sts, dec) 6 times. (18 sc)
Begin stuffing.
Rnd 9: (sc in next st, dec) 6 times. (12 sc)
Rnd 10: dec 6 times. (6 sc)
Finish stuffing. Close. FO.
Ears (make 2)
Using Color F:
MR, 5 sc into ring. (5 sc)
Sl st. FO. Leave tail.
Tail
Using Color F:
Rnd 1: MR, 6 sc into ring. (6 sc)
Rnd 2: inc in each st around. (12 sc)
Rnd 3: (sc in next st, inc in next st) 6 times. (18 sc)
Rnd 4: sc in each st around. (18 sc)
Rnd 5: sc in each st around. (18 sc)
Rnd 6: (sc in next st, dec) 6 times. (12 sc)
Rnd 7: (dec) 6 times. (6 sc)
Do not stuff. Close. FO. Leave long tail.
The tail is a flat oval puff shape. Curl one edge slightly and tack in place with a few stitches to give it a curved fluffy appearance.
Face
Using Color C, embroider a small oval muzzle. Embroider or attach 3mm safety eyes. Add a small black nose.
Assembly
Sew ears to top of head. Attach tail to lower back of body, curving it upward so it arches over the back. Attach squirrel to Loop 6 on band.
Acorn Charm
Acorn Body (lower cup shape)
Using Color F (burnt orange or tawny gold):
Rnd 1: MR, 6 sc into ring. (6 sc)
Rnd 2: inc in each st around. (12 sc)
Rnd 3: (sc in next st, inc in next st) 6 times. (18 sc)
Rnd 4: sc in each st around. (18 sc)
Rnd 5: sc in each st around. (18 sc)
Rnd 6: (sc in next st, dec) 6 times. (12 sc)
Begin stuffing.
Rnd 7: dec 6 times. (6 sc)
Close. FO. Leave tail.
Acorn Cap
Using Color E (dark brown):
Rnd 1: MR, 6 sc into ring. (6 sc)
Rnd 2: inc in each st around. (12 sc)
Rnd 3: (sc in next st, inc in next st) 6 times. (18 sc)
Rnd 4: BLO sc in each st around. (18 sc)
Rnd 5: (sc in next st, dec) 6 times. (12 sc)
Do not stuff. FO, leave long tail.
Cap Stem
Using Color G (mossy green):
Ch 4. Sl st in 2nd ch from hook, sl st in next 2 chs. FO, leave tail.
This creates a small stem nub approximately 0.3 inch (7 mm) long.
Assembly
Sew cap to top of acorn body, aligning openings. The BLO row on Round 4 of the cap creates a slight brim or ridge where it meets the body. Attach stem to top center of cap. Attach acorn to Loop 7 on band.
Checkpoint: After assembling all seven charms and attaching them to the band, hold the anklet up and check that charms hang at similar heights and are evenly distributed across the front. Adjust loop lengths if any charm hangs noticeably higher or lower than its neighbors.
Finishing and Blocking
Weave in all ends securely on each charm. On amigurumi at this scale, pull tails through to the interior of the stuffed body before trimming to hide them completely.
For the braided band, apply a tiny drop of craft glue or fray check to the inner side of each knot if the thread tends to loosen.
Trim tassel ends to even lengths with sharp scissors.
Gently steam block the braided band only, not the charms, if it has twisted during construction. Pin flat, spritz lightly with water, and allow to dry fully before removing pins.
Do not steam block the stuffed charms as heat can distort the fiberfill and compress the stitches.
If 3mm safety eyes were used, ensure they are secured on the inside with the washers before closing the final rounds of each charm, as they cannot be inserted after closing.
Size Customization Tips
For a smaller ankle under 7 inches (18 cm): Shorten the braid by 1 inch (2.5 cm) and trim tassels accordingly.
For a larger ankle over 9 inches (23 cm): Extend the braid by 1 to 2 inches (2.5 to 5 cm). The tie ends always provide approximately 3 to 4 inches (7.5 to 10 cm) of additional adjustability.
To add more charms: Mushrooms, berries, a fox, or a bear can be designed using the same basic 6-increase magic ring formula used for the owl and raccoon bodies. Simply add additional attachment loops evenly spaced when braiding.
To make it a bracelet: Shorten the braid to 7 inches (18 cm) knot to knot and use fewer charms. Three or four work best for a wrist scale.
Care Instructions
Hand wash only in cool water with a small amount of gentle soap. Do not wring. Gently squeeze excess water out and lay flat to dry on a clean towel.
Keep away from prolonged direct sunlight to preserve color saturation, particularly the cardinal red and earthy tones. Do not machine wash or tumble dry.
Store flat or loosely rolled to prevent the braided cord from crimping.
Final Thoughts on This Woodland Creatures Anklet Crochet Pattern
This crochet tutorial takes you through every step of creating seven tiny woodland friends and assembling them into a wearable piece of art. Yes, it takes time. Yes, those antlers will test your patience. But when you tie this around your ankle and see those little creatures dancing with every step, it is worth every hour.
The key to success is taking it one charm at a time. Do not try to make all seven in one sitting. Spread them out over a week or two, and you will enjoy the process much more.
Thank you so much for choosing this pattern! I hope these little woodland creatures bring as much joy to make as they did to design. If you create this anklet, I would absolutely love to see it. Tag me on Instagram or share a photo on Facebook. Seeing your finished projects genuinely makes my day.
If you loved this pattern, go ahead and save it to your Pinterest boards so you can find it again when you are ready to start. And please drop a comment below if you make it. I would love to hear how your tiny owl turned out or which charm ended up being your favorite!
You Might Also Like
- Orange Ginger Cat Velvet Bow Sweater Free Crochet Pattern
- Manta Ray Crochet Beach Carryall Free Pattern
- Soft Lavender Dream Slipper Boots Free Crochet Pattern
- Mint Green Dragon Amigurumi Plush Free Crochet Pattern
