
I found this design tucked away in one of my old notebooks from years ago, sketched out during a spring afternoon when the lilacs were just starting to bloom outside my window. I had named it "Lavender Dream" right there in the margin, and honestly, I had almost forgotten about it until I was cleaning out my craft room last month.
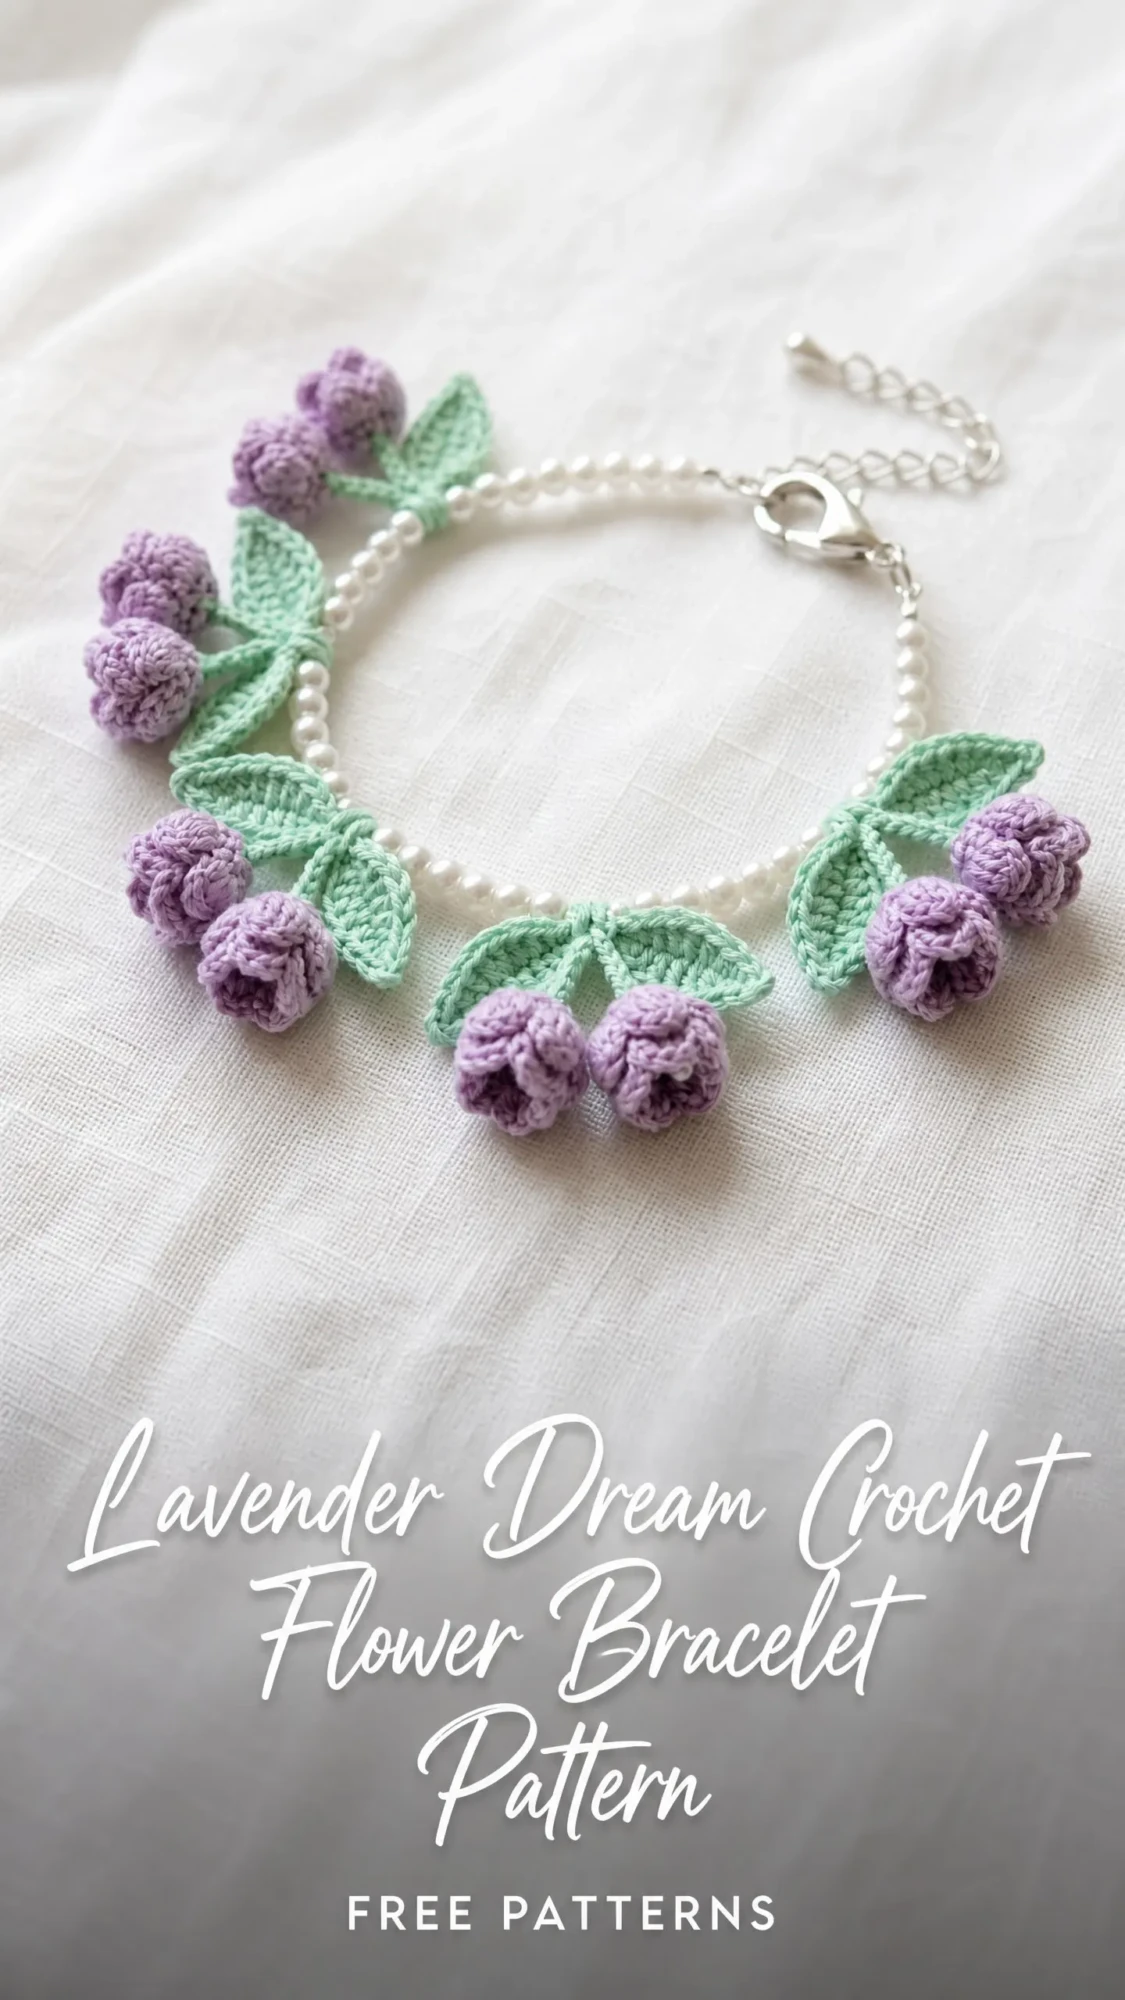
When I finally sat down to bring this bracelet to life, I remembered exactly why I had been so excited about the concept. Those tiny crocheted rosebuds paired with delicate mint leaves and a strand of pearls? It felt like something straight out of a vintage jewelry box.
Now that I have worked out every detail and tested it multiple times, I am thrilled to share this pattern with you. It is the kind of project that looks impossibly intricate but breaks down into simple, manageable pieces. Let me walk you through everything you need to know.
About This Crochet Flower Bracelet Pattern
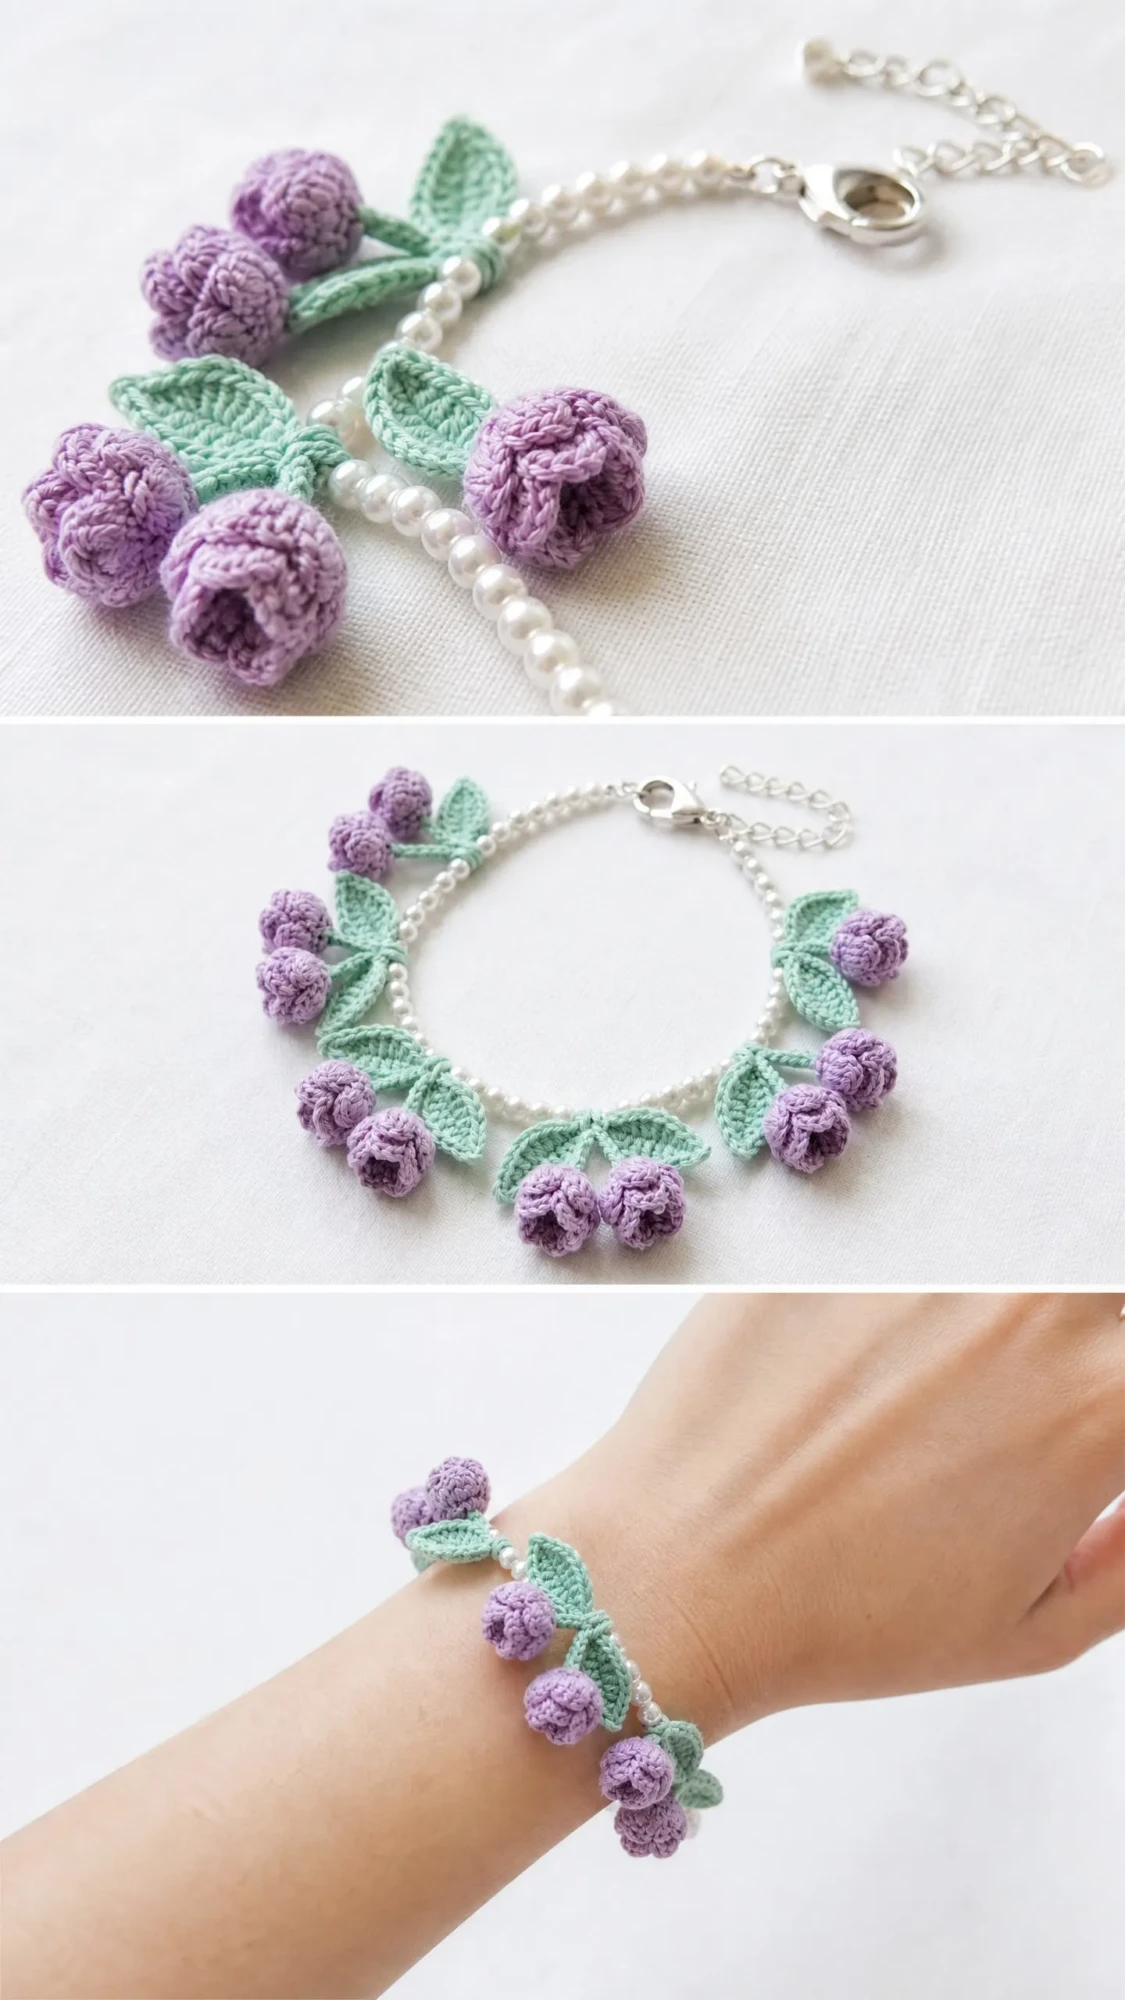
This delicate bracelet combines several techniques into one stunning piece of wearable art. You will create tiny crocheted rosebuds in soft lavender, nestled among mint green leaves, all mounted along a strand of white faux pearl beads. The result is romantic, botanical, and perfect for weddings, garden parties, or everyday wear when you want something special on your wrist.
The construction happens in stages. First, you make the individual rosebuds. Then you create the leaf motifs. After that, you prepare the pearl bead chain spine and finally join everything together with a metal clasp and extender chain. Breaking it into these steps makes the whole project feel much less overwhelming.
Skill Level: Intermediate. You should be comfortable working in very small rounds, making 3D bobble-style shapes, and crocheting tiny leaf motifs. If you have completed a few small amigurumi projects or jewelry pieces before, you are ready for this.
Time Estimate: 4 to 6 hours total, including assembly. Give yourself extra time if you are new to micro crochet or working with fine thread.
Finished Measurements
Understanding the final dimensions helps you know what to expect and troubleshoot if something looks off.
Materials You Will Need
Gathering everything before you start makes the process so much smoother. Here is your complete supply list.
Thread:
Hook:
Notions:
Recommended Yarn Choices
Not sure which thread to grab? Here are three excellent options that work beautifully for this crochet flower bracelet pattern.
DMC Petra Crochet Cotton Thread Size 10 offers a smooth, slightly shiny finish that gives the rosebuds clean definition and a subtle sheen. Try Color 54462 (soft lavender) and Color 53814 (sage/mint) for close matches to the original.
Aunt Lydia’s Classic Crochet Thread Size 10 is widely available and provides excellent stitch clarity thanks to its mercerized cotton construction. Color 486 (Orchid Pink / dusty violet range) and Color 484 (Myrtle Green) work well as substitutes.
Lizbeth Crochet Thread Size 10 by Handy Hands has a slightly softer hand with good sheen. Color 624 (Violet Medium) and Color 651 (Leaf Green) are suitable alternatives.
Important: Do not substitute with thicker yarn or embroidery floss. The motifs will end up too large to maintain proper bracelet proportions. If you substitute with size 20 thread, reduce your hook to a size 10 steel hook and expect motifs to run approximately 20% smaller.
Gauge Information
With size 7 / 1.65 mm steel hook and size 10 cotton thread:
Gauge matters here because the finished motifs must proportionally fit along a standard 6-inch pearl bead chain. If your motifs are running larger than stated, try a smaller hook. If they are running smaller, try a larger hook.
Abbreviations and Definitions
Let me walk you through every stitch abbreviation you will encounter. I have included plain-English definitions so nothing catches you off guard.
Special Stitches Explained
These two techniques give the bracelet its distinctive character. Take your time learning them before diving into the main pattern.
Puff Stitch Rosebud Shell
This stitch creates one petal-like raised shell within the rosebud. Here is how to work it step by step.
1. Insert hook into the designated stitch.
2. Yarn over, draw up a loop to approximately 0.25 inches / 0.6 cm tall (taller than a standard sc loop).
3. Without releasing, insert hook into the same stitch again.
4. Yarn over, draw up another tall loop.
5. Insert hook into the same stitch a third time.
6. Yarn over, draw up a third tall loop.
7. You now have 7 loops on the hook (original loop plus 3 pairs).
8. Yarn over and draw through all 7 loops at once.
9. Chain 1 to close and secure the puff. This ch-1 does not count as a stitch.
One completed puff stitch rosebud shell has been made.
Picot Leaf
This technique creates each individual leaf motif. Follow these steps carefully.
1. Ch 6.
2. Sl st into the 2nd ch from hook. (1 sl st made at leaf tip)
3. Sc into the next ch.
4. Hdc into the next ch.
5. Dc into the next ch.
6. Tr into the last ch (this is the base of the leaf).
7. Do not turn. Working back along the opposite side of the foundation chain:
8. Tr into the base ch (same stitch as the tr in step 6, working into the underside).
9. Dc into the next underside ch.
10. Hdc into the next underside ch.
11. Sc into the next underside ch.
12. Sl st into the last underside ch (this is the base joining point).
One completed picot leaf has been made. The leaf has a pointed tip at the sl st end and an open base at the other end.
Pattern Notes Before You Begin
Read through these tips before starting. They will save you time and frustration.
The bracelet shown features approximately 9 to 10 rosebuds and approximately 14 to 16 individual leaves arranged in groups of 2 along the bead chain spine. Count your bead chain carefully before assembly and adjust motif counts if needed.
All rosebuds are worked in Color A (Lavender). All leaves are worked in Color B (Mint Green).
Work the rosebuds in the round without turning. Do not join rounds with a sl st unless instructed. Use a stitch marker to track the beginning of each round.
Leave a 6-inch / 15-cm tail when starting and ending each motif. These tails are essential for sewing the motifs to the bead chain later.
Make all motifs first before assembling. Assembly happens with a tapestry needle and the thread tails you have left.
The bracelet is designed to wear with the rosebuds facing up, away from the skin. The back shows the plain bead chain with stitching.
Step by Step Crochet Bracelet Instructions
Now for the fun part. Let me guide you through creating each component of this beautiful piece.
Section 1: Rosebud (Make 9 to 10 in Color A)
Foundation: Using Color A and leaving a 6-inch / 15-cm starting tail, make a MR.
Round 1: Ch 1 (does not count as a stitch now or ever). Work 5 sc into the MR. Pull ring tail to close the center snugly. Do not join. Place stitch marker in first sc. (5 sc)
Round 2: Work 2 sc into each st around. (10 sc)
Round 3: Work 1 puff stitch rosebud shell (see Special Stitches) into each of the 10 sts around. After completing all 10 puff shells, sl st into the top of the first puff shell to join and close the round. (10 puff shells)
Finishing the rosebud: Fasten off, leaving a 6-inch / 15-cm tail. Thread the starting tail onto the tapestry needle and weave it through the back loops of the Round 1 stitches to gently cinch the bottom of the rosebud closed. This gives it a slightly cupped, bud-like shape. Tie off and leave both tails for attachment.
Checkpoint: Each completed rosebud should be roughly dome-shaped, approximately 0.5 inches / 1.3 cm across, with 10 small puff petals visible around the outside edge and a closed center on the back.
Section 2: Individual Leaves (Make 28 to 32 in Color B)
The leaves are made in pairs for attachment. Each leaf is made individually following the Picot Leaf instructions from the Special Stitches section.
Single Leaf:
Using Color B, leave a 6-inch / 15-cm starting tail.
Ch 6.
Sl st into the 2nd ch from hook. (1 sl st at tip)
Sc into the next ch. (1 sc)
Hdc into the next ch. (1 hdc)
Dc into the next ch. (1 dc)
Tr into the last ch. (1 tr)
Working back along the opposite side of the foundation chain:
Tr into the base ch (same stitch as the first tr, underside). (1 tr)
Dc into the next underside ch. (1 dc)
Hdc into the next underside ch. (1 hdc)
Sc into the next underside ch. (1 sc)
Sl st into the last underside ch. (1 sl st at base)
Fasten off, leaving a 6-inch / 15-cm tail.
Repeat to make 28 to 32 leaves total. They will be attached in pairs positioned to angle outward like a V-shape, with each grouping flanking a rosebud along the chain.
Checkpoint: Each leaf should be approximately 0.5 inches / 1.3 cm long with a defined pointed tip and a slightly cupped shape. If leaves are curling too much, lightly mist with water, pin flat, and allow to dry before assembly.
Section 3: Leaf Spine Strip (Make 1 in Color B)
This optional connecting strip helps anchor the leaf motifs along the top of the bead chain in an even vine-like line. If you prefer to sew each leaf directly to the bead chain without a connecting strip, you may skip this section and proceed to Assembly.
Using Color B, leave a 6-inch / 15-cm starting tail.
Ch 65.
Row 1: Sc into the 2nd ch from hook and into each ch across. (64 sc)
Fasten off, leaving a 6-inch / 15-cm tail.
This strip will be laid along the top of the pearl bead chain and stitched to it. The individual leaves are then attached along this strip at regular intervals.
Checkpoint: The finished strip should measure approximately 5.5 inches / 14 cm long. It does not need to be blocked. If your strip is significantly longer or shorter than your bead chain, adjust the starting chain count by adding or removing stitches in increments of 2.
Section 4: Assembly
This is where everything comes together. Take your time with this section.
Step 1: Prepare the bead chain.
Cut or purchase your pearl bead chain to a length of approximately 6 inches / 15 cm. If your chain has finished ends on both sides, set aside for attachment. If you are cutting from a longer strand, use scissors to cut between beads cleanly.
Step 2: Attach the leaf spine strip to the bead chain.
Lay the leaf spine strip along the top of the bead chain so the strip sits on the outer (top) surface of the chain. Thread a tapestry needle with a 12-inch / 30-cm length of Color B. Using small whip stitches or overcast stitches, sew the leaf spine strip to the bead chain every 3 to 4 beads, catching both a chain link between beads and a stitch in the strip. Do not pull too tightly. The strip should lay naturally along the chain without bunching. Tie off and hide the thread ends under the strip.
Step 3: Attach the individual leaves.
Pair the leaves in groups of 2. Position each pair so the two leaves splay outward from a central point, like a small V or spray. Using the thread tails remaining on each leaf, sew each pair to the leaf spine strip, spacing the pairs approximately 0.5 to 0.6 inches / 1.3 to 1.5 cm apart along the strip. There should be a grouping of 2 leaves positioned between every adjacent pair of rosebuds, and also at both ends of the bracelet. Secure all tails by weaving them through the strip and the chain, tying small knots, and optionally sealing with a tiny dot of fabric glue or clear nail polish.
Step 4: Attach the rosebuds.
Position the rosebuds along the bracelet at regular intervals, each rosebud sitting atop or just in front of a leaf-pair grouping. Using both thread tails from each rosebud, sew the bottom of the rosebud (the cinched back side) securely to the leaf spine strip and the underlying bead chain. Make 4 to 6 stitches through the rosebud base and through the strip to ensure each bud stays upright and does not rotate. Weave in all tails. Apply a small dot of fabric glue to each knot if desired for extra security.
Step 5: Attach the clasp.
Using needle-nose pliers, open one jump ring by twisting it sideways (not outward). Thread the jump ring through the end link of the bead chain at one end of the bracelet and through the loop of the lobster claw clasp. Close the jump ring firmly. Repeat on the other end of the bracelet, attaching the second jump ring to the end link of the bead chain and through the end link of the extender chain. Close that jump ring firmly. The lobster claw clasp hooks to any link of the extender chain to adjust length.
Final Checkpoint: The bracelet should lie flat with rosebuds evenly spaced along the front, leaves angling outward between each rosebud, the pearl bead chain visible along the inside curve, and the clasp and extender chain at one end. Hold the bracelet up to the light to confirm all attachment stitches are hidden under the motifs.
Size Customization Tips
Want to adjust the size? Here is how to modify the pattern.
For a longer bracelet (larger wrists or a looser fit):
Add 1 inch / 2.5 cm to the bead chain length. Add 1 to 2 extra rosebuds and 2 to 4 extra leaves to fill the additional length proportionally. Add 8 to 10 stitches to the leaf spine strip starting chain.
For a shorter bracelet (smaller wrists or children):
Reduce the bead chain to 5 inches / 12.5 cm. Remove 1 rosebud and 2 to 3 leaves. Reduce the leaf spine strip starting chain by 8 to 10 stitches.
For a matching anklet:
Double all motif counts and use a bead chain of approximately 9 to 10 inches / 23 to 25.5 cm. Adjust the leaf spine strip starting chain to approximately 112 stitches for a 9-inch anklet.
For a choker necklace version:
Use a bead chain of approximately 14 to 15 inches / 35.5 to 38 cm. Make approximately 18 to 20 rosebuds and 36 to 40 leaves. Adjust the leaf spine strip starting chain to approximately 170 stitches.
Finishing and Blocking Tips
Leaf motifs benefit from light blocking. After all leaves are made and before assembly, mist them lightly with cool water, pin each one flat to a blocking mat with the tip and base pinned, and allow to dry completely. This flattens any curling and gives the leaves a crisp, defined shape.
Do not block the rosebuds. Their 3D shape is intentional and essential to the design. Pressing them flat would ruin the petal texture.
Once fully assembled, you may mist the entire bracelet lightly and allow it to dry flat. Do not submerge the assembled bracelet in water, as the jump rings and clasp may tarnish.
Weave in all thread ends securely using a tapestry needle. Trim all ends to approximately 0.1 inches / 2 to 3 mm after weaving. Apply a tiny dot of fabric glue or clear nail polish to any ends that may be visible or at risk of unraveling.
Care Instructions
Hand wash the bracelet in cool water with a small amount of gentle soap if needed for the crochet motifs. Do not submerge if the metal hardware is not waterproof. Pat dry with a clean towel and allow to air dry flat. Do not wring, twist, or place in a dryer. Do not iron directly on the motifs. Store flat or hung to prevent the rosebuds from being crushed. Keep away from prolonged exposure to direct sunlight to prevent thread color fading.
Final Thoughts on This Crochet Flower Bracelet Pattern
Thank you so much for choosing this Lavender Dream crochet flower bracelet pattern for your next project. I hope the detailed instructions make the process enjoyable and the finished piece brings you as much joy as it brought me when I finally turned that old notebook sketch into reality. If you make one, I would absolutely love to see it! Share your photos on Instagram or Facebook and tag me so I can admire your work.
If this pattern caught your eye, go ahead and save it to your Pinterest boards so you can find it whenever the mood strikes. And please drop a comment below if you give it a try. I always love hearing how projects turn out and seeing the color combinations you choose!
You Might Also Like
- Mint Green Heart Granny Square Baby Blanket Free Crochet Pattern
- Moonlight Snake Plant Amigurumi Free Crochet Pattern
- Sage Green Botanical Granny Backpack Free Crochet Pattern
- Blush Pink Bow Front Crochet Cardigan Free Pattern
