
Last fall, I found myself standing in a farmer’s market with a flimsy plastic bag threatening to spill apples everywhere. My canvas tote had finally given up after years of abuse, and I thought, "I could make something better." Not just functional, but beautiful. Something that would make me smile every time I grabbed it.
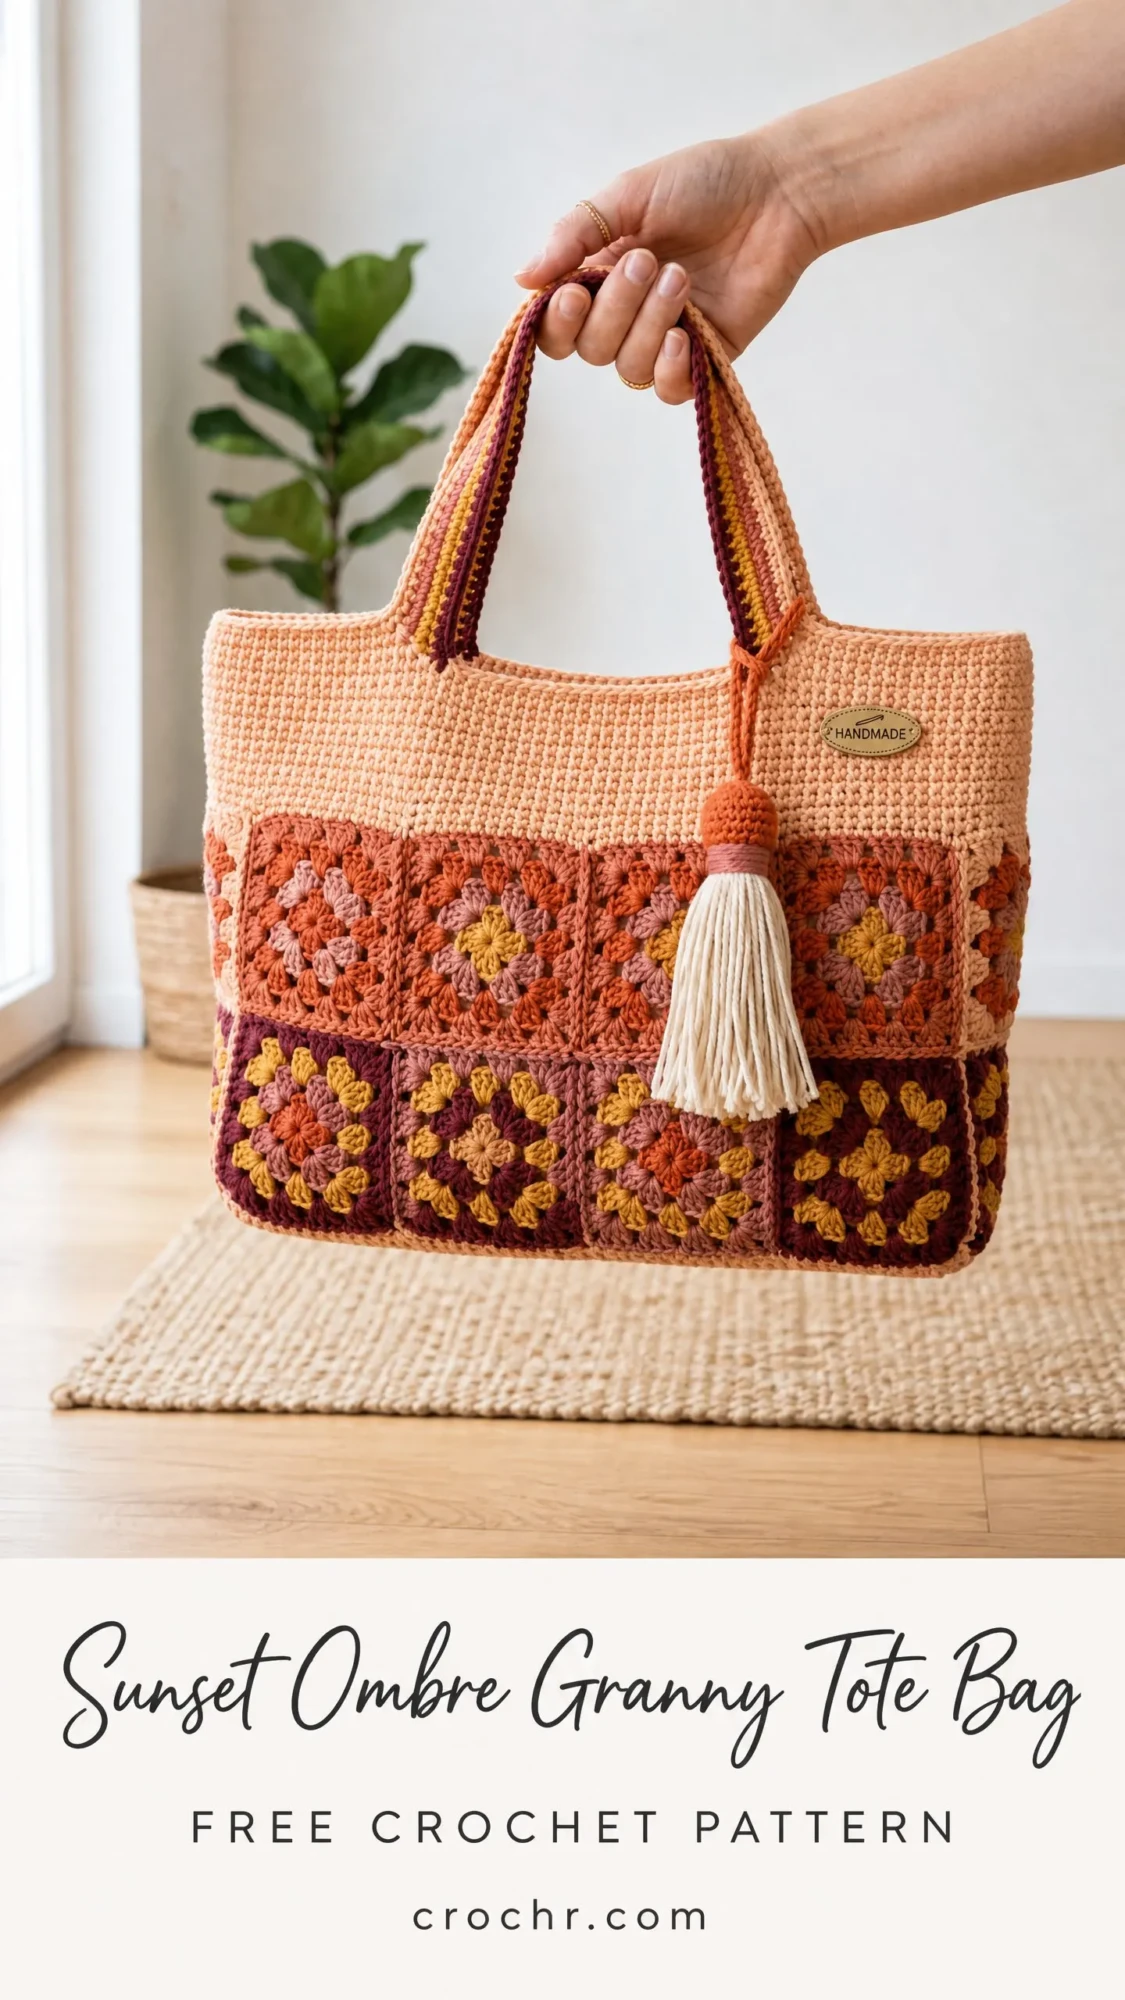
That moment sparked this design. I wanted a bag that combined the nostalgic charm of granny squares with a modern, structured shape. Something with autumn’s warmth built right into the color palette. A tote that could hold groceries, library books, or a weekend project without looking like an afterthought.
This Sunset Ombre Granny Tote Bag is everything I hoped it would be. The peach-to-burgundy gradient gives it that sunset glow, the moss stitch upper section adds sophistication, and those classic granny squares bring all the cozy handmade vibes. Let me walk you through how to make your own.
What Makes This Crochet Tote Bag Special
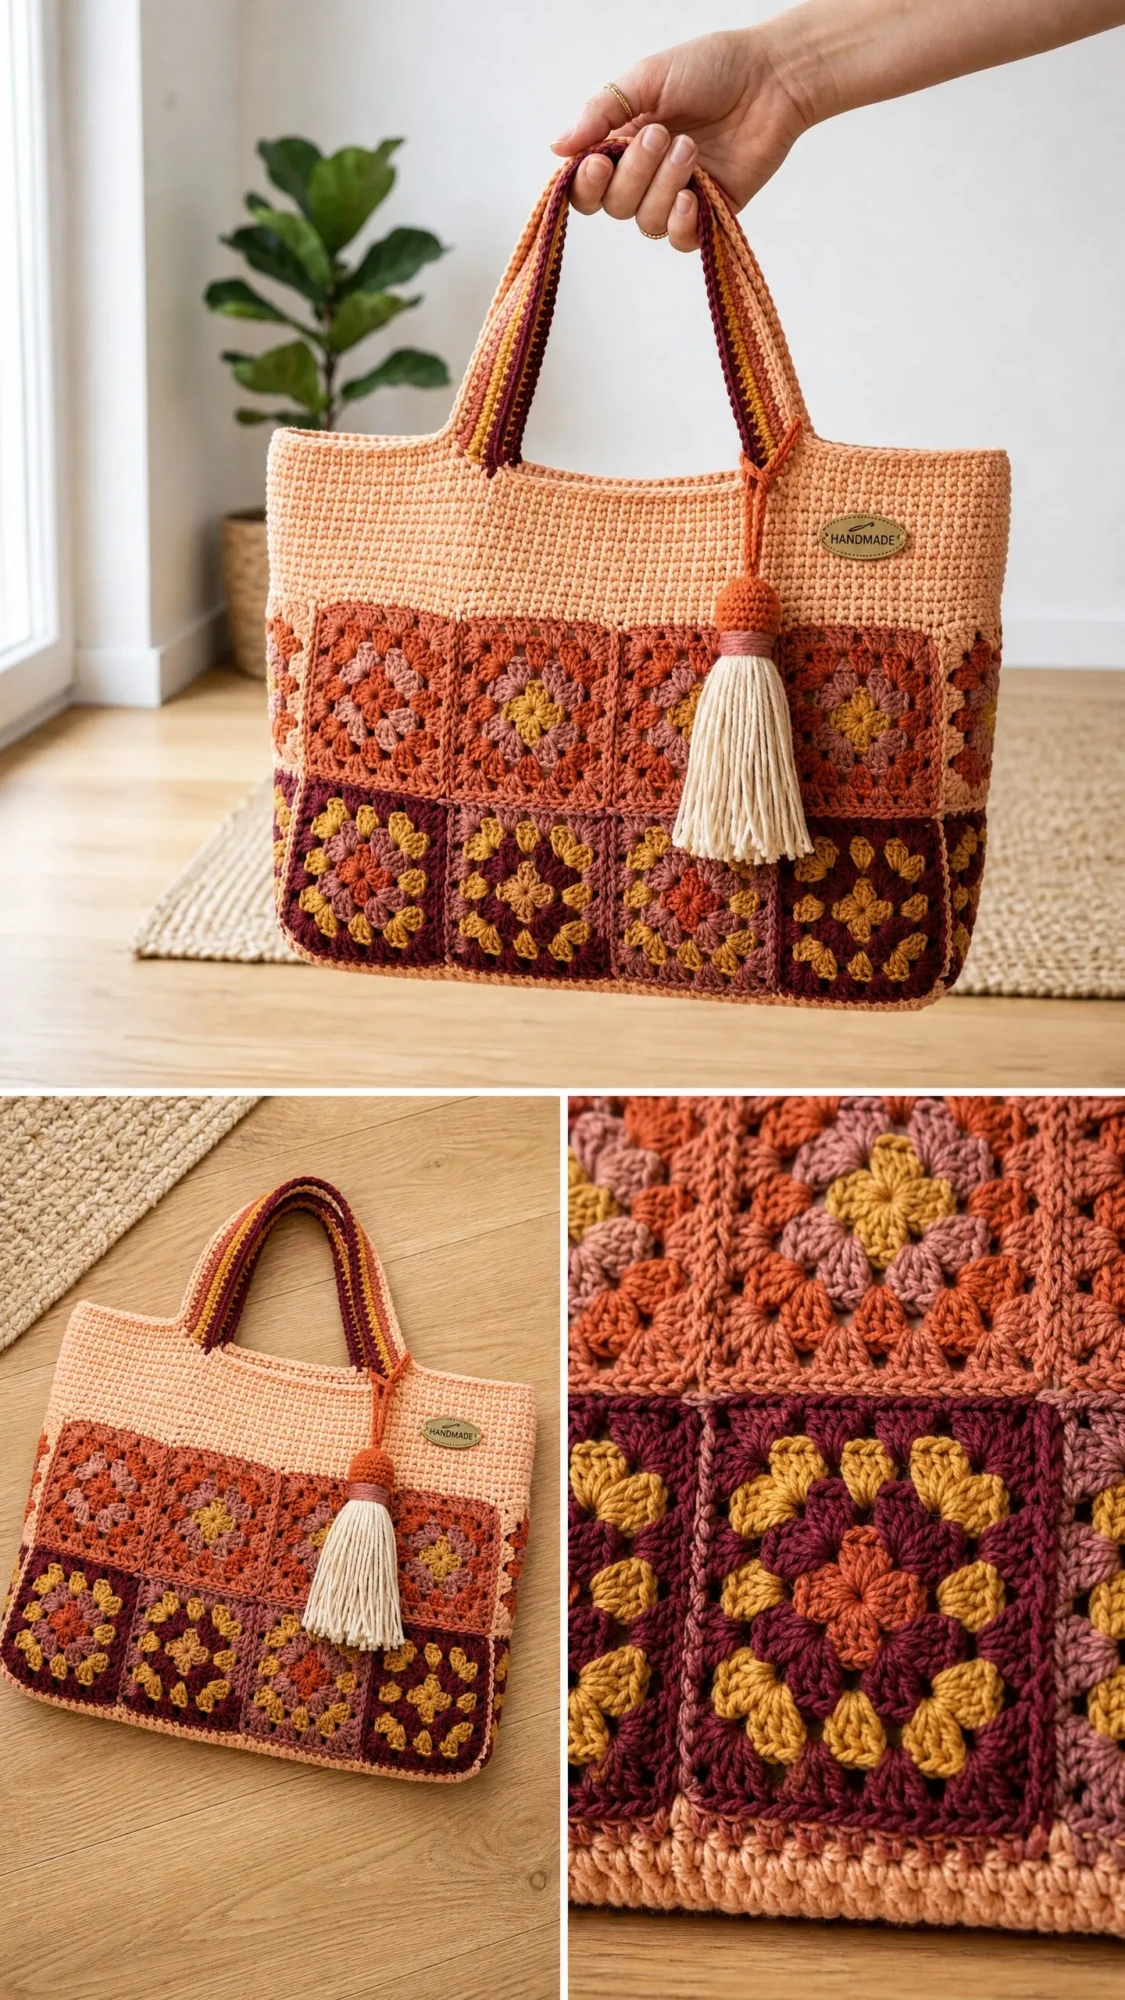
This bag combines two beloved crochet techniques into one cohesive design. The lower portion features classic granny squares arranged in two horizontal bands with a gorgeous ombre effect. The upper section uses moss stitch (also called linen stitch or granite stitch) to create a dense, woven-looking fabric that holds its shape beautifully.
The color progression moves from soft peach at the top through terracotta and dusty rose, down to deep burgundy and golden mustard at the bottom. It genuinely looks like a sunset captured in yarn.
The finished bag measures approximately 14 inches wide by 11 inches tall by 4.5 inches deep, not including handles. That’s about 35.5 cm by 28 cm by 11.5 cm for my metric friends. The handles add roughly 10 inches (25.5 cm) of drop, making it comfortable to carry on your shoulder.
Skill Level and Time Investment
I’d call this an intermediate project. You should be comfortable joining granny squares, working flat rows, seaming panels neatly, and managing multiple colors. Nothing here is technically difficult, but clean joins and color organization matter.
Expect to spend 16 to 24 hours on this project, depending on your speed with granny squares and seaming. I recommend spreading it across a few evenings rather than trying to marathon through.
Materials You’ll Need
Yarn
You’ll need approximately 730 yards (668 m) of worsted weight yarn total, divided across seven colors:
Yarn Suggestions
Lion Brand Pound of Love works wonderfully. It’s 100% acrylic, soft, washable, and comes in all the colors you need. Plus, it’s budget-friendly for a larger project like this.
Paintbox Yarns Simply DK is another great option. If you go this route, size up to a US K-10.5 / 6.5 mm hook to maintain gauge.
Cascade 220 gives superior stitch definition if you prefer wool. Just remember it’s hand wash only.
Whatever you choose, stick with smooth worsted weight yarn. Fuzzy or textured yarns will obscure those pretty granny square details.
Hooks and Notions
Gauge
Getting gauge right matters for this bag to come out the proper size.
With the larger hook in moss stitch: 14 stitches and 18 rows = 4 inches / 10 cm (blocked)
One completed granny square after Round 4: 3.5 inches / 9 cm square (blocked)
Make a swatch before you start. Trust me, it’s worth the extra 15 minutes.
Abbreviations and Special Stitches
Let me define everything you’ll need:
Moss Stitch (Linen Stitch)
This creates a dense, slightly textured fabric that looks almost woven. Here’s how it works:
Set-up Row: Chain an even number. Single crochet (sc) in the second chain from hook. Chain 1, skip the next chain, sc in the next chain. Repeat "chain 1, skip 1, sc in next chain" to the end. Turn.
Pattern Row (all subsequent rows): Chain 1, turn. Sc in the first chain-1 space. Chain 1, sc in the next chain-1 space. Repeat across. At the end of the row, sc in the turning chain space. Turn.
Classic Granny Square
Round 1: Make a magic ring. Chain 3 (counts as first dc). Work 2 dc into ring. Chain 2. Work 3 dc into ring. Chain 2. Repeat two more times. Join with slip stitch to top of beginning chain-3. Fasten off. (12 dc, 4 ch-2 corner spaces)
Round 2: Join next color to any ch-2 corner space. Chain 3. Work 2 dc, chain 2, 3 dc into same corner space. Chain 1. Work 3 dc, chain 2, 3 dc into next corner. Chain 1. Repeat around. Join with slip stitch. Fasten off. (24 dc, 4 ch-2 corner spaces, 4 ch-1 side spaces)
Round 3: Join next color to any ch-2 corner. Chain 3. Work 2 dc, chain 2, 3 dc into same corner. Chain 1. Work 3 dc into the ch-1 side space. Chain 1. Work corner cluster into next corner. Repeat around. Join. Fasten off. (36 dc, 4 ch-2 corner spaces, 8 ch-1 side spaces)
Round 4: Join next color to any ch-2 corner. Chain 3. Work 2 dc, chain 2, 3 dc into same corner. Chain 1. Work 3 dc into first ch-1 side space. Chain 1. Work 3 dc into next ch-1 side space. Chain 1. Work corner cluster into next corner. Repeat for all sides. Join. Fasten off. (48 dc, 4 ch-2 corner spaces, 12 ch-1 side spaces)
Color Placement for Granny Squares
This is important, so take a moment to understand the color scheme before you start crocheting squares.
Upper Granny Band Squares (make 12 total):
Lower Granny Band Squares (make 10 total):
Step-by-Step Pattern Instructions
Part One: Make the Granny Squares
Create 20 granny squares total following the color assignments above. Block each square to 3.5 inches / 9 cm after completing Round 4.
Part Two: Join Squares Into Panels
Front Panel:
Arrange 8 squares in a 4-wide by 2-tall grid. Upper row gets 4 upper-band squares. Lower row gets 4 lower-band squares.
Hold the first two upper squares with right sides together. Using Color B, slip stitch through the back loops only to join along one vertical edge. Continue joining all four upper squares into a horizontal strip.
Repeat for the four lower squares, using Color E to join.
Join the upper strip to the lower strip along their horizontal edges using Color B. Your front panel is complete. It should measure approximately 14 inches wide by 7 inches tall.
Back Panel:
Repeat identically.
Side Panels (make 2):
Each side panel is one square wide and two squares tall. Stack one upper-band square on top of one lower-band square and join vertically using Color E.
Part Three: Solid Moss Stitch Upper Body
With RS facing, join Color A to the top left corner of the front granny panel.
Foundation Row (RS): Chain 1, work 1 sc into each dc and 1 sc into each ch-1 side space across the top edge of all four squares. Work 2 sc into each ch-2 corner space at joins as needed to keep work flat. You should have approximately 39 sc across. Turn. (39 sc)
Row 1 (WS): Chain 1, turn. Sc in the first st. Chain 1, skip 1 st, sc in next st. Repeat across. (20 sc, 19 ch-1 spaces)
Row 2 (RS): Chain 1, turn. Sc in first ch-1 sp. Chain 1, sc in next ch-1 sp. Repeat across. Sc in the turning chain space. (20 sc, 19 ch-1 spaces)
Rows 3 through 18: Repeat Row 2.
Fasten off. Repeat for the back panel.
Part Four: Side Upper Body Extensions
For each side panel, join Color A to the top edge.
Foundation Row: Chain 1, sc evenly across top of one side granny panel. (11 sc)
Row 1 (WS): Chain 1, turn. Sc in first st. Chain 1, skip 1, sc in next st. Repeat across. (6 sc, 5 ch-1 spaces)
Row 2 (RS): Chain 1, turn. Sc in first ch-1 sp. Chain 1, sc in next ch-1 sp. Repeat across. Sc in t-ch sp. (6 sc, 5 ch-1 spaces)
Rows 3 through 18: Repeat Row 2.
Fasten off. Repeat for second side panel.
Part Five: Assemble the Body
Seam the front panel to the right side panel using whipstitch or mattress stitch with Color A. Then seam the right side panel to the back panel. Repeat with the left side panel.
You now have a tube open at top and bottom.
Part Six: The Base
With Color A and the larger hook, chain 17.
Row 1: Sc in the second chain from hook and in each chain across. Turn. (16 sc)
Rows 2 through 40: Chain 1, turn. Sc in each st across. (16 sc)
Pin the base into the bottom opening, right sides together. Whipstitch all the way around. Turn the bag right side out.
Part Seven: Top Edge Border
Join Color A to any stitch at the top edge.
Round 1: Chain 1. Work 1 sc in each sc and ch-1 space evenly around. Join with slip stitch. (96 sc)
Round 2: Chain 1. Sc in each sc around. Join. (96 sc)
Round 3: Slip stitch in each sc around. Fasten off. (96 sl st)
Part Eight: Handles
Make 2 handles using the smaller hook.
With Color A, chain 7.
Row 1: Sc in second chain from hook and each chain across. Turn. (6 sc)
Rows 2 through 4: Chain 1, turn. Working in back loops only, sc across. (6 sc)
Rows 5 and 6: Join Color B. Back loops only, sc across. (6 sc)
Rows 7 and 8: Join Color E. Back loops only, sc across. (6 sc)
Rows 9 and 10: Join Color D. Back loops only, sc across. (6 sc)
Rows 11 through 14: Return to Color A. (6 sc)
Repeat this 14-row sequence until the handle measures 28 inches.
Fold lengthwise and whipstitch the long edge closed. Attach handle ends to the front panel, each positioned 3.5 inches from center and 0.5 inches below the top border, overlapping 2 inches on the inside. Sew securely. Repeat for the back.
Part Nine: Tassel
Cut 40 strands of Color G, each 14 inches long. Bundle and fold in half.
Wrap Color B tightly around the bundle 1 inch below the fold, wrapping 8 to 10 times. Tie off. Wrap Color C just above, covering the first wrap.
For the tassel top, make a small crochet ball with Color B: Magic ring, 6 sc in ring. Round 2: 2 sc in each st. (12 sc) Round 3: Sc2tog around. (6 sc) Stuff lightly. Round 4: Sc2tog around. (3 sc) Close and fasten off.
Insert the folded loop through the ball, pull ends through to secure, and sew the ball to the front left handle join. Trim tassel ends to 5 inches.
Part Ten: Label
Sew the oval Handmade label to the upper right area of the front panel, approximately 1 inch below the top border and 1 inch from the right handle.
Finishing Your Crochet Tote Bag
Weave in all remaining ends. Hand wash gently in cool water, roll in a towel to remove excess moisture, and stuff with plastic bags or tissue to hold the shape while drying. Once dry, insert your optional base stiffener.
For acrylic yarn, you can machine wash on gentle inside a mesh bag. For wool, hand wash only.
Quick Tips for Success
Block your granny squares before joining. This makes assembly so much easier.
Use stitch markers generously, especially when counting stitches for the moss stitch section.
Don’t stress if your stitch count is off by one or two. Adjust to the nearest odd number and keep going.
The handles need to be firm, so use the smaller hook and work tightly.
This pattern has become one of my absolute favorites. Every time I grab this bag, I feel proud of the work that went into it. There’s something deeply satisfying about using something beautiful that you made with your own hands.
I hope you love making your Sunset Ombre Granny Tote Bag as much as I loved designing it. Thank you for trusting me with your time and yarn stash.
If you make one, please save this pattern to your Pinterest boards so you can find it easily later. And I would absolutely love to see your finished bags, so drop a comment below or tag me on Instagram. Your photos genuinely make my day!
You Might Also Like
- Sunshine Yellow Dahlia Crochet Dress Free Crochet Pattern
- Blush Pink Boho Wall Basket Free Crochet Pattern
- Ocean Jellyfish Crochet Market Bag Free Pattern
- Mint Green Lacy Baby Dress Free Crochet Pattern
