
This bag is GORGEOUS and I am SO excited to share it with you! Seriously, the moment I finished this tote, I knew it was going to become one of those patterns that people actually use every single day. The warm sunset colors, the classic granny squares, that beautiful braided handle. It all comes together into something that looks incredibly impressive but is totally achievable for intermediate crocheters.
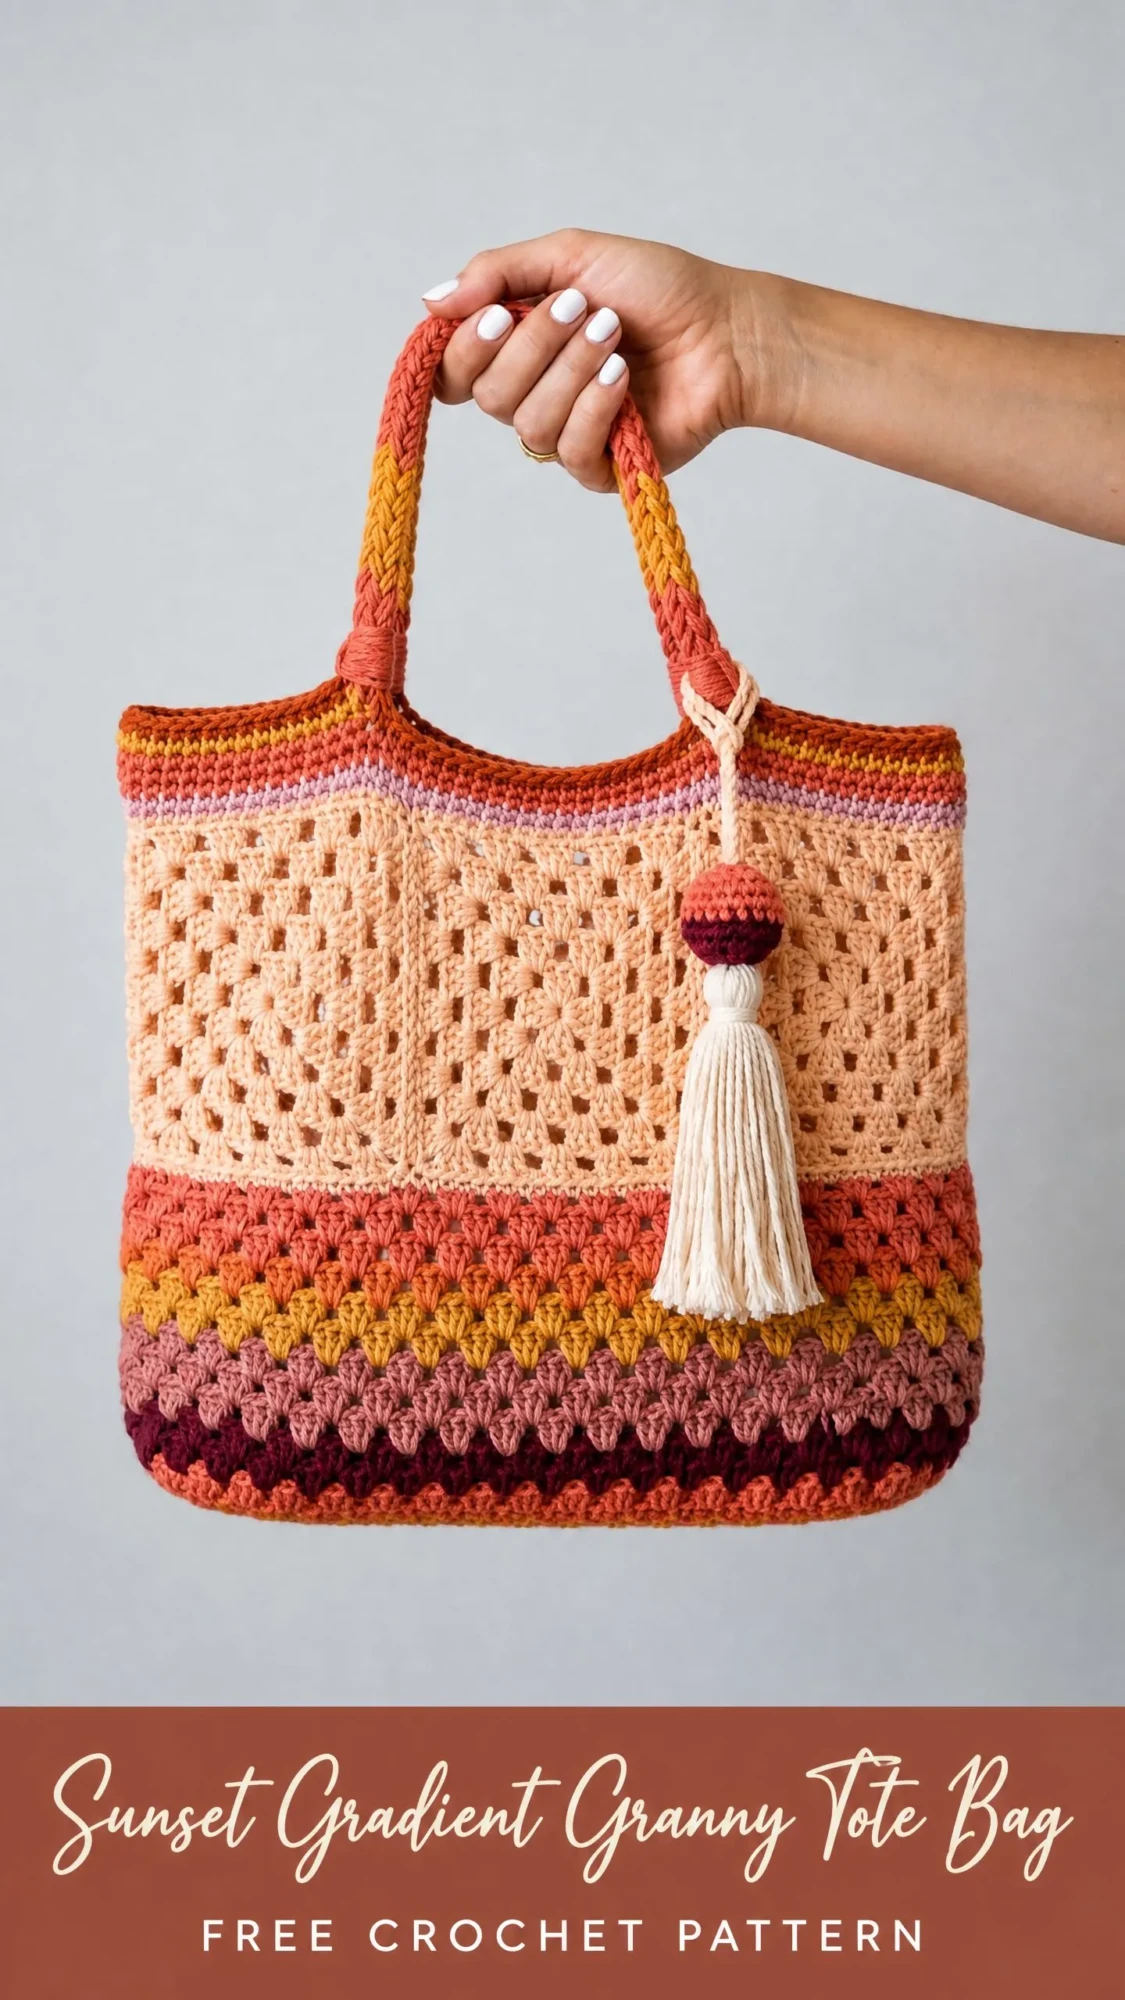
Here’s the thing. This project takes around 12 to 18 hours spread over several sessions, and every minute is satisfying. You’re not just making a bag. You’re creating a structured, functional, beautiful piece that will turn heads at the farmer’s market, the beach, or just running errands around town.
If you’ve been wanting to level up your crochet skills with a multi-section project that teaches you join-as-you-go techniques and braided handles, this is your sign. Let’s dive in!
About This Sunset Gradient Granny Tote Bag Crochet Pattern
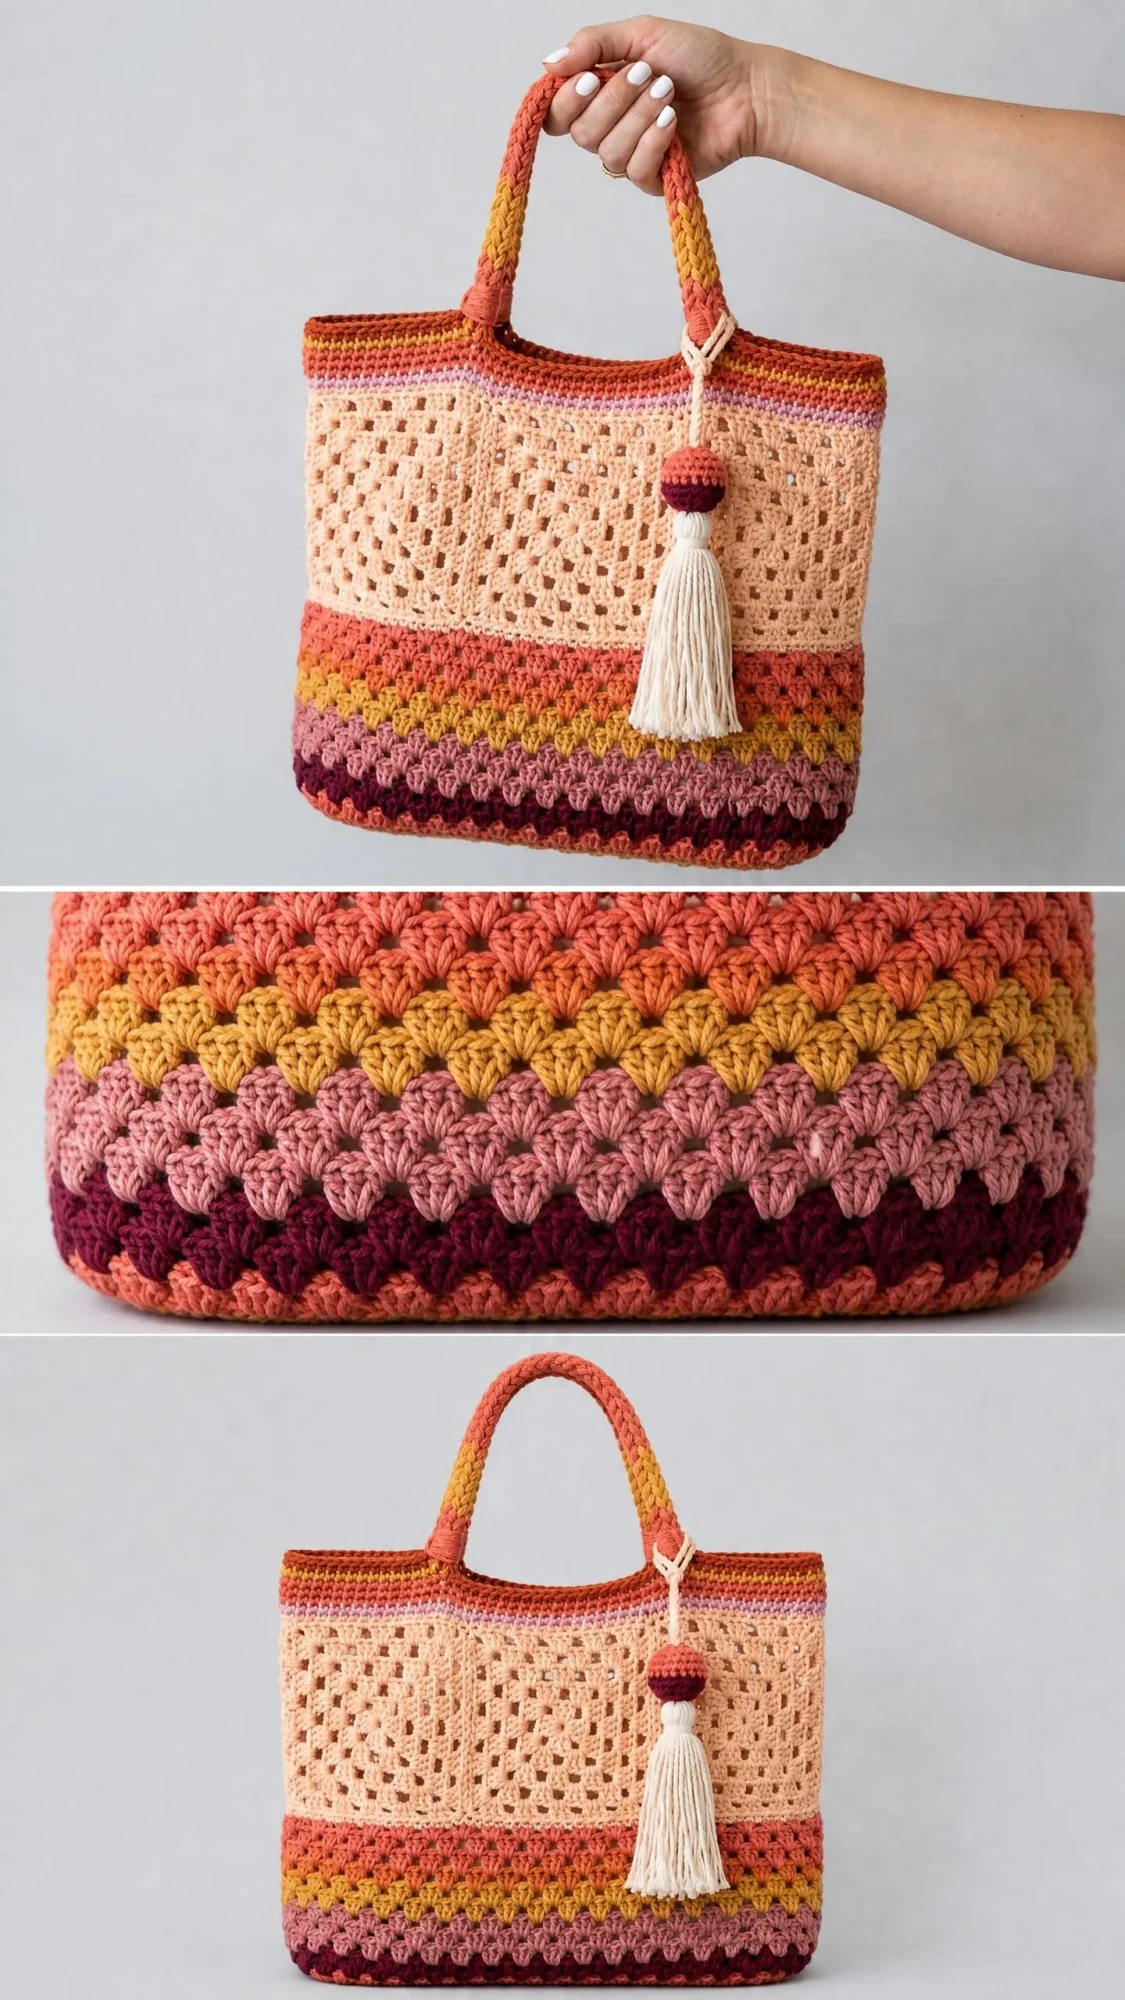
This structured tote combines three distinct construction techniques into one cohesive, boxy bag. The bottom section features dense shell stitches worked in gorgeous sunset stripes. Think burgundy, mauve, coral, and gold creating that perfect warm gradient. The center panel showcases four classic granny squares joined together using the join-as-you-go method. The upper section frames everything with a colorful striped band.
The finished bag measures approximately 14 inches wide by 13 inches tall, with a 10-inch handle drop. That’s the perfect size for carrying books, groceries, beach supplies, or your latest yarn haul. The 4-inch depth gives it a satisfying boxy shape that holds its form beautifully.
Skill Level: Intermediate. You should be comfortable working in the round, reading color sequences, and constructing granny squares. The multi-section construction and six-color management make this unsuitable for true beginners, but if you’ve made a few granny square projects before, you’re ready.
Materials You’ll Need
Yarn
You’ll need worsted weight cotton yarn in six colors, approximately 1,400 yards total. Here’s the breakdown:
Cotton yarn is strongly recommended here. It provides the structural stiffness that gives this tote its beautiful boxy shape. I love Lion Brand 24/7 Cotton for this project. It holds color vibrantly and has excellent stitch definition.
Hooks and Tools
Gauge
Getting gauge right matters for this project! With your J/10 hook in single crochet (sc), which means inserting your hook, yarn over, pull up a loop, yarn over, pull through both loops:
14 stitches by 16 rows = 4 inches by 4 inches
With your I/9 hook, one completed granny square through Round 4 should measure 5 inches by 5 inches.
Take time to check your gauge before starting. Adjust your hook size up or down if needed.
Abbreviations You’ll Use
Let me walk you through every stitch abbreviation in this pattern:
Numbers in parentheses at the end of each row or round tell you your total stitch count.
Special Stitches
Shell Stitch
Work 5 double crochets all into the same stitch or space. This creates a beautiful fan-shaped cluster. You’ll use this throughout the lower section of the bag.
Granny Cluster
Work 3 double crochets into the same chain space. This is the building block of your granny squares. Yarn over, insert hook into the chain space, pull up a loop, yarn over, pull through 2 loops. Repeat two more times in the same space. That’s one granny cluster.
Join-As-You-Go (JAYG)
This technique lets you connect your granny squares seamlessly as you work the final round. Work your double crochet until the last yarn over pull through. Drop the loop from your hook temporarily, insert your hook from front to back into the corresponding chain space of the adjacent square, place the dropped loop back on the hook, pull through, and complete the double crochet normally.
Pattern Notes Before You Begin
A few important things to know:
1. The bag body is worked in joined rounds without turning unless stated otherwise. Join each round with a slip stitch to the first stitch.
2. Make your color changes on the last yarn over of the final stitch of the previous round. This way your new color appears cleanly at the start of the new round.
3. Blocking your granny squares is not optional. Cotton squares need to be blocked to exact dimensions so your seams lie flat and panels sit evenly.
4. The stitch counts in parentheses at the end of each instruction tell you exactly how many stitches you should have. Count as you go!
Step-by-Step Instructions
Section 1: Bag Base
Using Color A and your J/10 hook, ch 50.
Foundation Row (RS): Sc in 2nd ch from hook and in each ch across. (49 sc)
Rows 2 through 14: Ch 1, turn. Sc in each st across. (49 sc)
After Row 14, do not fasten off. Your base rectangle should measure approximately 14 inches wide by 3.5 inches tall.
Section 2: Lower Shell Stripe Band
Now you’ll work in joined rounds around the perimeter of your base. Switch to Color F (burgundy).
Setup Round (Rnd 1): Ch 1. Work sc evenly around entire perimeter as follows: sc in each of 49 sts across top edge, 3 sc in corner st, sc in each of 14 row-end edges down side, 3 sc in corner, sc in each of 49 sts across bottom, 3 sc in corner, sc in each of 14 row-end edges up other side, 3 sc in corner. Join with sl st to first sc. (138 sc)
Place stitch markers at the 4 corner center stitches.
Rnd 2 (Color F, shell round): Ch 3 (counts as dc here and throughout), 2 dc in same st, sk 2 sts, sc in next st, [sk 2 sts, 5 dc in next st (shell made), sk 2 sts, sc in next st] around, adjusting final repeat to close round evenly, 2 dc in same st as beg ch-3, join with sl st to top of beg ch-3. (23 shell units)
At corner stitches, work your 5-dc shell into the corner stitch without skipping surrounding stitches. This eases the corner naturally.
Rnd 3 (Color F): Sl st into center of first shell, ch 3, 2 dc in same sp, sc in next sc between shells, [5 dc in center of next shell, sc in sc between shells] around. Join. (23 shells)
Rnd 4 (Color E, mauve): Join Color E. Rep Rnd 3. (23 shells)
Rnd 5 (Color E): Rep Rnd 3. (23 shells)
Rnd 6 (Color A, coral): Join Color A. Rep Rnd 3. (23 shells)
Rnd 7 (Color B, gold): Join Color B. Rep Rnd 3. (23 shells)
Rnd 8 (Color A): Join Color A. Rep Rnd 3. (23 shells)
Rnd 9 (Color A): Rep Rnd 3. (23 shells)
Transition Round (Rnd 10, Color A): Ch 1, sc in each dc and each sc around, working 3 sc into center dc of each corner shell. Join. (138 sc)
Your shell stripe section should now measure approximately 5.5 inches tall from the base.
Section 3: Granny Square Center Panel
Switch to your I/9 hook. You’ll make 4 granny squares separately, then join them.
Granny Square (Make 4 in Color C, peach)
Magic ring (or ch 4, join with sl st to form ring).
Rnd 1: Ch 3 (counts as dc), 2 dc in ring, ch 2, [3 dc in ring, ch 2] 3 times. Join with sl st to top of beg ch-3. Fasten off. (4 clusters, 4 ch-2 corner sps)
Rnd 2: Join Color C in any ch-2 corner sp. Ch 3, 2 dc in same sp, ch 2, 3 dc in same sp (first corner made), ch 1, [3 dc in next corner sp, ch 2, 3 dc in same sp, ch 1] 3 times. Join. Fasten off. (8 clusters, 4 ch-2 corner sps, 4 ch-1 side sps)
Rnd 3: Join Color C in any ch-2 corner sp. Ch 3, 2 dc in same sp, ch 2, 3 dc in same sp, ch 1, 3 dc in next ch-1 side sp, ch 1, [3 dc in next corner sp, ch 2, 3 dc in same sp, ch 1, 3 dc in ch-1 side sp, ch 1] 3 times. Join. Fasten off. (12 clusters, 4 ch-2 corner sps, 8 ch-1 side sps)
Rnd 4: Join Color C in any ch-2 corner sp. Ch 3, 2 dc in same sp, ch 2, 3 dc in same sp, [ch 1, 3 dc in next ch-1 sp] twice, ch 1, [3 dc in next corner sp, ch 2, 3 dc in same sp, (ch 1, 3 dc in next ch-1 sp) twice, ch 1] 3 times. Join. Fasten off. (16 clusters, 4 ch-2 corner sps, 12 ch-1 side sps)
Block all 4 squares to exactly 5 inches by 5 inches before joining.
Joining Squares Into Panels
Arrange your squares in a 2×2 grid. You’ll create two panels, one for the front and one for the back of your bag.
Join Square 2 to Square 1 along one side edge: Work Rnd 4 normally until you reach the joining side. At each ch-1 sp along the joining edge, instead of ch 1, work a joining dc into the corresponding ch-1 sp of Square 1. At the corner ch-2 sp, work ch 1, joining dc into corner sp of Square 1, ch 1. Continue normally on remaining sides.
Repeat for Squares 3 and 4 to complete your 10-inch by 10-inch panel. Make a second identical panel for the back.
Edging Round on Each Panel: Join Color A in any corner sp. Ch 1, sc around entire panel perimeter, working 3 sc into each outer corner sp, 1 sc into each ch-1 sp and 1 sc into each cluster top across. Join. Fasten off.
Attaching Panels to Bag Body
With Color A and J/10 hook, hold one panel against the front face of your bag with the right side facing outward. Using a slip stitch seam, join the bottom edge of the panel to the live stitches of Rnd 10 across the front, centering the panel. Repeat for the back panel.
Leave the top edges of each panel open for now.
Section 4: Upper Stripe Band
Setup Round: Join Color A to top right corner of front granny panel. Ch 1, sc across top of front panel (approximately 40 sts), sc across right gusset wall (approximately 14 sts), sc across top of back panel (approximately 40 sts), sc across left gusset wall (approximately 14 sts). Join. (108 sc)
Rnd 1 (Color A): Ch 1, sc in each st around. Join. (108 sc)
Rnd 2 (Color D, lavender): Join Color D. Ch 1, sc in each st around. Join. (108 sc)
Rnd 3 (Color D): Ch 1, sc in each st around. Join. (108 sc)
Rnd 4 (Color A): Ch 1, sc in each st around. Join. (108 sc)
Rnd 5 (Color A): Ch 1, sc in each st around. Join. (108 sc)
Rnd 6 (Color B): Join Color B. Ch 1, sc in each st around. Join. (108 sc)
Rnd 7 (Color A): Ch 1, sc in each st around. Join. (108 sc)
Rnd 8 (Color A): Ch 1, sc in each st around. Join. (108 sc)
Top Edging Round: With Color A, ch 1, sc in each st around. Join. Fasten off. (108 sc)
Section 5: Braided Handles
Each handle needs 18 strands total: 6 strands each of Colors A, B, and C. Cut each strand 60 inches long.
Handle anchor points: On each main face, mark two positions 3 inches in from the side edges along the top edge band. These sit approximately 8 inches apart.
Fold all 18 strands in half. Insert the folded center loop through the first anchor point from outside to inside. Pass working ends through the loop and pull firmly to secure with a lark’s head knot.
Divide the 36 working ends into 3 groups of 12 strands each. Braid firmly for approximately 22 to 24 inches.
Attach the free end to the second anchor point on the back face using the same method. Secure with several overhand knots on the inside. Trim ends to about 1 inch and weave in securely.
Repeat for your second handle.
Section 6: Tassel Embellishment
Tassel Body: Cut 40 strands of Color G, each 14 inches long. Fold all strands at the center. Tie a separate 12-inch strand tightly around the fold point, leaving a long tail for attachment.
Tassel Neck Wrap: Using Color C, wrap firmly around the bundle approximately 1 inch below the fold point, 8 to 10 times. Tie off and weave in.
Trim fringe ends evenly to about 5 inches below the neck wrap.
Crocheted Bead: With Color A and I/9 hook, make a magic ring.
Rnd 1: 6 sc into ring, pull tight. (6)
Rnd 2: 2 sc in each st around. (12)
Rnd 3: [Sc in next st, 2 sc in next st] 6 times. (18)
Rnd 4: Sc in each st around. (18)
Rnd 5: [Sc in next st, sc2tog] 6 times. (12)
Stuff lightly with polyfill.
Rnd 6: Sc2tog 6 times. (6)
Fasten off, leave a long tail, thread through remaining 6 sts, pull tight to close.
Before closing completely, thread the bead onto the tassel tie-strand so it sits directly above the tassel. Attach to the right handle attachment point at the front face.
Finishing Your Sunset Gradient Granny Tote
Weave in all yarn ends on the inside of the bag, working through at least 1 inch of stitches in two directions.
Lightly mist the entire bag with water or steam block using a garment steamer. Pin the granny square panels to ensure they lie flat.
Allow to dry completely before using.
If you’re using a base insert, cut your plastic canvas or cardboard to 13 inches by 3.5 inches and slip it into the bottom of your finished bag.
Care Instructions
Hand wash your tote in cool water with mild soap. Don’t wring or twist. Press gently to remove excess water, then reshape and lay flat to dry. Remove any cardboard base insert before washing.
You Did It!
I hope you love making this sunset gradient granny tote bag crochet pattern as much as I loved designing it. The combination of techniques, from shell stitches to granny squares to braided handles, makes this a truly satisfying project that teaches you so much along the way.
Thank you so much for choosing this pattern! I would absolutely love to see your finished bags. Tag me on Instagram or share in my Facebook group so I can cheer you on.
If this pattern is calling your name, go ahead and pin it to your crochet board so you can find it when you’re ready to start. And if you make one, please drop a comment below! I love hearing which colors you chose and seeing how your projects turn out.
You Might Also Like
- Mermaid Tail Sparkle Baby Blanket Free Crochet Pattern
- Mint Chocolate Chameleon Amigurumi Free Crochet Pattern
- Mint and Sage Green Baby Dress Free Crochet Pattern
- Dusty Rose Boho Romper Free Crochet Pattern
