
Last summer, I found myself standing in a craft market, completely mesmerized by a vintage 1970s bag hanging in a booth. The seller wanted way more than I could justify spending, but I could not stop thinking about those radiating wedge shapes and the rich, earthy tones. So I did what any obsessive crafter would do. I went home, grabbed my hooks, and spent the next three weeks figuring out how to recreate that retro magic.
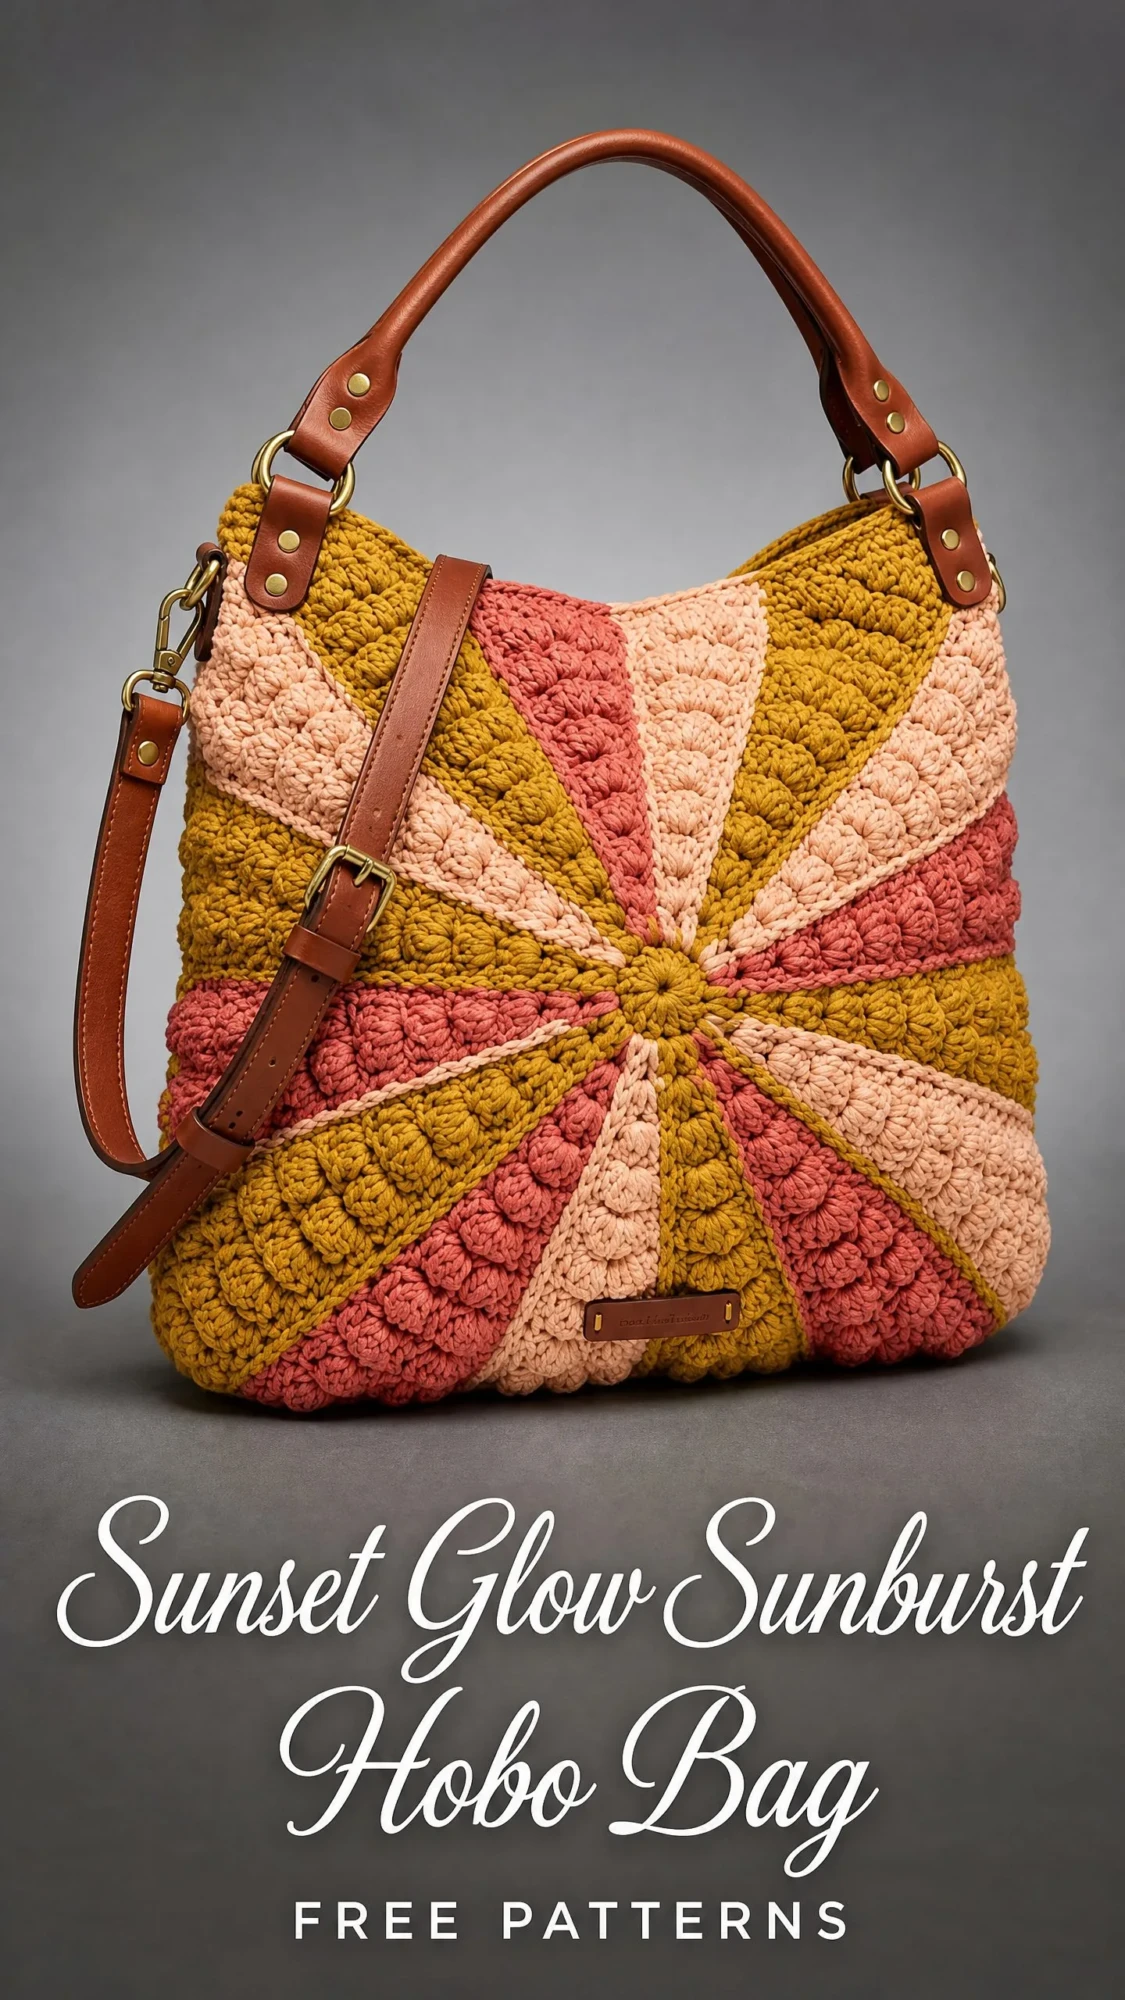
This pattern is the result of all that tinkering. The Sunset Glow Sunburst Hobo Bag captures everything I loved about that market find, from the sculptural bobble texture to the warm mustard, terracotta, and blush color story. It looks far more complicated than it actually is, which is my favorite kind of project.
If you have ever wanted to make a bag that stops people in their tracks and makes them ask "wait, you MADE that?", this is your pattern. Let me walk you through every single step.
What Makes This Crochet Hobo Bag Pattern Special
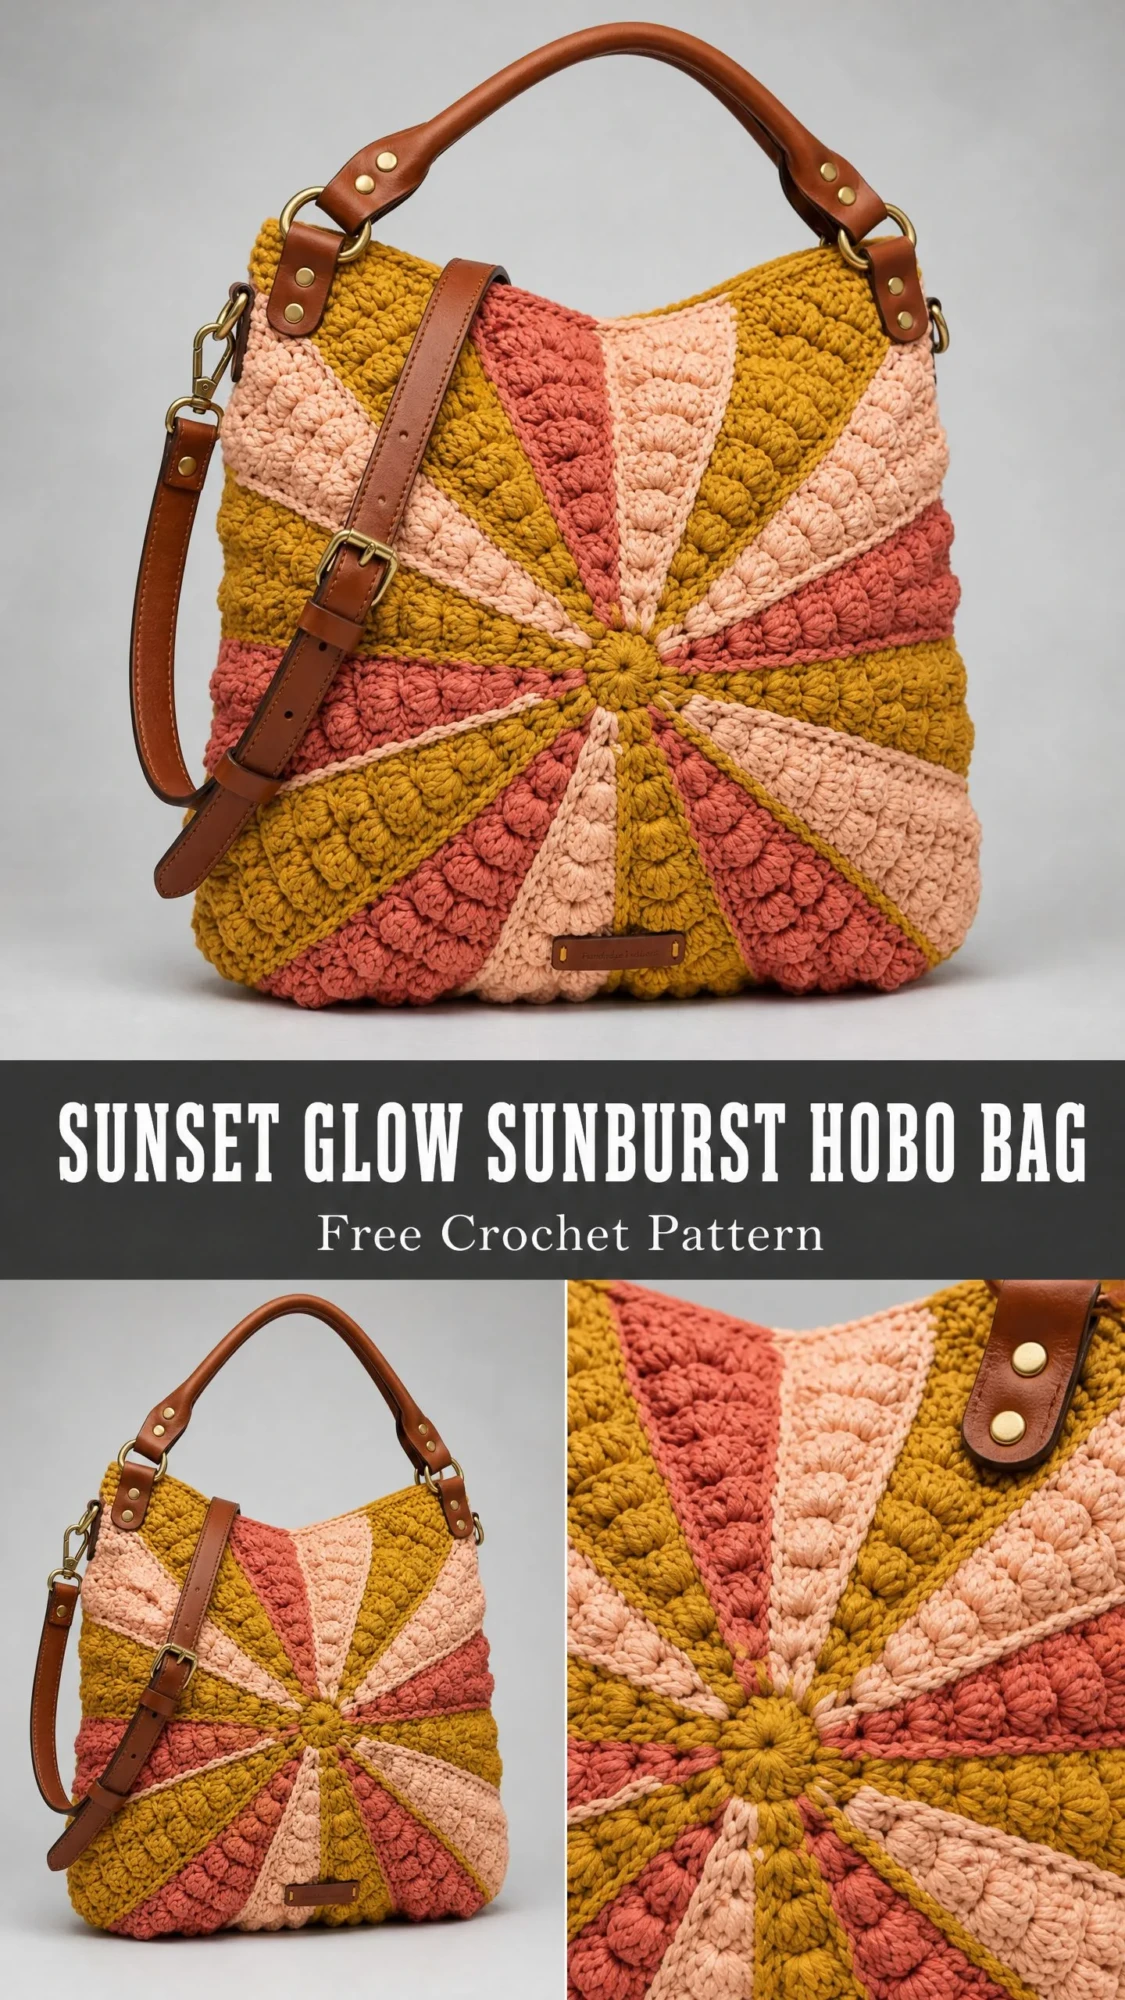
This bag is constructed from two identical sunburst panels worked in the round from the center outward. Think of it like crocheting two giant pinwheels, then seaming them together to form the bag body. The radiating wedge sections create that striking starburst effect you see in the finished piece.
The real showstopper here is the bobble stitch texture. Those raised, dimensional clusters cover almost every surface of the bag and give it serious visual weight. Combined with the leather handle and brass hardware, you end up with something that looks like it belongs in a boutique window.
Skill level sits at advanced beginner to intermediate. You need to be comfortable working in the round and following increase patterns. The bobble stitch is repetitive once you get the hang of it. No complicated shaping math required.
Materials You Will Need
Gather everything before you start. Nothing derails a project faster than running out of yarn halfway through a panel.
Yarn: Bulky weight (CYCA 5) cotton or cotton-blend yarn in three colors
Hook: US K / 6.5 mm crochet hook (adjust as needed to match gauge)
Notions:
Yarn Substitution Tips
Choose a yarn with good stitch definition and low stretch. Avoid fuzzy or halo yarns because they will hide your beautiful bobble texture. Cotton and wool blends hold their shape best for bags.
Some options that work beautifully:
Gauge Information
Getting gauge right matters a lot for this project. A loose fabric will cause your bag to sag and lose its sculptural quality.
With US K / 6.5 mm hook and bulky weight cotton-blend yarn:
12 stitches and 10 rows = 4 inches (10 cm) in single crochet
For the sunburst panel specifically:
Please swatch before beginning. Your future self will thank you.
Finished Size
Approximately 14 inches wide by 12 inches tall at the body, not including handles (35.5 cm wide by 30.5 cm tall). Depth at base approximately 3 inches (7.5 cm) when panels are seamed and the bag is filled.
Abbreviations Used in This Pattern
Let me break down every abbreviation you will encounter. If you are newer to crochet, bookmark this section.
Special Stitches Explained
How to Work the Bobble Stitch (bob)
The bobble stitch is a 5-double-crochet cluster worked in a single stitch that pops toward the right side of the fabric. Every bobble should be nudged toward the right side as you tighten it. Here is the step-by-step breakdown:
Step 1: Yarn over, insert hook into designated stitch or space.
Step 2: Yarn over and pull up a loop (3 loops on hook).
Step 3: Yarn over and draw through 2 loops (2 loops remain on hook). One unfinished double crochet made.
Step 4: Repeat Steps 1 through 3 four more times in the same stitch (6 loops on hook total).
Step 5: Yarn over and draw through all 6 loops on hook at once.
Step 6: Chain 1 to close and lock the bobble. This closing chain 1 does NOT count as a stitch.
The bobble stitch counts as 1 stitch in the stitch count for that round.
Magic Ring (Adjustable Ring)
Step 1: Wrap yarn around two fingers to form a loop, with the tail end behind.
Step 2: Insert hook through the loop, yarn over with the working yarn, and pull up a loop.
Step 3: Chain the number of chains specified to begin the round.
Step 4: Work the required stitches into the ring.
Step 5: Pull the tail to close the ring tightly.
Joining New Color
When changing colors at the end of a round, draw the new color through the final slip stitch that closes the round. Cut and fasten off the old color unless instructed to carry it.
Pattern Notes Before You Begin
The bag is made of two identical sunburst panels. Both panels are worked in exactly the same way. You will join them along their outer edges using a single crochet seam, leaving the top edge open.
The sunburst pattern is achieved by working 8 evenly spaced wedge sections around the panel. Each wedge section increases at its outer edge in every round, creating that fan or pie-slice shape radiating from the center.
When working bobble stitches, maintain firm, even tension. Bobbles worked too loosely will collapse and not pop. Bobbles worked too tightly will distort the panel and cause it to cup instead of lying flat.
All rounds are joined rounds. You will join with a slip stitch to the first stitch of the round, then chain as directed. Do not work in a continuous spiral.
The right side of fabric faces outward on both panels.
Crochet Hobo Bag Pattern Instructions
Panel (Make 2)
Both panels are identical, so follow these instructions twice.
Section 1: Sunburst Center
Foundation: Using Color A (Mustard Gold), make a magic ring.
Round 1: Chain 3 (counts as first dc here and throughout center section), work 15 dc into the ring. Pull ring closed. Join with sl st to top of beginning ch-3. (16 dc)
Round 2: Chain 1 (does NOT count as a stitch here and throughout unless stated). Work 2 sc in each stitch around. Join with sl st to first sc. (32 sc)
Fasten off Color A.
Section 2: Establishing the 8 Wedge Increases
In this section you establish 8 evenly spaced increase points, dividing the 32 stitches into 8 groups of 4 stitches each. Place a stitch marker in the increase stitch of each group at the end of Round 3 to track positions.
Join Color A in any stitch.
Round 3: Chain 1. (Sc in next 3 sts, 2 sc in next st) repeat 8 times. Join with sl st to first sc. (40 sc) Place markers in each of the 8 increase stitches just made.
Round 4: Chain 1. (Sc in next 4 sts, 2 sc in marked st) repeat 8 times, moving markers to new increase sts as you go. Join with sl st to first sc. (48 sc)
Round 5: Chain 1. (Sc in next 5 sts, 2 sc in marked st) repeat 8 times, moving markers. Join with sl st to first sc. (56 sc)
Round 6: Chain 1. (Sc in next 6 sts, 2 sc in marked st) repeat 8 times, moving markers. Join with sl st to first sc. (64 sc)
Checkpoint: After Round 6, your panel should measure approximately 5 to 6 inches (12.5 to 15 cm) in diameter. If your panel is measuring significantly smaller or larger, adjust your hook size before continuing.
Fasten off Color A.
Section 3: Bobble Texture and Continued Wedge Shaping
Beginning in this section, the wedge sections are worked with bobble stitches filling the interior of each wedge. The increase stitch at the tip of each wedge remains a plain sc (not a bobble) for clean shaping.
Color sequence for Rounds 7 through 18:
Join Color B in any marked increase stitch.
Round 7: Chain 1. Work the following 8-stitch sequence 8 times around: (2 sc in marked increase st, bob in next st, sc in next st, bob in next st, sc in next st, bob in next st, sc in next st, bob in next st). Join with sl st to first sc. (72 sts) Move markers to the first sc of each increase pair.
Round 8: Chain 1. Work the following 9-stitch sequence 8 times: (2 sc in marked st, bob, sc, bob, sc, bob, sc, bob, sc). Join with sl st to first sc. (80 sts)
Checkpoint: After Round 8, your panel should measure approximately 7 to 7.5 inches (18 to 19 cm) in diameter.
Fasten off Color B. Join Color C.
Round 9: Chain 1. Work the following 10-stitch sequence 8 times: (2 sc in marked st, sc, bob, sc, bob, sc, bob, sc, bob, sc). Join with sl st to first sc. (88 sts)
Round 10: Chain 1. Work the following 11-stitch sequence 8 times: (2 sc in marked st, sc, bob, sc, bob, sc, bob, sc, bob, sc, bob). Join with sl st to first sc. (96 sts)
Fasten off Color C. Join Color A.
Round 11: Chain 1. Work the following 12-stitch sequence 8 times: (2 sc in marked st, bob, sc, bob, sc, bob, sc, bob, sc, bob, sc, bob). Join with sl st to first sc. (104 sts)
Round 12: Chain 1. Work the following 13-stitch sequence 8 times: (2 sc in marked st, bob, sc, bob, sc, bob, sc, bob, sc, bob, sc, bob, sc). Join with sl st to first sc. (112 sts)
Checkpoint: After Round 12, your panel should measure approximately 10 inches (25.5 cm) in diameter.
Fasten off Color A. Join Color B.
Round 13: Chain 1. Work the following 14-stitch sequence 8 times: (2 sc in marked st, sc, bob, sc, bob, sc, bob, sc, bob, sc, bob, sc, bob, sc). Join with sl st to first sc. (120 sts)
Round 14: Chain 1. Work the following 15-stitch sequence 8 times: (2 sc in marked st, sc, bob, sc, bob, sc, bob, sc, bob, sc, bob, sc, bob, sc, bob). Join with sl st to first sc. (128 sts)
Fasten off Color B. Join Color C.
Round 15: Chain 1. Work the following 16-stitch sequence 8 times: (2 sc in marked st, bob, sc, bob, sc, bob, sc, bob, sc, bob, sc, bob, sc, bob, sc, bob). Join with sl st to first sc. (136 sts)
Round 16: Chain 1. Work the following 17-stitch sequence 8 times: (2 sc in marked st, bob, sc, bob, sc, bob, sc, bob, sc, bob, sc, bob, sc, bob, sc, bob, sc). Join with sl st to first sc. (144 sts)
Fasten off Color C. Join Color A.
Round 17: Chain 1. Work the following 18-stitch sequence 8 times: (2 sc in marked st, sc, bob, sc, bob, sc, bob, sc, bob, sc, bob, sc, bob, sc, bob, sc, bob). Join with sl st to first sc. (152 sts)
Round 18: Chain 1. Work the following 19-stitch sequence 8 times: (2 sc in marked st, sc, bob, sc, bob, sc, bob, sc, bob, sc, bob, sc, bob, sc, bob, sc, bob, sc). Join with sl st to first sc. (160 sts)
Checkpoint: After Round 18, your panel should measure approximately 13 to 14 inches (33 to 35.5 cm) in diameter.
Fasten off Color A.
Section 4: Outer Edge Border
The border stabilizes the edge and provides a clean surface for seaming.
Join Color A in any stitch.
Round 19: Chain 1. Sc in each stitch around, working plain sc (no bobbles). Join with sl st to first sc. (160 sc)
Do NOT fasten off on Panel 1 (you will use this yarn end to begin seaming).
Fasten off Panel 2, leaving a 12-inch (30.5 cm) tail for weaving.
Assembly Instructions
Seaming the Panels
Lay both panels flat with right sides facing outward. This creates a visible seam ridge on the outside as a design detail. If you prefer a hidden seam, place right sides together instead.
Identify the top opening by marking 8 stitches to the left and 8 stitches to the right of what will be the top center of the bag (16 stitches total, centered at top). These 16 stitches will remain unworked on both panels to form the bag opening.
Using the working yarn from Panel 1 and your hook, join the two panels together with a single crochet seam. With RS of both panels facing outward and panels held together, insert hook through the corresponding edge stitch of both panels simultaneously and work sc through both layers.
Work sc through both layers around the entire outer edge, stopping at each marker at the top opening and leaving those 16 stitches on each side unworked (32 total open stitches forming the top).
Begin seaming at one top-opening marker, work all the way around the bottom and sides of the bag, and stop at the second top-opening marker. (144 sc seam sts worked through both layers, 16 sts on each panel at top left open)
Join with sl st and fasten off. Weave in all ends.
Top Opening Edge
With RS facing and Color A, join yarn at one corner of the top opening.
Round 1 of opening edge: Chain 1. Sc evenly around the entire top opening, working 1 sc in each open stitch from both panels (approximately 32 sc across each panel side plus 2 sc at each side corner = approximately 68 sc total around the opening). Adjust count to an even number if needed. Join with sl st to first sc. (68 sc)
Round 2 of opening edge: Chain 1. Sc in BLO in each sc around. Join with sl st to first sc. (68 sc)
Fasten off and weave in ends. The BLO round creates a subtle ridge that reinforces the opening.
Handle and Strap Attachment
Handle tabs: Cut two small rectangular pieces of faux leather approximately 1.5 x 3 inches (3.8 x 7.5 cm). Fold each piece in half lengthwise around a D-ring and punch holes through both layers. Secure with Chicago screws or rivets. Position one tab on the left side of the top opening, centered approximately 3.5 inches (9 cm) from center. Position the second tab on the right side, mirroring the first. Attach each tab through the crochet fabric at the top edge using the Chicago screws or rivets, making sure to go through multiple layers of yarn for a secure hold.
Top handle: Cut or use a pre-made leather strap approximately 12 inches (30.5 cm) long for the top handle. Thread each end through a D-ring and fold the end back approximately 0.75 inch (2 cm). Punch holes and secure with rivets or Chicago screws.
Crossbody strap: Use a pre-made adjustable leather strap. Attach one end to the left D-ring and one end to the right D-ring using the swivel clips or lobster clasps on the strap.
Optional Lining Instructions
Cut two pieces of lining fabric each measuring 15 x 13 inches (38 x 33 cm). Place RS together and sew around three sides (both short sides and one long side) with a 0.5-inch (1.3 cm) seam allowance, leaving one long side open (the top). Trim corners. Turn under the top edge 0.5 inch (1.3 cm) and press. Insert lining into bag with WS of lining against WS of crochet. Hand-sew lining to the inside of the top opening edge using a whip stitch, stitching into the BLO ridge created at the opening edge.
Size Customization Tips
To make a smaller bag (approximately 11 x 10 inches): Stop the sunburst shaping at Round 14 (128 sts) instead of Round 18. Work the border round on 128 sts and seam with 112 sts, leaving 16 sts open at top.
To make a larger bag (approximately 17 x 14 inches): Continue the wedge increase sequence for 2 more color-pair rounds (Rounds 19 and 20 in Color B, Rounds 21 and 22 in Color C) following the same increase formula, then work the border round.
To adjust for different yarn weights: For worsted weight with a US I / 5.5 mm hook, the gauge will be tighter and the same round count will produce a smaller bag. Add approximately 4 extra rounds to reach the same 14-inch diameter.
Blocking and Finishing Your Crochet Bag
Wet blocking is recommended for cotton or cotton-blend yarns. Soak the completed panels in cool water for 15 minutes. Gently squeeze out excess water without wringing. Lay flat on blocking mats or a clean towel and pin to shape, coaxing each panel into a flat, even circle. Allow to dry completely before seaming or handling (24 to 48 hours depending on humidity).
For wool yarns, steam block by holding a steam iron approximately 1 inch above the surface. Do not press down onto the bobbles or you will flatten them.
After blocking, weave in all remaining yarn ends securely, going in at least two directions through the yarn fabric to prevent unraveling.
Care Instructions
Hand wash in cool water with a gentle soap. Do not wring. Lay flat to dry. Do not tumble dry. Do not dry clean. The leather hardware components should be wiped clean with a slightly damp cloth only and allowed to air dry away from direct heat. For bags with wool yarn, dry flat to prevent stretching.
Time to Show Off Your Work
Thank you so much for choosing this pattern for your next project. I genuinely hope you love making this bag as much as I loved designing it. There is something incredibly satisfying about watching those sunburst wedges take shape and seeing all that bobble texture come together.
If you make this Sunset Glow Sunburst Hobo Bag, I would absolutely love to see it. Tag me on Instagram or share your finished piece in my Facebook group. Seeing your creations is hands down the best part of sharing patterns.
Go ahead and save this crochet pattern to your Pinterest boards so you can find it when you are ready to start. And if you do make one, please drop a comment below. I read every single one, and I love hearing which color combinations you choose.
You Might Also Like
- Sunset Ombre Daisy Granny Square Blanket Free Crochet Pattern
- Cream Lace Bridal Barrel Bag Free Crochet Pattern
- Black Fishnet Crochet Bell Sleeve Shrug Free Pattern
- Sunset Orange Daisy Zipper Bag Free Crochet Pattern
