
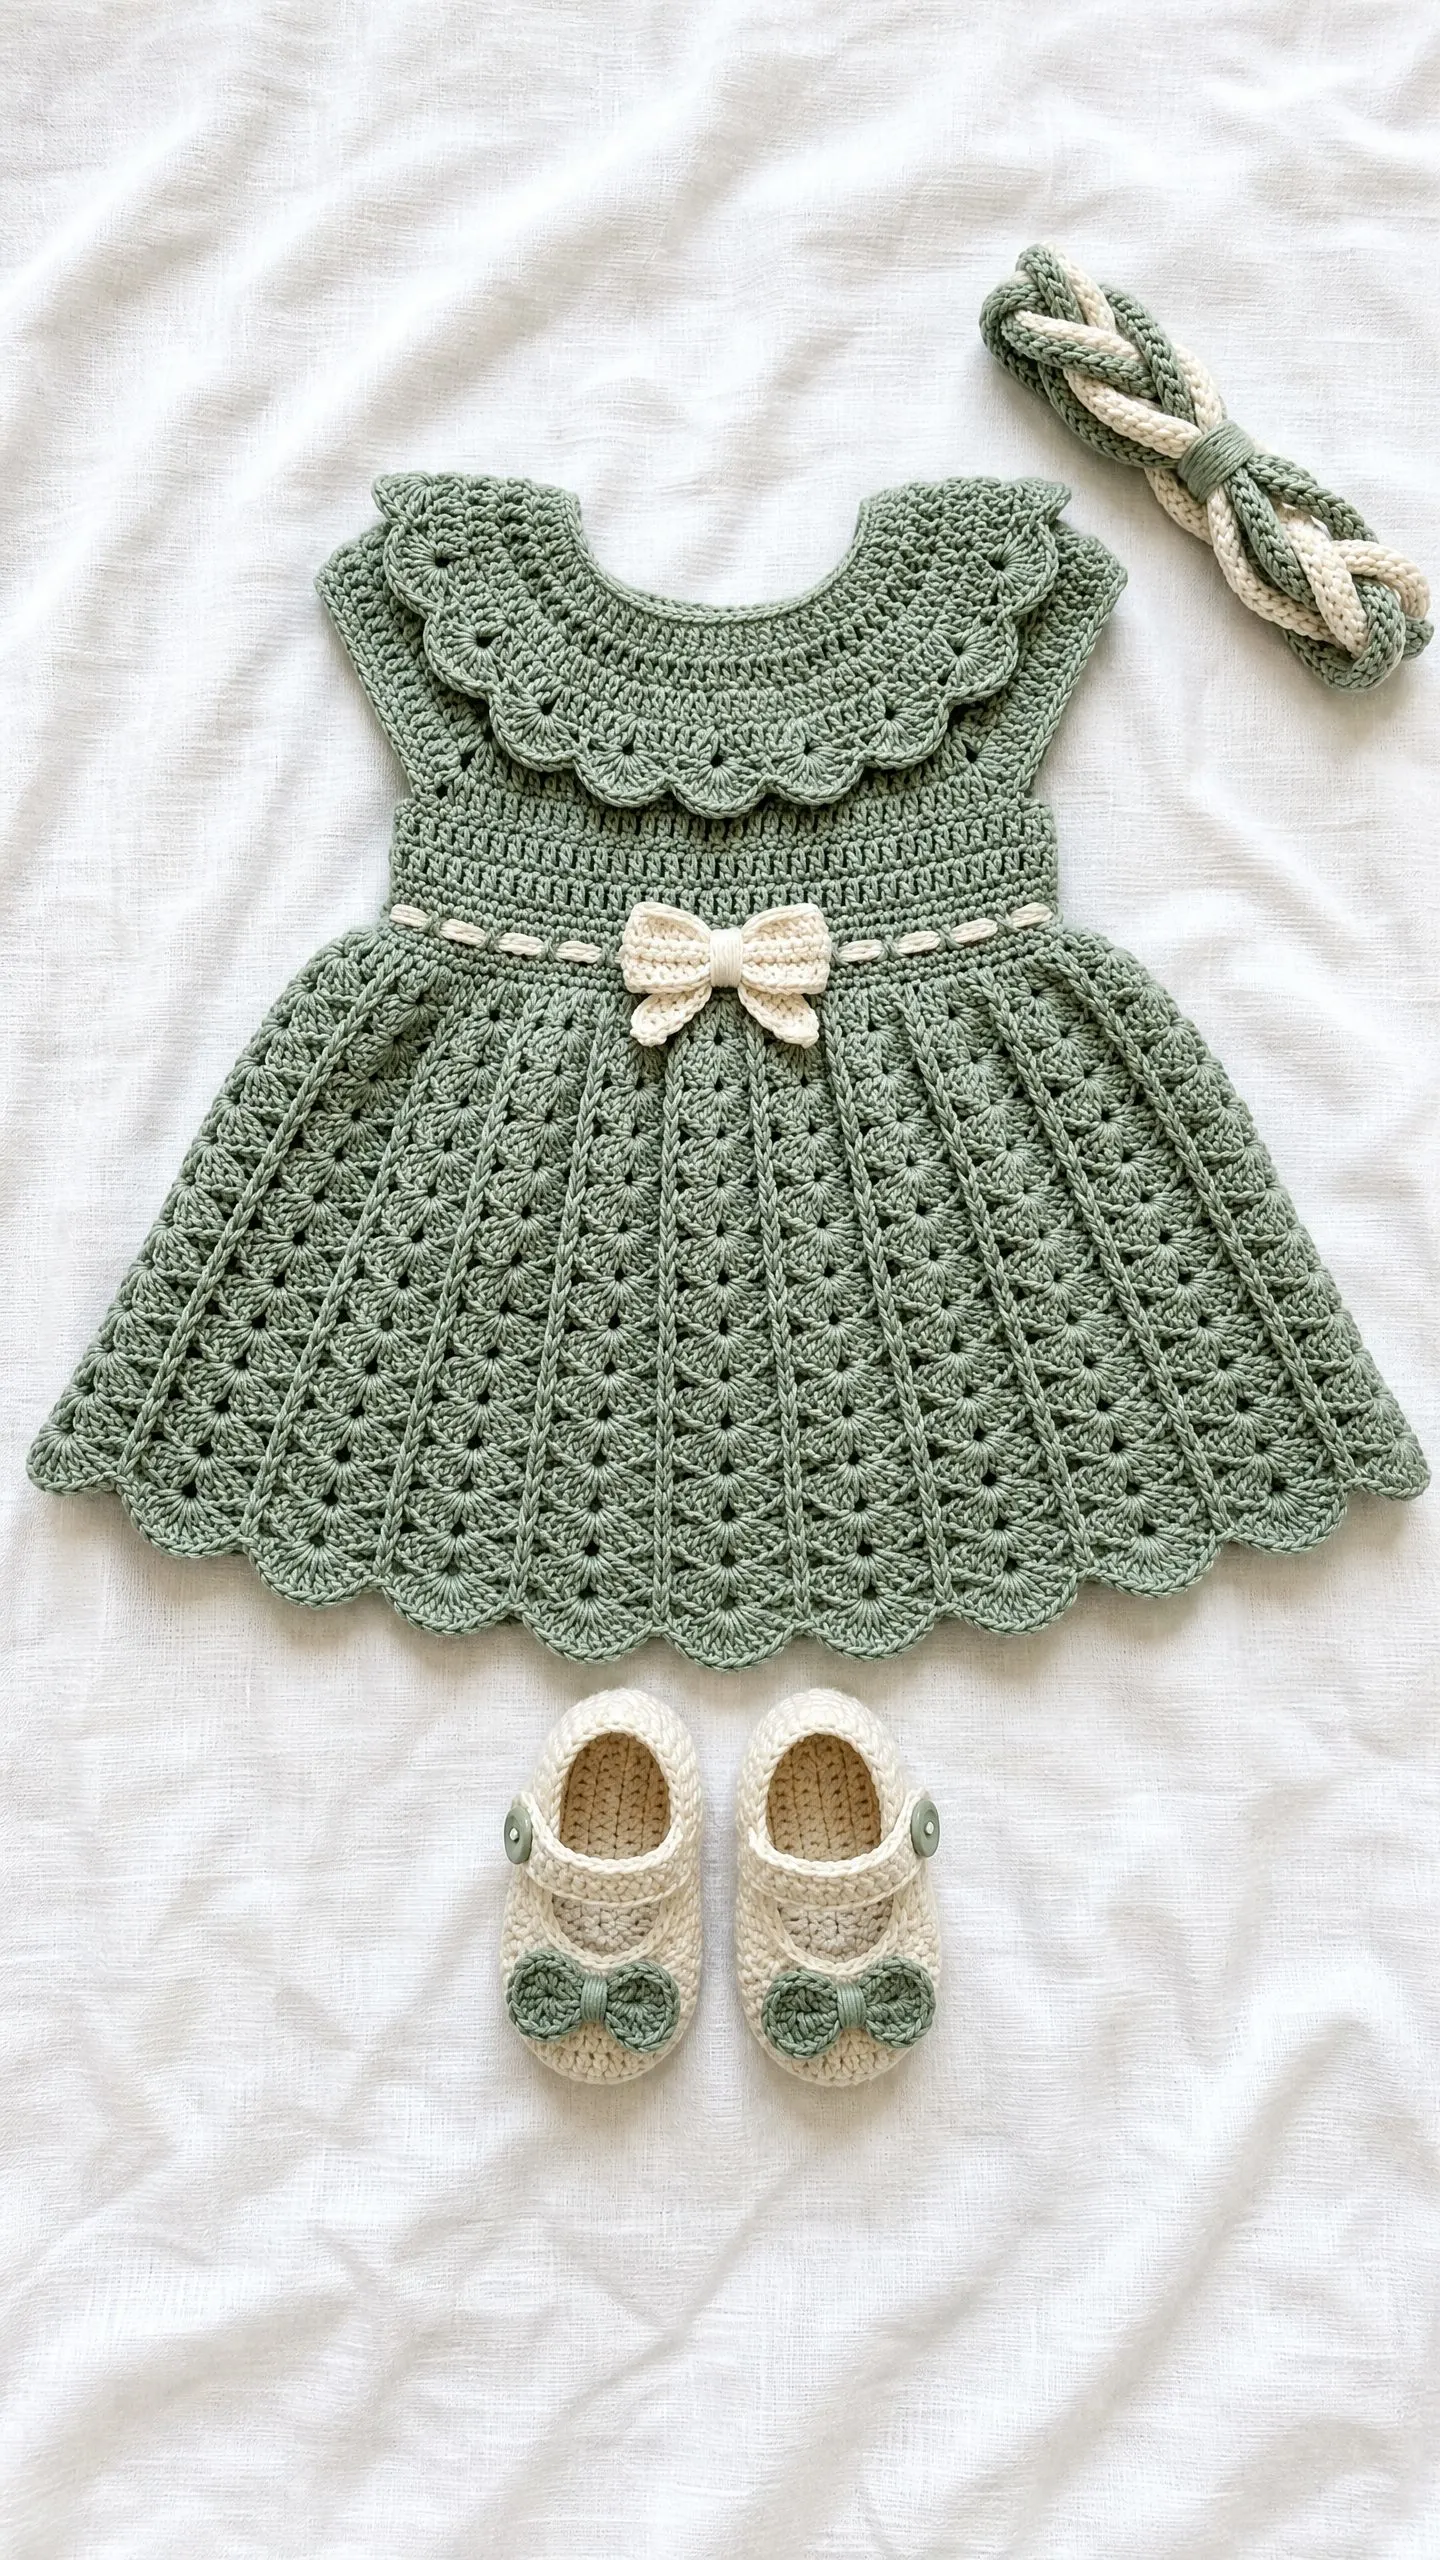
This is a complete baby dress set in sage green with a matching headband and Mary Jane booties. The dress features a scalloped Peter Pan collar, a fan stitch skirt, and a cream ribbon waistband with a bow. You will use basic stitches like single crochet and double crochet throughout. The set fits babies 3 to 6 months old.
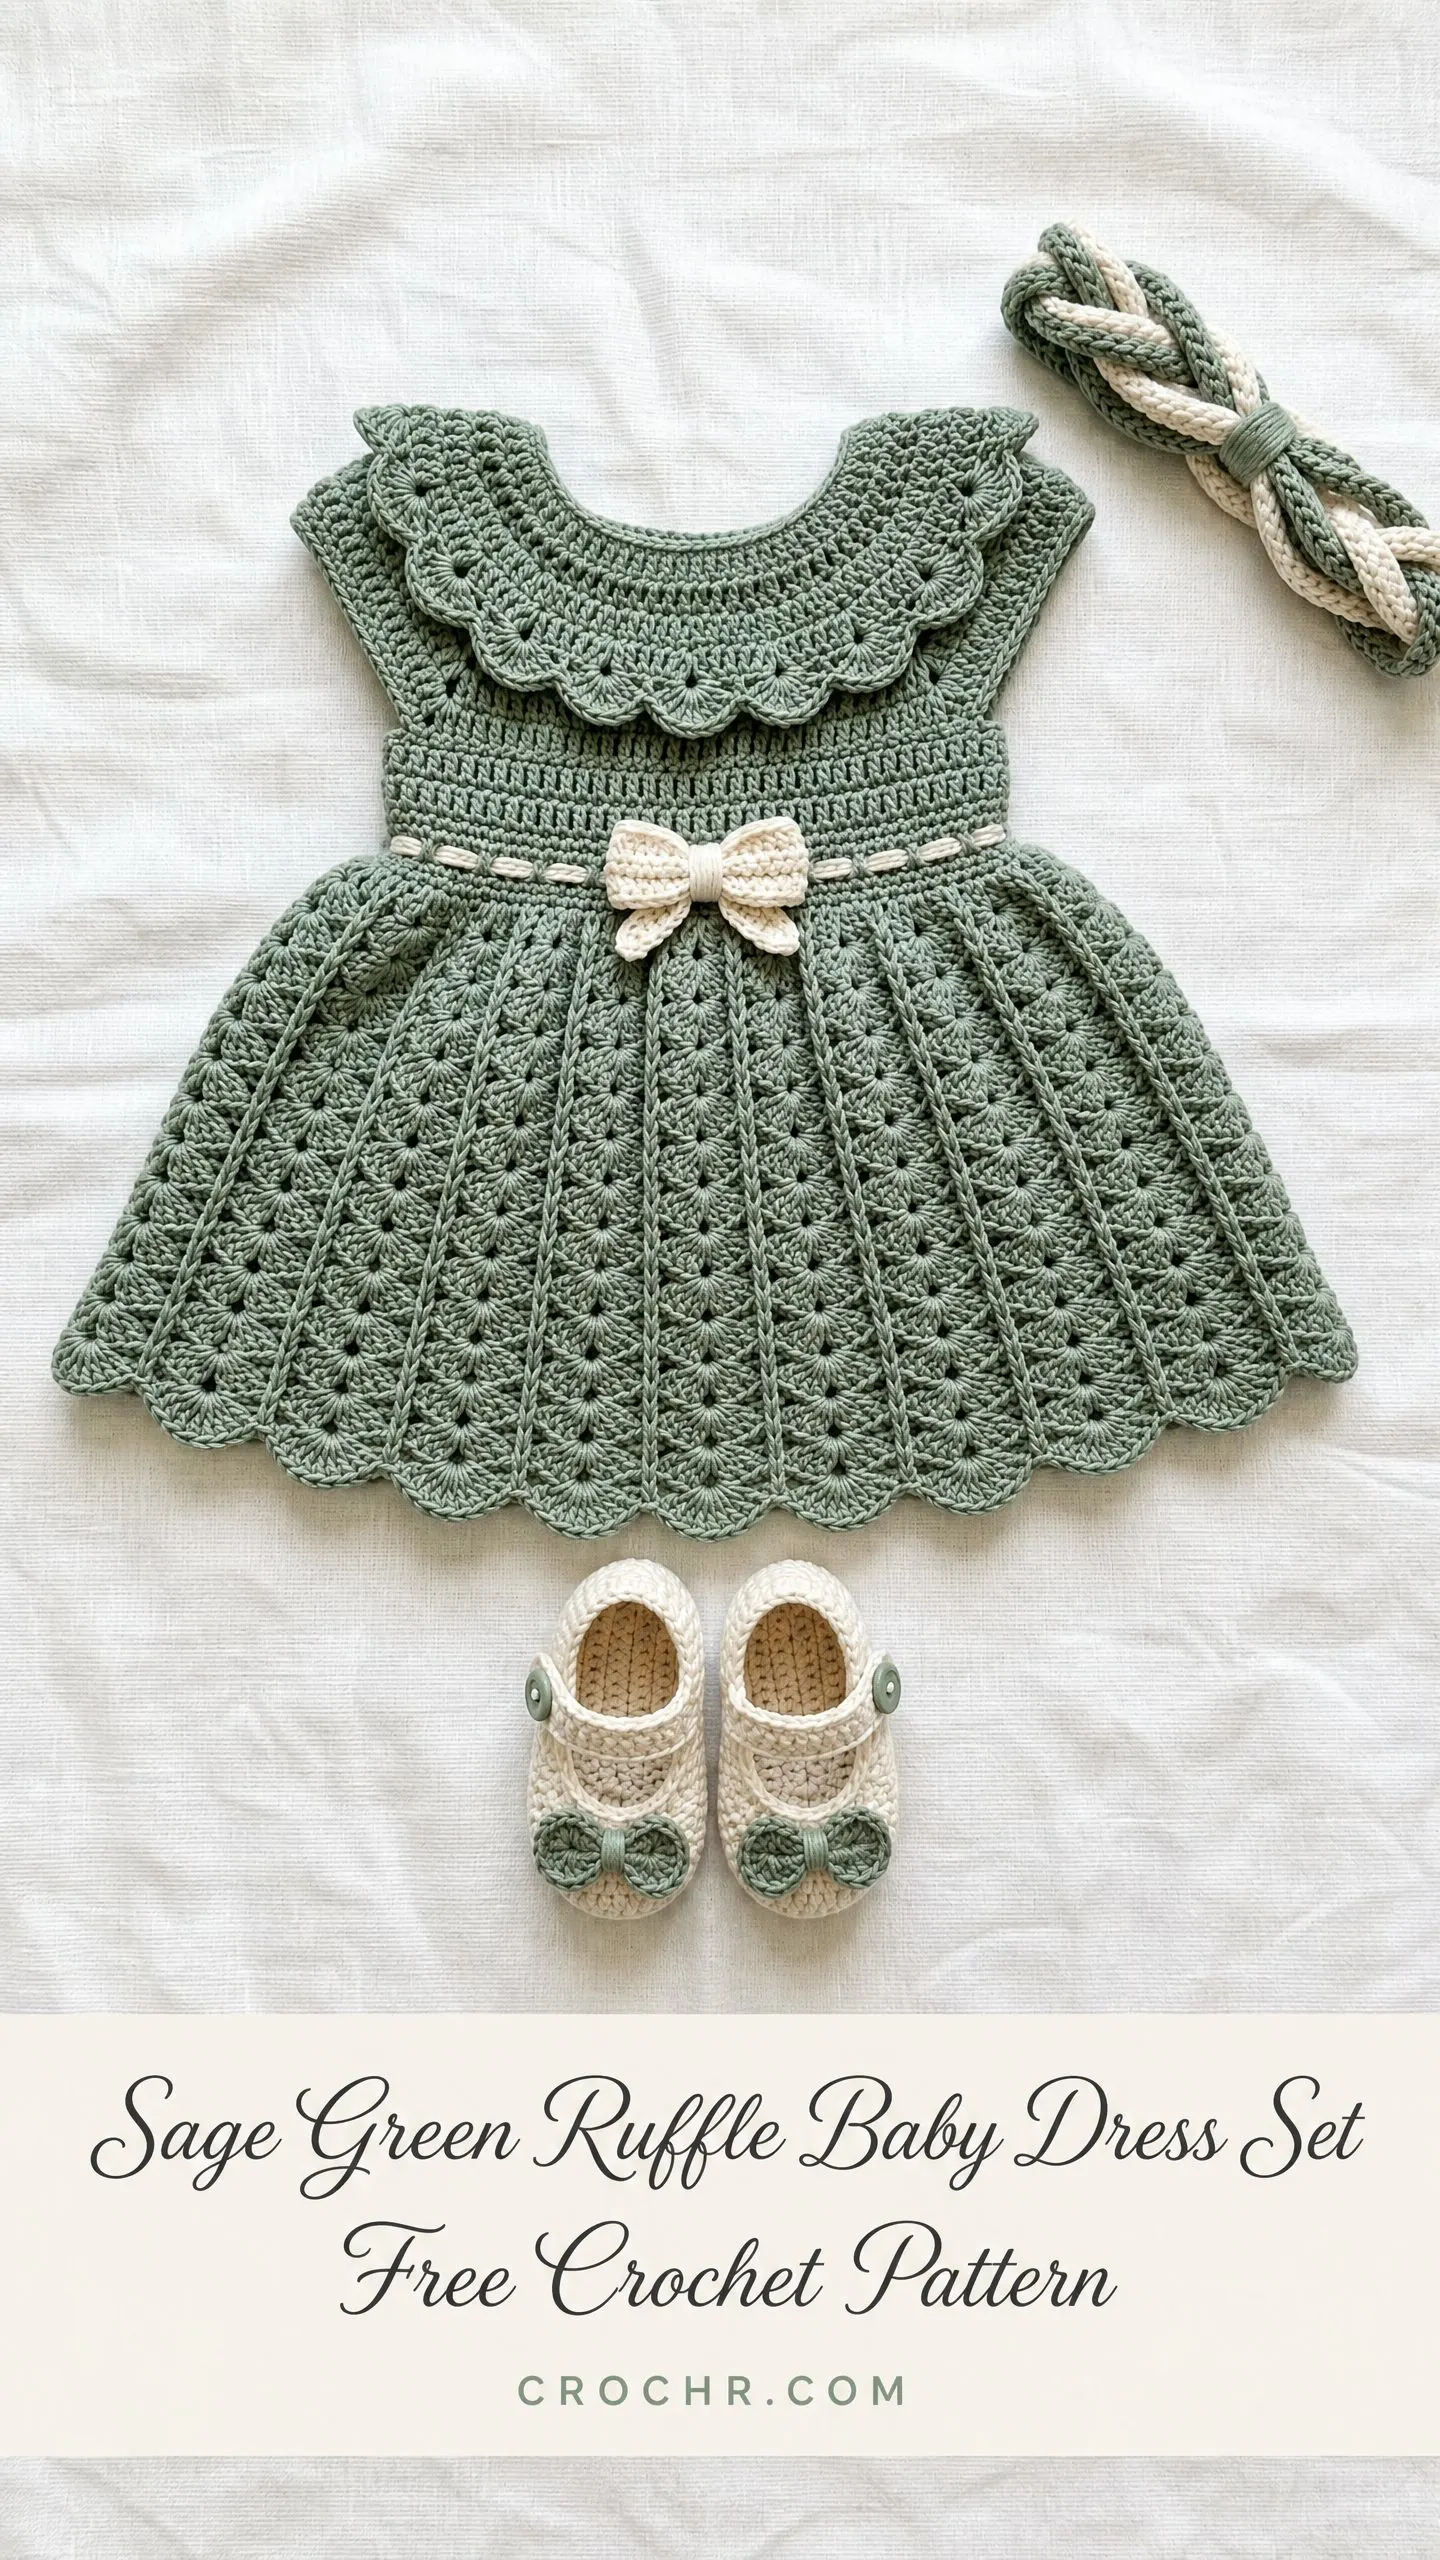
The construction is straightforward once you understand the flow. You work the dress from the top down, starting at the neckline and building outward. The collar and booties are made separately and joined at the end. If you can work in rounds and follow a stitch pattern repeat, you can absolutely make this.
I love how the sage green and cream combination creates that heirloom look without feeling fussy. The scalloped edges and delicate bow details make this set perfect for photos, baby showers, or special occasions. Let me walk you through everything you need to know.
Why This Baby Dress Set Works So Well
The beauty of this design lies in the details. That Peter Pan collar sits just right against a baby’s shoulders, giving it that classic vintage feel. The fan stitch pattern on the skirt creates natural vertical lines that flare outward from the waist, producing the A-line silhouette you see in the photo.
The cream contrast yarn does a lot of heavy lifting here. It appears in the waist ribbon threaded through eyelet holes, the bow at center front, the braided headband, and the tiny bows on the booties. This small amount of contrast color ties the whole set together beautifully.
What makes this manageable is that each piece is worked separately. You are not juggling complicated color changes or trying to construct everything at once. Make the dress. Make the collar. Make the booties. Make the headband. Seam and assemble. Done.
Skill Level
This pattern is rated Advanced Beginner to Intermediate. You should be comfortable working in joined rounds, reading stitch pattern repeats, working fan stitches, and picking up stitches along edges.
The collar and booties require small piece construction and seaming. If you have made a basic garment before, you will be fine. All techniques are explained fully in the special stitches section below.
Time Estimate
Plan for 12 to 18 hours total for the complete set. If you are an experienced crocheter who works quickly, you might finish in 10 to 12 hours. The dress takes the longest, followed by the booties, then the collar, then the headband.
Finished Measurements
Dress:
Headband:
Booties:
Materials Needed
Yarn:
Hooks:
Notions:
Yarn Suggestions
Option 1: Lion Brand Pound of Love (DK-adjacent worsted light), color Eucalyptus for Yarn A and Fisherman for Yarn B. This is widely available, machine washable, and has excellent stitch definition.
Option 2: Paintbox Yarns Simply DK, color Pistachio Green for Yarn A and Champagne White for Yarn B. Affordable, consistent, and great for stitch definition on fan patterns.
Option 3: Scheepjes Catona (4-ply / fingering) held double. This replicates the crisp, slightly textured appearance of the pictured dress. Use Sage Green (212) and Cream (130). Holding two strands of fingering together approximates DK weight nicely. Adjust your gauge swatch accordingly.
Substitution note: Choose a smooth, plied yarn with good stitch definition. Fluffy or single-ply yarns will obscure the fan stitch pattern. The finished dress benefits from a yarn with a slight sheen or matte cotton-blend finish. Cotton or cotton-blend DK weight is ideal for a baby garment because it is breathable and machine washable.
Gauge
With E-4 / 3.5 mm hook and Yarn A:
Fan stitch pattern gauge (in skirt pattern):
Take time to check gauge. The chest circumference and skirt flare depend on correct gauge. Adjust hook size up or down as needed.
Abbreviations (US Terms)
Before we dive in, here are all the abbreviations you will encounter. I am defining each one with its full name and a plain English explanation.
Special Stitches and Techniques
Fan Stitch (used in skirt)
The fan stitch creates those beautiful radiating lines on the skirt. To work one fan, you will make [3 dc, ch 1, 3 dc] all into the same stitch or space. This is sometimes called a V-fan.
The skirt uses an expanding version. As the skirt grows, you add additional chain spaces between fans, and the number of single crochet anchors increases. This creates the A-line flare that makes the dress so charming.
Scallop Edge
This creates the decorative wavy edge on the collar and hem. Here is how it works: skip 2 stitches, work 5 dc into the next stitch, skip 2 stitches, slip stitch into the next stitch. Repeat across.
Picot (optional on collar)
Chain 3, then slip stitch into the first chain of those 3 chains. This creates a tiny decorative bump.
How to Make the Bow
The bow is worked separately in Yarn B, then sewn onto the dress.
Chain 13.
Row 1: Sc in 2nd ch from hook and in each ch across. (12 sc)
Rows 2 through 6: Ch 1, turn. Sc in each st across. (12 sc)
Fasten off, leaving a long tail. Pinch the center of the rectangle and wrap yarn tail tightly around the center 4 to 5 times. Secure with a knot. This forms the bow shape. Weave in ends, leaving one tail long enough to sew onto dress.
Braided Headband
Cut 6 lengths of Yarn A and 3 lengths of Yarn B, each 32 inches / 81 cm long. Group into three bundles of 3 strands each (two bundles Yarn A, one bundle Yarn B). Knot all strands together at one end. Braid all three bundles to desired length. Knot at other end. Trim ends to 0.5 inch / 1.3 cm and fray slightly or fold under for a neat finish. Tie into a loop or knot ends together to form headband.
Important Pattern Notes
Read these before starting. They will save you confusion later.
1. The dress is constructed top-down beginning at the neckline. The yoke is worked flat (back and forth) to create the button-back opening, then joined in the round for the skirt.
2. The collar is worked separately and seamed to the neckline edge at the end. This gives the collar its three-dimensional Peter Pan appearance.
3. Stitch markers are essential. Place markers at raglan increase points and at center front and center back throughout the yoke.
4. When working the skirt fan rounds, each fan unit equals 7 stitches of width in counting reference (sc + ch-1 + fan). Keep this in mind if adjusting size.
5. The back opening is held closed with three small buttons and corresponding button loops made with chain stitches worked along the left back edge.
6. The cream waist ribbon is a separate strand threaded in and out through designated eyelet holes worked into Round 1 of the skirt joining row.
7. All rounds begin and end with a slip stitch to join, then ch 1 (for sc rounds) or ch 3 (for dc rounds) at the beginning. The beginning chain does NOT count as a stitch unless otherwise noted.
8. Read all notes for a section before beginning that section.
Step-by-Step Instructions
DRESS: NECKLINE AND YOKE
The yoke is worked flat from the neckline down. You will work increases at four raglan points to shape the armholes.
Set up: With Yarn A and E-4 / 3.5 mm hook, ch 63.
Foundation Row (RS): Sc in 2nd ch from hook and in each ch across. (62 sc)
Place markers BETWEEN stitches at these positions:
Section breakdown:
Row 1 (WS): Ch 1, turn. [Sc in each st to st before marker, 2 sc in st before marker, 2 sc in st after marker, move marker to sit between the two new sts] 4 times, sc to end. (70 sc)
Row 2 (RS): Ch 1, turn. Repeat Row 1 increase structure. (78 sc)
Rows 3 through 10: Continue in this manner, working 8 increases per row (2 at each of the 4 raglan points).
After Row 10, section counts:
CHECKPOINT: After Row 10, the yoke from neckline to underarm should measure approximately 3.5 inches / 9 cm. Hold the piece up and check that the armhole curves look even and the back opening lies straight.
DIVIDE FOR BODY
On the next row, you will place the sleeve stitches on hold and join the fronts and back to work as a single round for the skirt.
Row 11 (WS, dividing row): Ch 1, turn. Sc across right front 20 sts. Place right sleeve 32 sts on a stitch holder or scrap yarn. Ch 2 (underarm bridge). Sc across back 38 sts. Place left sleeve 32 sts on holder. Ch 2 (underarm bridge). Sc across left front 20 sts. Do not turn.
Now you will join to work in the round. Bring the left front edge to meet the right front edge (this is the button-band opening).
Joining Round: Join Yarn A at center back right edge. Ch 1. Sc across 20 right front sts, sc 2 into each of the 2 right underarm ch-sts (4 sc), sc across 38 back sts, sc 2 into each of the 2 left underarm ch-sts (4 sc), sc across 20 left front sts. Sl st to first sc to join. (86 sc)
WAIST EYELET ROUND
This creates the channel for threading the cream ribbon.
Round 1 (Eyelet Round): Ch 3 (counts as dc), dc in next 2 sts, [ch 1, sk 1 st, dc in next 2 sts] around, ending with ch 1, sk 1, sl st to top of ch-3 to join. (28 ch-1 spaces + 58 dc including the starting ch-3)
Round 2: Ch 1. Sc in each dc and each ch-sp around. Sl st to join. (86 sc)
CHECKPOINT: The body should now measure approximately 4.5 to 5 inches / 11.5 to 12.5 cm from neckline to this point.
SKIRT
The skirt uses an expanding fan stitch pattern. First, increase stitches to a count divisible for fan pattern.
Round 3 (Increase Round): Ch 1. Sc in each st around, working 2 sc into every 17th or 18th stitch to add 4 extra sts evenly. Sl st to join. (90 sc)
Skirt Round 1: Ch 3 (counts as dc). 2 dc in same st (half-fan start). [Ch 1, sc in next st, ch 1, (3 dc, ch 1, 3 dc) in next st] 14 times. Ch 1, sc in next st, ch 1, 3 dc in same st as beginning ch-3. Sl st to top of ch-3 to join.
This creates 15 V-fans alternating with sc anchors.
Skirt Round 2: Sl st across 3 dc and into ch-1 sp at center of first fan. Ch 3, 2 dc in same ch-1 sp. [Ch 1, sc in next sc, ch 1, (3 dc, ch 1, 3 dc) in ch-1 sp of next fan] 14 times. Ch 1, sc in next sc, ch 1, 3 dc in same ch-1 sp as beginning. Sl st to top of ch-3.
Skirt Round 3: Same as Round 2. Work fans into fan centers, sc into sc.
Skirt Round 4 (Expand Round): Sl st to first fan center ch-sp. Ch 3, 2 dc in same sp. [Ch 2, sc in next sc, ch 2, (3 dc, ch 2, 3 dc) in next fan center] 14 times. Ch 2, sc in next sc, ch 2, 3 dc in same sp as beg. Sl st to join.
Skirt Round 5: Work same as Round 4 but work into fan centers and sc anchors. [3 dc, ch 2, 3 dc in fan center, ch 2, sc in sc anchor, ch 2] around.
Skirt Round 6: Same as Round 5.
Skirt Round 7 (Expand Round): Change ch-2 bridges to ch-3 bridges. [3 dc, ch 2, 3 dc in fan center, ch 3, sc in sc anchor, ch 3] around.
Skirt Rounds 8 and 9: Same as Round 7.
Skirt Round 10 (Expand Round): Change to larger fans. [4 dc, ch 2, 4 dc in fan center, ch 3, sc in sc anchor, ch 3] around. Fans now have 8 dc each.
Skirt Rounds 11 and 12: Repeat Round 10 structure.
Skirt Round 13 (Scallop Hem): Sl st to first fan center ch-2 sp. [(5 dc, ch 1, 5 dc) in fan center ch-2 sp, sk 4 dc, sc in sc anchor, sk 4 dc] around 15 times. Sl st to join.
Fasten off. Weave in ends.
CHECKPOINT: After the skirt, the dress from shoulder to hem should measure approximately 13 inches / 33 cm. Check that the scalloped hem is even all the way around.
COLLAR
The collar is worked separately and seamed to the neckline. This creates the Peter Pan shape.
With smaller hook (D-3 / 3.25 mm) and Yarn A, ch 63.
Foundation Row: Sc in 2nd ch from hook and each ch across. (62 sc)
Row 1: Ch 1, turn. Sc in first 2 sts. [Inc in next st, sc in next 2 sts] 20 times. (82 sc)
Row 2: Ch 1, turn. Sc in each st across. (82 sc)
Row 3 (Scallop Row, RS): Do not turn after Row 2. Work scallop along the bottom edge of the collar piece. Turn the work so you are working along Row 2’s front edge from right to left. [Sk 2 sts, 5 dc in next st, sk 2 sts, sl st in next st] repeat across the entire edge.
Fasten off, leaving a long tail for seaming.
ASSEMBLY AND FINISHING
1. Attach Collar: Pin the collar to the neckline edge with RS facing out. The foundation chain edge of the collar aligns with the foundation chain edge of the dress neckline. Whip stitch in place using yarn needle and matching yarn.
2. Thread Ribbon: Using the cream ribbon or a length of Yarn B, weave in and out through the eyelet holes at the waist. Tie in a small bow at center front or simply knot at the back opening.
3. Attach Bow: Sew the crocheted bow to center front waist, covering the ribbon tie if desired.
4. Button Loops: Along the left back edge, work 3 evenly spaced button loops: join yarn, ch 5, sl st to edge about 1/2 inch away. Repeat at 3 points down the back opening.
5. Sew Buttons: Sew 3 buttons to the right back edge, corresponding to the button loops.
BOOTIES
Work in Yarn B for the main bootie body with Yarn A accents.
Sole: With E-4 hook and Yarn B, ch 10.
Round 1: Sc in 2nd ch from hook and next 7 ch, 3 sc in last ch. Working on opposite side of foundation ch, sc in next 7 ch, 2 sc in last ch. Sl st to join. (20 sc)
Round 2: Ch 1. 2 sc in first st, sc in next 7 sts, 2 sc in each of next 3 sts, sc in next 7 sts, 2 sc in each of last 2 sts. Sl st to join. (26 sc)
Round 3: Ch 1. Sc in each st around. Sl st to join. (26 sc)
Rounds 4 and 5: Repeat Round 3.
Round 6 (Toe Shaping): Ch 1. Sc in first 8 sts, [sc2tog] 5 times, sc in last 8 sts. Sl st to join. (21 sc)
Round 7: Ch 1. Sc in each st around. Sl st to join. (21 sc)
Strap: Ch 12, sk 6 sts, sl st to join on opposite side of bootie opening. Fasten off.
Button: Sew small button to strap.
Small Bow: Using Yarn A, make a tiny bow (ch 8, work 4 rows of 7 sc, pinch and wrap center). Sew to toe of each bootie.
Repeat for second bootie.
HEADBAND
Follow the braided headband instructions in the Special Stitches section. Cut your yarn lengths, braid, knot, and tie into a loop to fit baby’s head.
Tips for Success
Blocking: Lightly steam block the finished dress to even out the fan stitches and open up the scalloped edges. Do not press down hard on the textured stitches.
Washing: If you used cotton or cotton-blend yarn, machine wash cold and lay flat to dry. Avoid the dryer to prevent shrinkage.
Customizing Size: To make a smaller size (0-3 months), work 2 fewer raglan increase rows. To make a larger size (6-12 months), work 2 additional raglan increase rows and add 2 more rounds to the skirt.
Color Variations: This set looks beautiful in soft pink, butter yellow, lavender, or classic white with sage green as the contrast color instead.
You Did It!
This baby dress set is the kind of project that becomes an heirloom. The fan stitch skirt, the scalloped collar, the matching booties and headband. It all comes together into something truly special for a little one.
Take your time with each piece. Mark your stitches. Count your repeats. The details are what make this set so beautiful, and you have all the skills to make it happen.
Thank you so much for choosing this pattern. I hope you love making this set as much as I loved designing it. If you make one, I would absolutely love to see it! Tag me on Instagram or share a photo on Facebook. Seeing your finished projects is honestly the best part of sharing patterns.
If you loved this sage green baby dress set crochet pattern, go ahead and save it to your Pinterest boards so you can find it when you are ready to start. And if you make one, please come back and leave a comment below. I read every single one and would love to hear how yours turned out!
You Might Also Like
- Sage Green Boho Tiered Crochet Dress Free Pattern
- Sage Green Botanical Granny Backpack Free Crochet Pattern
- Mint Green Spring Purse Free Crochet Pattern
- Autumn Maple Leaf Table Runner Free Crochet Pattern
