
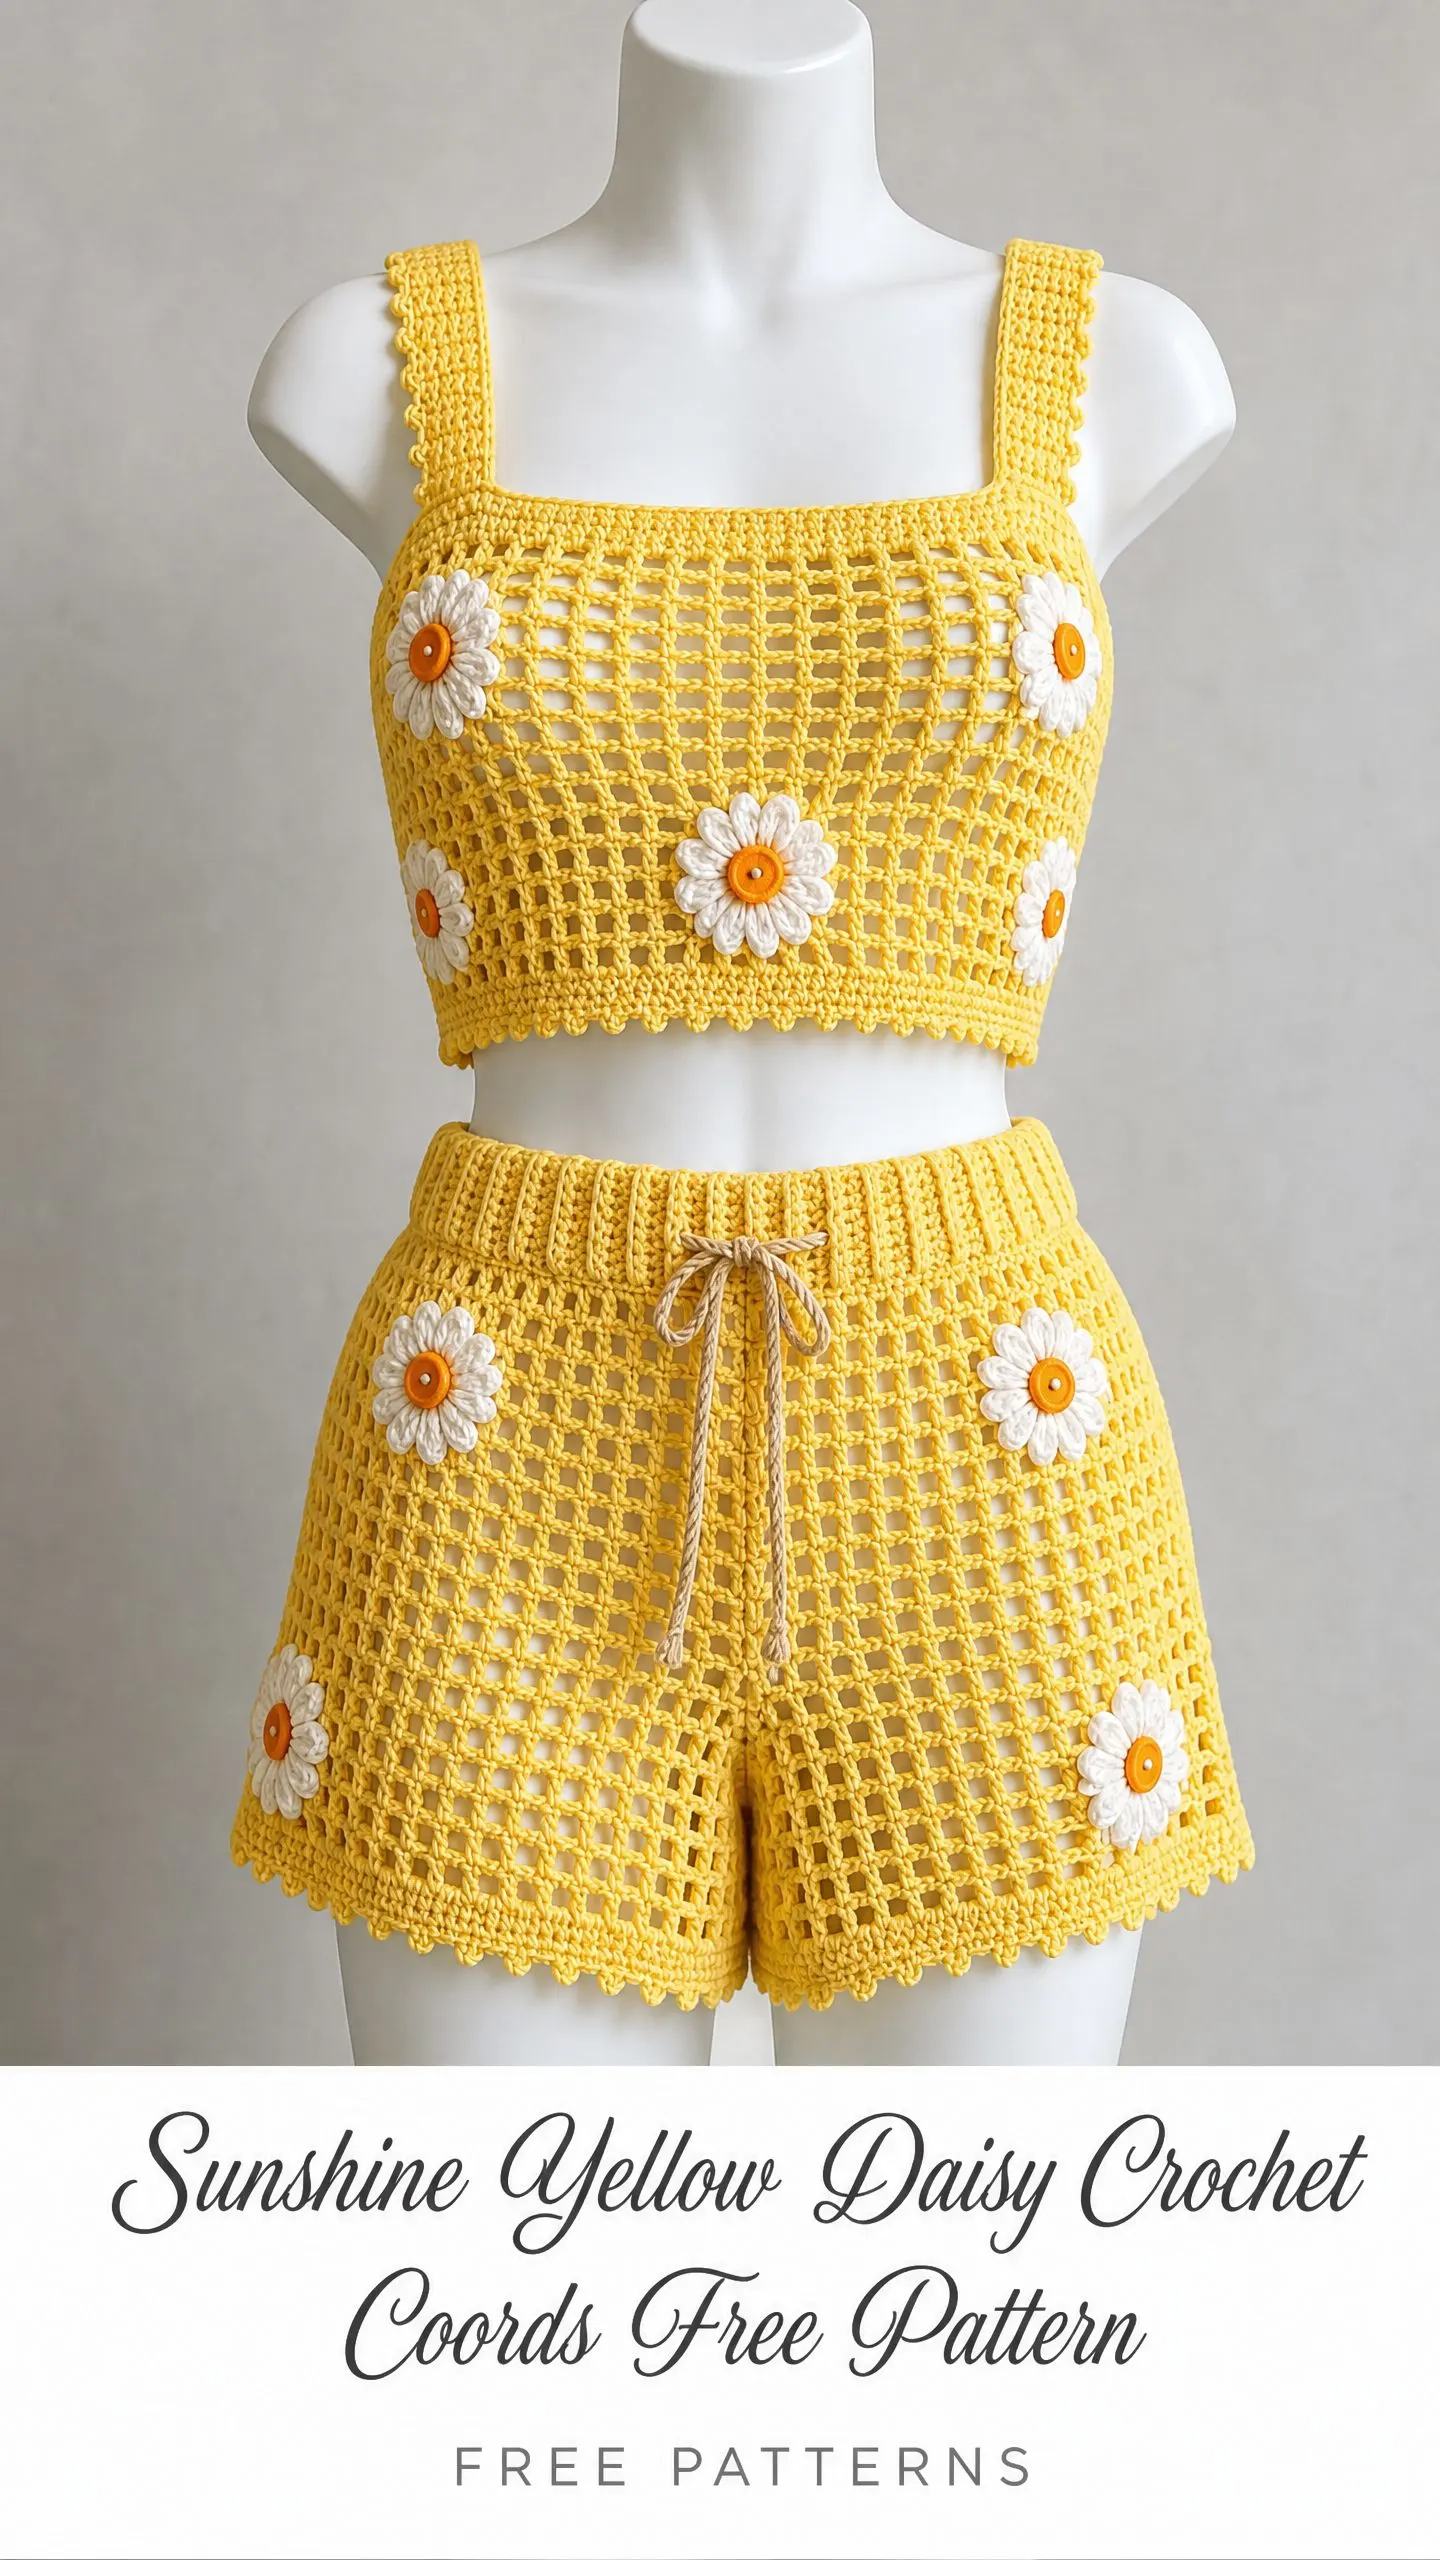
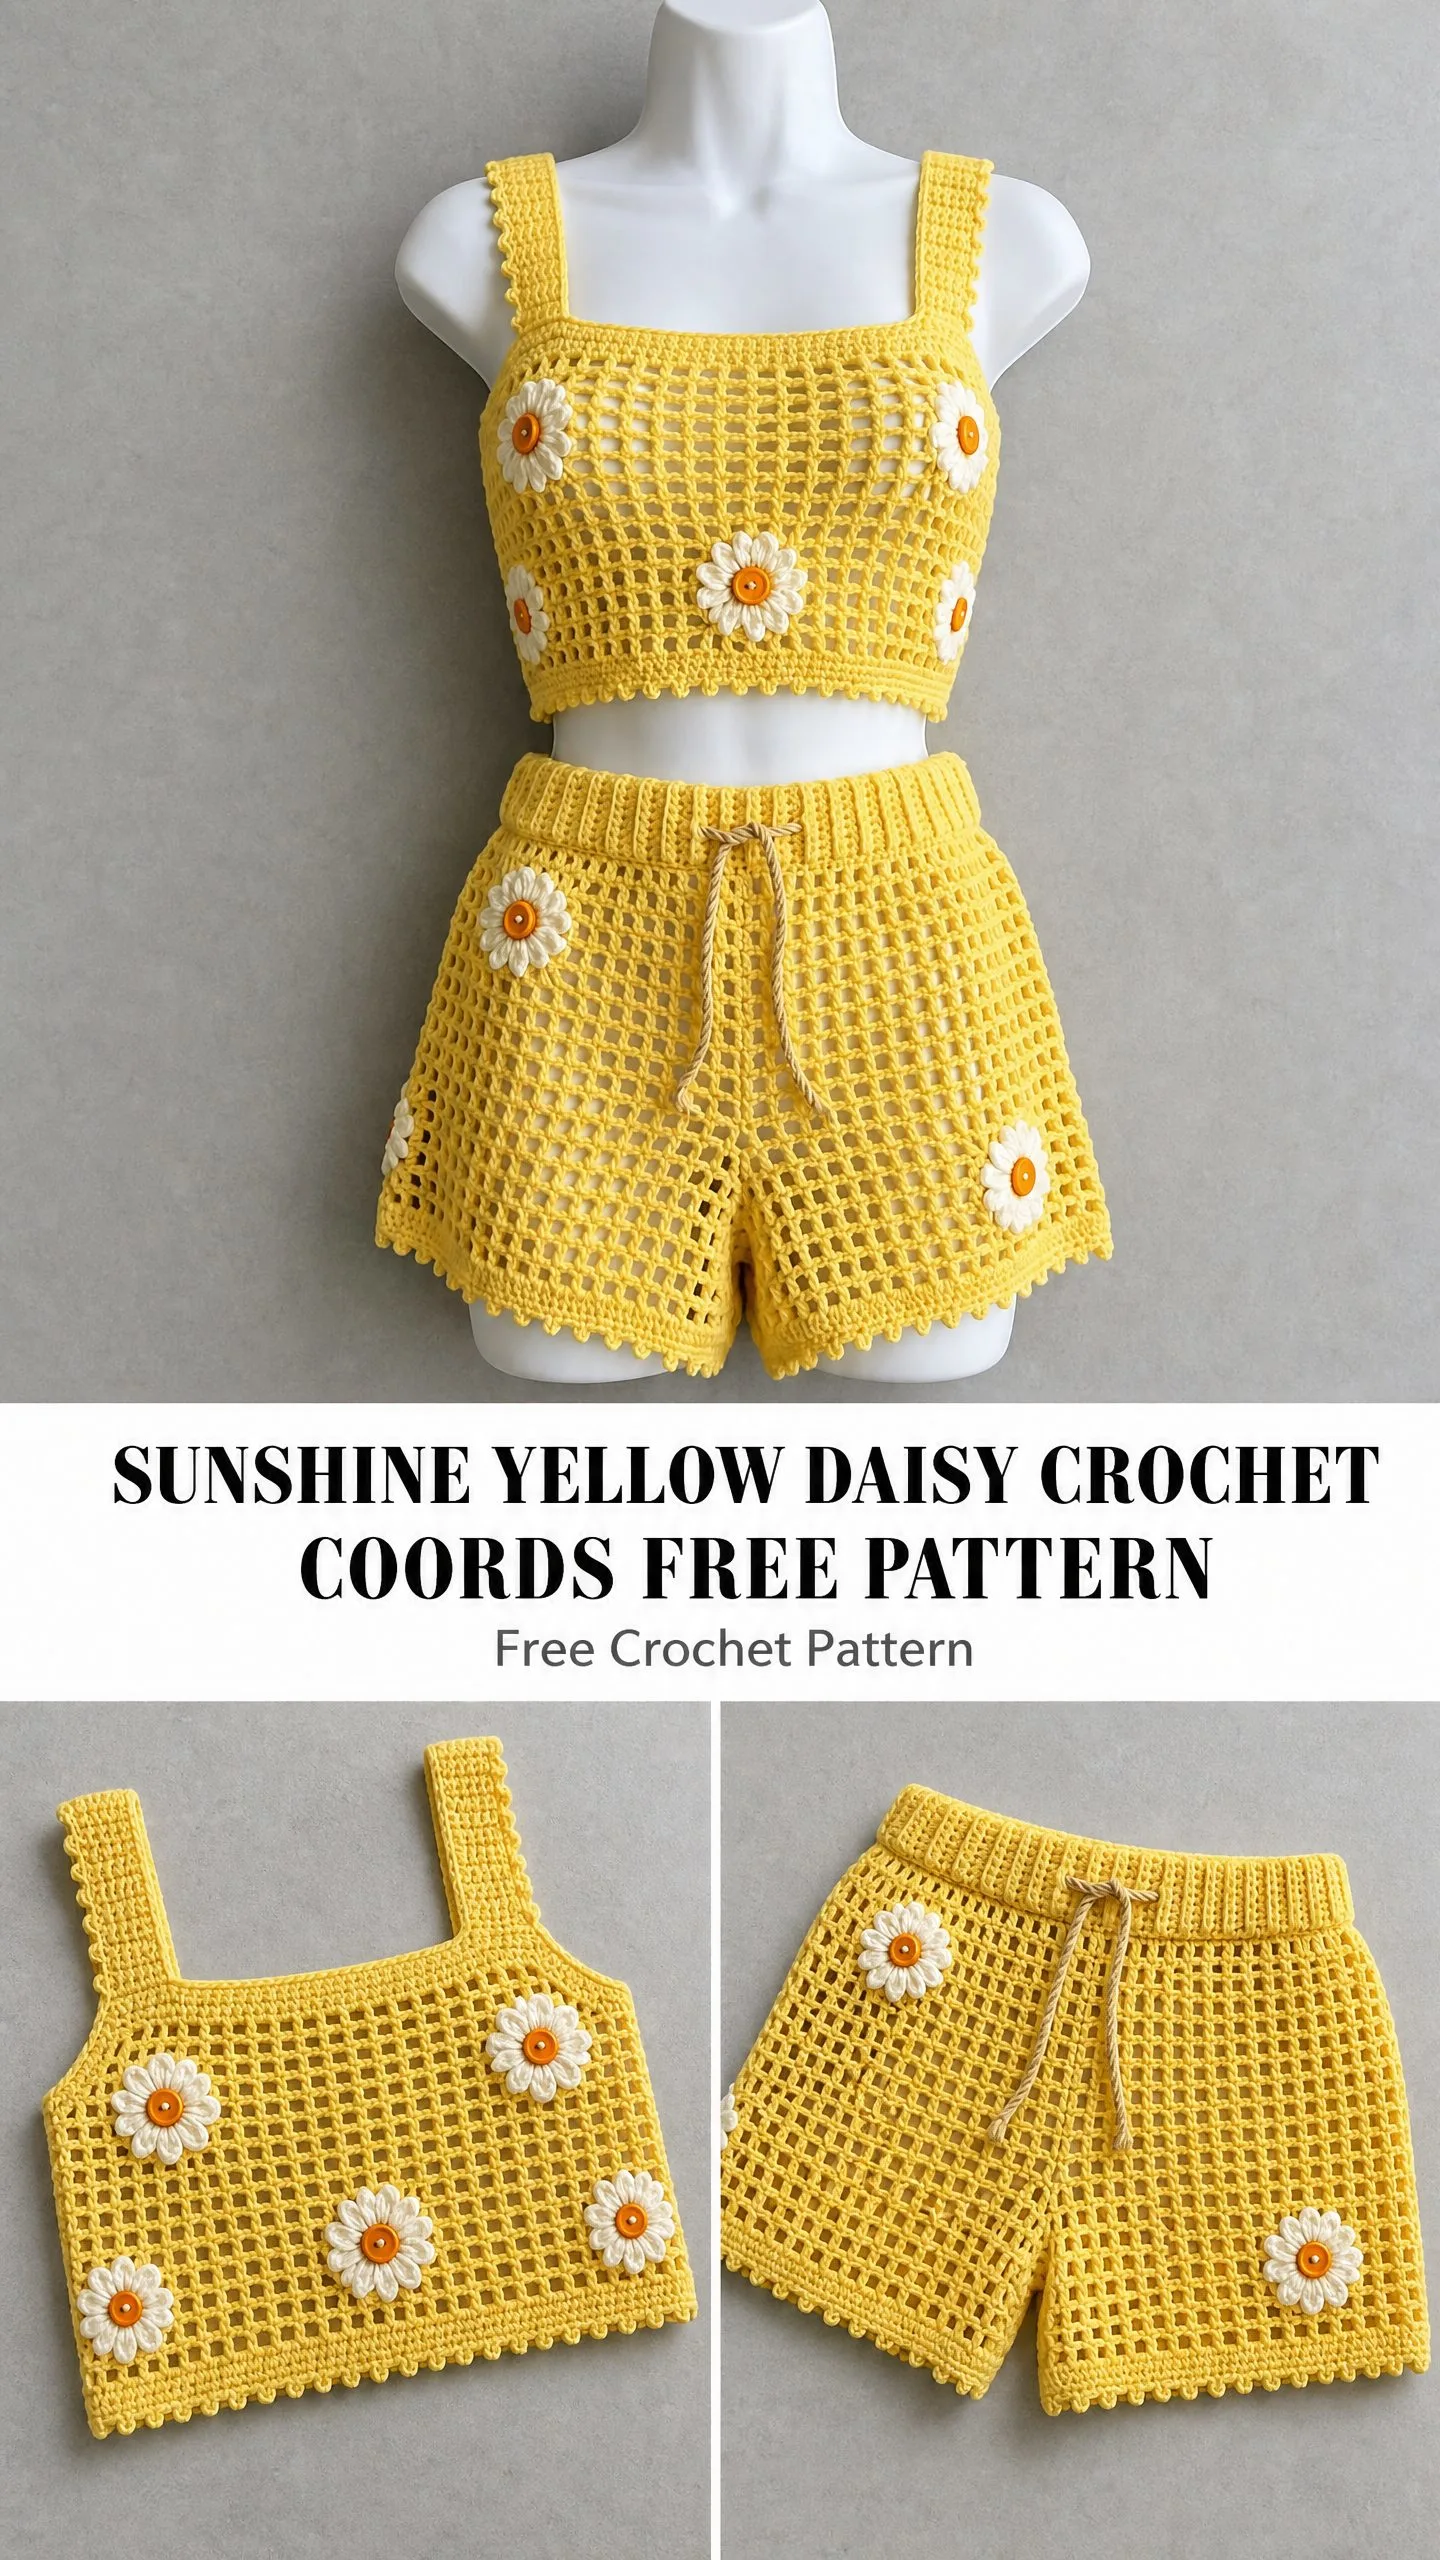
OKAY, this set is absolutely STUNNING and I cannot wait to share it with you! This sunshine yellow crochet coords set with adorable daisy appliques is one of those projects that looks incredibly impressive but breaks down into totally manageable pieces. We’re talking a cropped square-neck tank top and matching high-waisted shorts, both featuring that gorgeous open filet mesh texture and the sweetest white and orange daisies.
The whole set takes roughly 21 to 32 hours depending on your experience level, which sounds like a lot until you realize you’re getting TWO complete garments plus a bunch of cute little flowers. Trust me, this is the kind of project that gets compliments every single time you wear it.
Whether you’re dreaming of beach days, summer festivals, or just want to feel like a walking ray of sunshine, this crochet two piece set delivers. Let’s dive in!
About This Crochet Coords Pattern
This pattern creates a matching two piece outfit that’s perfect for warm weather. The cropped tank top features a flattering square neckline with wide straps and sits at a trendy cropped length. The high-waisted shorts have a comfortable ribbed waistband with an adjustable drawstring and the cutest scalloped hem on each leg opening.
Both pieces are constructed using the same filet mesh stitch, which creates that beautiful open grid texture you can see in the photos. The daisy appliques are made separately and sewn on at the end, so you can customize their placement however you like.
The skill level is intermediate. You’ll need to be comfortable with working in rows and rounds, basic seaming, and creating those three dimensional flower appliques. But don’t worry if any of those sound intimidating. Each individual technique is straightforward, and I’ll walk you through everything step by step.
Finished Measurements
This pattern is written for size Small. I’ve included customization tips at the end if you need to adjust.
Top:
Shorts:
Materials Needed
Yarn:
Hooks:
Notions:
Yarn Suggestions
Lion Brand Pound of Love works beautifully for this project. It’s a DK/light worsted weight, 100 percent acrylic, and comes in huge skeins. Look for Buttercup for your main color, White for the petals, and Goldenrod or Orange for the centers.
Paintbox Yarns Simply DK is another excellent choice. You’ll need approximately 6 balls in Buttercup Yellow, 1 ball in Paper White, and a partial ball in Mandarin Orange.
WeCrochet Dishie is perfect if you want a cotton option. Cotton gives a more structured drape and works wonderfully for warm weather wear. Grab about 5 balls in Canary, 1 ball in Cream, and a partial ball in Tangerine.
Choose a smooth yarn with good stitch definition. The filet mesh needs to read clearly, so avoid fuzzy or halo yarns. Cotton will give you a stiffer, more structured fabric while acrylic will be softer and stretchier.
Gauge
Getting your gauge right is critical for a fitted garment like this. Please make a swatch before starting!
With G-6 / 4.0 mm hook in filet mesh pattern:
In sc ribbing with E-4 / 3.5 mm hook:
Make a swatch of at least 20 stitches by 20 rows and measure after blocking. Adjust your hook size if needed.
Abbreviations and Stitch Definitions
Special Stitches
Filet Mesh Stitch
This creates the gorgeous open grid pattern used throughout both pieces.
Row 1 setup: Chain a multiple of 3 plus 2. Turn.
Working row: Ch 3 (counts as first dc), skip 2 chains, dc in next chain, ch 2, skip 2 chains, dc in next chain. Repeat "ch 2, skip 2, dc in next st" across to end.
Subsequent rows: Ch 5 (counts as dc plus ch 2), turn. Skip the first dc and the ch-2 space, dc in next dc. Continue: ch 2, skip ch-2 sp, dc in next dc. End with dc in 3rd ch of t-ch from previous row.
Each mesh unit equals 1 dc plus 1 ch-2 space. When I give stitch counts in this pattern, I’m counting mesh units, not individual stitches.
Shell Scallop Border
This creates the pretty scalloped edge on the hems.
Work into the final row: sl st to first st, ch 1. In same st: sc 1. Skip 2 sts, work 5 dc in next st (shell made), skip 2 sts, sc in next st. Repeat "skip 2, 5 dc in next, skip 2, sc" across. End with sl st to first sc.
Daisy Applique
Each daisy is worked separately and sewn on later.
Ring: With CA, make a magic ring.
Round 1: Ch 1, work 10 sc into ring, sl st to first sc to join. (10 sc)
Round 2 (petals): Ch 1. In same st as join: sc 1. Ch 10, sl st back into the base of that same sc to form a loop. Sc in next sc. Repeat "ch 10, sl st to base, sc in next sc" around until 10 petals are made. Sl st to first sc. Fasten off CA, leave a 12 inch (30 cm) tail for sewing.
Round 3 (center): Join CB with a sl st into the magic ring center hole, working over Round 1 sc stitches. Ch 1, work 6 sc around the center. Sl st to join. Fasten off CB, leave tail.
Optional button center: Sew a 10 mm orange button directly onto the CB center after the daisy is attached to the garment.
Each finished daisy measures approximately 3 inches (7.5 cm) in diameter.
Sc Ribbing
This creates the stretchy ribbed texture for the waistband and straps.
Foundation: Chain the number specified, turn.
Row 1: Sc in second ch from hook and each ch across, turn.
Row 2 and all subsequent rows: Ch 1, sc in blo of each st across, turn.
Drawstring Cord
Cut 3 strands of MC each 40 inches (101 cm) long. Hold together and twist tightly in one direction. Fold in half and allow to twist back on itself. Knot both ends and trim to 30 inches (76 cm).
Pattern Notes Before You Begin
1. The top is worked as two flat panels (front and back), seamed at the sides, then straps are added from the top edge.
2. The shorts are worked in the round for the waistband and upper hip, then divided and worked flat for each leg before joining at the crotch seam.
3. Mark the RS of your work with a stitch marker on Row 1.
4. Turning chain 3 counts as a dc throughout. Turning chain 5 counts as dc plus ch 2 in mesh rows.
5. All daisy appliques are made first, blocked, and sewn on after both pieces are assembled and blocked.
6. Make all your daisies before you start the garments. It’s a great way to use up any spare time and having them ready makes the finishing stage so satisfying!
Instructions: Cropped Tank Top
Section 1: Front Panel
Foundation: With G-6 hook and MC, chain 68.
Row 1 (RS): Dc in 6th ch from hook (counts as first dc plus ch-2 sp). Ch 2, skip 2 ch, dc in next ch. Repeat "ch 2, skip 2 ch, dc in next ch" across to end. Turn. (22 mesh units)
Row 2: Ch 5 (counts as dc plus ch 2), turn. Skip first dc and ch-2 sp, dc in next dc. Continue "ch 2, skip ch-sp, dc in next dc" across. End with dc in 3rd ch of t-ch. Turn. (22 mesh units)
Rows 3 through 14: Repeat Row 2. (22 mesh units each row)
Checkpoint: After Row 14 your front panel should measure approximately 7 inches (18 cm) wide and 7 inches (18 cm) tall before blocking.
Section 2: Armhole and Neckline Shaping (Front Panel)
Row 15 (begin armhole): Sl st across first mesh unit (sl st to dc, sl st across ch-2 sp, sl st to dc), ch 5, dc in next dc. Continue in mesh pattern across, stopping one mesh unit before end (leave last mesh unit unworked). Turn. (20 mesh units)
Row 16: Sl st across first mesh unit, ch 5, dc in next dc. Continue in mesh across, stopping one mesh unit before end. Turn. (18 mesh units)
Rows 17 through 18: Repeat Row 2 across all stitches without further decreasing. Turn. (18 mesh units)
Row 19 (neckline divide): Work 7 mesh units in pattern, ch 3, turn. Leave center 4 mesh units unworked for neckline (mark with stitch marker). You’ll attach yarn separately for the right shoulder.
Left Shoulder
Row 20: Ch 5, turn. Work 7 mesh units in pattern. (7 mesh units)
Rows 21 through 22: Ch 5, turn. Work in pattern across. (7 mesh units)
Fasten off at end of Row 22. Leave 18 inch (46 cm) tail for strap construction.
Right Shoulder
Join MC at the dc marking the start of the right shoulder section (12th dc from the left edge after the center 4-unit gap).
Row 19 right: Ch 5, work 7 mesh units to end. Turn. (7 mesh units)
Row 20: Ch 5, work 7 mesh units across. Turn. (7 mesh units)
Rows 21 through 22: Ch 5, work in pattern across. (7 mesh units)
Fasten off. Leave 18 inch (46 cm) tail.
Section 3: Back Panel
Work Rows 1 through 18 exactly as Front Panel Rows 1 through 18. (18 mesh units at end of Row 18)
Row 19 back: Ch 5, turn. Work across all 18 mesh units without dividing. (18 mesh units) The back neckline stays as a straight edge.
Rows 20 through 22 back: Ch 5, turn. Work across. (18 mesh units)
Fasten off. Leave long tail.
Section 4: Hem Border
Work this on both Front and Back panels separately before seaming.
With RS facing, join MC at bottom right corner of front panel foundation chain edge with sl st.
Ch 1. Sc evenly along foundation edge: work 3 sc per mesh unit (1 into each of the 3 chain segments of each mesh unit). Total: 66 sc.
Scallop row: Sl st to first sc. Ch 1, sc in same st. Skip 2 sc, 5 dc in next sc, skip 2 sc, sc in next sc. Repeat across. (11 scallop shells)
Sl st to first sc. Fasten off. Weave in ends.
Repeat hem border on back panel.
Section 5: Side Seaming
Block both panels before seaming (see Finishing section).
Align front and back panels with WS together. Using yarn needle and MC, whipstitch or mattress stitch along both side edges from hem to armhole shaping (Row 15 point). Leave armhole open.
Section 6: Straps
Each strap is worked as a narrow strip of sc-blo ribbing.
With E-4 hook and MC, chain 7.
Row 1: Sc in 2nd ch from hook and in each ch across. (6 sc)
Rows 2 through 100: Ch 1, turn. Sc in blo of each sc across. (6 sc)
Check strap against the garment. It should measure approximately 14 inches (35 cm) for size Small. Adjust row count as needed.
Fasten off. Leave long tails on both ends.
Sew one end of each strap to the top edge of the front panel at the left and right shoulder positions, centering each strap over 3 mesh units (approximately 2.25 inches/5.7 cm from the side edge). Sew the other end to the corresponding position on the back panel.
Make second strap identically. Attach symmetrically.
Section 7: Armhole Border
With E-4 hook and MC, join with sl st at bottom of left armhole opening.
Ch 1, sc evenly around armhole: approximately 3 sc per 2 rows along side edges and 1 sc per mesh unit along shoulder edges. Target count: 40 sc around each armhole.
Sl st to first sc, fasten off. Weave in ends.
Repeat for right armhole.
Top Complete Checkpoint
Your finished top should measure approximately 9 inches (23 cm) from hem to top of straps and 32 to 34 inches (81 to 86 cm) circumference at bust.
Instructions: High-Waisted Shorts
Section 1: Waistband
The waistband is worked flat in sc-blo ribbing and then joined into a ring.
With E-4 hook and MC, chain 21.
Row 1: Sc in 2nd ch from hook and each ch across. (20 sc)
Rows 2 through 120: Ch 1, turn. Sc in blo of each sc across. (20 sc)
After Row 120, sl st the short ends of the ribbing together to form a ring. Rotate work 90 degrees.
Joining row (top edge): With RS facing, join MC at the seam. Ch 1, sc in each row end around the top edge of the waistband. Work 1 sc per row end. (120 sc)
Sl st to first sc to join. Do not turn. (120 sc in round)
Section 2: Upper Hip Body (worked in the round)
Round 1: Ch 5 (counts as dc plus ch 2), skip first 2 sc, dc in next sc. Ch 2, skip 2 sc, dc in next sc. Continue "ch 2, skip 2, dc in next sc" around. Sl st to 3rd ch of starting ch-5 to join round. (40 mesh units)
Round 2: Sl st into ch-2 sp, ch 5, dc in next dc. Ch 2, dc in next dc. Continue around. Sl st to 3rd ch of ch-5. (40 mesh units)
Rounds 3 through 14: Repeat Round 2. (40 mesh units)
Checkpoint: After Round 14 the body tube measures approximately 7 inches (18 cm) around and 7 inches (18 cm) tall from top of waistband.
Section 3: Leg Divide
Round 14 ends with 40 mesh units total. Divide into 2 legs of 20 mesh units each.
Mark the first 20 mesh units as the front and the next 20 as the back.
Section 4: Front Leg
Turn to work flat from this point.
Row 1 (front leg, RS): Join MC with sl st to the dc at the start of front section. Ch 5, dc in next dc, continue in mesh pattern across front 20 units. Ch 1, turn. (20 mesh units)
Row 2: Ch 5, dc in next dc, continue across. Ch 1, turn. (20 mesh units)
Rows 3 through 4: Repeat Row 2. (20 mesh units)
Fasten off after Row 4.
Section 5: Back Leg
Join MC at start of back section.
Work Rows 1 through 4 exactly as Front Leg. (20 mesh units)
Fasten off after Row 4.
Section 6: Crotch Seam
Fold shorts so front and back leg panels face each other. Using yarn needle and MC, whipstitch or mattress stitch the front and back crotch edges together.
Seam approximately 8 inches (20 cm) from center. Leave the remaining 10 mesh units on each side open to form the two leg openings.
Section 7: Leg Hem Border
Work the scallop border on each leg opening.
For each leg: with G-6 hook and MC, join with sl st at inner leg edge.
Ch 1. Sc evenly around leg opening: work into each dc and into each ch-2 space of the final mesh row. Target: 60 sc around each leg opening.
Scallop row: Ch 1, sc in same st. Skip 2 sc, 5 dc in next sc, skip 2 sc, sc in next sc. Repeat around. (10 scallop shells)
Sl st to first sc. Fasten off. Weave in ends.
Repeat for second leg.
Section 8: Drawstring
Thread the twisted drawstring cord through two mesh openings near the center front of the waistband. Knot both ends.
Shorts Complete Checkpoint
Finished shorts should measure approximately 11 inches (28 cm) total length from top of waistband to hem.
Instructions: Daisy Appliques
Number of daisies needed:
Follow the Daisy Applique instructions in the Special Stitches section to make each flower.
Daisy Placement
Top front:
Top back: 2 daisies centered across Rows 5 through 7
Shorts front:
Shorts back: 2 daisies placed symmetrically
Sewing: Thread CA tail onto yarn needle. Position each daisy on the garment surface. Using small whipstitches, sew around the outer round of the daisy center, catching both the daisy and the underlying mesh. Tack petal tips lightly if desired to keep them flat.
Size Customization Tips
The filet mesh repeat uses a multiple of 3 stitches. Add or subtract 3 mesh units per panel for each approximately 2.25 inches (5.7 cm) of width change.
Top width: For a 36 to 38 inch (91 to 97 cm) bust, use 26 mesh units (foundation chain 80). For a 28 to 30 inch (71 to 76 cm) bust, use 18 mesh units (foundation chain 56).
Top length: Add or remove 2 row increments. Each 2 rows adds approximately 1 inch (2.5 cm).
Shorts hip: Add or remove mesh units in increments of 4 (2 per front, 2 per back). Every 4 units changes the hip by approximately 3 inches (7.5 cm).
Waistband: Work approximately 70 percent of the hip circumference. For a 40 inch (101 cm) hip, work 140 rows of waistband ribbing.
Strap length: Measure from front top edge over shoulder to back top edge. Adjust row count accordingly (approximately 7 rows per inch).
Finishing and Blocking
1. Weave in all ends using a yarn needle, running the tail at least 2 inches (5 cm) through stitches in two directions before trimming.
2. Wet blocking (recommended for cotton): Submerge pieces in cool water. Gently press out water without wringing. Lay flat on a blocking mat. Stretch to finished measurements. Pin mesh open to show the grid clearly. Pin daisy petals into rounded shapes. Allow to dry fully.
3. Steam blocking (recommended for acrylic): Pin to measurements on blocking mat. Hold a steam iron or steamer 1 inch (2.5 cm) above fabric. Do not press iron directly onto acrylic. Allow to cool before unpinning.
4. Block daisies individually before sewing them to the garment.
Care Instructions
Hand wash in cool water with mild soap. Lay flat to dry. Do not wring or twist. Do not tumble dry. If made in 100 percent acrylic, a cool machine wash on gentle cycle is acceptable, but always lay flat to dry to preserve shape.
Final Thoughts on This Crochet Coords Pattern
I really hope you love making this sunshine yellow daisy set as much as I loved designing it! There’s something so satisfying about creating a complete matching outfit from scratch, and those little daisy appliques add the sweetest finishing touch.
This crochet tutorial covers everything you need from start to finish, but don’t hesitate to reach out if you get stuck anywhere. The filet mesh might look complicated, but once you get the rhythm of it, the rows fly by.
Thank you so much for choosing this pattern for your next project! If you make this set, I would absolutely love to see it. Tag me on Instagram or share your photos in our Facebook group. Seeing your creations genuinely makes my day.
If you want to come back to this crochet daisy coords pattern later, go ahead and save it to your Pinterest boards so it’s easy to find when you’re ready to start. And please drop a comment below if you make it. I love hearing how projects turn out and seeing all the color combinations you choose!
You Might Also Like
- Ocean Blue Boho Crochet Gladiator Sandals Free Pattern
- Little Mermaid Baby Dress Set Free Crochet Pattern
- Mint Ocean Waves Doll Dress Free Crochet Pattern
- Navy Blue Open Weave Crochet Shrug Free Pattern
