
I’ve been on the hunt for the perfect doll dress pattern for months now, and this one stopped me in my tracks. The crocodile stitch skirt creates the most stunning layered scale effect I’ve ever seen on a tiny garment.
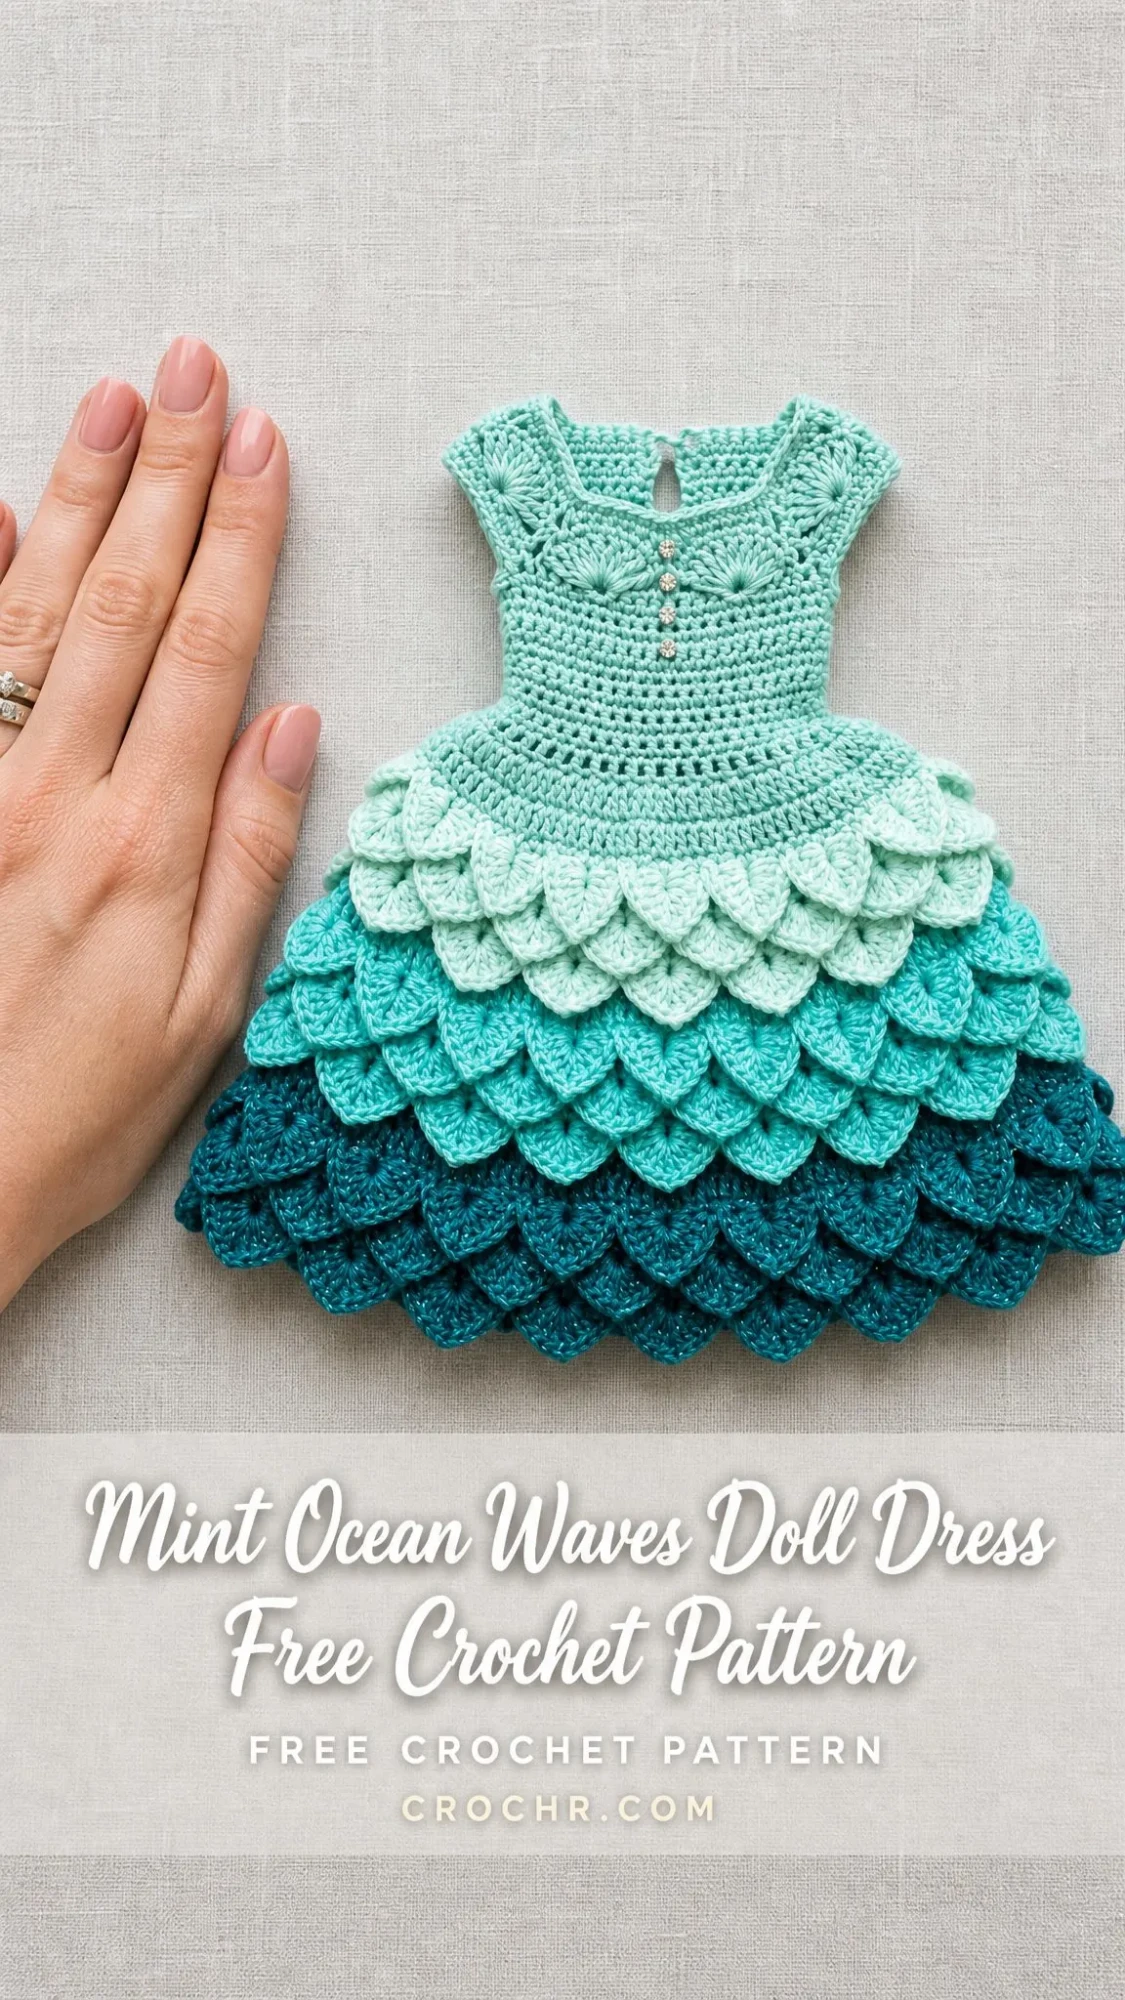
This is my favourite style of doll dress to make. The ombre tiers shift from pale mint at the waist down through aqua teal and into deep ocean teal at the hem. It genuinely looks like mermaid scales or gentle ocean waves cascading downward.
If you’ve been wanting to try crocodile stitch but felt intimidated, a doll dress is actually the ideal practice project. Small scale, quick results, and absolutely showstopping when finished. Let me walk you through every single step.
About This Crochet Pattern
This dress fits a standard 18-inch fashion doll or play doll. Think the classic dolls most of us grew up with. The construction is top-down, which means you start at the neckline and work your way to the hem without any seaming.
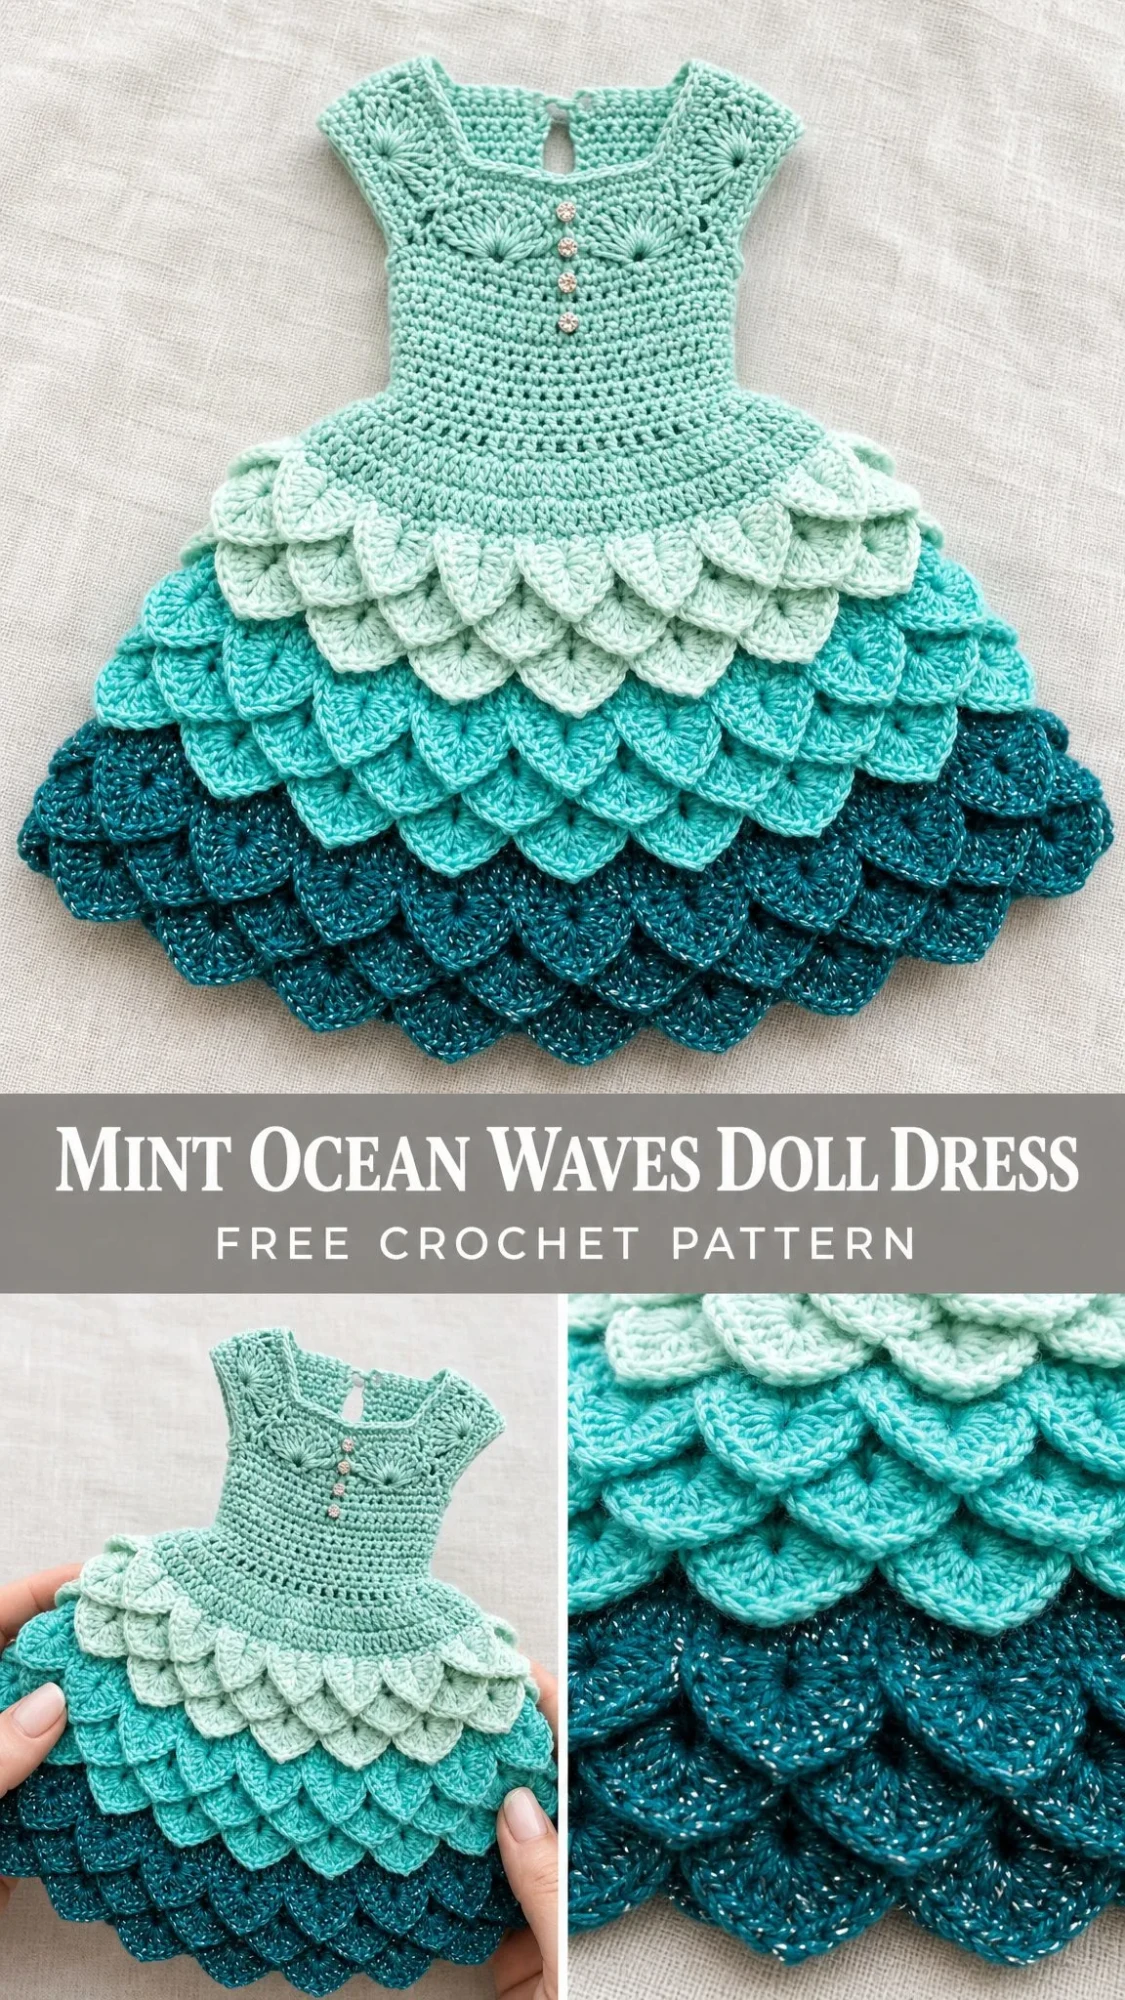
The bodice features single crochet (sc) worked in joined rounds with decorative fan shell stitches at the shoulders. Those little fan details create the pretty cap-sleeve effect you see in the finished piece. Three tiny rhinestone or pearl buttons adorn the center front for sparkle, and a small keyhole closure at the back neck lets you slip the dress on and off easily.
The real showstopper is the skirt. Five tiers of crocodile stitch scales create that dimensional, layered texture. Each tier gets worked in a graduated color sequence, pale mint at the top transitioning through medium aqua teal in the middle to deep ocean teal at the bottom.
Finished Measurements:
Skill Level
I’d call this Advanced Beginner to Intermediate. The bodice uses basic stitches that any beginner who understands joining rounds can handle. The crocodile stitch requires careful attention to working around post stitches in unusual orientations, which bumps it up to intermediate territory.
Here’s the good news: there’s no complex shaping or seaming required. If you can follow directions and take your time with the scale technique, you can absolutely make this dress.
Time estimate: Approximately 6 to 10 hours for an experienced crocheter. Allow up to 14 hours if crocodile stitch is new to you. I recommend making a practice swatch of a few scales before diving into the actual skirt.
Materials You’ll Need
Yarn:
Fingering weight (CYCA 1 / Lace-Fingering) cotton or cotton-blend yarn in three colors:
Yarn Suggestions:
DMC Natura Just Cotton works beautifully here. It’s 100% combed cotton with excellent stitch definition for scale texture. Scheepjes Catona is another gorgeous option, the mercerized finish gives a subtle sheen that really enhances the mermaid scale effect.
Choose a smooth plied cotton or cotton-blend with good stitch definition. Fuzzy or textured yarns will obscure all that beautiful crocodile detail you’re working so hard to create. Avoid purely acrylic yarns for this pattern as they tend to produce a looser, less structured scale.
Hook:
US B-1 / 2.25 mm crochet hook (or size needed to obtain gauge)
Notions:
Gauge
20 sc x 24 rows = 4 inches (10 cm) in single crochet, worked in rounds, using US B-1 / 2.25 mm hook with fingering weight cotton.
Crocodile stitch scale tier gauge: One complete scale worked over 5 dc posts equals approximately 0.6 inch (1.5 cm) wide. One tier height equals approximately 0.75 inch (2 cm).
Gauge matters for proper fit on this project. Please swatch before beginning.
Abbreviations and Stitch Definitions
Let me define every stitch we’ll use. Even if you know these, a quick refresher never hurts.
Special Stitches Explained
These special techniques create the dress’s signature look. Read through these carefully before starting.
Shell Stitch
Work (2 dc, ch 1, 2 dc) all into the same stitch or space. This forms a small fan of 4 dc with a chain-1 picot at the center.
Fan Shell (Used at Shoulders)
Work (dc, ch 1, dc, ch 1, dc, ch 1, dc, ch 1, dc) all into the same stitch. That’s five double crochets separated by chain-1 spaces, all in one stitch. This spreads into a beautiful decorative fan at the shoulder curve.
Crocodile Stitch Scale (The Star of the Show)
Each scale is worked over two adjacent double crochet posts that form a V-pair. You work down one post and then up the adjacent post.
Step 1: Your set-up row creates pairs of dc separated by ch-1 spaces or pairs of adjacent dc.
Step 2: To begin a scale, join or work to the top of the left post of a dc pair.
Step 3: Work 5 dc down the post of the left dc by inserting the hook from front to back around the post shaft (like a front post double crochet, but reading downward toward the foundation). Each dc stacks below the previous. You’ll have 5 dc fanning down the left post.
Step 4: Ch 1 at the bottom to pivot.
Step 5: Work 5 dc up the right post of the same V-pair, inserting hook from back to front and working upward. This creates 5 dc fanning up the right post.
Step 6: Sl st to the top of the right post to close the scale.
One complete croc scale is now formed. It looks like a rounded petal or fish scale sitting between the two posts. The first 5-dc group fans downward (away from the bodice) and the second 5-dc group fans back upward. The closed top of the petal faces toward the bodice, and the open scalloped edge faces the hem.
Keyhole Loop (Used at Back Neck)
At the designated closing point, ch 5, sl st back into the same stitch to form a small loop. This loop receives a small button for closure.
Pattern Notes Before You Begin
Read these notes first. They’ll save you confusion later.
The dress is worked from the neck down in joined rounds. Do not turn unless specifically instructed.
The bodice is worked in Color A throughout.
Color changes for the skirt tiers happen at the beginning of each new tier’s set-up round. Carry the old color loosely along the inside for no more than one round. Otherwise cut and rejoin.
Stitch markers are essential. Place a marker at the beginning of each round and move it up as you go. Also place markers at the four shoulder corner positions during yoke shaping.
The crocodile stitch tiers are not worked in continuous rounds. Each tier requires you to work across the row of dc post pairs, completing each scale before moving to the next.
Right side of work always faces outward. The scales sit on the RS.
For a snug fit on most 18-inch dolls, do not add extra ease to the bodice rounds. The yarn and stitch structure provide sufficient stretch.
The three decorative rhinestone buttons on the bodice front are sewn on after completion and do not function as closures. Only the back keyhole button is functional.
Step-by-Step Instructions
Section 1: Neck and Shoulder Setup
The neckline is a small oval worked to create a slightly square neck opening.
Using Color A, ch 28.
Round 1: Sc in the 2nd ch from hook and in each ch across to the last ch (27 sc along the top edge), work 3 sc into the last ch (corner), now working along the opposite side of the foundation chain, sc in each ch back across (27 sc), work 2 sc into the first ch (corner). Join with sl st to first sc. (59 sc)
Note: The join point is the center back. Place a stitch marker here.
Round 2: Ch 1. Sc in each sc around, working 2 sc into each of the 2 marked corner stitches at each end (increase 4 total). Join. (63 sc)
Round 3: Ch 1. Sc in each sc around. Join. (63 sc)
This forms the neck ring. The long sides are the front and back of the neckline, and the short ends are the shoulder junctions.
Checkpoint: The neck ring should measure approximately 2.25 inches (5.75 cm) across the front opening when laid flat.
Section 2: Shoulder Fans and Yoke Shaping
The shoulder fans create the decorative cap-sleeve effect.
Identify the 4 corner stitches of the neck oval (approximately at stitch positions 14 and 46 counting from center back join). Place markers in these 4 stitches.
Round 4: Ch 1. Sc across the back (14 sc). At the first marked shoulder stitch, work a fan shell into that stitch. Continue with sc across the front (35 sc). At the second marked shoulder stitch, work a fan shell into that stitch. Sc to end. Join. (79 working positions)
Round 5: Ch 1. Sc across back and around entire round, working sc into each dc of each fan shell and sc into each ch-1 space of each fan shell. Join. (79 sc)
Round 6: Ch 1. Sc in each sc around. Join. (79 sc)
Round 7: Ch 1. Sc 8, inc repeat across entire round, working any remainder as plain sc. Join. (88 sc)
Round 8: Ch 1. Sc in each sc around. Join. (88 sc)
Round 9: Ch 1. Sc 10, inc repeat 8 times, sc to end. Join. (96 sc)
Round 10: Ch 1. Sc in each sc around. Join. (96 sc)
Round 11: Ch 1. Sc 11, inc repeat 8 times. Join. (104 sc)
Round 12: Ch 1. Sc in each sc around. Join. (104 sc)
Checkpoint: After Round 12, the bodice should measure approximately 1.75 inches (4.5 cm) from the neck edge.
Section 3: Lower Bodice
Rounds 13-14: Ch 1. Sc in each sc around. Join after each round. (104 sc each round)
Round 15 (eyelet round): Ch 1. Sc 3, ch 1, sk 1 repeat 26 times around. Join. (78 sc + 26 ch-1 spaces = 104 working positions)
Round 16: Ch 1. Sc in each sc and sc into each ch-1 space around. Join. (104 sc)
Round 17: Ch 1. Sc in each sc around. Join. (104 sc)
Round 18 (waist increase round): Ch 1. Sc 12, inc repeat 8 times. Join. (112 sc)
Round 19: Ch 1. Sc in each sc around. Join. (112 sc)
Checkpoint: After Round 19, the full bodice should measure approximately 2.75 inches (7 cm) from the neck edge. This is the bodice completion point.
Section 4: Skirt Foundation and Tier 1 (Color A)
Round 20 (skirt expansion): Ch 1. Sc 6, inc repeat 16 times. Join. (128 sc)
Round 21 (first dc foundation): Ch 3 (counts as first dc). Dc in each sc around. Join to top of ch-3. (128 dc)
The 128 dc are arranged as 64 V-pairs of 2 adjacent dc each. Each pair becomes one croc scale.
Tier 1 Scale Round: Join Color A with sl st to the top of the first dc.
Work one croc scale over the next 2 dc, sl st to top of second dc of the pair, sl st forward to the top of the next dc repeat around for all 64 pairs. At end of round, join to base of first scale. (64 croc scales)
Section 5: Tier 2 Foundation and Scales (Color B)
Round 22 (tier 2 dc foundation): Join Color B at the top of any scale. Ch 3 (counts as dc). Working into the top closed points of the previous tier’s scales, work 2 dc into each scale top to create new pairs for the next tier. Join to top of ch-3. (128 dc)
Tier 2 Scale Round (Color B): Work exactly as Tier 1 Scale Round. 64 pairs, 64 croc scales. Join at end. (64 croc scales)
Section 6: Tier 3 Foundation and Scales (Color B)
Round 23 (tier 3 dc foundation): With Color B, ch 3. Working into the top closed points of tier 2 scales, work 2 dc into each scale top as before. Join. (128 dc)
Round 23b (tier 3 expansion dc foundation): Ch 3. Dc in next 5 dc, 2 dc in next dc repeat 21 times, dc in next 2 dc, 2 dc in last dc. Join. (150 dc, 75 pairs)
Tier 3 Scale Round (Color B): Work croc scale over 2 dc, sl st to top of second dc, sl st forward 75 times. Join. (75 croc scales)
Section 7: Tier 4 Foundation and Scales (Color C)
Round 24 (tier 4 dc foundation): Join Color C. Ch 3. Working into scale tops, 2 dc into each scale top. Join. (150 dc, 75 pairs)
Tier 4 Scale Round (Color C): Work croc scale over each pair, 75 times. Join. (75 croc scales)
Section 8: Tier 5 Foundation and Scales (Color C)
Round 25 (tier 5 expansion dc foundation): With Color C, ch 3. 2 dc in each of next 14 scale tops (28 dc), then 2 dc + 1 extra dc into the 15th scale top (3 dc into that top) repeat 10 times. Join. (160 dc, 80 pairs)
Tier 5 Scale Round (Color C): Work croc scale over each pair, 80 times. Join. (80 croc scales)
Section 9: Hem Finishing
Hem Round: Join Color C at the bottom point of any scale. Ch 1. Sc in the bottom point of each scale around. Join. (80 sc)
Fasten off. Weave in end.
Section 10: Back Closure and Neck Finishing
Return to the neck edge.
With Color A, join at the center back right edge of the neck opening.
Neck Edging Round 1: Ch 1. Work sc evenly around entire neck opening, placing 1 sc per chain stitch along the foundation chain sides and 1 sc per sc along the short ends. Approximate count: 59 sc. Join. (59 sc)
Neck Edging Round 2: Ch 1. Sc in each sc around to last 3 sc before center back join. Ch 5, sl st back into the same stitch to form keyhole loop. Sc in remaining 2 sc. Join. (59 sc + keyhole loop)
Fasten off. Sew small button at center back neck to correspond to the keyhole loop.
Finishing and Embellishment
Weave in all yarn ends securely.
Sew the three rhinestone or pearl buttons vertically in a line at the center front bodice. Position them on the sc fabric between the eyelet row and the fan shell shoulder area, spacing approximately 0.4 inch (1 cm) apart.
Optional: sew a small snap to the inside of the back neck as additional closure support.
Blocking: Lightly mist the dress with water, gently stretching the scale tiers to open up the scallop texture, and allow to dry flat on a towel. Do not press with an iron directly on the crocodile scales as this will flatten them. If using cotton yarn, a cool iron with a pressing cloth over the bodice section only is acceptable.
Size Customization Tips
For a larger doll: Add 4 stitches to the neck chain foundation and 4 stitches to the first expansion round, then continue increasing proportionally. Every 4 extra stitches added to the foundation adds approximately 0.8 inch (2 cm) to the finished bodice circumference.
To lengthen the bodice: Add plain sc rounds between Round 17 and the waist expansion round.
To add more tiers: Each additional tier requires a dc foundation round and a scale round, with periodic expansion rounds every 2 tiers to maintain the flared silhouette. Add approximately 5 to 8 extra pairs (10 to 16 dc) per expansion round.
For a 12-inch fashion doll: Reduce the neck chain to 20 chains, reduce the hook to US 10 / 1.5 mm, and use lace weight thread. Reduce the number of expansion rounds by removing Rounds 11 and 23b.
Care Instructions
Hand wash in cool water with mild soap. Press out excess water gently by rolling in a clean towel. Reshape while damp. Do not tumble dry. Lay flat to dry. If using mercerized cotton, you may lightly iron at a cool setting on the bodice section only, avoiding the scale tiers.
You Did It!
Thank you so much for choosing this crochet pattern for your next project. I hope you love making this dress as much as I loved designing it. Those crocodile stitch scales really do create something special, and watching the ombre color progression come together is incredibly satisfying.
If you make this Mint Ocean Waves Doll Dress, I would absolutely love to see your finished piece. Tag me on Instagram or share a photo in my Facebook group. Seeing your makes genuinely brightens my day.
If you want to find this pattern later, go ahead and save it to your Pinterest boards so it’s waiting for you when you’re ready. And please drop a comment below if you make one. I’d love to hear which colors you chose and how it turned out!
You Might Also Like
- Sunset Mermaid Amigurumi Doll Free Crochet Pattern
- Dusty Rose Knitted Baby Snowsuit Set Free Crochet Pattern
- Forest Green Fox Granny Square Baby Blanket Free Pattern
- Sage Green Botanical Lace Sundress Free Pattern
