
I’ve been searching for the perfect summer dress pattern for ages. Something that feels special enough for a garden party but wearable enough for a beach dinner. This ocean wave peplum dress is my absolute favourite find, and I’m thrilled to share it with you today.
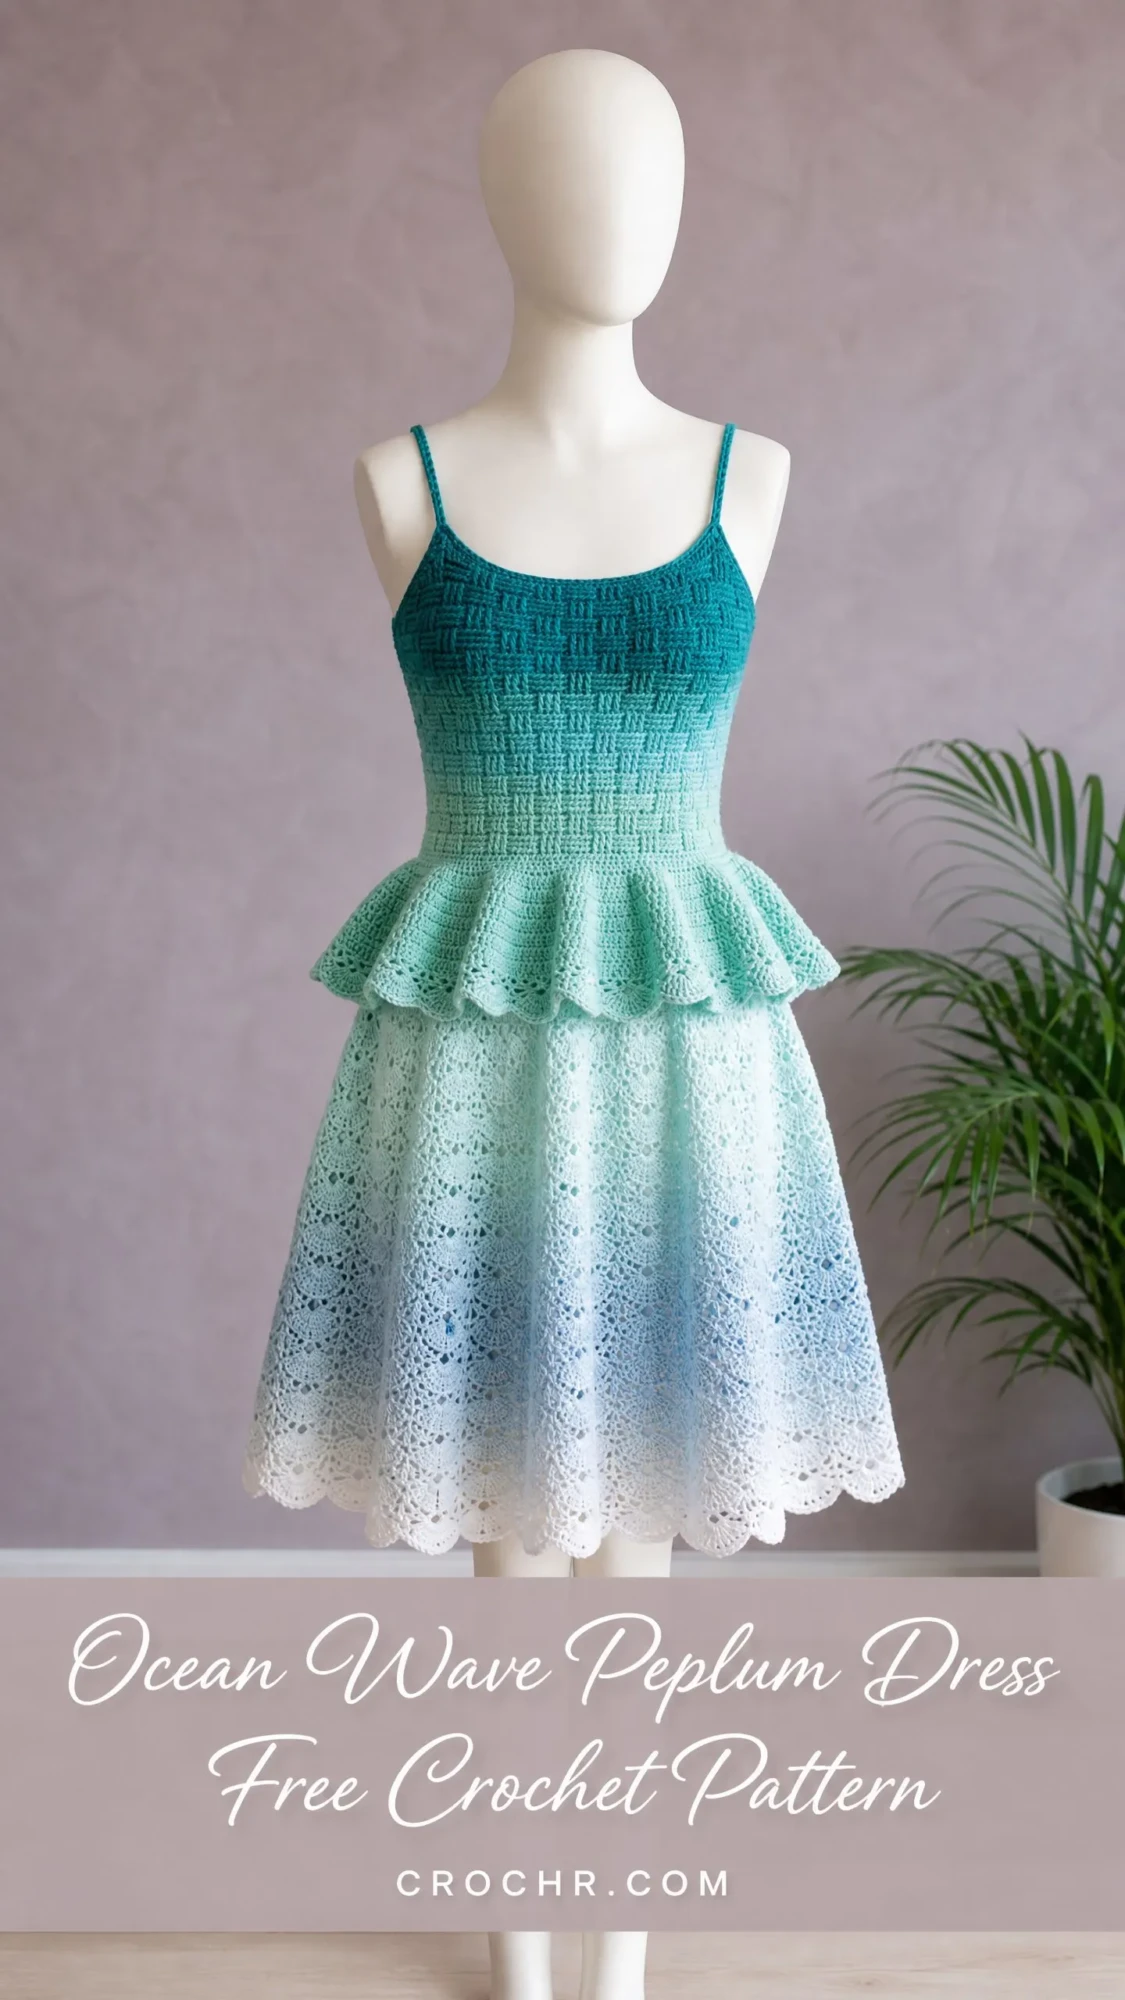
The gradient colour scheme drew me in immediately. That flow from deep teal at the shoulders down through mint, aqua, sky blue, and finally white at the hem creates such a dreamy ombre effect. It genuinely looks like ocean waves captured in yarn.
This is an intermediate to advanced pattern, so I won’t sugarcoat it. You’ll need to be comfortable with post stitches and lace work. But if you’ve been wanting to level up your crochet garment skills, this dress is worth every hour you’ll put into it.
About This Gorgeous Crochet Dress Pattern
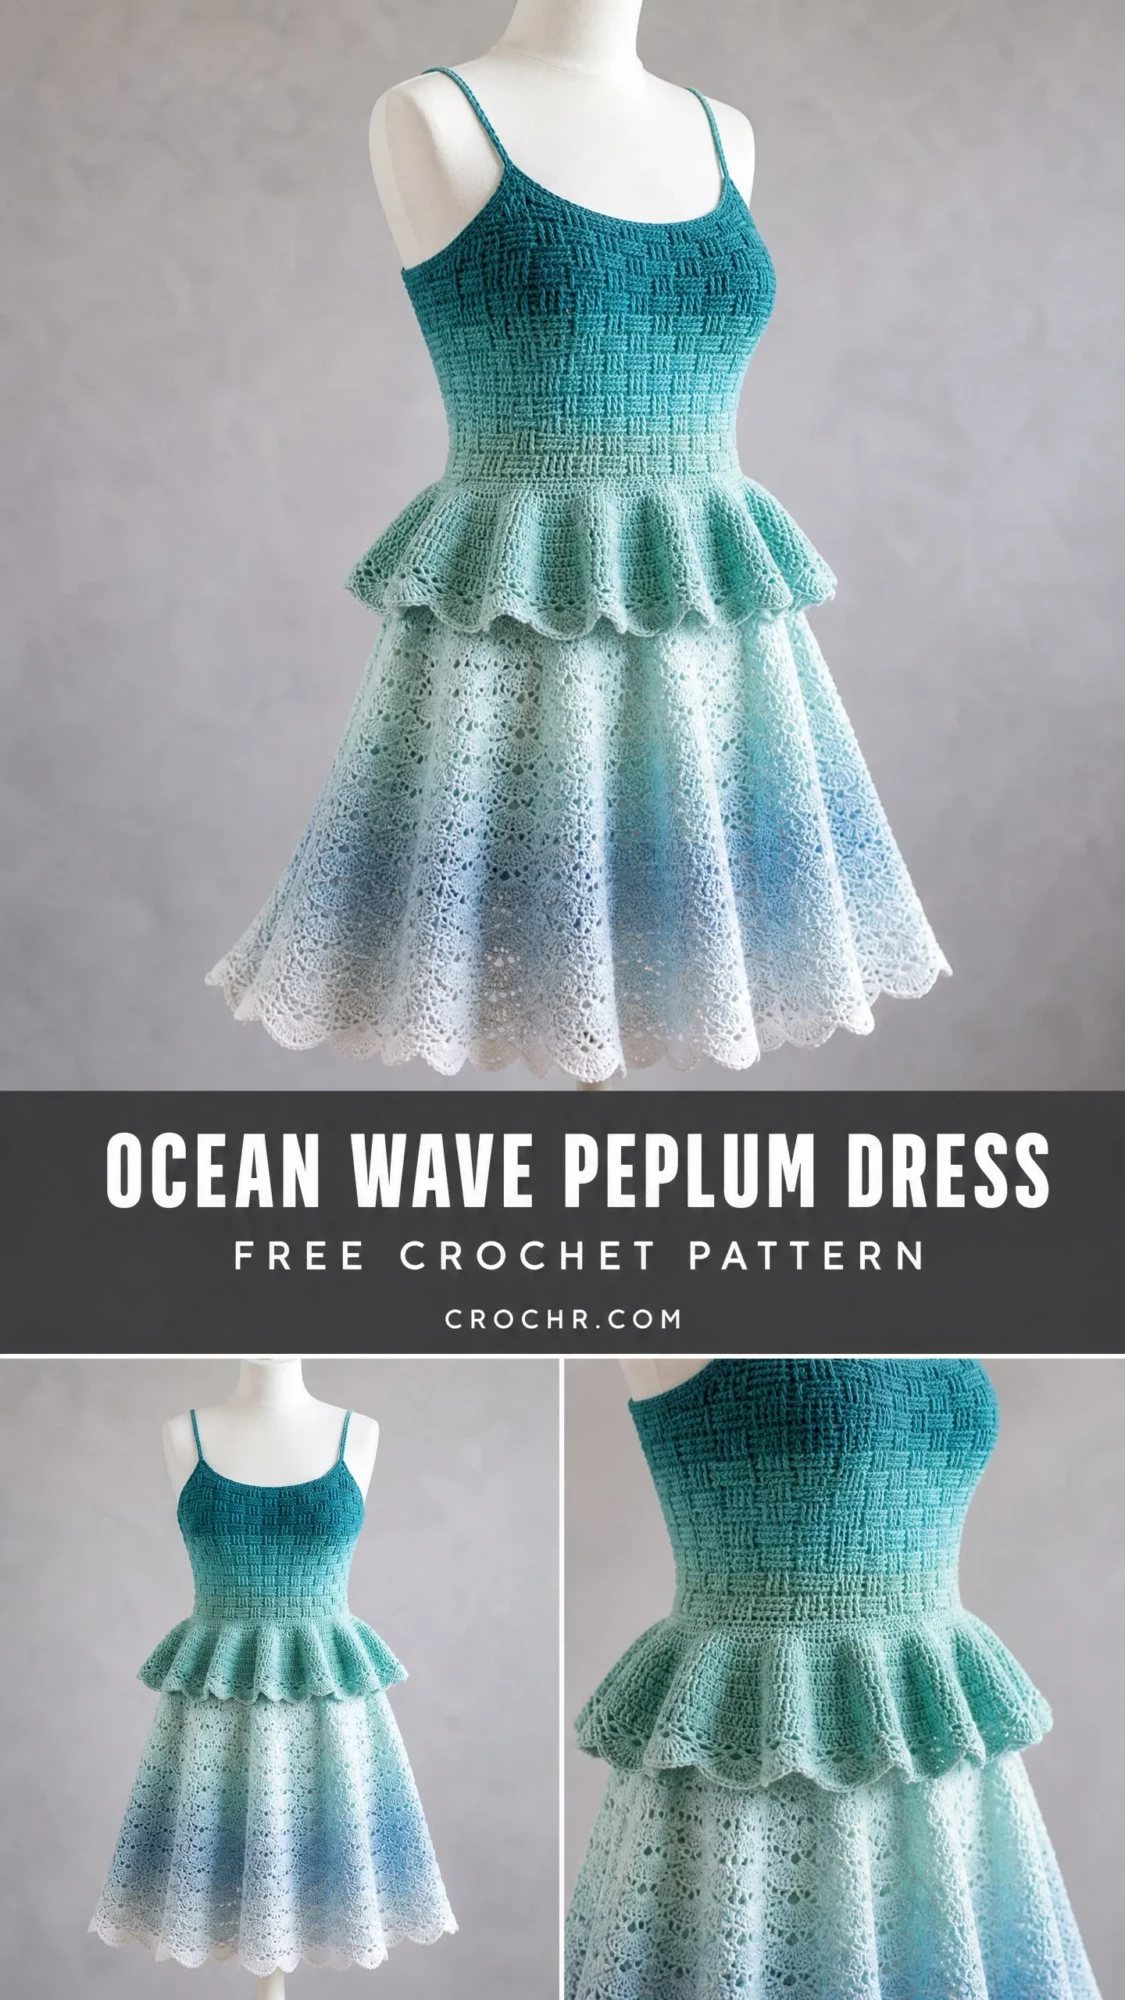
This stunning crochet dress combines three distinct techniques into one show-stopping garment. The fitted bodice uses a basket-weave stitch pattern that creates those beautiful woven-looking horizontal and vertical ridges. At the waist, a flirty peplum frill adds feminine volume with shell stitches. The skirt flows out in an open lace motif pattern that drapes beautifully and catches the light.
The construction is more manageable than it first appears. You’ll work the bodice as two flat panels, seam them together, then pick up stitches for the peplum and skirt. Each section builds on the last, so you can celebrate small wins along the way.
One important note: the skirt features open lacework, so you’ll want to wear this over a slip or fitted bodysuit. The sheerness is intentional and looks absolutely elegant with proper lining underneath.
Skill Level and Time Investment
This crochet pattern tutorial is best suited for intermediate to advanced crocheters. You should feel confident with:
Expect to spend approximately 40 to 60 hours on this project. The bodice alone takes roughly 10 to 15 hours. The lace skirt is the most time-intensive section at around 20 to 30 hours. I recommend breaking this into sessions and enjoying the process rather than rushing.
Finished Sizes and Measurements
This step by step crochet pattern covers sizes XS through XL. All measurements are given as bust circumference, waist circumference, hip circumference, and total length from shoulder to hem.
Size XS: 30 in / 76 cm bust, 24 in / 61 cm waist, 34 in / 86 cm hip, 27 in / 69 cm length
Size S: 32 in / 81 cm bust, 26 in / 66 cm waist, 36 in / 91 cm hip, 27.5 in / 70 cm length
Size M: 34 in / 86 cm bust, 28 in / 71 cm waist, 38 in / 97 cm hip, 28 in / 71 cm length
Size L: 36 in / 91 cm bust, 30 in / 76 cm waist, 40 in / 102 cm hip, 28.5 in / 72 cm length
Size XL: 38 in / 97 cm bust, 32 in / 81 cm waist, 42 in / 107 cm hip, 29 in / 74 cm length
The pattern is written for size S throughout. Instructions for other sizes appear in parentheses in the order XS, S, M, L, XL.
This dress has 0 to 1 inch of positive ease at the bust. The basket-weave fabric has minimal stretch, so measure yourself carefully before starting.
Materials Needed
Yarn
You’ll need fingering weight or sport weight cotton or cotton-blend yarn in four colours for the ombre effect. You could also use one gradient skein with planned colour placement.
Colour A (Deep teal): 280 (310, 340, 375, 410) yards / 256 (283, 311, 343, 375) meters. Used for top of bodice.
Colour B (Mint/medium aqua): 320 (360, 400, 440, 480) yards / 293 (329, 366, 402, 439) meters. Used for middle bodice and peplum.
Colour C (Sky blue/pale aqua): 450 (510, 570, 630, 700) yards / 412 (466, 521, 576, 640) meters. Used for upper skirt.
Colour D (White): 300 (340, 380, 420, 460) yards / 274 (311, 348, 384, 421) meters. Used for lower skirt and hem.
Yarn Suggestions
Paintbox Yarns Cotton DK used at fingering-weight tension works beautifully. It comes in a wide range of solids perfect for the ombre effect. 100 percent cotton, 273 yards per 100g skein, machine washable.
WeCrochet Brava Sport is a budget-friendly option. The acrylic gives a smoother drape in lace than pure cotton. Colours like Peacock, Aloe, Clarity, and White reproduce the palette well.
Hobbii Rainbow Cotton 8/4 is designed for thread-style crochet garments and gives excellent stitch definition.
When substituting, choose any fingering or light sport weight yarn with a recommended gauge of 22 to 26 stitches per 4 inches in single crochet. Avoid very stretchy yarns because the bodice must hold its shape.
Hooks
The different hook sizes are intentional. The smaller hook creates the firm bodice structure while the larger hook gives the skirt its lovely drape.
Notions
Gauge (Please Don’t Skip This!)
For bodice using E-4 / 3.5 mm hook in basket-weave pattern:
20 stitches and 16 rows = 4 inches / 10 cm
For skirt using F-5 / 3.75 mm hook in lace motif pattern:
One complete lace motif repeat = 1.5 inches / 3.8 cm wide and 1.25 inches / 3.2 cm tall
I know gauge swatches feel tedious, but they’re mandatory for this garment. A difference of even one stitch per 4 inches will result in a dress that is multiple inches too large or too small at the bust. Swatch, wash your swatch, and measure it after it dries.
Abbreviations
Here are all the abbreviations you’ll encounter in this how to crochet tutorial:
Special Stitches Explained
Front Post Double Crochet (FPdc)
This stitch creates raised texture by working around the post of a stitch rather than into its top. Yarn over. Insert your hook from front to back to front around the post of the indicated stitch in the row below. Yarn over and pull up a loop so you have 3 loops on your hook. Yarn over, pull through 2 loops. Yarn over, pull through remaining 2 loops. You’ve made one FPdc.
Back Post Double Crochet (BPdc)
The mirror image of FPdc. Yarn over. Insert your hook from back to front to back around the post of the indicated stitch in the row below. Yarn over and pull up a loop so you have 3 loops on hook. Yarn over, pull through 2 loops. Yarn over, pull through remaining 2 loops. One BPdc complete.
Basket-Weave Stitch Pattern
This gorgeous texture requires a multiple of 4 stitches. It creates alternating horizontal and vertical ridges that look woven.
Basket-Weave Row A (RS): Chain 3 (counts as first dc). Skip first stitch. Work 2 FPdc around each of the next 2 sts, then 2 BPdc around each of the next 2 sts. Repeat from across to last stitch. Dc in top of turning chain. Turn.
Basket-Weave Row B (WS): Chain 3. Skip first stitch. Work 2 BPdc around each of the next 2 sts, then 2 FPdc around each of the next 2 sts. Repeat from across to last stitch. Dc in top of turning chain. Turn.
Basket-Weave Row C (RS): Chain 3. Skip first stitch. Work 2 BPdc around each of the next 2 sts, then 2 FPdc around each of the next 2 sts. Repeat from across to last stitch. Dc in top of turning chain. Turn.
Basket-Weave Row D (WS): Chain 3. Skip first stitch. Work 2 FPdc around each of the next 2 sts, then 2 BPdc around each of the next 2 sts. Repeat from across to last stitch. Dc in top of turning chain. Turn.
Rows A through D form one complete basket-weave block. The ridges shift direction every 2 rows, creating that woven appearance.
Peplum Shell Stitch
Work (dc, ch 1, dc, ch 1, dc) all in the same stitch. This creates a 3-dc shell with chain-1 spaces for the ruffled peplum frill.
Scallop Edging
Slip stitch to first stitch. Skip 1 stitch, work 5 dc in next stitch (fan made), skip 1 stitch, sl st in next stitch. Repeat from around.
Pattern Instructions
Bodice Front Panel
Using Colour A and E-4 / 3.5 mm hook, chain 82 (74, 90, 98, 106).
Row 1 (RS): Dc in 4th chain from hook (counts as 2 dc). Dc in each chain across. Turn. 80 (72, 88, 96, 104) dc
Your stitch count must be a multiple of 4 for the basket-weave pattern. For size S, 80 divided by 4 equals 20 repeats.
Row 2 (WS, Basket-Weave Row A): Ch 3, skip first st. 2 FPdc around each of next 2 sts, 2 BPdc around each of next 2 sts. Rep from to last st. Dc in top of ch-3. Turn. 80 (72, 88, 96, 104) sts
Row 3 (RS, Basket-Weave Row B): Ch 3, skip first st. 2 BPdc around each of next 2 sts, 2 FPdc around each of next 2 sts. Rep from to last st. Dc in top of ch-3. Turn. 80 (72, 88, 96, 104) sts
Row 4 (WS, Basket-Weave Row C): Ch 3, skip first st. 2 BPdc around each of next 2 sts, 2 FPdc around each of next 2 sts. Rep from to last st. Dc in top of ch-3. Turn. 80 (72, 88, 96, 104) sts
Row 5 (RS, Basket-Weave Row D): Ch 3, skip first st. 2 FPdc around each of next 2 sts, 2 BPdc around each of next 2 sts. Rep from to last st. Dc in top of ch-3. Turn. 80 (72, 88, 96, 104) sts
Rows 6 through 9: Repeat Rows 2 through 5. Change to Colour B at the end of Row 6. 80 (72, 88, 96, 104) sts
Continue the Basket-Weave Rows A through D in sequence with these colour changes:
Continue until the bodice front measures 12 (11.5, 12.5, 13, 13.5) inches / 30.5 (29, 32, 33, 34) cm from the foundation chain. This is approximately 24 (23, 25, 26, 27) rows total. Fasten off.
Bodice Back Panel
Work exactly as the Bodice Front Panel through all rows. After the final row, do not fasten off. Continue with the neckline finishing below.
Neckline Finishing
For back panel: With RS facing and active yarn, work 1 row of sc evenly across the top edge, working 1 sc per stitch across. 80 (72, 88, 96, 104) sc. Fasten off.
For front panel: With RS facing, attach yarn at right top corner. Work 1 row of sc across top edge. 80 (72, 88, 96, 104) sc. Fasten off.
Checkpoint 1
After completing both panels, each piece should measure approximately 12 (11.5, 12.5, 13, 13.5) in / 30.5 (29, 32, 33, 34) cm tall and 16 (14.5, 17.5, 19, 20.5) in / 40.5 (37, 44.5, 48, 52) cm wide. The basket-weave texture should be clearly visible and consistent. Lay flat and measure before seaming.
Seaming the Bodice
Hold front and back panels with wrong sides together so right sides face outward. Using a yarn needle and Colour B or matching colour, whipstitch the side seams from the bottom edge up to 2.5 inches / 6.5 cm below the top edge. This leaves the armhole opening, which should measure approximately 5 (5, 5.5, 6, 6) in / 12.5 (12.5, 14, 15, 15) cm deep.
After seaming both sides, you have a joined bodice tube. The total circumference at the bottom waist edge is 32 (29, 35, 38.5, 41.5) in / 81 (73.5, 89, 98, 105) cm.
Straps (Make 2)
Using Colour A and E-4 / 3.5 mm hook, chain 80 (76, 80, 80, 80) or to desired length.
Row 1: Sc in 2nd chain from hook. Sc in each chain across. Fasten off, leaving a 12-inch / 30 cm tail for sewing.
Sew one end of each strap to the front neckline approximately 2 inches / 5 cm in from each side edge. Sew the other ends to the back neckline at matching positions. Try on or check on a dress form and adjust strap length before securing. Steam block the straps if they curl before attaching.
Armhole and Neckline Edging
With Colour A and E-4 / 3.5 mm hook, attach yarn at one side seam of the armhole opening.
Round 1: Work sc evenly around the armhole opening, placing 1 sc per stitch along horizontal edges and approximately 1 sc per 2 rows along vertical edges. Join with sl st to first sc. Approximately 36 (36, 40, 44, 44) sc
Round 2: Ch 1. Sc in each sc around. Join with sl st. Fasten off.
Repeat for the second armhole.
For the neckline, with Colour A, attach yarn at one shoulder strap position on the front neckline. Work 1 round of sc across the entire top neckline edge front and back, working 1 sc per stitch. Join. Fasten off.
Peplum Frill
The peplum is worked in the round along the bottom edge of the joined bodice. Use Colour B and E-4 / 3.5 mm hook throughout.
Setup Round: With RS facing, attach Colour B at one side seam at the bottom edge of the bodice. Ch 1. Work 1 sc in each stitch around the bottom edge of the bodice. Join with sl st to first sc.
Stitch count around bottom edge:
Round 1 (Peplum increase round): Ch 3 (counts as dc). Work 2 dc in each sc around. Join with sl st to top of ch-3.
Round 2: Ch 3. Dc in next 3 sts. 2 dc in next st. Rep from around. Join with sl st to top of ch-3.
Round 3 (Shell round, using 5-stitch repeat): Ch 1. (Dc, ch 1, dc, ch 1, dc) in next st, skip 1 st, sl st in next st, skip 1 st. Rep from 40 (36, 44, 48, 52) times around. Join with sl st.
Round 4 (Scallop hem of peplum): Working into the tops of the shell stitches and sl sts from Round 3: Skip the sl st, work 5 dc in the centre dc of each shell, sl st in next sl st between shells. Rep from around. Join. Fasten off.
The peplum should hang approximately 3 to 3.5 inches / 7.5 to 9 cm below the bodice waist edge with a ruffled, scalloped hem.
Skirt
The skirt is attached at the waist, just above the peplum. It’s picked up from the same bottom edge of the bodice. The peplum will hang over the top of the skirt, concealing the joining round.
Change to F-5 / 3.75 mm hook and Colour C.
Joining Round: Attach Colour C at one side seam at the same bottom edge of the bodice. Ch 1. Work 1 sc in each sc around the bottom edge. Join with sl st.
Expansion Round 1: Ch 1. Sc in next 3 sts. 2 sc in next st. Rep from around. Join with sl st.
Expansion Round 2: Ch 1. Sc in next 4 sts. 2 sc in next st. Rep from around. Join with sl st.
Expansion Round 3: Ch 1. Sc in next 5 sts. 2 sc in next st. Rep from around. Join with sl st.
Expansion Round 4: Ch 1. Sc in next 6 sts. 2 sc in next st. Rep from around. Join with sl st.
Expansion Round 5: Ch 1. Sc in next 7 sts. 2 sc in next st. Rep from around. Adjust to reach the following final counts (divisible by 10 for the lace pattern). Join with sl st.
Skirt Lace Section
The lace is worked in a repeating sequence. One complete repeat adds approximately 1.25 in / 3.2 cm in length.
Lace Round A (Arch round): Ch 1. Ch 5, skip 4 sts, sc in next st. Rep from around. Join with sl st to first sc.
Lace Round B (Shell fill round): Sl st into first ch-5 arch space. Ch 3 (counts as dc). 4 dc in same arch. Ch 2, sc in next arch, ch 2, 5 dc in next arch. Rep from around, ending ch 2, sc in last arch, ch 2. Join with sl st to top of ch-3.
Lace Round C (Increase arch round): Ch 1. Sc in top centre dc of next 5-dc shell, ch 5, sc in next sc, ch 5. Rep from around. Join with sl st.
This round doubles your arch count:
Lace Round D (Full shell round): Sl st into first ch-5 arch. Ch 3. 4 dc in same arch. Ch 2, sc in next arch, ch 2, 5 dc in next arch. Rep from around, ending ch 2, sc in last arch, ch 2. Join.
Work the lace in this order:
Continue this pattern until the skirt measures approximately 11 to 12 in / 28 to 30 cm from the joining round. This results in approximately 8 to 10 tiers of lace total.
Colour change for skirt gradient: Begin in Colour C. After completing 4 tiers (8 rounds), transition to Colour D (white).
The final arch count at the hem:
The hem circumference will be approximately:
Finishing
Work a final scallop edging round around the hem using the scallop edging stitch described earlier. Block your dress using blocking mats and pins, paying special attention to opening up the lace motifs in the skirt. Steam lightly or wet block according to your yarn’s care instructions.
Pattern Notes and Tips
On colour changes: When changing colours, work the last yarn over of the final stitch in the old colour with the new colour yarn. Cut the old colour and weave in ends after blocking to prevent holes.
On fit: The basket-weave fabric has natural compression that creates a fitted appearance without explicit decreases. Trust the pattern, but always try on as you go.
On the peplum: This section conceals where the skirt joins the bodice beautifully. Take your time with the shell stitches for a polished look.
On blocking: This is not optional. Blocking opens up the lace motifs and evens out your stitches. It makes a significant difference in the finished appearance.
You’ve Got This
This ocean wave peplum dress is a labour of love, and every stitch is worth it. Take your time, enjoy the process, and don’t hesitate to break the project into manageable sections. The bodice feels like a huge accomplishment on its own. The peplum adds that exciting moment of seeing the silhouette come together. And the lace skirt is meditative once you get into the rhythm.
Thank you so much for choosing this pattern. I truly hope you love making it as much as I loved designing it. If you complete your dress, I would absolutely love to see it! Tag me on Instagram or share in my Facebook group. Nothing makes my day quite like seeing your finished projects.
If this crochet dress pattern caught your eye, go ahead and save it to your Pinterest boards so you can find it when you’re ready to start. And please drop a comment below if you make one. I’d love to hear which colours you choose and how it turns out for you!
You Might Also Like
- Pastel Rainbow Dreamy Clutch Free Crochet Pattern
- Sage Green Shell Stitch Romper Free Crochet Pattern
- Sage Green Boho Halter Dress Free Crochet Pattern
- Dusty Rose Boho Romper Free Crochet Pattern
