
I’ve been looking for the perfect baby dress pattern for months now. One that combines a classic silhouette with those dreamy pastel colors everyone loves. This rainbow shell dress is my absolute favourite find.
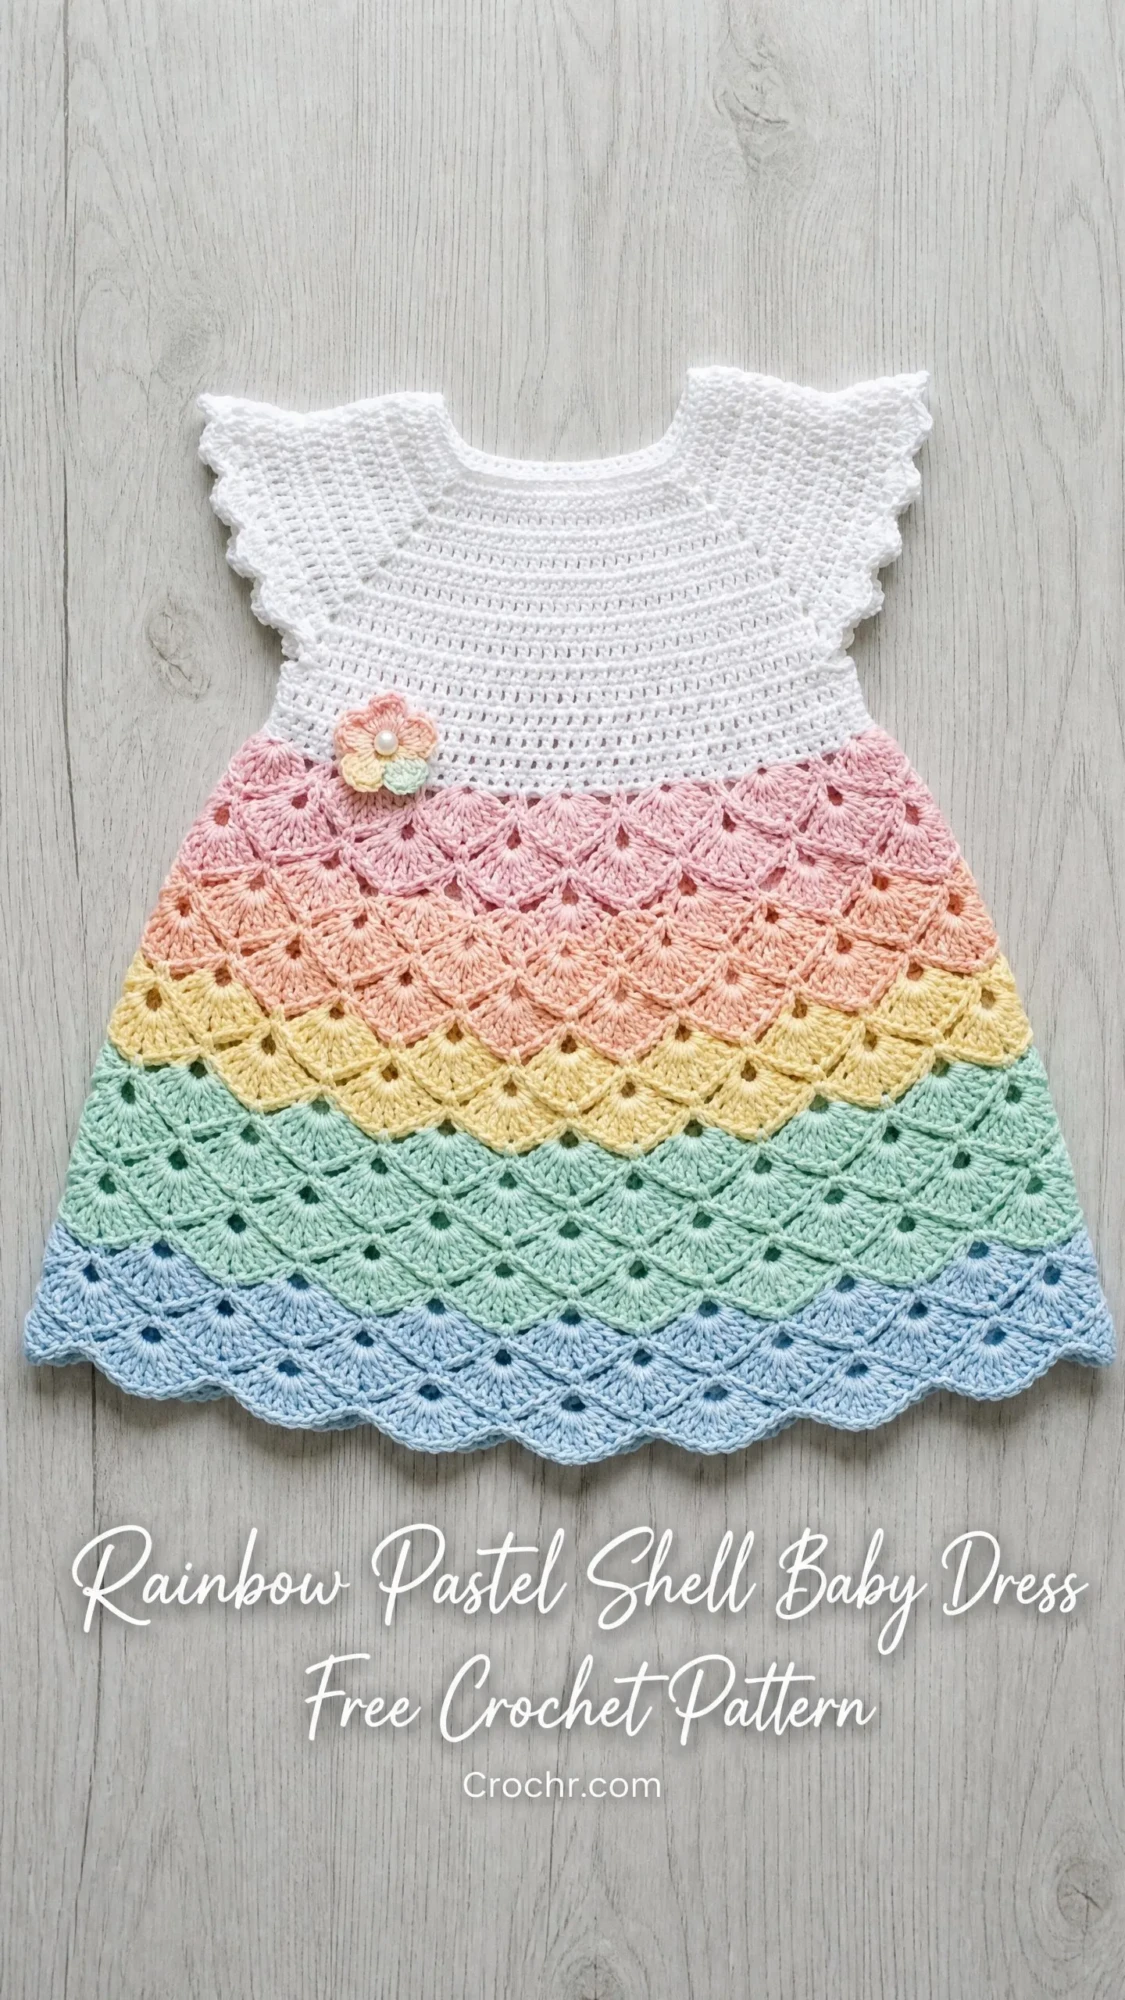
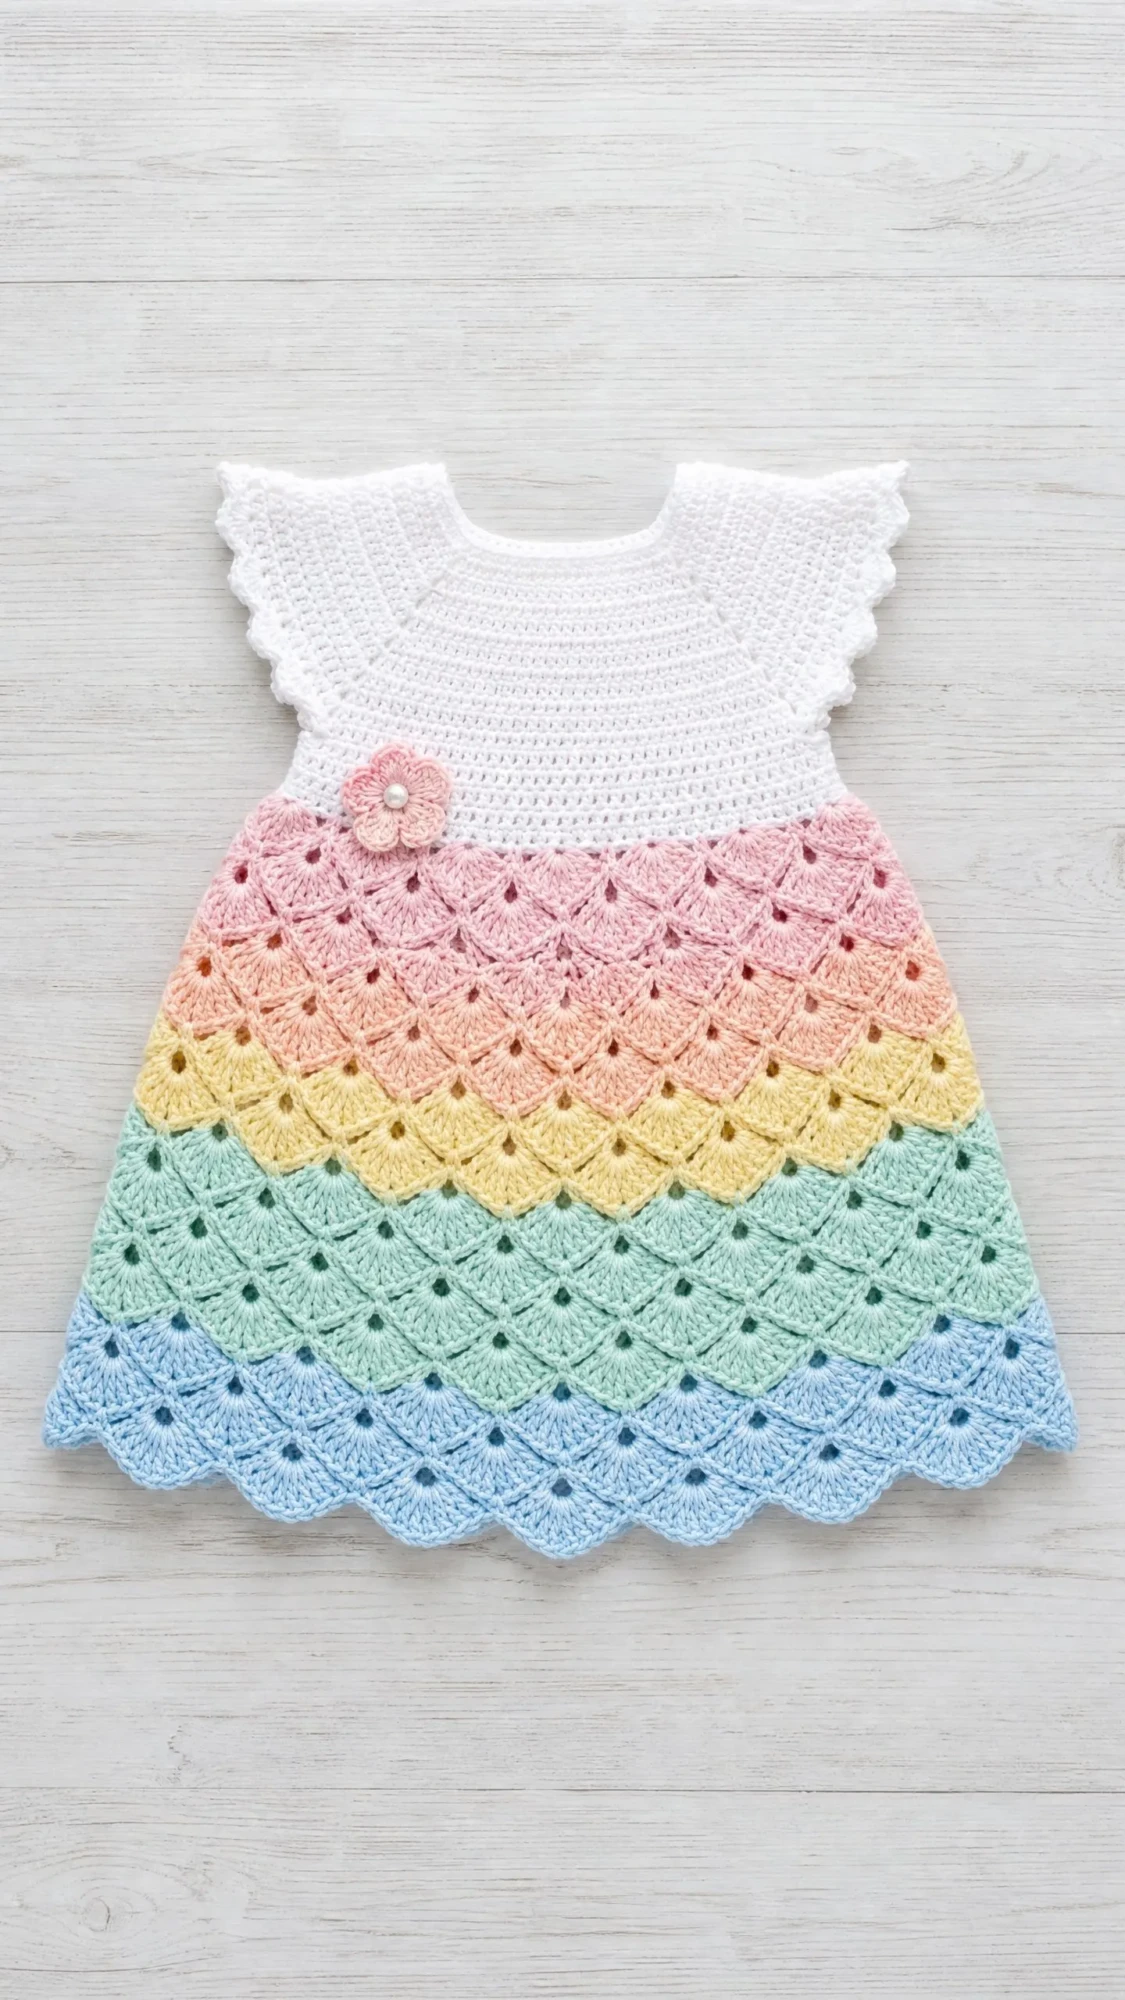
The soft gradient from pink through peach, yellow, mint, and blue creates the sweetest watercolor effect. And that delicate fan stitch in the skirt? It looks far more complicated than it actually is.
If you’re comfortable working in the round and have made at least one basic garment before, you can absolutely make this dress. Let me walk you through every single step.
Why This Baby Dress Pattern Works So Well
This dress is constructed top-down in one piece, which means minimal seaming and a smooth workflow. You start at the neckline, work the yoke with simple increases, then transition into that gorgeous shell stitch skirt. The flutter sleeves are added last by picking up stitches around the armholes.
The shell stitch (also called fan stitch) creates those beautiful scalloped waves you see in the photo. Each "fan" is simply six double crochet stitches worked into the same stitch. That’s it. When you stack them in rows with single crochet between each fan, you get this stunning lace effect.
The pastel color bands graduate naturally from warm to cool tones. Pink flows into peach, then pale orange, yellow, mint green, and finally powder blue at the hem. A small crocheted flower with a pearl center adds the perfect finishing touch at the waist.
Skill Level and Time Investment
This pattern is rated intermediate. You should be comfortable with working joined rounds, reading stitch counts carefully, picking up stitches, and changing colors cleanly. If you’ve never crocheted a garment before, I’d suggest practicing a simple baby hat first.
That said, don’t let "intermediate" scare you. The yoke is just single crochet with evenly spaced increases. The shell stitch follows a simple repeat. Once you get the rhythm, it almost works itself.
Time estimate: Approximately 10 to 15 hours for an experienced crocheter. Budget extra time for blocking, weaving in ends, and attaching the flower. This isn’t a weekend project, but it’s absolutely doable over a week of evening sessions.
Finished Measurements
This dress fits a 6 to 12 month infant.
Materials You’ll Need
Yarn: Light worsted weight, sometimes labeled DK or size 3. I strongly recommend 100% cotton or a cotton blend for breathability against baby skin. You’ll need approximately 500 to 600 yards (457 to 548 meters) total, divided across seven colors.
Here’s the color breakdown:
Hook: US size E-4 (3.5 mm). Adjust if needed to meet gauge.
Notions: At least 4 stitch markers, yarn needle, scissors, one pearl-style button or bead (6 to 8 mm) for the flower center, sewing needle and thread to secure the bead.
Yarn Suggestions
Lion Brand 24/7 Cotton works beautifully for this project. It’s 100% mercerized cotton, machine washable, and available in colors that match this palette perfectly. Try White, Ballet Pink, Peach, Goldenrod, Seafoam, and Powder Blue.
Paintbox Yarns Simply DK is another excellent choice. This cotton-acrylic blend is soft, affordable, and widely available. The slight sheen really highlights the fan stitch texture.
Whatever you choose, avoid heavily textured or fuzzy yarns. They’ll obscure the shell stitch pattern. Always swatch before beginning.
Gauge
18 single crochet stitches and 20 rows = 4 inches (10 cm), worked in the round with Color A and your 3.5 mm hook.
In shell stitch pattern: 1 complete fan repeat (7 stitches) = approximately 1.5 inches (3.8 cm) wide. Two rows of fan pattern = approximately 0.75 inches (1.9 cm) tall.
Gauge is critical for proper fit. Please swatch. I know it’s tempting to skip this step, but baby garments need to fit properly to be useful.
Abbreviations
Let me define every abbreviation before we begin. These use US crochet terms.
Special Stitches Explained
Fan Stitch (Shell Stitch)
This is the star of the show. To make one complete fan, work 6 double crochet stitches all into the same stitch. That’s it. The fans are anchored on each side by a single crochet worked into the valley between fans.
Here’s how a full fan round works:
1. Slip stitch to join at end of previous round, chain 3 (this counts as your first dc)
2. Work 2 more dc into the same joining stitch (this creates half of the first fan)
3. Skip 2 stitches, single crochet into the next stitch
4. Skip 2 stitches, work 6 dc into the next stitch (complete fan)
5. Repeat steps 3 and 4 around to the last repeat
6. Skip 2 stitches, single crochet into the next stitch, skip 2 stitches, work 3 dc into the same stitch as the beginning chain-3
7. Join with slip stitch to the top of the beginning chain-3
The half-fans at the beginning and end of the round join together to create one complete fan at the seam.
Picot Stitch
Used for the sleeve ruffles and hem border. Here’s how:
1. Single crochet into the indicated stitch
2. Chain 3
3. Slip stitch into the first chain just made (the one closest to your hook)
4. Continue to the next single crochet
This creates a small decorative bump along the edge.
Pattern Instructions
Neckline and Yoke
The yoke begins at the neckline and is worked downward in single crochet rounds with increases placed to shape the chest, back, and armhole areas.
Foundation: With Color A, chain 56. Join with slip stitch to first chain, being careful not to twist. (56 ch)
Round 1: Chain 1, sc in each chain around. Join with slip stitch to first sc. (56 sc)
Round 2: Chain 1, sc in each of the first 6 sts, inc in next st, (sc in next 6 sts, inc in next st) 7 times. Join. (64 sc)
Round 3: Chain 1, sc in each st around. Join. (64 sc)
Round 4: Chain 1, sc in each of the first 7 sts, inc in next st, (sc in next 7 sts, inc in next st) 7 times. Join. (72 sc)
Round 5: Chain 1, sc in each st around. Join. (72 sc)
Round 6: Chain 1, sc in each of the first 8 sts, inc in next st, (sc in next 8 sts, inc in next st) 7 times. Join. (80 sc)
Round 7: Chain 1, sc in each st around. Join. (80 sc)
Round 8: Chain 1, sc in each of the first 9 sts, inc in next st, (sc in next 9 sts, inc in next st) 7 times. Join. (88 sc)
Round 9: Chain 1, sc in each st around. Join. (88 sc)
Round 10: Chain 1, sc in each of the first 10 sts, inc in next st, (sc in next 10 sts, inc in next st) 7 times. Join. (96 sc)
Round 11: Chain 1, sc in each st around. Join. (96 sc)
Round 12: Chain 1, sc in each of the first 11 sts, inc in next st, (sc in next 11 sts, inc in next st) 7 times. Join. (104 sc)
Round 13: Chain 1, sc in each st around. Join. (104 sc)
Checkpoint: After Round 13, the yoke should measure approximately 2.5 inches (6.5 cm) from the neckline join. The fabric should lie flat.
Armhole Separation
Round 14 divides the yoke into front, back, and armhole openings.
Round 14: Chain 1. Sc in next 24 sts (right back). Chain 12 (right armhole bridge), skip next 16 sts. Sc in next 24 sts (front). Chain 12 (left armhole bridge), skip next 16 sts. Sc in next 24 sts (left back). Join with slip stitch to first sc. (72 sc + 24 chain sts = 96 total working sts for next round)
The 16 skipped stitches on each side become your armhole openings. The chain-12 bridges replace those stitches in the working round.
Round 15: Chain 1. Sc in each sc and in each chain across. Join. (96 sc)
Round 16: Chain 1, sc in each of the first 11 sts, inc in next st, (sc in next 11 sts, inc in next st) 7 times. Join. (104 sc)
Round 17: Chain 1, sc in each st around. Join. (104 sc)
Round 18: Chain 1, sc in each of the first 12 sts, inc in next st, (sc in next 12 sts, inc in next st) 7 times. Join. (112 sc)
Round 19: Chain 1, sc in each st around. Join. (112 sc)
Checkpoint: After Round 19, the bodice should measure approximately 5.5 to 6 inches (14 to 15 cm) from the neckline edge.
Skirt in Fan Stitch Pattern
The skirt requires a multiple of 7 stitches. You have 112 stitches, which divides perfectly into 16 fans. No adjustment needed.
Change to Color B (soft pink) at the end of Round 19 by completing the final slip stitch join with the new color. Fasten off Color A.
Important: For every fan round, chain 3 counts as your first dc. The anchor rounds between fan rounds are worked in sc to maintain stitch count.
Color B (Soft Pink) – 2 Fan Rounds
Round 20 (fan round): Ch 3, 2 dc in same st, skip 2, sc in next, (skip 2, 6 dc in next, skip 2, sc in next) 15 times, skip 2, 3 dc in same st as beg ch-3, join. (112 sts)
Round 21 (anchor round): Ch 1, sc in each dc and each sc around. Join. (112 sc)
Round 22 (fan round): Ch 3, 2 dc in same st, skip 2, sc in next, (skip 2, 6 dc in next, skip 2, sc in next) 15 times, skip 2, 3 dc in same st as beg ch-3, join. (112 sts)
Round 23 (anchor round): Ch 1, sc in each dc and each sc around. Join. (112 sc)
Change to Color C (peach) at end of Round 23.
Color C (Peach) – 2 Fan Rounds
Round 24 (fan round): Ch 3, 2 dc in same st, skip 2, sc in next, (skip 2, 6 dc in next, skip 2, sc in next) 15 times, skip 2, 3 dc in same st as beg ch-3, join. (112 sts)
Round 25 (anchor round): Ch 1, sc in each dc and each sc around. Join. (112 sc)
Round 26 (fan round): Ch 3, 2 dc in same st, skip 2, sc in next, (skip 2, 6 dc in next, skip 2, sc in next) 15 times, skip 2, 3 dc in same st as beg ch-3, join. (112 sts)
Round 27 (anchor round): Ch 1, sc in each dc and each sc around. Join. (112 sc)
Change to Color D (pale orange) at end of Round 27.
Color D (Pale Orange) – 2 Fan Rounds
Round 28 (fan round): Ch 3, 2 dc in same st, skip 2, sc in next, (skip 2, 6 dc in next, skip 2, sc in next) 15 times, skip 2, 3 dc in same st as beg ch-3, join. (112 sts)
Round 29 (anchor round): Ch 1, sc in each dc and each sc around. Join. (112 sc)
Round 30 (fan round): Ch 3, 2 dc in same st, skip 2, sc in next, (skip 2, 6 dc in next, skip 2, sc in next) 15 times, skip 2, 3 dc in same st as beg ch-3, join. (112 sts)
Round 31 (anchor round): Ch 1, sc in each dc and each sc around. Join. (112 sc)
Change to Color E (yellow) at end of Round 31.
Color E (Yellow) – 2 Fan Rounds
Round 32 (fan round): Ch 3, 2 dc in same st, skip 2, sc in next, (skip 2, 6 dc in next, skip 2, sc in next) 15 times, skip 2, 3 dc in same st as beg ch-3, join. (112 sts)
Round 33 (anchor round): Ch 1, sc in each dc and each sc around. Join. (112 sc)
Round 34 (fan round): Ch 3, 2 dc in same st, skip 2, sc in next, (skip 2, 6 dc in next, skip 2, sc in next) 15 times, skip 2, 3 dc in same st as beg ch-3, join. (112 sts)
Round 35 (anchor round): Ch 1, sc in each dc and each sc around. Join. (112 sc)
Change to Color F (mint green) at end of Round 35.
Color F (Mint Green) – 3 Fan Rounds
Round 36 (fan round): Ch 3, 2 dc in same st, skip 2, sc in next, (skip 2, 6 dc in next, skip 2, sc in next) 15 times, skip 2, 3 dc in same st as beg ch-3, join. (112 sts)
Round 37 (anchor round): Ch 1, sc in each dc and each sc around. Join. (112 sc)
Round 38 (fan round): Ch 3, 2 dc in same st, skip 2, sc in next, (skip 2, 6 dc in next, skip 2, sc in next) 15 times, skip 2, 3 dc in same st as beg ch-3, join. (112 sts)
Round 39 (anchor round): Ch 1, sc in each dc and each sc around. Join. (112 sc)
Round 40 (fan round): Ch 3, 2 dc in same st, skip 2, sc in next, (skip 2, 6 dc in next, skip 2, sc in next) 15 times, skip 2, 3 dc in same st as beg ch-3, join. (112 sts)
Round 41 (anchor round): Ch 1, sc in each dc and each sc around. Join. (112 sc)
Change to Color G (powder blue) at end of Round 41.
Color G (Powder Blue) – 3 Fan Rounds Plus Border
Round 42 (fan round): Ch 3, 2 dc in same st, skip 2, sc in next, (skip 2, 6 dc in next, skip 2, sc in next) 15 times, skip 2, 3 dc in same st as beg ch-3, join. (112 sts)
Round 43 (anchor round): Ch 1, sc in each dc and each sc around. Join. (112 sc)
Round 44 (fan round): Ch 3, 2 dc in same st, skip 2, sc in next, (skip 2, 6 dc in next, skip 2, sc in next) 15 times, skip 2, 3 dc in same st as beg ch-3, join. (112 sts)
Round 45 (anchor round): Ch 1, sc in each dc and each sc around. Join. (112 sc)
Round 46 (fan round): Ch 3, 2 dc in same st, skip 2, sc in next, (skip 2, 6 dc in next, skip 2, sc in next) 15 times, skip 2, 3 dc in same st as beg ch-3, join. (112 sts)
Round 47 (anchor round): Ch 1, sc in each dc and each sc around. Join. (112 sc)
Checkpoint: After Round 47, the dress from neckline to hem should measure approximately 12 to 13 inches (30.5 to 33 cm).
Hem Border
With Color G still attached:
Round 48 (scallop border): Ch 1. Work 1 sc into first st, ch 3, sl st into same st (first picot). (Skip 2 sts, sl st into next st, skip 2 sts, sc into next st, ch 3, sl st into same sc) repeat around. Adjust if needed to end evenly. Join with sl st. Fasten off.
Neckline Finishing
Rejoin Color A to the original foundation chain at the neckline edge.
Neckline Round 1: Ch 1, sc in each foundation chain around. Join. (56 sc)
Neckline Round 2: Ch 1. Work 1 sc into first st, ch 3, sl st into same st (picot). (Skip 1 st, sl st into next st, skip 1 st, sc into next st, ch 3, sl st into same sc) repeat around. Join with sl st. Fasten off. Weave in ends.
Sleeve Ruffles (Make 2)
Each armhole has approximately 28 accessible stitches around the opening. Work into both the skipped body stitches and the chain bridge stitches.
Join Color A to the center underarm chain of one armhole opening.
Ruffle Round 1: Ch 1, sc evenly around the armhole opening, placing 1 sc into each skipped body stitch and 1 sc into each chain stitch. Place marker at beginning of round. Join. (28 sc)
Ruffle Round 2: Ch 1, inc in every st around. Join. (56 sc)
Ruffle Round 3: Ch 1, sc in each st around. Join. (56 sc)
Ruffle Round 4 (fan round): Ch 3, 2 dc in same st, skip 2, sc in next, (skip 2, 6 dc in next, skip 2, sc in next) 6 times, skip 2, 3 dc in same st as beg ch-3, join. (56 sts)
Ruffle Round 5 (anchor round): Ch 1, sc in each dc and each sc around. Join. (56 sc)
Ruffle Round 6 (picot border): Ch 1. Work 1 sc into first st, ch 3, sl st into same st (picot). (Skip 1 st, sl st into next st, skip 1 st, sc into next st, ch 3, sl st into same sc) repeat around. Join with sl st. Fasten off.
Repeat for second sleeve.
Flower Embellishment
With Color B and your hook, make a magic ring.
Round 1: Ch 1, work 6 sc into the magic ring. Pull ring closed. Join with sl st to first sc. (6 sc)
Round 2: (Ch 3, 2 dc into the same st, ch 3, sl st into same st, sl st into next st) 6 times. (6 petals made)
Fasten off leaving a long tail. Using needle and thread, stitch pearl bead firmly to center of flower. Using yarn tail and yarn needle, sew flower to dress at the transition point between the white bodice and the first fan row on the upper left of the front.
Finishing and Blocking
Weave in all remaining yarn ends securely, taking care to work ends into matching color sections.
Wet blocking is strongly recommended for cotton yarn. Soak the finished dress in cool water for 15 to 20 minutes, gently press out excess water in a clean towel (do not wring), and lay flat on a blocking mat. Smooth the skirt fan sections and spread them gently to open the lace pattern. Pin the hem border into its scalloped shape. Allow to dry completely.
For acrylic yarn, steam blocking works well. Hold a steam iron 1 to 2 inches above the surface without pressing directly onto the fabric.
Care Instructions
Machine wash on gentle cycle in cold water or hand wash. Lay flat to dry. Do not tumble dry. Do not iron directly over the embellishment. Store folded, not hung, to prevent stretching of the neckline.
Size Customization Tips
To size up to 12 to 18 months: Work 2 additional increase rounds in the yoke before the armhole split. After the bodice, work an additional increase round to bring the stitch count to 119 (17 fans of 7) by adding 7 stitches evenly. Add 2 additional fan-and-anchor rounds to each color band for length.
To size down to 3 to 6 months: Remove 2 yoke increase rounds and reduce the foundation chain to 48. Adjust the fan count accordingly. Reduce each color band by 1 fan round pair.
To make the dress longer: Simply add additional fan-and-anchor rounds to any color band. Each pair adds approximately 0.75 inches (1.9 cm) of length.
You’ve Got This
This rainbow pastel shell baby dress looks like it belongs in a boutique, but you can make it yourself with patience and attention to detail. The construction is straightforward once you understand the rhythm of the fan stitch. Take your time with the yoke increases, count your stitches at each checkpoint, and trust the process.
Thank you so much for choosing this pattern. I really hope you love making it as much as I loved putting it together for you. If you make one, I’d absolutely love to see it. Tag me on Instagram or share a photo on Facebook. Seeing your finished projects is the best part of my day.
If this pattern caught your eye, go ahead and save it to your Pinterest boards so you can find it easily when you’re ready to start. And if you do make this sweet little dress, drop a comment below. I’d love to hear how it turned out for you!
You Might Also Like
- Terracotta Boho Basket Bag with Black Fringe Free Crochet Pattern
- Mint Ocean Waves Doll Dress Free Crochet Pattern
- Autumn Burnt Orange Monstera Crochet Plant Free Pattern
- Forest Green Ivy Leaf Earrings Free Crochet Pattern
