
Fitted crochet garments look intimidating. I get it. When you see a structured bustier bodice with three-dimensional cups and lacy shell stitch shorts, your first thought might be "I could never make that." But here is the truth: this romper is absolutely achievable if you break it down piece by piece.
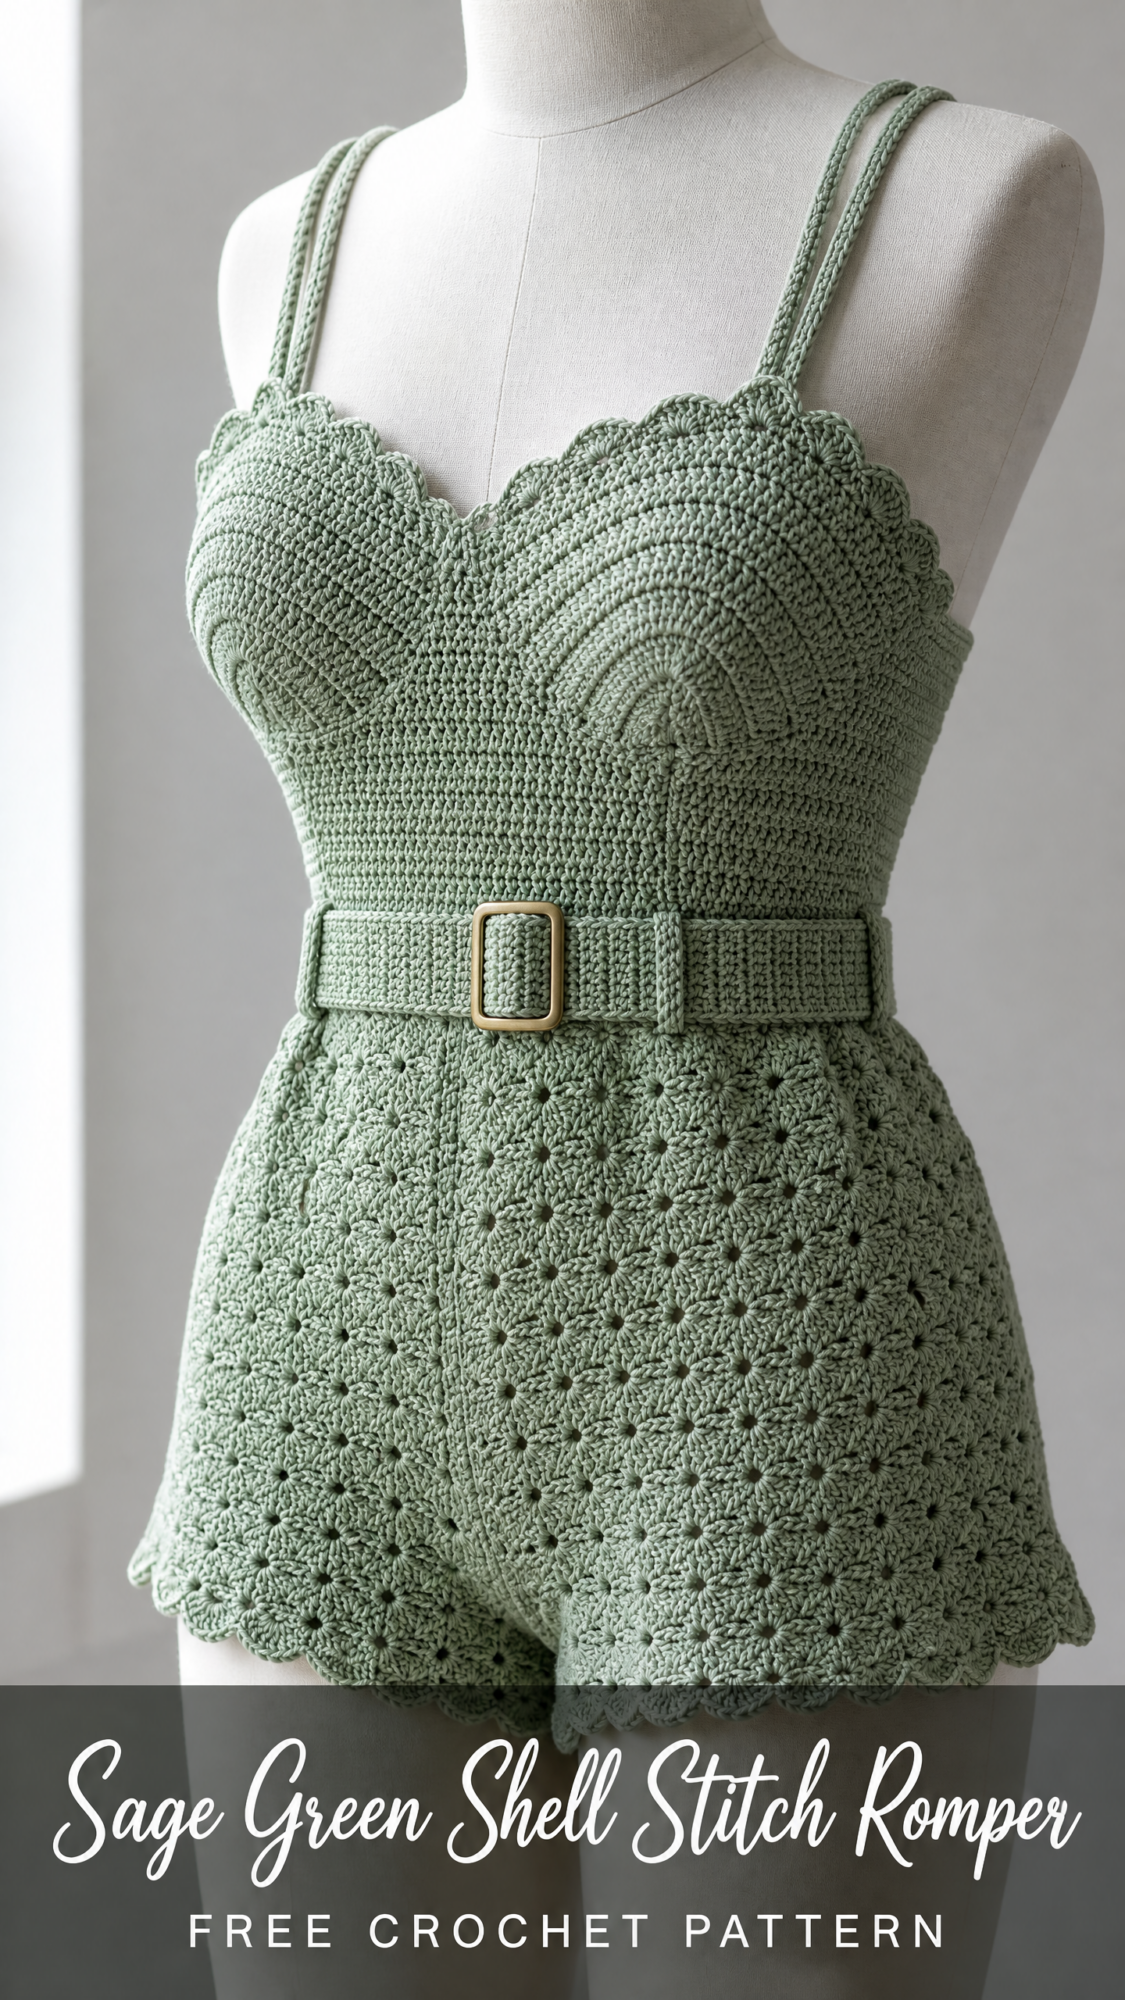
The construction is actually quite logical. You work the cups flat, join them together, build the torso in simple single crochet rounds, then switch to a beautiful repeating shell pattern for the shorts. Each section builds on skills you probably already have. If you can single crochet, double crochet, and count stitches carefully, you can make this romper.
I designed this pattern for crafters who want to push their skills without getting lost in confusing instructions. Every step is explained thoroughly. Every stitch count is provided. You will know exactly where you should be at every checkpoint along the way.
About This Vintage-Inspired Shell Stitch Romper
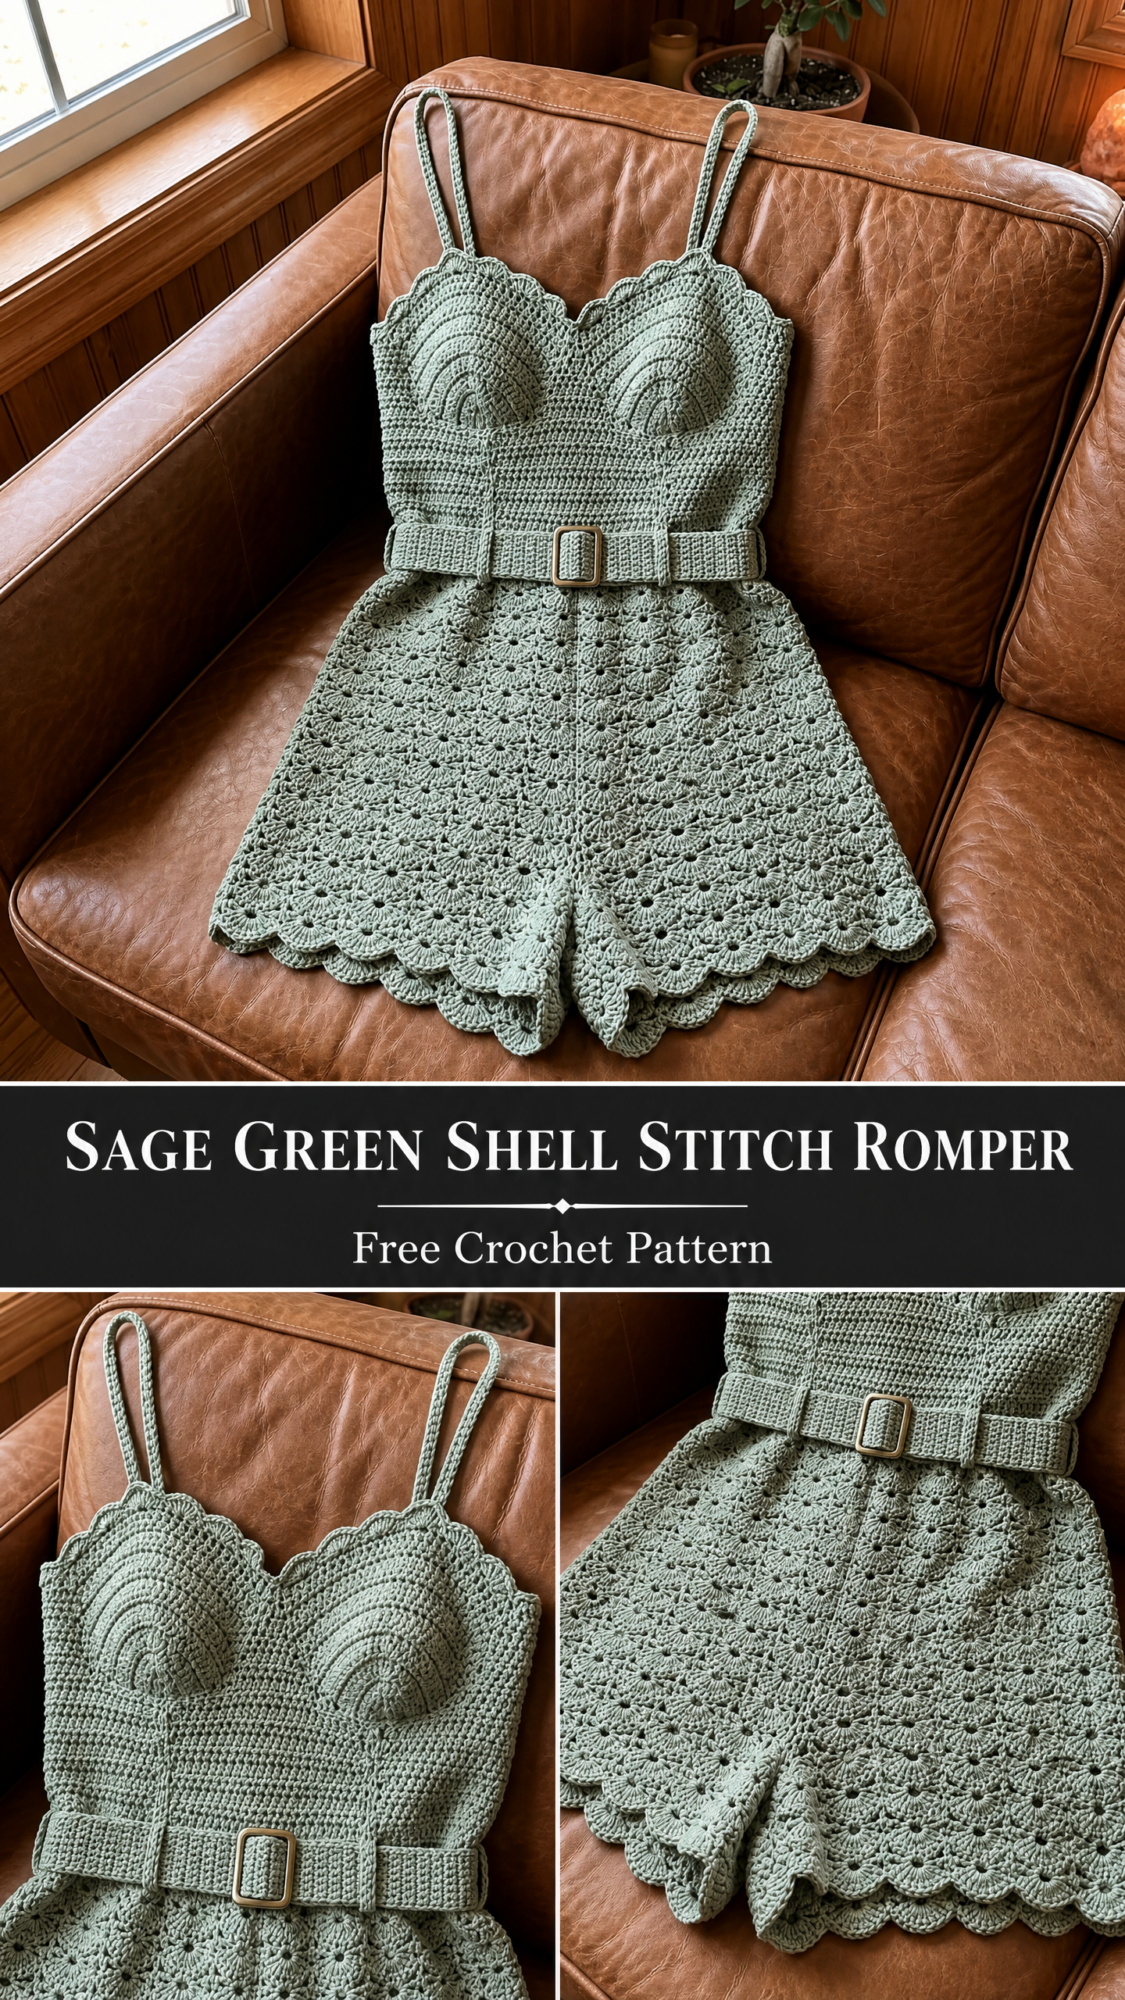
This one-piece fitted romper features a structured bustier bodice with a sweetheart neckline, flowing shell stitch shorts, adjustable spaghetti straps, and a matching crocheted belt that threads through a rectangular metal buckle. The silhouette is distinctly vintage, calling back to 1950s beachwear and retro summer fashion.
The bodice uses tight single crochet (sc) stitches to create structure and support. The cups are shaped with increases and decreases to form a three-dimensional half-dome effect. Below the waist, the open shell stitch (also called fan stitch) creates beautiful drape and breathability perfect for warm weather.
Every raw edge features delicate scallop edging for a polished, cohesive finish. The sage green color shown in the reference images works beautifully with the stitch patterns, but this romper would look stunning in cream, dusty rose, or even classic black.
Pattern Details at a Glance
Skill Level: Advanced
Finished Size (US Small):
Time Estimate: 40 to 60 hours depending on your experience level. The bodice cups and edging sections take the most time.
Materials Needed
Yarn:
100% mercerized cotton, sport weight (CYCA 2), approximately 1,600 to 1,800 yards / 1,460 to 1,645 meters total, in sage green
Recommended Yarn Options:
Important: Choose yarn with good stitch definition. Avoid yarns containing elastane or stretch content because the bodice needs to hold its shape. A mercerized finish gives the scallop edging beautiful crispness.
Hooks:
Notions:
Gauge
20 sc x 24 rows = 4 inches / 10 cm in single crochet, worked flat, with US E-4 / 3.5 mm hook, blocked.
Shell stitch gauge: 1 complete fan repeat (shell of 5 dc plus 2 sc) = approximately 1.5 inches / 3.8 cm wide.
Check your gauge carefully. The bodice and shorts dimensions depend on accurate gauge. If your swatch is larger than specified, go down one hook size. If smaller, go up one hook size. This step is not optional for a fitted garment.
Abbreviations Used in This Crochet Pattern
Special Stitches Explained
Shell Stitch (Fan Stitch)
Work 5 double crochet stitches all into the same stitch or space. This forms one shell. In this pattern, shells are separated by single crochet stitches worked into the chain spaces of the previous round. This creates the open, lacy texture visible in the shorts section.
Scallop Edging
This decorative edge finishes all the openings on the romper. Here is how to work it:
1. Join yarn at any edge stitch with a sl st
2. Ch 1, sc in same stitch
3. Sk 2 sts
4. Work 5 dc all into the next stitch (one shell/scallop made)
5. Sk 2 sts
6. Sc in next stitch
7. Repeat steps 3 through 6 across or around the entire edge
8. End with sl st into first sc, fasten off
Note: The edge stitch count must be a multiple of 6 for scallop edging to work out evenly. Adjustments are noted at each application point in the pattern.
sc2tog (Single Crochet Decrease)
Insert hook into next stitch, pull up a loop. Insert hook into following stitch, pull up a loop. Yarn over and pull through all 3 loops on hook. One decrease made.
Important Pattern Notes Before You Begin
1. Construction order: Left Cup, Right Cup, Cup Join and Neckline, Torso Body (worked in the round), Waist Band, Shorts (shell stitch in rounds, split and seamed), Leg Edging, Belt, Straps, Final Scallop Edging.
2. The bodice cups are worked flat (back and forth in rows). All other major sections are worked in joined rounds.
3. Right side (RS) is always facing you when working in rounds.
4. Turning chains: In sc rows, ch 1 turns do not count as a stitch. In dc rows or rounds, ch 3 counts as first dc.
5. Use stitch markers. Place markers at: side seams (2 markers), center front, center back, and at each cup base join point.
6. The belt is a separate flat piece that threads through the buckle. It is not sewn to the garment.
7. Block each major section (cups, torso, shorts panel) before seaming. This is not optional for a fitted cotton garment.
8. The shorts section uses a 6-stitch repeat for the shell pattern. The starting stitch count at the waist must be a multiple of 6.
Step by Step Crochet Tutorial
Section 1: Left Cup
The cup is worked flat from bottom center upward. Begin with a foundation chain at the base of the cup.
Row 1 (RS): Ch 13. Sc in 2nd ch from hook and in each ch across. Turn. (12 sc)
Row 2 (WS): Ch 1, inc in first st, sc across to last st, inc in last st. Turn. (14 sc)
Row 3 (RS): Ch 1, inc in first st, sc across to last st, inc in last st. Turn. (16 sc)
Row 4 (WS): Ch 1, inc in first st, sc across to last st, inc in last st. Turn. (18 sc)
Row 5 (RS): Ch 1, inc in first st, sc across to last st, inc in last st. Turn. (20 sc)
Row 6 (WS): Ch 1, sc across. Turn. (20 sc)
Row 7 (RS): Ch 1, inc in first st, sc across to last st, inc in last st. Turn. (22 sc)
Row 8 (WS): Ch 1, sc across. Turn. (22 sc)
Row 9 (RS): Ch 1, sc2tog, sc across to last 2 sts, sc2tog. Turn. (20 sc)
Row 10 (WS): Ch 1, sc2tog, sc across to last 2 sts, sc2tog. Turn. (18 sc)
Row 11 (RS): Ch 1, sc2tog, sc across to last 2 sts, sc2tog. Turn. (16 sc)
Row 12 (WS): Ch 1, sc2tog, sc across to last 2 sts, sc2tog. Turn. (14 sc)
Row 13 (RS): Ch 1, sc2tog, sc across to last 2 sts, sc2tog. Turn. (12 sc)
Row 14 (WS): Ch 1, sc2tog, sc across to last 2 sts, sc2tog. Turn. (10 sc)
Row 15 (RS): Ch 1, sc2tog, sc across to last 2 sts, sc2tog. Turn. (8 sc)
Do not fasten off. Place a stitch marker on working loop. Set Left Cup aside.
Checkpoint: Left Cup should measure approximately 4 inches / 10 cm tall and 5.5 inches / 14 cm wide at its widest point (Rows 7-8). The piece should curve slightly at the edges due to the shaping.
Section 2: Right Cup
Work Rows 1 through 15 exactly as Left Cup.
Do not fasten off. You will use this working yarn to join the two cups.
Section 3: Cup Join and Center Panel
With RS of Right Cup facing, continue working across to join the two cups.
Row 16 (joining row, RS): Ch 1. Sc across the 8 sts of Right Cup. Ch 4 (this creates the center front dip of the sweetheart neckline). Pick up the working loop of Left Cup and sc across the 8 sts of Left Cup. Turn. (8 sc + 4 ch + 8 sc = 20 total)
Row 17 (WS): Ch 1, sc in each st and ch across. Turn. (20 sc)
Row 18 (RS): Ch 1, sc across. Turn. (20 sc)
Row 19 (WS): Ch 1, sc across. Turn. (20 sc)
Row 20 (RS): Ch 1, inc in first st, sc across to last st, inc in last st. Turn. (22 sc)
Row 21 (WS): Ch 1, sc across. Turn. (22 sc)
Row 22 (RS): Ch 1, inc in first st, sc across to last st, inc in last st. Turn. (24 sc)
Row 23 (WS): Ch 1, sc across. Turn. (24 sc)
Row 24 (RS): Ch 1, sc across. Turn. (24 sc)
Set this front panel aside. Do not fasten off.
Section 4: Back Panel
Foundation: Ch 87. Sc in 2nd ch from hook and each ch across. Turn. (86 sc)
Row 1 (WS): Ch 1, sc across. Turn. (86 sc)
Row 2 (RS): Ch 1, sc across. Turn. (86 sc)
Rows 3 through 8: Repeat Rows 1 and 2 three more times. (86 sc)
Row 9 (WS): Ch 1, sc2tog, sc across to last 2 sts, sc2tog. Turn. (84 sc)
Row 10 (RS): Ch 1, sc across. Turn. (84 sc)
Row 11 (WS): Ch 1, sc2tog, sc across to last 2 sts, sc2tog. Turn. (82 sc)
Row 12 (RS): Ch 1, sc across. Turn. (82 sc)
Row 13 (WS): Ch 1, sc2tog, sc across to last 2 sts, sc2tog. Turn. (80 sc)
Row 14 (RS): Ch 1, sc across. Turn. (80 sc)
Row 15 (WS): Ch 1, sc2tog, sc across to last 2 sts, sc2tog. Turn. (78 sc)
Row 16 (RS): Ch 1, sc across. Turn. (78 sc)
Do not fasten off.
Section 5: Side Seam Join and Torso Body
Lay the Back Panel and Front Cups flat with RS facing outward. The front panel at Row 24 is 24 sc wide. The back panel is 78 sc wide at Row 16. Each side extension equals (78 minus 24) divided by 2, which is 27 sc per side beyond the front panel width.
Side seam join: Join the front panel to the back panel, leaving 10 rows of the back panel’s side edges unjoined at the top as the armhole opening. Sc seam through both layers for approximately 6 rows on each side. Fasten off.
Torso pickup round: With RS facing, join yarn at right side seam at the bottom of the bodice. Work sc evenly around the full bottom opening: pick up approximately 24 sc along front bottom, 27 sc along right side extension, 78 sc along back bottom, 27 sc along left side extension. Join with sl st. Place marker for beginning of round. (156 sc)
Round 1: Sc in each st around. Join. (156 sc)
Round 2: Sc in each st around. Join. (156 sc)
Round 3: Sc in each st around. Join. (156 sc)
Round 4 (decrease): Ch 1, [sc in next 24 sts, sc2tog] 6 times. Join. (150 sc)
Round 5: Sc in each st around. Join. (150 sc)
Round 6: Sc in each st around. Join. (150 sc)
Round 7 (decrease): Ch 1, [sc in next 23 sts, sc2tog] 6 times. Join. (144 sc)
Round 8: Sc in each st around. Join. (144 sc)
Round 9: Sc in each st around. Join. (144 sc)
Round 10 (decrease): Ch 1, [sc in next 22 sts, sc2tog] 6 times. Join. (138 sc)
Round 11: Sc in each st around. Join. (138 sc)
Round 12: Sc in each st around. Join. (138 sc)
Round 13 (decrease): Ch 1, [sc in next 21 sts, sc2tog] 6 times. Join. (132 sc)
Round 14: Sc in each st around. Join. (132 sc)
Round 15: Sc in each st around. Join. (132 sc)
Round 16 (decrease): Ch 1, [sc in next 20 sts, sc2tog] 6 times. Join. (126 sc)
Round 17: Sc in each st around. Join. (126 sc)
Round 18: Sc in each st around. Join. (126 sc)
Round 19 (decrease): Ch 1, [sc in next 19 sts, sc2tog] 6 times. Join. (120 sc)
Round 20: Sc in each st around. Join. (120 sc)
Checkpoint: After Round 20, the torso body should measure approximately 6 inches / 15 cm from the underarm pickup round. The waist circumference with ease should be approximately 28 inches / 71 cm.
Section 6: Waist Transition Round
This round establishes the belt loop channel using BLO. Current count is 120 sc, which is already a multiple of 6.
Round 21 (belt channel): Ch 1, sc in BLO of each st around. Join. (120 sc)
The front loops left behind form a natural ridge where the belt rests when worn.
Section 7: Shorts in Shell Stitch
The shorts are worked in joined rounds downward from the waist. Current stitch count is 120 sc, which equals 20 shell repeats per round.
Round 1 (setup round): Ch 3 (counts as first dc), 2 dc in same st as join. [Sk 2 sts, sc in next st, sk 2 sts, 5 dc in next st] 19 times. Sk 2 sts, sc in next st, sk 2 sts, 2 dc in joining st. Join with sl st to top of ch-3. (20 shells)
Round 2: Sl st into the 3rd dc of the first shell (center dc), ch 1, sc in same sp. [Ch 2, 5 dc in next sc, ch 2, sc in center dc of next shell] 19 times. Ch 2, 5 dc in next sc, ch 2. Join with sl st to first sc. (20 shells)
Round 3: Ch 3 (counts as first dc), 2 dc in same sc. [Sc in center dc of next shell, 5 dc in next sc] 19 times. Sc in center dc of last shell, 2 dc in same sc as start. Join with sl st to top of ch-3. (20 shells)
Rounds 4 through 12: Alternate Rounds 2 and 3. Work Round 2, then Round 3, then Round 2, and continue for a total of 12 rounds of shell stitch after the setup round.
Continue until the shorts section measures approximately 7 inches / 18 cm from the waist round, not including the scallop edging. Do not fasten off.
Checkpoint: After all shell stitch rounds, the shorts section should measure approximately 7 inches / 18 cm from waist down, before edging. The hip circumference will have opened naturally to approximately 36 inches / 91 cm due to the fan stitch expansion.
Section 8: Inseam and Crotch Seam
The shorts are currently an open tube. Flatten the tube so center front aligns with center back. The fold lines on each side are the side seams.
Mark the center front and center back points with stitch markers.
At the crotch area (bottom of the tube at the center point), seam together the front and back layers for approximately 2.5 inches / 6 cm up from the bottom edge using a whip stitch or sc seam through both layers. This creates two separate leg openings.
Fasten off and weave in ends.
Section 9: Leg Edging
Work Scallop Edging around each leg opening.
Each leg opening should have approximately 60 stitches around its circumference. Since 60 is a multiple of 6, the scallop edging works out to exactly 10 scallops per leg.
Right Leg: Join yarn at the inseam point. Work Scallop Edging evenly around the full leg opening. Join and fasten off.
Left Leg: Join yarn at the inseam point. Work Scallop Edging evenly around the full leg opening. Join and fasten off.
Section 10: Neckline and Armhole Edging
Neckline: With RS facing, join yarn at right back strap attachment point. Sc evenly along the entire neckline opening: approximately 6 sc along right back top, approximately 24 sc across top of right cup, approximately 6 sc across center V dip, approximately 24 sc across top of left cup, approximately 6 sc along left back top. Total approximately 66 sc. Adjust to nearest multiple of 6 by adding or omitting 1 to 2 sc as needed. Work Scallop Edging across this pickup round. Fasten off.
Right Armhole: With RS facing, join yarn at bottom of right armhole. Pick up approximately 42 sc evenly around the armhole opening. Adjust to nearest multiple of 6. Work Scallop Edging around. Join and fasten off.
Left Armhole: Repeat for left armhole.
Section 11: Spaghetti Straps (Make 2)
Use the smaller D-3 / 3.25 mm hook.
Foundation: Ch 5.
Row 1: Sc in 2nd ch from hook and each ch across. Turn. (4 sc)
Rows 2 through 100: Ch 1, sc in each st across. Turn. (4 sc)
Continue until strap measures approximately 14 inches / 35.5 cm, or to desired length.
Final Row: Ch 1, sl st in each st across. Fasten off, leaving a 12 inch / 30 cm tail for sewing.
Make 2 straps.
Attachment: Fold the top end of each strap into a loop (approximately 1.5 inches / 3.8 cm folded back) and sew securely. These loops rest over the shoulders. Sew the bottom end of each strap to the back of the bodice at the top back corner on each side.
Section 12: Belt
Use the smaller D-3 / 3.25 mm hook for a firmer texture.
Foundation: Ch 7.
Row 1: Sc in 2nd ch from hook and each ch across. Turn. (6 sc)
Continue working rows of 6 sc until the belt measures approximately 32 inches / 81 cm, or long enough to wrap around your waist, thread through the buckle, and have extra length for adjustment.
Fasten off. Thread the belt through the rectangular buckle and fold the end back on itself, stitching securely to secure the buckle. The other end remains free to thread through when wearing.
Finishing and Blocking
Weave in all remaining ends with your tapestry needle. Block each section of the romper by soaking in lukewarm water for 15 minutes, gently squeezing out excess water (do not wring), and pinning flat to blocking mats. Shape the cups, scallop edges, and shell stitch shorts while pinning. Allow to dry completely before wearing.
Size Customization Tips
This pattern is written for size Small. To adjust:
Always make a gauge swatch and adjust hook size as needed.
You Did It!
This sage green shell stitch romper is a true statement piece. The combination of structured bodice and flowing lacy shorts creates a silhouette that looks far more complicated than the individual techniques involved. Take your time with each section, trust your stitch counts, and do not skip blocking.
I hope you love making this romper as much as I loved designing it. Thank you so much for choosing this pattern for your next project.
If you make this romper, I would absolutely love to see it! Save this pattern to your Pinterest boards so you can find it when you are ready to start. And please leave a comment below once you finish yours. Seeing your creations is the best part of sharing patterns.
You Might Also Like
- Forest Green Fox Granny Square Baby Blanket Free Pattern
- Sparkle Galaxy Snake Amigurumi Free Crochet Pattern
- Mint Green Floral Crochet Backpack Free Pattern
- Blush Pink Feminine Shell Bag Free Crochet Pattern
