
You know that gorgeous skein of DK weight yarn sitting in your stash? The one you’ve been saving for "something special"? This is the project.
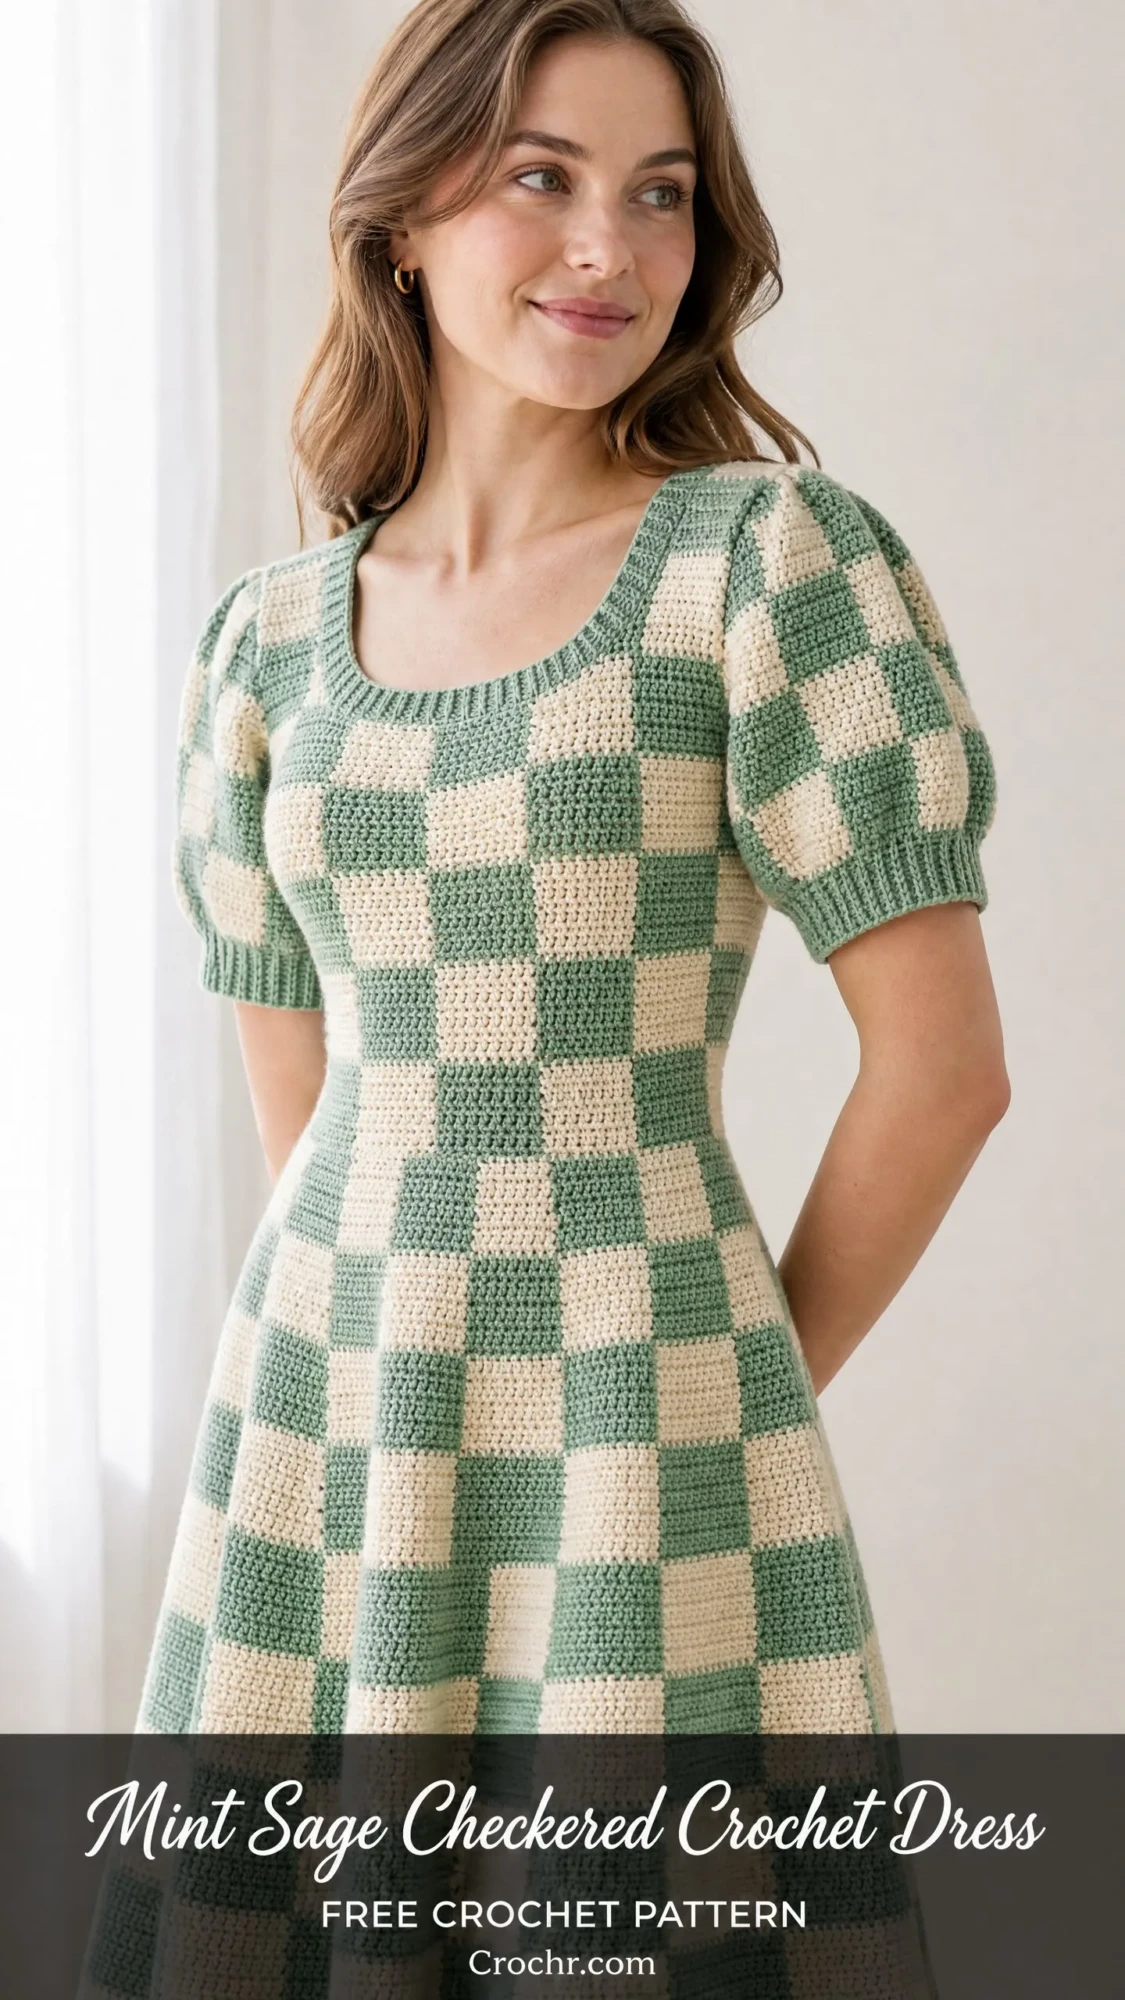
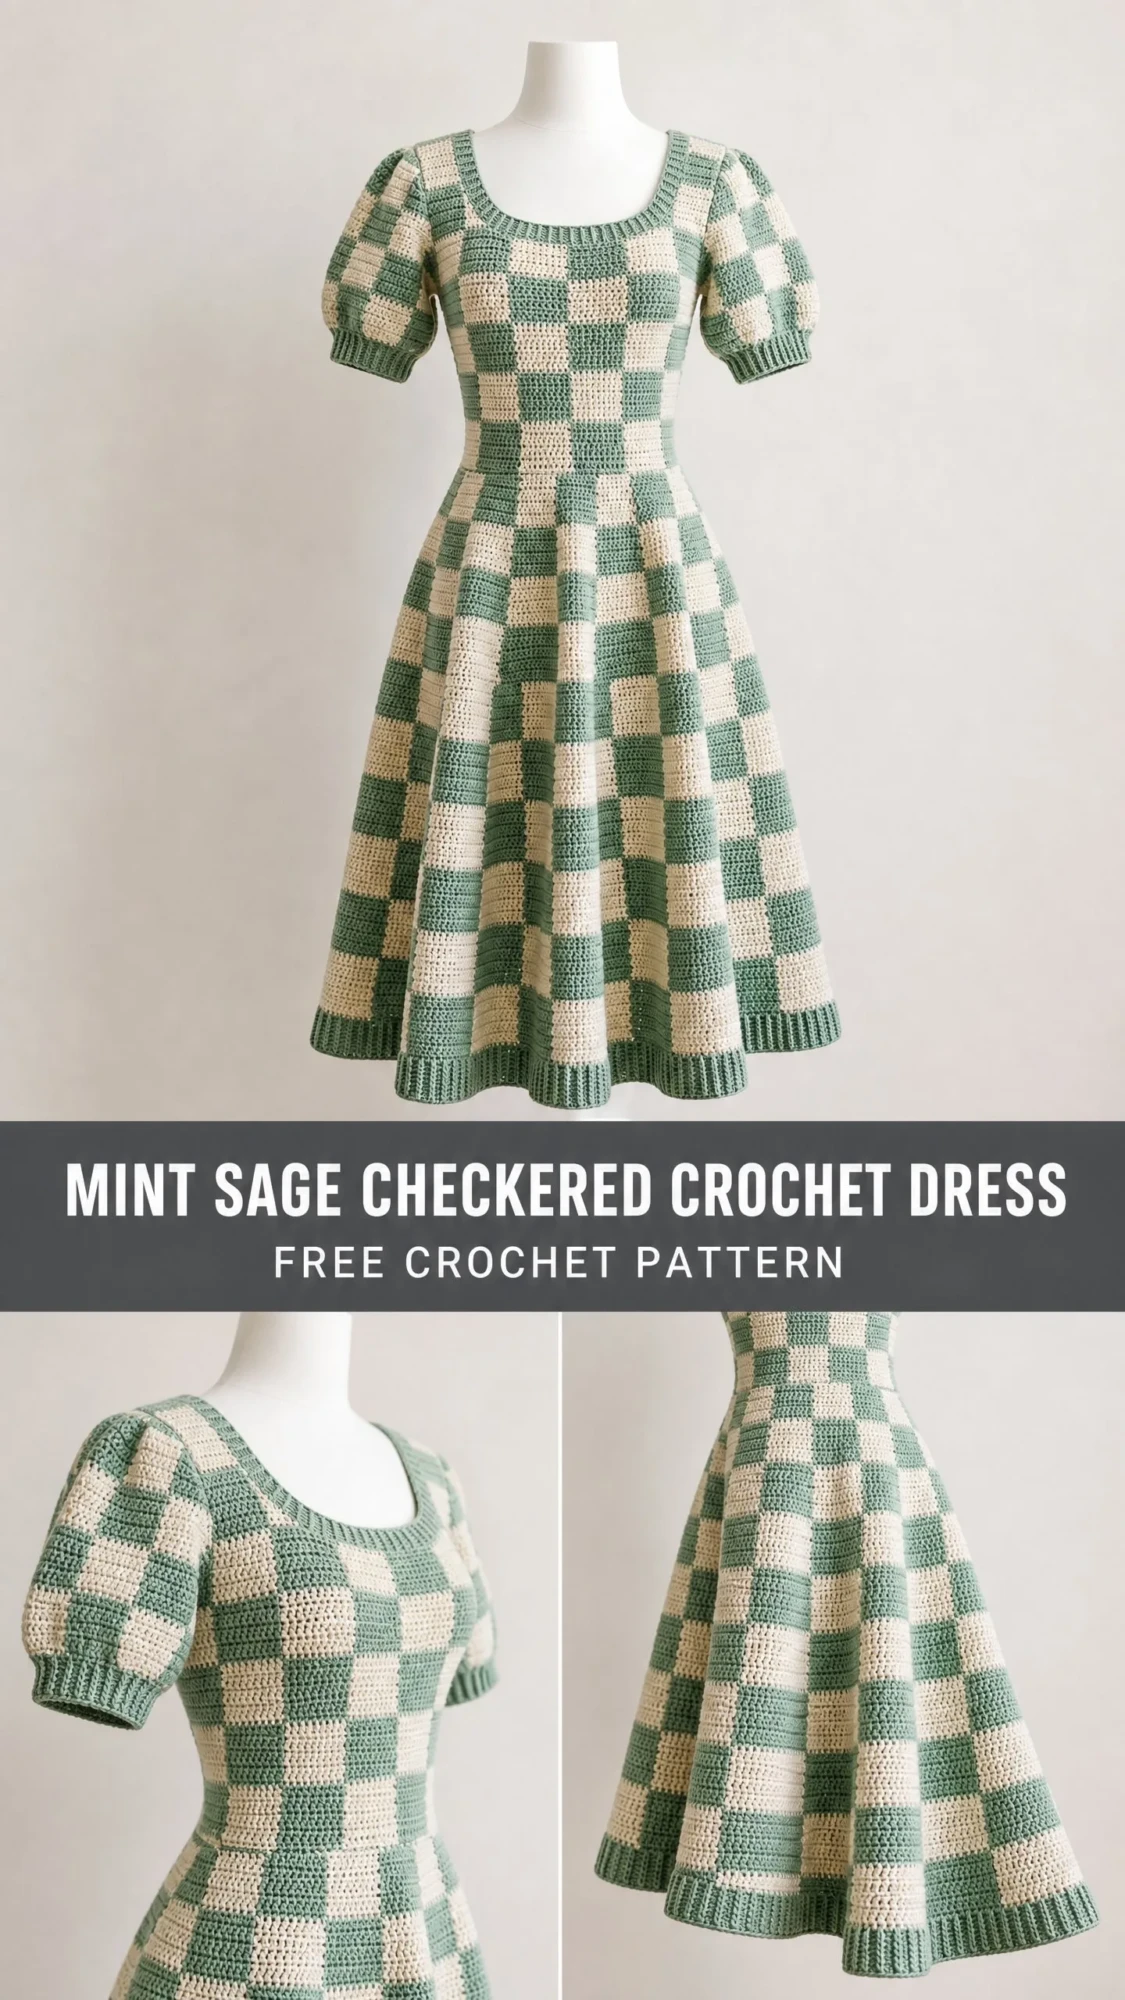
This mint sage checkered crochet dress combines vintage charm with modern wearability, and the construction is genuinely fascinating. You’ll work top-down in continuous rounds, carrying two colors to create those bold checkerboard blocks without cutting yarn at every color change. The fitted bodice flows into a full A-line skirt, complete with puffed sleeves and ribbed finishing details that give it that polished, handmade-but-professional look.
I won’t sugarcoat it though. This is an intermediate to advanced project that requires comfort with colorwork, garment shaping, and working sleeves separately. If you’ve completed a couple of garment projects and dabbled in two-color work, you’re ready. Budget 40 to 60 hours, grab your favorite beverage, and let’s make something stunning.
Why This Checkered Dress Pattern Works
The checkerboard pattern in this crochet dress isn’t just visually striking. It’s mathematically satisfying. Each color block measures 4 stitches wide by 4 rows tall, creating perfect squares that align in a true checkerboard where every block is surrounded by the opposite color on all four sides.
The dress features a scoop neckline finished with clean ribbing, short puffed sleeves that add a romantic vintage touch, defined waist shaping, and a sweeping A-line skirt that falls to midi length. On a 5’5" frame, the hem sits just below the knee.
What makes the construction interesting is how the checkerboard blocks naturally expand in the skirt as you add increases. The pattern maintains that perfect square proportion throughout, which takes careful planning but creates a seamless visual flow from bodice to hem.
Materials You’ll Need
Yarn Requirements:
Recommended Yarn Options:
Paintbox Yarns Simply DK works beautifully here. It’s 100% acrylic with 276 yards per 100g skein, offering excellent stitch definition and machine washability. Choose Grass Green for Color A and Champagne White for Color B. You’ll need 5 skeins of each color.
Lion Brand Pound of Love is another solid choice. The large 1,020 yard skeins reduce joins significantly, and the yarn is soft against skin. Look for Sage and Cream colorways.
For a more luxurious option, Cascade 220 Superwash in a sage colorway and natural ecru gives superior drape. You’ll need approximately 6 skeins of each color.
Substitution tip: Any smooth DK weight yarn that hits gauge will work. Avoid textured, fuzzy, or highly elastic yarns because they’ll obscure that crisp checkerboard pattern you’re working so hard to achieve.
Hooks:
Notions:
Gauge (Please Don’t Skip This)
With the larger hook and single crochet in the two-color checkerboard pattern:
22 stitches = 4 inches
24 rows/rounds = 4 inches
I know gauge swatches feel tedious, but for a fitted garment like this dress, they’re non-negotiable. Even one stitch per inch difference will significantly alter your finished measurements. Work a swatch at least 6 inches square in the checkerboard pattern, wash and block it the way you plan to treat the finished dress, then measure.
For the ribbing sections with the smaller hook, you should also get 22 stitches per 4 inches, though the ribbing will be slightly compressed.
Finished Measurements
This pattern is written for size Medium, fitting a 36 inch bust, 28 inch waist, and 38 inch hip.
Finished garment measurements:
Abbreviations and Stitch Definitions
Let me walk you through every abbreviation you’ll encounter. If you’re newer to garment making, bookmark this section.
Special Techniques Explained
1×1 Ribbing
This creates those clean, stretchy bands at the neckline, sleeve cuffs, and hem.
Row 1: Chain an even number. Single crochet in second chain from hook and in each chain across. Turn.
Row 2: Chain 1. Single crochet in the front loop only of the first stitch, single crochet in the back loop only of the second stitch. Continue alternating front loop and back loop across. Turn.
Repeat Row 2 for the ribbing pattern. The alternating loops create vertical ridges that stretch horizontally.
Two-Color Checkerboard Single Crochet
This is the heart of the dress. Each color block spans 4 stitches wide and 4 rows tall. Colors alternate to create the checkerboard effect.
The key technique: Carry the unused color behind your work, encasing it within your stitches as you crochet over it. When you reach a color change point (every 4 stitches), drop the current color to the wrong side and pick up the waiting color from underneath.
Color change method: Work the stitch before your color change until 2 loops remain on hook. Drop the current color to the wrong side. Pick up the new color and draw through both loops to complete the stitch. The new color is now active for the next 4 stitches.
Checkerboard Color Sequence
Here’s how the colors flip to create true checkerboard:
Rounds 1 through 4: Stitches 1 to 4 = Color A, Stitches 5 to 8 = Color B, continue alternating every 4 stitches.
Rounds 5 through 8: Colors flip. Stitches 1 to 4 = Color B, Stitches 5 to 8 = Color A, continue alternating.
Rounds 9 through 12: Return to original arrangement like Rounds 1 to 4.
This 8-round repeat continues throughout the dress. I recommend keeping a notepad handy to track which round you’re on within each repeat.
Pattern Instructions
Neckline Ribbing
With the smaller hook (D-3 / 3.25 mm) and Color A, chain 9.
Row 1: Single crochet in second chain from hook and in each chain across. Turn. (8 sc)
Row 2: Chain 1. Single crochet in front loop only of first stitch, single crochet in back loop only, single crochet in front loop only, single crochet in back loop only, single crochet in front loop only, single crochet in back loop only, single crochet in front loop only, single crochet in back loop only. Turn. (8 sc)
Repeat Row 2 until your ribbing strip measures 30 inches long. This takes approximately 165 rows. Do not fasten off.
Joining the ribbing: Slip stitch the last row to your foundation chain, matching stitch for stitch across all 8 stitches to form a ring.
Neckline pickup round: Switch to the larger hook (E-4 / 3.5 mm). Working along one long edge of the ribbing ring, single crochet evenly around, picking up 1 single crochet per row end. Pick up 120 single crochets total. Join with slip stitch to first single crochet. (120 sc)
Placement note: Position the ribbing seam at center back. The front of the neckline naturally dips into a scoop shape.
Bodice Increase Section (Rounds 1 through 89)
Begin the checkerboard pattern: 4 single crochets in Color A, 4 single crochets in Color B, repeating around. With 120 stitches, you have exactly 15 full checkerboard repeats.
The bodice increases from 120 stitches at the neckline to 208 stitches at full bust, adding 8 stitches at a time in increase rounds.
Rounds 1 through 4: Chain 1. Work 120 sc in checkerboard pattern. Join. (120 sc each round)
Rounds 5 through 8: Flip checkerboard colors. Chain 1. Work 120 sc in new arrangement. Join after each round. (120 sc each round)
Round 9 (increase round): Chain 1. Work 14 sc in pattern, increase in next stitch. Repeat this sequence 8 times around. Join. (128 sc)
Rounds 10 through 12: Chain 1. Work 128 sc in pattern. Join. (128 sc)
Rounds 13 through 16: Flip checkerboard. Chain 1. Work 128 sc in pattern. Join. (128 sc)
Round 17 (increase round): Chain 1. Work 15 sc in pattern, increase in next stitch. Repeat 8 times. Join. (136 sc)
Rounds 18 through 20: Chain 1. Work 136 sc in pattern. Join. (136 sc)
Rounds 21 through 24: Flip checkerboard. Chain 1. Work 136 sc in pattern. Join. (136 sc)
Round 25 (increase round): Chain 1. Work 16 sc in pattern, increase in next stitch. Repeat 8 times. Join. (144 sc)
Rounds 26 through 28: Chain 1. Work 144 sc in pattern. Join. (144 sc)
Rounds 29 through 32: Flip checkerboard. Chain 1. Work 144 sc in pattern. Join. (144 sc)
Round 33 (increase round): Chain 1. Work 17 sc in pattern, increase in next stitch. Repeat 8 times. Join. (152 sc)
Rounds 34 through 36: Chain 1. Work 152 sc in pattern. Join. (152 sc)
Rounds 37 through 40: Flip checkerboard. Chain 1. Work 152 sc in pattern. Join. (152 sc)
Round 41 (increase round): Chain 1. Work 18 sc in pattern, increase in next stitch. Repeat 8 times. Join. (160 sc)
Rounds 42 through 44: Chain 1. Work 160 sc in pattern. Join. (160 sc)
Rounds 45 through 48: Flip checkerboard. Chain 1. Work 160 sc in pattern. Join. (160 sc)
Round 49 (increase round): Chain 1. Work 19 sc in pattern, increase in next stitch. Repeat 8 times. Join. (168 sc)
Rounds 50 through 52: Chain 1. Work 168 sc in pattern. Join. (168 sc)
Rounds 53 through 56: Flip checkerboard. Chain 1. Work 168 sc in pattern. Join. (168 sc)
Round 57 (increase round): Chain 1. Work 20 sc in pattern, increase in next stitch. Repeat 8 times. Join. (176 sc)
Rounds 58 through 60: Chain 1. Work 176 sc in pattern. Join. (176 sc)
Rounds 61 through 64: Flip checkerboard. Chain 1. Work 176 sc in pattern. Join. (176 sc)
Round 65 (increase round): Chain 1. Work 21 sc in pattern, increase in next stitch. Repeat 8 times. Join. (184 sc)
Rounds 66 through 68: Chain 1. Work 184 sc in pattern. Join. (184 sc)
Rounds 69 through 72: Flip checkerboard. Chain 1. Work 184 sc in pattern. Join. (184 sc)
Round 73 (increase round): Chain 1. Work 22 sc in pattern, increase in next stitch. Repeat 8 times. Join. (192 sc)
Rounds 74 through 76: Chain 1. Work 192 sc in pattern. Join. (192 sc)
Rounds 77 through 80: Flip checkerboard. Chain 1. Work 192 sc in pattern. Join. (192 sc)
Round 81 (increase round): Chain 1. Work 23 sc in pattern, increase in next stitch. Repeat 8 times. Join. (200 sc)
Rounds 82 through 84: Chain 1. Work 200 sc in pattern. Join. (200 sc)
Rounds 85 through 88: Flip checkerboard. Chain 1. Work 200 sc in pattern. Join. (200 sc)
Round 89 (final increase round): Chain 1. Work 24 sc in pattern, increase in next stitch. Repeat 8 times. Join. (208 sc)
You now have 208 stitches, which equals 26 checkerboard repeats around. Your bust circumference measures approximately 38 inches.
Important Pattern Notes
About increases and the checkerboard: When you work an increase, place both stitches of the increase in the same color as the block where it falls. On following rounds, treat the increased stitch as part of that existing block until colors flip in the next sequence.
Tracking your rounds: The 8-round color flip cycle can get confusing. I highly recommend using a separate stitch marker or notepad to track which round you’re on within each repeat. Trust me, this saves hours of frogging.
Weaving ends as you go: Two-color work generates many short yarn tails at color transitions. Weave these in as you work whenever possible. Your future self will thank you.
The chain 1 at round beginnings: Throughout this pattern, the chain 1 at the start of each single crochet round does NOT count as a stitch. This keeps your stitch counts accurate.
Finishing Your Checkered Crochet Dress
After completing all bodice rounds, the waist shaping, skirt increases, sleeves, and all ribbed finishing, take time to block your dress properly. Wet blocking is ideal for this project. Lay the dress flat on blocking mats, gently shape it to measurements, and allow it to dry completely.
The checkerboard pattern really pops after blocking. The squares even out, the colorwork relaxes, and the whole garment takes on that professional, polished appearance that makes people ask "Wait, you MADE that?"
Tips for Success
Check your gauge religiously. This bears repeating. A fitted dress with precise measurements demands accurate gauge. Swatch, wash, block, measure. Adjust hook size as needed.
Use lifelines. At the end of each major section, thread a piece of contrasting yarn through all live stitches. If you need to rip back, you won’t lose more than a section’s worth of work.
Try it on as you go. Once you’re past the bodice increases, slip the dress over your head periodically to check fit. It’s much easier to adjust now than after finishing.
Don’t stress about perfect color changes. The carried yarn might show slightly on the wrong side. This is normal and won’t be visible when worn.
Size Customization Tips
To adjust this pattern for different sizes, remember that all stitch counts must be divisible by 8 to maintain the checkerboard pattern. Calculate your target circumference, multiply by your gauge, and round to the nearest multiple of 8.
For a smaller size, reduce neckline pickup stitches and maximum bust stitches proportionally. For a larger size, increase these counts while maintaining the divisibility rule.
The waist shaping can be adjusted by adding or removing decrease rounds, and the skirt flare can be modified by changing how frequently you work increase rounds.
Thank you so much for choosing this mint sage checkered crochet dress pattern. This project takes real commitment, and I’m genuinely excited for you to create something this beautiful with your own hands. The finished dress is absolutely worth every hour you’ll put into it.
If you make this dress, I would absolutely love to see it! Share your photos on Instagram or Facebook and tag me so I can celebrate your work with you.
Save this checkered crochet dress pattern to your Pinterest boards so you can find it easily when you’re ready to start. And please drop a comment below if you make it. I’d love to hear how it turns out and see which color combination you chose!
You Might Also Like
- Lavender Granny Square Sofa Cover Free Crochet Pattern
- Mint Daisy Bathroom Set Free Crochet Pattern
- Sunset Coral Ruffle Dress Free Crochet Pattern
- Sage Green Natural Minimalist Braided Bag Free Crochet Pattern
