
I’ve been looking for a way to give my living room a complete makeover without buying new furniture, and this lavender granny square sofa cover set is exactly what I had in mind. The soft purple yarn, the classic granny square construction, the delicate cream scalloped edging. It all comes together into something that looks like it belongs in a design magazine.
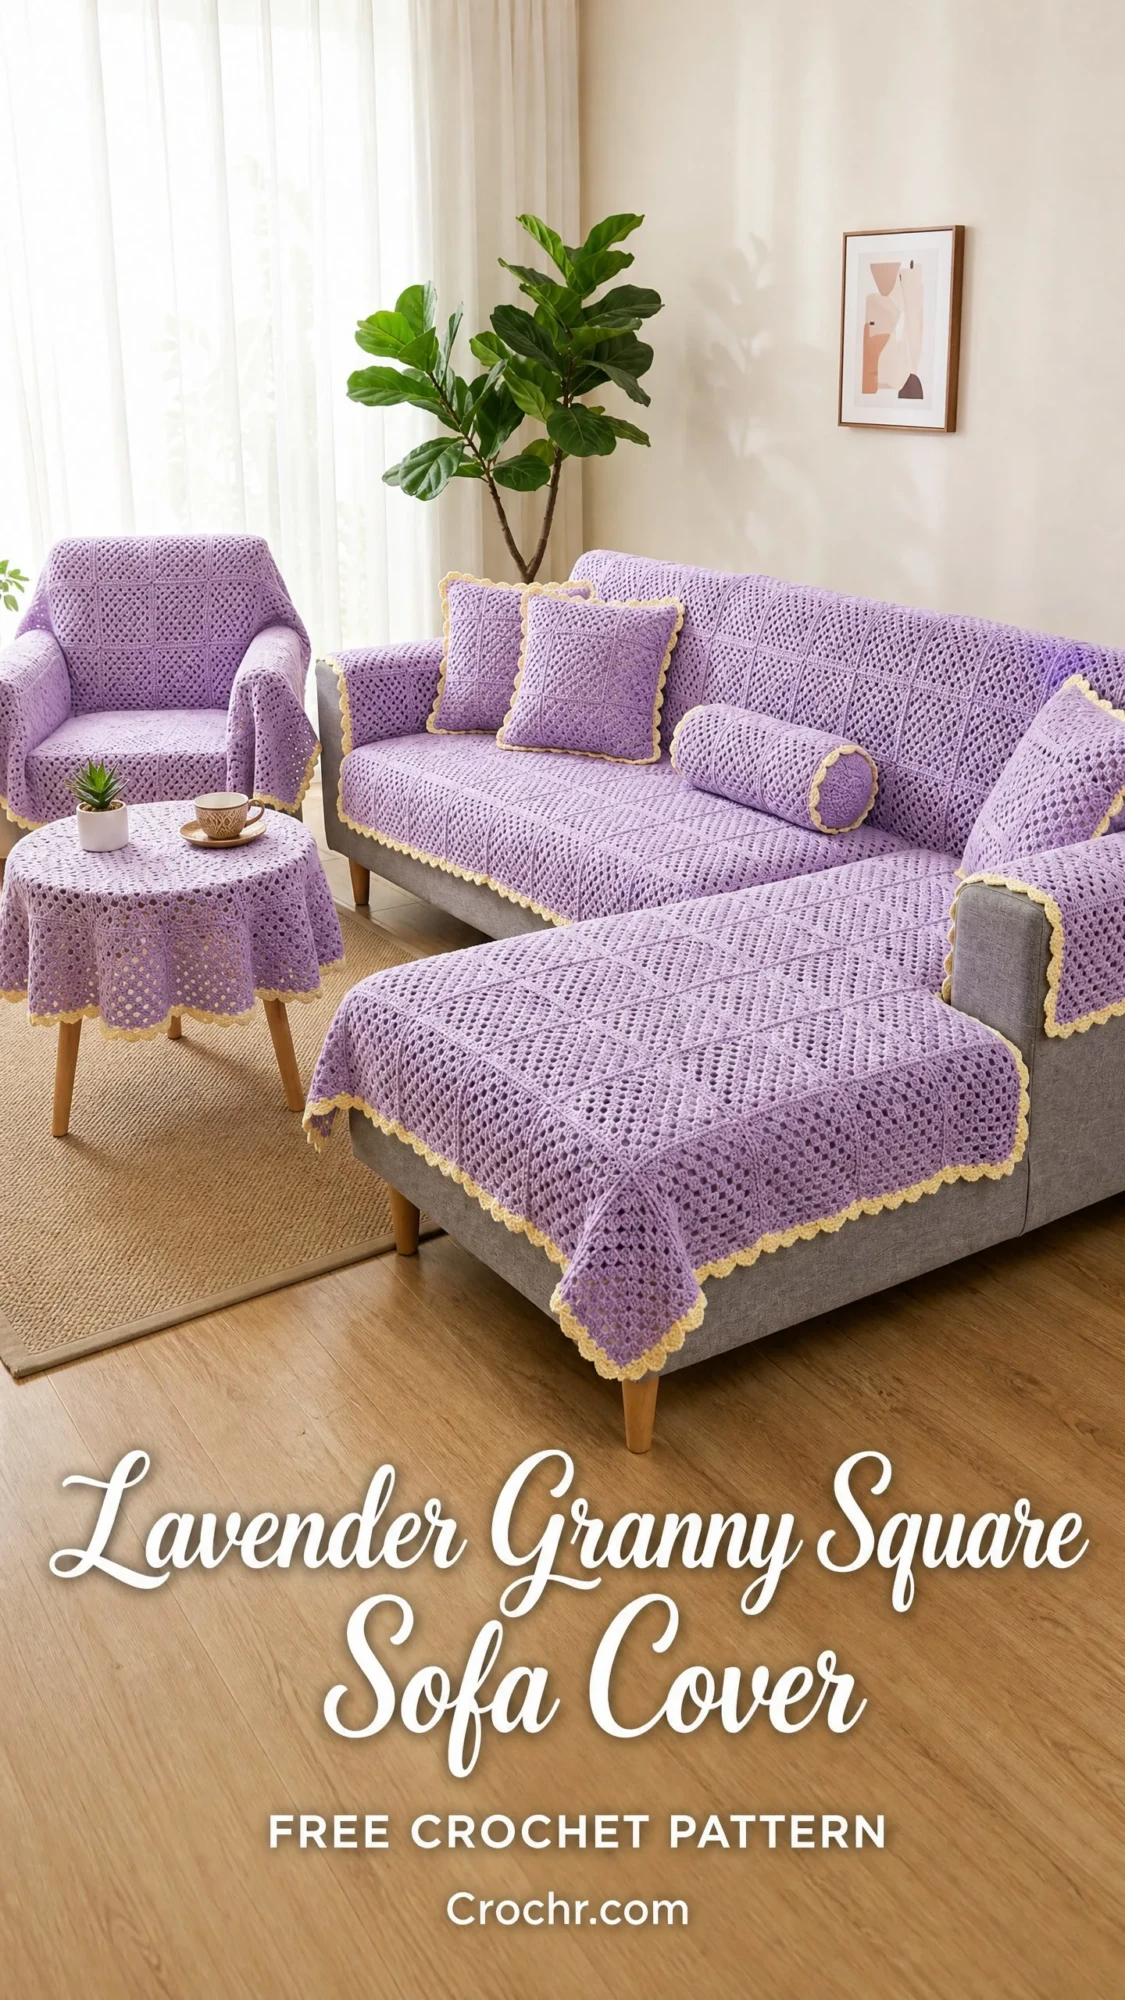
This is my favorite kind of project. The kind where individual portable squares add up to something absolutely stunning. You can work on a square while waiting at appointments, watching TV, or during lunch breaks. Then suddenly you have enough to cover an entire sectional sofa, an armchair, a side table, and a whole collection of matching throw pillows.
If you’ve ever made a granny square, you already know the core skill for this entire set. The rest is just multiplication and patience.
About This Lavender Granny Square Sofa Cover Crochet Pattern
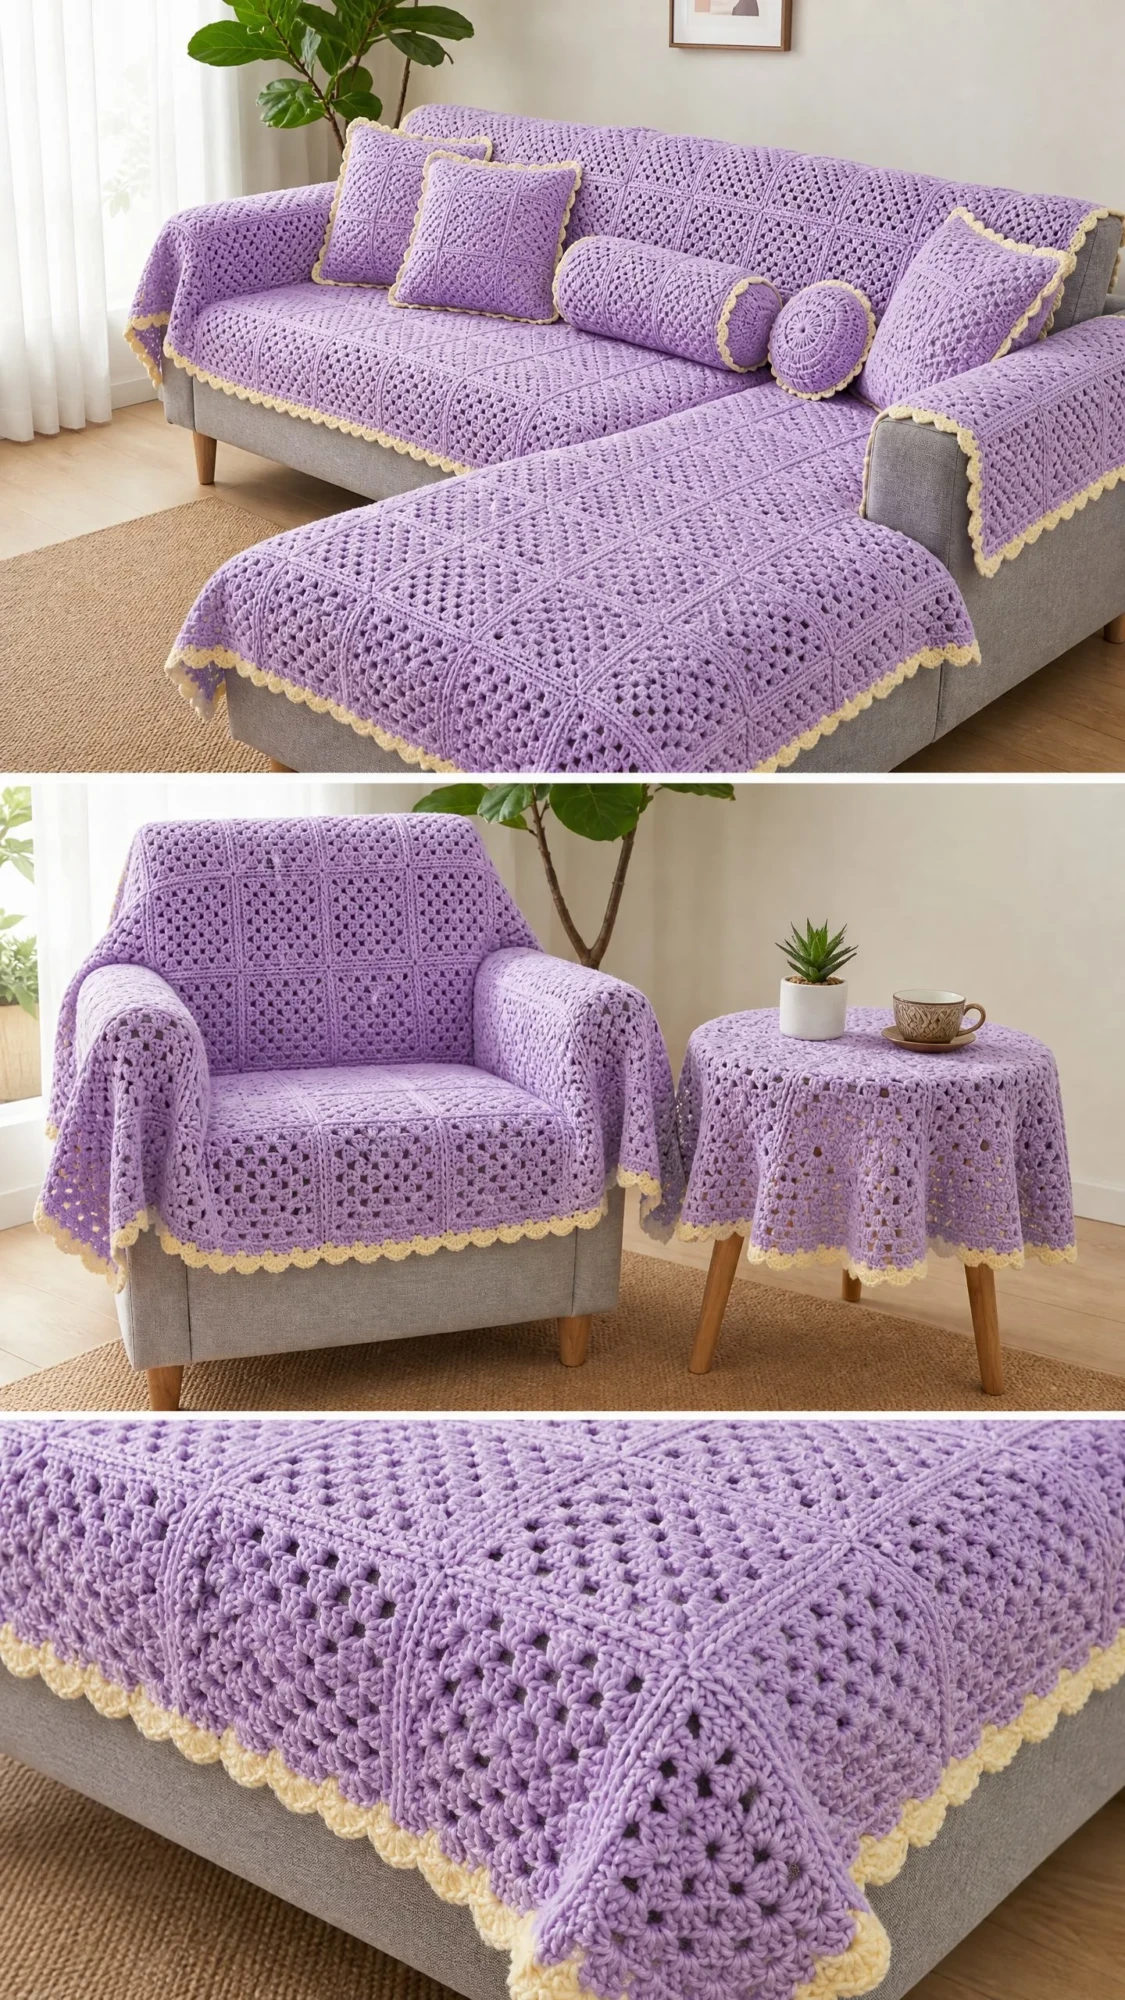
This pattern creates a complete coordinated living room set. You’ll make panels for a three-seat sofa with attached chaise, one armchair, one round side table, and several decorative pillows in various sizes. Everything uses the same classic four-round granny square worked in a gorgeous lavender yarn with warm cream picot edging.
The construction is modular. You work individual squares, join them into panels, then drape those panels over your furniture. Nothing is form-fitted. Nothing requires precise measurements to work. The panels simply lay over your existing furniture and transform it completely.
Skill level: Intermediate. The individual granny square is beginner territory. But the scale of this project, the joining techniques, and maintaining consistent gauge across hundreds of squares requires comfort with working in rounds and some experience joining motifs.
Time estimate: Budget 80 to 120 hours for the complete set. That breaks down to roughly 40 to 60 hours for squares, 15 to 20 hours for joining and assembly, 10 to 15 hours for edging, and 10 to 20 hours for pillows and the table cover.
Finished Measurements
Here’s what each piece measures when complete:
All panels drape over furniture rather than fitting tightly. This makes the pattern forgiving and easy to customize for your specific sofa dimensions.
Materials You’ll Need
Yarn:
Yarn suggestions from the pattern:
Avoid fuzzy or halo yarns. You want clean stitch definition so the granny square lattice pattern shows clearly.
Hook: US size G-6 (4.00 mm) for squares and panels. US size F-5 (3.75 mm) optional for tighter edging.
Notions:
Gauge (Please Check This First)
One completed 4-round granny square measures 5 in by 5 in (12.7 cm by 12.7 cm) after light blocking.
Gauge matters enormously for this project. Every panel dimension is calculated based on that 5-inch square. If your square is even half an inch off, that compounds across dozens of squares and throws off your entire panel. Work a test square, block it, measure it, and adjust your hook size before starting the main work.
Abbreviations
Let me walk you through every abbreviation you’ll encounter:
Special Stitches for This Crochet Tutorial
The Classic Granny Square (4 rounds)
This is the building block of your entire sofa cover set. Every square follows the same construction.
Round 1:
With MC, make a magic ring (or ch 4 and join with sl st to form a ring).
Ch 3 (counts as first dc now and throughout). Work 2 dc into the ring. Ch 2. (3 dc, ch 2) three more times into the ring. Join with sl st to top of beg ch-3. Fasten off or continue.
(4 clusters of 3 dc, 4 ch-2 corner spaces)
Round 2:
Join MC with sl st to any ch-2 corner sp. Ch 3, work 2 dc into same corner sp. Ch 2, work 3 dc into same corner sp. (This completes the first corner.) Ch 1. In the next corner sp, work (3 dc, ch 2, 3 dc). Ch 1. Rep from start of this instruction for remaining 2 corners. Join with sl st to top of beg ch-3.
(8 clusters of 3 dc, 4 ch-2 corner spaces, 4 ch-1 side spaces)
Round 3:
Join MC with sl st to any ch-2 corner sp. Ch 3, work 2 dc into same sp. Ch 2, work 3 dc into same sp. Ch 1. Work 3 dc into the ch-1 side sp. Ch 1. In the next corner sp, work (3 dc, ch 2, 3 dc). Ch 1. Work 3 dc into ch-1 side sp. Ch 1. Rep for remaining 2 corners. Join with sl st to top of beg ch-3.
(12 clusters of 3 dc, 4 ch-2 corner spaces, 8 ch-1 side spaces)
Round 4:
Join MC with sl st to any ch-2 corner sp. Ch 3, work 2 dc into same sp. Ch 2, work 3 dc into same sp. (Ch 1, work 3 dc in next ch-1 sp) twice. Ch 1. In next corner sp, work (3 dc, ch 2, 3 dc). Rep for remaining 3 sides. Join with sl st to top of beg ch-3. Fasten off and weave in ends.
(16 clusters of 3 dc, 4 ch-2 corner spaces, 12 ch-1 side spaces)
Picot Shell Edging
This creates that beautiful scalloped cream border you see throughout the finished set.
Step 1: Join CC with sc in any corner or along any edge st.
Step 2: Work 2 more sc, then work a picot by chaining 3 and sl st into the first of those 3 chains.
Step 3: Work 2 sc, then picot again.
Repeat steps 2 and 3 across each edge. At corners, work 3 sc into the corner ch-2 sp before the first picot to turn neatly.
Join-As-You-Go Method
When working Round 4 of a new square that connects to an already-completed square, replace each ch-1 between clusters with: ch 1, sl st into the corresponding ch-1 sp of the adjacent square, ch 1. At corners, replace the ch-2 with: ch 1, sl st into the corner ch-2 sp of adjacent square, ch 1.
This creates flat, neat joins without additional seaming.
Step by Step Pattern Instructions
Sofa Back Panel
Required squares: 17 squares wide by 6 squares tall = 102 squares total
1. Work 102 granny squares following the instructions above.
2. Arrange squares in a 17-wide by 6-tall grid on a flat surface. Make sure all squares face the same direction.
3. Join squares in rows first (horizontal), then join rows together (vertical) using JAYG or flat sl-st seam method.
4. Block assembled panel to 84 in by 30 in.
5. Add Picot Shell Edging in CC around all four outer edges.
Sofa Seat Panel
Required squares: 17 squares wide by 5 squares deep = 85 squares total
Assemble using the same method as the Sofa Back Panel in a 17-wide by 5-deep grid. Block and add Picot Shell Edging in CC. Finished size approximately 84 in wide by 28 in deep.
Chaise Seat Panel
Required squares: 12 squares wide by 8 squares deep = 96 squares total
Assemble in a 12-wide by 8-deep grid. Block and add Picot Shell Edging in CC. Finished size approximately 60 in wide by 40 in deep.
Chaise Side Drop Panel
Required squares: 12 squares wide by 3 squares tall = 36 squares total
Assemble in a 12-wide by 3-tall grid. Block and add Picot Shell Edging in CC. Finished size approximately 60 in wide by 14 in tall.
Armchair Cover
Required squares: 8 squares wide by 12 squares tall = 96 squares total
This panel drapes over the entire armchair like a throw. Assemble in an 8-wide by 12-tall grid. Block and add Picot Shell Edging in CC on all four sides. Finished size approximately 40 in wide by 60 in tall.
Round Table Cover
Required squares: 25 squares total (arranged in a 5-wide by 5-tall grid)
The circular shape comes from the edging, not the square arrangement. Block to 25 in by 25 in, then add extended Picot Shell Edging in CC. At each corner, work a fan of 9 dc into the corner ch-2 sp to create rounded corners. Continue picot sc edging along straight edges. Finished diameter approximately 28 in.
Large Square Throw Pillow (make 2)
Required squares: 32 squares total per pillow (2 panels of 16 squares each, arranged 4 by 4)
Assemble two panels per pillow. Block both to 20 in by 20 in. Add Picot Shell Edging to opening edge. Place panels WS together. SC through both layers around three sides to join. Insert pillow form. SC the fourth side closed. Finished size approximately 18 in by 18 in.
Bolster Pillow
Required squares: 16 squares total (4 wide by 4 tall)
Create a panel 20 in by 20 in. Seam the short sides together to form a tube. Gather one end tightly, insert bolster form, gather and fasten the other end. Optional: work endcap circles approximately 6 in diameter and attach. Finished size approximately 6 in diameter by 18 in long.
Small Accent Pillow
Required squares: 18 squares total (2 panels of 9 squares each, arranged 3 by 3)
Assemble exactly like the large throw pillow using a 3-by-3 grid instead of 4-by-4. Finished size approximately 12 in by 12 in.
Customizing for Your Sofa Size
The beauty of granny square construction is how easy it is to resize. Measure your sofa in inches. Divide width by 5. Divide depth or height by 5. Round to the nearest whole number. That’s your square count.
Always add one extra square rather than coming up short. These panels are meant to drape and overhang slightly. Budget approximately 50 yards of MC per square when calculating yarn needs for custom sizes.
Blocking and Finishing
Wet blocking gives the best results. Soak completed panels in cool water with fiber wash for 20 minutes. Press out excess water gently without wringing. Lay flat on blocking mats, pin to measurements, and dry completely.
After adding edging, lightly steam block the scalloped edges to open the picots.
Weave in all ends by running the tail in two directions through the wrong side for at least 1 inch each way. This prevents unraveling with regular use.
A thin strip of non-slip grip fabric between the sofa and panel keeps everything in place during daily use.
Care Instructions
Machine wash cold on gentle cycle in a mesh laundry bag. Lay flat to dry. Do not tumble dry. Do not bleach. Steam only if needed.
Store by folding loosely in a breathable cotton bag. Avoid compressing for long periods to preserve the open lace texture.
You Did It!
Thank you so much for choosing this lavender granny square sofa cover crochet pattern for your living room transformation. I know it’s a big project, but the portable nature of granny squares makes it completely manageable. Work a few squares here and there, and before you know it, you’ll have a stunning coordinated set.
If you make this sofa cover set, I would absolutely love to see your finished project. Tag me on Instagram or share in my Facebook group. Seeing your color choices and styling always makes my day.
Save this pattern to your Pinterest boards so you can find it when you’re ready to start. And if you have any questions as you work through this crochet tutorial, drop a comment below. I’m always happy to help troubleshoot.
You Might Also Like
- Sunshine Yellow Baby Crochet Pinafore Free Pattern
- Sage Green Spiral Puff Stitch Clutch Free Crochet Pattern
- Sunshine Yellow Dahlia Crochet Dress Free Crochet Pattern
- Peach Blossom Fairy Crochet Dress Free Crochet Pattern
