
Looking for the perfect handmade baby shower gift that will actually get worn? This adorable mint green baby dress delivers on every front. It keeps little ones looking precious while being soft enough for sensitive skin.
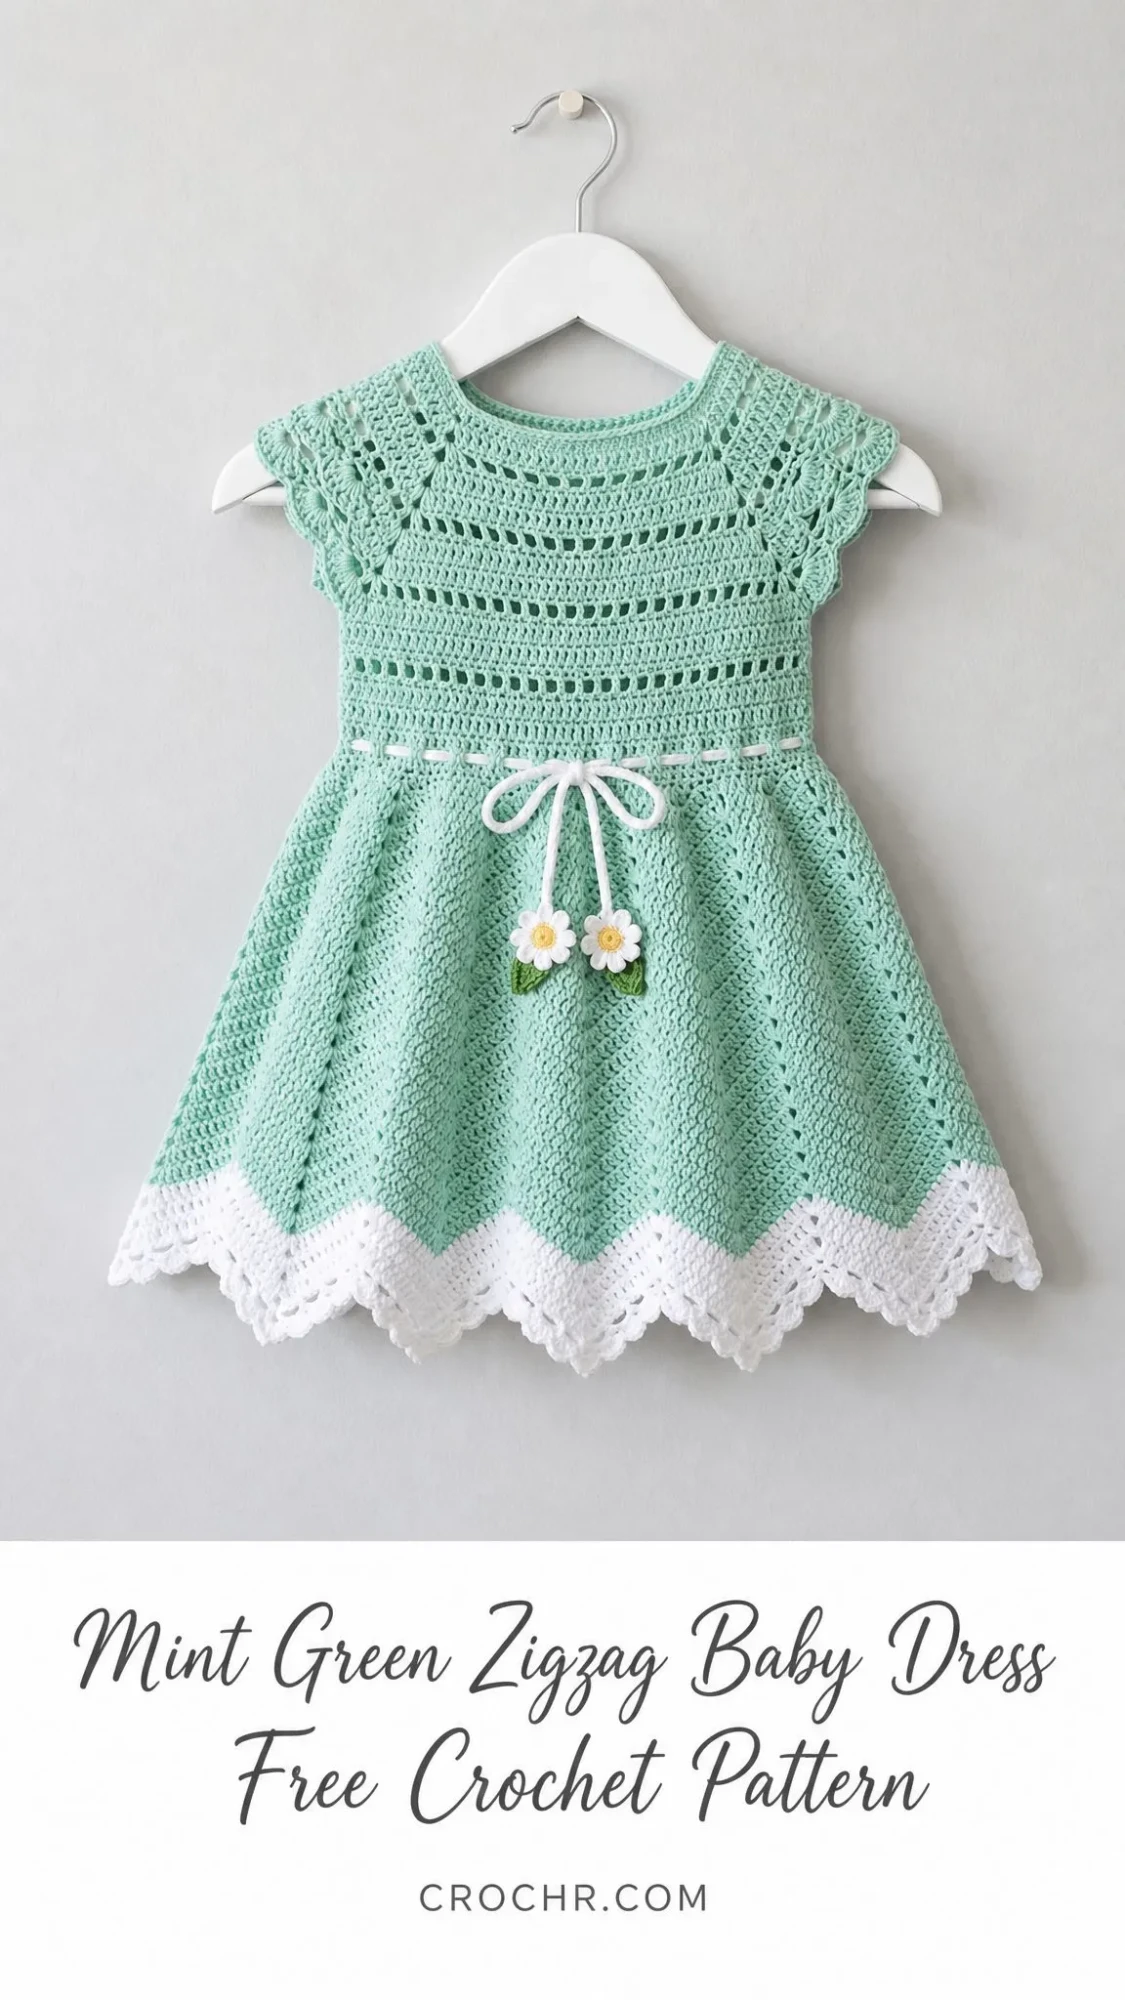
The construction uses basic double crochet and single crochet stitches with a gorgeous chevron pattern that creates that eye-catching zigzag hem. Sized for toddlers 12 to 18 months, this dress works up in about 14 to 20 hours and makes an unforgettable gift for new parents or grandparents.
I designed this pattern to be worked seamlessly from the top down, which means minimal sewing at the end. The fitted yoke, flared skirt, and delicate white lace border combine to create something truly special. Plus, those tiny crocheted daisy appliques on the ribbon tie? Absolutely adorable.
Why You’ll Love This Baby Dress Crochet Pattern
This crochet baby dress hits all the marks. The construction is straightforward once you understand the rhythm of the chevron stitch. The seamless top-down method means you can try it on as you go, and the raglan-style yoke creates a comfortable fit across baby’s shoulders without any separate sleeve construction.
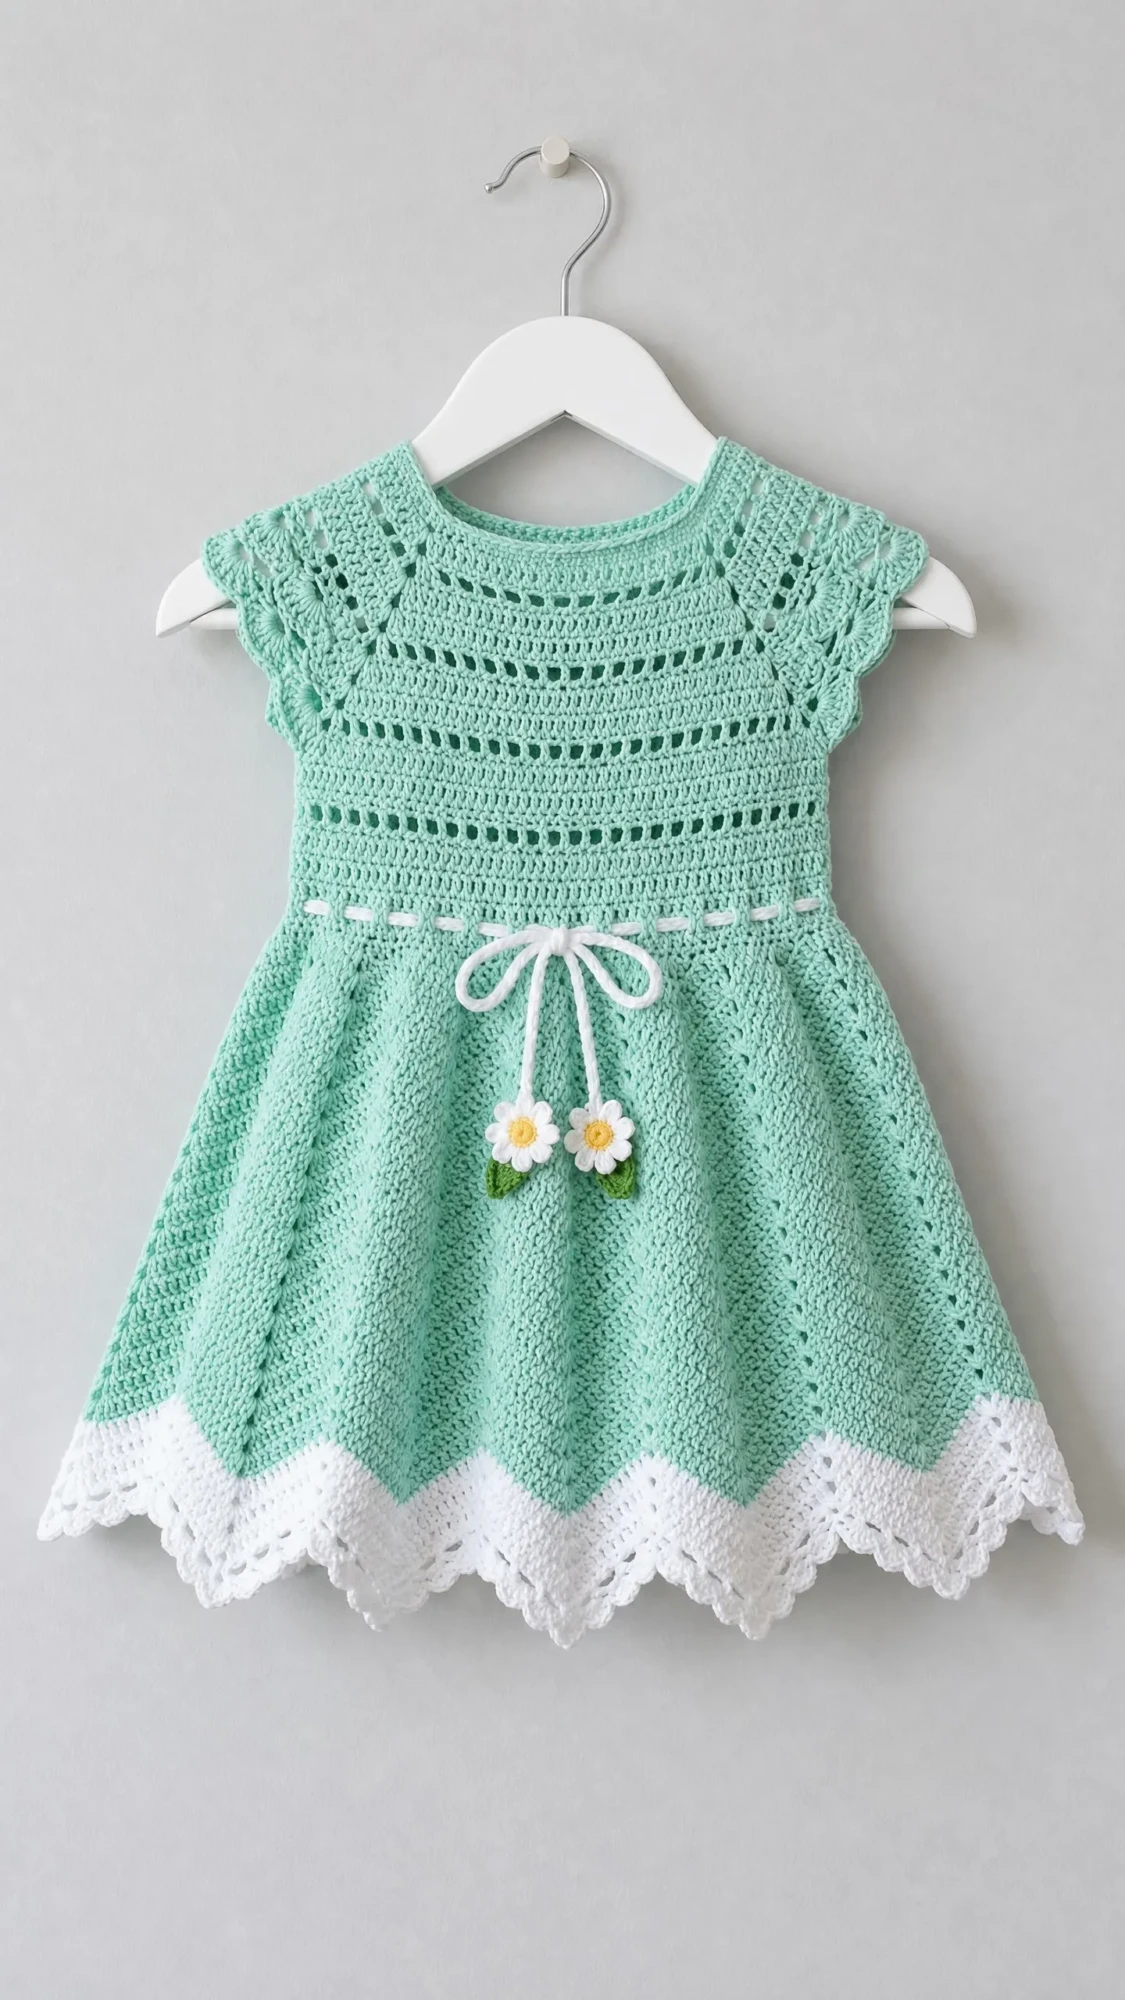
The zigzag chevron stitch pattern in the skirt gives this dress its signature silhouette. Each wave flows naturally into the next, and the white lace border at the hem frames everything beautifully. The drawstring channel at the waist adds both function and style, while those sweet daisy motifs make the whole piece feel extra special.
Cotton yarn is the star here. It washes well, feels gentle against baby skin, and shows off the lace pattern with excellent stitch definition.
Skill Level
This pattern is rated intermediate. You should be comfortable working in the round, reading multi-step stitch patterns, managing two yarn colors, and working basic lace edging. If you understand foundation chains and can join rounds without twisting, you have the skills needed.
Don’t let the intermediate label scare you off if you’re an adventurous beginner. The pattern breaks everything down step by step, and the techniques build on each other naturally.
Finished Measurements
This dress fits a toddler approximately 12 to 18 months old.
Size customization notes are included at the end of the pattern for newborn through 2T to 3T sizes.
Materials Needed
Yarn:
Recommended Yarn Options:
Option 1: Paintbox Yarns Simply DK (100 percent cotton, 137 yards / 125 meters per 50 g ball). This yarn has excellent stitch definition, washes well, and is soft against infant skin. Purchase 3 balls in mint / spearmint and 1 ball in white.
Option 2: Lion Brand 24/7 Cotton DK (100 percent mercerized cotton, 180 yards / 165 meters per 100 g ball). A widely available option with great drape and a smooth surface that shows the lace pattern clearly. Purchase 2 balls in sage or mint and 1 ball in white.
Option 3: Scheepjes Catona (100 percent mercerized cotton, 62 yards / 57 meters per 25 g ball). A premium option with exceptional color range for both mint and white. Purchase approximately 6 small balls in mint and 2 in white.
Substitution note: Any smooth DK or light worsted weight yarn at 22 stitches per 4 inches / 10 cm in single crochet will work. Avoid heavily textured or fuzzy yarns as they obscure the lace and zigzag stitch pattern. Cotton or cotton-blend yarns are strongly recommended for a garment worn against a toddler’s skin.
Hooks:
Using a slightly larger hook for the skirt helps the fabric drape properly.
Notions:
Gauge
Using size E-4 / 3.5 mm hook and Yarn A:
20 stitches and 22 rows = 4 inches / 10 cm in single crochet worked in rounds.
Using size F-5 / 3.75 mm hook and Yarn A:
One full chevron repeat (12 stitches) = approximately 2.4 inches / 6 cm in the zigzag stitch pattern.
Gauge is critical for fit. Work a swatch and adjust hook size as needed before beginning.
Abbreviations (US Terms)
Special Stitches for This Crochet Tutorial
Shell Stitch (shell):
Work 5 double crochet stitches all into the same stitch or space. This creates a fan shape used in the lace border.
V-Stitch (V-st):
Work 1 double crochet, chain 1, and 1 double crochet all into the same stitch or space.
Picot:
Chain 3, then slip stitch into the first chain made. This creates a small decorative loop used in the lace hem edging.
Zigzag Chevron Stitch (worked in the skirt, multiple of 12 stitches):
Round setup: \Work 2 dc in next st (inc), dc in next 4 sts, sk 1 st, dc in next 4 sts, 2 dc in next st (inc)\; repeat around. This creates the wave effect. On subsequent rounds, the increases and decreases align vertically to form continuous ridges.
Drawstring Channel Round:
Work \ch 2, sk 1 st, sc in next st\; repeat around. On the following round, work sc into each sc and 2 sc into each ch-2 space to restore the stitch count.
Daisy Motif:
With yellow yarn or button center method: Magic ring, chain 1, work 10 sc into the ring, join with sl st. Fasten off yellow. Join white. \Ch 5, sl st into base ring between sts\; repeat 10 times total to form 10 petals. Join two small green leaves by chaining 5 and working sc, hdc, dc, hdc, sc back along the chain, or cut small leaf shapes from green yarn.
Pattern Notes Before You Begin
The dress is worked from the top down entirely in the round. The yoke is worked with increases at 4 raglan points to create a shallow dome shape that sits flat on the shoulders. The neckline is finished with a simple sc edging before the body is worked.
All rounds are joined with a slip stitch at the end and began with a turning chain unless otherwise noted.
Yarn B (white) is introduced at the drawstring channel row and used again for the hem lace border. The cap sleeve effect is created by the widened yoke. There are no separately worked sleeves.
Stitch markers should be placed at all 4 raglan increase points at the beginning and moved up each round.
When changing to Yarn B, fasten off Yarn A and join Yarn B with a standing single crochet or a slip stitch join at any stitch. Weave in ends securely.
The ribbon is threaded through the drawstring channel after the dress is complete.
All stitch counts in parentheses at the end of each round reflect the total stitch count in that round.
Step by Step Instructions
Yoke
The yoke is worked from the neckline down. You will have 4 raglan points, each marked with a stitch marker. Increases of 2 stitches (one on each side of the marker) are worked every round to create the dome-shaped yoke.
Foundation: With Yarn A and size E-4 / 3.5 mm hook, chain 56. Join with sl st to first chain, being careful not to twist. (56 ch)
Round 1: Ch 1, sc in each ch around, join with sl st to first sc. (56 sc)
Round 2 (neckline edging): Ch 1, sc in first st, \sc in next st\; rep around, join. (56 sc)
Now divide the neckline into yoke sections. The yoke has 4 sections: 2 front/back panels and 2 sleeve panels.
Raglan setup: Place markers at stitches 1, 15, 29, and 43. These are your 4 raglan points. Each pair of raglan points defines a panel.
Round 3 (first increase round): Ch 3 (counts as dc), \work 2 dc in marked st (raglan inc), dc to 1 st before next marker, 2 dc in marked st (raglan inc)\; rep from \* 3 more times, dc to end of round, join with sl st to top of ch-3. Move markers to the center of each pair of increase stitches. (64 dc)
Round 4: Ch 3, dc in each st around, join. (64 dc)
Round 5 (increase round): Ch 3, \2 dc in st before marker, dc in marked st, 2 dc in st after marker, dc to next marker position\; rep around all 4 raglan points, join. (80 dc)
From this point forward, work 1 increase at each of the 4 raglan points every round. Each increase round adds 8 stitches (2 dc at each of 4 points).
Round 6: Increase round. (88 dc)
Round 7: Increase round. (96 dc)
Round 8: Increase round. (104 dc)
Round 9: Increase round. (112 dc)
Round 10: Increase round. (120 dc)
Round 11: Increase round. (128 dc)
Round 12: Increase round. (136 dc)
Round 13: Increase round. (144 dc)
Round 14 (Eyelet round): Ch 4 (counts as dc, ch 1), \sk 1 st, dc in next st, ch 1\; rep around, join with sl st to 3rd ch of beg ch-4. (72 dc and 72 ch-1 sp = 144 total working loops)
Round 15: Ch 3, dc in each ch-1 sp and each dc around, join. (144 dc)
Round 16: Increase round at all 4 raglan points. (152 dc)
Round 17: Increase round. (160 dc)
Checkpoint: After Round 17, the yoke should measure approximately 3.5 inches / 9 cm from the top of the neckline. The widest point of the yoke should be approximately 20 inches / 51 cm in circumference. If your measurement is significantly off, check your gauge and adjust.
Separating Sleeves from Body
The 160 stitches break down as follows: 46 stitches each for front and back body, 34 stitches each for the 2 sleeve panels.
Round 18 (separation round): Ch 1, sc in first 46 sts (front panel), ch 4 (underarm bridge), skip next 34 sts (sleeve), sc in next 46 sts (back panel), ch 4 (underarm bridge), skip next 34 sts (sleeve), join with sl st to first sc. (92 sc plus 8 ch = 100 working sts)
Round 19: Ch 1, sc in each sc and 2 sc in each ch-4 bridge (work 4 sc across each bridge), join. (100 sc)
Checkpoint: The body tube should now sit flat. You should have 100 stitches in the round.
Bodice Body (Waist Shaping)
Switch to size F-5 / 3.75 mm hook.
Rounds 20 through 25: Ch 1, sc in each st around, join. (100 sc each round)
Round 26 (waist decrease round): Ch 1, \sc in next 9 sts, sc2tog\; rep around, join. (90 sc)
Rounds 27 and 28: Ch 1, sc in each st around, join. (90 sc each round)
Round 29 (waist increase round to prepare for skirt): Ch 1, \sc in next 9 sts, 2 sc in next st\; rep around, join. (99 sc)
Round 30: Ch 1, sc in each st around, join. (99 sc)
Round 31 (adjustment round): Ch 1, \sc in next 10 sts, 2 sc in next st\; rep 9 times, join. (108 sc)
108 divided by 12 = 9 full chevron repeats. This is correct.
Checkpoint: After Round 31, the bodice from the underarm separation to this point should measure approximately 4 inches / 10 cm. The total from neckline to this point should be approximately 7.5 inches / 19 cm.
Drawstring Channel
Round 32: Join Yarn B at any st. Ch 1, \ch 2, sk 1 st, sc in next st\; rep around, join. (54 sc and 54 ch-2 sp)
Round 33: Ch 1, sc in each sc and 1 sc in each ch-2 sp around (do not double into ch-2 sp), join. (108 sc)
Fasten off Yarn B. Rejoin Yarn A.
Skirt
The skirt uses a chevron (zigzag) pattern over a multiple of 12 stitches. Each repeat has 2 increase points and 2 decrease points per 12 stitches.
Round 34 (skirt launch round): Ch 3 (counts as dc), \2 dc in next st, dc in next 4 sts, sk 2 sts, dc in next 4 sts, 2 dc in next st\; rep from \* 8 more times, join with sl st to top of ch-3. (108 dc)
Rounds 35 through 41: Rep Round 34 pattern (maintaining chevron alignment: increases stack over increases, decreases stack over decreases). (108 dc each round)
Round 42 (flare): Work the chevron as established, but in each of the 9 repeats, work an additional dc at the center of each peak: \2 dc in next st, dc in next 4 sts, 2 dc at peak center, dc in next 4 sts, 2 dc in next st, sk 2 at valley\; rep 9 times, join. (126 dc)
Rounds 43 through 47: Work chevron over 126 sts: \2 dc in first st of peak group, dc in next 5 sts, sk 2 sts at valley, dc in next 5 sts, 2 dc in last st of peak group\; rep 9 times, join. (126 dc each round)
Round 48 (second flare increase): \2 dc in peak, dc in next 5 sts, 2 dc in next st (mid-peak add), dc in next 5 sts, 2 dc at peak end, sk 2 at valley\; 9 repeats, join. (144 dc)
Rounds 49 through 54: Work chevron over 144 sts: \2 dc in peak start, dc in next 6 sts, sk 2 sts, dc in next 6 sts, 2 dc in peak end\; rep 9 times, join. (144 dc each round)
Checkpoint: After Round 54, the skirt alone should measure approximately 7.5 inches / 19 cm from the drawstring channel. Total dress length should be approximately 15 to 16 inches / 38 to 41 cm.
Hem Lace Border (White)
Fasten off Yarn A. Join Yarn B at any valley point (the sk-2 valley of a chevron repeat).
Round 55 (transition round): Ch 1, sc in each st around, working sc2tog at 9 valley points and at 3 additional evenly spaced points, join. (132 sc)
Round 56: Ch 1, sc in first st, \ch 2, sk 2 sts, 5 dc (shell) in next st, ch 2, sk 2 sts, sc in next st\; rep 21 more times, ending last rep with join to first sc. (22 shells)
Round 57 (picot edging): Sl st across to top of first shell, ch 1, sc in same dc, \[picot, sc in next dc] 4 times, picot, sc in ch-2 sp, sc in next sc, sc in ch-2 sp\; rep around all 22 shells, join. Fasten off Yarn B.
Neckline Edging
Rejoin Yarn A at back neckline with RS facing.
Round 1: Ch 1, sc evenly around neckline opening (approximately 56 sc), join. (56 sc)
Round 2: Ch 1, sc in each st, join. Fasten off.
Sleeve Openings
The sleeve opening has approximately 34 held stitches plus 4 chain stitches from the underarm bridge.
Rejoin Yarn A at underarm bridge with RS facing.
Round 1: Ch 1, work 38 sc evenly around sleeve opening (34 held sts plus 4 bridge sts), join. (38 sc)
Round 2: Ch 1, sc in each st, join. Fasten off.
Repeat for second sleeve opening.
Daisy Appliques (Make 2)
With yellow yarn or thread, make a magic ring.
Round 1: Ch 1, 8 sc into ring, join. Fasten off yellow. (8 sc)
Join Yarn B.
Round 2: \Ch 5, sl st into next sc of center ring\; rep 8 times. (8 petals)
Fasten off, leaving a 6-inch / 15 cm tail for attaching.
Leaf (make 4, in green yarn):
Ch 6. Sc in 2nd ch from hook, hdc in next ch, dc in next ch, hdc in next ch, sc in last ch. Fasten off, leaving tail for attaching.
Attach 2 leaves to the base of each daisy. Sew 1 daisy to each end of the ribbon tie after threading ribbon through the drawstring channel.
Assembly
Step 1: Weave in all ends securely on WS.
Step 2: Thread the white ribbon through the drawstring channel (Round 32) starting and ending at the center front.
Step 3: Attach daisy appliques to the ribbon ends as described above.
Step 4: Sew any loose floats at color change points.
Finishing and Blocking
Wet blocking is strongly recommended for this dress.
Step 1: Submerge the finished dress in cool water and allow it to soak for 15 to 20 minutes.
Step 2: Gently squeeze out excess water without wringing.
Step 3: Lay flat on a blocking mat or clean towel. Smooth the yoke flat, spread the skirt into a full circle with the chevron ridges aligned, and pin the hem scallops into their final shapes.
Step 4: Allow to dry completely (12 to 24 hours) before moving.
The ribbon should be removed before blocking and re-threaded after drying.
Size Customization Tips
For newborn (0 to 3 months): Begin with a foundation chain of 44. Work 12 increase rounds on the yoke instead of 17. Separate sleeves at 120 stitches (32 sts each sleeve, 28 sts each body panel). Work 3 inches of bodice. Use 84 stitches for the skirt (7 repeats of 12).
For 2T to 3T (18 to 24 months): Begin with a foundation chain of 60. Work 20 increase rounds on the yoke. Separate sleeves at 180 stitches. Target 120 stitches for the skirt (10 repeats of 12). Add 2 additional skirt length rounds.
General rule: Every 12 stitches added to the skirt start count adds approximately 1.5 inches / 4 cm to the hem circumference. Every 6 additional skirt rounds add approximately 1 inch / 2.5 cm to skirt length.
Care Instructions
Machine wash cold on gentle cycle if using cotton yarn. Lay flat to dry. Do not tumble dry. Do not iron the ribbon while attached. Remove ribbon for washing and replace after drying. Store folded, not hung, to prevent the skirt from stretching under its own weight.
Final Thoughts on This Baby Dress Crochet Pattern
This mint green zigzag baby dress is the kind of project that makes you fall in love with crochet all over again. The combination of the fitted yoke, flared chevron skirt, and delicate lace border creates something truly heirloom-worthy. Every time I see those little daisy appliques dangling from the ribbon tie, I smile.
Thank you so much for choosing this pattern. I truly hope you enjoy making it as much as I enjoyed designing it. If you create this dress, I would absolutely love to see your finished piece. Tag me on Instagram or share it in our Facebook group.
If you loved this baby dress pattern, go ahead and save it to your Pinterest boards so you can find it easily when you’re ready to start. And please drop a comment below if you make one. I read every single comment and love hearing about your projects!
You Might Also Like
- Creamy White Boho Peplum Sleeve Top Free Crochet Pattern
- Dusty Rose Gradient Crochet Mini Dress Free Pattern
- Sage Green Boho Tiered Lace Dress Free Crochet Pattern
- Dusty Rose Bow Handbag Free Crochet Pattern
