
I set out to design a bathroom set that would transform an ordinary space into something that feels like a cozy cottage retreat. My goals were clear: a cohesive color palette, a floral motif that reads beautifully from across the room, and construction sturdy enough to handle regular washing. Every piece needed to coordinate perfectly while still being practical for daily use.
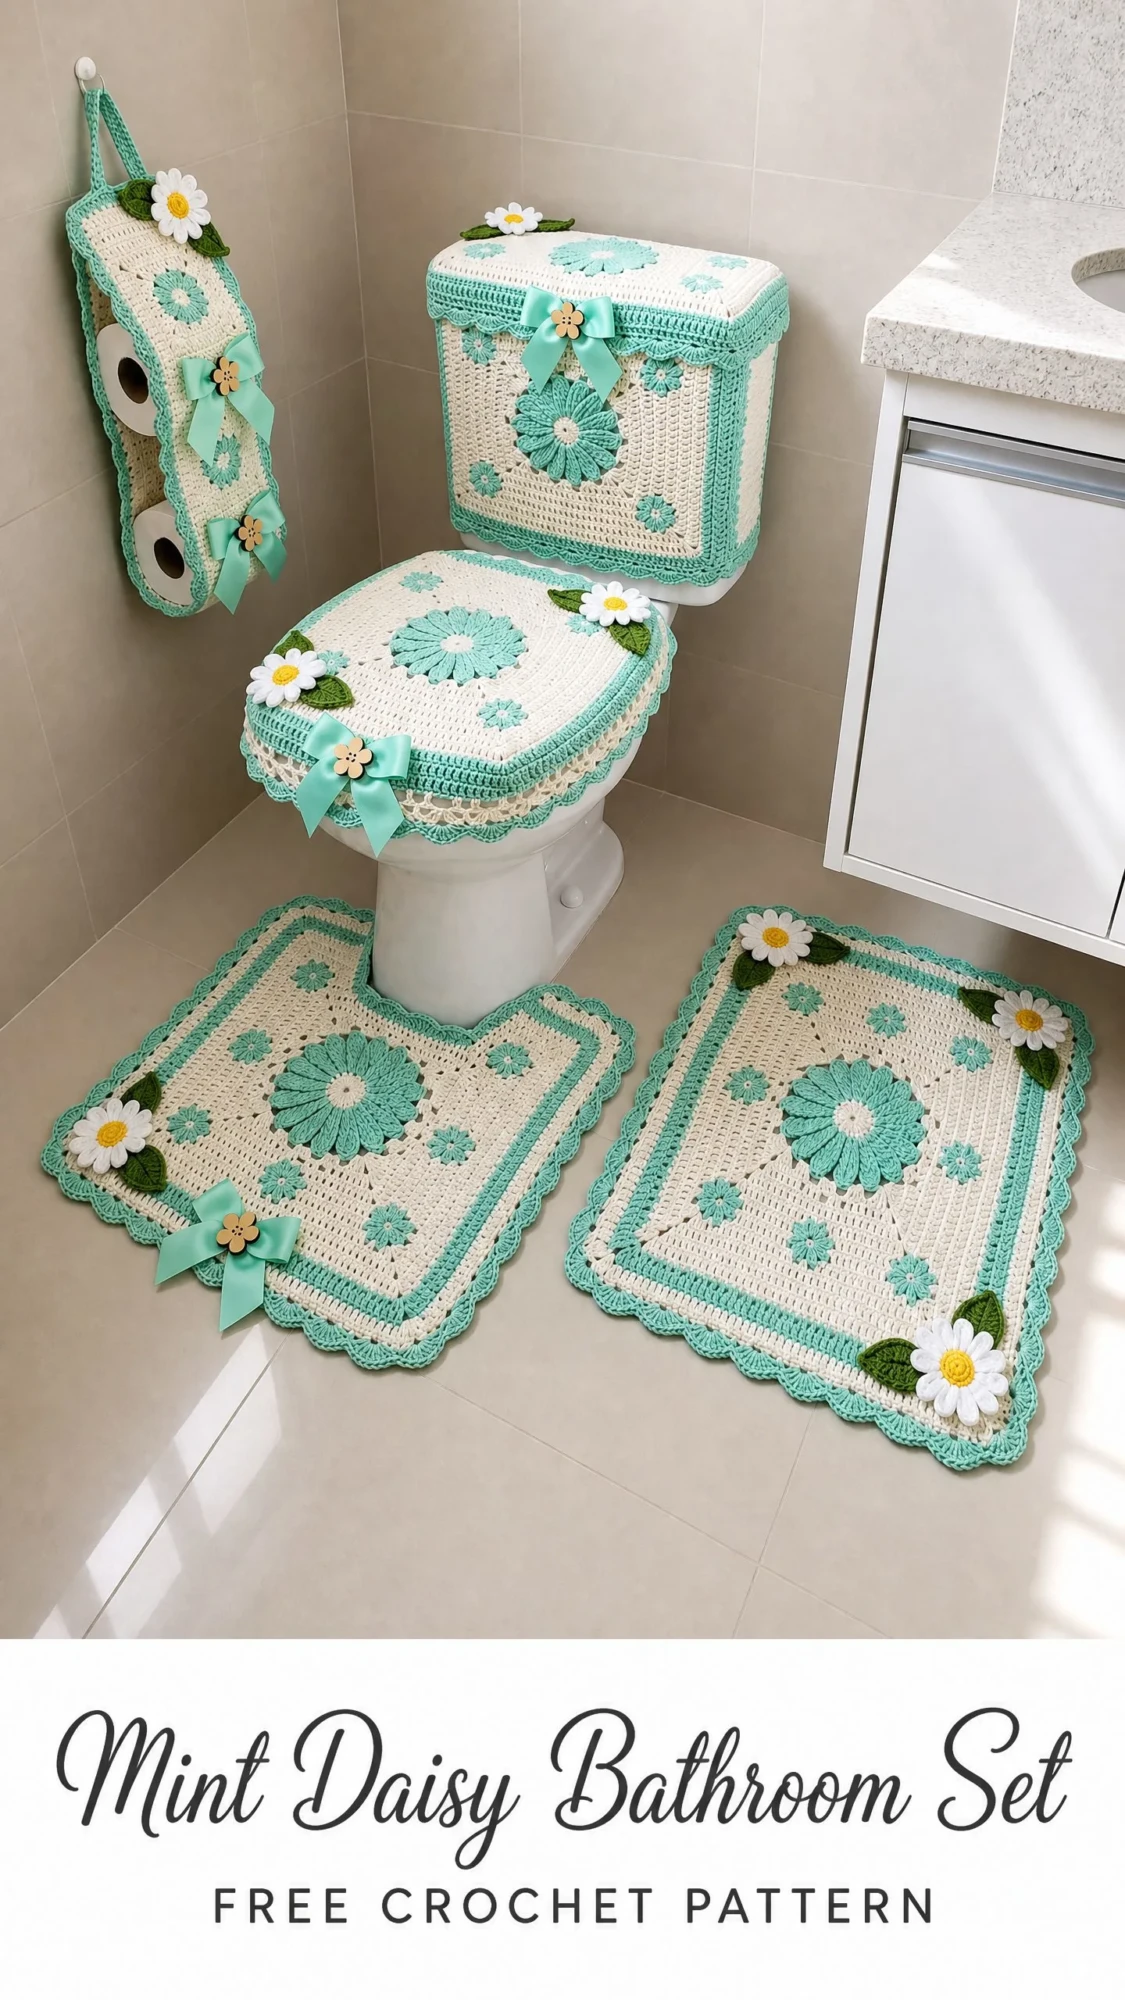
After weeks of swatching, adjusting, and testing different daisy designs, I landed on this five-piece collection. The mint and cream combination feels fresh without being overwhelming. The sunburst motifs add visual interest without making the stitchwork too complicated.
I am SO pleased with how this set turned out! The shell borders give each piece a finished, polished look. The three-dimensional white daisies add that perfect pop of texture. And honestly, every time I walk into my bathroom now, it makes me smile.
What You Will Be Making
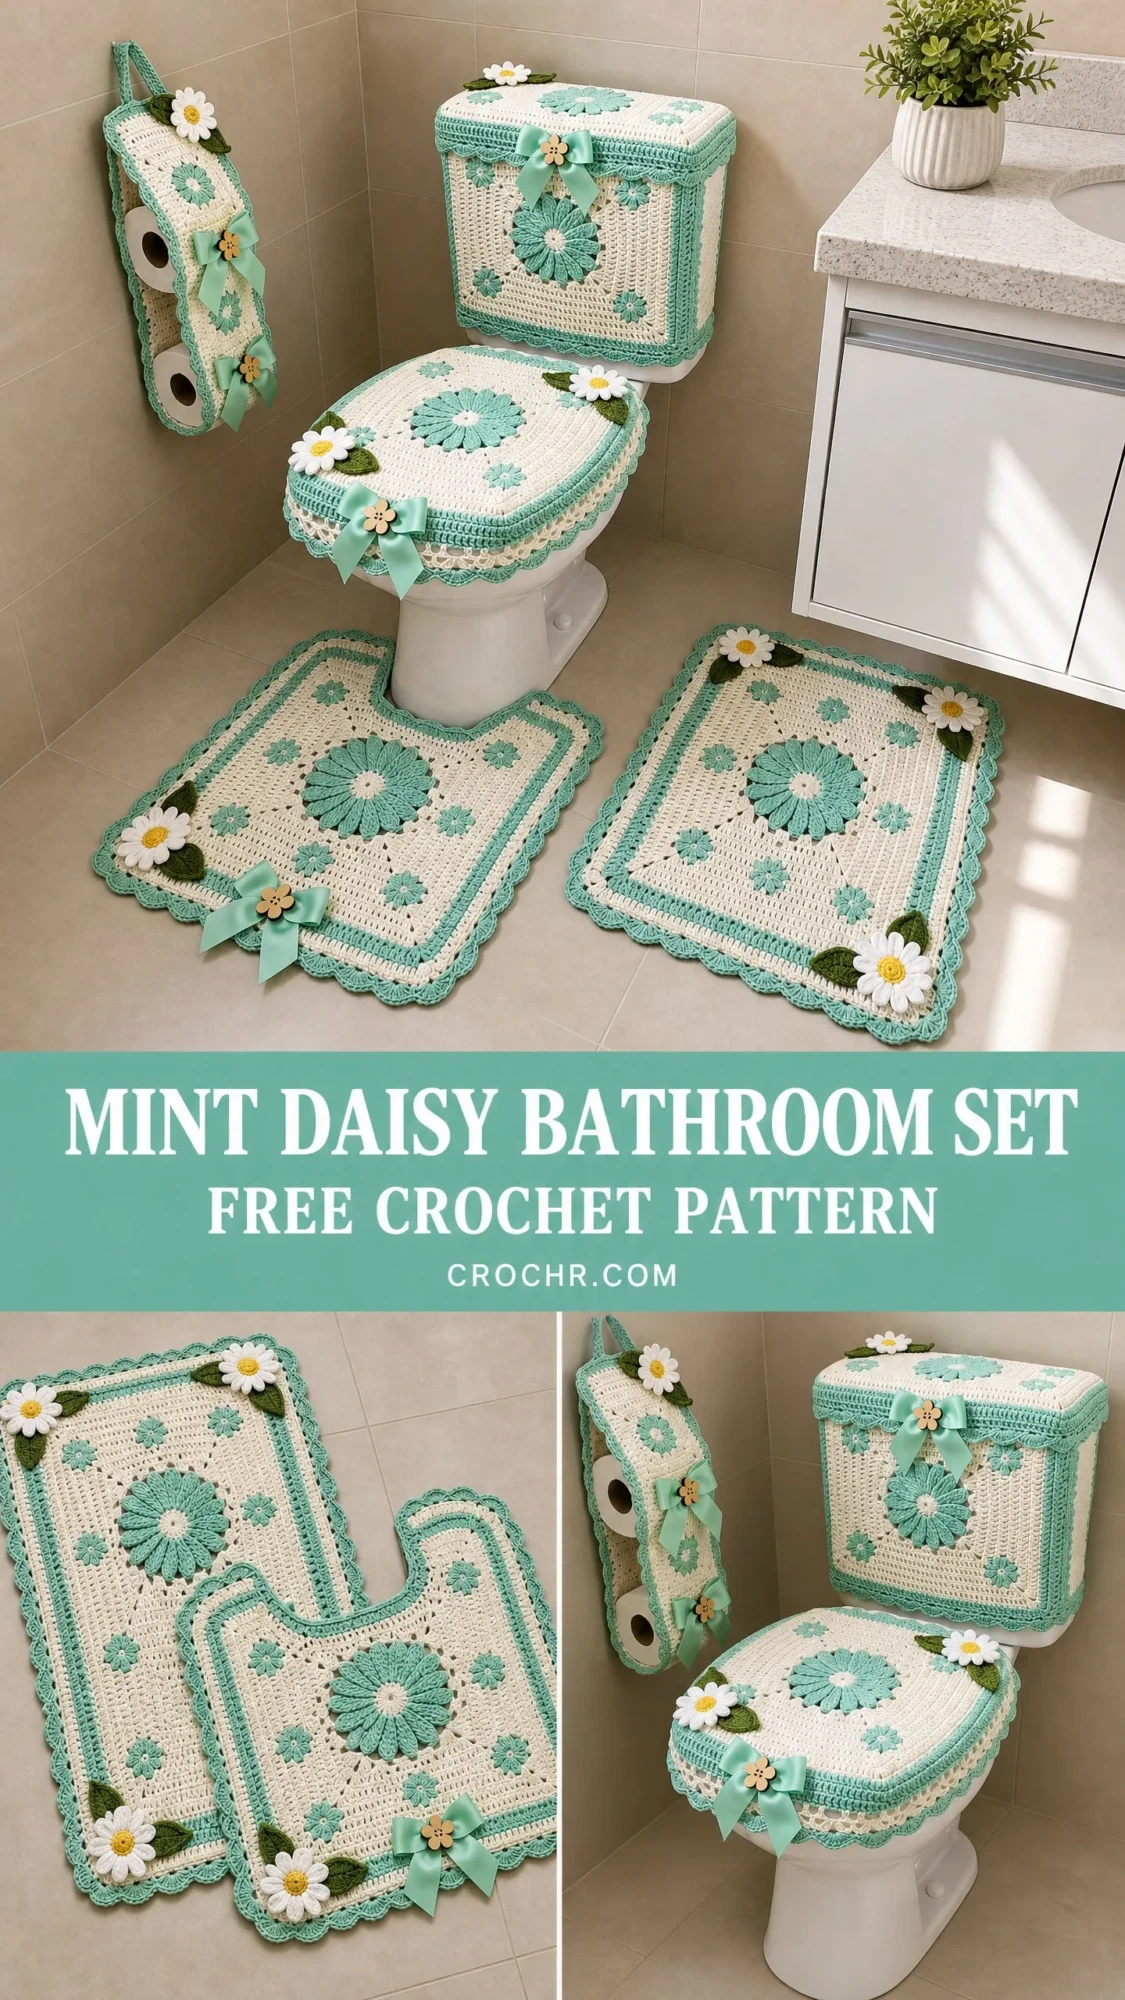
This coordinated bathroom accessory set includes five matching pieces: a rectangular bath mat, a contour rug that fits around the base of your toilet, a toilet tank cover, a toilet lid cover, and a hanging toilet paper holder that stores three rolls vertically.
All pieces share the same design elements. You will work a dense half double crochet (hdc) fabric as your base, add crocheted sunburst daisy motifs to each center, accent with smaller corner motifs, and finish everything with a beautiful scalloped shell border in mint.
The satin ribbon bows and wooden flower buttons add that extra touch of charm. The white applique daisies with their yellow French knot centers bring dimension and personality to each piece.
Skill Level
This pattern is rated intermediate. You will use only basic stitches: chain (ch), slip stitch (sl st), single crochet (sc), half double crochet (hdc), and double crochet (dc). The skills you need include working in the round for the circular motifs, joining motifs neatly to flat fabric, working a shell border, managing clean color changes between cream and mint, and constructing shaped covers with elastic casings.
If you are a confident beginner who has mastered gauge swatching and color changes, you can absolutely complete this set. Just take your time and work through each section carefully.
Time Estimate
Plan for approximately 20 to 28 hours total across all five pieces:
Finished Sizes
Bath Mat (rectangular): 20 inches wide x 24 inches long (51 cm x 61 cm)
Contour Rug (U-shaped): approximately 20 inches wide x 18 inches long (51 cm x 46 cm), with a U-cutout approximately 7 inches wide x 8 inches deep (18 cm x 20 cm) at center top
Toilet Tank Cover: approximately 8 inches wide x 6 inches tall x 6.5 inches deep (20 cm x 15 cm x 16.5 cm), fits standard elongated tank
Toilet Lid Cover: approximately 14 inches wide x 18 inches long (36 cm x 46 cm), fits standard elongated lid
Toilet Paper Holder (hanging pocket): approximately 7 inches wide x 22 inches long (18 cm x 56 cm), holds 3 standard rolls stacked vertically
Important: Toilet tanks and lids vary by manufacturer. Measure your specific toilet before beginning the covers. Sizing tips appear at the end of each piece’s instructions.
Materials Needed
Yarn
Color A (Cream/Off-White): approximately 650 yards (595 m) total across all pieces
Color B (Mint/Teal): approximately 450 yards (411 m) total across all pieces
Color C (White): approximately 75 yards (69 m) for daisy petals
Color D (Yellow): approximately 25 yards (23 m) for daisy centers
Color E (Green): approximately 40 yards (37 m) for daisy leaves
Yarn weight: Size 3 light DK or size 4 medium worsted weight cotton. Cotton is strongly recommended because it is machine washable, holds its shape, and produces clean stitch definition for the motif details.
Recommended Yarn Brands
Lion Brand 24/7 Cotton in Ecru (Color A) and Jade (Color B): This 100% mercerized cotton worsted-weight yarn has excellent stitch definition, is machine washable, and comes in reliable dye lots. It works at exactly gauge with a G-6 hook for most crocheters.
Paintbox Yarns Simply DK in Champagne White (Color A) and Spearmint (Color B): A smooth 100% cotton DK yarn that gives a slightly more refined fabric. Use with an E-4 or F-5 hook and adjust your gauge swatch accordingly.
Scheepjes Catona 100% Mercerized Cotton (Sport/DK weight) in Cream (Color A) and Light Sea Green (Color B): A premium option with vibrant color and extreme stitch clarity, ideal for the small motif details.
Substitution Note: Any smooth, tightly spun cotton yarn in your chosen weight will work. Avoid fuzzy, fluffy, or highly textured yarns because the stitch pattern and motifs will not read clearly. Always swatch to match gauge before beginning. Cotton has very little stretch and sizing will not adjust during blocking the way wool does.
Hook
US size G-6 (4.0 mm) for worsted cotton, or US size E-4 (3.5 mm) for DK cotton. See gauge section below.
Additional Materials
Gauge
For Worsted Cotton with G-6 hook:
16 hdc x 12 rows = 4 inches x 4 inches (10 cm x 10 cm) in half double crochet, blocked flat.
For DK Cotton with E-4 hook:
18 hdc x 14 rows = 4 inches x 4 inches (10 cm x 10 cm) in half double crochet, blocked flat.
All stitch counts in this pattern are written for the worsted/G-6 gauge. If you use DK yarn, the stitch counts remain the same but your finished dimensions will be slightly smaller.
How to Make a Gauge Swatch
Chain 22 with Color A. Row 1: Hdc in 3rd chain from hook and in each chain across. (20 hdc) Rows 2 through 14: Ch 2, turn, hdc in each stitch across. (20 hdc) Fasten off. Block swatch flat and measure the center 4 inches (10 cm).
Do not skip this step! Cotton gauge can be tricky, and your bathroom set pieces need to fit properly.
Abbreviations
ch = chain: wrap yarn over hook, pull through loop on hook
sl st = slip stitch: insert hook, yarn over, pull through stitch and loop on hook in one motion
sc = single crochet: insert hook, yarn over, pull up loop (2 loops on hook), yarn over, pull through both loops
hdc = half double crochet: yarn over, insert hook, pull up loop (3 loops on hook), yarn over, pull through all 3 loops
dc = double crochet: yarn over, insert hook, pull up loop (3 loops on hook), yarn over, pull through 2 loops, yarn over, pull through remaining 2 loops
tr = treble crochet: yarn over twice, insert hook, pull up loop, (yarn over, pull through 2 loops) three times
inc = increase: work 2 stitches in the same stitch
dec = decrease: hdc2tog or sc2tog as specified
hdc2tog = half double crochet 2 together (decrease): yarn over, insert hook in next stitch, pull up a loop (3 loops on hook), yarn over, insert hook in following stitch, pull up a loop (5 loops on hook), yarn over and draw through all 5 loops
sc2tog = single crochet 2 together: insert hook in next stitch, pull up loop, insert hook in following stitch, pull up loop, yarn over and draw through all 3 loops
sk = skip
sp = space
ch-sp = chain space
RS = right side
WS = wrong side
rep = repeat
pm = place marker
sm = slip marker
BLO = back loop only
FLO = front loop only
rnd = round
st/sts = stitch/stitches
t-ch = turning chain
yo = yarn over
Special Stitches and Techniques
Shell Stitch
Work 5 dc all into the same stitch or space. This creates a fan or shell shape that forms the scalloped border. It looks fancy but is simply five double crochets stacked together in one spot.
Sunburst Daisy Motif (Large)
This is the central design element. You work it separately and then sew it onto each piece.
Round 1: With Color D (yellow), make a magic ring (or ch 4 and join with sl st to form a ring). Ch 1, work 10 sc into the ring. Join with sl st to first sc. Fasten off Color D. (10 sc)
Round 2: Join Color B (mint). Ch 1, work 2 sc in each sc around. Join with sl st to first sc. Fasten off Color B. (20 sc)
Round 3: Join Color A (cream). Ch 1, sc in first st. Ch 3, sk 1 st, (sc in next st, ch 3, sk 1 st) repeat around. Join with sl st to first sc. (10 ch-3 spaces)
Round 4: Sl st into first ch-3 space. Ch 1. In each ch-3 space work (sc, hdc, 3 dc, hdc, sc). This creates one petal. Repeat in each ch-3 space around. Join with sl st to first sc of first petal. Fasten off Color A. (10 petals)
Round 5: Join Color B at the back of work by inserting hook around the sc posts between petals of Round 3. Ch 1, sc in same post. Ch 4, (sc around next Round-3 sc post, ch 4) repeat around. Join with sl st to first sc. (10 ch-4 spaces)
Round 6: Sl st into first ch-4 space. (Sc, hdc, 4 dc, hdc, sc) in each ch-4 space around. Join with sl st. Fasten off Color B. (10 larger petals)
The finished sunburst motif measures approximately 3.5 inches (9 cm) in diameter.
Small Corner Daisy Motif
Round 1: With Color D, magic ring, ch 1, work 8 sc into ring. Join. Fasten off Color D. (8 sc)
Round 2: Join Color B. Ch 1, 2 sc in each sc around. Join. Fasten off Color B. (16 sc)
Round 3: Join Color A. Ch 1, sc in first st. Ch 2, sk 1 st, (sc in next st, ch 2, sk 1 st) repeat around. Join. (8 ch-2 spaces)
Round 4: Sl st into first ch-2 space. (Sc, hdc, 2 dc, hdc, sc) in each ch-2 space around. Join. Fasten off Color A. (8 petals)
The finished small corner motif measures approximately 2 inches (5 cm) in diameter.
White Applique Daisy
With Color C (white), ch 2.
Round 1: Work 6 sc in 2nd ch from hook. Join with sl st. (6 sc)
Round 2: (Ch 5, sl st back into base of ch, sl st into next sc) repeat 6 times. (6 petal loops)
Fasten off, leaving a long tail for sewing. Thread Color D and make 2 to 3 French knots or tight sc in center. The finished white daisy measures approximately 1.25 inches (3 cm) in diameter.
Leaf
With Color E (green), ch 9.
Row 1: Sl st in 2nd ch from hook, sc in next, hdc in next, dc in next 2, hdc in next, sc in next, sl st in last. Ch 1, do not turn, work back along opposite side of foundation chain: sl st in first, sc, hdc, dc in next 2, hdc, sc, sl st. Join with sl st to first sl st. Fasten off, leaving a sewing tail.
Each leaf measures approximately 1.5 inches (4 cm) long.
Picot Edging
Used on the inner edge of the contour rug cutout: (Sc in next 3 sts, ch 3, sl st in 3rd ch from hook) repeat across, sc in remaining sts.
Elastic Casing Row
Work a row of sc in BLO around bottom edge. Then work a second row of sc in BLO through the loops left unworked in the previous row. This creates a tunnel or channel for elastic. Thread elastic through channel, adjust to fit, and sew elastic ends together securely.
Pattern Notes Before You Begin
1. The main fabric of every flat piece is worked in rows of half double crochet with Color A as the dominant background. Color B is introduced in accent rows.
2. Color changes: When changing from Color A to Color B (or vice versa) in a row, work to the last yarn over of the last stitch before the color change, draw new color through to complete that stitch, then continue with the new color. Carry the unused color loosely along the top of the row or fasten off and rejoin as you prefer.
3. Turning chains: For hdc rows, chain 2 at beginning of row. This chain 2 does NOT count as a hdc stitch throughout this pattern. Always work your first hdc into the first actual stitch at the base of the turning chain.
4. The large sunburst motif and small corner motifs are worked entirely separately and whipstitched or sewn in place after the main fabric pieces are complete. The center of the large motif is placed at the center of each piece. The four small motifs are placed approximately 3 inches (7.5 cm) in from each corner.
5. The bath mat and contour rug are worked back and forth in rows and then the border is added in one continuous round.
6. The tank cover and toilet paper holder are worked as flat rectangles that are then seamed into three-dimensional shapes. The lid cover is a shaped flat oval.
7. Check measurements against your actual toilet before starting the tank cover and lid cover. Instructions for sizing adjustments appear at the end of each piece’s section.
8. Weave in all ends securely before attaching motifs and before the final border round.
9. All pieces are worked with a single strand of yarn unless otherwise noted.
10. The stitch count given at the end of each row is the number of working stitches in that row, not including the turning chain.
Piece 1: Bath Mat (Rectangular)
Finished size: 20 inches x 24 inches (51 cm x 61 cm)
With Color A and G-6 hook, chain 83.
Foundation Row (RS): Hdc in 3rd chain from hook and in each chain across. (81 hdc)
Note: Ch 2 at beginning of each row does not count as a stitch.
Rows 1 through 4: Ch 2, turn. Hdc in each st across. (81 hdc)
Row 5: Join Color B at end of Row 4. Ch 2, turn. Hdc in each st across. (81 hdc)
Row 6: Ch 2, turn. With Color B, hdc in each st across. Fasten off Color B. (81 hdc)
Rows 7 through 10: Join Color A. Ch 2, turn. Hdc in each st across. (81 hdc)
Row 11: Join Color B. Ch 2, turn. Hdc in each st across. (81 hdc)
Row 12: Ch 2, turn. Hdc in each st across. Fasten off Color B. (81 hdc)
Continue this 6-row stripe pattern (4 rows Color A, 2 rows Color B) through Row 72.
The stripe sequence continues as follows:
Rows 13 through 16: Color A (81 hdc per row)
Rows 17 through 18: Color B (81 hdc per row)
Rows 19 through 22: Color A (81 hdc per row)
Rows 23 through 24: Color B (81 hdc per row)
Rows 25 through 28: Color A (81 hdc per row)
Rows 29 through 30: Color B (81 hdc per row)
Rows 31 through 34: Color A (81 hdc per row)
Rows 35 through 36: Color B (81 hdc per row)
Rows 37 through 40: Color A (81 hdc per row)
Rows 41 through 42: Color B (81 hdc per row)
Rows 43 through 46: Color A (81 hdc per row)
Rows 47 through 48: Color B (81 hdc per row)
Rows 49 through 52: Color A (81 hdc per row)
Rows 53 through 54: Color B (81 hdc per row)
Rows 55 through 58: Color A (81 hdc per row)
Rows 59 through 60: Color B (81 hdc per row)
Rows 61 through 64: Color A (81 hdc per row)
Rows 65 through 66: Color B (81 hdc per row)
Rows 67 through 70: Color A (81 hdc per row)
Rows 71 through 72: Color B (81 hdc per row). Do not fasten off after Row 72.
The body of the bath mat is now complete. It should measure approximately 20 inches wide x 24 inches tall (51 cm x 61 cm) before the border.
Bath Mat Border
The border is worked in Color B continuously around all four edges. Do not turn the work. Rotate to work along the right side edge.
Round 1 (SC foundation for border): With Color B, ch 1. Work sc evenly around all four sides as follows:
Join with sl st to first sc. (81 + 3 + 72 + 3 + 81 + 3 + 72 + 3 = 318 sc)
Round 2 (Shell Border): Ch 3 (counts as first dc here only in this round). Work along the border as follows: sk 1 sc, sc in next sc, sk 1 sc, 5 dc in next sc (shell made), sk 1 sc, (sc in next sc, sk 1 sc, shell in next sc, sk 1 sc) repeat to 2 sts before each corner 3-sc group. At corners, work the 3 sc group as: sc, (2 dc, ch 2, 2 dc) for corner shell, sc. Continue around, maintaining the pattern. Join with sl st to top of ch-3. Fasten off Color B.
Note on Round 2 divisibility: The shell pattern uses a 4-stitch repeat (sk, sc, sk, shell). Along each long edge there are 81 sc plus 3 corner sc. The 81 non-corner sts divide into 20 complete 4-st repeats (80 sts) with 1 stitch adjusted at each end to balance the shells. Work your first and last sc of each edge into the corner groups to maintain visual alignment. Adjust by working sk 1 or sc 1 at transition points as needed so shells land symmetrically. The exact shell count will be approximately 79 total shells across all four sides.
Checkpoint: After the border, the bath mat should measure approximately 20 inches x 24 inches (51 cm x 61 cm) including border.
Bath Mat Motif Placement
Piece 2: Contour Rug (U-Shaped)
Finished size: 20 inches wide x 18 inches long (51 cm x 46 cm) with U-cutout 7 inches wide x 8 inches deep
The contour rug is worked as a rectangle with the U-cutout formed by shaping.
With Color A and G-6 hook, chain 83.
Foundation Row: Hdc in 3rd ch from hook and in each ch across. (81 hdc)
Rows 1 through 26: Ch 2, turn. Hdc in each st across, following the same 6-row stripe sequence as the bath mat (4 rows Color A, 2 rows Color B, repeat). (81 hdc per row)
After Row 26, the piece should measure approximately 20 inches wide x 8.5 inches long (51 cm x 21.5 cm) before the cutout shaping begins.
U-Cutout Shaping
The cutout is centered on the top edge. Width of cutout = 7 inches = approximately 28 stitches. Each side of the rug above the cutout = (81 – 28) divided by 2 = 26.5, rounded to 27 stitches on the left panel and 26 stitches on the right panel.
Note: For a more even result, use a 27-stitch cutout so each panel is exactly 27 stitches. (27 + 27 + 27 = 81.) With a 27-stitch cutout, the opening measures approximately 7.25 inches (18.4 cm), which is within the size tolerance.
Working Left Panel (Rows 27 through 54)
Row 27 (Left Panel): Ch 2, turn. Hdc in first 27 sts. Leave remaining 54 sts unworked. Turn. (27 hdc)
Rows 28 through 54: Ch 2, turn. Hdc in each st across the 27 left-panel sts. Follow the color stripe pattern continuing from where you left off. (27 hdc per row)
After Row 54 of the left panel, fasten off.
Working Right Panel (Rows 27 through 54)
With RS facing, skip the center 27 sts on Row 26 (this will become the open cutout). Join Color A in the 55th stitch.
Row 27 (Right Panel): Ch 2. Hdc in same st and in each of the next 26 sts. (27 hdc)
Rows 28 through 54: Ch 2, turn. Hdc in each st across. Follow color stripe pattern. (27 hdc per row)
After Row 54 of the right panel, the piece should measure approximately 20 inches wide x 18 inches long (51 cm x 46 cm) from foundation to top of right and left panels.
Contour Rug Border
Join Color B at bottom right corner.
Work Round 1 (SC foundation) around the entire outer perimeter of the U-shape:
Total outer perimeter sc: 81 + 3 + 54 + 27 + 26 + 27 + 26 + 27 + 54 + 3 = 328 sc (approximately; adjust if row counts vary slightly to keep fabric flat).
Join with sl st.
Work Round 2 (Picot edging along the inner cutout edges only, shell border along outer edges):
Fasten off Color B.
Contour Rug Motif Placement
Piece 3: Toilet Tank Cover
Finished size to fit standard tank: approximately 8 inches wide x 6 inches tall x 6.5 inches deep (20 cm x 15 cm x 16.5 cm)
The tank cover is constructed as follows: one large TOP PANEL (rectangle to cover the top of the tank) and one SIDE WRAP PANEL (a long rectangle that wraps around the front and two short sides of the tank). These two pieces are seamed together. The bottom edge has an elastic casing.
Tank Cover Top Panel
With Color A and G-6 hook, chain 35.
Foundation Row: Hdc in 3rd ch from hook and in each ch across. (33 hdc)
Rows 1 through 26: Ch 2, turn. Hdc in each st across following the 6-row color stripe pattern (4 rows Color A, 2 rows Color B). (33 hdc per row)
After Row 26, the top panel should measure approximately 8.25 inches wide x 8.75 inches long (21 cm x 22 cm). This extra length (compared to 6.5 inch depth of tank) accounts for the overhang at back and the seam allowance. Trim rows if your tank is shallower; add rows if deeper.
Tank Cover Side Wrap Panel
This panel wraps around front face and two short ends of the tank. Total length = front width (8 inches) + two short sides (6.5 inches each) = 8 + 13 = 21 inches (53 cm). Height = 6 inches (15 cm) = 18 rows at gauge.
With Color A, chain 85.
Foundation Row: Hdc in 3rd ch from hook and in each ch across. (83 hdc)
Note: 83 hdc x 4 sts per inch = approximately 20.75 inches. This accounts for slight compression in cotton. Adjust your foundation chain to match your specific tank’s three-side circumference.
Rows 1 through 18: Ch 2, turn. Hdc in each st across following the stripe pattern. (83 hdc per row)
After Row 18, the side panel should measure approximately 20.75 inches wide x 6 inches tall (52.7 cm x 15 cm).
Elastic Casing for Side Wrap Panel
After Row 18 (do not fasten off), continue in Color A:
Casing Row 1: Ch 1, turn. Working in BLO only, sc in each st across. (83 sc)
Casing Row 2: Ch 1, turn. Working in the remaining front loops of Row 18 (the loops left behind when you worked Casing Row 1 in BLO), sc in each loop across. (83 sc)
This creates a tunnel. Fasten off. Thread approximately 20 inches (51 cm) of elastic through the tunnel, adjust to the exact circumference of your tank’s bottom edge minus 0.5 inch (13 mm) for snug fit, and sew elastic ends together.
Tank Cover Assembly
Step 1: Fold the side wrap panel in half lengthwise to find the center of the long edge (this center point aligns with the center front of the tank). With yarn needle and Color A, whipstitch or mattress stitch the short ends of the side wrap panel together to form a rectangle/loop (front + two sides). Leave the back open (the back of the tank has plumbing and is not covered).
Step 2: Pin the top panel to the top edge of the side wrap loop, aligning corners. Seam together using mattress stitch with Color A. The back edge of the top panel hangs down approximately 2 to 2.5 inches (5 to 6.5 cm) at the back of the tank to conceal the gap.
Tank Cover Border
With Color B, work one round of sc around the top edge of the assembled cover (the seam line where top panel meets side wrap), followed by one row of shell border. This visually frames the top.
Work one round of shell border around the bottom edge of the side wrap (the open bottom, above the elastic casing).
Tank Cover Motif Placement
Helpful Tips for Success
Measure your toilet first. Every toilet is different. Before cutting your elastic or seaming your covers, place the unfinished pieces on your actual toilet to check the fit. It is much easier to add or remove a few rows now than to redo everything later.
Block your pieces. Cotton does not have much give, but blocking helps even out your stitches and gives the finished pieces a more polished look. Wet block by soaking, squeezing out excess water, and pinning flat to dry.
Secure your ends well. Bathroom items get washed frequently. Weave your ends in securely, going back and forth through several stitches to prevent unraveling.
Pre-wash your ribbon. Satin ribbon can shrink or bleed color. Give it a quick hand wash and let it dry before attaching to your finished pieces.
Care Instructions
These pieces are designed to be practical and washable. Machine wash on gentle cycle with cold water. Tumble dry on low or lay flat to dry. The ribbon bows and wooden buttons can be removed before washing if desired, or left on if secured well.
You Might Also Like
- Sage Green Boho Poncho Free Crochet Pattern
- Ocean Jellyfish Crochet Market Bag Free Pattern
- Pastel Pink Daisy Tote Bag Free Crochet Pattern
- Terracotta Boho Basket Bag with Black Fringe Free Crochet Pattern
