
You know that gorgeous ombre skein sitting in your stash? The one you bought because the color transitions were too beautiful to leave behind, but you have not found the right project yet? This is its moment.
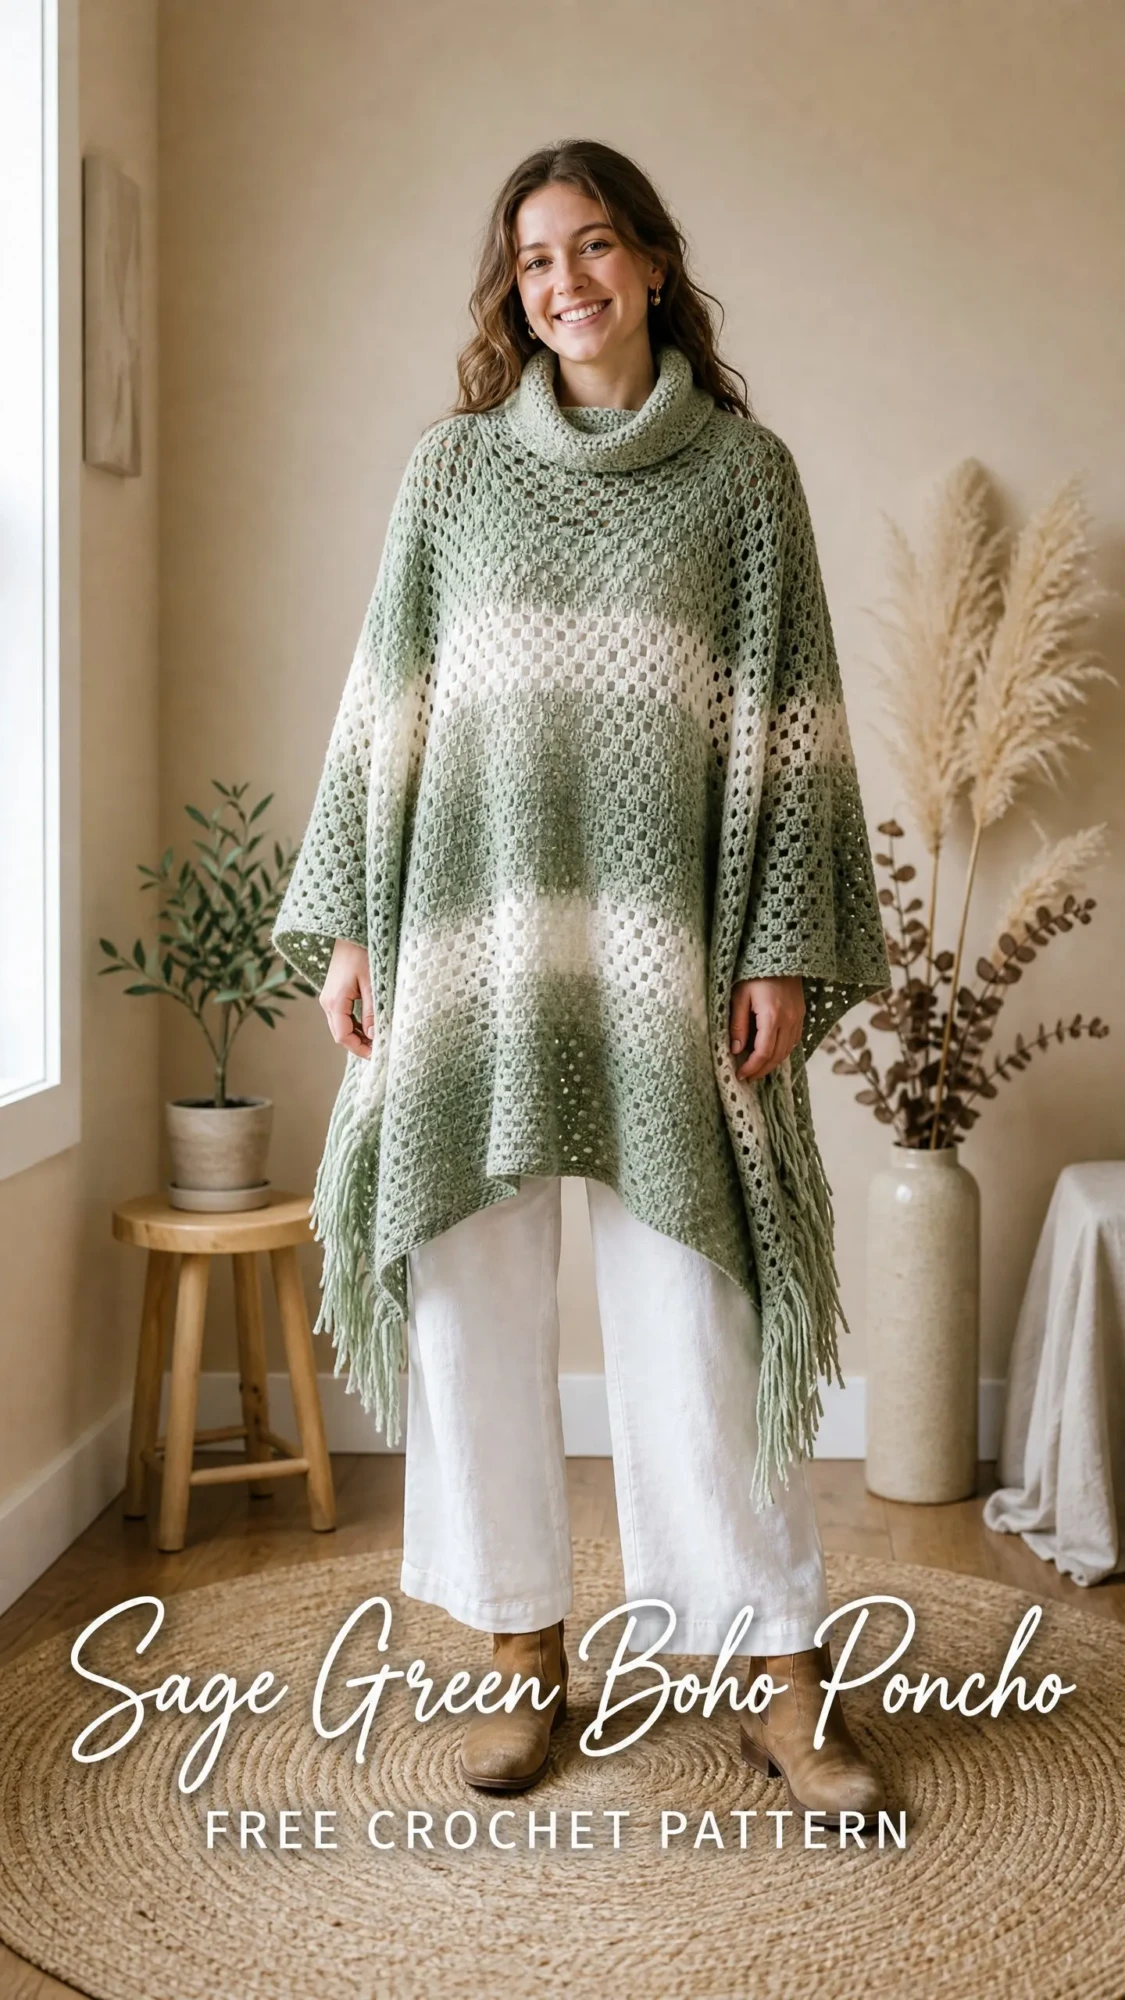
This boho poncho works up in a classic granny mesh stitch that lets those color changes shine. The construction is surprisingly straightforward. You are making two identical rectangles, seaming them at the shoulders, and adding a cozy cowl collar. No complicated shaping, no fussy increases or decreases.
I will be honest with you about the skill level. If you can make a basic granny square and you are comfortable seaming pieces together, you can absolutely handle this poncho. The mesh stitch is repetitive in the best way, which means you will find your rhythm quickly and can crochet while watching your favorite show.
Why This Poncho Works
The magic of this sage green boho poncho crochet pattern comes from its simplicity. Two flat panels hang at an angle when worn, creating those elegant pointed hems at the front and back without any shaping within the rows themselves. The granny mesh stitch produces a beautifully open, drapey fabric that moves with you.
The ombre yarn does all the heavy lifting for visual interest. Starting with sage green at the collar, fading through cream in the middle, and returning to sage at the hem creates a stunning gradient effect with zero color changes on your part. You just keep crocheting and watch the colors bloom.
That cowl collar? It is worked directly onto the neck opening in simple half double crochet rounds. It folds over naturally for that cozy turtleneck look without any complicated construction.
Materials You Will Need
Yarn:
One skein of ombre or self-striping bulky weight (weight 5) yarn in a sage green to cream to sage colorway. You will need approximately 590 to 620 yards total. I recommend purchasing two skeins to ensure you have enough, as exact yardage per skein varies by brand.
Suggested Yarn Options:
Hooks:
Notions:
Gauge
Getting gauge matters for this project because it affects the final size and drape of your poncho.
In the Granny Mesh Stitch pattern on your K / 6.5 mm hook, blocked:
To make a gauge swatch: Chain 25. Work the Granny Mesh Stitch for 8 rows. Block your swatch. Measure the center area. If your swatch is too small, go up a hook size. If it is too big, go down a hook size.
Finished Size
These dimensions create a relaxed, oversized fit suitable for most adult sizes small through 2X. I have included size customization tips at the end of this tutorial.
Abbreviations
Before we dive in, let me define every stitch abbreviation you will encounter:
Special Stitches Explained
Granny Mesh Unit
This is the building block of your entire poncho. One Granny Mesh Unit consists of 3 double crochets worked into the same chain 2 space, followed by chain 2 and skip the next space.
Think of it like a tiny granny square cluster that you repeat across each row.
3-dc Cluster into Chain Space
Insert your hook into the chain 2 space (not into a stitch), yarn over, pull up a loop, yarn over, draw through 2 loops. That is your first double crochet. Work 2 more double crochets into the same space. Now you have 3 double crochets sitting in one space.
Starting Cluster at Row Beginning
Chain 3 (this counts as your first double crochet). Work 2 more double crochets into the same space or turning chain space as directed. Chain 2. This completes your first unit and creates the chain 2 space before the next cluster.
Fringe
You will add fringe after all construction is complete. Cut yarn strands 14 inches long. Fold 4 strands together in half to create a bundle with a loop at one end. Insert your hook into a hem edge stitch from front to back, place the folded loop onto your hook, pull the loop through the fabric, pull all loose ends through the loop, and pull firmly to secure a lark’s head knot.
Panel Instructions (Make 2)
You will make two identical panels. Panel 1 becomes the front, Panel 2 becomes the back.
Foundation Chain
Chain 63.
Row 1 (RS)
Double crochet into the 6th chain from hook. The skipped 5 chains count as your first dc plus a chain 2 space.
Chain 2, skip 2 chains, dc in next chain. Repeat from to across to end. Turn.
You will have 20 chain 2 spaces across the row plus edge dc posts at each end. [20 spaces]
This foundation row is different from all following rows. It creates the chain 2 spaces that Row 2 will work into.
Row 2 (WS)
Chain 3 (counts as first dc here and throughout). Turn. Work 2 dc into the first chain 2 space to complete your first cluster of 3 dc. Chain 2.
Skip the next dc post. Work 3 dc into the next chain 2 space. Chain 2.
Continue working 3 dc into each chain 2 space with chain 2 between each cluster across the row.
At the end, work 3 dc into the last chain 2 space (the turning chain space from Row 1). Work 1 dc into the top of the turning chain. Turn.
[20 complete 3-dc clusters plus edge dc = 20 units]
Stitch count check: 20 clusters multiplied by (3 dc + 2 ch) equals 100 stitches across, plus edge double crochets.
Rows 3 through 35
Repeat Row 2, turning at the end of each row.
Each row maintains 20 units.
After Row 35, fasten off and weave in your end. Do not block yet.
Make your second panel identically.
Checkpoint: Before seaming, each panel should measure approximately 28 inches wide and 26 inches long when lightly spread out flat.
Seaming the Panels
Lay both panels side by side on a flat surface with right sides facing up. Orient them so the foundation chain edges are at the top.
Seaming Plan
You will join 9 inches of the top edge of Panel 1 to 9 inches of the top edge of Panel 2 on the LEFT shoulder. Leave the center 10 inches OPEN for the neck opening. Then join 9 inches on the RIGHT shoulder.
At gauge, 9 inches equals approximately 7 units. The center 6 units remain open for the neck.
Left Shoulder Seam
Hold Panel 1 and Panel 2 with right sides together, aligning the top edges. Using your yarn needle and a length of yarn (or your crochet hook with a slip stitch seam), join 7 units starting from the LEFT outer edge. Work through both layers together. Fasten off and weave in your end.
Right Shoulder Seam
Reposition to align the top RIGHT edges. Join 7 units from the RIGHT outer edge inward. Fasten off and weave in your end.
The remaining 6 units in the center top create your neck opening.
Checkpoint: Slip the poncho over your head. The neck opening should fit comfortably without pulling or gaping. The poncho should drape with pointed hems at center front and center back. If the neck is too tight, undo 1 unit from each shoulder seam. If it is too loose, add 1 unit to each seam.
Collar Instructions
Switch to your US size J / 6.0 mm hook for a slightly tighter collar. If you prefer a looser, softer cowl, keep the K hook.
Joining Round
With the right side of the poncho facing, join yarn with a slip stitch to any corner of the neck opening. Work 1 single crochet evenly around the entire neck opening edge, placing 1 sc into each dc top, 1 sc into each chain 2 space top, and 1 sc into each corner. Join with a slip stitch to the first single crochet.
Target: 64 sc around the neck opening. [64 sc]
Round 1
Chain 2 (does not count as a stitch throughout the collar). Work 1 half double crochet into each single crochet around. Join with a slip stitch to the first hdc. [64 hdc]
Rounds 2 through 7
Chain 2, hdc into each hdc around, join with a slip stitch to first hdc. [64 hdc each round]
After Round 7, the collar measures approximately 5 inches tall. Fasten off and weave in your end.
The collar will fold over naturally when worn.
Adding Fringe
Fringe goes on all four lower hem edges of the poncho.
Preparation: Cut yarn strands 14 inches long. Use 4 strands per fringe bundle.
Spacing: Attach 1 fringe bundle into every other chain 2 space along all four lower edges. Add 1 extra bundle at each corner point for fullness.
You will need approximately 40 bundles total (10 bundles per edge x 4 edges).
After attaching all fringe, lay the poncho flat and trim all ends to a consistent length of 6 to 7 inches below the knots.
Finishing and Blocking
Weave in all remaining yarn ends securely.
Wet blocking (recommended for acrylic blends): Fill a basin with cool water and a drop of gentle wool wash. Submerge the poncho and soak for 15 to 20 minutes. Do not wring or twist. Press out excess water by rolling in a clean towel. Lay flat on blocking mats, pin or smooth to 28 inches wide per panel and 26 inches per panel length. Allow to dry completely for at least 24 hours.
Steam blocking (alternative): Hold a steam iron 1 inch above the fabric and apply steam in slow passes. Do not press the iron directly onto the fabric. Allow to cool and dry fully.
Size Customization Tips
For a wider poncho: Add 5 chains to the foundation for each additional Granny Mesh Unit. Each additional unit adds approximately 1.33 inches of width per panel.
For a longer poncho: Work additional rows beyond Row 35. Every 4 rows adds approximately 3 inches of length.
For a wider neck opening: Join fewer units at the shoulder seams. Reducing each shoulder seam by 1 unit widens the neck opening by approximately 2.67 inches total.
For a smaller body (XS or petite): Begin with chain 53 instead of 63 for 16 units and approximately 21 to 22 inches wide panels.
For a larger body (3X or 4X): Begin with chain 73 for 24 units and approximately 32 inches wide panels.
Care Instructions
Machine wash cold on gentle cycle if using acrylic or acrylic blend yarn. Lay flat to dry. Do not put in the dryer, as heat can distort the mesh openwork. Do not iron directly. Store folded, not hung, to prevent the mesh from stretching over time.
Final Thoughts on This Crochet Tutorial
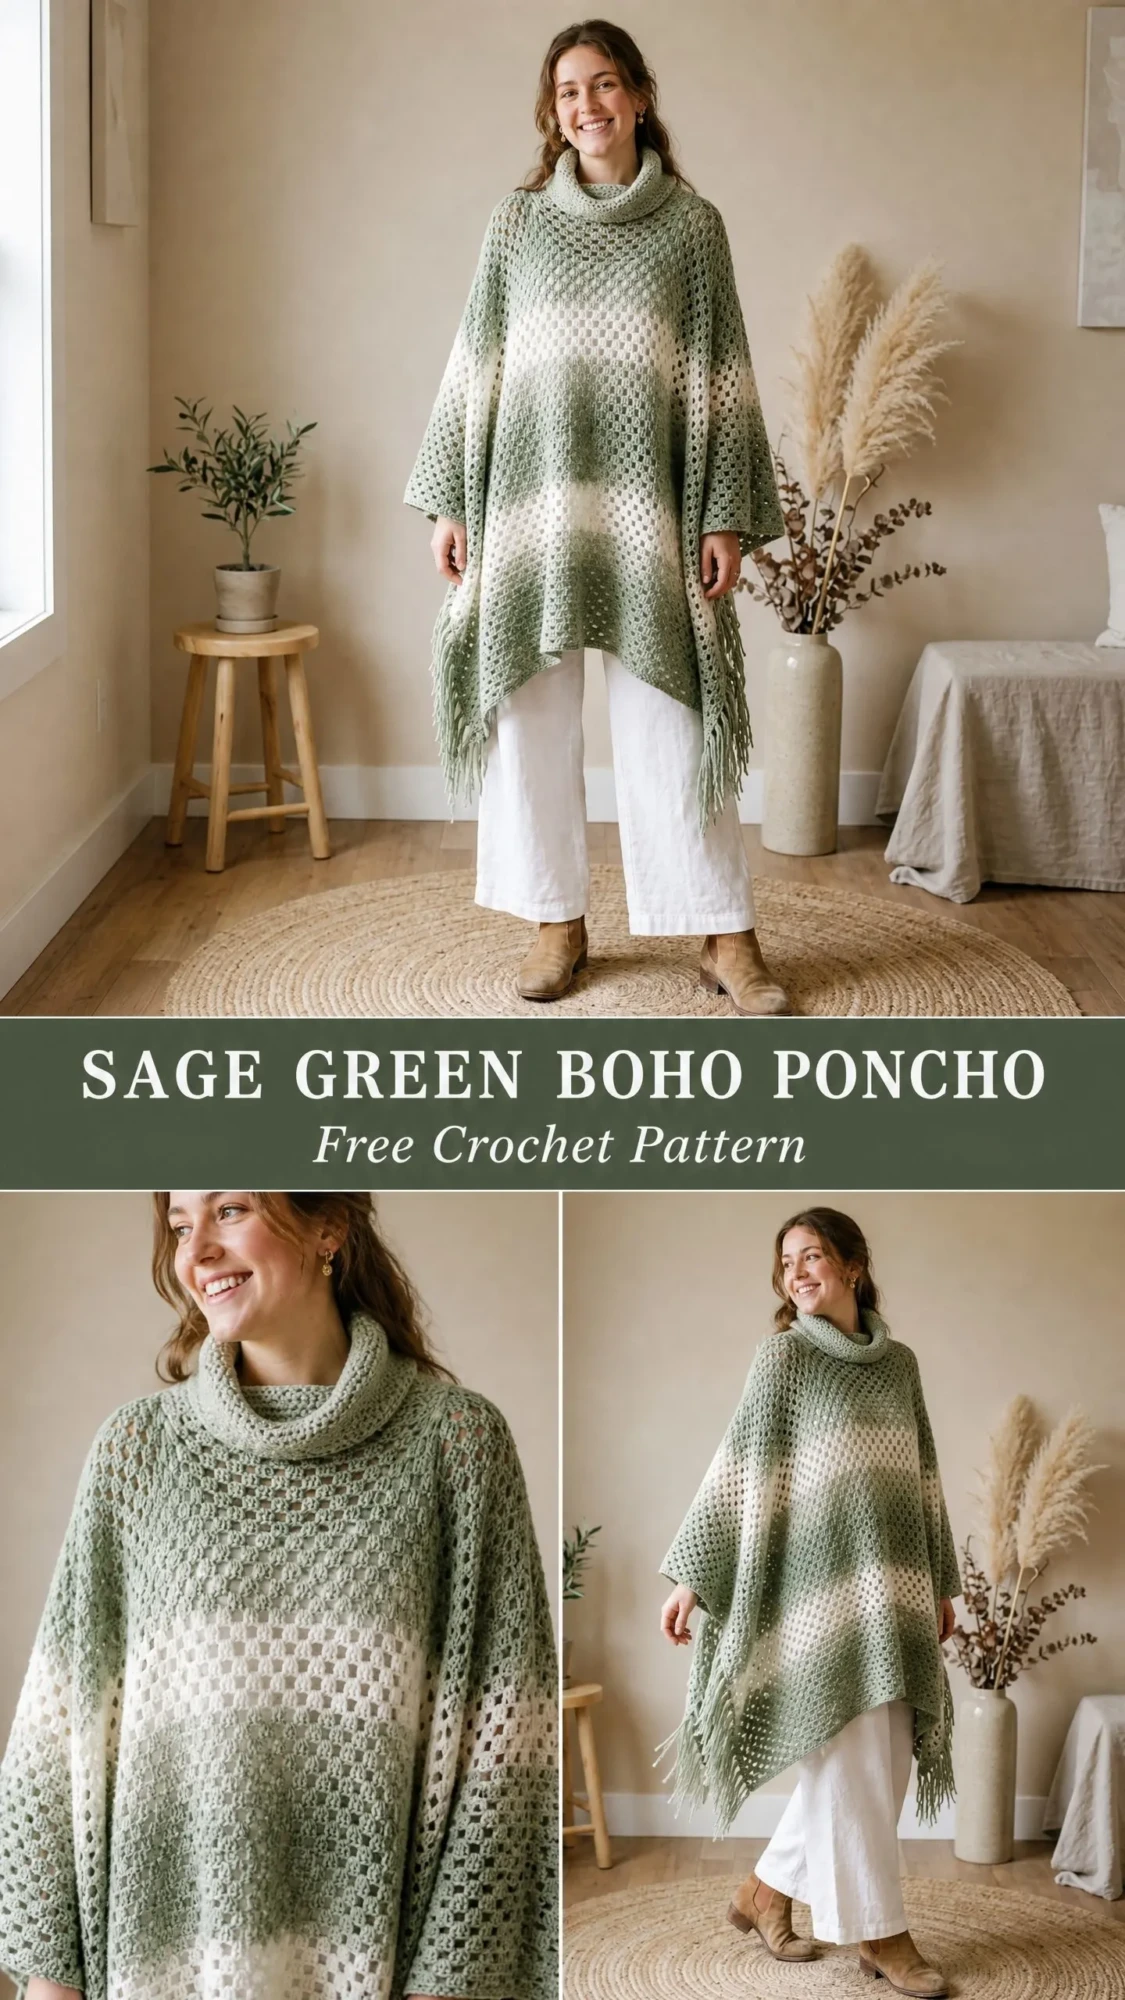
This sage green boho poncho crochet pattern is one of those projects that looks far more impressive than it actually is to make. The granny mesh stitch creates gorgeous texture with minimal effort, and the ombre yarn handles all the colorwork drama for you. Whether you are making this for yourself or as a gift, the cozy cowl collar and flowing fringe give it that perfect bohemian vibe.
I hope you enjoy every stitch of this poncho. It is the kind of project that reminds you why you fell in love with crochet in the first place.
Thank you so much for choosing this pattern. I would absolutely love to see your finished poncho, so please tag me on Instagram or share in my Facebook group when yours is complete.
If you loved this poncho pattern, save it to your Pinterest boards so you can find it when you are ready to cast on. And if you make one, please drop a comment below. I always love hearing which colors you chose and seeing how your projects turn out!
You Might Also Like
- Sage Green Natural Minimalist Braided Bag Free Crochet Pattern
- Sage Green Daisy Bow Bucket Bag Free Crochet Pattern
- Succulent Garden Crochet Bowl Free Crochet Pattern
- Terracotta Sunset Crochet Sneaker Boots Free Pattern
