
I don’t know about you, but I have been searching for the perfect crochet dress pattern for years. Something that looks stunning without requiring a PhD in advanced fiber arts. Something that flatters without clinging in all the wrong places.
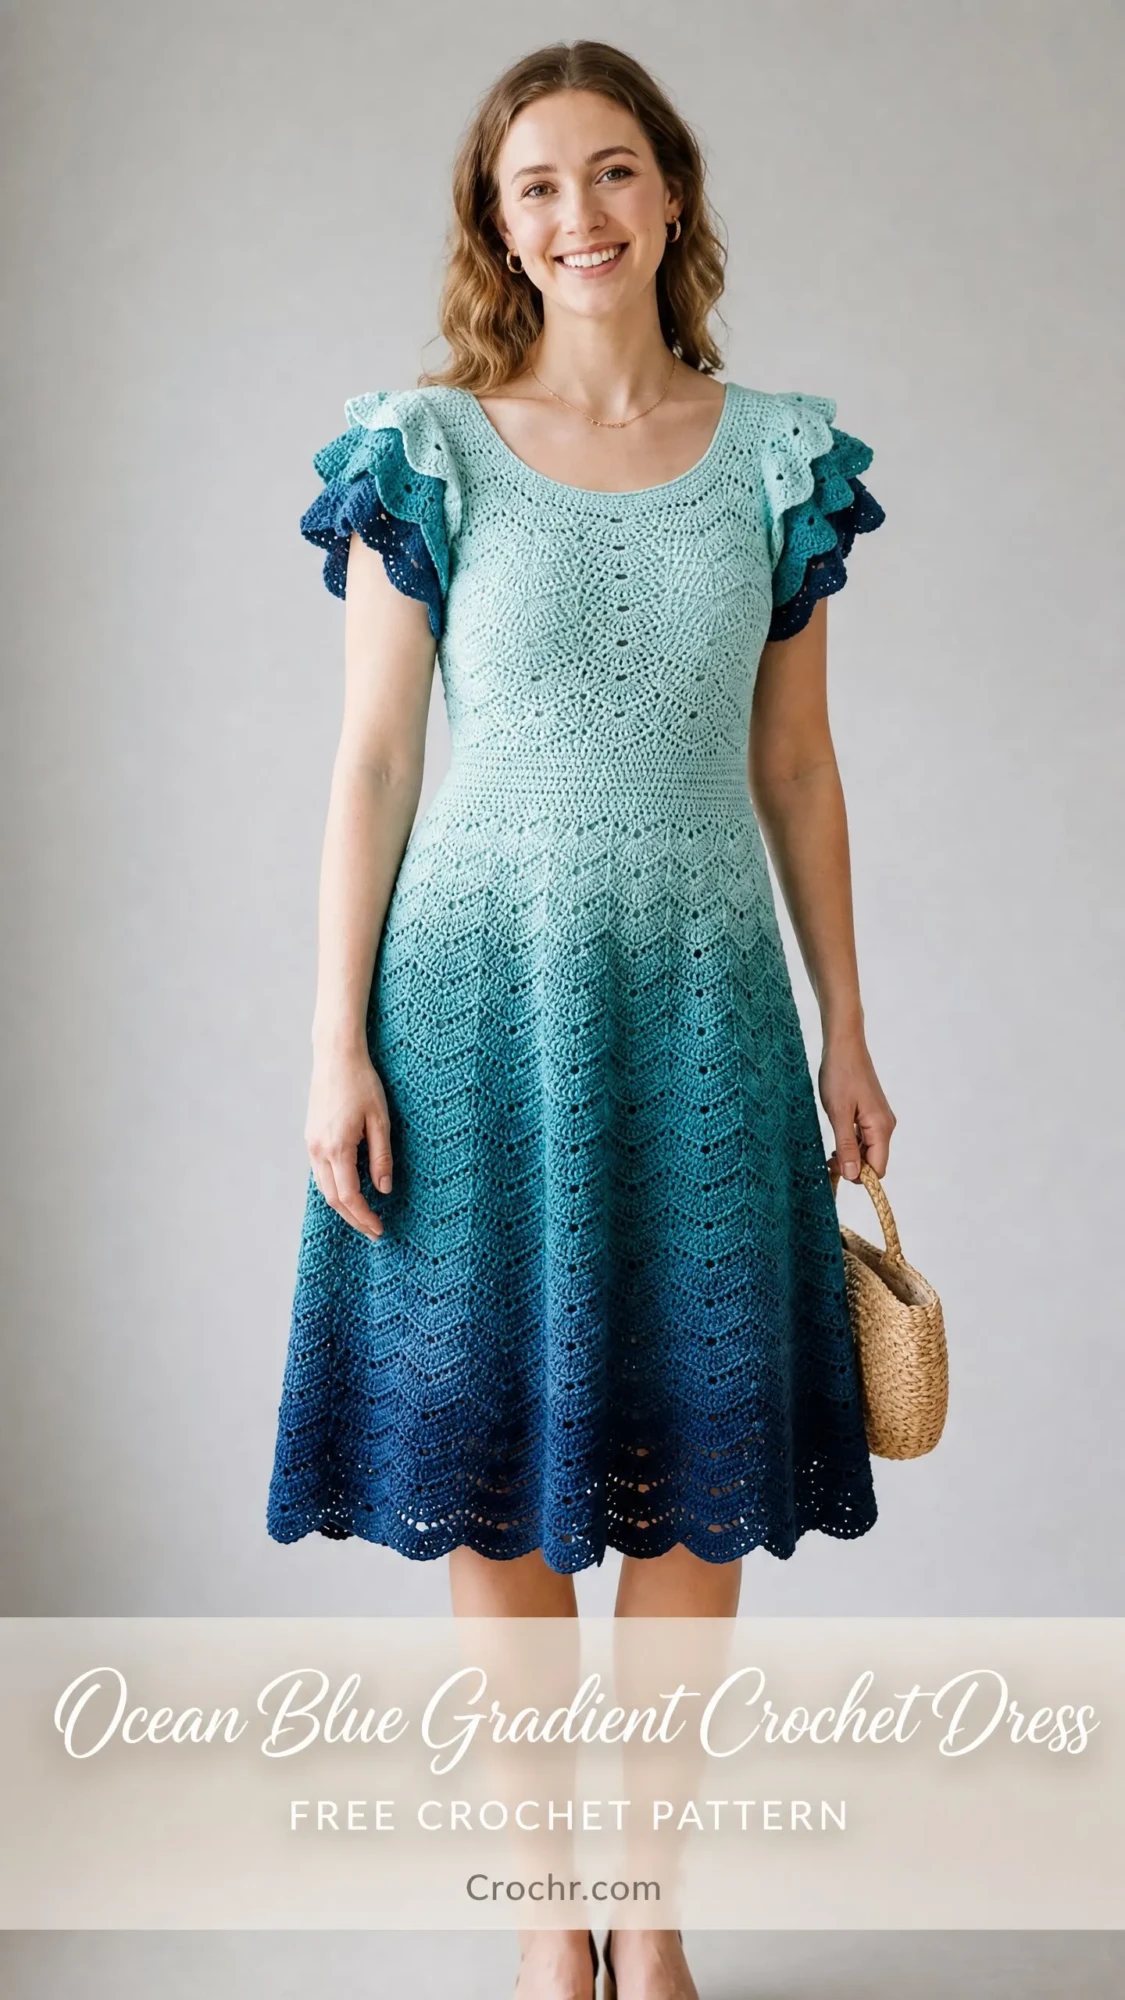
Well, this ocean blue gradient crochet dress finally scratched that itch. The color flows from soft mint at the neckline down through teal and into deep navy at the hem. It looks incredibly complex, but the construction is logical once you understand the flow.
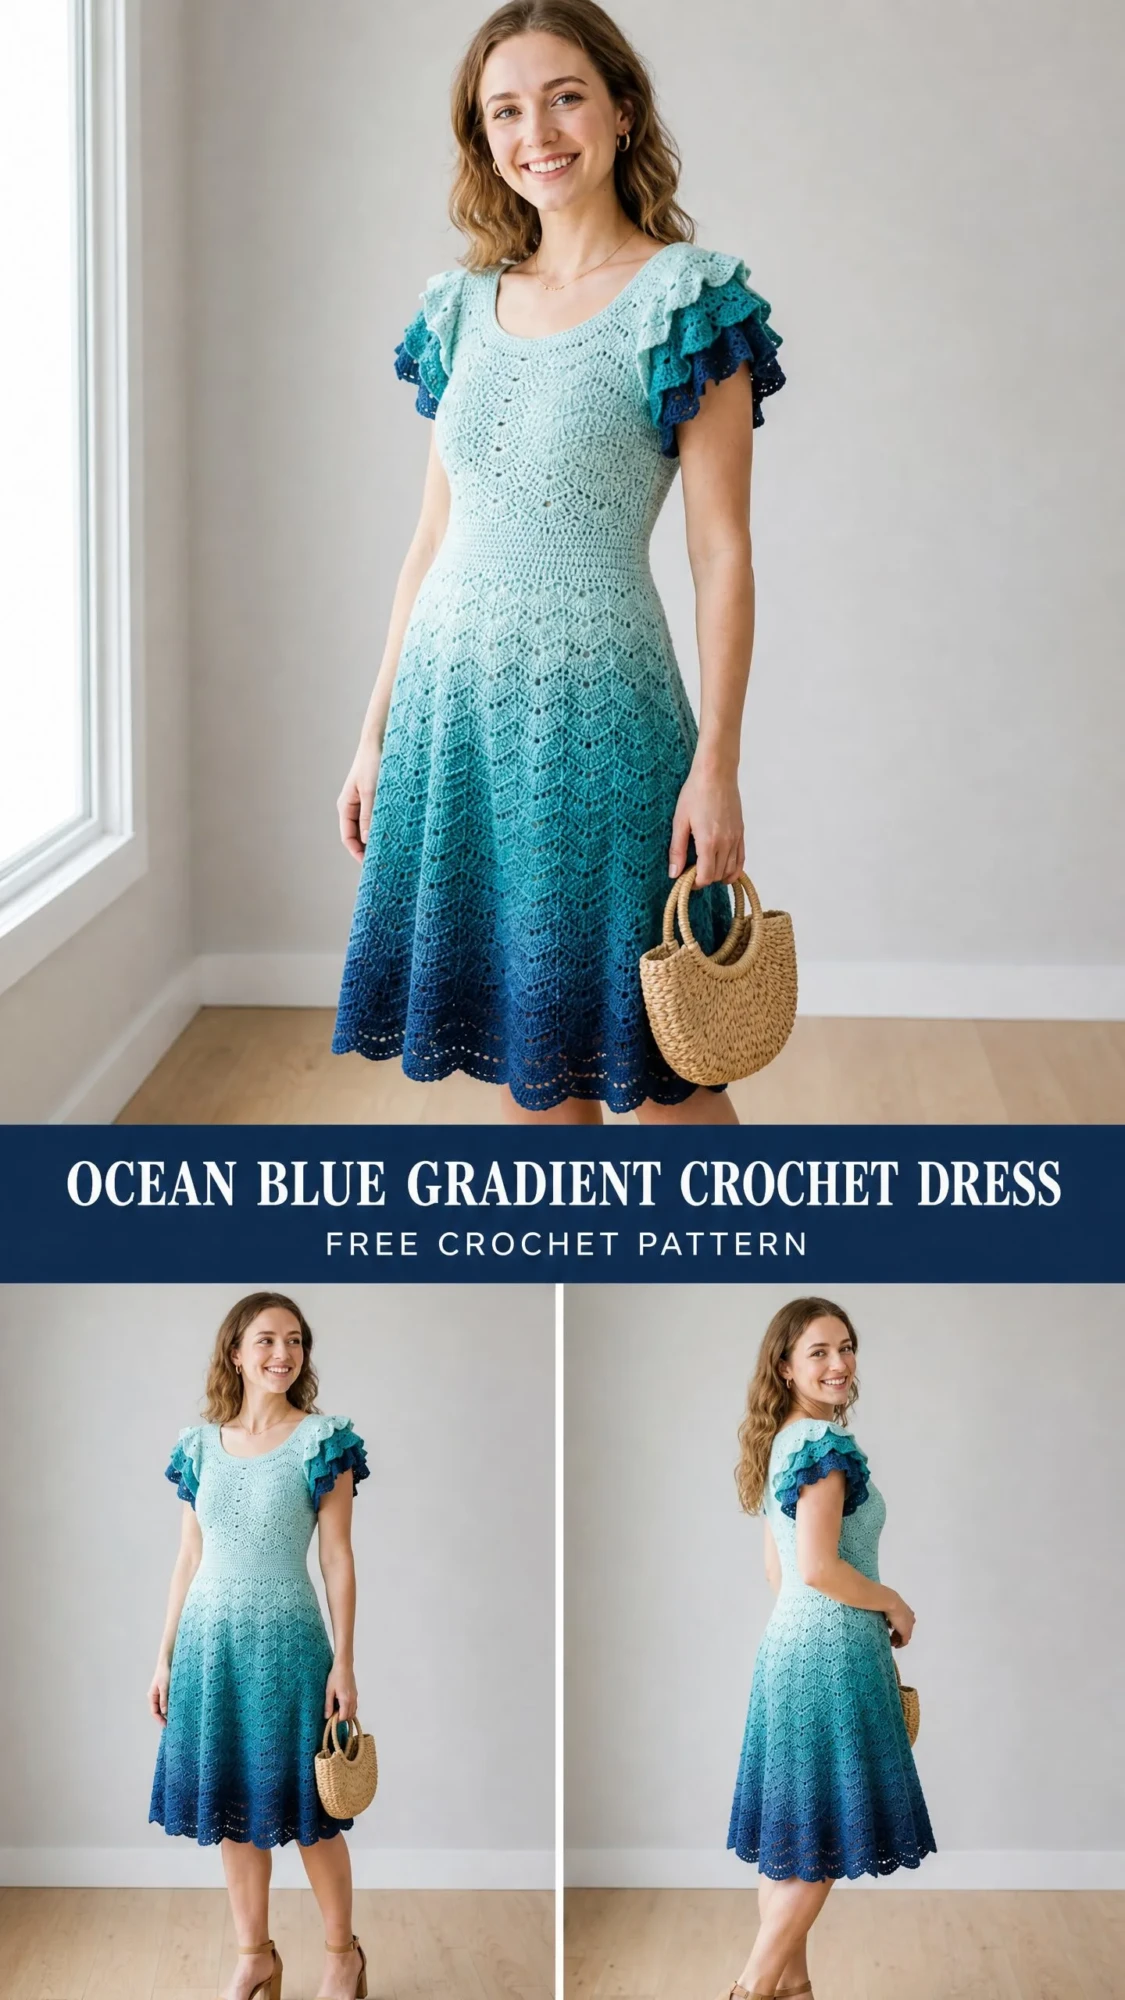
The fitted bodice, the flared chevron skirt, those dreamy ruffle sleeves. All of it comes together in a garment that actually looks like something you would buy at a boutique. Let me walk you through every single step.
About This Ocean Blue Gradient Dress Pattern
This dress is worked from the top down, which means you try it on as you go. No guessing about length or fit until the very end. The bodice starts at the neckline with a seamless yoke using raglan shaping, then transitions into a gorgeous chevron lace skirt that creates natural flare and movement.
The gradient effect can come from a single self-striping yarn or from joining three solid colors at strategic points. Either approach works beautifully. The tiered ruffle sleeves frame the shoulders with three layers of scalloped edges, and a delicate scalloped hem finishes everything off.
A small keyhole opening at the back adds a feminine detail and makes the dress easier to get on and off. You will close it with either a small button or a hook-and-eye closure.
Skill level: Intermediate to advanced. You should be comfortable with working in the round, managing increases within lace patterns, and constructing separate pieces that get attached later.
Time estimate: Approximately 60 to 80 hours for a size Medium, including all finishing work. The dense bodice section takes the longest because of the tight mesh structure.
Finished Sizes
This pattern includes four sizes. Instructions for Medium, Large, and XL appear in parentheses throughout in the format Small (Medium, Large, XL).
Size Small: Bust 34 in / 86.5 cm, Waist 27 in / 68.5 cm, Hip 36 in / 91.5 cm, Length shoulder to hem 43 in / 109 cm
Size Medium: Bust 37 in / 94 cm, Waist 30 in / 76 cm, Hip 39 in / 99 cm, Length shoulder to hem 43 in / 109 cm
Size Large: Bust 40 in / 101.5 cm, Waist 33 in / 84 cm, Hip 42 in / 106.5 cm, Length shoulder to hem 44 in / 112 cm
Size XL: Bust 43 in / 109 cm, Waist 36 in / 91.5 cm, Hip 45 in / 114.5 cm, Length shoulder to hem 44 in / 112 cm
Crochet fabric has moderate negative ease, meaning it stretches to fit. Choose one size smaller than your actual measurements for a fitted look, or match your measurements exactly for a more relaxed fit.
Materials Needed
Yarn: 1,200 (1,400, 1,600, 1,800) yards of fingering to light DK weight yarn in a mint-to-navy gradient colorway. If using solid colors instead of gradient yarn, you will need three skeins of approximately 400 (467, 533, 600) yards each in mint (Color A), teal (Color B), and deep navy (Color C).
Hooks:
Adjust hook size as needed to match gauge.
Notions:
Yarn Suggestions
Lion Brand Mandala Baby: 590 yards per skein, fingering weight, 60% acrylic and 40% nylon. Use two skeins in a blue-to-teal colorway and add a navy solid for the hem. This yarn is machine washable and budget-friendly.
Paintbox Yarns Simply DK: 137 yards per skein, DK weight, 100% acrylic. Purchase individual skeins in Spearmint Green, Seafarer Teal, and Sailor Navy. Join at color change points approximately every 400 yards. This option gives you maximum color control.
WeCrochet Chroma Fingering: 396 yards per skein, fingering weight, 70% superwash wool and 30% nylon. A luxurious option with gorgeous tonal transitions. Hand wash cold and lay flat to dry.
Any fingering or light DK weight yarn with good stitch definition will work. Avoid overly fuzzy or halo yarns since they obscure the lace texture.
Gauge
Bodice gauge (US E-4 / 3.5 mm hook): 22 stitches and 24 rows = 4 in / 10 cm in single crochet, blocked
Skirt gauge (US F-5 / 3.75 mm hook): One 12-stitch chevron lace repeat = 2.75 in / 7 cm wide, 4 rows of chevron lace = 1.5 in / 3.8 cm tall, blocked
Please do not skip the gauge swatch for a fitted garment like this dress. The bodice gauge determines bust and waist fit. The skirt gauge determines drape and hem circumference.
Abbreviations
Special Stitches
Scallop Stitch
This creates the decorative edge on the ruffles and hem.
Step 1: Work 5 dc into the indicated stitch or space.
Step 2: This cluster of 5 dc forms one scallop shell.
When the pattern says "scallop in next ch-sp," insert your hook into the chain space and work all 5 dc in that same space.
V-Stitch
Used in the ruffle construction.
Step 1: Work 1 dc into the indicated stitch, chain 1, then work 1 dc into the same stitch.
Step 2: This creates a V shape with a chain-1 space at the center.
Chevron Lace Shell
This is the main skirt pattern and creates that beautiful wave texture. It works over a 12-stitch repeat.
Step 1: Skip 2 stitches.
Step 2: Work 5 dc into the next stitch. This is the shell peak.
Step 3: Skip 2 stitches.
Step 4: Work 1 sc into the next stitch. This is the valley.
Step 5: Skip 2 stitches.
Step 6: Work 5 dc into the next stitch. This is the second shell peak.
Step 7: Skip 2 stitches.
Step 8: Work 1 sc into the next stitch. This is the second valley.
That completes one full 12-stitch repeat. At the beginning and end of each round, you will work a half-shell (3 dc) to maintain pattern alignment at the join.
Picot
Creates a small decorative bump at the edge.
Step 1: Chain 3.
Step 2: Slip stitch into the first of the 3 chains just made.
Invisible Join
This closes rounds without a visible seam.
Step 1: Cut yarn leaving a 6-inch tail.
Step 2: Thread tail onto yarn needle.
Step 3: Insert needle from front to back under both loops of the first stitch of the round.
Step 4: Insert needle back down through the back loop only of the last stitch worked.
Step 5: Pull gently to match tension of surrounding stitches.
Pattern Notes Before You Begin
The dress is worked from the neckline downward in the round with a small section worked flat at the center back for the keyhole opening.
All rounds are worked with the right side facing unless noted otherwise.
The yoke begins with a foundation chain joined into a ring. Increases are worked in a raglan-style arrangement at 8 marked positions to simultaneously shape the front, back, and sleeve caps.
Once the yoke reaches the underarm, sleeve stitches are placed on hold and the body is joined into one seamless tube.
The bodice uses sc (single crochet) and hdc (half double crochet) mesh from the underarm to approximately 2 inches above the natural waist. A transition row of sc joins the bodice to the skirt lace section.
The skirt chevron lace begins after the waist transition and uses the larger hook to create drape and ease.
If using a gradient yarn, the color will shift naturally. If joining solid skeins, join new color at the beginning of a round for clean changes.
Section 1: Neckline and Yoke
The yoke is worked top-down from the neckline. Eight raglan markers divide the round into four sections: left front, right front, left back, right back.
Foundation Chain
Chain 84 (92, 100, 108). Join with slip stitch to first chain, being careful not to twist. This forms the neckline ring.
Round 1 (setup): Chain 1, sc in each chain around, join with sl st to first sc. (84, 92, 100, 108 sc)
Place markers to create 4 raglan spine positions. For size Small, the 84 stitches divide as follows: 33 front, 1 spine, 6 right sleeve, 1 spine, 33 back, 1 spine, 6 left sleeve, 1 spine = 84 total.
Round 2 (increase round): Ch 1, sc to 1 st before first marker, inc in next st (spine), sc to 1 st before next marker, inc in next st (spine), repeat around all 4 spine sts, join. (92, 100, 108, 116 sts)
Round 3 (even round): Ch 1, sc in each st around, join. (92, 100, 108, 116 sts)
Repeat Rounds 2 and 3 alternately for a total of 18 increase rounds (Rounds 2, 4, 6, 8, 10, 12, 14, 16, 18, 20, 22, 24, 26, 28, 30, 32, 34, 36).
Stitch Count After Round 36
Checkpoint: After completing all yoke rounds, your piece should measure approximately 7 in / 18 cm from the neckline edge to the underarm fold. Lay the yoke flat and confirm the front measures approximately 12.5 in / 32 cm wide.
Section 2: Back Keyhole
For simplicity, the keyhole can be created during finishing. Join yarn at the center back top edge after the dress is complete. Work 1 sc edging along the back neck opening for 2 in / 5 cm down each side. Work a chain-4 button loop at the top right edge and close. Sew button on the opposite side.
Section 3: Separate Sleeves and Join Body
After Round 36 of the yoke, separate the sleeve stitches.
Separation Round: Work across front section (69, 72, 75, 78 sts), place right sleeve sts on waste yarn holder (42, 43, 44, 45 sts), chain 4 for underarm bridge, work across back section (69, 72, 75, 78 sts), place left sleeve sts on waste yarn holder (42, 43, 44, 45 sts), chain 4 for second underarm bridge, join with sl st to first front stitch.
Stitch count after separation:
Round 37 (first body round): Ch 1, sc in each st across front, sc in each of the 4 underarm chain sts, sc across back, sc in each of the 4 underarm chain sts, join. (146, 152, 158, 164 sts)
Section 4: Bodice
Switch to US E-4 / 3.5 mm hook.
Bodice stitch pattern: Ch 1, (sc in next st, hdc in next st) repeat around, join.
Work this alternating sc/hdc round for 20 (20, 22, 22) rounds, or until the bodice from the underarm join measures approximately 6 in / 15 cm.
Rounds 38 to 57: Work (sc, hdc) alternating, join each round. Stitch count remains constant at 146, 152, 158, 164 sts.
Waist Shaping
Waist decrease Round 1 (Round 45): Ch 1, (work 11 sc, dec) 11 times, work rem sts even to end, join. (135, 141, 147, 153 sts)
Waist decrease Round 2 (Round 49): Ch 1, (work 11 sc, dec) 11 times, work rem sts even, join. (124, 130, 136, 142 sts)
Work 4 rounds even after Round 49 (Rounds 50 to 53). (124, 130, 136, 142 sts)
Waist increase Round 1 (Round 54): Ch 1, (work 10 sc, inc) 11 times, work rem sts even, join. (135, 141, 147, 153 sts)
Waist increase Round 2 (Round 57): Ch 1, (work 10 sc, inc) 11 times, work rem sts even, join. (146, 152, 158, 164 sts)
Checkpoint: After Round 57, the bodice should measure approximately 6 in / 15 cm from the underarm join.
Section 5: Waist Transition Row
Round 58 (transition): Switch to US F-5 / 3.75 mm hook. Ch 3 (counts as first dc), dc in each st around, join with sl st to top of beg ch-3. (146, 152, 158, 164 sts)
This dc round provides a slight flare at the hip onset.
Section 6: Skirt Chevron Lace Pattern
Adjust stitch count in Round 59 to the nearest multiple of 12:
Round 59 (adjustment round): Ch 1, sc around with evenly spaced adjustments as noted, join. (144, 156, 156, 168 sts)
Begin Chevron Lace Shell Pattern
Round 60 (foundation lace round): Ch 3, 2 dc in same st as join (half shell), (sk 2 sts, sc in next st, sk 2 sts, 5 dc in next st) repeat to last 6 sts, sk 2 sts, sc in next st, sk 2 sts, 2 dc in same st as beg ch-3, join with sl st to top of beg ch-3 to complete half shell. (12, 13, 13, 14 full repeats plus 2 half-shells)
Rounds 61 to 66 (increase rounds for skirt flare): To build the A-line silhouette, add stitches by inserting ch-1 on each side of the valley sc (ch 1, sc, ch 1 instead of plain sc). This adds 2 stitches per repeat per increase round.
Continue working the chevron lace pattern, working increase rounds every 4 rounds, until the skirt measures approximately 30 in / 76 cm from the waist transition or your desired length.
Scalloped Hem Edging
Work one final round of scallop stitch along the bottom edge: (sk 2 sts, 5 dc in next st, sk 2 sts, sl st in next st) repeat around. Fasten off.
Section 7: Ruffle Sleeves
The ruffles are worked flat in three tiers and attached by seaming at the armhole edges.
Tier 1 (outermost, lightest color): Chain 60 (66, 72, 78). Work in V-stitch pattern for 3 rows. On Row 4, work scallop edging along the bottom.
Tier 2 (middle): Chain 54 (60, 66, 72). Work in V-stitch pattern for 3 rows. On Row 4, work scallop edging.
Tier 3 (innermost, darkest color): Chain 48 (54, 60, 66). Work in V-stitch pattern for 3 rows. On Row 4, work scallop edging.
Layer the three tiers with Tier 1 on top, Tier 2 in the middle, and Tier 3 closest to the body. Seam all three tiers together at the top edge. Attach to the armhole opening using a whip stitch or slip stitch join.
Repeat for the second sleeve.
Finishing Your Ocean Blue Gradient Dress
Weave in all ends using your yarn needle. Take extra care around color change points to ensure they are secure.
Block the dress by soaking in lukewarm water for 15 to 20 minutes. Gently squeeze out excess water (do not wring). Lay flat on blocking mats and pin to measurements. Allow to dry completely.
Attach the button or hook-and-eye closure at the back keyhole opening.
Tips for Success
Take your time with the gauge swatch. A fitted dress demands accurate gauge more than almost any other project.
If you are new to gradient yarns, watch how the color shifts as you work and adjust your starting point if needed to get mint at the neckline.
The chevron lace pattern looks intimidating on paper but makes sense quickly once you work a few repeats. The rhythm becomes almost meditative.
Try on the bodice frequently as you work to ensure a good fit before committing to the full skirt length.
When attaching the ruffle sleeves, pin them in place first and step back to check that they sit symmetrically on both shoulders.
I hope you absolutely love making this beautiful ocean-inspired dress. It is one of those projects that looks museum-worthy when finished but builds logically from one section to the next. If you make this dress, I would genuinely love to see it. Save this pattern to your Pinterest boards so you can find it when you are ready to start, and please leave a comment below to share your progress or finished piece. Happy crocheting!
You Might Also Like
- Rainbow Pastel Shell Baby Dress Free Crochet Pattern
- Dusty Rose Gradient Crochet Mini Dress Free Pattern
- Granny Square Patchwork Baby Dress Free Crochet Pattern
- Sage Green Bow Handbag Free Crochet Pattern
