
I’ve been searching for the perfect baby dress pattern for months now, and this granny square patchwork design is exactly what I was hoping to find. The combination of dusty rose, coral, mauve, and soft peach creates that dreamy vintage look that photographs beautifully for baby showers and first birthday parties.
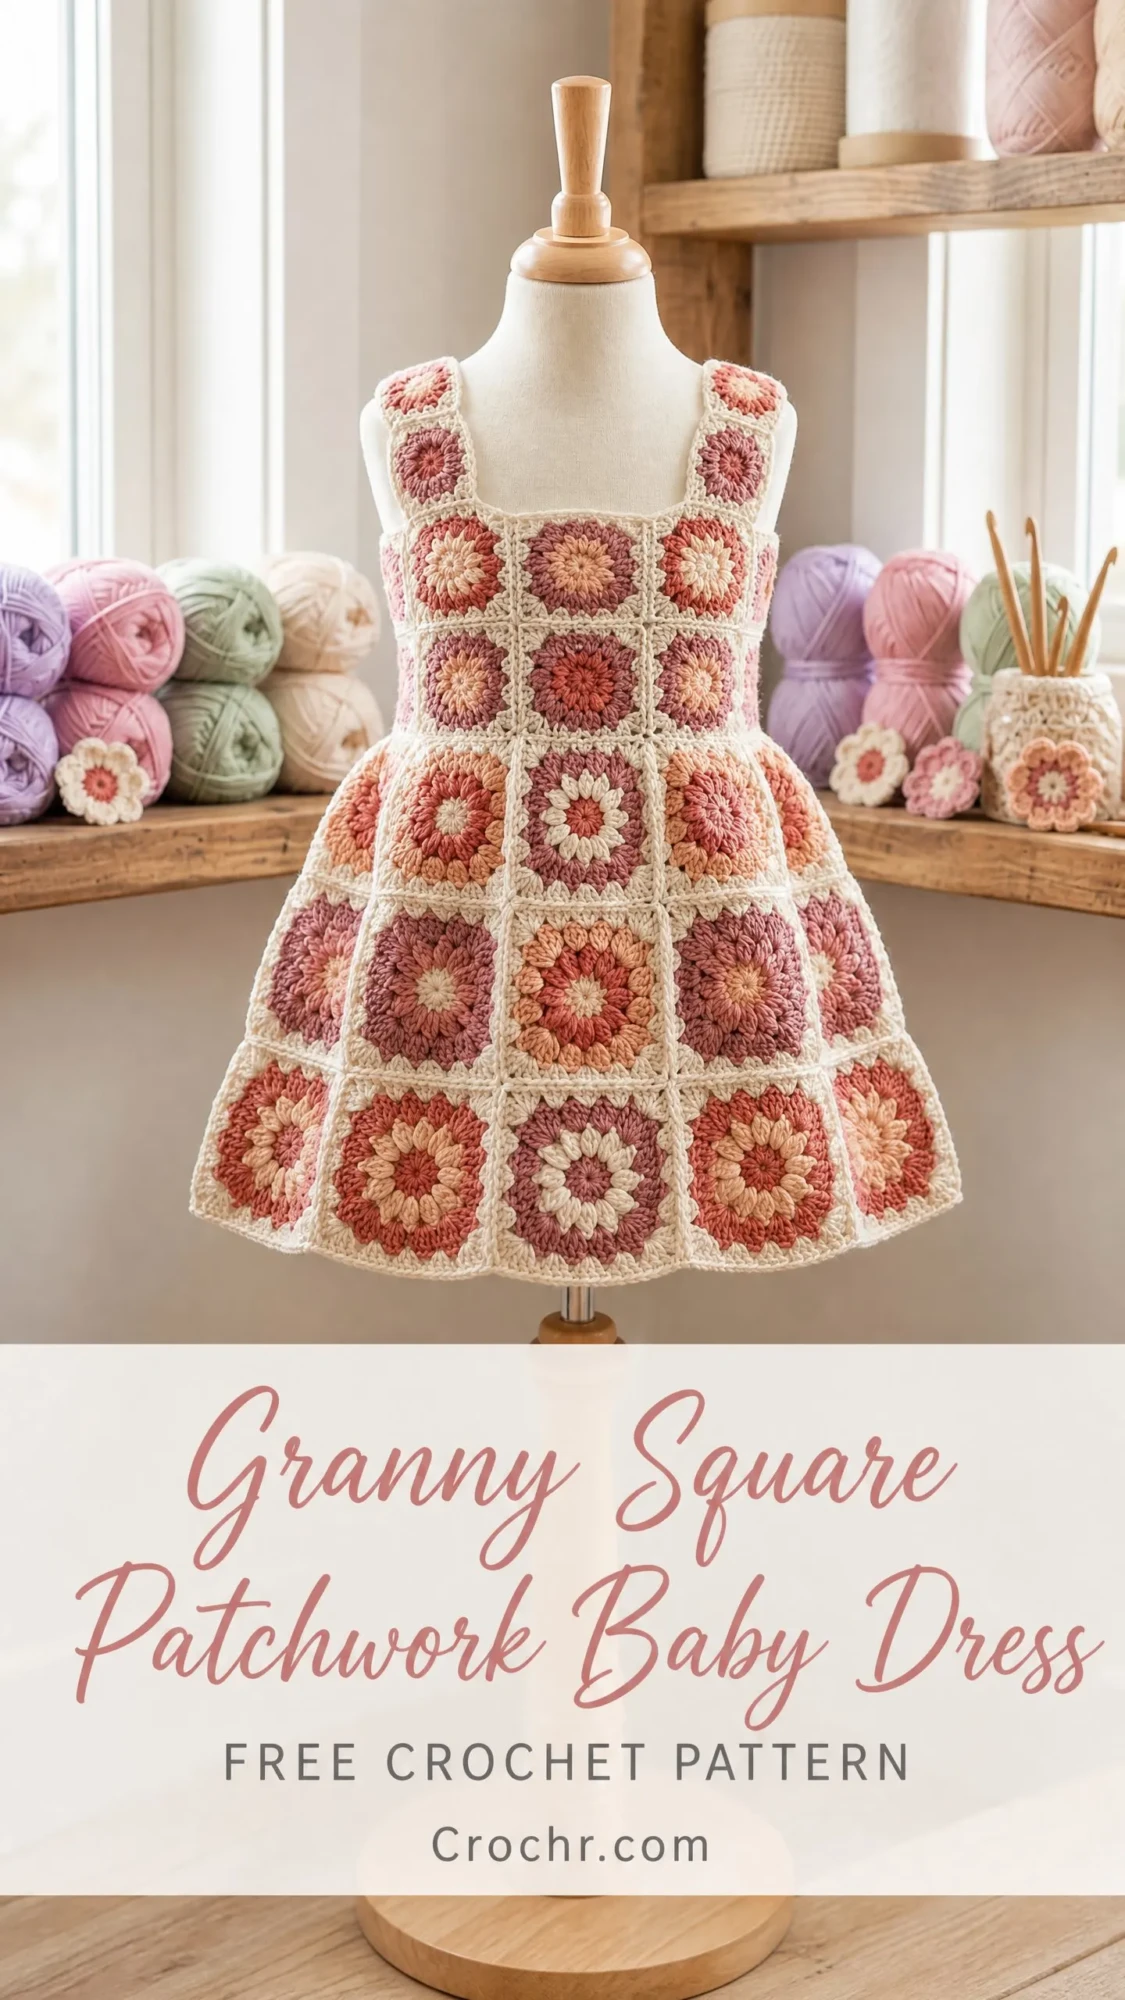
This is my favorite type of project. You get the satisfaction of making small, manageable granny squares, then watching them transform into an adorable A-line sundress. The join as you go technique means minimal sewing at the end, which is always a win in my book.
If you’ve ever wanted to try garment construction but felt intimidated, this crochet pattern breaks everything down into bite-sized pieces. Literally. Each little square is its own mini accomplishment, and before you know it, you’ve got a complete dress ready for that special little one in your life.
Why This Granny Square Baby Dress Pattern Works So Well
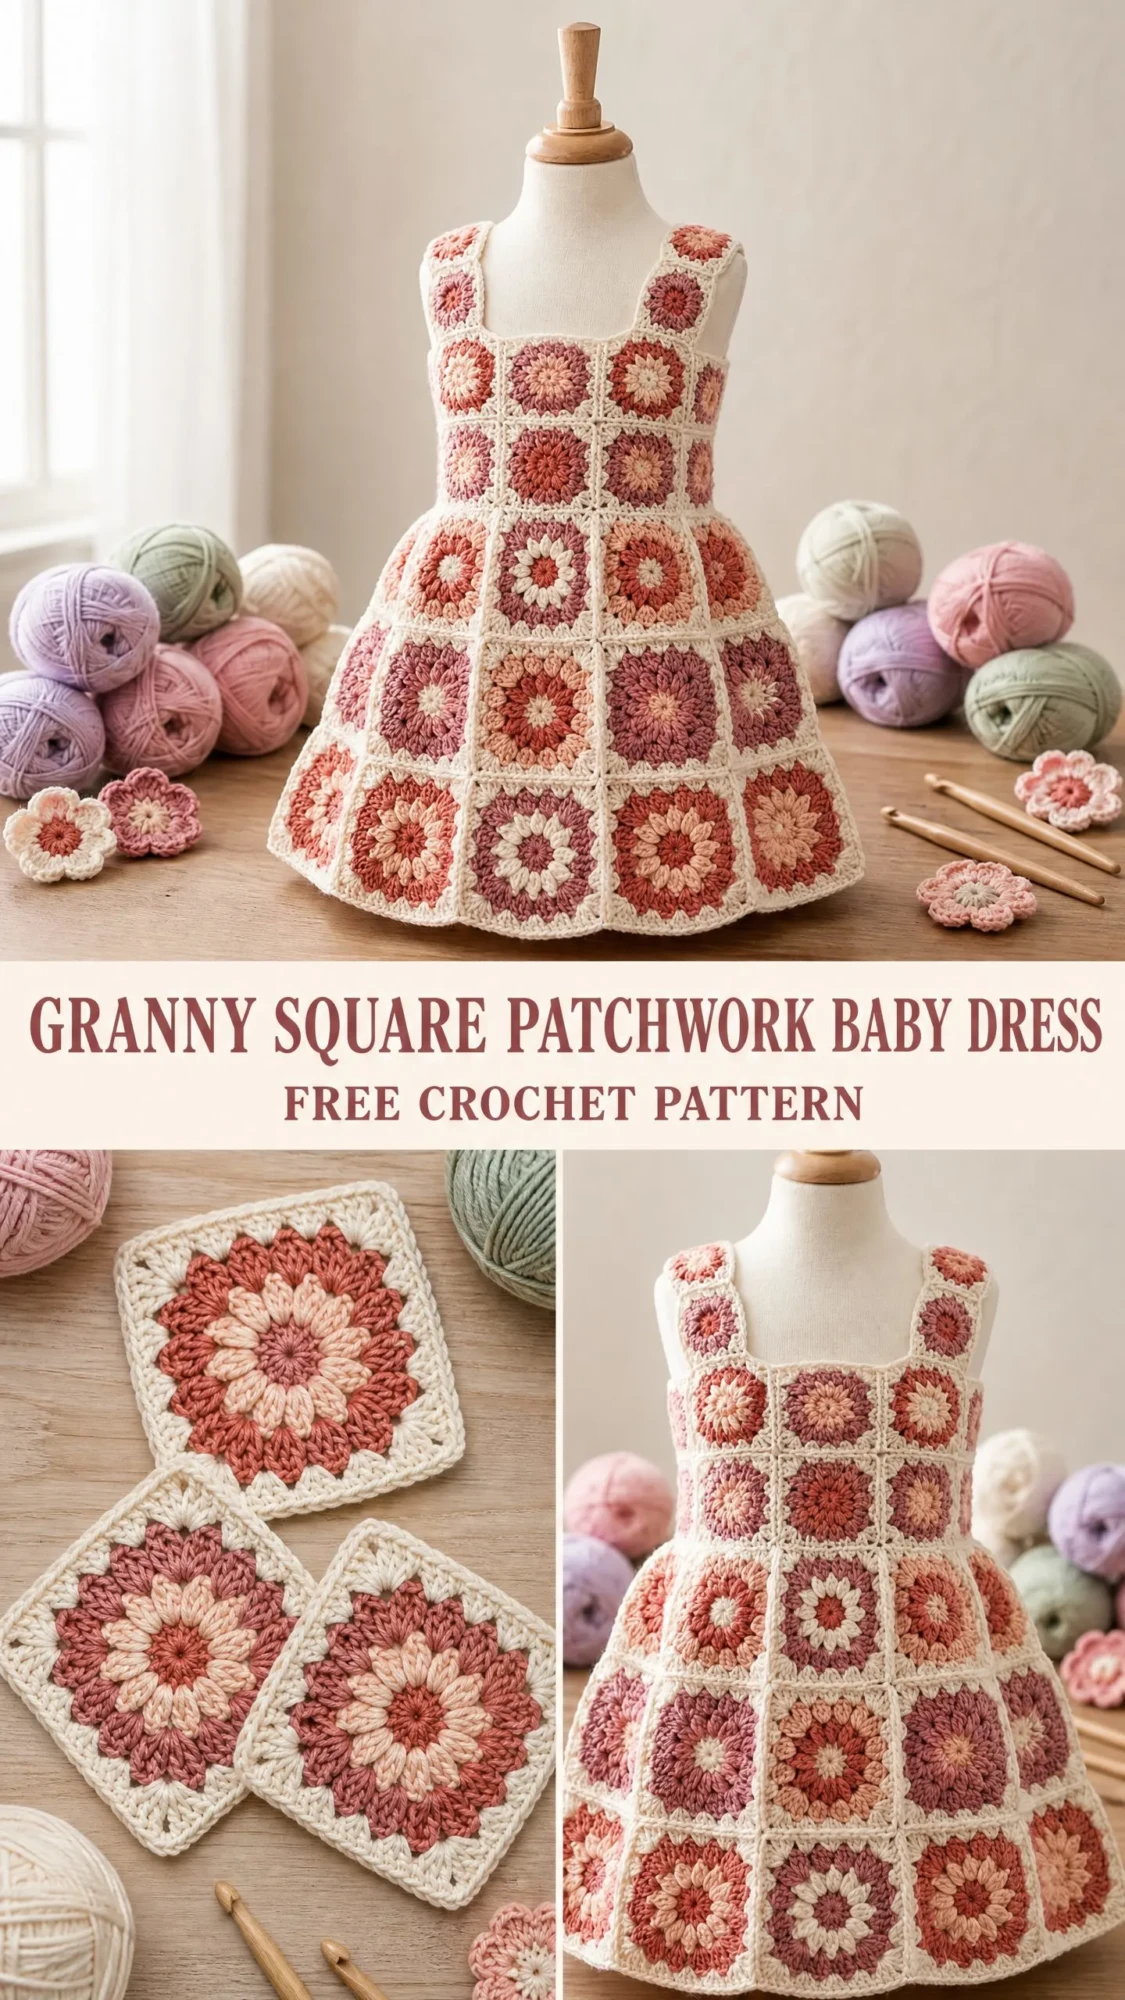
The genius of this design is in the construction method. Instead of working complicated shaping or dealing with confusing increases and decreases, you’re simply making squares and joining them together strategically. The bodice forms a fitted rectangular yoke, and the skirt flares naturally as you add more squares to each row going down.
The square neckline gives it that classic vintage feel, while the wide tank-style shoulder straps stay put on wiggly babies. The back features a center opening with button closures, so you won’t be wrestling the dress over anyone’s head during diaper changes.
What I love most is the color play. Each square uses a slightly different combination of the warm peachy pink tones, creating that beautiful watercolor patchwork effect you see in the finished piece. No two squares are exactly alike, but they all work together harmoniously.
Skill Level and Time Commitment
This pattern is rated intermediate. The individual granny square is absolutely beginner-friendly. If you can chain, double crochet, and slip stitch, you can make these squares. The complexity comes from the join as you go technique and understanding how the squares fit together to create the garment shape.
Plan for approximately 15 to 22 hours of total work time for the size 12 to 18 months. That sounds like a lot, but remember you’re making 46 individual squares. I like to think of it as 46 tiny projects that add up to one stunning dress.
Finished Measurements
The pattern is written for three sizes:
Size 6 to 12 months: chest 18 inches (45.5 cm), dress length 13 inches (33 cm)
Size 12 to 18 months: chest 20 inches (51 cm), dress length 15 inches (38 cm)
Size 18 to 24 months: chest 22 inches (56 cm), dress length 17 inches (43 cm)
The main instructions are written for size 12 to 18 months, with adjustments noted in brackets as [6 to 12 months / 18 to 24 months].
Each finished granny square measures 2.5 inches (6.35 cm) square after blocking. This measurement is critical for the dress to fit properly.
Materials You’ll Need
Yarn
You’ll need light weight yarn, also called DK weight or weight category 3. Here’s the breakdown by color:
Color A (Cream/off-white): approximately 100 [90 / 115] yards
Color B (Dusty rose): approximately 80 [70 / 90] yards
Color C (Coral): approximately 80 [70 / 90] yards
Color D (Mauve/antique rose): approximately 70 [60 / 80] yards
Color E (Soft peach): approximately 70 [60 / 85] yards
Total yardage: approximately 400 [350 / 460] yards (366 [320 / 421] meters)
Yarn Recommendations
Paintbox Yarns Simply DK works beautifully for this project. It’s 100% acrylic with a smooth finish that shows the granny square stitch definition perfectly. Plus it’s machine washable, which is essential for baby items.
Scheepjes Stonewashed gives the dress an heirloom quality with its slightly textured, muted palette. The cotton blend feels lovely against baby skin.
Lion Brand Comfy Cotton Blend is another excellent choice. The 60% cotton and 40% acrylic blend makes it breathable for warmer months while holding color wash after wash.
Whatever yarn you choose, make sure it achieves gauge and comes from the same dye lot for each color.
Hook and Notions
Gauge Information
One granny square, blocked, measures 2.5 inches by 2.5 inches (6.35 cm by 6.35 cm).
I cannot stress this enough. Gauge matters here. Because the dress is assembled from a fixed number of motifs in each row, every quarter inch of deviation per square multiplies across 4 to 8 squares per row. That could result in a dress that’s 1 to 2 inches off the intended measurements.
To check your gauge, make one complete granny square through Round 4. Block it gently and let it dry completely before measuring. If your square is smaller than 2.5 inches, go up a hook size. If it’s larger, go down a hook size.
Abbreviations and Definitions
Here are all the abbreviations you’ll encounter in this pattern:
beg: beginning
ch: chain (yarn over, pull through loop on hook)
ch-sp: chain space (the gap created by a chain stitch)
dc: double crochet (yarn over, insert hook, pull up loop, yarn over and pull through 2 loops, yarn over and pull through remaining 2 loops)
hdc: half double crochet
JAYG: join as you go
pm: place marker
rem: remaining
rep: repeat
rnd: round
RS: right side (the side that faces out when worn)
sc: single crochet (insert hook, pull up loop, yarn over and pull through both loops)
sk: skip
sl st: slip stitch (insert hook, yarn over, pull through both the stitch and the loop on hook in one motion)
sp: space
st(s): stitch(es)
WS: wrong side (the inside of the garment)
yo: yarn over
Special Techniques
Join As You Go Flat Join
This technique lets you connect squares as you work the final round, eliminating most of the sewing at the end. Here’s how it works:
When you’re working the final round of a new square that will sit next to an already-completed square, replace each chain-1 side space with a slip stitch into the corresponding chain space of the neighboring finished square. Skip the chain entirely.
At corners shared between squares, work a slip stitch into the corner chain space of the neighboring square, chain 1, then slip stitch back into the same corner chain space before continuing with your working square corner.
The result is an invisible flat join with no added bulk.
Standing Double Crochet
This technique lets you start a new color mid-round without that obvious starting chain showing on the right side.
Without making a slip knot, create a loop on your hook. Yarn over, insert hook into the indicated stitch or space, yarn over and pull up a loop, yarn over and draw through 2 loops, yarn over and draw through the remaining 2 loops.
Granny Square Instructions
You’ll make all the squares needed for the bodice and skirt following these instructions. Each square has 4 rounds.
Round 1 (Center)
With Color E or Color B (vary across squares), make a magic ring.
Chain 3 (this counts as your first double crochet). Work 2 double crochet into the ring, chain 2. (Work 3 double crochet into ring, chain 2) repeat 3 times. Slip stitch to top of beginning chain-3 to join.
Fasten off, leaving a 6-inch tail to weave.
Stitch count: 12 dc, 4 ch-2 spaces
Round 2
Join Color C or Color D with a standing double crochet into any chain-2 corner space.
Chain 3 (counts as first dc of this corner cluster). Work 2 more double crochet into same corner space, chain 2, work 3 double crochet into same corner space (corner made), chain 1. (Work 3 dc, ch 2, 3 dc) into next ch-2 corner space, chain 1. Repeat from * 2 more times. Slip stitch to top of beginning chain-3 to join.
Fasten off.
Stitch count: 24 dc, 4 ch-2 corner spaces, 4 ch-1 side spaces
Round 3
Join Color B or Color D with a standing double crochet into any chain-2 corner space.
Work (3 dc, ch 2, 3 dc) into corner ch-2 space, chain 1, 3 dc into ch-1 side space, chain 1. Repeat from * 3 more times. Slip stitch to top of beginning chain-3 to join.
Fasten off.
Stitch count: 36 dc, 4 ch-2 corner spaces, 8 ch-1 side spaces
Round 4 (Joining Round)
Join Color A with a standing double crochet into any chain-2 corner space.
For a standalone square (no neighbors yet):
Work (3 dc, ch 2, 3 dc) into corner ch-2 space, chain 1, 3 dc into first ch-1 space, chain 1, 3 dc into next ch-1 space, chain 1. Repeat around all four sides. Slip stitch to top of beginning chain-3.
Fasten off.
Stitch count: 60 dc, 4 ch-2 corner spaces, 12 ch-1 side spaces
For JAYG squares: Work Round 4 as above, but replace each chain-1 or chain-2 along the joining edge(s) with a slip stitch into the corresponding space of the adjacent completed square.
Color Placement Guide
Here’s how to create that beautiful watercolor effect:
Vary the combinations so no two adjacent squares share identical coloring. This creates visual interest across the entire dress.
Square Count Summary
Here’s how many squares you need for each section:
Bodice: 16 squares total (8 front, 8 back)
Skirt Row 1: 8 squares
Skirt Row 2: 10 squares
Skirt Row 3: 12 squares
Grand total: 46 squares
Bodice Construction
Step 1: Make the Bodice Front
Arrange 8 squares in a 4-column by 2-row rectangle. The two top outer squares (columns 1 and 4) form the shoulder straps. The center top position remains open to create the square neckline.
Square 1 (Row 1, Column 1): Work all 4 rounds as standalone. This is the top left strap square.
Square 2 (Row 1, Column 4): Work all 4 rounds as standalone. This is the top right strap square.
Square 3 (Row 2, Column 1): Work Rounds 1 through 3 standalone. On Round 4, join the top edge to the bottom edge of Square 1 using JAYG.
Square 4 (Row 2, Column 2): Work Rounds 1 through 3 standalone. On Round 4, join the left edge to the right edge of Square 3. Top edge remains open for neckline.
Square 5 (Row 2, Column 3): Work Rounds 1 through 3. On Round 4, join left edge to right edge of Square 4.
Square 6 (Row 2, Column 4): Work Rounds 1 through 3. On Round 4, join left edge to right edge of Square 5, join top edge to bottom edge of Square 2.
Squares 7 and 8 (Row 1, Columns 2 and 3): These frame the neckline. Join them to the straps and to each other, with top edges remaining open.
Checkpoint: The completed front panel should measure approximately 10 inches wide (4 squares x 2.5 inches) and 5 inches tall (2 squares x 2.5 inches).
Step 2: Make the Bodice Back Panels
Create two separate panels, each 2 squares wide by 2 squares tall. This creates the center back opening.
Left back panel: Work 4 squares (B1 through B4) as a joined rectangle.
Right back panel: Work 4 squares (B5 through B8) as a mirror of the left panel.
Step 3: Join Front to Back at Side Seams
Hold the front panel and left back panel with right sides together. Using Color A and a yarn needle (or slip stitch join for a decorative seam), join the left outer edge of the bodice front to the right outer edge of the left back panel.
Join only the lower row of side squares (Row 2). The upper row remains free to create the armhole.
Repeat for the right side.
Checkpoint: The joined bodice should form a tube open at top and bottom. Chest circumference should measure approximately 20 inches.
Step 4: Join Shoulder Straps
Whipstitch or slip stitch join the top edge of the back panels to the top edge of the front strap squares.
Step 5: Button Loops and Buttons
Along the right back panel inner edge, work single crochet evenly (approximately 1 sc per dc stitch). At the top, work chain 5, slip stitch into same stitch to form a button loop.
Work matching single crochet edging on the left back panel without button loops.
Sew 2 small buttons to the left back panel, aligning with the button loops.
Skirt Construction
The skirt builds downward from the bodice, with squares increasing each row for the A-line flare.
Skirt Row 1 (8 squares)
Attach new squares to the entire lower edge of the bodice. Work 4 squares for the front, 2 for each back panel. Join adjacent squares at their vertical edges to close the skirt into a continuous ring.
Circumference: 8 squares x 2.5 inches = 20 inches
Skirt Row 2 (10 squares)
Join 8 squares to the bottom of Row 1. Add 2 extra squares at the side seam positions to create the flare.
Circumference: 10 squares x 2.5 inches = 25 inches
Skirt Row 3 (12 squares)
Join 10 squares to the bottom of Row 2. Add 2 more squares at evenly spaced positions.
Circumference: 12 squares x 2.5 inches = 30 inches
Final checkpoint: Total dress length from shoulder to hem should measure approximately 15 inches.
Finishing Touches
Hem Edging
Join Color A with a standing single crochet into any lower corner chain-2 space.
Work 1 single crochet into every double crochet stitch and 1 single crochet into every chain-1 space along the lower edges. Work (1 sc, ch 1, 1 sc) into each corner chain-2 space.
Slip stitch to first single crochet to join. Fasten off.
Armhole Edging
Join Color A with a standing single crochet into the bottom corner of one armhole opening.
Work 1 single crochet into every available stitch and space around the armhole (approximately 36 to 40 sc around).
Slip stitch to join. Fasten off. Repeat on second armhole.
Neckline Edging
Join Color A at the top corner of the right strap. Work single crochet evenly around the entire neckline opening, including across the back neckline edges.
Slip stitch to join. Fasten off.
Weave in all remaining ends on the wrong side.
Tips for Success
Block your squares before joining. This makes the JAYG process so much easier because all your squares will be uniform.
Use stitch markers liberally. Mark which edges need to join to which squares. Trust me, when you have 46 squares that look similar, you’ll thank yourself.
Change colors by completing the last stitch of a round with the new color. This keeps your color changes neat and invisible.
Weave ends as you go. With this many color changes, leaving all the ends for the end will feel overwhelming.
Caring for the Finished Dress
If you used acrylic or acrylic blend yarn, this dress is machine washable on a gentle cycle with cold water. Lay flat to dry to maintain the shape.
For cotton or cotton blend yarns, hand washing is gentler on the fibers. Reshape while damp and dry flat.
Store the dress folded rather than hung to prevent stretching at the straps.
I really hope you enjoy making this granny square patchwork baby dress as much as I enjoyed writing up this crochet tutorial. Save this pattern to your Pinterest boards so you can find it easily when you’re ready to start, and please leave a comment below if you make one. I’d absolutely love to see your color combinations and hear how it turns out!
You Might Also Like
- Rainbow Hexagon Pride Blanket Free Crochet Pattern
- Mint and Sage Green Baby Dress Free Crochet Pattern
- Blush Pink Seahorse Baby Blanket Free Crochet Pattern
- Sunset Glow Granny Square Tote Free Crochet Pattern
