
I have been wanting to design a piece that combines my love for beadwork with miniature amigurumi for ages. This anklet gave me the perfect excuse to experiment with both techniques in one project. My goals were clear from the start: create something wearable that showcases intricate seed bead tapestry crochet, add whimsical animal charms that actually look like the creatures they represent, and make the whole thing adjustable so it fits a range of ankle sizes.
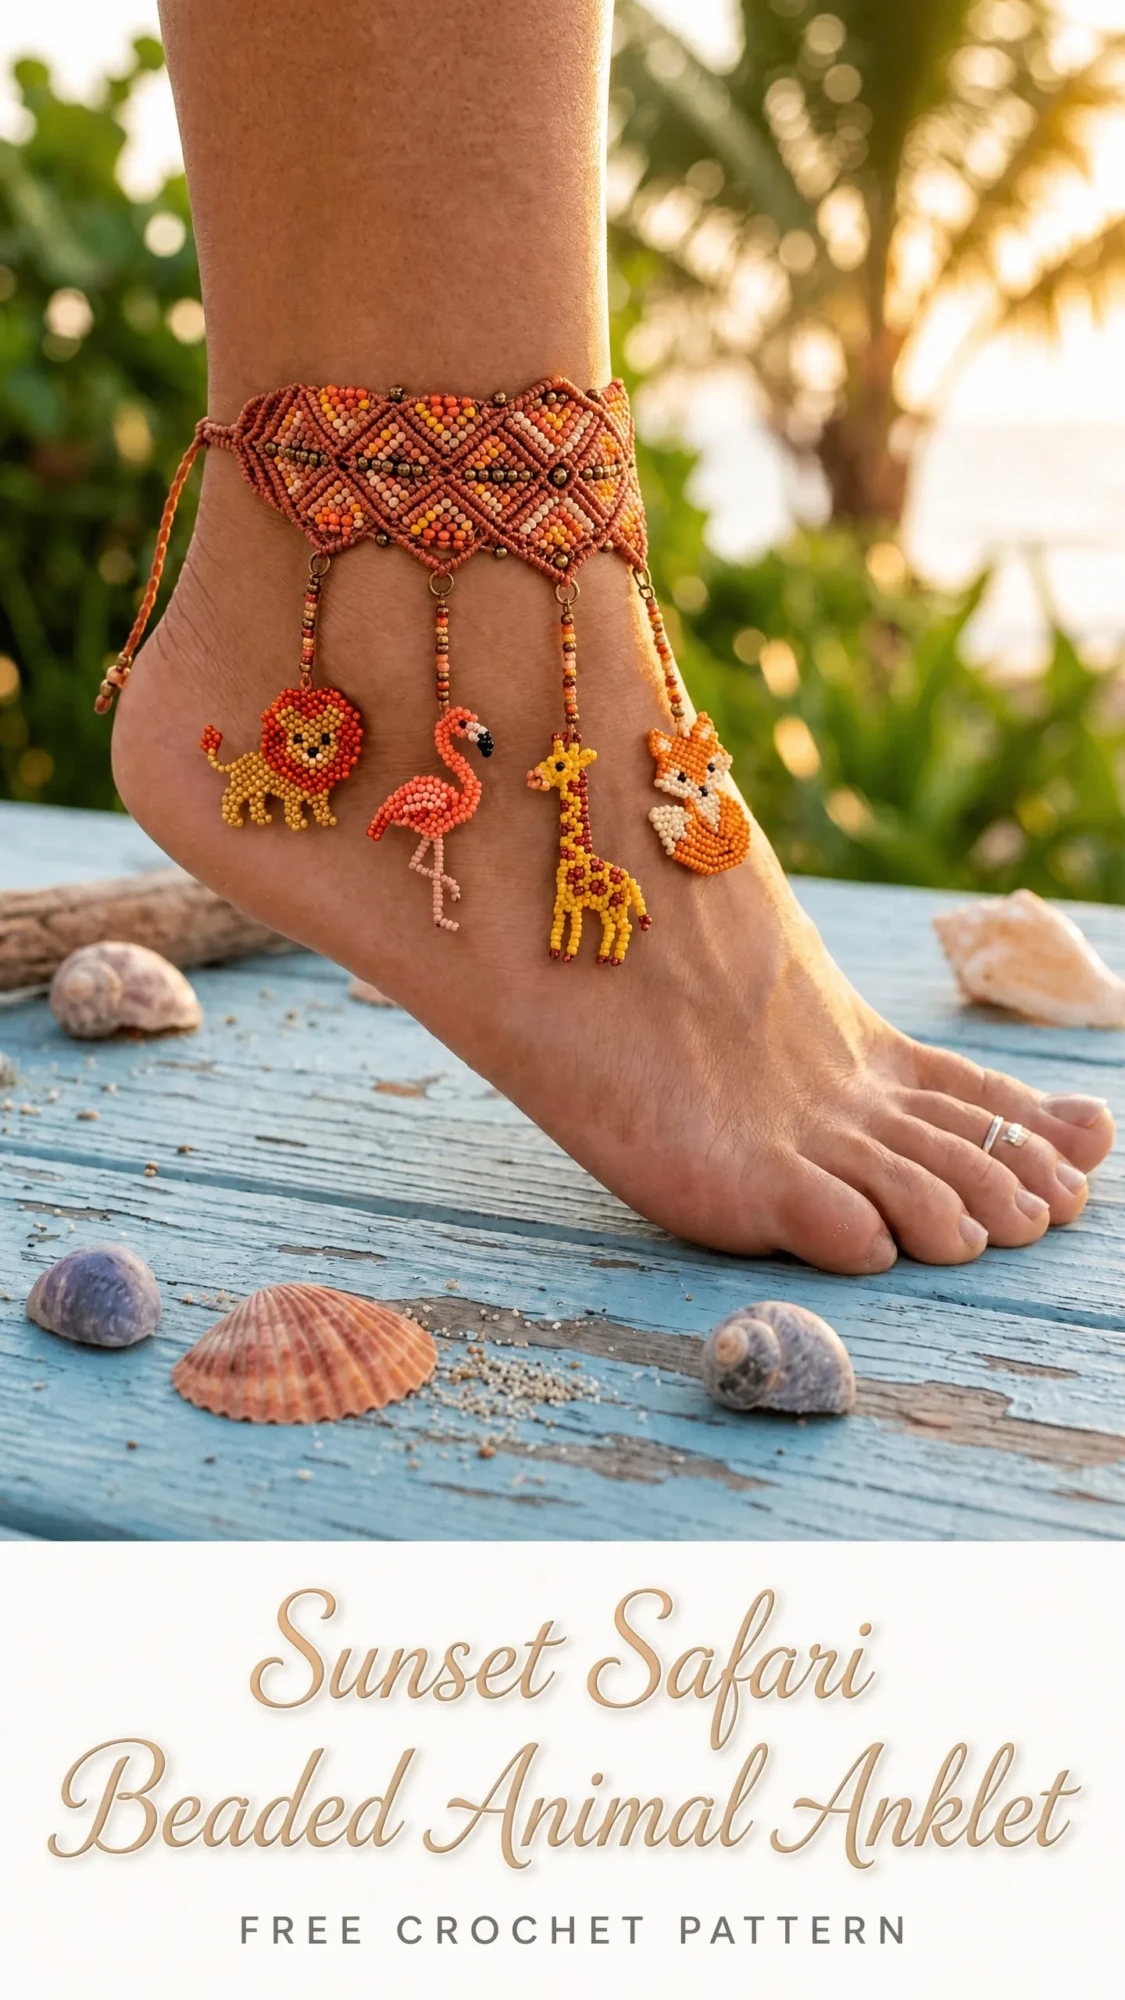
The geometric diamond pattern on the band took several attempts to get right. I wanted those warm sunset colors to pop against the terracotta background without looking muddy or cluttered. And those little dangling animals? Each one needed to be recognizable at under an inch tall, which meant every single stitch mattered.
I am SO pleased with how this turned out! The lion’s fluffy mane, the flamingo’s bent legs, the giraffe’s spots, the fox’s white chest patch. They all came together better than I hoped. If you love detailed handwork and want a statement piece that will get compliments everywhere you go, this is the project for you.
About This Beaded Anklet Crochet Pattern
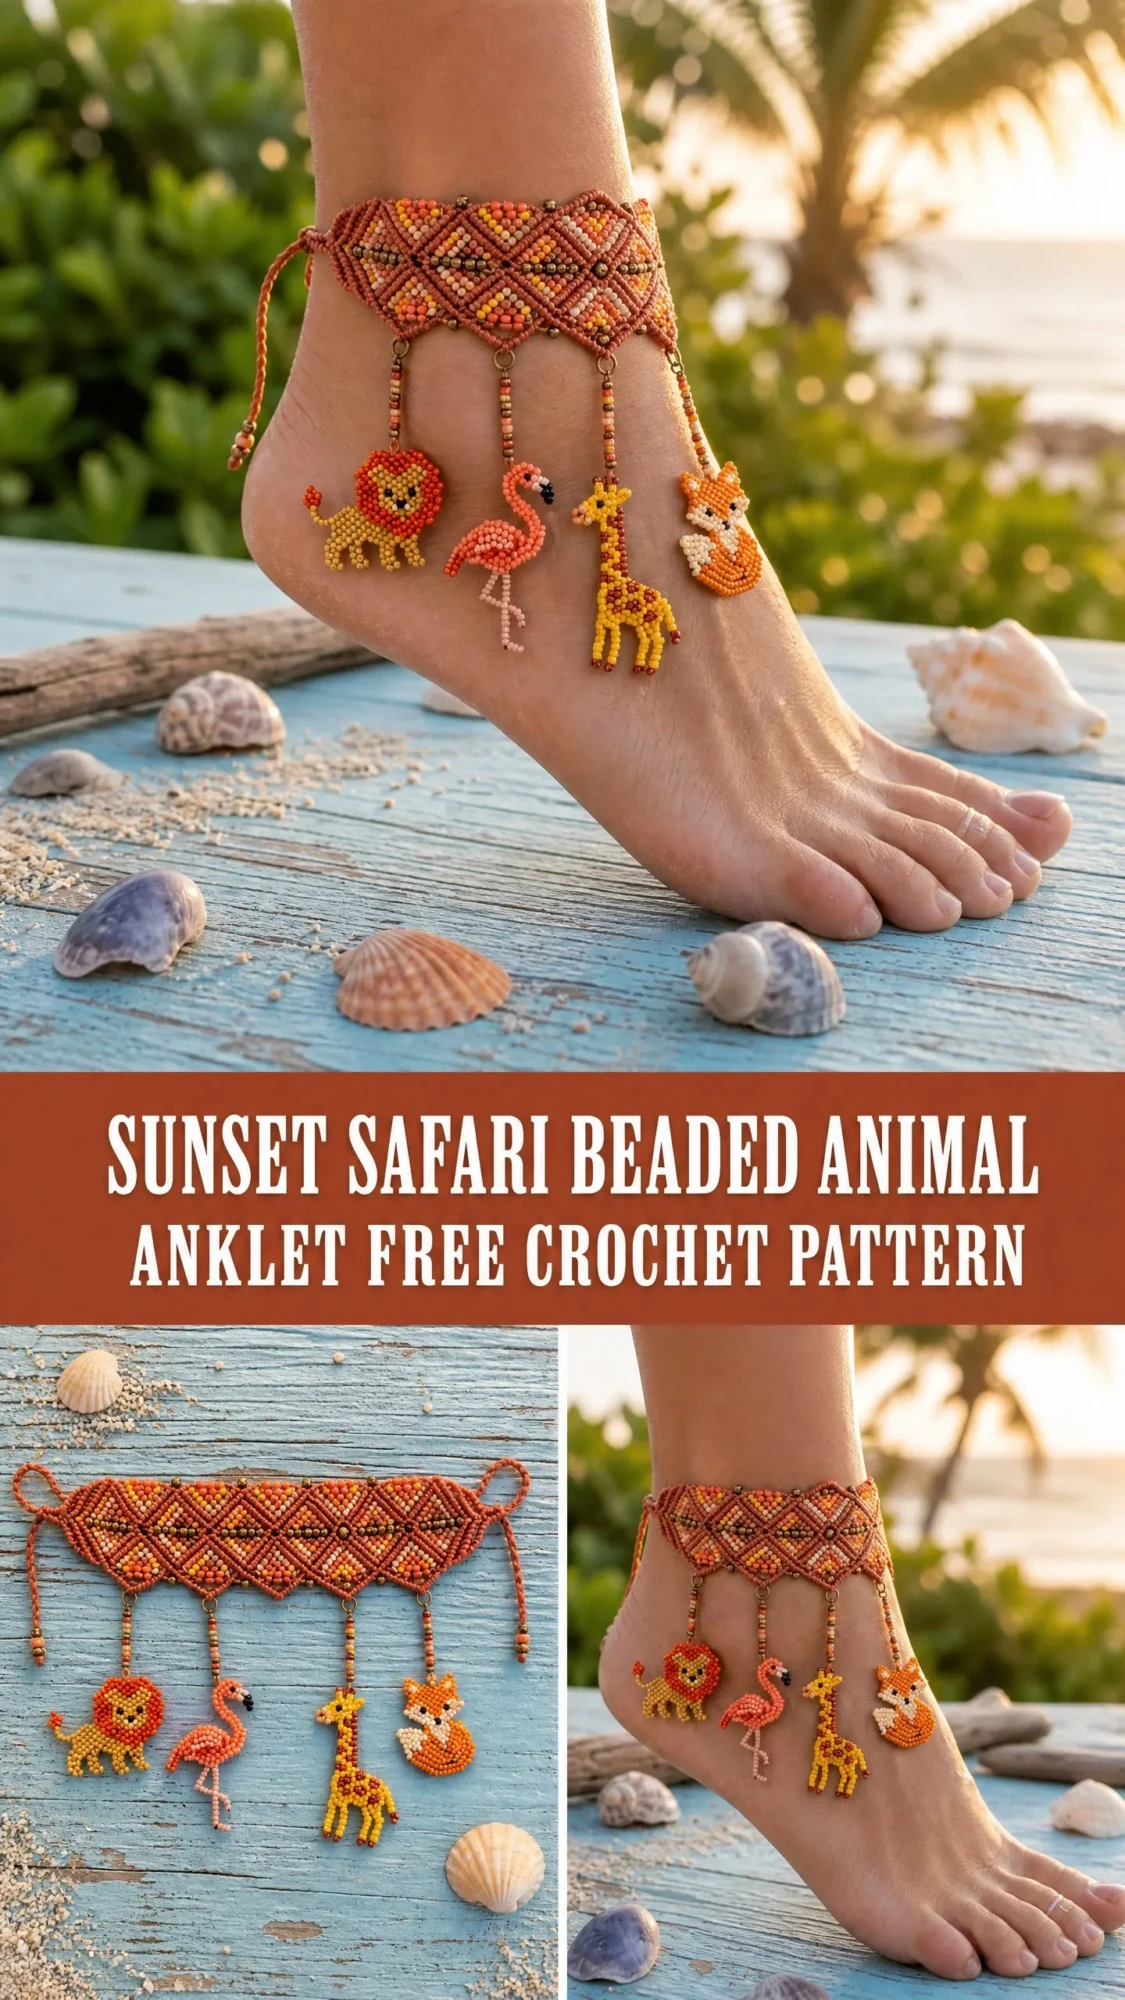
This anklet combines two distinct crochet techniques into one stunning accessory. The main band uses tapestry crochet with seed beads pre-strung onto thread, creating that gorgeous geometric diamond pattern you see across the entire width. Four separately crocheted miniature animal charms hang from the band’s lower edge via beaded dangle strands and bronze jump rings.
The construction method is straightforward once you understand the basics. You work the band flat in rows of single crochet (sc), which is simply inserting your hook into a stitch, pulling up a loop, then pulling through both loops on your hook. Beads get placed on wrong side rows, where you push them through to the right side of the fabric. Each charm is worked in continuous rounds using tiny amigurumi techniques, which just means crocheting in a spiral without joining at the end of each round.
The finished band measures approximately 6.5 inches wide and 1.25 inches tall. Each animal charm is about 0.75 to 1 inch tall. The adjustable ties let you fit ankles measuring 8 to 10 inches around.
Skill Level and Time Estimate
I would call this advanced beginner to intermediate. The band itself uses basic single crochet with bead placement, which becomes second nature after a few rows of practice. The miniature animal charms require comfort working in the round at a very small scale, changing colors, and reading simple shaping instructions.
If you can make a basic amigurumi ball and work single crochet confidently, you can absolutely make this anklet. The tiny scale might feel fiddly at first, but take your time and use good lighting.
Time estimate: approximately 8 to 12 hours total. The band takes roughly 2 hours. Each animal charm takes 1 to 2 hours depending on your experience with miniature work. Finishing and assembly takes approximately 1 hour.
Materials You Will Need
Thread and Yarn
For the main band:
For the animal charms:
Beads and Hardware
Tools
Recommended Yarn Brands
Lizbeth Size 10 Crochet Thread by Handy Hands offers excellent twist consistency and the full color range needed.
DMC Cebelia Size 10 Crochet Thread has a smooth finish that works beautifully for bead work because beads slide easily without snagging.
Aunt Lydia’s Classic Crochet Thread Size 10 is budget-friendly and widely available at most craft stores.
Gauge
Main Band:
18 single crochet = 2 inches / 5 cm
20 rows = 2 inches / 5 cm
Worked in single crochet with size 10 thread and 1.65 mm hook, flat, with beads placed on wrong-side rows.
Animal Charms:
Exact gauge is not critical. Work tightly enough that fiberfill stuffing does not show through. As a general reference, 10 single crochet = approximately 0.75 inch with size 12 hook and 3-strand embroidery floss.
Abbreviations
Special Stitches Explained
Bead-Push Bead (BPB)
Before you start crocheting, you need to pre-string all your seed beads onto the thread in the correct color sequence. Use your beading needle for this. Push the beads down the thread away from your hook while working right-side rows.
On wrong-side rows (when the back of your work faces you), slide one bead up snugly against the back of your last completed stitch. Then insert your hook into the next stitch and complete your single crochet normally. The bead is now locked between two stitches and sits on the right side of your fabric.
This technique feels awkward at first, but after a few rows it becomes automatic. Just remember: beads go on wrong-side rows only.
Magic Ring (MR)
Form a loop with your thread, leaving a 6-inch tail. Insert your hook into the loop, pull up a loop of working thread, chain 1, then work the required number of single crochets into the center of the loop. Pull the tail end firmly to close the ring.
The magic ring gives you a tight, closed center for your charms with no hole in the middle.
Tapestry Color Carry
When working the geometric diamond pattern, you will carry unused thread colors loosely along the wrong side and crochet over them with your active color. Do not cut thread between color sections unless a color is not used for more than 4 stitches in a row.
Pattern Notes Before You Begin
1. The main band is worked flat in rows. Turn your work at the end of each row. Chain 1 at the beginning of each row counts as a turning chain but does NOT count as a stitch.
2. Pre-string beads in reverse order of use: the last bead you will place goes onto the thread first.
3. The four animal charms are worked separately and completely before assembly. All charms are worked in continuous spiral rounds unless stated otherwise. Use a stitch marker in the first stitch of each round and move it up as you go.
4. The diamond geometric pattern repeat is 6 stitches wide and 8 rows tall. The band is 36 stitches wide and 10 rows tall, with a bronze bead row at top and bottom, giving 12 rows total plus a final Row 13.
Main Band Instructions
Preparation
Pre-string seed beads onto Color A (terracotta) thread before beginning. You will need approximately 252 beads. String them in the color sequence described below, remembering to string in reverse order.
The bronze beads are placed at positions 3, 9, 15, 21, 27, and 33 on Rows 1 and 13. All other positions get terracotta beads on those rows.
Foundation and Row Sequence
Using Color A and 1.65 mm hook, chain 37.
Row 1 (WS, bead row): Ch 1, turn. Working into the second chain from hook, sc with BPB (terracotta bead) in each chain across, placing bronze beads at positions 3, 9, 15, 21, 27, 33. (36 sts)
Row 2 (RS, no beads): Ch 1, turn. Sc in each stitch across. (36 sts)
Row 3 (WS, bead row): Ch 1, turn. Work bead sequence: terracotta, terracotta, coral, terracotta, terracotta, terracotta. Repeat this 6-stitch sequence 6 times across. (36 sts)
Row 4 (RS): Ch 1, turn. Sc in each st across. (36 sts)
Row 5 (WS, bead row): Ch 1, turn. Work bead sequence: terracotta, coral, peach, coral, terracotta, terracotta. Repeat 6 times. (36 sts)
Row 6 (RS): Ch 1, turn. Sc in each st across. (36 sts)
Row 7 (WS, bead row): Ch 1, turn. Work bead sequence: coral, peach, yellow, peach, coral, terracotta. Repeat 6 times. (36 sts)
Row 8 (RS): Ch 1, turn. Sc in each st across. (36 sts)
Row 9 (WS, bead row): Ch 1, turn. Work bead sequence: terracotta, coral, peach, coral, terracotta, terracotta. Repeat 6 times. (36 sts)
Row 10 (RS): Ch 1, turn. Sc in each st across. (36 sts)
Row 11 (WS, bead row): Ch 1, turn. Work bead sequence: terracotta, terracotta, coral, terracotta, terracotta, terracotta. Repeat 6 times. (36 sts)
Row 12 (RS): Ch 1, turn. Sc in each st across. (36 sts)
Row 13 (WS): Ch 1, turn. Work top bronze divider row same as Row 1. (36 sts)
Do not fasten off. Proceed to tie construction.
Tie Construction
At the end of Row 13, chain 30 stitches loosely. Slip stitch back along the chain to reinforce it, then fasten off, leaving a 6-inch tail.
Rejoin thread to the opposite end of the foundation chain row at stitch 1. Chain 30 stitches loosely. Slip stitch back along the chain, fasten off leaving a 6-inch tail.
For a braided tie alternative, leave thread tails approximately 12 inches long on each end and braid them into cords 4 to 5 inches long, securing with an overhand knot.
Lion Charm Instructions
Colors: golden yellow (Y) for body, orange-red (R) for mane, black (B) for face details.
Body and Head
Rnd 1: MR, 6 sc into ring. (6 sts)
Rnd 2: Inc in each st around. (12 sts)
Rnd 3: (Sc in 1 st, inc in next st) 6 times. (18 sts)
Rnd 4: Sc in each st around. (18 sts)
Rnd 5: Sc in each st around. (18 sts)
Rnd 6: (Sc in 1 st, sc2tog) 6 times. (12 sts)
Begin stuffing lightly.
Rnd 7: Sc2tog 6 times. (6 sts)
Fasten off, pull tail through remaining sts to close.
Mane Ring
Using orange-red thread, chain 24. Sl st into first chain to form a ring. Work 2 sc into each chain around the ring. (48 sts) Fasten off. Sew around the outer edge of the head at Rnds 4 to 5.
Tail
Using yellow thread, chain 8. Sc back along chain from 2nd ch from hook. At tip, work 3 sc into last ch for the tuft. Fasten off. Sew to back of body.
Legs
Make 4. For each: chain 4, sl st into 2nd ch from hook and each ch back to base. Sew 2 to front lower body and 2 to back.
Face Details
Using black thread, embroider two small straight-stitch eyes and a V-shaped nose at approximately Rnd 3 from top of head.
Flamingo Charm Instructions
Colors: flamingo pink (P) for body, pale pink (L) for legs and neck, black for beak tip.
Body
Rnd 1: MR, 6 sc into ring. (6 sts)
Rnd 2: Inc in each st around. (12 sts)
Rnd 3: Sc in each st around. (12 sts)
Rnd 4: Sc in each st around. (12 sts)
Rnd 5: (Sc in 2 sts, sc2tog) 3 times. (9 sts)
Rnd 6: (Sc in 1 st, sc2tog) 3 times. (6 sts)
Stuff lightly and close.
Neck
Using pink thread, chain 6. Sc back along the chain. Sew base to top of body. (6 sts)
Head
Using pink thread, MR, 6 sc. (6 sts)
Rnd 2: Inc in each st. (12 sts)
Rnd 3: Sc in each st. (12 sts)
Rnd 4: Sc2tog 6 times. (6 sts)
Close, stuff very lightly, sew to top of neck.
Beak
Using pale pink thread, chain 4. Sl st back along chain. Add a tiny black stitch at the tip. Sew to head.
Legs
Make 2. Using pale pink thread, chain 8. Sl st into 4th chain from hook for the foot bend, then sl st back to base. Sew both to underside of body.
Giraffe Charm Instructions
Colors: yellow-gold (G) for body, dark brown (D) for spots and hooves.
Body
Rnd 1: MR, 6 sc. (6 sts)
Rnd 2: Inc in each st. (12 sts)
Rnd 3: (Sc in 1 st, inc) 6 times. (18 sts)
Rnd 4: Sc in each st. (18 sts)
Rnd 5: Sc in each st. (18 sts)
Rnd 6: (Sc in 1 st, sc2tog) 6 times. (12 sts)
Stuff lightly.
Rnd 7: Sc2tog 6 times. (6 sts)
Close.
Neck
Using yellow-gold thread, chain 10. Sc back along all 10 chains. Sew base to top of body.
Head
MR, 6 sc. (6 sts)
Rnd 2: Inc in each st. (12 sts)
Rnd 3: Sc in each st around. (12 sts)
Rnd 4: (Sc in 2 sts, sc2tog) 3 times. (9 sts)
Close, stuff lightly, sew to top of neck.
Ossicones (Horns)
Make 2. Chain 3, sl st back. Sew to top of head.
Legs
Make 4. Chain 7. Sc back along chain. At last 2 sts, switch to dark brown for the hoof. Sew to body.
Spots
Using dark brown thread, embroider 6 to 8 small irregular cross stitches or French knots scattered across the body.
Fox Charm Instructions
Colors: golden orange (O) for body and head, cream white (W) for chest and tail tip, black for face details.
Body
Rnd 1: MR, 6 sc in orange. (6 sts)
Rnd 2: Inc in each st. (12 sts)
Rnd 3: (Sc in 1 st, inc) 6 times. (18 sts)
Rnd 4: Sc in each st. (18 sts)
Rnd 5: Sc in 6 sts in white (chest panel), sc in 12 sts in orange. (18 sts)
Rnd 6: (Sc in 1 st, sc2tog) 6 times in orange. (12 sts)
Stuff lightly.
Rnd 7: Sc2tog 6 times. (6 sts)
Close.
Head
MR, 6 sc in orange. (6 sts)
Rnd 2: Inc in each st. (12 sts)
Rnd 3: Sc in each st. (12 sts)
Rnd 4: Sc in each st. (12 sts)
Rnd 5 (Muzzle): Work next 4 sts in white, continue remaining 8 sts in orange. (12 sts)
Rnd 6: Sc2tog 6 times in orange. (6 sts)
Close, stuff lightly, sew to body.
Ears
Make 2. Using orange thread, chain 3. Row 1: sc 2 sts across. Row 2: sc2tog. (1 st) Fasten off. Sew upright to top of head.
Tail
Chain 10 in orange. Sc back along chain in orange for 7 chains, then switch to white and sc in last 3 chains. Sew to back lower body.
Legs
Make 4. Chain 4, sl st back along chain. Sew to lower body.
Face
Embroider 2 small black eyes and a tiny black nose with straight stitches.
Assembly Instructions
Step 1: Confirm all four charms are complete, stuffed, closed, and all tails are woven in except the single long tail left on each charm for attachment.
Step 2: Open a 5mm bronze jump ring for each of the four attachment points on the band lower edge at stitches 7, 14, 21, and 28 of Row 1.
Step 3: For each dangle strand, cut two 5-inch lengths of Color A thread. Fold together and loop through the 5mm jump ring. Thread 8 to 10 seed beads in mixed earth tones onto the doubled strand.
Step 4: At the bottom of each bead strand, thread a 3mm jump ring onto the strand. Tie through the ring using two overhand knots pulled tight. Trim to 0.1 inch.
Step 5: Using the long tail left on each charm, loop it several times through the 3mm jump ring. Pull tight and secure with two overhand knots. Attach charms in this order from left to right: lion, flamingo, giraffe, fox.
Step 6: Check that all four charms hang at approximately the same level. Adjust bead strand lengths if needed before knotting permanently.
Size Customization Tips
To make the band longer for larger ankles, add 6 stitches to the foundation chain for each additional diamond repeat. Each 6-stitch addition adds approximately 0.65 inch to the band length.
To make the band shorter, reduce the foundation chain by 6 stitches per repeat removed. Minimum recommended width is 24 stitches for a slim anklet with 3 charms.
To make a bracelet instead of an anklet, reduce the foundation chain to 25 stitches and use 2 to 3 charms.
Finishing and Care
Lightly wet block the main band only, not the charms. Pin flat on a foam blocking mat and allow to dry completely. Do not wet block the animal charms, as the stuffing will absorb water and may distort.
Hand wash only in cool water with gentle soap. Lay flat to dry away from direct sunlight. Remove before swimming or bathing.
Thank you so much for choosing this pattern! I hope you love making your Sunset Safari Beaded Animal Anklet as much as I loved designing it. If you create one, I would absolutely love to see it. Tag me on Instagram or share a photo on Facebook so I can cheer you on.
If this pattern is calling your name but you are not quite ready to start yet, go ahead and save it to your Pinterest boards so you can find it easily later. And please drop a comment below if you make one of these anklets. I would love to hear which animal charm is your favorite!
You Might Also Like
- Sage Green Spiral Puff Stitch Clutch Free Crochet Pattern
- Dusty Rose Pink Drawstring Bucket Bag Free Crochet Pattern
- Black Cat Halloween Tote Bag Free Crochet Pattern
- Sage Green Boho Backpack Free Crochet Pattern
