
Last spring, my best friend called me in a panic. Her sister’s baby shower was three weeks away, and she wanted to give something handmade. Something special. Something that would make the new mom cry happy tears when she opened it. I pulled out my hook that same evening and started sketching ideas.
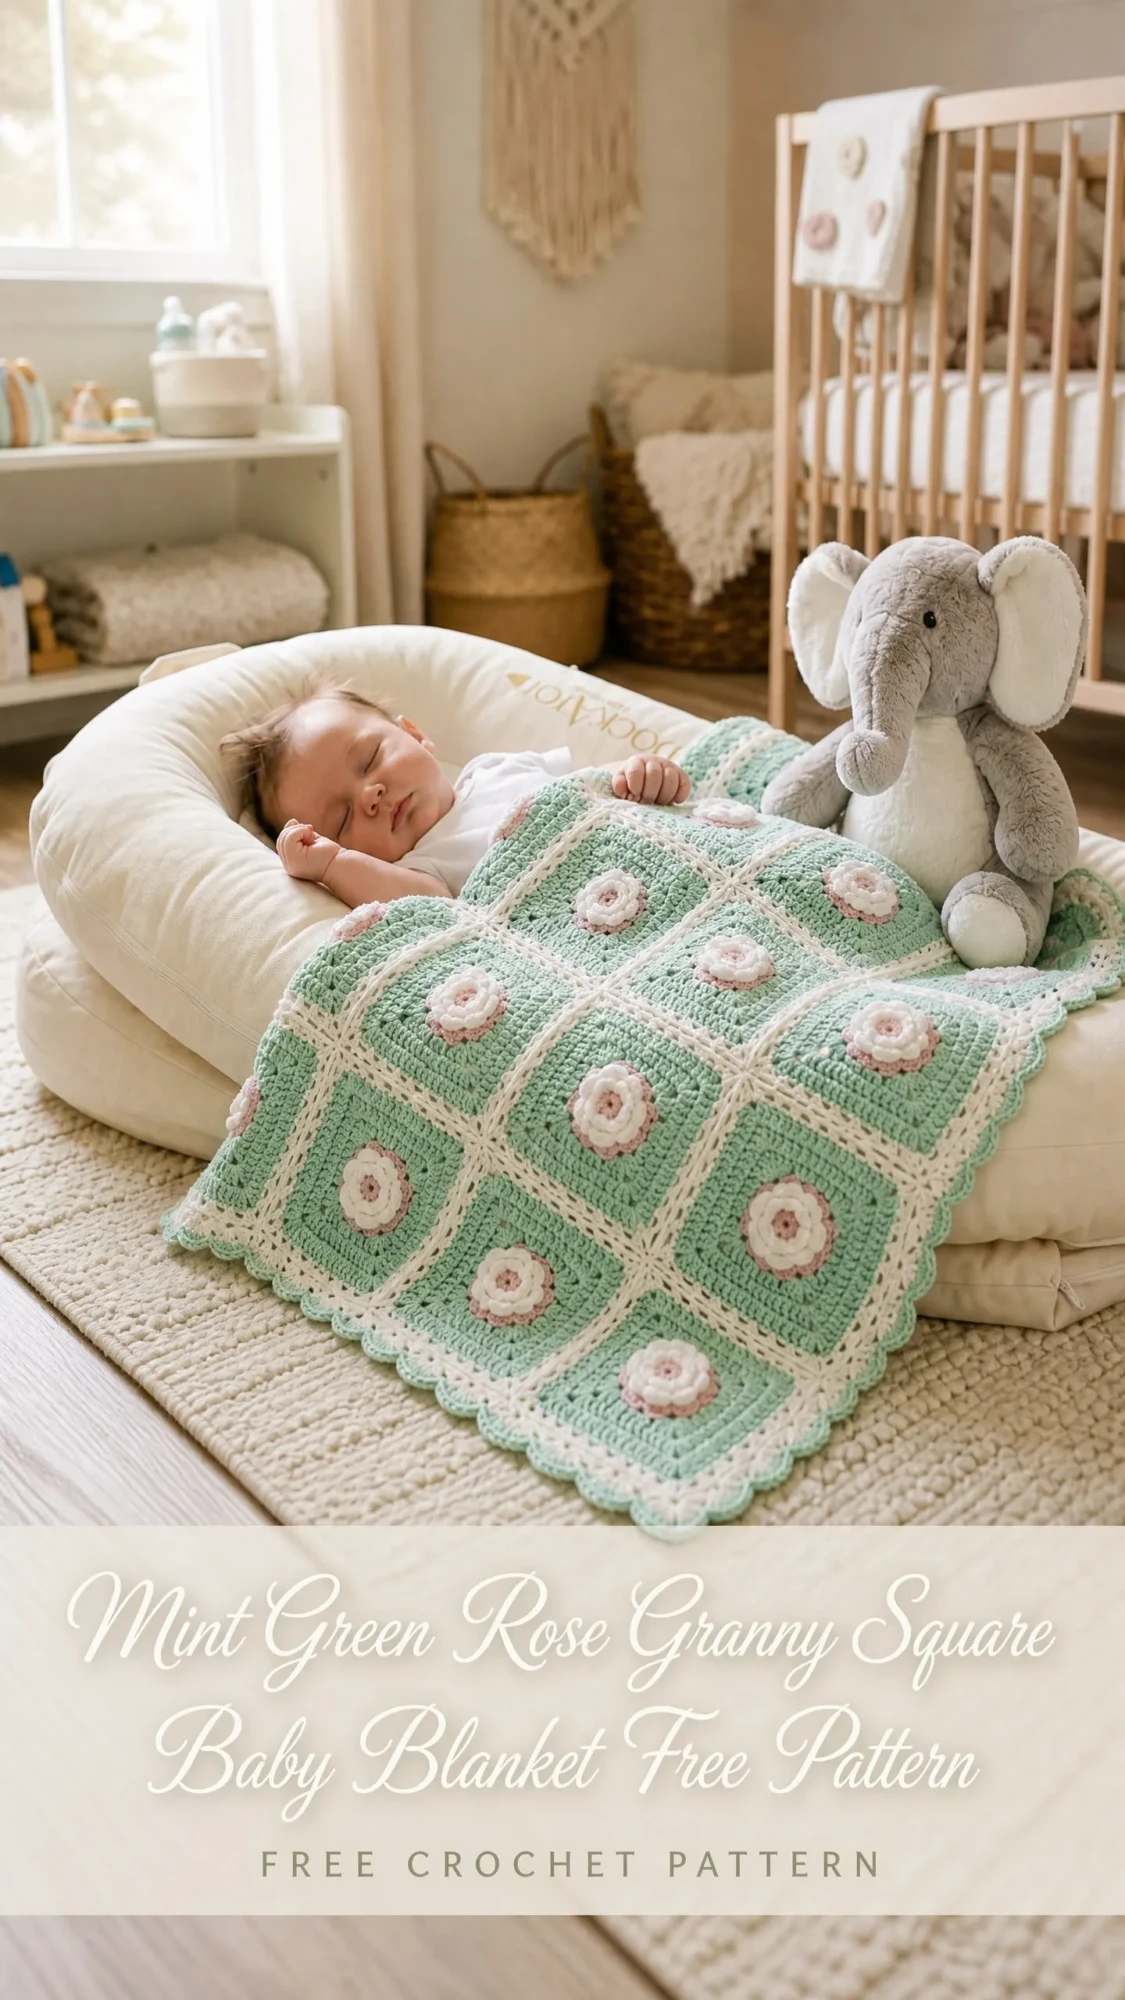
This blanket is what came out of those late nights. Nine soft mint squares, each one cradling a delicate 3D rose at its center. The kind of heirloom piece that gets passed down, photographed a thousand times, and draped over sleeping babies for years to come.
My friend did make her sister cry, by the way. The good kind of crying. And now I get to share this pattern with you so you can create that same magic for someone you love.
About This Crochet Pattern
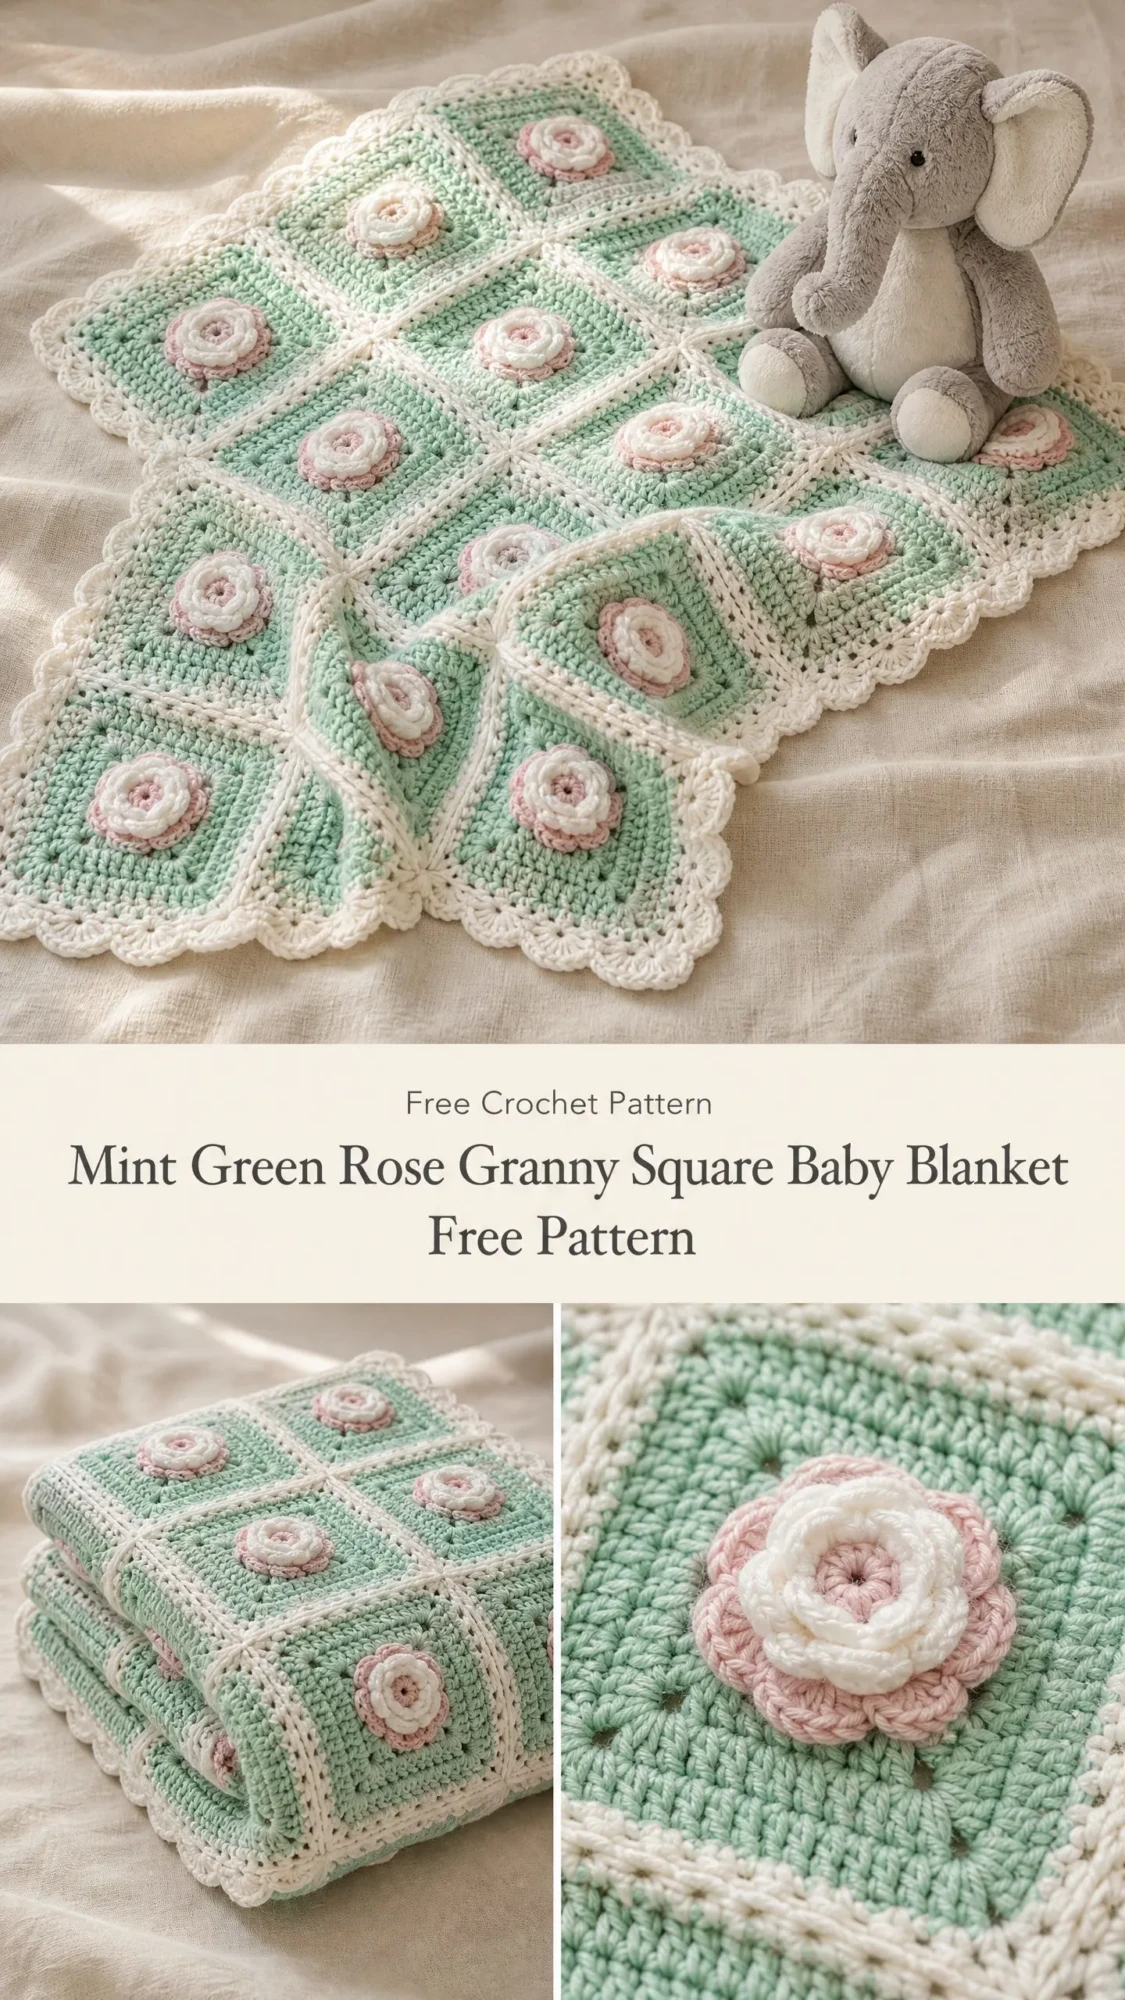
This mint green rose granny square baby blanket combines classic granny square construction with sculptural flower appliques for a stunning finished piece. The blanket uses nine individual squares arranged in a three by three grid, each featuring a raised rose motif that sits above the surface of the fabric.
The construction happens in three distinct phases. First, you create nine identical granny squares in soft mint green with a cream border round. Second, you work nine separate 3D roses and sew them to the center of each square. Third, you join all the squares together and finish with a decorative scalloped edge.
Skill level: Intermediate. If you can work double crochet clusters and feel comfortable reading your fabric, you can absolutely make this blanket. The roses require working into the front loop only and shaping petals, which takes a bit of practice. But I promise the technique clicks after the first flower or two.
Time estimate: Plan for 12 to 18 hours total. Each granny square takes roughly 45 to 60 minutes. Each rose takes 20 to 30 minutes. Joining and the border add another 2 to 3 hours at the end.
Finished size: Approximately 24 inches by 24 inches before blocking, stretching to about 26 inches by 26 inches after wet blocking. Perfect for newborns through twelve months.
Materials You Will Need
Yarn:
Hook: US size G-6 / 4.0 mm crochet hook
Notions:
Yarn Suggestions
Option 1: Lion Brand Pound of Love. This DK weight acrylic is machine washable and incredibly soft against baby skin. One skein of mint covers your main color with plenty to spare.
Option 2: Paintbox Yarns Simply DK. Available in gorgeous pastels including a near perfect mint. You will need approximately 5 balls of MC, 2 balls of CA, 1 ball of CB, and 1 ball of CC.
Option 3: Drops Safran. This cotton acrylic blend adds lovely drape and breathability for warmer climates. Approximately 4 balls of MC, 2 balls of CA, 1 ball of CB, and 1 ball of CC.
Any DK weight yarn that achieves gauge works beautifully. Prioritize machine washable fibers for practical baby care. Avoid heavily textured or variegated yarns since they will hide your beautiful rose details.
Gauge
With MC and G-6 / 4.0 mm hook:
16 double crochet stitches by 9 rows = 4 inches by 4 inches, measured after light blocking.
Each completed granny square (Rounds 1 through 7, before joining) should measure approximately 7.5 inches by 7.5 inches.
Gauge matters for this project. If your squares run larger, go down one hook size. If they run smaller, go up one hook size. Consistent gauge across all nine squares keeps your joining seams even and your finished blanket square.
Abbreviations and Stitch Definitions
This crochet tutorial uses US terminology throughout. Here are all the abbreviations you will encounter:
Special Stitches for This Blanket
3-dc Cluster
This is the building block of your granny squares. Yarn over, insert hook into the indicated stitch or space, yarn over and pull up a loop, yarn over and draw through 2 loops. Repeat this sequence 3 times into the same spot. You will have 4 loops on your hook. Yarn over and draw through all 4 loops at once. One cluster complete.
Beginning 3-dc Cluster (beg-3dc-cl)
Chain 3, which counts as your first double crochet. Then work 2 more partial double crochets into the same space: yarn over, insert hook, pull up loop, yarn over and draw through 2 loops. Do this twice. Yarn over and draw through all 3 loops on hook. This replaces the first dc in a cluster group and eliminates the visible gap that a standard chain 3 can create.
Shell
Work 3 dc, ch 2, 3 dc all into the same stitch or space. One shell made.
Scallop
Work sc, hdc, 3 dc, hdc, sc all into the same stitch or space. This creates the pretty wavy edge around your finished blanket.
Petal (for Rose construction)
Row 1 (RS): Ch 6, sc in second ch from hook, hdc in next ch, dc in next 2 ch, hdc in last ch. Turn.
Row 2 (WS): Ch 1, working in FLO: sc in first st, hdc in next st, dc in next 2 sts, hdc in next st, sc in last st. Do not turn. Slip stitch back to the base of the petal along the foundation chain.
The petals naturally cup and curve because of working in the front loop only. Each rose uses inner petals (starting with ch 5) and outer petals (starting with ch 7).
Granny Square Instructions
Make 9 squares total. Use MC (mint green) unless stated otherwise.
Round 1
With MC, make a magic ring.
Ch 3 (counts as first dc), 2 dc into ring, ch 2, [3 dc into ring, ch 2] 3 times. Join with sl st to top of beg ch-3. Pull ring tail to close.
(4 groups of 3-dc, 4 ch-2 corner spaces)
Round 2
Sl st into each of next 2 dc and into corner ch-2 sp.
Ch 3 (counts as first dc), 2 dc in same sp, ch 2, 3 dc in same sp (corner made), ch 1, [3 dc in next ch-2 corner sp, ch 2, 3 dc in same sp, ch 1] 3 times. Join with sl st to top of beg ch-3.
(8 groups of 3-dc)
Round 3
Sl st into next 2 dc and into corner ch-2 sp.
Ch 3, 2 dc in same sp, ch 2, 3 dc in same sp (corner), ch 1, 3 dc in ch-1 side sp, ch 1, [3 dc in next corner ch-2 sp, ch 2, 3 dc in same sp, ch 1, 3 dc in ch-1 side sp, ch 1] 3 times. Join with sl st to top of beg ch-3.
(12 groups of 3-dc)
Round 4
Sl st into next 2 dc and into corner ch-2 sp.
Ch 3, 2 dc in same sp, ch 2, 3 dc in same sp (corner), [ch 1, 3 dc in next ch-1 sp] 2 times, ch 1, [3 dc in next corner ch-2 sp, ch 2, 3 dc in same sp, (ch 1, 3 dc in next ch-1 sp) 2 times, ch 1] 3 times. Join with sl st to top of beg ch-3.
(16 groups of 3-dc)
Round 5
Sl st into next 2 dc and into corner ch-2 sp.
Ch 3, 2 dc in same sp, ch 2, 3 dc in same sp (corner), [ch 1, 3 dc in next ch-1 sp] 3 times, ch 1, [3 dc in next corner ch-2 sp, ch 2, 3 dc in same sp, (ch 1, 3 dc in next ch-1 sp) 3 times, ch 1] 3 times. Join with sl st to top of beg ch-3.
(20 groups of 3-dc)
Round 6
Sl st into next 2 dc and into corner ch-2 sp.
Ch 3, 2 dc in same sp, ch 2, 3 dc in same sp (corner), [ch 1, 3 dc in next ch-1 sp] 4 times, ch 1, [3 dc in next corner ch-2 sp, ch 2, 3 dc in same sp, (ch 1, 3 dc in next ch-1 sp) 4 times, ch 1] 3 times. Join with sl st to top of beg ch-3.
(24 groups of 3-dc)
Round 7
Change to CA (cream). Sl st into next 2 dc and into corner ch-2 sp.
Ch 3, 2 dc in same sp, ch 2, 3 dc in same sp (corner), [ch 1, 3 dc in next ch-1 sp] 5 times, ch 1, [3 dc in next corner ch-2 sp, ch 2, 3 dc in same sp, (ch 1, 3 dc in next ch-1 sp) 5 times, ch 1] 3 times. Join with sl st to top of beg ch-3. Fasten off CA.
(28 groups of 3-dc)
Checkpoint: After Round 7, each square should measure approximately 7 inches by 7 inches before any blocking. If your squares are smaller than 6.5 inches, increase your hook size by half a size. If larger than 7.5 inches, decrease your hook size.
3D Rose Instructions
Make 9 roses total.
The rose is built in three parts: a tight spiral center, an inner petal ring, and an outer petal ring.
Rose Center
With CC (white), make a magic ring.
Round 1: Ch 1, 10 sc into ring. Join with sl st to first sc. (10 sc)
Do not fasten off. Continue to Round 2.
Inner Petal Ring
Round 2: Working in FLO of each sc around, [ch 5, sc in second ch from hook, hdc in next ch, dc in next ch, hdc in last ch, sl st into FLO of next sc of center ring] 5 times.
Change to CB (blush pink) on final sl st of last inner petal.
(5 inner petals worked in CC)
Outer Petal Ring
Round 3: Working now in BLO of each of the original 10 sc from Round 1, join CB if not already attached. Work 2 petals into each BLO sc: [ch 7, sc in second ch from hook, hdc in next ch, dc in next 3 ch, hdc in last ch, sl st into BLO of sc, ch 7, make petal, sl st into same BLO of sc] 5 times.
(10 outer petals worked in CB)
Fasten off CB, leaving a 12-inch tail for sewing.
Rose Assembly
Thread the tail onto a tapestry needle. With the right side of the rose facing up, coil the outer petal ring around the center so the larger petals frame the inner petals. Tack down the underside with small stitches to hold the coiled shape. The finished rose should measure approximately 2 inches in diameter.
Sewing Rose to Square
Center the rose over the magic ring of the completed granny square. Using the long tail or a length of matching yarn, sew the rose to the square by stitching around the underside perimeter of the rose and catching the top surface of Round 1 of the granny square. Do not pull too tight. The rose should sit above the surface like a little pillow.
Joining the Squares
Arrange all 9 squares in a three by three grid. All squares should face right side up.
Flat Slip Stitch Join Method
Step 1: Hold the first two squares of the top row with wrong sides together and right sides facing outward.
Step 2: Join CA in the ch-2 corner space of the top-right corner of the left square and the corresponding ch-2 corner space of the top-left corner of the right square, inserting hook through both spaces simultaneously.
Step 3: Ch 1. Working through both layers at the same time, sc through the ch-2 corner spaces. Then sc through the next ch-1 sp of both squares simultaneously across, working through matching pairs. End with sc through the final ch-2 corner space. Fasten off.
(8 sc per joining seam)
Step 4: Repeat joining along all horizontal seams of the top row (2 seams for 3 squares). Fasten off after each seam.
Step 5: Assemble the middle row of 3 squares the same way (2 seams).
Step 6: Assemble the bottom row of 3 squares the same way (2 seams).
Step 7: Now join the three rows to each other along horizontal strip seams. Lay Row 1 and Row 2 with wrong sides together. Join CA at the left corner. Work sc join across, working through corresponding spaces of both strips simultaneously. At any junction where four square corners meet, insert hook through all four corner spaces and sc once. Continue across.
(22 sc per horizontal strip seam)
Repeat to join Row 2 to Row 3. Fasten off.
Checkpoint: After all squares are joined, the assembled piece should measure approximately 22.5 inches by 22.5 inches.
Scalloped Border
The border is worked in CA (cream) around the entire perimeter of the assembled blanket.
Join CA in any outer corner ch-2 space with a sl st.
Border Round 1
Ch 3 (counts as first dc). Work 2 dc in same corner sp, ch 2, 3 dc in same corner sp (corner shell made).
Along each side edge, work [ch 1, 3 dc in next available sp] across each square’s worth of edge, ch 1 at each square junction. End each side with a corner shell [3 dc, ch 2, 3 dc] in each outer corner sp.
Repeat across all 4 sides. Join with sl st to top of beg ch-3.
Border Round 2
Sl st into next 2 dc and into corner ch-2 sp. Ch 3, 2 dc in same sp, ch 2, 3 dc in same sp (corner shell). Work [ch 1, 3 dc in next ch-1 sp] across each side, placing [3 dc, ch 2, 3 dc] in each corner ch-2 sp. Join with sl st to top of beg ch-3.
Border Round 3 (Scallop Round)
Sl st into corner ch-2 sp.
Ch 1. In corner ch-2 sp: work a scallop [sc, hdc, 3 dc, hdc, sc].
Sk next dc group, [sc in ch-1 sp, sk next dc group, scallop in next ch-1 sp, sk next dc group] across to next corner, ending sc in last ch-1 sp before corner, then scallop in corner ch-2 sp.
Work all 4 sides in this manner. Join with sl st to first sc. Fasten off CA.
Checkpoint: After the border, the blanket should measure approximately 24 to 25 inches by 24 to 25 inches before blocking.
Finishing and Blocking Your Baby Blanket
Weave in all ends securely using a tapestry needle. Work ends back and forth through the backs of stitches in at least two directions to prevent unraveling.
Wet blocking: Submerge the completed blanket in cool water and gently press out air. Do not wring or twist. Press the water out by rolling the blanket in a clean towel. Lay flat on blocking mats. Use rust-proof pins to stretch each corner to its finished measurement. Gently smooth each square to an even shape. Allow to dry completely, which may take 12 to 24 hours.
The scallop border will open and flatten beautifully with blocking, and the 3D roses will retain their lovely shape.
Care Instructions
Hand wash in cool water with gentle detergent, or machine wash on the delicate cycle in a mesh laundry bag. Reshape while damp and lay flat to dry. Avoid tumble drying on high heat, which can distort the roses. Do not iron directly over the rose motifs.
Size Customization Tips
For a larger lap blanket (30 by 30 inches): Make a 4 by 4 grid of 16 squares. Increase MC to approximately 900 yards and CA to approximately 380 yards.
For a smaller lovey (16 by 16 inches): Make a 2 by 2 grid of 4 squares. You will need approximately 280 yards of MC and 120 yards of CA.
To add size without more squares: Add one or more additional rounds of the standard granny pattern in MC before the final CA round. Each additional round adds approximately 1 inch to each side of the square.
Thank you so much for choosing this pattern for your next project. I truly hope whoever receives this blanket treasures it for years. If you make one, I would absolutely love to see it! Tag me on Instagram or share a photo in my Facebook group.
Save this mint green rose granny square baby blanket pattern to your Pinterest boards so you can find it when you are ready to start. And please leave a comment below if you make one. I read every single comment and your photos make my whole week!
You Might Also Like
- Lemon Sorbet Candy Bolster Pillow Free Crochet Pattern
- Navy Nautical Crochet Sandals in Coastal Bathroom Free Pattern
- Watermelon Slice Tropical Charm Bracelet Free Crochet Pattern
- Forest Green Ivy Leaf Earrings Free Crochet Pattern
