
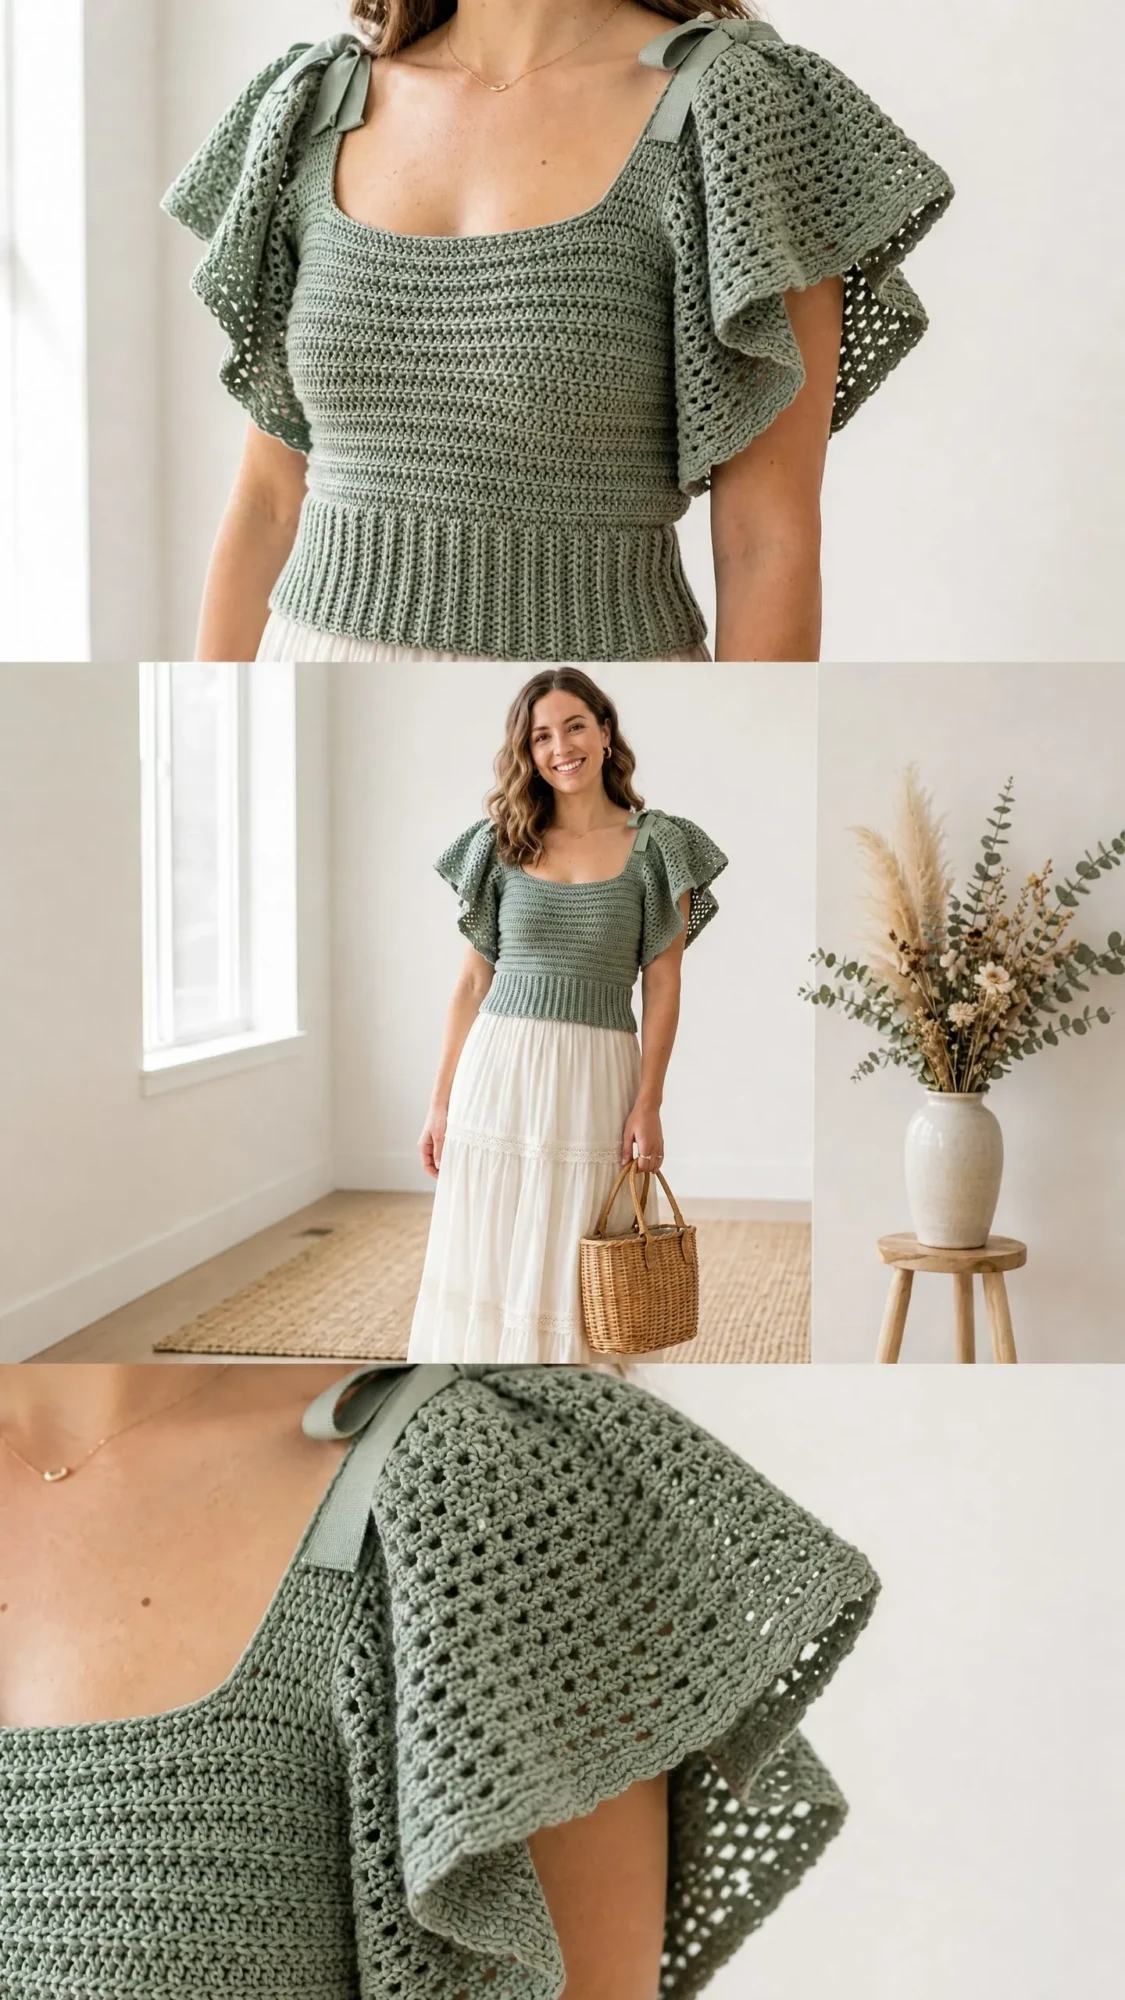
This pattern is SERIOUSLY one of my favorite makes this year! Those dramatic ruffle sleeves, the beautiful lace body, the romantic shoulder ties. It looks like it belongs in a boutique window, but I promise you can absolutely make this yourself. The construction is clever and straightforward once you break it down into sections.
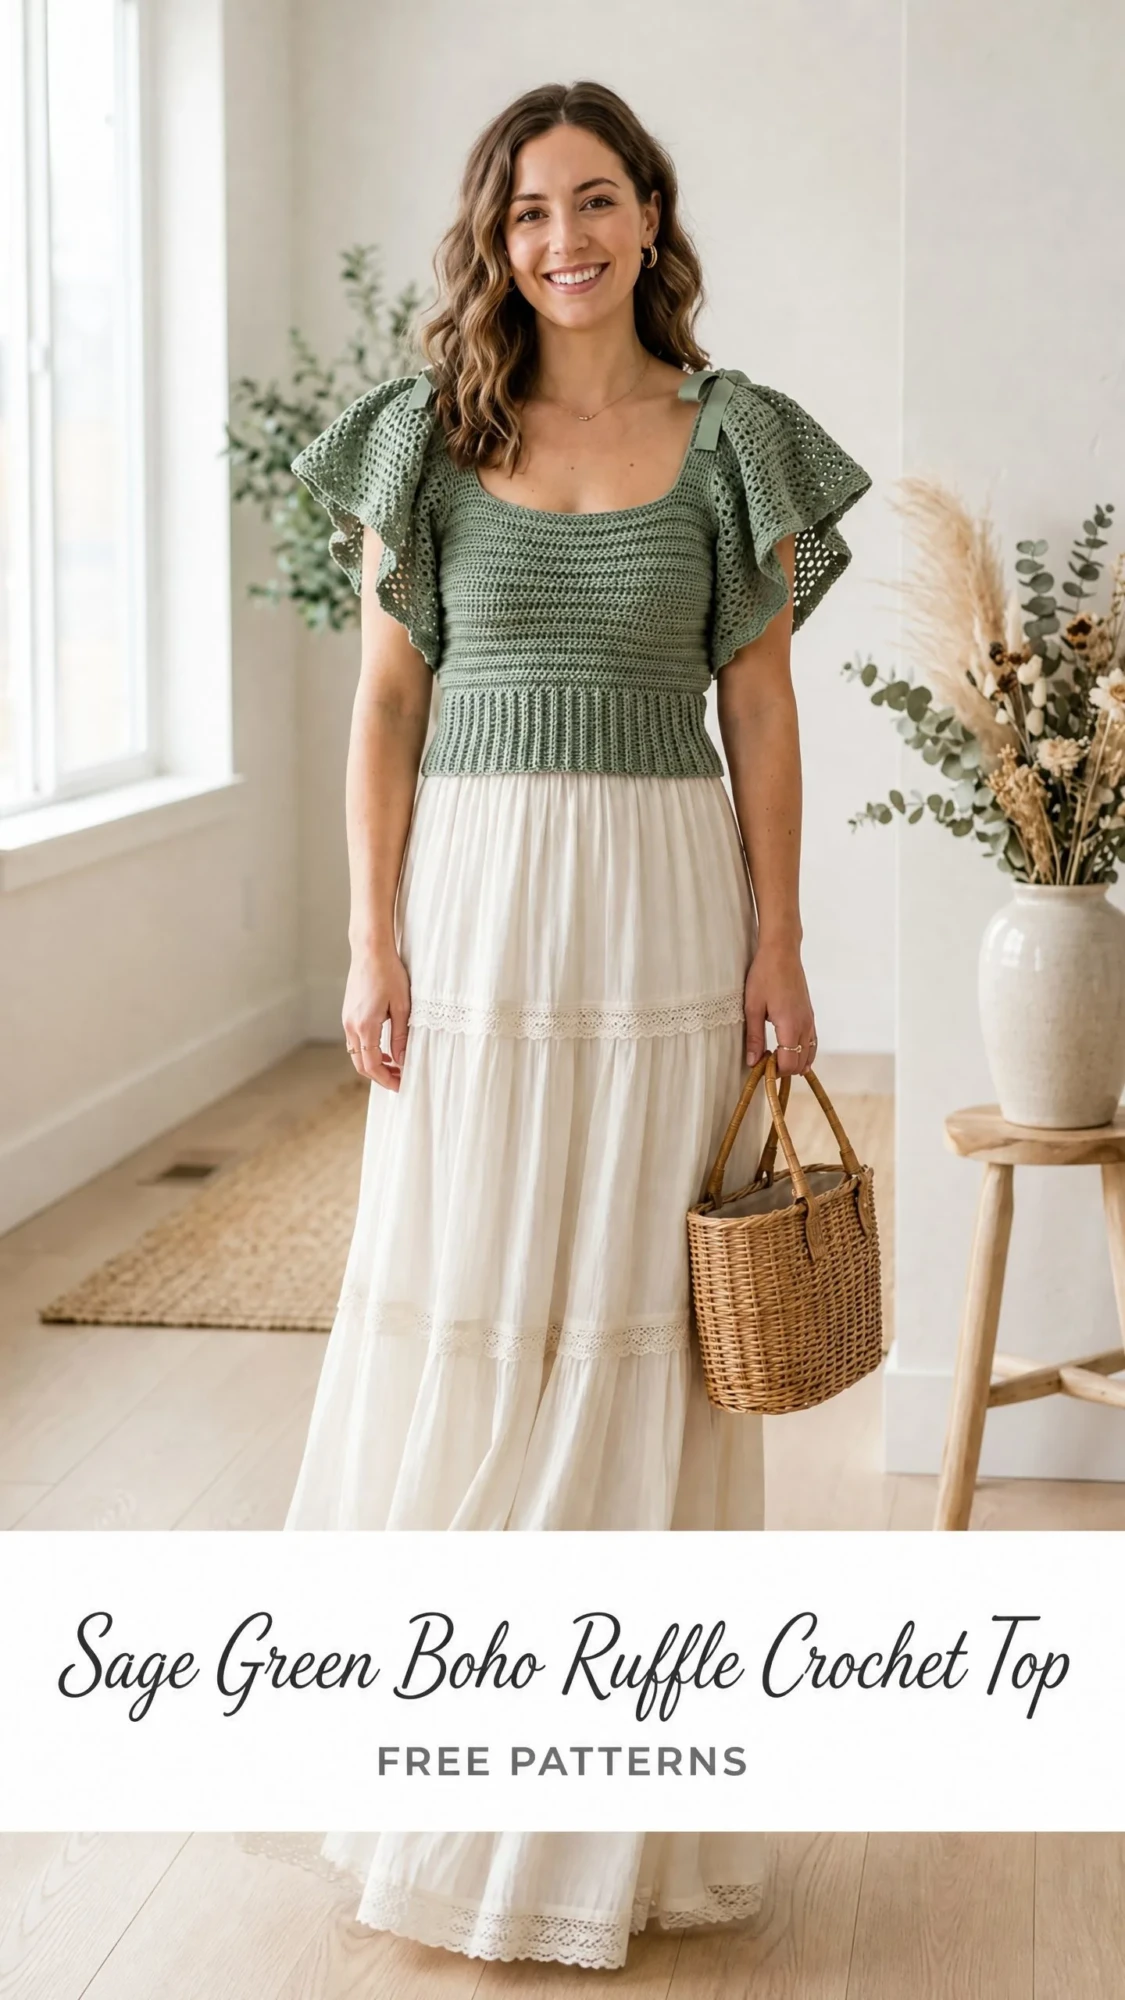
I designed this cropped top to hit all the summer style notes. A fitted ribbed waistband, an airy lace bodice that breathes in the heat, and those show-stopping double-layer ruffle sleeves that move beautifully when you walk. The whole thing works up in about 14 to 20 hours depending on your pace.
This is going to be your new favorite piece in your handmade wardrobe. Let me walk you through every single step.
Why This Boho Ruffle Crochet Top Works So Well
The genius of this crochet pattern is in the construction order. You start with a simple ribbed band worked flat, seam it into a tube, then pick up stitches and work the lace bodice upward in the round. When you reach the armholes, you split into front and back panels, shape the square neckline, and seam the shoulders. The ruffle sleeves get picked up last around the armhole openings.
Each section uses a different technique, which keeps the project interesting. The ribbing uses back loop only single crochet for stretch. The bodice uses a V-stitch lace pattern for that beautiful open mesh look. The ruffles use aggressive increases to create volume and movement.
The finished top is cropped, hitting about 2 to 3 inches above your natural waist. The square neckline is flattering on most body types, and those ribbon ties at the shoulders add the perfect romantic boho detail.
Skill Level and Time Estimate
This is an intermediate level crochet pattern. You should be comfortable working in the round, reading lace stitch repeats, working flat ribbing joined into a tube, picking up stitches around edges, creating ruffle increases, and basic seaming.
No advanced techniques required. If you can make a basic hat and have tried one lace project before, you can handle this.
Time to complete: 14 to 20 hours for most intermediate crocheters.
Finished Sizes
This pattern is written for five sizes:
Size XS: Bust 30 to 32 inches, finished circumference 33 inches, length 14 inches
Size S: Bust 32 to 34 inches, finished circumference 35 inches, length 14.5 inches
Size M: Bust 34 to 36 inches, finished circumference 37 inches, length 15 inches
Size L: Bust 38 to 40 inches, finished circumference 39 inches, length 15.5 inches
Size XL: Bust 42 to 44 inches, finished circumference 42 inches, length 16 inches
The top has about 1 to 2 inches of positive ease at the bust. Instructions are written for size S throughout, with other sizes in parentheses where they differ.
Materials You Will Need
Yarn: DK weight, Category 3, smooth cotton or cotton-blend yarn. You will need approximately 550 (600, 650, 720, 800) yards total depending on your size.
Hook: US size E-4 (3.5 mm) for the main bodice and ribbing. US size F-5 (3.75 mm) for the ruffle sleeves only.
Notions:
Yarn Suggestions
Option 1: Lion Brand 24/7 Cotton in Sage. A smooth workhorse cotton DK with excellent stitch definition for lace work. Widely available and machine washable.
Option 2: Paintbox Yarns Simply DK in Grass Green. Pure cotton DK that produces crisp stitch definition and washes beautifully.
Option 3: We Are Knitters The Cotton in Sage. Soft matte-finish cotton DK with a slightly rustic texture.
Important: Choose a smooth, non-fuzzy yarn. Fuzzy or textured fibers will obscure the lace detail. Avoid yarn with too much stretch since the bodice relies on the structure of cotton for shape retention.
Gauge
Getting gauge right is mandatory for a fitted garment like this one.
Main bodice gauge with E-4 (3.5 mm) hook in Half Double Crochet Lace pattern: 18 stitches x 12 rows = 4 inches, blocked.
Ribbing gauge with E-4 (3.5 mm) hook: 20 stitches x 16 rows = 4 inches, blocked.
Make a gauge swatch before starting. If your swatch is too big, go down a hook size. If it is too small, go up a hook size.
Abbreviations
ch = chain (wrap yarn over hook, pull through loop on hook)
sl st = slip stitch (insert hook, yarn over, pull through stitch and loop on hook in one motion)
sc = single crochet (insert hook, yarn over, pull up a loop, yarn over, pull through both loops)
hdc = half double crochet (yarn over, insert hook, pull up a loop, yarn over, pull through all 3 loops)
dc = double crochet (yarn over, insert hook, pull up a loop, yarn over and pull through 2 loops twice)
sk = skip
st(s) = stitch(es)
sp(s) = space(s)
ch-sp = chain space
rep = repeat
pm = place marker
RS = right side
WS = wrong side
BLO = back loop only
dec = decrease (work 2 stitches together)
Special Stitches
V-Stitch (V-st)
Work 1 double crochet, chain 1, 1 double crochet all into the same stitch or space. This creates a small V shape with a chain space in the center.
Half Double Crochet Lace Pattern
This is the main stitch pattern for the bodice. The repeat is 4 stitches wide.
How it works: Skip 1 stitch, work a V-stitch in the next stitch, skip 1 stitch, single crochet in the next stitch. Repeat around.
In following rounds, you work the single crochet into the single crochet of the previous round, and the V-stitch into the chain-1 space of the V-stitch below.
BLO Single Crochet Ribbing
Work single crochet into the back loop only of each stitch across every row. This creates a stretchy ribbed texture that looks like traditional post-stitch ribbing but is much easier to work.
Ruffle Stitch
For the dramatic ruffle sleeves, you work aggressive increases. First round: 3 double crochets into every stitch. Second round: 2 double crochets into every stitch. This quadruples your stitch count, creating lots of volume and movement.
Pattern Instructions
Section 1: Ribbed Waistband
The ribbing is worked as a flat strip, then seamed to form a ring. Each row is worked in back loop only.
Starting chain: Ch 13.
Row 1: Sc in 2nd ch from hook and in each ch across. Turn. (12 sc)
Row 2: Ch 1, turn. Sc in BLO of each st across. (12 sc)
Repeat Row 2 until your ribbing strip measures:
Do not fasten off. Seam the two short ends together using a slip stitch seam with right sides facing each other. Your ribbing strip is now a ring.
Checkpoint: Your ribbing ring should measure approximately 2.5 to 3 inches tall and stretch comfortably to fit around your lower bust.
Section 2: Bodice Foundation Round
With right side of ribbing facing, join yarn to top edge of ribbing at the seam with a slip stitch.
Round 1 (pickup round): Ch 1. Work sc evenly around the top edge of the ribbing ring, placing 1 sc per row end across. Place a stitch marker at the start of the round.
Target stitch counts (must be divisible by 4):
If your row count does not yield exactly the target number, increase or decrease a few stitches evenly in this round to reach it.
Place a second marker at the halfway point to mark the front/back division.
Section 3: Bodice Lower Lace Section
Now you will work the beautiful V-stitch lace pattern in the round. The ch 2 at the start of each round does NOT count as a stitch.
Round 2 (Lace Setup): Ch 2. Working into the foundation round: (Sk 1 sc, V-st in next sc, sk 1 sc, sc in next sc) around. Join with sl st to first sc.
Stitch counts:
Round 3 (Lace Continuation): Ch 2. (Sc in sc of previous round, V-st in ch-1 sp of V-st below) around. Join with sl st to first sc.
Rounds 4 through 14: Repeat Round 3.
Checkpoint: After Round 14, your lace section should measure approximately 5 inches above the waistband.
Section 4: Armhole Shaping and Division
Now you split into front and back panels and work flat to create armholes and the square neckline.
Panel stitch counts:
Back Panel
Join yarn at the first stitch of the back panel.
Transition Row (RS): Ch 1, turn. Sc across all sts of back panel, working 1 sc into each dc and 1 sc into each ch-1 sp.
Armhole Bind-off: Leave 4 sts unworked at each end of the panel.
Armhole Row 1 (RS): Ch 1, turn. Dec over first 2 sts, sc across to last 2 sts, dec over last 2 sts.
Armhole Row 2 (WS): Repeat decreases.
Armhole Row 3 (RS): Repeat decreases.
Work even in sc for: XS/S: 8 rows, M/L: 9 rows, XL: 10 rows
Back Neckline and Shoulder Straps
Divide your remaining stitches into three sections: left shoulder, center neck opening, right shoulder.
Shoulder strap width:
Left Back Shoulder: Work 4 rows of sc across your shoulder sts only. Fasten off leaving a long tail.
Right Back Shoulder: Join yarn to right shoulder sts. Work 4 rows of sc. Fasten off leaving a long tail.
Front Panel
Work the front panel identically to the back: transition row, armhole bind-off, armhole decrease rows, even rows, then divide for neckline.
Join shoulders: Seam front left shoulder to back left shoulder. Seam front right shoulder to back right shoulder.
Checkpoint: Both shoulder seams joined. Square neckline complete.
Section 5: Neckline Edging
Join yarn to any corner of the neckline opening.
Round 1: Ch 1. Work sc evenly around entire neckline, placing 1 sc per st across horizontal edges and 1 sc per row end along vertical edges. Work 3 sc into each corner. Join with sl st.
Round 2: Ch 1. Sc in each sc around, working 3 sc into each corner sc. Join with sl st. Fasten off.
Section 6: Ruffle Sleeves
Switch to your F-5 (3.75 mm) hook for the ruffles.
Armhole Pickup Round
Join yarn to center underarm.
Pickup Round: Ch 1. Work sc evenly around the armhole opening. Join with sl st.
Target counts:
Outer Ruffle (work into front loops only)
Round 1: Ch 3 (counts as dc). Work 2 dc into same st. Work 3 dc into every remaining st around. Join with sl st.
Round 2: Ch 3. Work 1 dc into same st. Work 2 dc into every st around. Join with sl st.
Round 3: Ch 1. Sl st loosely in each st around. Fasten off.
Inner Ruffle (work into back loops only)
Rejoin yarn to the back loops of the pickup round.
Round 1: Ch 3. Work 2 dc into same st. Work 3 dc into every remaining st around. Join with sl st.
Round 2: Ch 1. Sl st loosely in each st around. Fasten off.
Repeat for second sleeve.
Checkpoint: Each sleeve has two ruffle layers. The outer ruffle falls about 3 to 4 inches below the armhole. The inner ruffle falls about 1.5 to 2 inches.
Section 7: Shoulder Ties
Ribbon option: Cut two 18-inch pieces of satin ribbon. Fold each in half. Tack the fold point securely to the outer edge of each shoulder strap. Tie into bows.
Crocheted tie option: Chain 80. Sl st in 2nd ch from hook and each ch across. Fasten off. Make 4 ties total. Attach two ties to each shoulder, then tie into bows.
Finishing
Weave in all ends. Wet block your finished top for best results. Cotton blooms and relaxes beautifully with blocking. Lay flat on blocking mats, pin to measurements, and allow to dry completely.
Tips for Success
Take your time with the lace rounds. The V-stitch pattern creates gorgeous results, but it requires attention. Count your stitches after each round until the pattern becomes automatic.
Block before wearing. This makes a huge difference in how the lace opens up and how the ruffles drape.
Try it on as you go. After completing the ribbed waistband, slip it over your head to check the fit. The ribbing should stretch comfortably but feel snug.
For the ruffles, keep your tension relaxed. Tight stitches will make the ruffles stiff instead of flowy.
I really hope you love making this boho ruffle crochet top as much as I loved designing it. Those double-layer sleeves are such a satisfying payoff for your work.
If this project caught your eye, go ahead and save it to your Pinterest boards so you can find it when you are ready to start. And please leave a comment below if you make one. I would absolutely love to see your finished tops!
You Might Also Like
- Charcoal Gray Bathroom Storage Basket Free Crochet Pattern
- Emerald Green Bobble Stitch Clutch Free Crochet Pattern
- Lemon Sorbet Candy Bolster Pillow Free Crochet Pattern
- Rainbow Hexagon Pride Blanket Free Crochet Pattern
