
I call this one the Meadow Poncho, and it has quite the little story behind it. About three years ago, I sketched out this design in a notebook while waiting at my daughter’s dance class. I wanted to create something for my friend’s baby shower that looked impressive but used techniques I already loved. That original poncho went home with a tiny human named Lily, and I have made at least a dozen more since then for babies in my life.
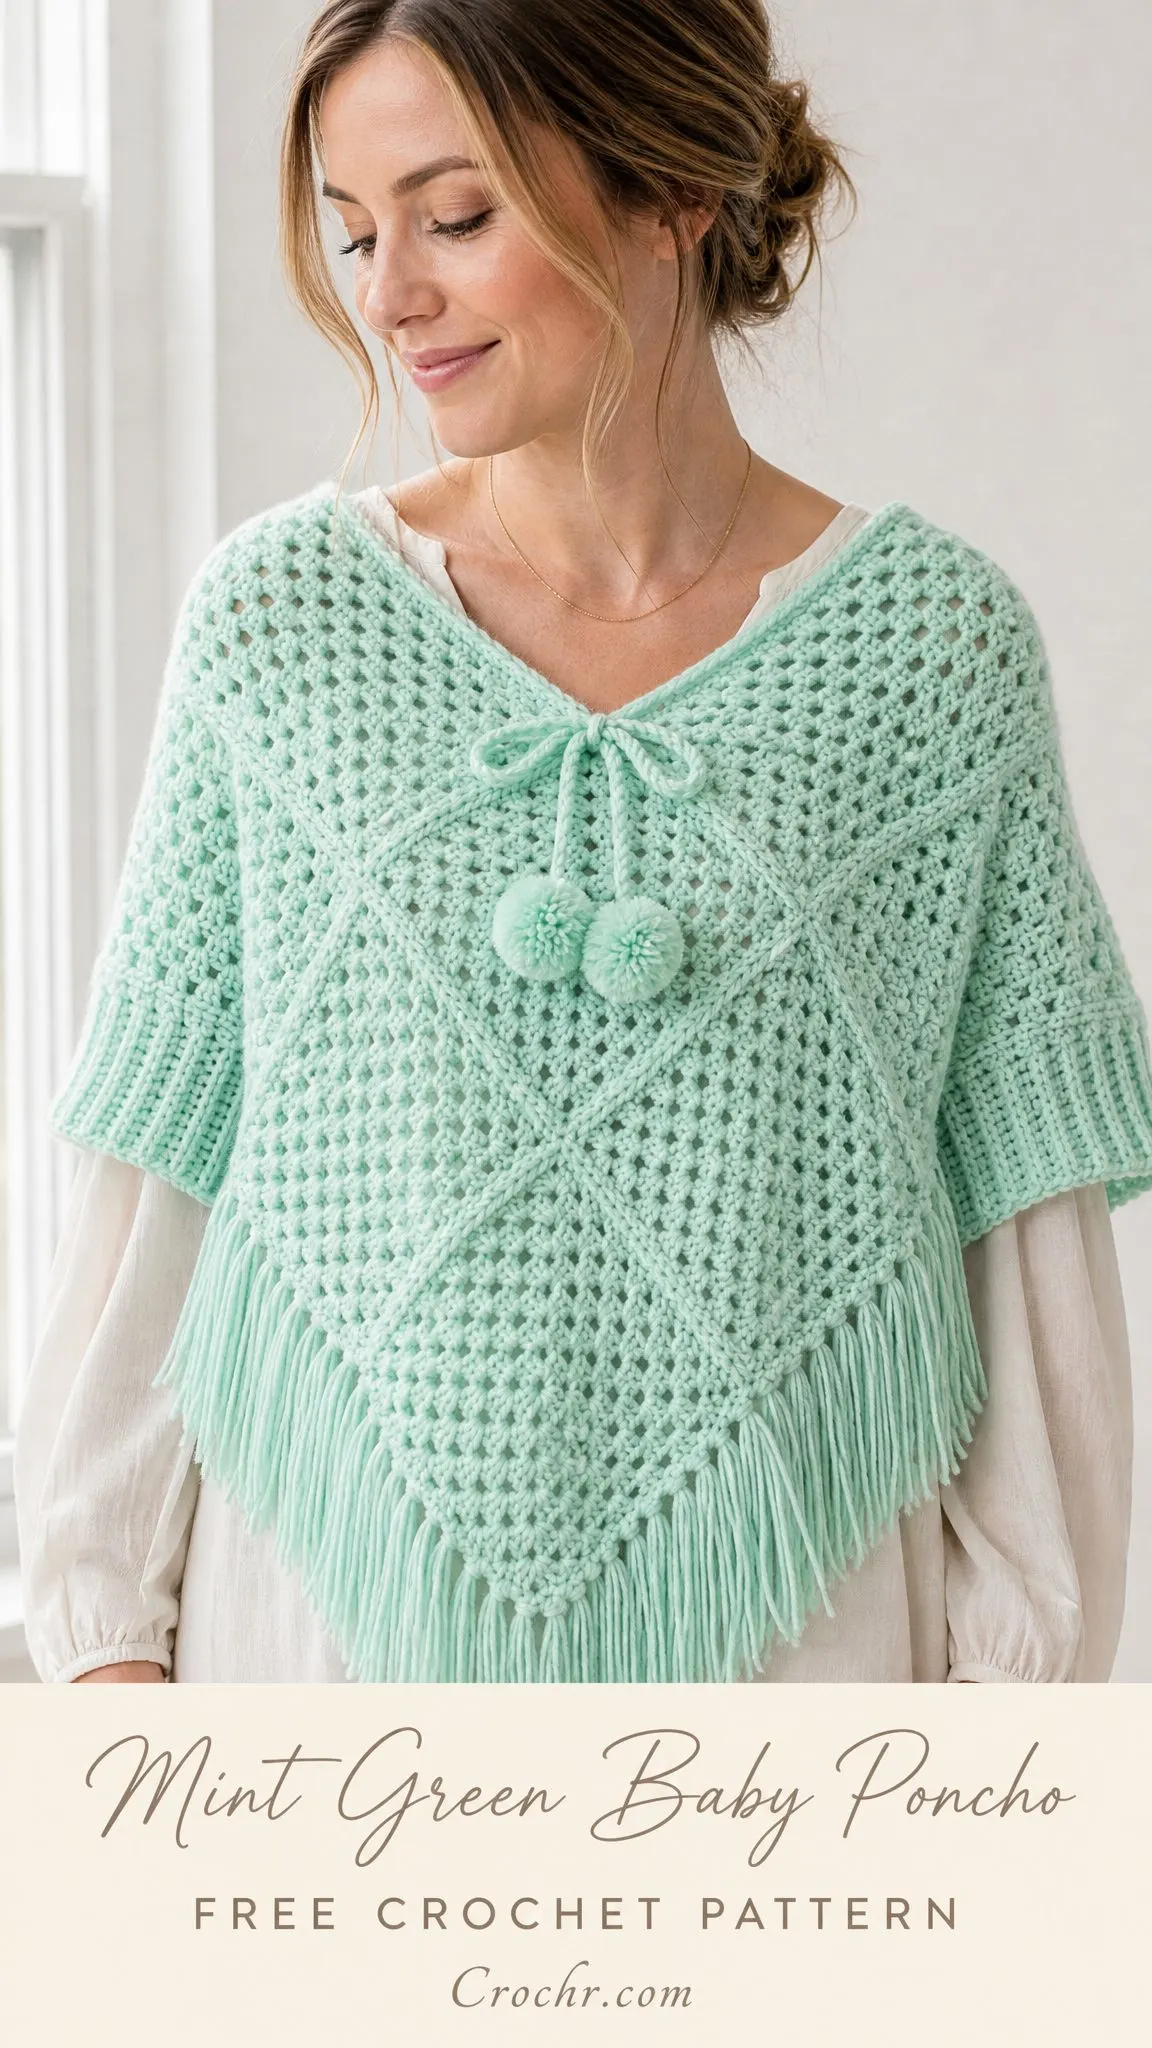
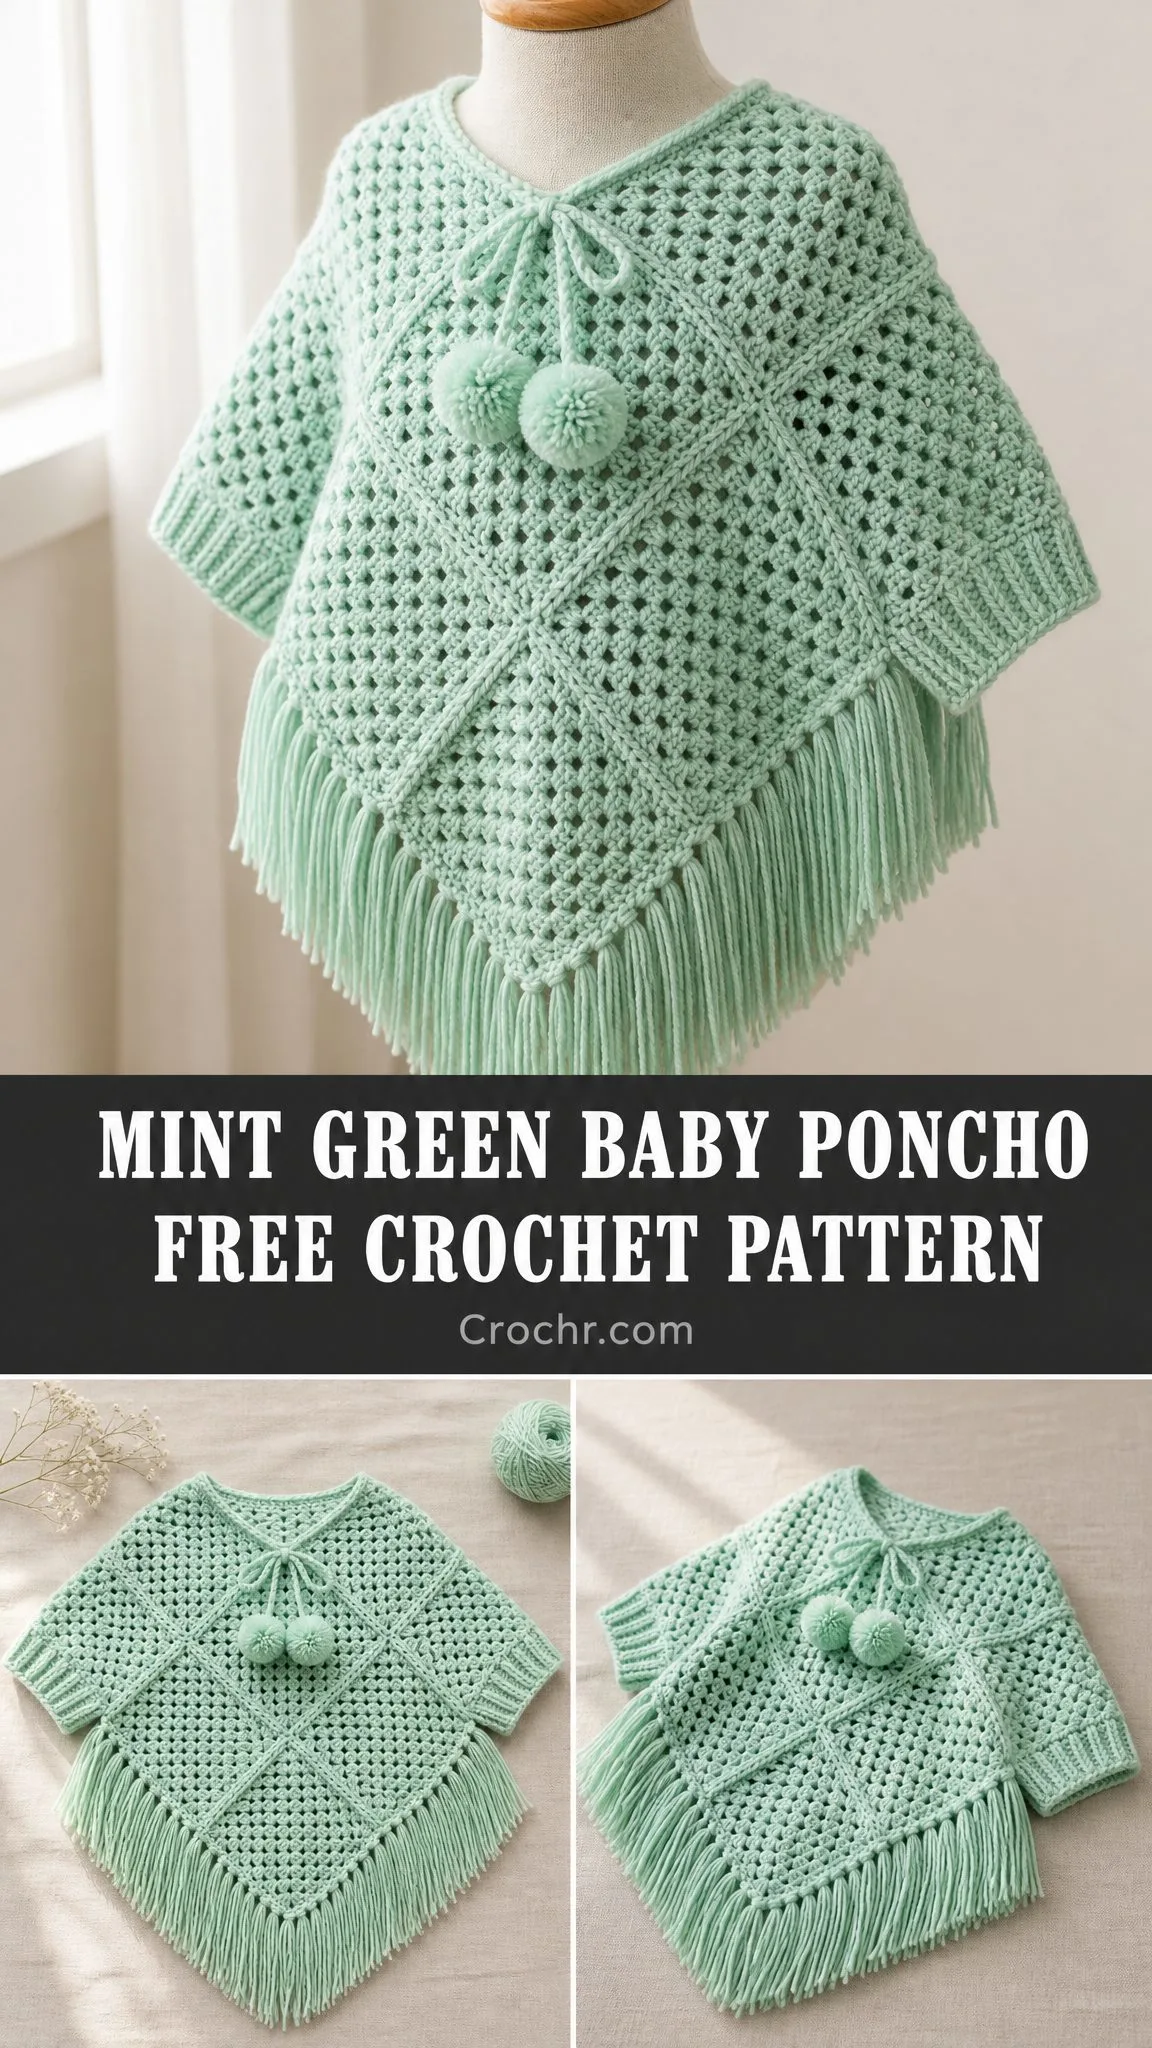
The construction is what makes this pattern so satisfying. You work two identical granny stitch panels flat, seam them together at the shoulders and one side, then add ribbed cuffs and a playful fringe trim. The mint green color feels fresh and modern, but this design works beautifully in any shade you choose.
If you have been wanting to try garment construction without the stress of complicated shaping, this is your project. The granny stitch creates that classic open, airy texture while working up quickly. Plus, those little pompoms on the neckline tie add the sweetest finishing touch.
Why You Will Love This Baby Poncho Pattern
This crochet pattern hits that sweet spot between looking intricate and being completely doable. The granny stitch, also called the cluster stitch, creates beautiful texture with a simple repeat you will memorize after just a few rows. The construction teaches you valuable skills like seaming panels, picking up stitches for edging, and working attached ribbing.
The finished poncho fits babies 12 to 18 months old comfortably. It measures approximately 22 inches around the chest and 11 inches from shoulder to hem, not counting the fringe. The boxy shape gives little ones room to move while keeping them cozy.
Perfect for gift giving. Baby items work up fast, and this poncho makes an unforgettable shower gift. The fringe and pompom details look professional, but I promise they are easier than they appear.
Materials You Will Need
Gathering your supplies before you start makes the whole process smoother. Here is everything you need for this baby poncho crochet pattern.
Yarn: Approximately 350 yards of worsted weight yarn in mint green. I recommend smooth acrylic or superwash wool blends since baby items need to be machine washable. Lion Brand Pound of Love in Pastel Green works beautifully. Red Heart Soft in Seafoam is another great budget option.
Hook: US size J-10, which is 6.0 mm
Notions:
Gauge Information
Getting gauge right matters for garments, even tiny ones. Take a few minutes to make a swatch before diving in.
With your J-10 hook in the granny stitch pattern:
To check your gauge, chain 28 and work the granny stitch pattern for 8 rows. Block lightly and measure the center section. If your swatch is too big, try a smaller hook. If it is too small, go up a hook size.
Skill Level
I would call this an intermediate pattern. The granny stitch itself is beginner territory, but the construction involves seaming two panels precisely, working ribbed cuffs in a different direction, and adding fringe. If you have completed at least one flat seamed project before, you will feel confident here.
Time estimate: Plan for 8 to 12 hours total, not including blocking or making the pompoms.
Abbreviations and Special Stitches
Let me walk you through every abbreviation you will see in this pattern.
ch = chain. Wrap yarn over hook and pull through the loop on your hook.
sl st = slip stitch. Insert hook, yarn over, pull through both the stitch and the loop on your hook in one motion.
sc = single crochet. Insert hook, yarn over, pull up a loop, yarn over, pull through both loops.
dc = double crochet. Yarn over, insert hook, yarn over, pull up a loop, yarn over, pull through 2 loops, yarn over, pull through remaining 2 loops.
ch-sp = chain space. The gap created by chain stitches in the previous row.
sk = skip
BLO = back loop only. Insert your hook under just the back loop of the stitch instead of both loops.
RS = right side
WS = wrong side
The 3 Double Crochet Cluster (3dc-cl)
This is the heart of the granny stitch pattern. Here is how to work it:
1. Yarn over, insert hook into the designated space
2. Yarn over, pull up a loop, yarn over, pull through 2 loops. One double crochet complete.
3. Yarn over, insert hook into the SAME space
4. Yarn over, pull up a loop, yarn over, pull through 2 loops. Second double crochet complete.
5. Yarn over, insert hook into the SAME space
6. Yarn over, pull up a loop, yarn over, pull through 2 loops. Third double crochet complete.
You now have 3 double crochets all worked into one space. That is your cluster.
Pattern Instructions
Panel A (Make 1)
You will make two identical panels, then seam them together. Each finished panel measures approximately 11 inches wide by 11 inches tall.
Foundation Chain: Chain 24.
Row 1 (RS): Work 3dc-cl into the 6th chain from hook. The 5 skipped chains create your turning structure and first edge space. Ch 2, skip 2 chains, 3dc-cl into next chain. Repeat from to 5 times. Ch 2, skip 2 chains, dc into last chain. Turn. (7 clusters, 8 ch-2 spaces)
Row 2 (WS): Ch 3, turn. This turning chain does not count as a stitch. Work 3dc-cl into first ch-2 space. Ch 2, 3dc-cl into next ch-2 space. Repeat from to 6 times. Ch 2, dc into the top of the turning chain from the previous row. Turn. (7 clusters, 8 ch-2 spaces)
Rows 3 through 14: Repeat Row 2 exactly. (7 clusters, 8 ch-2 spaces per row)
Do not fasten off yet.
Checkpoint: Your panel should measure approximately 11 inches wide by 10.5 to 11 inches tall. Count your clusters on any row to confirm you have 7 across.
Cuff Ribbing for Panel A
The ribbed cuff creates that stretchy, textured edge you see on the sleeve openings. You will work it sideways, attaching it to one short edge of your panel as you go.
Setup: After Row 14, fasten off and cut yarn. With the right side of your panel facing you, find one short side edge. You will see 14 row ends along this edge. Join yarn at the top corner of this short edge.
Chain: Ch 7.
Cuff Row 1: Sc into 2nd chain from hook and in each of the next 5 chains. Sl st into the first row end on the panel edge to anchor. Turn. (6 sc)
Cuff Row 2: Ch 1, turn. Working in BLO only, sc in each of the 6 sc across. Turn. (6 sc in BLO)
Cuff Row 3: Ch 1, turn. BLO sc in each of 6 sc. Sl st into the next row end on the panel edge. Turn. (6 sc)
Repeat Cuff Rows 2 and 3 until you have attached to all 14 row ends on the panel edge. This creates 28 rows of ribbing with 14 attachment points.
Sl st into the corner stitch. Fasten off.
Panel B (Make 1)
Work Panel B exactly like Panel A, including the cuff ribbing on one short edge.
Checkpoint: You should now have two identical panels, each with a ribbed cuff strip along one short edge.
Seaming the Panels
Now comes the exciting part where your poncho takes shape. You will use a slip stitch seam, which creates a decorative ridge on the outside.
How to Work the Slip Stitch Seam: Hold both panels with wrong sides together, meaning right sides face out. Insert your hook through both layers at the same time. Yarn over and pull through all loops to create a slip stitch. This joins the panels with a visible, attractive seam line.
Shoulder Seam
Lay Panel A flat with the right side facing up. Place Panel B on top with wrong sides together. Align all edges.
Starting at the right corner of the top edge, slip stitch seam through both layers for approximately 3 inches. Stop and leave the center approximately 5 inches OPEN for the neckline. Continue slip stitch seaming for the remaining 3 inches to the left corner. Fasten off.
Side Seam
Slip stitch seam along the entire left side edge of both panels, working the full 11 inches. Fasten off.
Leave the right side edge completely open. This forms one arm opening. The opposite arm opening is created by the open space on the other side.
Turn your poncho right side out.
Neckline Edging
Join yarn at one corner of the neck opening. Work sc evenly around the entire neck opening, placing approximately 3 sc per inch. When you reach your starting point, sl st to join. Fasten off.
Adding the Fringe
The fringe gives this baby poncho its playful, bohemian vibe. You will add it along the entire lower hem.
To make fringe:
1. Wrap yarn around your 3 inch cardboard rectangle about 20 times
2. Cut along one edge to create strands approximately 6 inches long
3. Take 2 or 3 strands and fold them in half
4. Insert your crochet hook through a stitch along the hem edge
5. Pull the folded loop through partway
6. Draw the cut ends through the loop and pull tight
Space your fringe evenly along both lower edges of the poncho. The finished fringe hangs approximately 3 inches long.
Making the Pompom Tie
The neckline tie with pompoms adds the sweetest finishing detail.
For the tie: Chain approximately 60, or until your chain measures about 20 inches. Fasten off, leaving long tails. Weave this chain through the sc stitches around the neckline, creating a drawstring effect.
For the pompoms: Wrap yarn around your 2.5 inch cardboard circle many times until it is nice and full. Tie tightly in the center, cut the loops, and trim into a round shape. Make 2 pompoms and attach one to each end of your tie.
Tips for Success
Blocking makes a difference. Wet your finished poncho, gently squeeze out excess water, and lay it flat to dry. This evens out your stitches and helps the panels lie nicely.
Count your clusters regularly. It is easy to accidentally add or skip a cluster in the granny stitch pattern. A quick count every few rows saves frogging later.
The cuff attachment can feel awkward at first. Take it slow on your first panel. By the second panel, you will have the rhythm down.
Yarn choice matters for drape. A smooth worsted weight yarn shows off the granny stitch clusters beautifully. Avoid fuzzy or textured yarns that will obscure the stitch definition.
Finished Measurements
This Mint Green Baby Poncho crochet pattern creates such a darling little garment, and I hope you enjoy making it as much as I have over the years. If you give it a try, I would absolutely love to see your finished poncho. Tag me on Instagram or share a photo in our Facebook group.
Save this baby poncho crochet tutorial to your Pinterest boards so you can find it when you are ready to start. And please drop a comment below if you make one. I always love hearing which colors you choose and who the lucky little recipient will be.
You Might Also Like
- Sunset Ombre Butterfly Bloom Charm Free Crochet Pattern
- Sage Green Garden Wrap Free Crochet Pattern
- Pastel Rainbow Dreamy Clutch Free Crochet Pattern
- Navy Nautical Crochet Sandals in Coastal Bathroom Free Pattern
