
I’ve been searching for the perfect statement cardigan pattern for what feels like forever. You know the kind. The one that makes people stop and ask where you got it. This black and white shearling crochet cardigan is exactly that piece, and I’m thrilled to finally share it with you.
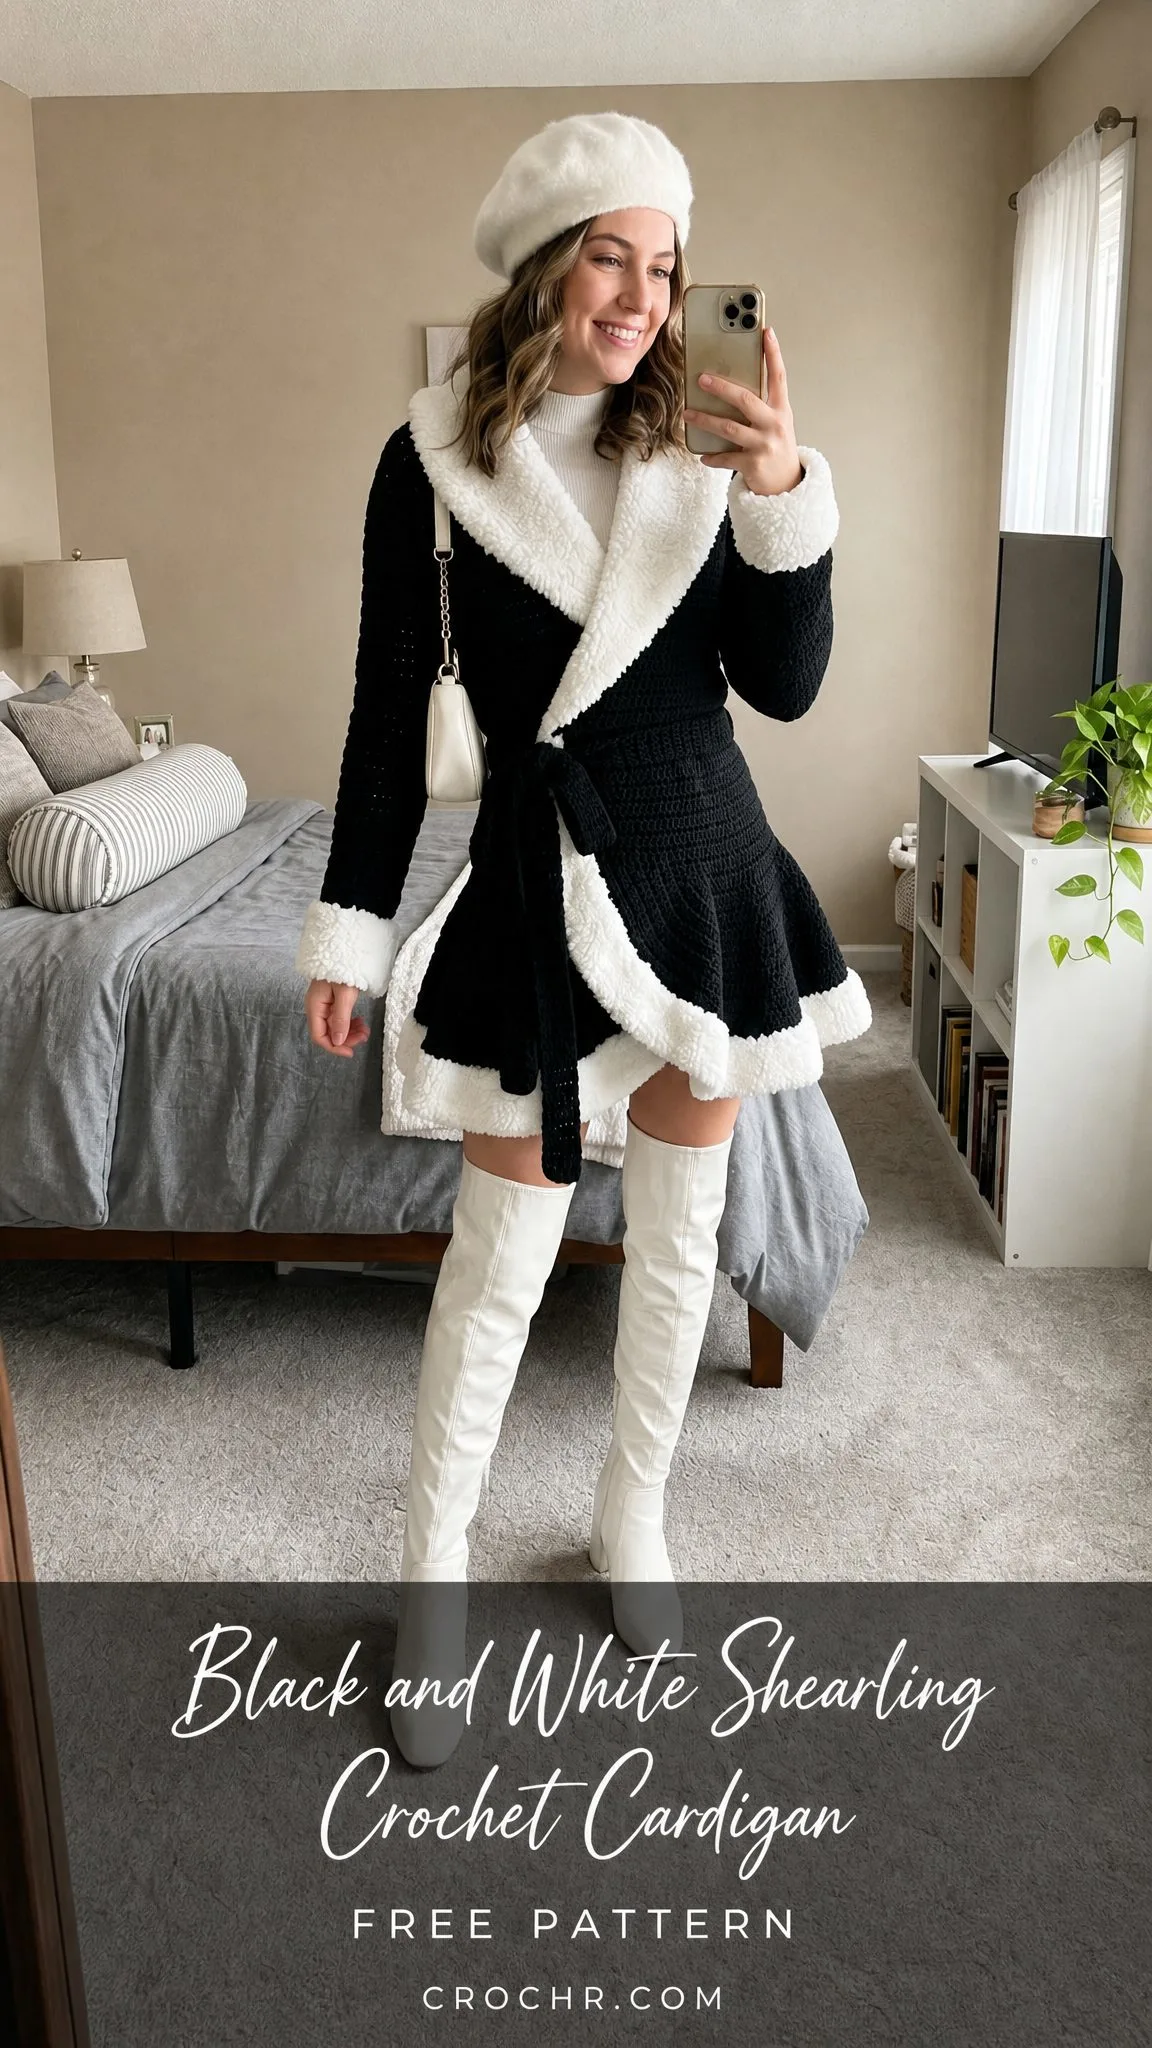
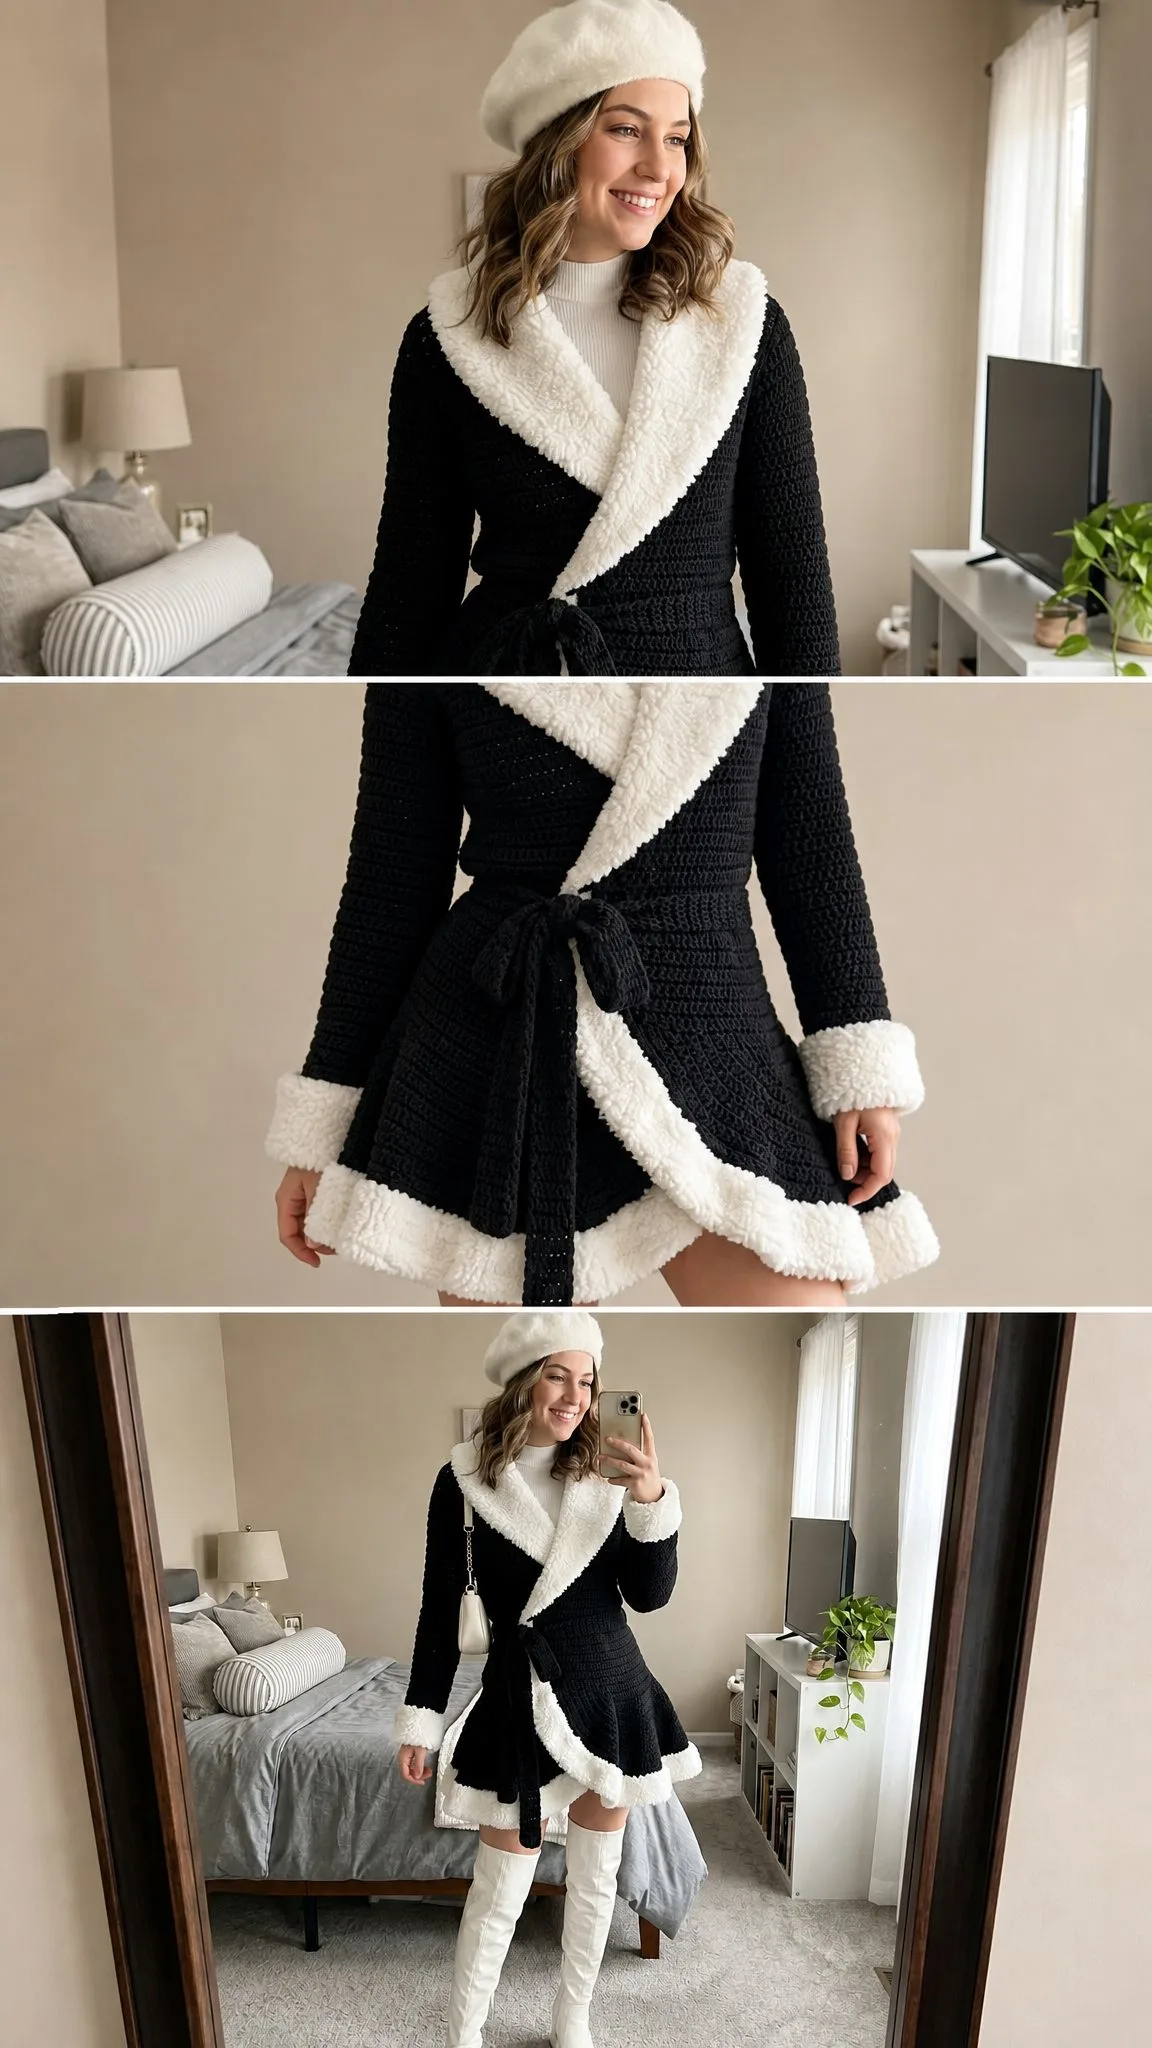
The contrast between the sleek black body and that fluffy off-white sherpa trim creates such a striking look. It’s giving high-end boutique vibes while being completely handmade. The fitted bodice flows into a flared peplum hem that swishes when you walk, and those wide shawl lapels frame your face beautifully.
If you’ve ever wanted to crochet something that looks professionally constructed, this is your project. Yes, it takes time and patience. But every single hour is worth it when you wrap yourself in this cozy masterpiece.
Why This Crochet Cardigan Pattern Stands Out
This wrap-style cardigan combines structure with softness in a way that’s genuinely eye-catching. The body uses half double crochet (hdc) throughout, which creates a dense, fabric-like texture that holds its shape beautifully. Meanwhile, all the trim pieces use a fluffy sherpa-style yarn that mimics real shearling without any animal products involved.
The construction might look intimidating at first glance. But here’s the truth: if you can work basic stitches and follow a pattern carefully, you can absolutely make this. It’s built in pieces and seamed together, which actually makes it more manageable than working a garment all in one piece.
The flared hem is achieved through simple increase rows at the bottom, then decrease rows taper everything back in at the waist. It’s clever shaping that creates a flattering silhouette without complicated techniques.
Skill Level
This pattern is rated Intermediate to Advanced. You’ll need confidence with shaping in rows, which means working increases and decreases. You’ll also seam garment pieces together, work sleeves in the round from the armhole down, and switch between different yarn weights for the body and trim sections.
If you’ve completed at least one seamed garment before, you’re ready for this. Take it slow, check your stitch counts, and you’ll do great.
Time Estimate
Plan for approximately 25 to 40 hours of work total. Your actual time depends on your working speed, the yarn you choose, and how familiar you are with garment construction. I recommend breaking this into sessions rather than trying to power through.
Finished Measurements
This pattern is written for a finished bust of 36 inches (91.5 cm), which fits a size Small/Medium.
Here are all the finished measurements:
Materials You’ll Need
Yarn
Yarn A (Main Color): Black, medium weight (Category 4) textured or boucle-adjacent yarn with visible stitch definition. You need approximately 1,200 yards / 1,097 meters.
Yarn B (Trim Color): Off-white, bulky weight (Category 5 or 6) sherpa, boucle, or faux shearling yarn with a fluffy, fleece-like texture. You need approximately 350 yards / 320 meters.
Yarn Suggestions
Option 1: Lion Brand Yarn Pound of Love in Black (Yarn A) paired with Bernat Blanket in Vintage White (Yarn B, used single strand). The Pound of Love offers excellent stitch definition and durability. The Blanket yarn gives a lush, plush trim that reads as shearling.
Option 2: Red Heart Super Saver in Black (Yarn A) paired with Lion Brand Go For Fleece Sherpa in Cream (Yarn B). The Super Saver provides crisp stitch clarity and the Sherpa yarn produces an exceptionally realistic faux shearling border.
Option 3: Paintbox Yarns Simply DK in Pure Black, held double (Yarn A) paired with Paintbox Yarns Evergreen Chunky in Paper White (Yarn B). Holding DK double creates a firm, tailored hand for the body panels.
Substitution note: For Yarn A, choose any worsted or medium weight yarn that holds stitch definition well. Avoid overly fuzzy or halo yarns for the body since they’ll obscure the texture. For Yarn B, the fluffier and more sherpa-like the better. Test your trim gauge before starting.
Hooks
Additional Materials
Gauge
Getting gauge right is critical for correct fit. Make a swatch and measure before you start.
With Yarn A and Hook A:
14 hdc x 10 rows = 4 inches / 10 cm, blocked
With Yarn B and Hook B:
12 sc x 12 rows = 4 inches / 10 cm (trim pieces only)
Adjust your hook size as needed to match gauge.
Abbreviations
Let me explain each abbreviation you’ll encounter:
Special Stitches Explained
hdc2tog (Half Double Crochet Two Together)
This is your decrease stitch. Here’s exactly how to work it:
Yarn over, insert hook into next stitch, yarn over and pull up a loop. You now have 3 loops on hook. Don’t complete the stitch yet. Yarn over, insert hook into the following stitch, yarn over and pull up a loop. Now you have 5 loops on hook. Yarn over and pull through all 5 loops. One decrease made. Counts as 1 stitch.
hdc-inc (Half Double Crochet Increase)
Work 2 hdc into the same stitch. Counts as 2 stitches. Simple as that.
Surface Slip Stitch
With trim yarn and trim hook, insert hook from front to back through the fabric at the designated edge. Pull up a loop of Yarn B. Insert hook through the next designated point, pull up a loop, and pull through loop on hook. Continue along the edge. This creates a base row before adding single crochet trim rows.
Shearling Single Crochet Border
Using Yarn B and Hook B, work 1 sc into each stitch or space along the designated edge. Turn. Work 1 sc into each sc across. Fasten off. The fluffy texture of Yarn B creates the shearling appearance without any additional technique.
Important Pattern Notes
Read these before you begin:
The cardigan is worked in pieces and seamed. Construction order is: Back Panel, Left Front Panel, Right Front Panel, Left Sleeve, Right Sleeve, assembly by seaming shoulders and sides, then Collar, Lapel Trim, Cuff Trim, Hem Trim, Pocket, Belt.
All body pieces use Yarn A and Hook A unless otherwise specified. All trim pieces use Yarn B and Hook B unless otherwise specified.
The turning chain of 2 does NOT count as a stitch. Always work the first hdc of every row into the first stitch at the base of the turning chain. This is really important.
When working flat, odd-numbered rows are RS rows and even-numbered rows are WS rows unless otherwise stated.
Stitch counts in parentheses at the end of each row reflect the total number of working stitches, not counting turning chains.
Do not block pieces before seaming. Block the fully assembled and trimmed cardigan at the end.
Step by Step Crochet Instructions
Back Panel
Foundation: Using Yarn A and Hook A, ch 85.
Row 1 (RS): Hdc in 3rd ch from hook and in each ch across. Turn. (83 hdc)
Row 2 (WS): Ch 2, hdc in each st across. Turn. (83 hdc)
Row 3 (RS): Ch 2, hdc-inc in first st, hdc in each st across to last st, hdc-inc in last st. Turn. (85 hdc)
Row 4 (WS): Ch 2, hdc in each st across. Turn. (85 hdc)
Row 5 (RS): Ch 2, hdc-inc in first st, hdc in each st across to last st, hdc-inc in last st. Turn. (87 hdc)
Row 6 (WS): Ch 2, hdc in each st across. Turn. (87 hdc)
Row 7 (RS): Ch 2, hdc-inc in first st, hdc in each st across to last st, hdc-inc in last st. Turn. (89 hdc)
Row 8 (WS): Ch 2, hdc in each st across. Turn. (89 hdc)
Row 9 (RS): Ch 2, hdc-inc in first st, hdc in each st across to last st, hdc-inc in last st. Turn. (91 hdc)
Row 10 (WS): Ch 2, hdc in each st across. Turn. (91 hdc)
Row 11 (RS): Ch 2, hdc-inc in first st, hdc in each st across to last st, hdc-inc in last st. Turn. (93 hdc)
Row 12 (WS): Ch 2, hdc in each st across. Turn. (93 hdc)
CHECKPOINT: After Row 12, the back panel hem section should measure approximately 5 inches / 12.5 cm tall and approximately 26.5 inches / 67 cm wide at the widest point.
Now begin waist shaping decreases to taper from flared hem into fitted bodice.
Row 13 (RS): Ch 2, hdc2tog over first 2 sts, hdc in each st across to last 2 sts, hdc2tog. Turn. (91 hdc)
Row 14 (WS): Ch 2, hdc in each st across. Turn. (91 hdc)
Row 15 (RS): Ch 2, hdc2tog over first 2 sts, hdc in each st across to last 2 sts, hdc2tog. Turn. (89 hdc)
Row 16 (WS): Ch 2, hdc in each st across. Turn. (89 hdc)
Row 17 (RS): Ch 2, hdc2tog over first 2 sts, hdc in each st across to last 2 sts, hdc2tog. Turn. (87 hdc)
Row 18 (WS): Ch 2, hdc in each st across. Turn. (87 hdc)
Row 19 (RS): Ch 2, hdc2tog over first 2 sts, hdc in each st across to last 2 sts, hdc2tog. Turn. (85 hdc)
Row 20 (WS): Ch 2, hdc in each st across. Turn. (85 hdc)
Row 21 (RS): Ch 2, hdc2tog over first 2 sts, hdc in each st across to last 2 sts, hdc2tog. Turn. (83 hdc)
Row 22 (WS): Ch 2, hdc in each st across. Turn. (83 hdc)
CHECKPOINT: After Row 22, the piece should measure approximately 9 inches / 23 cm tall. The waist is now returned to the original foundation width of 83 stitches.
Work straight bodice section with no shaping.
Rows 23 through 32: Ch 2, hdc in each st across. Turn. (83 hdc each row)
CHECKPOINT: After Row 32, the bodice should measure approximately 13 inches / 33 cm from the foundation edge.
Now begin armhole shaping.
Row 33 (RS): Sl st across first 5 sts, ch 2, hdc in same st as last sl st and in each st across to last 5 sts. Turn, leaving last 5 sts unworked. (73 hdc)
Row 34 (WS): Ch 2, hdc2tog over first 2 sts, hdc in each st across to last 2 sts, hdc2tog. Turn. (71 hdc)
Row 35 (RS): Ch 2, hdc2tog over first 2 sts, hdc in each st across to last 2 sts, hdc2tog. Turn. (69 hdc)
Row 36 (WS): Ch 2, hdc2tog over first 2 sts, hdc in each st across to last 2 sts, hdc2tog. Turn. (67 hdc)
Row 37 (RS): Ch 2, hdc in each st across. Turn. (67 hdc)
Work even on 67 stitches until armhole measures 7 inches / 17.75 cm from Row 33.
Rows 38 through 54: Ch 2, hdc in each st across. Turn. (67 hdc each row)
Now shape shoulders and back neck.
Row 55 (RS): Ch 2, hdc in first 20 sts. Turn, leaving rem sts unworked. (20 hdc) This is the right shoulder.
Row 56 (WS): Ch 2, hdc in each st across. Turn. (20 hdc)
Fasten off right shoulder.
Back neck: Skip center 27 sts for back neck opening.
Reattach Yarn A to the 48th stitch from the right edge.
Row 55L (RS): Ch 2, hdc in each of next 20 sts. Turn. (20 hdc)
Row 56L (WS): Ch 2, hdc in each st across. Turn. (20 hdc)
Fasten off left shoulder. Back panel is complete.
Right Front Panel
Foundation: Using Yarn A and Hook A, ch 45.
Row 1 (RS): Hdc in 3rd ch from hook and in each ch across. Turn. (43 hdc)
Row 2 (WS): Ch 2, hdc in each st across. Turn. (43 hdc)
Row 3 (RS): Ch 2, hdc-inc in first st, hdc in each st across to last st, hdc-inc in last st. Turn. (45 hdc)
Row 4 (WS): Ch 2, hdc in each st across. Turn. (45 hdc)
Row 5 (RS): Ch 2, hdc-inc in first st, hdc in each st across to last st, hdc-inc in last st. Turn. (47 hdc)
Row 6 (WS): Ch 2, hdc in each st across. Turn. (47 hdc)
Row 7 (RS): Ch 2, hdc-inc in first st, hdc in each st across to last st, hdc-inc in last st. Turn. (49 hdc)
Row 8 (WS): Ch 2, hdc in each st across. Turn. (49 hdc)
Row 9 (RS): Ch 2, hdc-inc in first st, hdc in each st across to last st, hdc-inc in last st. Turn. (51 hdc)
Row 10 (WS): Ch 2, hdc in each st across. Turn. (51 hdc)
Row 11 (RS): Ch 2, hdc-inc in first st, hdc in each st across to last st, hdc-inc in last st. Turn. (53 hdc)
Row 12 (WS): Ch 2, hdc in each st across. Turn. (53 hdc)
Now begin waist shaping decreases.
Row 13 (RS): Ch 2, hdc2tog over first 2 sts, hdc in each st across to last 2 sts, hdc2tog. Turn. (51 hdc)
Row 14 (WS): Ch 2, hdc in each st across. Turn. (51 hdc)
Row 15 (RS): Ch 2, hdc2tog over first 2 sts, hdc in each st across to last 2 sts, hdc2tog. Turn. (49 hdc)
Row 16 (WS): Ch 2, hdc in each st across. Turn. (49 hdc)
Row 17 (RS): Ch 2, hdc2tog over first 2 sts, hdc in each st across to last 2 sts, hdc2tog. Turn. (47 hdc)
Row 18 (WS): Ch 2, hdc in each st across. Turn. (47 hdc)
Row 19 (RS): Ch 2, hdc2tog over first 2 sts, hdc in each st across to last 2 sts, hdc2tog. Turn. (45 hdc)
Row 20 (WS): Ch 2, hdc in each st across. Turn. (45 hdc)
Row 21 (RS): Ch 2, hdc2tog over first 2 sts, hdc in each st across to last 2 sts, hdc2tog. Turn. (43 hdc)
Row 22 (WS): Ch 2, hdc in each st across. Turn. (43 hdc)
Work straight bodice section.
Rows 23 through 32: Ch 2, hdc in each st across. Turn. (43 hdc each row)
Now begin armhole shaping at the side edge.
Row 33 (RS): Sl st across first 5 sts at the side edge, ch 2, hdc in same st as last sl st and in each st across to end. Turn. (38 hdc)
Row 34 (WS): Ch 2, hdc in each st across to last 2 sts, hdc2tog. Turn. (37 hdc)
Row 35 (RS): Ch 2, hdc2tog over first 2 sts at armhole edge, hdc in each st across. Turn. (36 hdc)
Row 36 (WS): Ch 2, hdc in each st across to last 2 sts, hdc2tog. Turn. (35 hdc)
Row 37 (RS): Ch 2, hdc in each st across. Turn. (35 hdc)
Rows 38 through 46: Ch 2, hdc in each st across. Turn. (35 hdc each row)
Now begin front neck shaping.
Row 47 (RS): Ch 2, hdc in first 20 sts. Turn, leaving rem 15 sts unworked. (20 hdc)
Row 48 (WS): Ch 2, hdc2tog at neck edge, hdc in each st across. Turn. (19 hdc)
Row 49 (RS): Ch 2, hdc in each st across to last 2 sts at neck edge, hdc2tog. Turn. (18 hdc)
Row 50 (WS): Ch 2, hdc2tog at neck edge, hdc in each st across. Turn. (17 hdc)
Row 51 (RS): Ch 2, hdc in each st across. Turn. (17 hdc)
Rows 52 through 56: Ch 2, hdc in each st across. Turn. (17 hdc each row)
Fasten off right front panel.
Left Front Panel
Work Rows 1 through 32 exactly as for the Right Front Panel. (43 hdc at end of Row 32)
Armhole shaping is now at the opposite edge.
Row 33 (RS): Ch 2, hdc in each st across to last 5 sts. Turn, leaving last 5 sts unworked. (38 hdc)
Row 34 (WS): Ch 2, hdc2tog at armhole edge, hdc in each st across. Turn. (37 hdc)
Row 35 (RS): Ch 2, hdc in each st across to last 2 sts, hdc2tog at armhole edge. Turn. (36 hdc)
Row 36 (WS): Ch 2, hdc2tog at armhole edge, hdc in each st across. Turn. (35 hdc)
Row 37 (RS): Ch 2, hdc in each st across. Turn. (35 hdc)
Rows 38 through 46: Ch 2, hdc in each st across. Turn. (35 hdc each row)
Front neck shaping, left side:
Row 47 (RS): Skip first 15 sts, reattach Yarn A to 16th stitch. Ch 2, hdc in same st and in each rem st across. Turn. (20 hdc)
Row 48 (WS): Ch 2, hdc in each st across to last 2 sts at neck edge, hdc2tog. Turn. (19 hdc)
Row 49 (RS): Ch 2, hdc2tog at neck edge, hdc in each st across. Turn. (18 hdc)
Row 50 (WS): Ch 2, hdc in each st across to last 2 sts, hdc2tog. Turn. (17 hdc)
Rows 51 through 56: Ch 2, hdc in each st across. Turn. (17 hdc each row)
Fasten off left front panel.
Assembly of Body
Place front panels onto back panel with right sides together.
Shoulder seams: Align the 17-stitch shoulder of each front with the corresponding back shoulder. Center the front shoulder on the back, easing slightly. Using yarn needle and Yarn A, whipstitch or mattress stitch each shoulder seam.
Side seams: Align front and back panels at the side edges from hem up to the armhole. Seam from hem to armhole on both sides using mattress stitch. Leave armhole openings unsewn.
Sleeves (Make 2)
Sleeves are worked in the round from the armhole down.
With RS facing, Hook A and Yarn A, beginning at the underarm point, join with a sl st.
Round 1: Ch 2. Work hdc evenly around the armhole opening, picking up approximately 56 hdc total. Join with sl st to first hdc. (56 hdc)
Rounds 2 through 5: Ch 2, hdc in each st around. Join. (56 hdc each round)
Round 6 (decrease): Ch 2, hdc2tog over first 2 sts, hdc in each st around to last 2 sts, hdc2tog. Join. (54 hdc)
Rounds 7 through 11: Ch 2, hdc in each st around. Join. (54 hdc)
Round 12 (decrease): Ch 2, hdc2tog, hdc in each st around to last 2 sts, hdc2tog. Join. (52 hdc)
Rounds 13 through 17: Ch 2, hdc in each st around. Join. (52 hdc)
Round 18 (decrease): Ch 2, hdc2tog, hdc in each st around to last 2 sts, hdc2tog. Join. (50 hdc)
Rounds 19 through 23: Ch 2, hdc in each st around. Join. (50 hdc)
Round 24 (decrease): Ch 2, hdc2tog, hdc in each st around to last 2 sts, hdc2tog. Join. (48 hdc)
Rounds 25 through 29: Ch 2, hdc in each st around. Join. (48 hdc)
Round 30 (decrease): Ch 2, hdc2tog, hdc in each st around to last 2 sts, hdc2tog. Join. (46 hdc)
Rounds 31 through 35: Ch 2, hdc in each st around. Join. (46 hdc)
Round 36 (decrease): Ch 2, hdc2tog, hdc in each st around to last 2 sts, hdc2tog. Join. (44 hdc)
Rounds 37 through 41: Ch 2, hdc in each st around. Join. (44 hdc)
Round 42 (decrease): Ch 2, hdc2tog, hdc in each st around to last 2 sts, hdc2tog. Join. (42 hdc)
Rounds 43 through 47: Ch 2, hdc in each st around. Join. (42 hdc)
Round 48 (decrease): Ch 2, hdc2tog, hdc in each st around to last 2 sts, hdc2tog. Join. (40 hdc)
Rounds 49 through 54: Ch 2, hdc in each st around. Join. (40 hdc)
Fasten off Yarn A. Make second sleeve the same way.
Collar
Foundation: Using Yarn B and Hook B, ch 191.
Row 1: Sc in 2nd ch from hook and in each ch across. Turn. (190 sc)
Rows 2 through 6: Ch 1, sc in each st across. Turn. (190 sc)
Fasten off Yarn B, leaving a long tail for sewing.
With WS of collar facing RS of cardigan neckline, whipstitch the collar along the full neckline edge, easing evenly. The collar will naturally fold outward to form the lapels.
Lapel and Center Front Trim
With RS facing, Yarn B and Hook B, join at the bottom right front edge. Work sc evenly along the front opening edges of both front panels, blending into the collar fold.
Cuff Trim
With Yarn B and Hook B, join at sleeve cuff edge. Work 2 rows of sc around the cuff opening. Fasten off. Repeat for second sleeve.
Hem Trim
With Yarn B and Hook B, join at the back hem edge. Work 2 rows of sc along the entire bottom hem, going around all flared edges. Fasten off.
Belt
Foundation: Using Yarn A and Hook A, ch 211.
Row 1: Hdc in 3rd ch from hook and in each ch across. Turn. (209 hdc)
Rows 2 and 3: Ch 2, hdc in each st across. Turn. (209 hdc)
Fasten off. Weave in ends.
Finishing
Weave in all remaining ends securely. Block the fully assembled cardigan by laying flat and steaming lightly or wet blocking. Allow to dry completely before wearing.
To wear, wrap left panel over right and tie belt at waist.
Tips for Success
Take breaks between sections. This is a big project and rushing leads to mistakes.
Count your stitches at checkpoints. It’s much easier to fix errors early than to rip back many rows.
Use different colored stitch markers to track RS versus WS.
When picking up stitches for sleeves, work slowly and space your pickups evenly to avoid puckering.
The sherpa yarn can be tricky to work with. Use a slightly larger hook if you’re struggling to see your stitches.
I really hope you love making this black and white shearling crochet cardigan as much as I loved designing it. Save this pattern to your Pinterest boards so you can find it when you’re ready to cast on. And please, leave a comment below if you make one. I would absolutely love to see your finished piece!
You Might Also Like
- Coral Reef Floral Bell Top Free Crochet Pattern
- Strawberry Sweet Bow Crochet Vest Free Crochet Pattern
- Sunset Coral Drawstring Bucket Bag Free Crochet Pattern
- Sunset Ombre Crochet Two-Piece Fringe Set Pattern
