
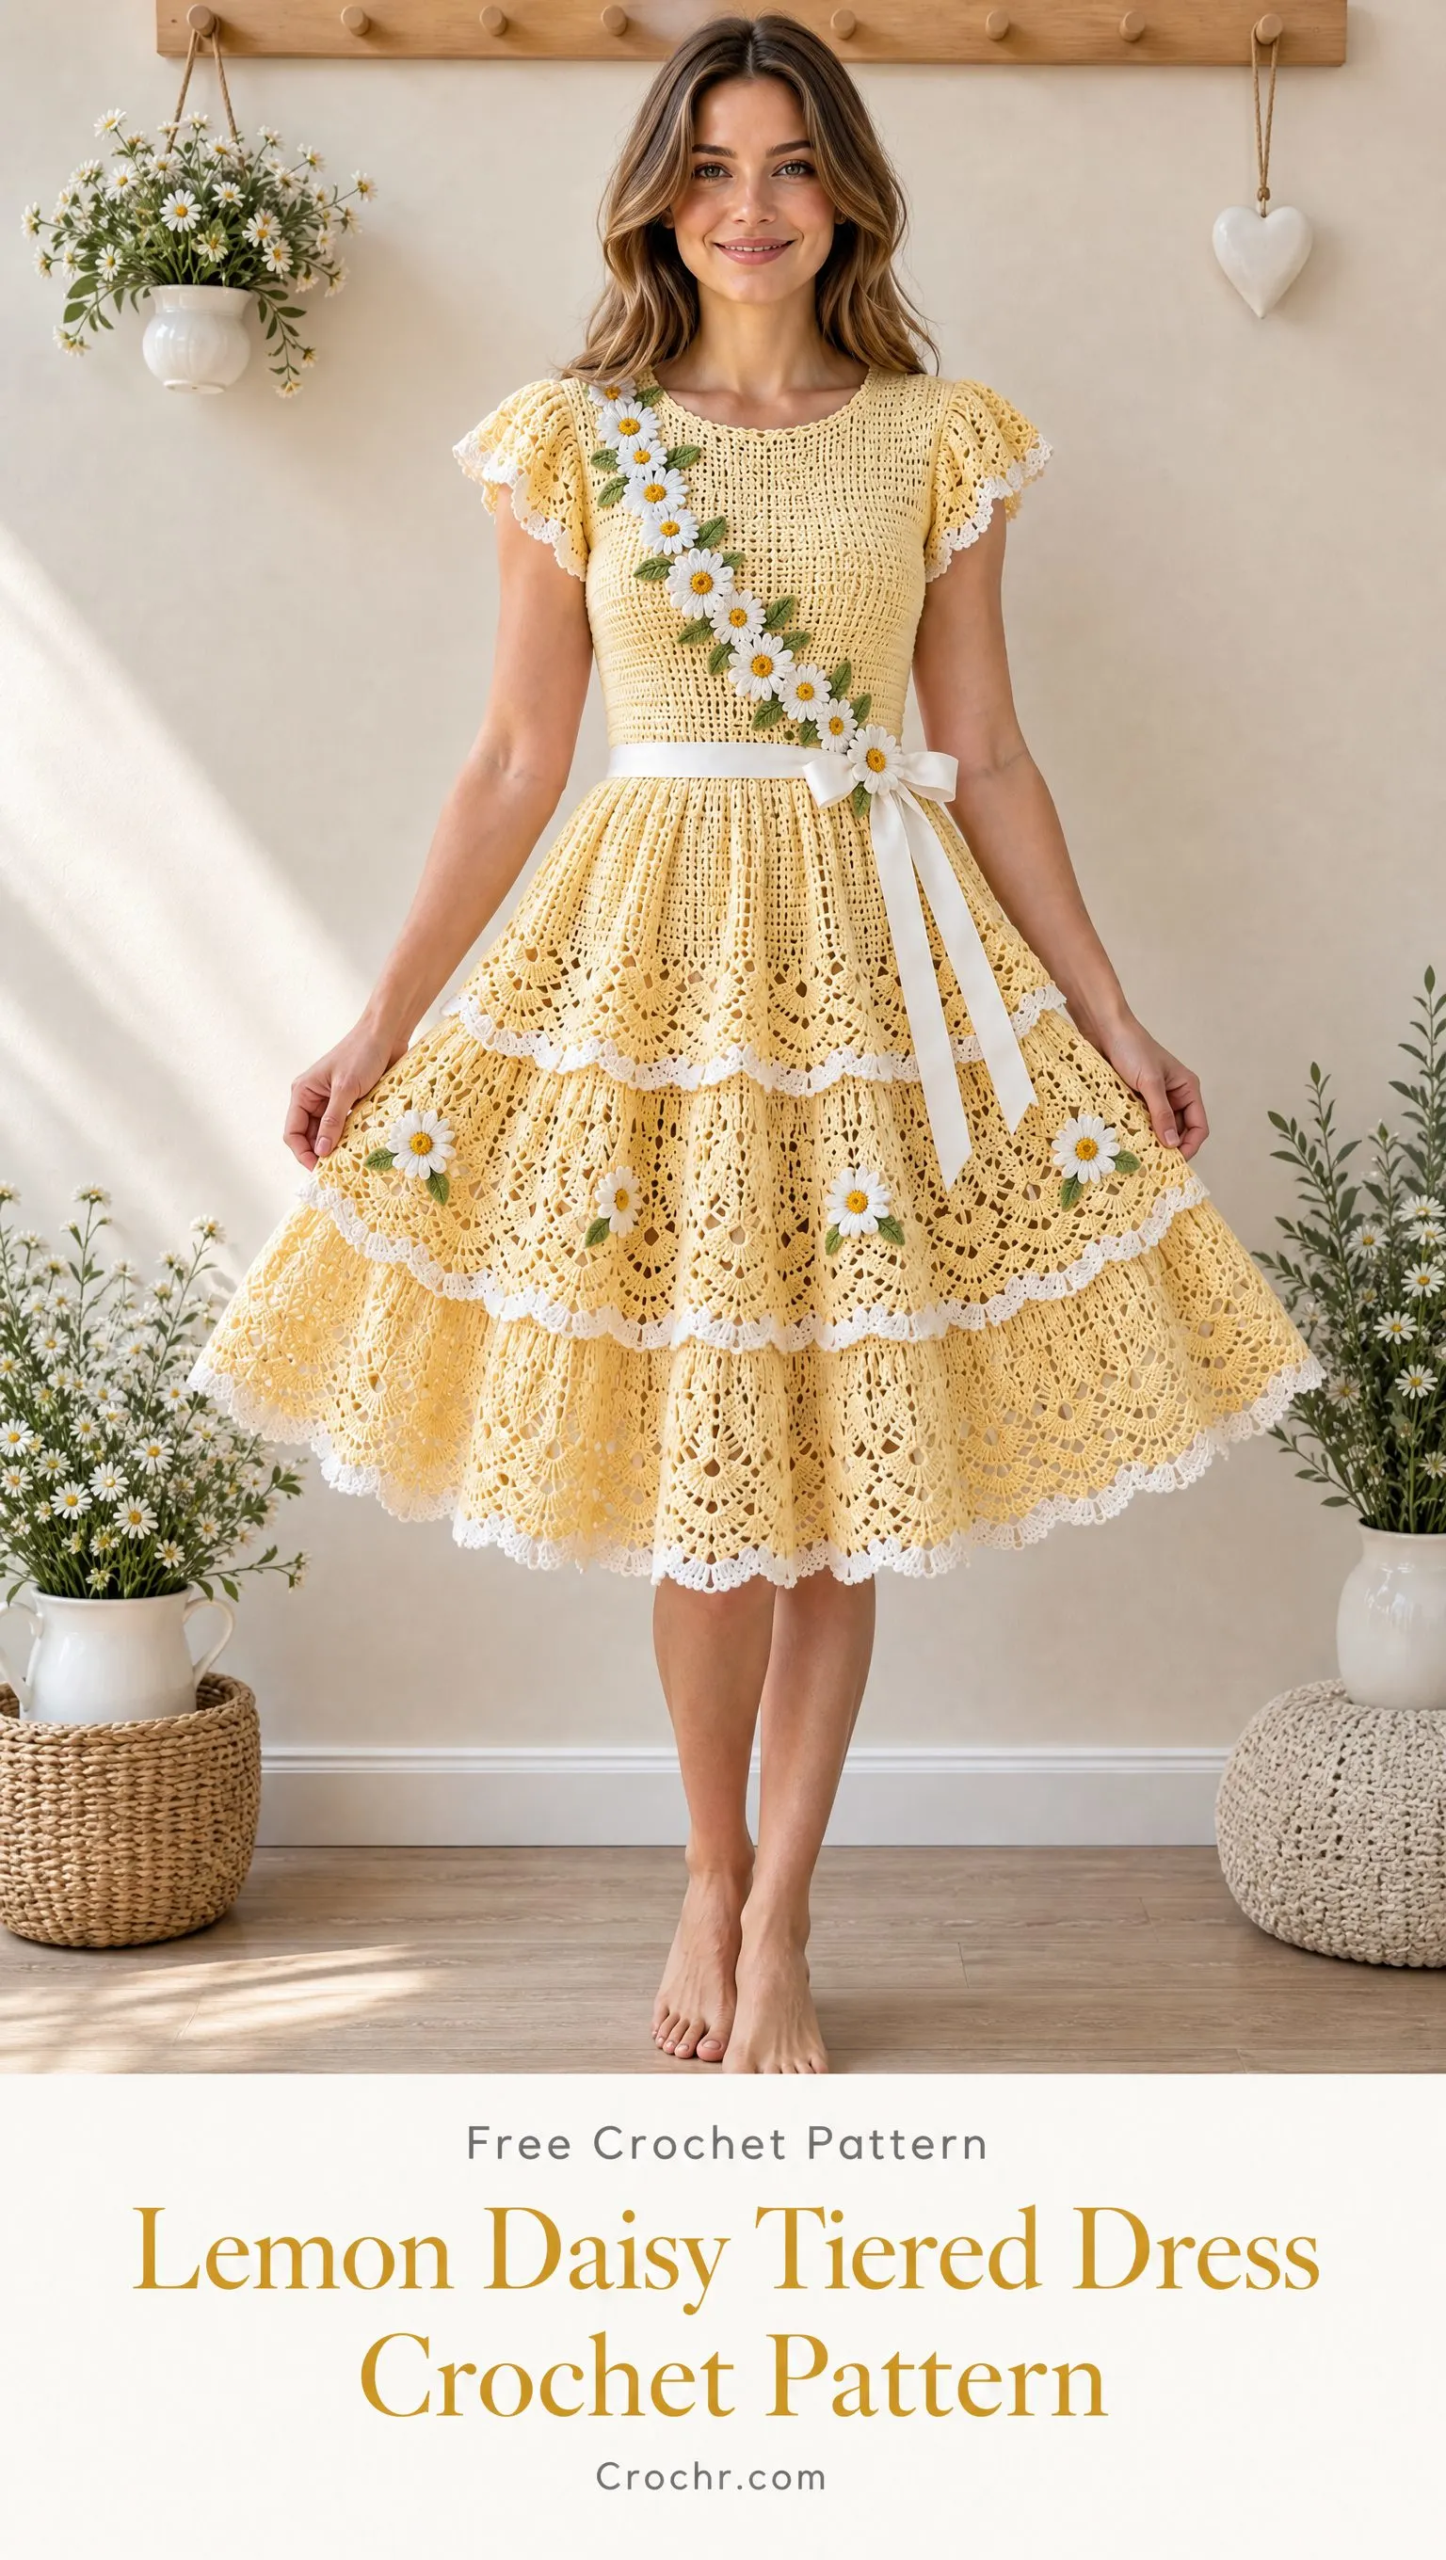
This is a fitted crochet dress with a lemon yellow bodice, three flowing tiered skirt layers, and sweet daisy appliques. It uses half double crochet for the bodice, shell stitches for the skirt, and simple flower motifs sewn on after blocking. The construction is top down, worked in rounds, with shaping at the bust and waist.
Get the Ad-Free PDF Pattern
You can find the free pattern below, or you can purchase the ad-free printable PDF from my shop.
Get the Printable PDF →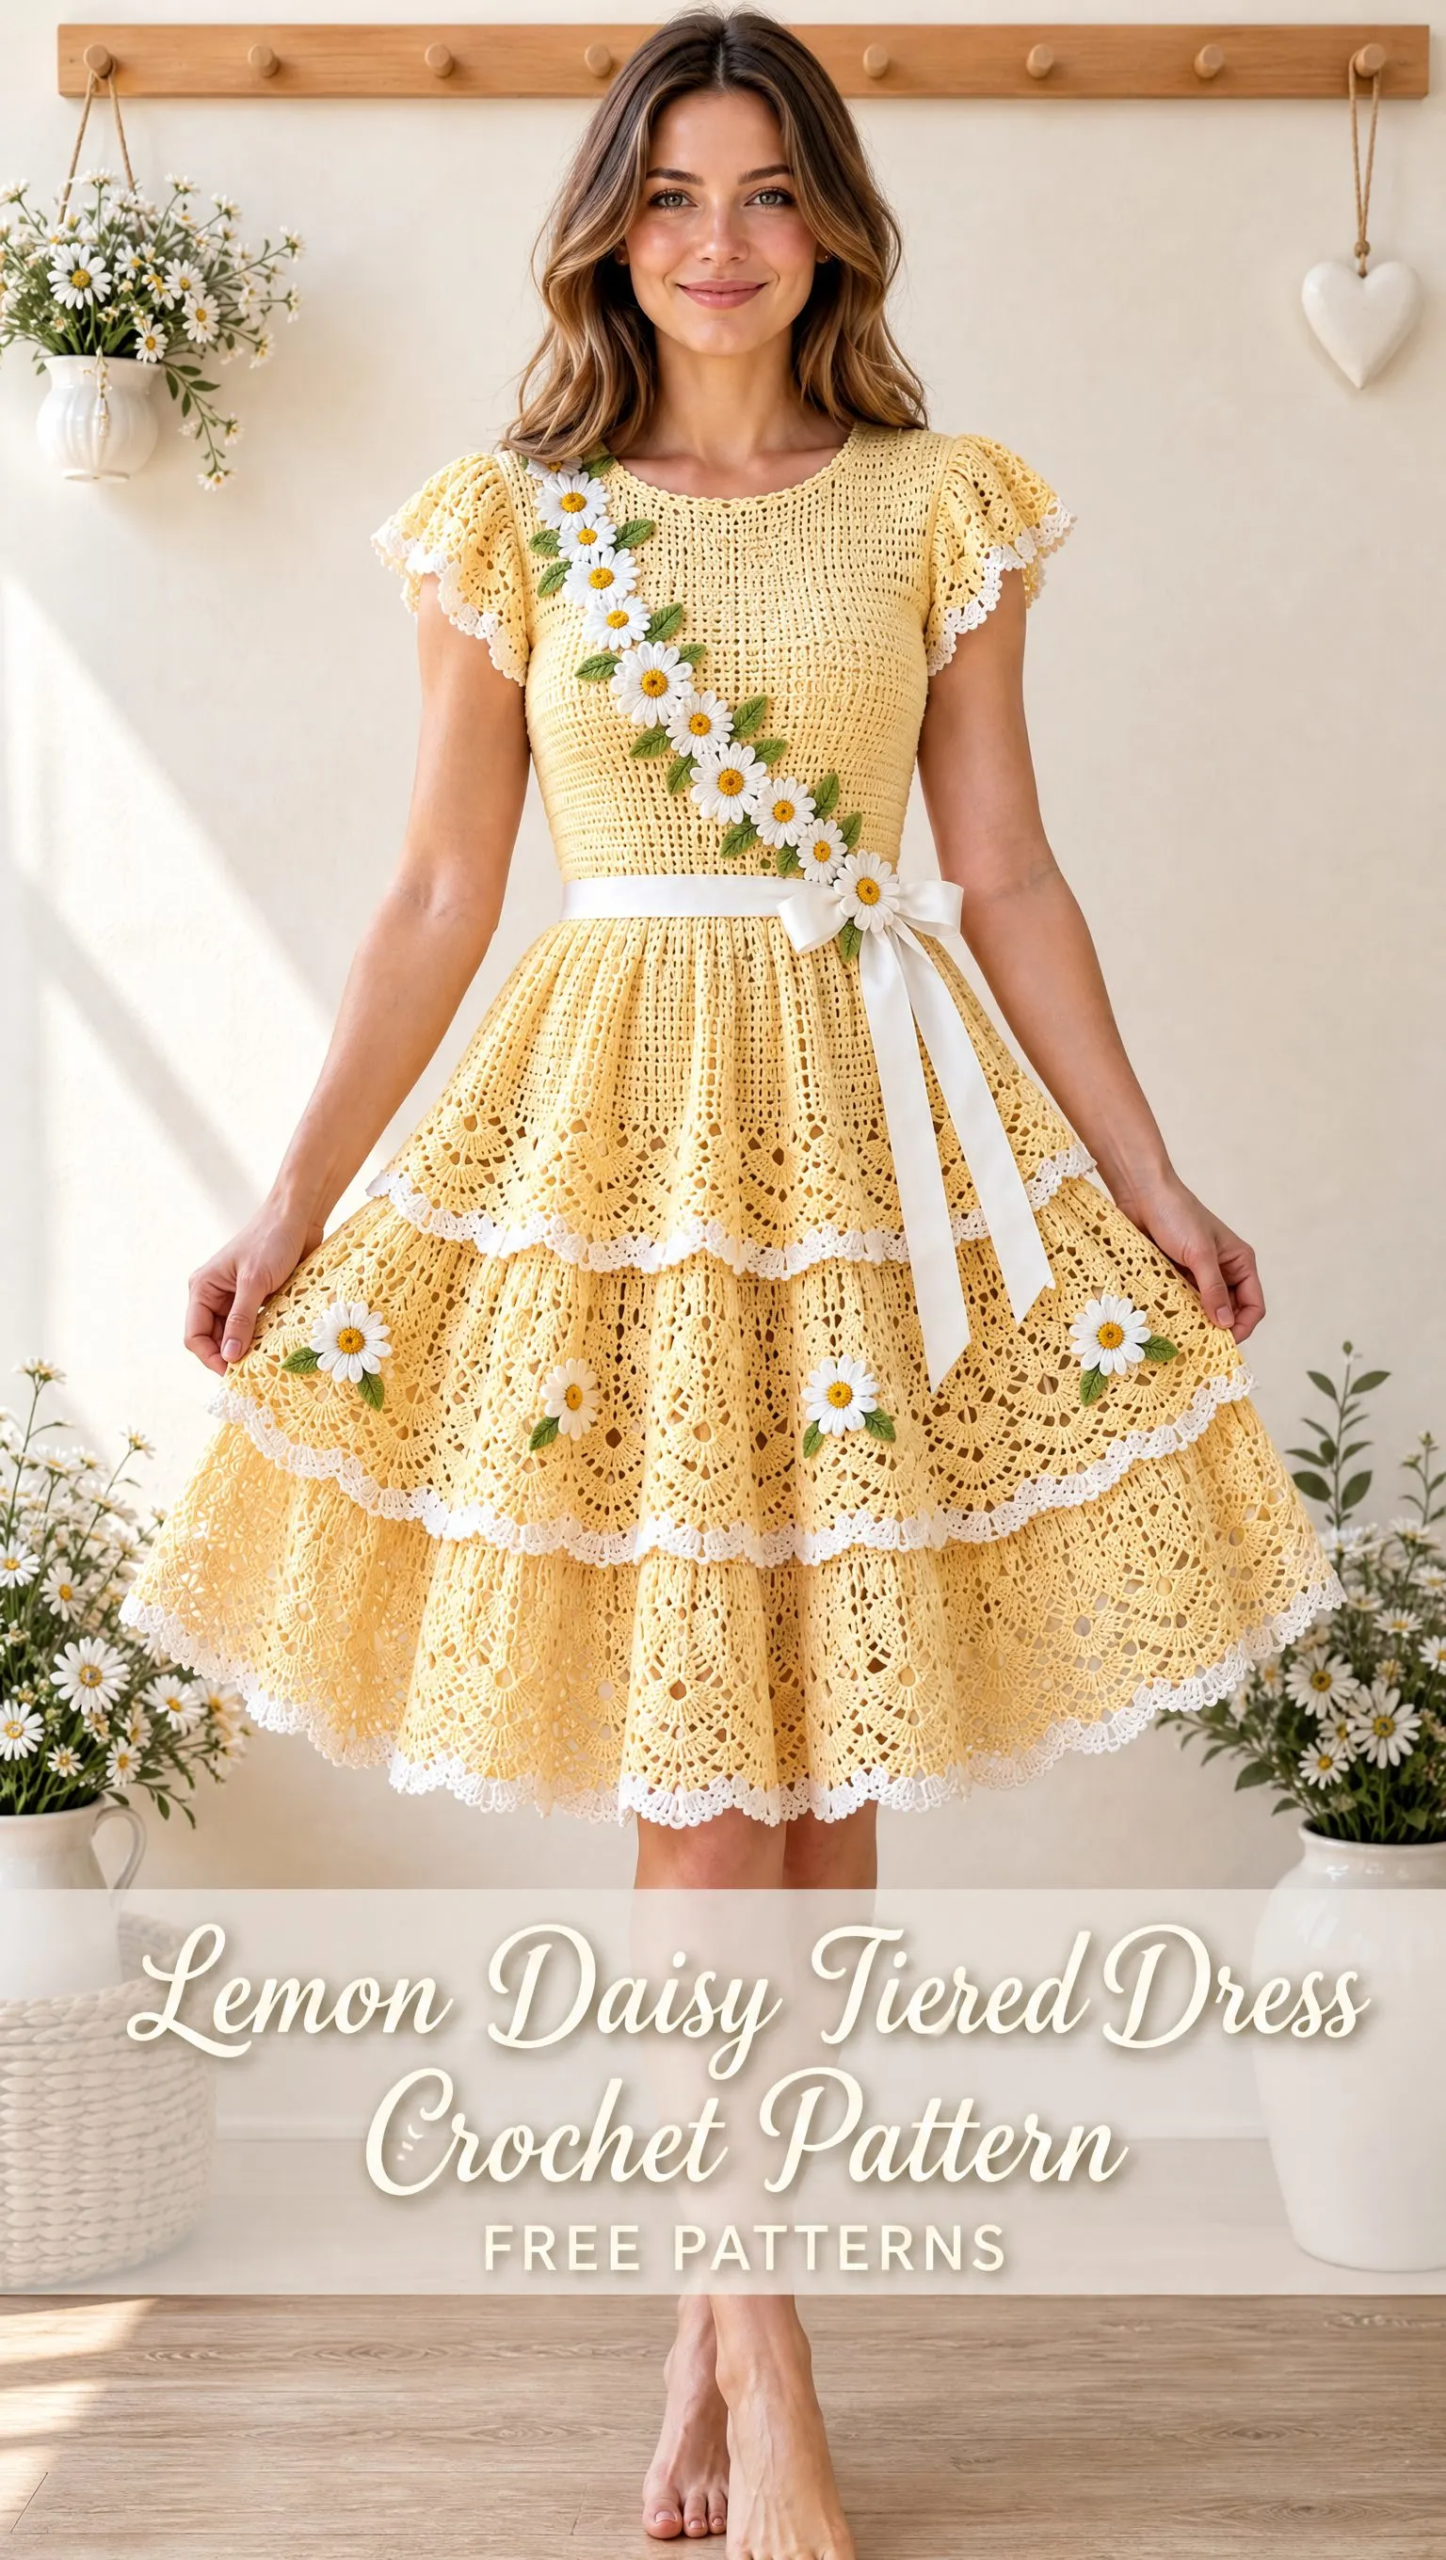
If you have been wanting to try garment making and already feel comfortable with basic stitches and working in the round, this is a beautiful project to challenge yourself. The pattern covers sizes XS through XXL, so you can customize the fit to your measurements.
I love how the tiered skirt creates movement and the daisy accents add a feminine touch without being fussy. It is perfect for spring, summer weddings, garden parties, or any time you want to feel pretty in something you made with your own hands.
About This Dress Pattern
The Lemon Daisy Tiered Dress combines solid shaping stitches with airy lace panels for a lightweight warm weather garment. The bodice is fitted and worked in half double crochet (hdc) with increases at the side seams. The waist cinches in with a few rounds of single crochet (sc) decreases. Then the skirt flares out in three tiers of shell stitch lace, each one wider and more flowing than the last.
The daisy flowers are made separately and sewn on after the dress is complete. You can place them diagonally across the bodice, scatter them on the upper skirt tier, or arrange them however you like. The pattern suggests 12 to 20 daisies depending on your size and preferred look.
Skill level: Intermediate. You should be comfortable working in rounds, increasing and decreasing evenly, following lace stitch repeats, joining motifs, shaping a fitted bodice, and finishing garment edges.
Finished Measurements
This pattern is designed for adult sizes XS through XXL.
Bust: 32 to 48 inches (81 to 122 cm)
Length: 36 to 42 inches (91 to 107 cm)
The length is adjustable. You can add more rounds to the skirt tiers for a longer dress or remove rounds for a shorter one. I recommend trying the dress on as you go or measuring against a dress you already own and love.
Materials Needed
Yarn:
Hooks:
Notions:
Yarn Suggestions
The pattern calls for DK weight cotton yarn. Here are some options that work well:
Cotton yarn can be heavy, especially when you use a lot of it for a full length dress. If you find the skirt is weighing down too much, consider using a lighter yarn or shortening the tiers.
Gauge
20 double crochet stitches x 10 rows = 4 x 4 inches (10 x 10 cm) using the 4.0 mm hook.
Please take time to check your gauge before starting. Gauge matters a lot for garments because even a small difference per inch adds up across the bust and length. If your gauge is off, try going up or down a hook size until you match.
Abbreviations and Stitch Definitions
Let me walk you through all the stitches used in this pattern.
ch (chain): Yarn over, pull through the loop on your hook. This creates the foundation for most crochet projects.
sl st (slip stitch): Insert hook into stitch, yarn over, pull through both the stitch and the loop on your hook in one motion. Used for joining rounds and moving across stitches invisibly.
sc (single crochet): Insert hook into stitch, yarn over and pull up a loop (2 loops on hook), yarn over and pull through both loops. A short, tight stitch.
hdc (half double crochet): Yarn over, insert hook into stitch, yarn over and pull up a loop (3 loops on hook), yarn over and pull through all 3 loops. Slightly taller than sc with a bit of stretch.
dc (double crochet): Yarn over, insert hook into stitch, yarn over and pull up a loop (3 loops on hook), yarn over and pull through 2 loops (2 loops remain), yarn over and pull through remaining 2 loops. A taller stitch that creates an open, drapey fabric.
tr (treble crochet): Yarn over twice, insert hook into stitch, yarn over and pull up a loop (4 loops on hook), yarn over and pull through 2 loops three times. Even taller than dc.
st (stitch): A single stitch.
sp (space): The gap or hole created by chain stitches in lace patterns.
inc (increase): Work 2 stitches into the same stitch to add width.
dec (decrease): Work 2 stitches together as one to reduce width.
Special Stitches
Shell Stitch
Work 5 dc into the same stitch. This creates a fan shaped cluster that forms the lacy pattern in the skirt tiers.
Daisy Flower
Center: Work 6 sc into a magic ring. Pull the ring closed and join.
Petals: Work 5 dc clusters around the center with chain spaces between each petal. The full instructions are in the Daisy Appliques section below.
Construction Notes
The dress is worked from the top down in one piece. Here is the order:
1. Bodice: Start at the bust, work hdc in rounds with shaping increases at the sides
2. Waist: Work sc rounds with decreases to create a fitted waist
3. Skirt Tier 1: Attach at the waist and work shell stitch pattern with gradual increases
4. Skirt Tier 2: Attach below the first tier, wider and more flowing
5. Skirt Tier 3: Attach below the second tier, the widest and laciest layer
6. Sleeves and edging: Optional flutter sleeves and picot trim
7. Daisy appliques: Made separately and sewn on after blocking
Bodice Instructions
Foundation
Chain enough stitches to comfortably fit around your bust measurement. Join with a slip stitch to form a ring, being careful not to twist the chain.
To calculate your starting chain: measure your bust, multiply by 5 (your stitch gauge per inch), and round to an even number. For example, a 36 inch bust would need approximately 180 chains.
Round 1
Work hdc into each chain around. Join with a slip stitch to the first hdc.
Rounds 2 through 18
Work hdc into each stitch around. Add increases evenly at the side seams every 3 rounds until you reach your desired bust width.
To place your side seam increases, mark the stitches at each side of the dress (roughly at the quarter and three quarter points of the round). Every third round, work 2 hdc into the marked stitch on each side. This adds 2 stitches per increase round.
Waist Shaping
Switch to single crochet and work 4 rounds while decreasing evenly around the waist for a fitted shape.
To decrease, work sc2tog (single crochet 2 together) at evenly spaced intervals. The number of decreases depends on how much you want to cinch the waist. A general guide is to decrease 8 to 12 stitches per round for 4 rounds.
Skirt Tier 1
Round 1
Attach yarn at the waist edge. Work dc into each stitch around. Join.
Round 2
Create the shell stitch pattern:
Rounds 3 through 12
Continue the shell stitch pattern. Every few rounds, increase by adding one additional shell repeat. To do this, work an extra shell into a sc space where the pattern allows.
The shells should stack above each other round after round, creating a scalloped lace effect.
Skirt Tier 2
Attach yarn below the first tier. You will be working into the bottom edge of Tier 1, catching the back loops or the turning chain ridge.
Round 1
Work a dc increase round. Work 2 dc into every other stitch, or whatever rate gives you a fuller tier than the one above.
Rounds 2 through 14
Repeat the shell stitch pattern with additional increases to create a wider, more flowing layer. The second tier should be noticeably fuller than the first.
Skirt Tier 3
Attach yarn below the second tier.
Rounds 1 through 18
Work larger shell repeats combined with lace arches:
Continue until you reach your desired length. This tier is the widest and laciest, designed to swish and flow as you move.
Sleeves and Edging
Optional Flutter Sleeves
Work shell stitches around the armhole openings for 5 to 7 rounds. This creates a short, fluttery cap sleeve effect.
Edging
Finish the neckline and sleeve edges with picot edging. To make a picot, work sc, ch 3, sl st into the first chain, then sc into the next stitch. Repeat around for a delicate scalloped border.
Daisy Appliques
Make 12 to 20 daisies depending on your size and how many you want to use.
Center
Using soft yellow yarn and your smaller hook, make a magic ring. Work 6 sc into the ring. Pull the ring closed. Join with a sl st to the first sc.
Petals
Switch to white yarn.
Repeat around to create 6 petals total. Fasten off and weave in the tail.
Attaching the Daisies
Sew the daisies diagonally across the bodice and onto the upper skirt tier using your yarn needle and matching thread or yarn. The pattern suggests a diagonal cascade from one shoulder down toward the opposite hip, with a few scattered on the skirt.
You can also add small crocheted leaves if you like. Simply chain 8, then work sc, hdc, dc, hdc, sc back along the chain to create a leaf shape.
Assembly and Finishing
1. Weave in all ends securely using your yarn needle
2. Block the dress gently using steam blocking or wet blocking, this relaxes the stitches and evens out the lace pattern
3. Shape the tiers evenly while the dress is drying so they hang nicely
4. Add lining if desired for opacity, especially helpful with lighter colored yarn
5. Check seams and reinforce any stress points at the waist and armholes
Care Instructions
Troubleshooting Tips
If the skirt becomes too heavy: Try using a lighter weight yarn or shorten the tiers by a few rounds each.
If the bodice stretches out: Add a reinforcing row of slip stitches on the inside of the waist to help it hold its shape. You can also thread a thin ribbon through the waist for adjustable cinching.
If the shell pattern is not lining up: Make sure your stitch count is divisible by 6 (the shell repeat is 6 stitches wide). Adjust your foundation chain or waist stitches if needed.
If the daisies look too flat: Block them individually before sewing on, or add a small bead or French knot in the center for dimension.
Frequently Asked Questions
Can I change the length?
Yes. Add more rounds to the skirt tiers for a longer dress, or remove rounds for a shorter one. Each tier can be adjusted independently.
Can I use a different yarn?
Yes, but match the gauge before starting. A yarn that works up too loosely will make the dress too big, and one that works up too tightly will make it too small and stiff.
Is this pattern beginner friendly?
This pattern is best suited for crocheters who are already comfortable with garment shaping. If you have never made a fitted garment before, you might want to try a simpler top or skirt first to practice working with shaping and gauge.
Pattern License
This pattern is for personal use only. Please do not resell, redistribute, or reproduce the pattern itself. Finished items made from this pattern may be sold in small quantities.
Share Your Finished Dress
I would absolutely love to see your finished Lemon Daisy Tiered Dress. This is such a beautiful project and every version turns out a little different depending on yarn choices and daisy placement. Tag me on Instagram or share in my Facebook group so I can cheer you on.
If you loved this pattern, save it to your Pinterest boards so you can find it when you are ready to start. And please drop a comment below if you make one. I always love hearing how projects turn out and seeing photos of your beautiful work.
Want a Quick & Easy Printable Version?
Get a clean, beautifully formatted PDF of this pattern — easy to follow step by step, ready to print or save on any device. No scrolling, no distractions, just the pattern.
Get the Printable PDF →You Might Also Like
- Mint Green Zigzag Baby Dress Free Crochet Pattern
- Soft Lavender Dream Slipper Boots Free Crochet Pattern
- Sunset Ombre Jellyfish Trio Free Crochet Pattern
- Sunset Garden Floral Crochet Blouse Free Pattern
